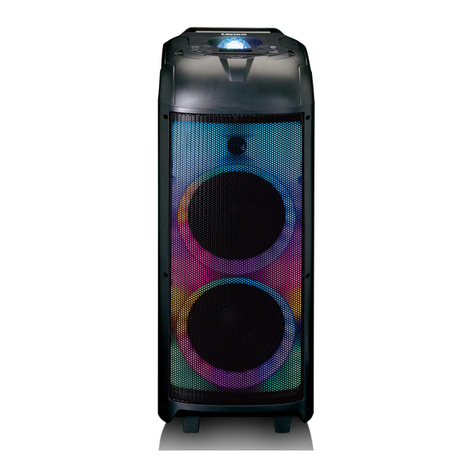
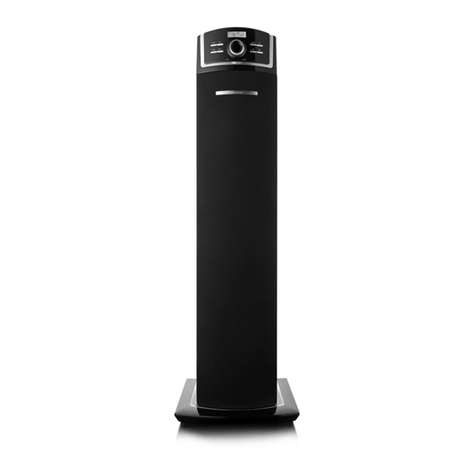
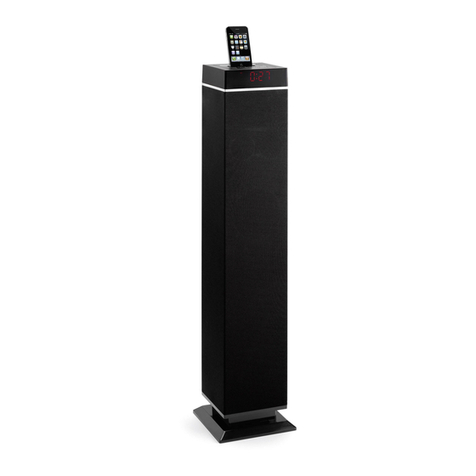
LENCO BTL-450 User manual

Model BTL-450
User manual Bluetooth® Tower Speaker
Gebruiksaanwijzing Bluetooth® Tower Speaker
Benutzerhandbuch Bluetooth® Turmlautsprecher
Mode d’emploi Enceinte Tour Bluetooth®
Manual del usuario Altavoz de Torre Bluetooth®

2
Index
English .................................................................................................................................................. 3
Nederlands ......................................................................................................................................... 13
Deutsch ...............................................................................................................................................24
Français .............................................................................................................................................. 35
Español ............................................................................................................................................... 46

3
English
1. Safety Precautions
The purpose of these precautions is to ensure user safety and prevent property damage. Be sure to
read and observe all safety precautions.
CAUTION
RISK OF ELECTRIC SHOCK
DO NOT OPEN
The lightning flash with arrowhead symbol, within an equilateral triangle is intended
to alert the user to the presence of un-insulated “dangerous voltage” enclosed
within the productthat may be of sufficient magnitude to constitute a risk of electric
shock to the person using the device.
The exclamation mark within an equilateral triangle is intended to alert the user to
the presence of important operating and maintenance (servicing) instructions in
the instruction manual accompanying the appliance.
1. Read, keep and follow these instructions carefully.
2. The appliance is only for domestic use and not for commercial use.
3. Please check that the voltage on the type plate of your appliance corresponds with your house
electricity supply (type plate is located on the back of the unit).
4. Do not use this apparatus near water.
5. Do not block any of the ventilation openings. Install in accordance with the manufacturer’s
instructions.
6. Do not install near any heat sources such as radiators, heat registers, stoves, or other devices
(including amplifiers) that produce heat.
7. Do not defeat the safety purpose of the polarized or grounding type plug. A polarized plug has
two blades with one wider than the other. A grounding type plug has two blades and a third
grounding prong. The wide blade or the third prong is provided for your safety. When the
provided plug does not fit into your outlet, consult an electrician for replacement of the
obsolete outlet. (For UK only)
8. Protect the power cord from being walked on or pinched, particularly at plugs, convenience
receptacles, and the point where they exit from the apparatus.
9. Only use attachments/accessories specified by the manufacturer.
10. Unplug this apparatus during lightning storms or when unused for long periods of time.
11. Refer all servicing to qualified service personnel. Servicing is required when the apparatus has
been damaged in any way, such as the power supply cord or the plug, when liquid has been
spilled or objects have fallen into the apparatus, when the apparatus has been exposed to rain
or moisture, does not operate normally, or has been dropped.
12. Do not use a damaged power cord or plug or a loose outlet. Doing so may result in fire or
electric shock.

4
13. Apparatus shall not be exposed to dripping or splashing and no objects filled with liquids, such
as vases, shall be placed on the apparatus.
14. Do not let children play with the product.
15. Do not store the product in extremely cold or warm environments.
16. The appliance is not intended for use by persons (including children) with reduced physical,
sensory or mental capabilities, or lack of experience and knowledge, unless they have been
given supervision or instructions concerning the use of the appliance by a person responsible
for their safety.
2. Getting Started
-Read this instruction manual carefully.
-Remove the equipment from the box.
-Remove the packaging and save it for future use (for example when moving the unit).
3. Features
-Two main speakers
-Bluetooth® Connectivity
-Aux Jack Included
-3.5mm Aux Cable Included
-USB Port for charging (5V, 1A)
-USB Port for playing MP3
-SD card slot for playing MP3
-FM radio
-LED display
-One built-in Subwoofer
-LED Pulse light in whole front which blink with the music (light with 7 single colors and 3
modes)
4. Box Content
-Speaker Body
-Speaker Base
-Screw (1 pc)
-Metal washer (1 pc)
-3.5 mm Line-in Cable
-Remote Control
-Instruction Manual

5
5. Description of Parts
5.1 Top panel
No.
Description
1.
Support Bracket
2.
LED Display
3.
Standby Button: Press to turn the speaker on and off
4.
Source Button: Press to switch between FM mode, USB mode (for both USB and SD playing), Aux-in
mode and Bluetooth mode.
5.
Skip Backward: Press to skip to previous track / long press to FM stations down searching.
6.
Play/Pause/Pairing: Press to play or pause and long press to start the pairing mode with Bluetooth.
When in USB mode, a long press around 3 seconds can swap between USB and SD playing when both
devices are inserted into the unit.
7.
Skip Forward: Press to skip to next track / long press to FM stations up searching.
8.
Volume - : Press to decrease the volume.
9.
Volume + : Press to increase the volume.

6
5.2 Remote control
No.
Description
1.
Standby Button (Power on/off)
2.
Source Button: Press to switch between FM, Bluetooth, AUX-in and USB/SD Card Mode.
3.
Mute Button
4.
OFF/ON (For LED light only)
5.
Mode: switch the mode for the LED light’s mode only. There are three modes in Spectrum Mode, Level
Mode and Wall Lamp Mode
6.
Colour Style: Switch the LED colour only: Color 00 in random color, Color 01 in Red, Color 02 in green,
Color 03 in Blue, Color 04 in purple, Color 05 in light yellow, Color 06 in light blue, Color 07 in white,
Color 08 in random color flash circularly.
7.
Skip Backward Button
8.
Play/Pause/Pairing Button
9.
Skip Forward Button
10.
Scan/Memory Button: Short press for memory, long press for scan and save
11.
CH -
12.
CH +
13.
Bass+ Effect Button
14.
Bass- Effect Button
15.
Treb+ Effect Button
16.
Treb- Effect Button
17.
Volume+ Button
18.
Volume- Button

7
6. Using the Remote Control to Operate the Unit
Aim the remote control directly at the remote control sensor (IR) on the front panel. Don’t put any
objects between the remote control and the system while operating the unit.
7. Batteries
7.1 Installing Batteries
1. Slide out the battery holder from the remote control case. (Push tab "A" towards the middle
first, see diagram).
2. Place one 3V CR2025 (Lithium) battery into the battery holder, observing the polar marking. If
the battery is placed incorrectly, the remote control will not work. Dispose of the old battery
properly. Do not leave it lying around where a child or pet could play with it or swallow it.
3. The battery may explode or leak if it is mistreated. Do not attempt to recharge it or disassemble
it. Do not dispose of the old battery in a fire.
4. Insert the battery holder into the battery compartment.
NOTE: Please remove all the batteries to prevent damage or injury from battery leakage if the unit
will not be used for a long period of time. Use only the specified size and type of battery.
7.2 Battery Safety
Always:
-Ensure the battery compartment is secured.
-Only use the batteries recommended.
-Ensure a correct fit of the batteries. Observe the plus and minus marks on both the battery
and the compartment.
-Replace a full set of batteries at one time.
-Store unused batteries in their packaging and keep away from metal objects that may cause
a short circuit.
-Remove dead batteries from the equipment.
-Remove batteries from the remote control if it is not to be used for a long time.
-Remember to keep button cells and batteries away from children as they can easily be
swallowed.
-Seek medical attention immediately if batteries are swallowed.

8
Never:
-Dispose of batteries in a fire.
-Attempt to recharge ordinary batteries.
8. Set Up
1. Take out the speaker body and speaker base carefully from the box.
2. Take out the accessories (1 pc of screw and 1 pc of metal washer).
3. Fit the base with the body with 1 hole.
4. Screw the base into the body by using a proper screwdriver with the screw and washer.
5. Place the speaker in a standing position on the floor and it's ready to use.

9
9. Functions
9.1 Bluetooth Pairing
1. Power on the unit, press “SOURCE” on the top panel or the button “SOURCE” on the remote
control to switch to the Bluetooth mode, the LED will indicate “ BT ”.and the LED icon“ ”
will start blinking after 3-5 seconds; this means the speaker unit is ready for the Pairing mode.
2. Turn on Bluetooth in your smartphone/tablet , and ensure it at “SEARCHING DEVICE” mode ,
Found “Lenco BTL-450” and select.
3. Once the unit is found, enter password 0000 to connect with smart phone/tablet (some devices
may not need password).
4. The LED icon“ ” will light up and you will hear “DU” sound , if the connection was a success.
5. If the smartphone/tablet cannot find the unit or can’t pair, please power on again and repeat
the above steps.
6. It will auto reconnect the previous paired device when it enters into Bluetooth mode. If the unit
doesn’t auto connect with the previous paired device, please restart the Bluetooth in the
smartphone/tablet and then follow the above steps to finish the connection.
7. You can manually turn of Bluetooth for your smartphone/tablet; Bluetooth connection will also
be canceled in case the smartphone/tablet is too far away from the speaker (over 10m). in this
latter case, the unit will go back to Bluetooth standby mode.
8. To reconnect, please ensure that Bluetooth on your smartphone is set at the ‘searching device’
mode. Keep pressing ‘pairing’ until you find the Lenco BTL-450 again, and follow the above
steps.
9.2 AUX-IN (Line in Type)
Requires a 3.5 mm cable (included).
1. Connect a 3.5 mm cable to the Aux-in jack. Connect the other end of the 3.5 mm cable to an
MP3 player or other audio source.
2. Press the “STANDBY” button to turn the unit on.
3. Press the “SOURCE” button on the top panel or the “SOURCE” button on the remote to switch
to Aux-in mode.
4. Use the controls on the connected device to begin playing audio routed through the unit.
9.3 USB port for charging
USB power output DC 5V 1A. It supports charging all devices in the power range.
When charging a device, ensure that the power supply is the right one for your device.
9.4 USB port for playing MP3
Power on the unit and insert a USB Flash Drive (not supplied) into the USB Port, ensuring the plug is
fully inserted in the correct way.
The tower will play music from the USB automatically. The maximum size of the Flash Drive that can
be supported is up to 32GB.
9.5 SD card slot for playing MP3
Insert an SD card (not supplied) into the memory card expansion slot. Make sure it is inserted in the
correct way.
The tower will play music from the SD card automatically. The maximum size of the Flash Drive that
can be supported is up to 32GB.
10
REMARK: When both USB and SD card are inserted, pressing the play button for a long time can
swap between USB and SD card.
9.6 Playing the FM radio
1. Press the "STANDBY" button to turn the unit on.
2. Ensure that the FM Antenna has been fully extended and press "SOURCE" on the top panel or
the “SOURCE” button on the remote control to adjust to the "FM" mode.
3. Press “Skip forward” or “Skip backward” and hold; the unit will scan the radio station, and stop
once it has found one.
4. For fine tuning 0.1MHz, press the “Skip Forward or Skip Backward” button once.
9.7 Programming & Playing of FM radio presets
1. Follow the steps for Playing the FM Radio.
2. Press the "Scan" button for a long time on the remote to search and preset stations in memory
(i.e. “P01” – this will blink on the display - and then the preset station frequency number will be
shown on the display).
3. Note: 30 FM stations can be preset.
4. To play the preset Radio Stations, press the "CH-" or "CH+" buttons to cycle through the preset
FM radio stations.
9.8 Manual FM station save
1. When under FM mode, press the Skip backward /Skip forward button to choose the
station.
2. Press the Scan/Memory button shortly; “P 00” will blink on the display which means
you enter into the manual saving state, and then Press the "CH-" or "CH+" buttons to cycle
through the preset FM radio stations.
3. Press Scan/Memory button to finish manual saving.
10. Cleaning the Appliance
Disconnect the appliance from the power source when cleaning.
If the unit becomes dusty, wipe it with a soft and dry duster. Use a soft cloth to clean this appliance.
Do not use any wax, polish sprays, or abrasive cleaners on the unit.
The normal function of the product may be disturbed by strong Electro-Magnetic Interference. If so,
simply reset the product to resume normal operation by following the instruction manual. In case
the functions could not resume, please use the product in another location.
Care and maintenance specifications
1. Always disconnect the equipment from the power supply
before cleaning.
2. Clean the equipment with a soft, damp, lint free cloth.
3. Do not use abrasives or harsh cleaners.

11
11. Trouble Shooting
Problem
Remedy
Power
System does not turn on or
does not respond to the
remote control.
-Make sure the AC power plug is connected to the wall socket
outlet properly and that it has power.
-If this does not help, leave the unit unplugged before seeking
advice.
Remote control
No functions or short range.
-Insert new batteries.
-Aim the remote directly towards the remote sensor.
The sound is distorted
Check the volume setting on both the speaker and your device
and adjust the volume to a suitable level.
No sound can be heard
Check whether the volume is set in MUTE mode, and then
adjust the volume level in desired level.
12. Technical Information
AC power source
AC 230V~50Hz
Remote Control:
3V (Lithium CR2025 x 1pc.)
Unit Output Power:
Total 60 Watt (45Watt RMS 10%THD)
Speaker unit
2 x 3.5” speakers + 1 x 4” speaker
The Max. power consumption :
Max 60W
Operation temperature:
0°C to + 40°C
Aux:
3.5mm stereo jack
Power Management
15 minutes after no signal from unit
The Power Consumption in standby:
≤1W
Note:
As a result of continuous improvements, the design and specifications of the product within the
packaging might differ slightly from the unit illustrated on the packaging.
For more information, please contact the local authority or your retailer where you purchased the
product.
This product operates at 2400 - 2483.5 MHz and is designated only to be used inside a normal
household environment. This product is suited for this purpose within all EU counties.

12
13. Guarantee
Lenco offers service and warranty in accordance to European law, which means that in case of
repairs (both during and after the warranty period) you should contact your local dealer.
Important note: It is not possible to send products that need repairs to Lenco directly.
Important note: If this unit is opened or accessed by a non-official service center in any way, the
warranty expires.
This device is not suitable for professional use. In case of professional use, all warranty obligations of
the manufacturer will be voided.
14. Disclaimer
Updates to Firmware and/or hardware components are made regularly. Therefore some of the
instruction, specifications and pictures in this documentation may differ slightly from your particular
situation. All items described in this guide for illustration purposes only and may not apply to
particular situation. No legal right or entitlements may be obtained from the description made in
this manual.
15. Disposal of the Old Device
This symbol indicates that the relevant electrical product or battery should not be
disposed of as general household waste in Europe. To ensure the correct waste
treatment of the product and battery, please dispose them in accordance to any
applicable local laws of requirement for disposal of electrical equipment or
batteries. In so doing, you will help to conserve natural resources and improve
standards of environmental protection in treatment and disposal of electrical
waste (Waste Electrical and Electronic Equipment Directive).
16. CE Marking
Products with the CE marking comply with the EMC Directive (2014/30/EU) and
the Low Voltage Directive (2014/35/EU) issued by the Commission of the
European Community.
Hereby, Lenco Benelux BV, Thermiekstraat 1a, 6361 HB Nuth, The
Netherlands, declares that this product is in compliance with the essential requirements and other
relevant provisions of Directive 1999/5/EC.
The declaration of conformity may be consulted at techdoc@lenco.com
17. Service
For more information and helpdesk support, please visit www.lenco.com
Lenco Benelux BV, Thermiekstraat 1a, 6361 HB, The Netherlands.
®All rights reserved

13
Nederlands
1. Veiligheidsvoorschriften
Deze voorzorgsmaatregelen zijn bedoeld om uw veiligheid te garanderen en beschadigingen aan
eigendommen te voorkomen. Zorg ervoor alle veiligheidsvoorschriften te lezen en op te volgen.
LET OP
RISICO OP ELEKTRISCHE SCHOKKEN
NIET OPENEN
Het bliksemschichtsymbool binnen in een gelijkzijdige driehoek is bedoeld de gebruiker te
wijzen op de aanwezigheid van ongeïsoleerde “gevaarlijke spanning” binnenin de
productbehuizing die krachtig genoeg kan zijn om voor personen een risico op elektrische
schokken te vormen.
Het uitroepteken binnenin een gelijkzijdige driehoek is bedoeld om de gebruiker te wijzen
op de aanwezigheid van belangrijke gebruik- en onderhoudsinstructies in de documentatie
meegeleverd met het apparaat.
1. Lees, bewaar en volg deze instructies.
2. Dit apparaat is uitsluitend bestemd voor huishoudelijk gebruik.
3. Controleer of de spanning op het specificatieplaatje van uw apparaat overeenkomt met het
lichtnet in uw huis (specificatieplaatje is te vinden op de achterzijde van het apparaat).
4. Gebruik het apparaat niet in de buurt van water.
5. Blokkeer geen van de ventilatieopeningen. Installeer het apparaat volgens de instructies van de
fabrikant.
6. Niet installeren in de buurt van hittebronnen zoals radiateurs, hitteroosters, kachels of andere
hitte genererende apparatuur (waaronder versterkers).
7. Houd het veiligheidsdoeleinde van de gepolariseerde stekker of aardstekker intact. Een
gepolariseerde stekker heeft twee uiteindes, waarbij de ene breder is dan de andere. Een
aardstekker heeft twee uitsteeksels met een derde aardpen. Het bredere uitsteeksel of de derde
pen is voorzien voor uw veiligheid. Mocht de geleverde stekker niet in uw stopcontact passen,
raadpleeg dan a.u.b. een elektromonteur voor vervanging van het verouderde stopcontact
(Alleen voor het Verenigd Koninkrijk van toepassing).
8. Zorg ervoor dat niemand op de voedingskabel kan gaan staan of dat de kabel kan worden
ingedrukt, voornamelijk bij stekkers, stopcontacten en het punt waar kabels uit het apparaat
komen.
9. Gebruik uitsluitend uitbreidingen/accessoires gespecificeerd door de fabrikant.
10. Haal de stekker uit het stopcontact tijdens onweer of wanneer u het apparaat voor langere tijd
niet gebruikt.

14
11. Laat alle reparaties over aan gekwalificeerd onderhoudspersoneel. Reparatie is vereist wanneer
het apparaat op enige wijze beschadigd is geraakt, bijvoorbeeld een beschadigde voedingskabel
of stekker, vloeistof of voorwerpen zijn in het apparaat terechtgekomen, het apparaat is
blootgesteld aan regen of vocht, het apparaat werkt abnormaal of is gevallen.
12. Gebruik nooit een beschadigde voedingskabel of stekker of een los stopcontact. Dit vormt
namelijk een risico op brand of elektrische schokken.
13. Het apparaat mag niet worden blootgesteld aan druppelend of opspattend water en er mogen
geen voorwerpen gevuld met vloeistoffen, zoals vazen, op het apparaat worden geplaatst.
14. Laat kinderen dit product niet als speelgoed gebruiken.
15. Berg het product niet op in extreem koude of warme omgevingen.
16. Dit apparaat is niet bestemd voor gebruik door personen (waaronder kinderen) met
gereduceerde fysieke, zintuiglijke of mentale capaciteiten, of met een tekort aan ervaring en
kennis, tenzij ze onder toezicht staan of instructies hebben gekregen m.b.t. veilig gebruik van het
apparaat door een persoon verantwoordelijk voor hun veiligheid.
2. Aan de Slag
-Lees deze gebruikshandleiding zorgvuldig.
-Haal de apparatuur uit de verpakking.
-Verwijder de verpakkingsmaterialen en bewaar deze voor toekomstig gebruik (bijvoorbeeld
voor transport van het apparaat).
3. Eigenschappen
-Twee hoofdluidsprekers
-Bluetooth® verbinding
-Aux-aansluiting inbegrepen
-3,5 mm Aux-kabel inbegrepen
-USB-poort voor opladen (5 V, 1 A)
-USB-poort voor het afspelen van MP3
-SD-kaartsleuf voor afspelen van MP3
-FM-radio
-LED-display
-Eén ingebouwde subwoofer
-LED-pulslicht in de gehele voorzijde, dat knippert met de muziek (licht met 7 individuele
kleuren en 3 modi)
4. Leveringsomvang
-Luidsprekerbehuizing
-Luidsprekerbasis
-Schroef (1 stuk)
-Metalen sluitring (1 stuk)
-3,5 mm lijn-in kabel
-Afstandsbediening
-Handleiding

15
5. Onderdelenbeschrijving
5.1 Bovenpaneel
No.
Beschrijving
1.
Steunbeugel
2.
LED Display
3.
Standby Toets: Indrukken om de luidspreker in of uit te schakelen.
4.
Bron Toets: Indrukken om te wisselen tussen FM-modus, USB-modus (voor beide USB- en SD-
weergave), Aux In modus en Bluetooth-modus.
5.
Vorige: Indrukken om de vorige track te selecteren/ingedrukt houden om naar FM-stations te zoeken
in aflopende volgorde.
6.
Start/Pauze/Pairing: Indrukken om af te spelen of te pauzeren en lang indrukken om de Bluetooth-
pairing modus te openen. Wanneer in USB-modus, ongeveer 3 seconden indrukken om te wisselen
tussen USB- en SD-weergave wanneer beiden zijn aangesloten op het apparaat.
7.
Volgende: Indrukken om de volgende track te selecteren/ingedrukt houden om naar FM-stations te
zoeken in oplopende volgorde.
8.
Volume - : Indrukken om het volume te verlagen.
9.
Volume + : Indrukken om het volume te verhogen.

16
5.2 Afstandsbediening
No.
Beschrijving
1.
Standby Button (In-/uitschakelen)
2.
BRON-toets (Indrukken om te wisselen tussen FM, Bluetooth, AUX IN en USB/SD-kaartmodus)
3.
Demptoets
4.
OFF/ON (Alleen voor LED-licht)
5.
Modus (de modus wisselen van alleen het LED-licht). De beschikbare modi zijn Spectrummodus,
Niveaumodus en Muurlampmodus.
6.
Kleurstijl (alleen kleur wisselen van het LED-licht): Kleur 00 in willekeurige kleur, kleur 01 in rood, kleur
02 in groen, kleur 03 in blauw, kleur 04 in paars, kleur 05 in lichtgeel, kleur 06 in lichtblauw, kleur 07 in
wit, kleur 08 knippert in willekeurige en herhalende kleuren.
7.
Vorige-toets
8.
Start/Pauze/Koppelingstoets
9.
Volgende
10.
Scan/Geheugentoets
11.
Kanaal-
12.
Kanaal+
13.
Lage tonen+ Effecttoets
14.
Lage tonen- Effecttoets
15.
Hoge tonen+ Effecttoets
16.
Hoge tonen- Effecttoets
17.
Volume+ Toets
18.
Volume- Toets

17
6. De afstandsbediening gebruiken om het apparaat te bedienen
Richt de afstandsbediening direct op de afstandsbedieningssensor (IR) op het voorpaneel. Plaats
geen voorwerpen tussen de afstandsbediening en het systeem terwijl u het apparaat bedient.
7. Batterijen
7.1 Batterijen Installeren
1. Schuif de batterijhouder uit de behuizing van de afstandsbediening. (Druk palletje “A” eerst
naar het midden, zie diagram).
2. Plaats één 3 V CR2025 (Lithium) batterij in de batterijhouder en let daarbij op de
polariteitmarkering. De afstandsbediening zal niet werken als u de batterij incorrect installeert.
Dank oude batterijen op gepaste wijze af. Laat de batterij niet ergens achter waar uw kind of
huisdier ermee kan spelen of deze kan inslikken.
3. Batterijen kunnen ontploffen of lekken wanneer incorrect behandeld. Probeer de batterij niet
op te laden of te ontmantelen. Dank oude batterijen nooit af in vuur.
4. Steek de batterijhouder terug in het batterijcompartiment.
OPMERKING: Verwijder a.u.b. alle batterijen als u het apparaat voor langere tijd niet gebruikt, om
beschadiging of letsel wegens batterijlekkage te voorkomen. Gebruik uitsluitend batterijen van het
gespecificeerde type en de gespecificeerde afmeting.
7.2 Batterijveiligheid
Altijd:
-Ervoor zorgen dat de batterijhouder is gesloten.
-Alleen de aanbevolen batterijen gebruiken.
-Controleren of batterijen goed passen. Op de markeringen plus en min letten op zowel de
batterij als de houder.
-Telkens een volledige set batterijen vervangen.
-Ongebruikte batterijen opbergen in hun verpakking en uit de buurt van metalen voorwerpen
die een kortsluiting kunnen veroorzaken.
-Uitgeputte batterijen uit de apparatuur verwijderen.
-Batterijen uit de afstandsbediening halen wanneer voor langere tijd niet gebruikt.

18
-Onthouden muntcellen en batterijen uit de buurt van kinderen te houden, omdat zijn deze
gemakkelijk kunnen inslikken.
-Onmiddellijk medische hulp zoeken wanneer batterijen zijn ingeslikt.
Nooit:
-Batterijen afdanken in vuur.
-Proberen ordinaire batterijen op te laden.
8. Instellingen
1. Haal de luidsprekerbehuizing en luidsprekerbasis voorzichtig uit de verpakking.
2. Haal de accessoires uit de verpakking (1 schroef en 1 sluitring).
3. Pas de basis op de behuizing met het gat.
4. Gebruik de schroef en sluitring om de basis in de behuizing te schroeven met een passende
schroevendraaier.
5. Plaats de luidspreker rechtopstaand op de vloer, het apparaat is nu gereed voor gebruik.

19
9. Functies
9.1 Bluetooth-functie
1. Schakel het apparaat in, druk op “SOURCE” op het bovenpaneel of op de toets “SOURCE” op de
afstandsbediening om de Bluetooth-modus te openen. De LED zal nu “BT ” aangeven en het
LED-icoontje “” zal na 3-5 seconden beginnen te knipperen om aan te geven dat de luidspreker
gereed is voor de paring modus.
2. Schakel de Bluetooth-functie in op uw smartphone/tablet en activeer de modus “SEARCHING
DEVICE” (apparaat zoeken), zoek naar “Lenco BTL-450” en selecteer deze optie.
3. Zodra het apparaat is gevonden, kunt u het wachtwoord 0000 invoeren om verbinding te
maken met uw smartphone/tablet (sommige apparaten vragen niet om een wachtwoord).
4. Het LED-icoontje zal oplichten en u zult een “DU” geluid horen zodra de verbinding is geslaagd.
5. Als de smartphone/tablet het apparaat niet kan vinden of de paring mislukt, schakel het
apparaat dan a.u.b. opnieuw in en herhaal de bovengenoemde stappen.
6. Telkens als u de Bluetooth-modus opent, zal de luidspreker automatisch verbinding maken met
het laatst gepaarde apparaat. Als de luidspreker niet automatisch verbinding kan maken met het
eerder gepaarde apparaat, dient u de Bluetooth-functie van uw smartphone/tablet opnieuw te
starten en vervolgens de bovengenoemde stappen te volgen om de verbinding tot stand te
brengen.
7. Als u de Bluetooth-functie van uw smartphone handmatig uitschakelt of als de smartphone
buiten bereik raakt van het apparaat (verder dan 10m), zal de verbinding tussen de luidspreker
en smartphone verloren gaan en schakelt het apparaat terug op de Bluetooth standby-modus.
8. Zorg ervoor dat de Bluetooth-functie van uw smartphone op de modus “searching device”
(apparaat zoeken) staat, blijf op “paring” op het bovenpaneel drukken en herhaal vervolgens de
bovengenoemde stappen om opnieuw verbinding te maken.
9.2 AUX-IN (Lijn-in type)
Vereist een 3,5 mm kabel (inbegrepen).
1. Sluit een 3,5 mm kabel aan op de Aux-ingang. Sluit het andere uiteinde van de 3,5 mm kabel
aan op een MP3-speler of andere audiobron.
2. Druk op de toets “STANDBY” om het apparaat in te schakelen.
3. Druk op de toets “SOURCE” op het bovenpaneel of op de toets “SOURCE” op de
afstandsbediening om de Aux-in modus te openen.
4. Gebruik de bedieningen op het aangesloten apparaat om het afspelen via de luidspreker te
starten.
9.3 USB-poort voor opladen
USB-uitgangsvermogen DC 5 V 1 A. Deze poort ondersteunt het opladen van alle Apple apparatuur
en andere apparatuur binnenin het vermogensbereik. Wanneer u apparatuur oplaadt, dient u te
verifiëren dat de voeding geschikt is voor uw apparaat.

20
9.4 USB-poort voor het afspelen van MP3
Schakel het apparaat in en steek een USB-flashdrive (niet inbegrepen) in de USB-poort, zorg er
hierbij voor de stekker volledig en correct in het stopcontact te steken.
De toren zal de muziek van de USB automatisch afspelen. De maximale capaciteit van flashdrives
ondersteund door de toren is tot 32GB.
9.5 SD-kaartsleuf voor afspelen van MP3
Steek een SD-kaart (niet inbegrepen) in de geheugenkaartsleuf. Zorg ervoor de kaart op de juiste
wijze aan te sluiten.
De toren zal de muziek van de SD-kaart automatisch afspelen. De maximale capaciteit van
flashdrives ondersteund door de toren is tot 32GB.
OPMERKING: Wanneer zowel een USB-apparaat als een SD-kaart zijn aangesloten, kunt u de
starttoets ingedrukt houden om te wisselen tussen USB en SD-kaart.
9.6 De FM-radio afspelen
1. Druk op de toets “STANDBY” om het apparaat in te schakelen.
2. Zorg ervoor de FM-antenne volledig uit te trekken en druk op “SOURCE” op het bovenpaneel of
op “SOURCE” op de afstandsbediening om de modus “FM” te selecteren.
3. Houd de toets “Volgende” of “vorige” ingedrukt om het apparaat naar radiostations te laten
zoeken en te stoppen zodra een station is gevonden.
4. U kunt eenmaal op de toets “Volgende” of “Vorige” drukken om fijner af te stemmen in stappen
van 0,1MHz.
9.7 FM-station-geheugens programmeren en afspelen
1. Volg de stappen van “De FM-radio afspelen”.
2. Houd de toets “Scan” op de afstandsbediening ingedrukt om naar stations te zoeken en deze op
te slaan in het geheugen (bijv. “P01” zal op de display knipperen en vervolgens wordt de
frequentie van het stationgeheugen weergegeven).
3. Opmerking: U kunt 30 FM-stations in het geheugen opslaan.
4. Om een opgeslagen stationgeheugen af te spelen, drukt u op de toets “CH-” of “CH+” om de
FM-stationgeheugens te doorlopen.
Table of contents
Languages:
Other LENCO Speakers manuals

LENCO
LENCO PA-260BK User manual

LENCO
LENCO BTT-9 User manual

LENCO
LENCO BTT-100 User manual

LENCO
LENCO BT-4650 User manual

LENCO
LENCO BTS-5 User manual

LENCO
LENCO BT-4650 User manual

LENCO
LENCO BTSW-1 City Romance User manual

LENCO
LENCO BT-191 User manual

LENCO
LENCO PMX-250 User manual

LENCO
LENCO BT-125 User manual