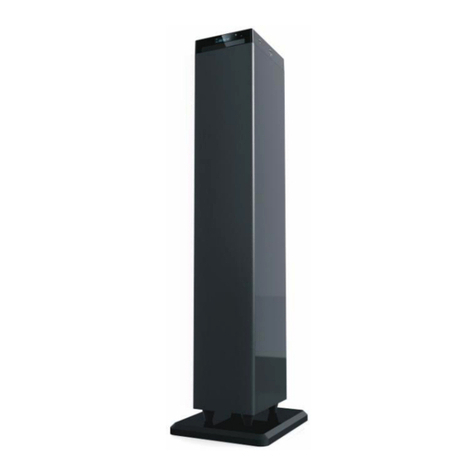
LENCO BTT-2 User manual

BTT-2
SPEAKER TOWER WITH
BLUETOOTH®, FM RADIO, USB AND
SD CARD READER
User Manual
www.lenco.com
20130103 v1.0

2
IMPORTANT INFORMATION:
Checking the model number
Before you get stared, please make sure the right user manual is included and it
belongs to your device. This user manual is only intended for the Lenco BTT-2. You
can find the model number on the packaging or on the specification plate on the back
of the device.
f

3
Table of contents
Checking the model number....................................................................................... 2
Table of contents........................................................................................................ 3
What’s in the box? ...................................................................................................... 6
Explanation of the symbols......................................................................................... 7
Important information before using the device............................................................ 7
Unpacking the device ................................................................................................. 8
What to do with the packaging material.............................................................................. 8
Mounting the base...................................................................................................... 9
Exploring the device ................................................................................................. 10
Exploring the remote control..................................................................................... 12
Where to install......................................................................................................... 13
Mounting the FM wire antenna................................................................................. 14
Connecting the device to a power supply................................................................. 15
Stopping the device in an emergency...............................................................................15
Connecting the device to the mains..................................................................................16
General information about the energy saving mode................................................. 17
Basic control............................................................................................................. 17
General operation.............................................................................................................17
Turning the power on or off on the device.................................................................................... 17
Turning the device on from standby mode ................................................................................... 17
Putting the device in standby mode.............................................................................................. 17
Adjusting the speaker volume....................................................................................................... 17
Muting the speakers...................................................................................................................... 17
Selecting the input source ............................................................................................................ 17
Bluetooth® mode..............................................................................................................17
Connecting with a Bluetooth® device........................................................................................... 17
Playing an audio file...................................................................................................................... 18
Pausing playback.......................................................................................................................... 18
Skipping to the next track ............................................................................................................. 18
Searching forward......................................................................................................................... 18
Skipping to the previous track....................................................................................................... 18
Searching backward ..................................................................................................................... 18
Stop playback ............................................................................................................................... 18
AUX Mode........................................................................................................................18

4
Connecting an AUX device........................................................................................................... 19
FM Radio mode................................................................................................................19
Manual tuning ............................................................................................................................... 19
Automatic tuning........................................................................................................................... 19
Searching for a radio station by program type.............................................................................. 20
Saving a radio frequency.............................................................................................................. 20
Recalling a preset station ............................................................................................................. 20
Switching between mono and stereo............................................................................................ 20
SD Card mode..................................................................................................................20
Pausing playback.......................................................................................................................... 21
Skipping to the next track ............................................................................................................. 21
Searching forward......................................................................................................................... 21
Skipping to the previous track....................................................................................................... 21
Searching backward ..................................................................................................................... 21
Stopping playback......................................................................................................................... 21
Playing the content on the storage media in random order.......................................................... 21
Repeating the content on the storage media................................................................................ 21
USB Mode ........................................................................................................................22
Pausing playback.......................................................................................................................... 22
Skipping to the next track ............................................................................................................. 22
Searching forward......................................................................................................................... 22
Skipping to the previous track....................................................................................................... 22
Searching forward......................................................................................................................... 23
Stopping playback......................................................................................................................... 23
Playing the content on the storage media in random order.......................................................... 23
Repeating the content on the storage media................................................................................ 23
Advanced.................................................................................................................. 23
Display information ...........................................................................................................23
Sleep timer .......................................................................................................................23
Adjusting the audio settings..............................................................................................24
Resetting the device .........................................................................................................24
Maintenance............................................................................................................. 24
Breaking down the device......................................................................................... 25
Storing and transporting the device.......................................................................... 28
Reorder accessories................................................................................................. 29
Glossary ................................................................................................................... 29

5
Bluetooth®................................................................................................................................... 29
Open standard............................................................................................................................. 29
LED............................................................................................................................................... 29
Sensor.......................................................................................................................................... 29
LCD............................................................................................................................................... 29
USB stick ..................................................................................................................................... 29
USB port ...................................................................................................................................... 30
Flash memory.............................................................................................................................. 30
SD Card........................................................................................................................................ 30
AUX in .......................................................................................................................................... 30
Fail situation................................................................................................................................ 30
Mono............................................................................................................................................. 30
Stereo........................................................................................................................................... 30
Troubleshooting........................................................................................................ 31
Specifications ........................................................................................................... 32
Safety Precautions ................................................................................................... 33
Notice, statements and information.......................................................................... 35
Declaration of Conformity..................................................................................................35
Service and support..........................................................................................................36
Do not distribute copyrighted material...............................................................................37
Trademarks ......................................................................................................................37
Disclaimer.........................................................................................................................38

6
Dear customer,
This device allows you to listen to radio, stream Bluetooth® audio to this device and
playback audio from a USB storage device, SD card of via the AUX input.
Thank you for choosing for Lenco. At Lenco, we are convinced that everyone should
enjoy life as much as possible. Our products are meant to support, improve and
create joyful moments for everyone. For this reason, we offer user-friendly, high-
quality and well-designed consumer electronics for an excellent price. This user
manual is designed to help you with the features of this device. Please keep this
manual for future reference.
This user manual was written during the development of the product, based on the
factory settings. If the product would need improvement, priority is given to the
product and therefore, in these cases, the quick start guide, user manual, illustrations
in the user manual and/or packaging may differ from the actual product.
What’s in the box?
The content of the box is assembled with the utmost care. In the unfortunate case
that anything is missing, please contact your dealer.
Content of the box:
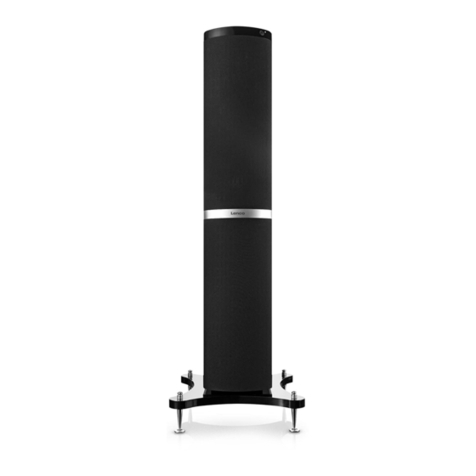
1 Speaker tower
1 Remote control
1 Power cord
1 Base
4 Mounting screws
1 Quick start guide

Explanation of the symbols :
This symbol indicates that there are important operating maintenance
instructions in the user manual accompanying the device.
This symbol indicates that dangerous voltage is present within this device,
constituting a risk of electronic shock or personal injury.
This symbol indicates that the action in question may not be performed by a
child because there is a risk of personal injury.
Important information before using the device
Use the device only as described in the user manual.
Read the safety precautions carefully before use. The safety precautions can
be found in the back of the user manual.
If certain functions or instructions are unclear, always contact our helpdesk
or the dealer where the device was bought. Information about our helpdesk
can be found in the back of the manual.
This device is only intended for private use. Information about the use and
warranty can be found at the safety precautions and the information about
service and support.
Never use this device in an explosive atmosphere.

8
Unpacking the device
The operations in this chapter should not be performed by children.
Get ready: a knife* or a pair of scissors *
1 Cut the tape 2 Open the box
3 Lift the device from the box and remove the foam
What to do with the packaging material
Lenco recommends to keep the box and foam in case the product needs transporting
in the future or to store the device when it’s not being used for a long time. The other
packaging materials can be disposed of according to the local regulations. Please
contact your local authorities.
Legend:
* = not included

9
Mounting the base
The operations in this chapter should not be performed by children.
Get ready: Phillips screwdriver*
Put the device on a flat, stable surface that is slightly elevated (for instance on a
table) so that the base can easily be mounted. Place the base against the bottom of
the device and secure it with the 4 included screws.
Legend:
* = not included

10
Exploring the device
The instructions below will briefly explain the functionality of the buttons and controls.
A detailed instruction can be found
in the various chapters of this
manual.
1. Play / pause button, press this
button to pause or resume
playback.
2. Previous / rewind button,
press this button to skip to the
previous song, hold the button
to search backward in the track.
3. Next / fast forward button,
press this button to skip to the
next track or, hold the button to
search forward in the track.
4. Bluetooth® status LED, this
LED will flash when the device
is trying to setup a Bluetooth®
connection. If a Bluetooth®
connection is active, the LED is
lit continuously. If no
Bluetooth® connection is active,
the LED will not be lit.
5. Remote control sensor, this sensor receives remote control signals.
6. Stop button, press this button to stop playback.
7. Volume knob, turn this knob clockwise to increase the volume or
counterclockwise to decrease the volume.
8. LCD display, the LCD display displays the most important information.
9. Modus button, press this button to switch between the Bluetooth®, AUX, FM,
SD and USB mode.
10.Standby button, press this button to turn the device on or press the button to
switch to standby mode.
11.Pair button, when the device is in Bluetooth® mode, press this button to
reconnect with another device.
12.Mute button, press this button to mute the speakers. Press this button again to
unmute the speakers.
13.SD card slot, insert an SD card in this slot.
1
2
3
4 5 6 7 9 10
11
12
13 14 15 16
17
18
8

11
14.USB port, insert a USB storage device in this port.
WARNING: Do not use a USB extension cable to
connect a USB device. The use of a USB
extension cable can cause malfunction or loss of
data.
15.AUX INPUT, connect a device that is equipped with an
AUX output or headphones output to this input.
16.Wire antenna, the antenna receives the FM radio
signals.
17.Power on / off switch, set the switch in the OFF
position to switch off the device. Set the switch in the ON
position to put the device in standby mode.
18.AC connection, connect the power cord to this
connection.

12
Exploring the remote control
1. Function button, press this button to switch
between the Bluetooth®, AUX, FM, SD and
USB mode.
2. Info button, in the FM mode RDS
information is shown on the display. Press
this button to show the frequency and PTY
information on the display.
3. Sleep button, press this button to display
sleep timer information, set the sleep timer or
turn off the sleep timer.
4. Previous / rewind button, press this button
to skip to the previous song, hold the button
to search backward in the track.
5. Next / fast forward button, press this
button to skip to the next track or, hold the
button to search forward in the track.
6. M+ button, only works in radio mode. Use this button to save a preset station or
recall a preset station.
7. Tune- button, only works in radio mode. Use this button to change the radio
frequency.
8. Store button, only works in radio mode. Use this button to save a station.
9. Numeric buttons, use these buttons to input digits.
10.Repeat button, only works in SD & USB mode. Press this button to repeat a
track, folder or all tracks on the media.
11.Volume- button, press this button to decrease the volume.
12.Standby button, press this button to turn on the device or put the device in
standby mode.
13.Mute button, press this button to mute the speakers. Press this button again to
unmute the speakers.
14.Play / pause button, press this button to pause or resume playback.
15.Stop button, press this button to stop playback.
16.Tune+ button, only works in radio mode. Use this button to change the radio
frequency.
17.M- button, only works in radio mode. Use this button to save a preset station or
recall a preset station.
18.Pair button, if the device is in Bluetooth® mode, press this button to reconnect
to another device.
1
2
3
4
5
7
8
12
13
14
15
17
6
16
9
11
10 21
20
22
23
19
18

13
19.PTY button, only works in radio mode.
Press this button to select the desired
program type.
20.Ran button, only works in SD & USB mode.
Press this button to play tracks in a random
order.
21.MO / ST button, only works in radio mode.
Press this button to switch between FM
mono and stereo audio.
22.Tone button, press this button to adjust the
high and low tones.
23.Volume+ button, press this button to
increase the volume.
Where to install
Never place the device in direct sunlight. Place it on a sturdy platform of which the
surface should be flat and steady, so the product can’t fall or hit by any objects. Make
sure the product is placed in such a manner that nothing can fall on top of it, as
pressure will damage or break the product. Prevent insertion of objects into the
ventilation slots, or openings in the cabinet at all time.
1
2
3
4
5
7
8
12
13
14
15
17
6
16
9
11
10 21
20
22
23
19
18

14
Mounting the FM wire antenna
The operations in this chapter should not be performed by children.
The wire antenna can be found on the back of the device. If you cannot find the wire
antenna, please check the section Exploring the device (number 16) to see where
the wire antenna can be found exactly. Extend the wire antenna, for the best results
we recommend hanging the wire antenna as high and as close as possible near a
window.

15
Connecting the device to a power supply
The operations in this chapter should not be performed by children.
Before connecting the device to the mains, make sure that the mains voltage
corresponds to the voltage that is suitable for the device. The information
about a suitable mains voltage can be found in the specification table. If you
are unsure about the mains voltage at your current location, please contact
the utility company.
Make sure the outlet to which the device is connected is easily accessible.
Before connecting the device, please make sure that the main power switch
on the back of the device is in the OFF position. If you cannot find the switch,
please check the section Exploring the device (number 17) to see where this
switch can be found.
Do not touch the metal parts of the power cable, because there is a risk of
shocks with personal injury.
Stopping the device in an emergency
In “fail situations” it might be needed to have the device make an emergency
stop. For instance when smoke or a strange smell is coming out of the
device, when the device is making a strange noise, etc. You can stop the
device in emergencies by:
Disconnecting the power cord from the outlet.
Always pull the plug of the power cord, never the
cord itself.
If the outlet is not accessible, go to the meter
cupboard and switch off the corresponding group or
the ground fault circuit breaker.
When a fail situation has occurred, make sure to
contact your dealer or the Lenco helpdesk before using the device again. Explain to
the employee what happened, the employee will then advise you whether it’s wise to
start using the device again.

16
Connecting the device to the mains
Fully extend the power cord and connect the narrow end to
the back of the device and connect the wide end of the
power cord to the power outlet.
Preparing the remote control
Remove the battery cover and insert 2 A-brand AAA UM4
1,5V batteries. Make sure that the batteries are placed in the
right direction into the remote control (the + and the –side).
After the batteries are placed, place the battery cover back.
Please remove the batteries from the remote control when it’s not being used for a
long time.

17
General information about the energy saving mode
This device is equipped with an energy saving mode. This means that when the
device doesn’t receive any signal for 10 minutes (think of: no Bluetooth® connection,
song has been paused for a long time, etc.), it switches itself off.
Basic operation
General operation
Turning the power on or off on the device
To power the device, put the switch on the back of the device in the ON position. The
device will now switch to the standby mode.
To turn off the power, put the switch on the back of the device in the OFF position.
Turning the device on from standby mode
When the device is in standby mode, press the standby button on the device or the
remote control to turn the device on.
Putting the device in standby mode
When the device is turned on, press the standby button on the device or the remote
control to put the device in the standby mode.
Adjusting the speaker volume
Turn the volume knob to adjust the speaker volume. Turn
counterclockwise to decrease the speaker volume or turn
clockwise to increase the speaker volume.
When using the remote control, press the VOL- button to
decrease the speaker volume or press VOL+ to increase the
speaker volume.
Muting the speakers
Press the mute button on the device or the remote control to mute the speakers.
Press the mute button again to unmute the speakers. MUTE will appear on the
display when the speakers are muted.
Selecting the input source
Press the mode button on the device or the function button on the remote control to
select the desired input source. The order of the input sources is: Bluetooth®, AUX,
FM Radio, SD Card & USB.
Bluetooth® mode
Connecting with a Bluetooth® device

18
Put the device in Bluetooth® mode. If the device is in Bluetooth®
mode, press the pair button on the device or remote control. When
the device is ready to pair with an external Bluetooth® device, the
Bluetooth® LED will flash. Find "BTT-2" on the external device and
connect with it. Thanks to Pair & Play™ there is no need to enter a password. Pair &
Play™ allows you to pair a Bluetooth®device with a single press of a button and
enjoy your favorite music right away.
Important note: Depending on the external Bluetooth® device, the instructions
below might not work or might not work correctly. This is not a malfunction of the
Lenco device or the external Bluetooth® device.
Playing an audio file
Choose your favorite audio file on the external Bluetooth® device and play it on the
device. You can press play on the device or the remote control to start playback of
the audio file.
Pausing playback
During playback, press the play / pause button on the device or the remote control to
pause playback, press the button again to resume playback.
Skipping to the next track
During playback of an audio file, press the next button on the device or the remote
control to skip to the next track.
Searching forward
During the playback of an audio file, hold the next button on the device or the remote
control. The device will search forward in the track until the button is released.
Skipping to the previous track
During playback of an audio file, press the previous button on the device or the
remote control to skip to the previous track.
Searching backward
During the playback of an audio file, hold the previous button on the device or the
remote control. The device will search backward in the track until the button is
released.
Stop playback
Press the stop button on the device or the remote control to stop playback.
AUX Mode
Put the device in AUX mode. When the device is in the AUX mode, the volume can
only be controlled via the tower speaker. All other controls should be used on the
external device.

19
Connecting an AUX device
The AUX input allows you to connect any device that is equipped with an AUX output
or a headphones output. The cables that are required to connect these external
devices are not included with this product. The AUX input can be found on the back
of the device.
FM Radio mode
Put the device in radio mode.
Manual tuning
The display shows the current frequency. You can search for the desired frequency
in 2 ways:
1. Increase the frequency with steps of 0.05 MHz by pressing the next button on the
device or the tune+ on the remote control.
2. Lower the frequency with steps of 0.05 MHz by pressing the previous button on
the device or the tune- on the remote control.
Automatic tuning
The display shows the current frequency. When the device finds a station with
sufficient signal strength, the device will automatically stop searching. You can
automatically search for a station in 2 ways:
1. Search for stations with a higher frequency by holding the next button on the
device or the tune+ on the remote control for 3 seconds.
2. Search for stations with a lower frequency by holding the previous button on the
device or the tune- on the remote control for 3 seconds.
If needed, manual tuning can be used to fine tune to a station.

20
Searching for a radio station by program type
The Program Type function (abbreviated PTY function) allows you to search for a
station that is broadcasting a specific genre, for instance classical music. When the
PTY function is activated, the search function will stop only at stations that belong to
the set category of the PTY function. If, for instance, classical music has been set,
then the search function will not stop at a station that only plays rock music. Activate
the PTY function by holding the PTY button on the remote control until a genre
appears on the display. Then repeatedly press the PTY button until the desired genre
is shown on the display. Then press the tune+ button on the remote control to search
for this genre. If needed, manual tuning can be used to fine tune to a station.
Saving a radio frequency
You can save up to 20 preset stations in the memory of this device. Tune to the
frequency that you would like to save and follow the steps below to save the
frequency:
1. Press the store button on the remote control, the preset number appears on
the display.
2. The preset number can be increased by pressing M+ on the remote control
and decreased by pressing M- on the remote control.
3. Press the store button on the remote control to save the frequency.
Recalling a preset station
Press the M+ and M- buttons on the remote control to tune to a desired preset
station. Alternatively, you can also enter the number by using the numeric buttons on
the remote control.
Switching between mono and stereo
Press the MO/ST button to switch between mono and stereo FM reception. If the
station being listened to has a weak signal, some hiss may be audible. It is possible
to reduce this hiss by forcing the radio to play the station in mono rather than stereo.
SD Card mode
Put the device in SD Card mode and insert the SD memory card.
Table of contents
Other LENCO Speakers manuals

LENCO
LENCO PLAYLINK 6 User manual

LENCO
LENCO PA-200 User manual

LENCO
LENCO PA-360BK User manual

LENCO
LENCO BTL-450 User manual

LENCO
LENCO PA-90 User manual

LENCO
LENCO BT-4650 User manual

LENCO
LENCO PA-46 User manual

LENCO
LENCO Alecto HeeHee User manual

LENCO
LENCO BT-191BU User manual

LENCO
LENCO BTP-200BK User manual