1 DOC-6004-EN-US— revision 1.001
The LNL-200XA Power Supply Unit (PSU)
The LNL-200XA is a high-efficiency and cost-effective power supply
designed to house a Lenel controller and reader interface module in an
OnGuard®system.
Featuring a regulated 13.8 VDC output, the LNL-200XA supplies
continuous full rated current to load. Maximum battery life is assured using
deep discharge protection to prevent premature battery failure when
operating in standby mode for extended periods. Two sets of volt-free
contacts are provided to signal (i) loss of mains and (ii) battery and loss of
output faults.
The LNL-200XA can supply a continuous full-rated current to load plus an
additional 0.5A for charging a 12V standby battery.
The universal mains input voltage enables the power supply to be used
across a wide geographical area. The highly efficient switch mode design
ensures low operating costs while generating less heat. The modular
construction simplifies maintenance.
• Continuous full-rated current-to-load
• Universal mains input voltage 90-264 VAC
• High-efficiency electronics for reduced running costs and lower
operating temperatures
• Mains transient protection circuit
• Lid and removal from wall tamper detection
• Installer-safe design with all high-voltage electronics fully shrouded
• PCB supports and fixings supplied
• Houses an LNL-1300e Single Door IP Interface Module or an LNL-
2210 Intelligent Single Door Controller and an
LNL-1300 Single Reader Interface Module
• PSU status and diagnostic LEDs (mains present and fault)
• Volt-free contact signaling mains failure (EPS)
• Volt-free contact signaling output and battery faults (GEN)
• Full electronic short circuit and overload protection on load output
under mains operation
• Individual battery and output fuse protection
• Three-year warranty
Installation
This unit is only suitable for installation as permanently connected
equipment. The PSU is NOT SUITABLE for external installation.
Before installation, ensure that the mains power source has a separate
(approved) disconnect device that is fitted with a fuse or other over-current
protection rated at 3 A maximum. Ensure that the disconnect device has the
appropriate earth fault protection to the applicable standard.
Before connecting the PSU to the mains power source, verify that the
external disconnect device is OFF.
Install the PSU according to all relevant safety regulations applicable to the
application. EQUIPMENT MUST BE EARTHED.
Mounting
1. Mount the PSU securely in correct orientation allowing minimum
clearance.
Mounting the Power Supply
2. Route mains and low voltage output cables via different knockouts
and/or cable entry holes.
Note: Use bushes and cable glands rated to UL94 HB minimum.
Mains Power-up
1. Attach the appropriately-rated mains cable (minimum 0.5mm2[3A],
300/500 VAC) and fasten using cable ties.
2. Apply mains power. Check for 13.8 VDC on load outputs. Ensure that
the green Mains LED is on.
3. Disconnect mains power.
Load Output
1. Attach the appropriately-rated load cable and fasten using cable ties.
Note polarity.
2. Apply mains power. Check green Mains LED is on.
Note: The red LED on the PSU may flash to indicate that no battery
has been connected. This is normal.
3. Verify load is operating correctly.
4. Disconnect mains power.
Signaling
1. Connect EPS and GEN fault outputs to appropriate inputs of control
and indicating equipment (CIE).
Standby Battery
1. Attach supplied battery cables to terminal block and battery.
Note: Ensure correct polarity of battery connections: +ve use red lead,
-ve use black lead.
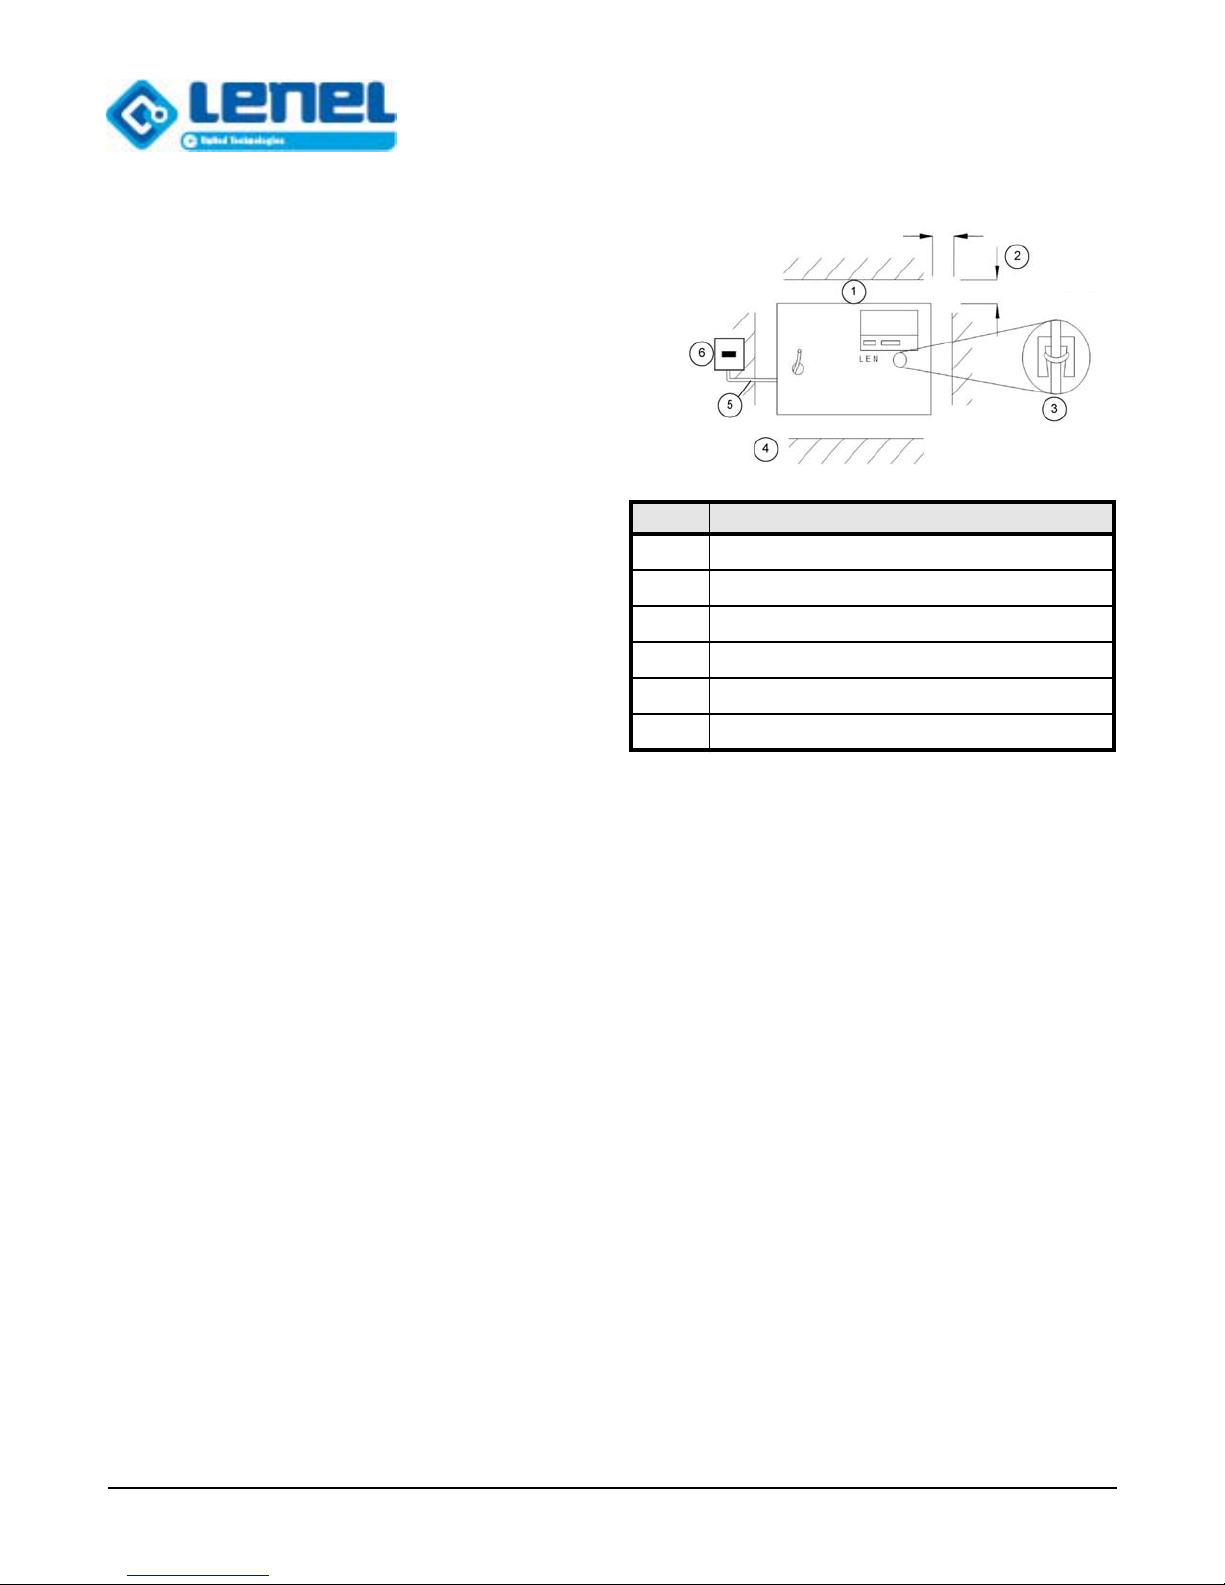
Callout Description
1 10 cm clearance minimum
2 Load output cable: current rating to match maximum load
3 Fasten cables using cable tie
4 Mains input cable rated: 3 A, 300 VAC minimum
5 3 A minimum
6 Fused spur
LNL-200XA 13.8 VDC 2A Switch Mode Power Supply
Quick Reference


