Lenoxx MF550 User manual

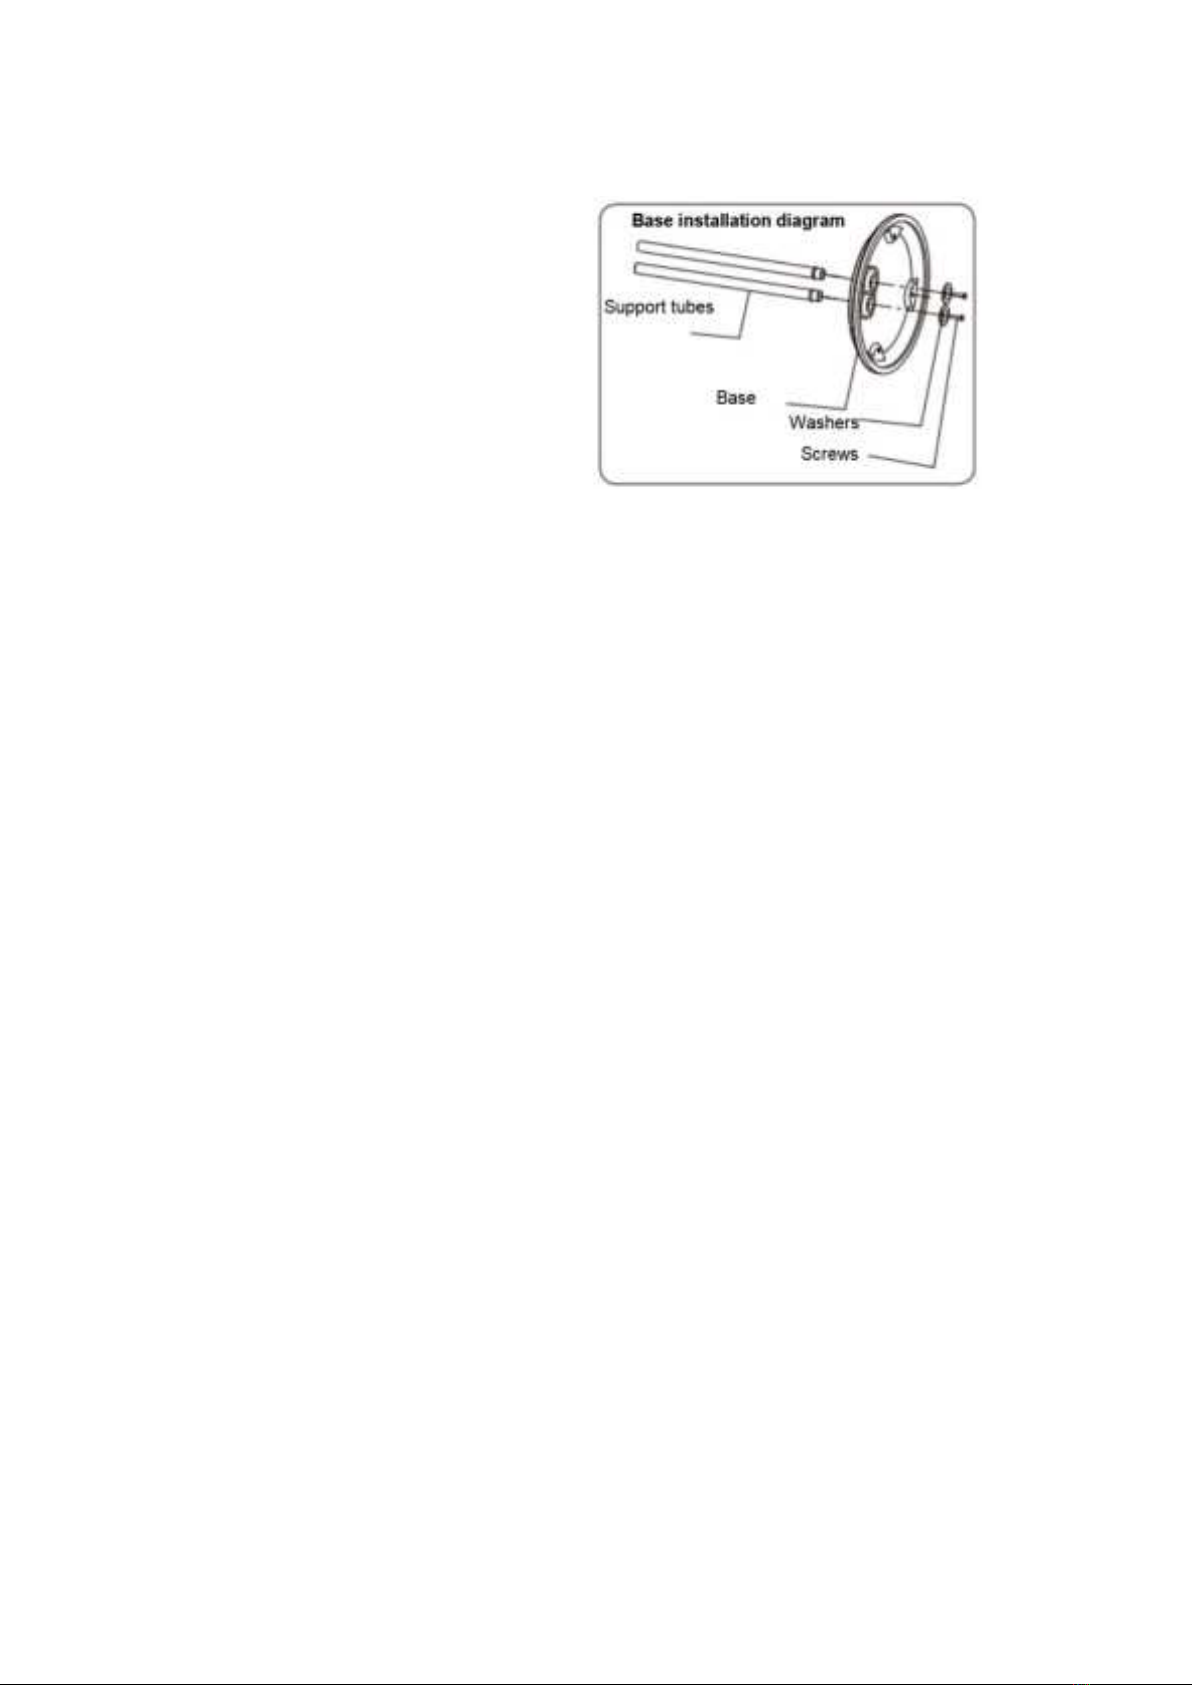
The illustrations used in the manual are to illustrate the operation method and structure of
the product. Where there is a small difference between the physical item and the
illustrations, please take the physical as the standard.
Read these instructions carefully before attempting to assemble, install, operate or maintain
the product. Protect yourself and others by observing all safety information. Failure to
comply with instructions could result in personal injury and / or property damage.
ABOUT THE ITEM:
Calm down, settle back and take a breather with our remote-controlled 40cm Misting
Pedestal Fan. This standing pedestal fan will mist and chill the airflow up to 50m²
around your home or small office.
Use the convenient touch-panel settings or full function remote control with 5 metre
range to adjust between three wind speeds and three wind adjustment modes. Natural
mode simulates a natural breeze perfect for daytime use and sleep mode simulates a soft
breeze perfect for night-time use. Set your timer between .5 and 7.5 hours to control
your cooling session, your way. Control the mist while running the fan or resting in idle
mode – the choice is yours. If you prefer an oscillation, this large, 40-centimetre fan has all
the options available for you.
This misting pedestal fan has a water tank capacity of 3.2L and can produce up to 220mL of
mist per hour. The misting indicator light and empty water tank indicator light as well as the
tinted transparent water tank each help to keep misting and keep track without ever
missing a beat.
Enjoy a sturdy, reliable base at a fixed height of 1.2 metres. The safety fan guard around the
large, 40-centimetre head will prevent unwanted accidental injury, so you can relax to the
max without a worry.
Take a deep breath in and feel the difference of clean, refreshing air cycling through
your room with our 40cm Misting Pedestal Fan, with remote control.
IMPORTANT SAFEGUARDS:
When using electrical appliances, basic safety precautions should always be followed,
including the following:
1. Read instructions carefully before use.
2. Remove and safely disregard any packaging material and labels before using this product
for the first time. Ensure children and babies do not play with plastic bags or any packaging
materials.
3. Before use, check that your local voltage corresponds with the specifications shown on
the appliance nameplate located under the appliance.

4. Always operate the appliance on a horizontal surface which is level and stable. Do not
operate the appliance on or near combustible materials such as tablecloths or curtains.
5. Do not place the appliance on or near a hot gas or electric burner, or in a heated oven.
6. Never connect this appliance to an external timer or separate remote-control system.
7. Never use this appliance with an extension cord or power board. Ensure it is plugged into
a dedicated power point and without any other appliances on the same outlet.
8. Do not turn on the power until the appliance and parts are in place as required.
9. To protect against electric shock, do not immerse the cord, plug, or appliance in water or
any other liquid. Do not expose the appliance to dripping or splashing and ensure that no
objects filled with liquids such as vases are placed on the appliance. Do not put any water or
other liquid into the main housing of the appliance through the vents. Do not rinse it under
the tap.
10. Do not touch the appliance, power cord or power plug with wet hands.
11. Unplug from the outlet when not in use, before putting on or taking off the parts, and
before cleaning.
12. The appliance does not contain any serviceable parts inside. Do not attempt to open
and repair the unit yourself. All components should only be serviced by a qualified
technician.
13. Do not use the appliance if the plug, power cable or unit itself are damaged. If the power
cord is damaged, you must have it replaced at a service centre with qualified persons in
order to avoid a hazard.
14. Do not use the appliance for anything other than the intended use. It is for household
use only. It is not to be used outdoors or for commercial purposes.
15. Close supervision is necessary when any appliance is used near children. Keep the
appliance and power cord out of reach of children when it is in operation.
16. This appliance is intended to be used in household and similar applications such as:
- staff kitchen areas in shops, offices and other working environments;
- farm houses;
- by clients in hotels, motels and other residential type environments;
- bed and breakfast type environments

17. This misting fan should be operated on a separate electrical power point from other
operating appliances. If the power point is overloaded with other appliances, this misting
fan may not work properly.
18. Leave enough open space from other objects while in use. Do not block air intakes or
exhausts.
19. Do not place the appliance against a wall or against other appliances. Leave at least 5
inches of free space on the back and sides and above the appliance. Do not place anything
on top of the appliance.
20. Do not cover the misting fan while in use.
21. Do not let the cord hang over the edge of the table or counter.
22. Do not unplug the misting fan by pulling on the cord.
23. This appliance is not designed to be used by people (including children) with a physical,
sensory or mental impairment, or people without knowledge or experience, unless they are
supervised or given prior instructions concerning the use of the appliance by someone
responsible for their safety. Children must be supervised to ensure that they do not play
with the appliance.
24. Do not leave the appliance operating while unattended.
25. Never put fingers or any other objects through the grilles (fan guards) while the fan is
running.
26. Long hair can be caught in the fan owing to the air turbulence. Hair, jewellery and loose
clothing must be kept away from the fan.
27. The misting fan is not an aromatiser or vaporiser. Do not add any liquid into it such as
essential oils, fragrances or vaporising fluid. Only add water.
SHORT CORD INSTRUCTIONS:
Do not use with an extension cord. A short power supply cord is provided to reduce the risks
resulting from being entangled in or tripping over a long cord.
PREPARATION FOR USE:
Before using the misting fan for the first time:
Carefully unpack the misting fan and remove all the packing materials.
Place the misting fan on a flat and stable surface.

Use a soft cloth to remove any dust on the surface that may happen during packing and
transport.
ASSEMBLY INFORMATION:
PARTS:

BASE ASSEMBLY:
FAN HEAD/CONTROLLER ASSEMBLY:
1. Loose the two thumbscrews located at the back of the fan head/controller.
• Do not fully unscrew- the two nuts will fall off.
2. Locate the two holes underneath the fan head /controller. Assemble the two tubes and
push down until it stops.
3. Tighten the two Thumb Screws.
FAN BLADE AND SAFETY GRID ASSEMBLY:
1. Place the rear grid on the fan head, ensuring the wire handle on the back of the grid is at
the top.
2. Screw the plastic nut to secure the grid.
3. Place the fan blade onto the motor spindle.
4. Fix the blade into place by gently tightening the spinner anticlockwise onto the end of the
motor spindle. The spinner nut is self-tightening when the motor starts - so do not force it.
5. Place the front grid into position and secure it by closing the secure clips. The screw and
nut at the bottom of the grille must be fitted.
ATTENTION!
• Do not operate the fan until the safe grills and blade properly installed.
MIST GENERATOR AND WATER TANK
1. Place the misting generator onto the base, ensuring it is seated properly in its recess.
2. Place the water tank on top of the misting generator. Fit the cover to the top of the water
tank.
3. Push the end of the flexible hose into the hole at the top of the water tank cover and
push in as far as you can. Do not kink the hose.
1. Put the plastic cover on the weighted
base.
2. Remove the screws from the ends. Insert
the two supporting tube ends into the plate
holes.
3. Fit the washers and replace the two
screws to fix the supporting tubes.

4. Push the other end of the hose into the mist vent, that is located at the front of the fan
grid. Do not kink the hose.
FILLING THE WATER TANK
Unplug the appliance before filling and cleaning the water tank.
1. Take off the water tank and turn it upside down.
2. Twist the cap anticlockwise to unlock it.
3. Fill the tank with cold and clean water, making sure not to overfill it.
4. Refit the cap and turn clockwise to lock in place.
5. Turn the tank over and place it back on the misting generator.
ATTENTION!
• Ensure the product is unplugged from the mains before filling or refilling the water tank.
• Only use water in the water tank. Do not add any chemicals, oils, or other additives.
• Only use cold or warm water in the water tank. The water must not be warmer than 40°C.

CONTROLS:
CONTROL PANEL:
Indicator lights:
1. Mode:
Normal/Natural/Sleeping
2. Timer indicator
3. Speed: high-medium-low
4. Power on indicator
5. Oscillation
6. Mist indicator
Buttons:
A. MIST: Press repeatedly to choose between the
three mist levels or no mist.
B. TIMER: See the section “Timer”.
C. ON/SPEED: Press to turn the fan on. Once the fan
is on, press it repeatedly to change between the
different fan speeds.
D. MODE: Press to change between three different
wind modes.
E. OFF: Press to turn the fan off.
F. SWING: Press to turn oscillation on or off.
REMOTE CONTROL
To use the remote control, first, insert two AAA batteries (not included) in the
remote control.

OPERATION:
When connected to power, the indicator will illuminate. The fan is in standby mode. You can
control the fan with the control buttons or the remote control.
Operation using the buttons on the fan:
1. Fan function:
•Use the “ON/SPEED” button to switch the fan ON
•Set the wind speeds (high-medium-low) by pressing the “ON/SPEED” button several times.
•Press the “OFF” button to switch the fan off.
2. Oscillation function:
•First, switch the fan on. Then press the “SWING” button. The mist fan head moves
continuously from side to side. Pressing the button again stops the oscillation of the mist
fan.
3. Manual tilt:
•Hold the fan head securely. Then undo the wing screw on the right-hand side of the fan
head. You can now tilt the head upwards and downwards to adjust the angle. After
adjusting the angle, tighten the wing screw again.
4. Cooling using ultrasonic mist:
•Press the “Mist” button to switch the ultrasonic mist on / off or adjust the mist volume
(Max-medium-Minimum) by pressing the “Mist” button several times.
• The same mist function also can be controlled by the remote.
• When the mist function is selected the water indicator light will be illuminated blue.
• If the water tank is empty (Short of water), the water indicator light will be illuminated
red.
• The mist function and fan function can be worked independently, or together.
5. Timer
• Press the “Timer” button repeatedly when the fan is on, the indicator will then show the
time remaining until the fan is due to switch off. You can select between 0.5 and 7.5 hours.
• When the unit is operating, you can set the timer to switch the fan off automatically after
the set time. Press the timer button repeatedly to select the desired time in half hours
increments: from 0.5 hours to 7.5 hours.
There are only 4 indicator lights for the timer mode on the control panel.
When the indicator light for 0.5 hours is illuminated, the misting fan will operate for 30
minutes.

When the indicator light for 1 hour is illuminated, the misting fan will operate for 1 hour.
When the indicator lights for 0.5 hours and 1 hour are both illuminated, the misting fan will
operate for 1 hour and 30 minutes.
When the indicator light for 2 hours is illuminated, the misting fan will operate for 2 hours.
When the indicator lights for 0.5 hours and 2 hours are both illuminated, the misting fan will
operate for 2 hours and 30 minutes.
When the indicator lights for 1 hour and 2 hours are both illuminated, the misting fan will
operate for 3 hours.
When the indicator lights for 0.5 hours, 1 hour and 2 hours are all illuminated, the misting
fan will operate for 3 hours and 30 minutes.
When the indicator light for 4 hours is illuminated, the misting fan will operate for 4 hours.
When the indicator lights for 0.5 hours and 4 hours are both illuminated, the misting fan will
operate for 4 hours and 30 minutes.
When the indicator lights for 1 hour and 4 hours are both illuminated, the misting fan will
operate for 5 hours.
When the indicator lights for 0.5 hours, 1 hour and 4 hours are all illuminated, the misting
fan will operate for 5 hours and 30 minutes.
When the indicator lights for 2 hours and 4 hours are both illuminated, the misting fan will
operate for 6 hours.
When the indicator lights for 0.5 hours, 2 hours and 4 hours are al illuminated, the misting
fan will operate for 6 hours and 30 minutes.
When the indicator lights for 1 hour, 2 hours and 4 hours are all illuminated, the misting fan
will operate for 7 hours.
When the indicator lights for 0.5 hours, 1 hour, 2 hours and 4 hours are all illuminated, the
misting fan will operate for 7 hours and 30 minutes.
If the time button is pressed one more time, then no indicator lights will be on and no timer
will be set and the misting fan will operate until it is manually turned off.

6. Different wind settings
The wind mode can be adjusted by pressing the “MODE” button on the control panel or the
remote.
•Press “Mode” to set the wind mode (normal, sleep, natural).
7. Switching off
•The fan is switched off by pressing the “OFF” button.
CLEANING, MAINTENACE, SERVICE, AND DISPOSAL
Cleaning
•Always unplug the fan before cleaning it.
•Clean the water tank and the water unit once a week to prevent the formation of scale,
algae, or bacteria.
•If the fan will not be used for a longer period of time, empty the water tank and dry the
water unit with a microfiber cloth.
•If the fan will be placed in storage for a longer period of time (over winter, etc.), always
cover it with a suitable cover to prevent dust from entering the device in key places.
•To avoid damaging the plastic and indicators, do not use any abrasive cleaning agents or
chemicals.
Maintenance
In general, the mist fan does not require any maintenance. The fan must not be opened by
unauthorized persons. If there seems to be a problem, contact your dealer.
Service and repair
If you notice any damage or a fault with your mist fan, it must be checked and repaired by a
specialist. This may be a qualified electrician or your dealer. Damage or faults arising from
unauthorized repairs, as well as modifications to the fan, misuse, negligence, and improper
or inadequate maintenance void the warranty. Dealers and the manufacturer shall not be
liable.
Disposal
The mist fan must not be disposed of together with your normal household waste. Please
take the fan to your local recycling centre to dispose of it.

FAULTS & TROUBLESHOOTING
Fault
Possible cause
Solution
The Off button does not light
up, the fan does not start,
there is no mist
The fan is not plugged in.
The fuse has tripped.
Plug the fan in. Reset the fuse.
There is no mist No water in the
tank.
The valve in the tank
opening is trapped.
Fill with water.
Gently move the valve with your
finger.
The mist smells funny
The water tank is not
clean.
Clean the water unit & tank.
Fill with clean water.
The tank display lights up,
but there is no wind or mist
The water level is too
high.
Remove some water.
Too little mist
The valve may be dirty.
Clean the water unit.
SPECIFICATIONS:
Voltage: 220 -240V ~ 50 Hz
Power: 75 W
Water Tank: 3.2 Litre capacity
Remote control: yes
Fan oscillation: yes
Water consumption: 220 ml per hour (mist production)
Mist production: by Ultrasonic technology
Fan diameter: 40 cm
Dimensions (HxWxD): 125 x 40 x 40 cm
Weight: 7.2 kg
Range of remote control: 5 m
Batteries for the remote: 2x AAA (not included)
This manual suits for next models
1
Table of contents
Other Lenoxx Fan manuals
Popular Fan manuals by other brands

Hurricane
Hurricane W Instruction guide

Franklin Electric
Franklin Electric SubDrive50 Connect N3R install guide

Sharper Image
Sharper Image FLY 01 owner's guide

Monte Carlo Fan Company
Monte Carlo Fan Company 3SU54BK Owner's guide and installation manual

Nordic Home
Nordic Home FT-532 user manual

Kichler Lighting
Kichler Lighting Salvo 330045 instruction manual