2
FEATURES
3
ASSEMBLE
CHANGING THE FOOD DISPENSER
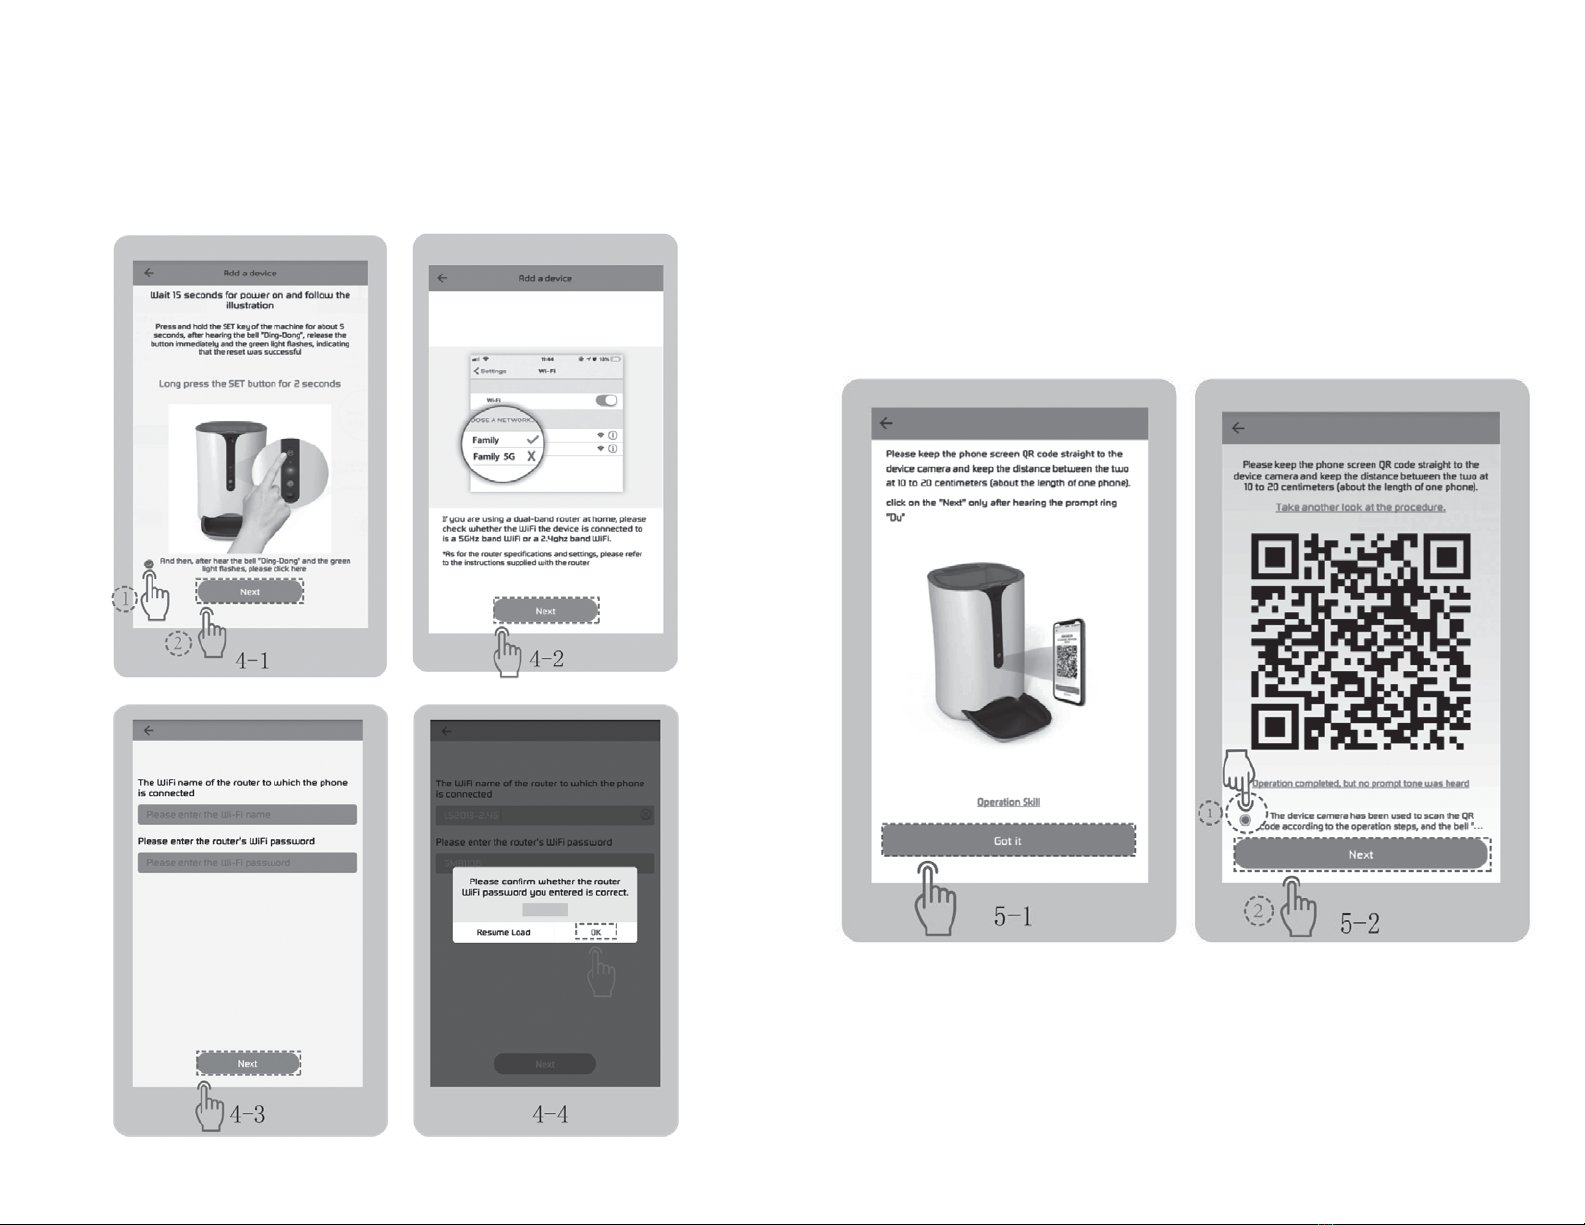
APP INSTALLATION
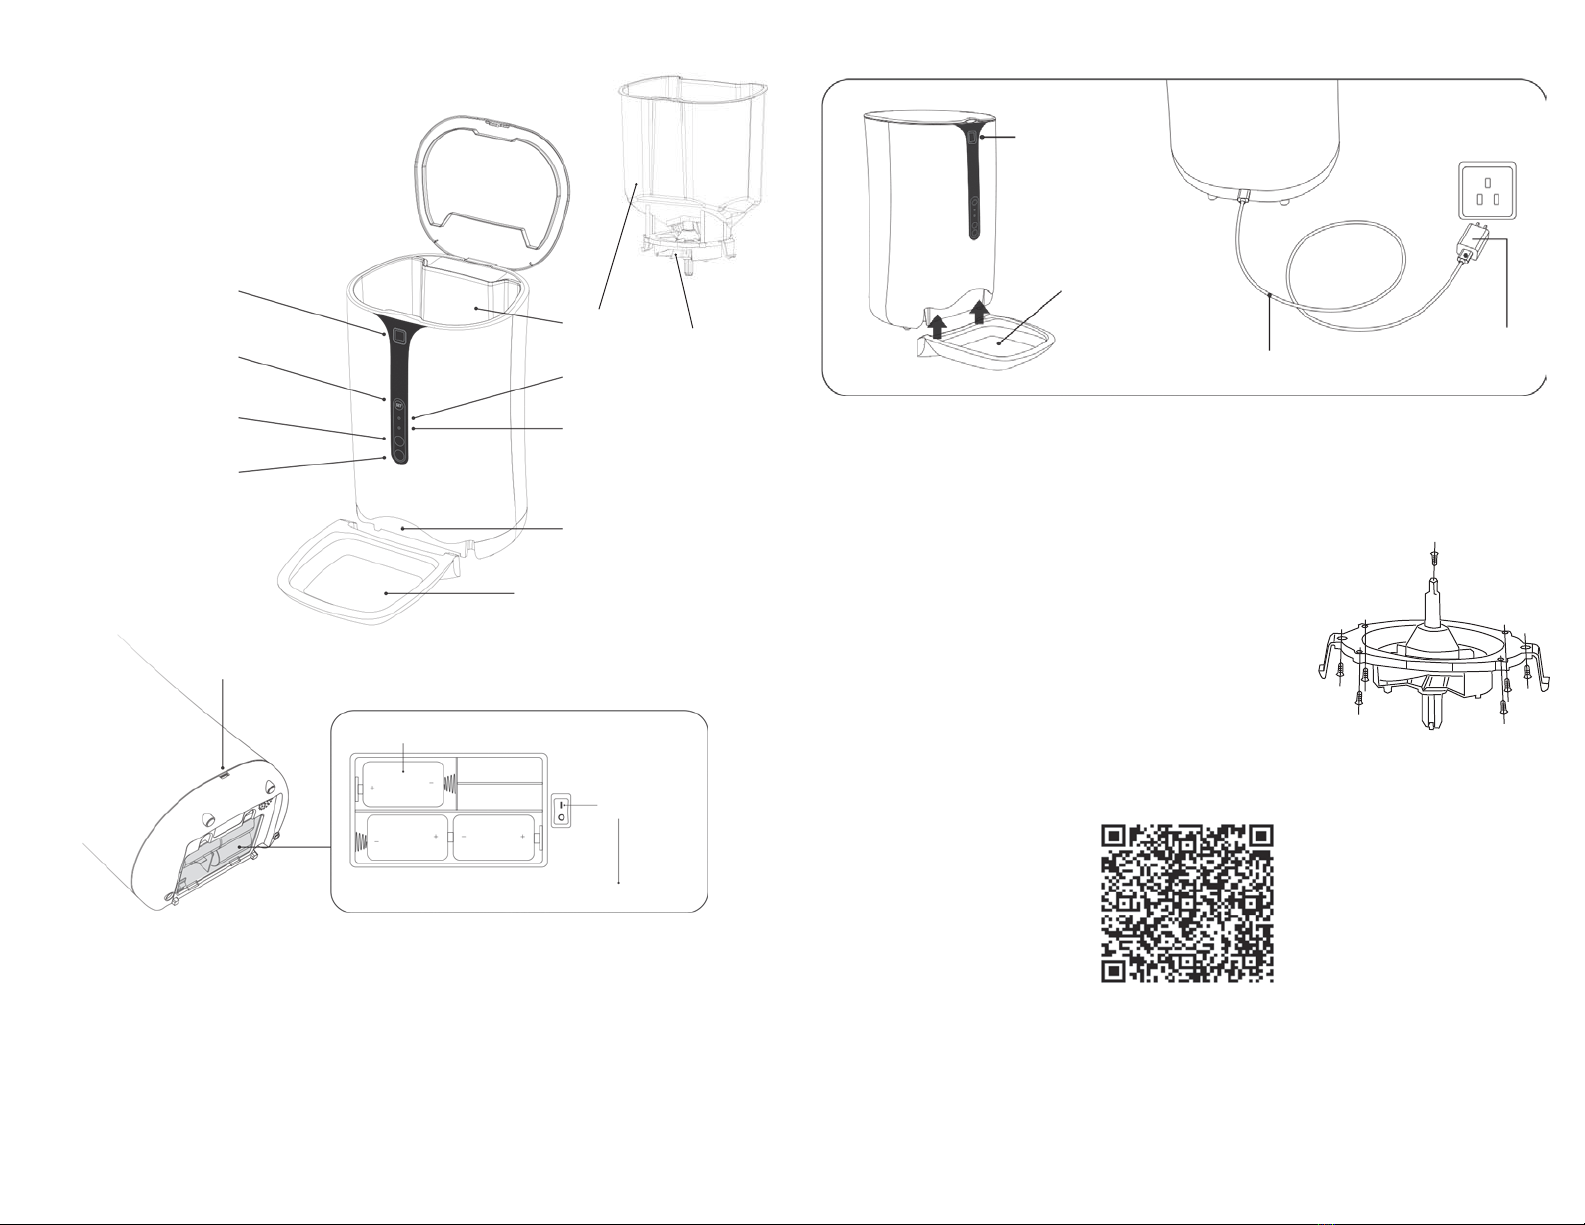
lid button
bowl
USB cable
adaptor
Method 1
Scan the QR code (Fig 1-1) to redirect to the APP download page, follow the instructions to download
and install corresponding APP.
Method 2
Search “PetU” at APP Store (IOS users) or in Google Play (Android users), download and install.
NOTES
• Permissions needed when installing the app.
• Allow WLAN, Location, Use Microphone, Use Phone Storage.
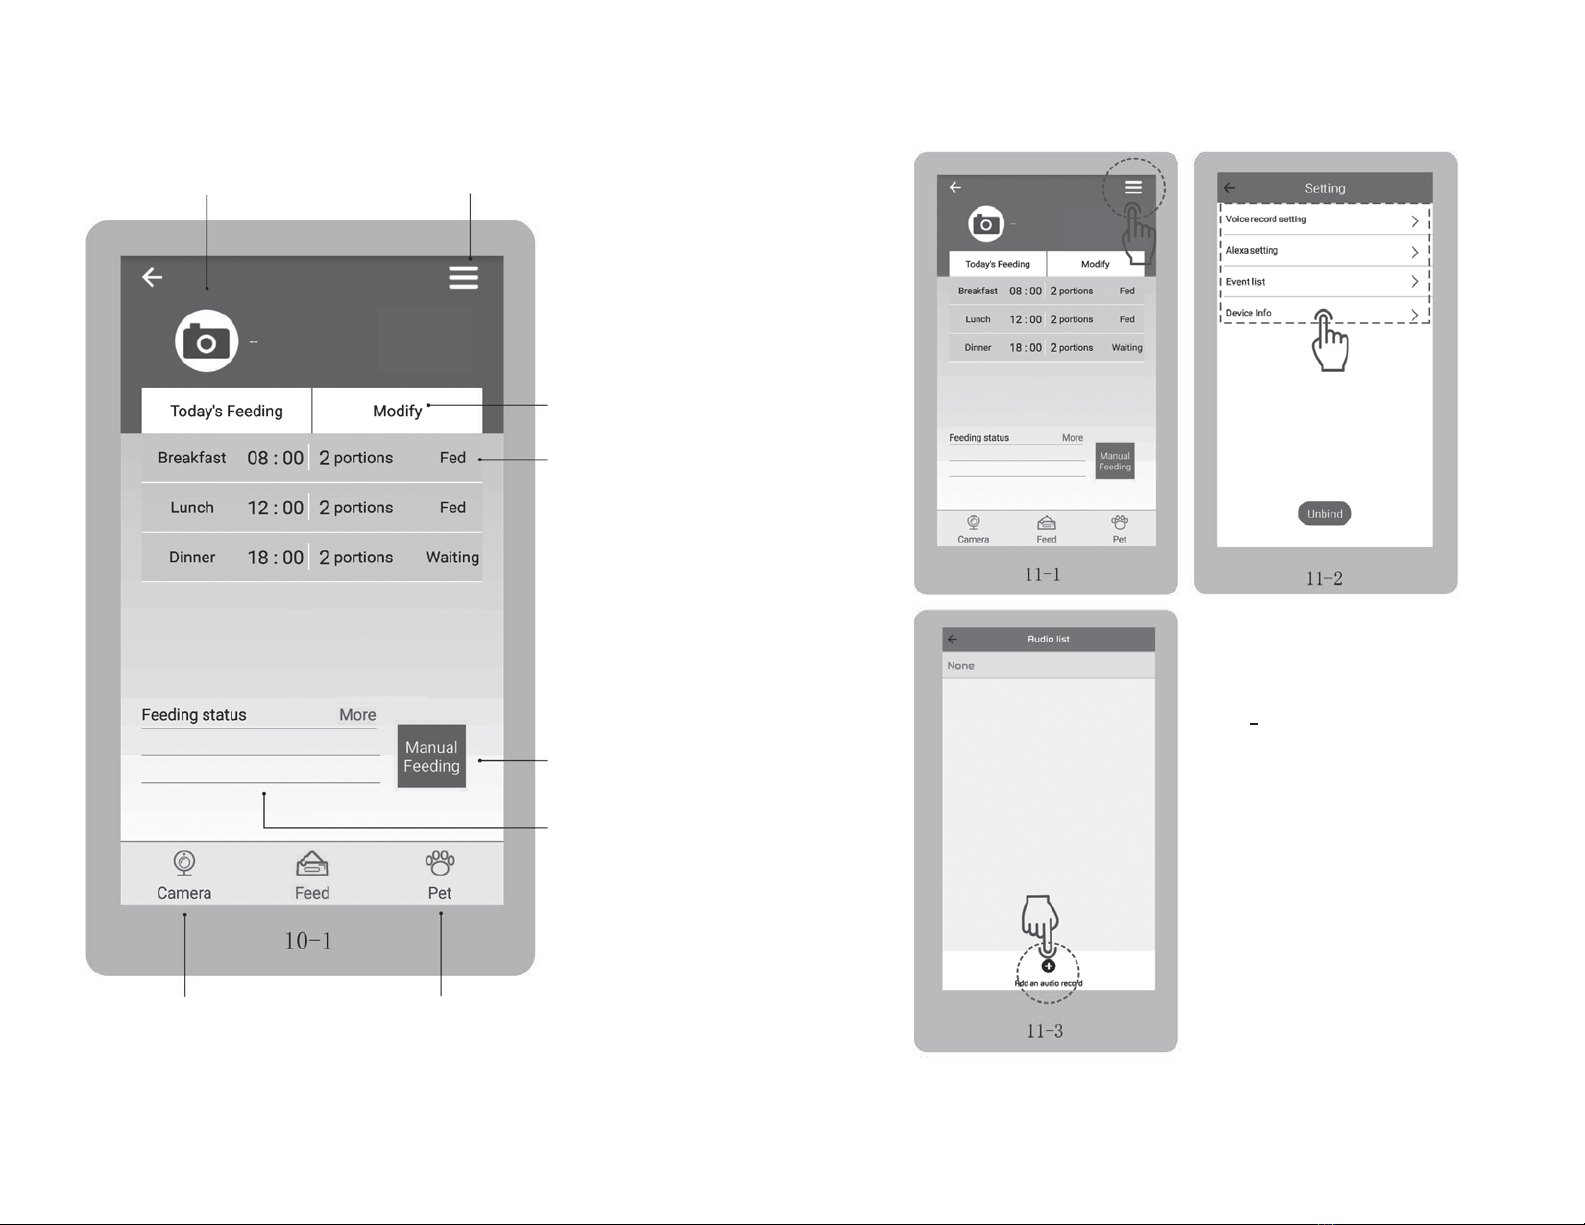
• SET button : short press to activate the manual feeding function; long press for 5 seconds
to restore factory settings.
• The batteries are only a backup in case of power failure.
MIC
hopper
food dispenser
lid button
SET button
night light
camera
indicator
dispensing port
bowl
USB port
Make sure the power switch
is at “I” location.
3 x ‘D’ batteries (not included)
power switch
• Open the cover by pressing the Lid Button.
• Assemble the bowl upward, disassemble the bowl downward.
• To power via power adaptor, plug in power adaptor.
The default installed food dispenser is the larger size, programmable:
- 1 to 39 portions (10-390g)
Small food dispenser for small pets, programmable:
- 1 to 39 portions (5-195g)
Changing between dispensers:
Step 1 : lift the hopper from the body of the unit
Step 2 : remove the 7 screws and the dispenser installed
Step 3 : replace with the desired sized dispenser and fix in place with the screws.
Fig 1-1
SIZE D
SIZE D SIZE D