FOR ASSISTANCE CALL: 1.888.213.5015 | MON-FRI 8AM-6PM EST
AXIS SERIES: AxV60/AxV80 SETUP GUIDE 7
6
WARNING
Always turn off the amplifier or receiver when connecting speakers or any other
components to the system.
NEW CONSTRUCTION INSTALLATIONS
New construction is the easiest time to choose and wire each speaker location.
It is suggested that you use pre-construction brackets to simplify final installation.
Pre-construction brackets are designed to act as a speaker locator for finish
contractors. It is highly recommended that you consult with the finish contractors
to discuss the cut out requirements in each room.
Performance of the Axis custom installed speaker can be enhanced if the wall or
ceiling cavity is filled with standard fiberglass insulation. If there is already insulation
in the wall or ceiling that has a paper backing facing the speaker, remove the backing
in the area behind the installation location. Taking steps to increase the rigidity of
the mounting surface by using additional drywall screws, and/or the use of a
construction adhesive between the drywall and joists adjacent to the speaker
location, will further enhance performance while strengthening the wall around
the speaker. Vibrations can cause plaster to fail and crack, paint to chip and screw
heads may show in the drywall and other masonry materials.
RETROFIT INSTALLATIONS
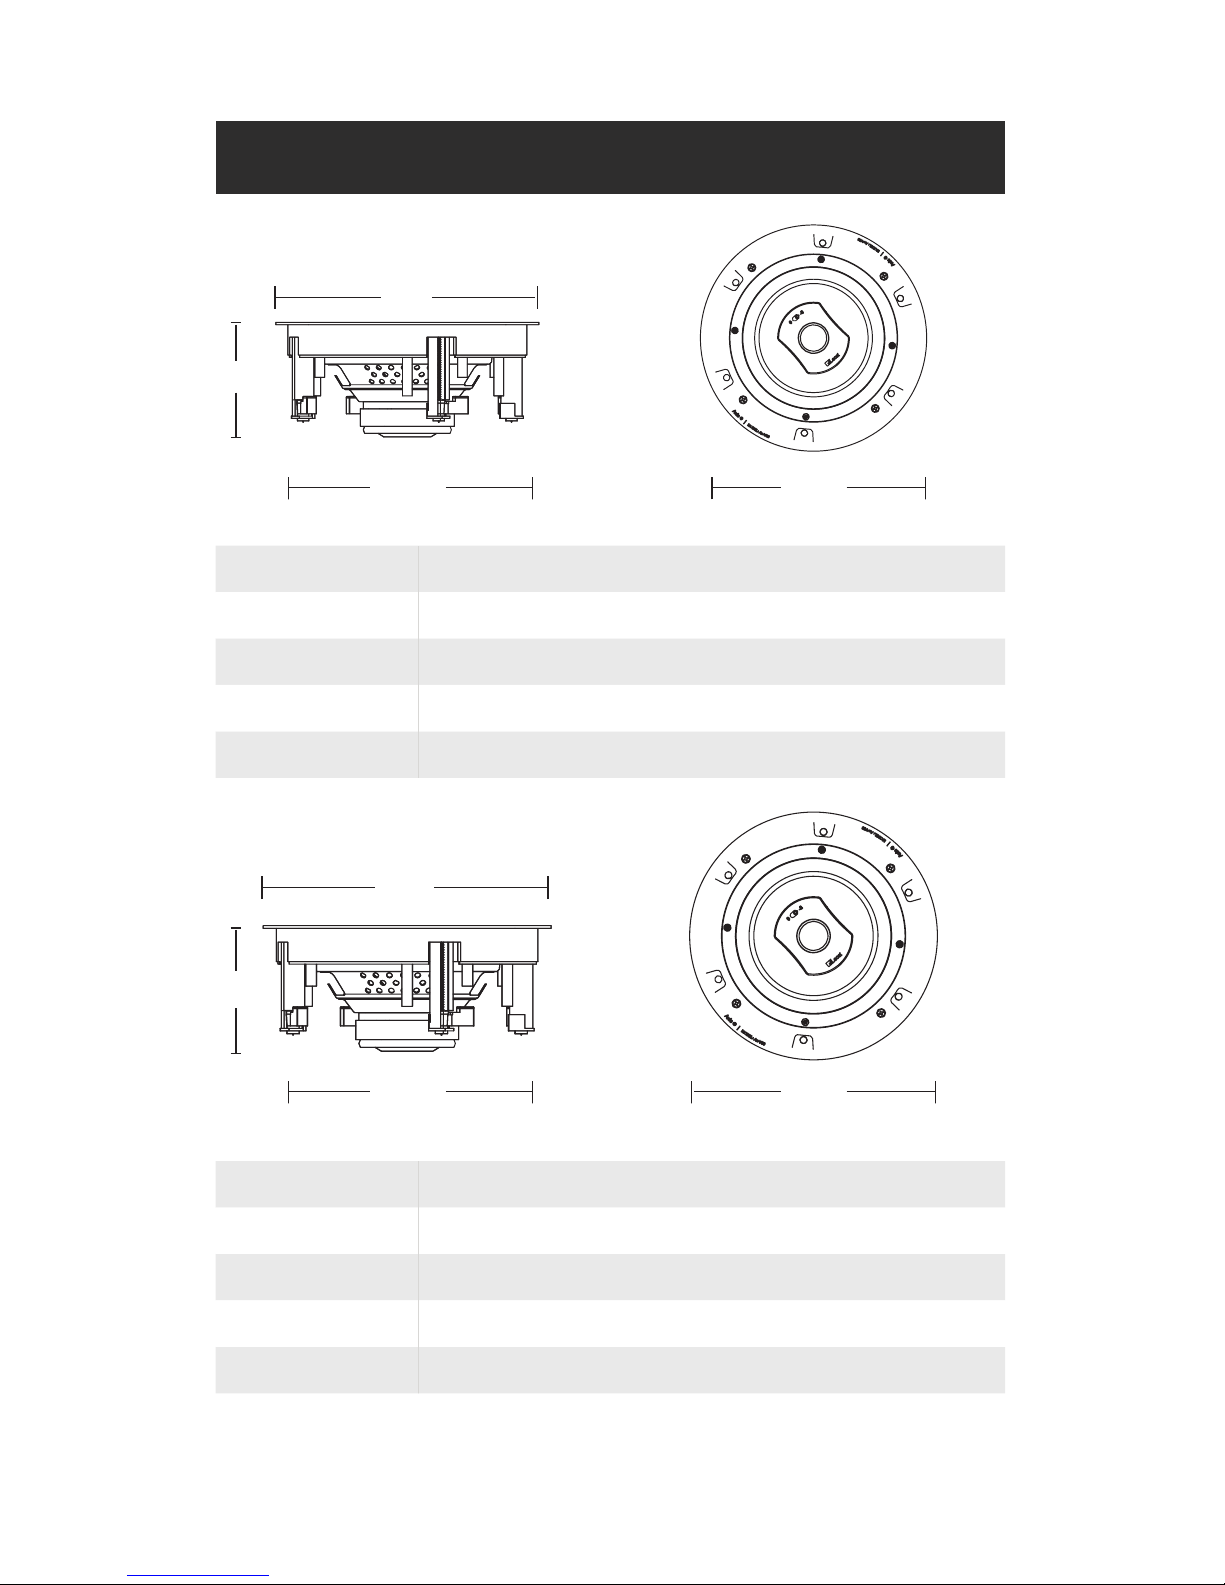
1. Mark the outline of the installation hole using the supplied template.
2. Make a small hole at the center of the speaker location.
QUICK TIP: Insert a bent piece of coat hanger wire and rotate to confirm
that there are no obstructions behind the location.
3. Continue cutting along the outline using shallow cuts to avoid possible
electrical wiring.
4. Run the speaker wire in the wall down to the amplifier/receiver
location. Allow for a 3‘ service loop for removal and easy movement of
equipment.
5. Follow the ‘ALL INSTALLATIONS’ steps 1-4 on the following page.
ALL INSTALLATIONS
1. Strip 1/2-inch (13mm) of insulation from the wire, and twist the wire strands
together. The Axis speaker terminals will accept either bare wire up to
12-gauge, or single banana plugs.
2. Connect the wire to the speaker (positive to red, negative to black).
3. Slide the speaker into the cutout.
4. Tighten each mounting clamp to an appropriate amount of torque. The
mounting clamp should be tight enough to keep the speaker from
spinning in the cutout hole but not over-tightened to the point of
damaging the construction materials or the speaker. If using a cordless
drill/screwdriver, take the necessary precautions to set the clutch.
PAINTING THE AXIS SPEAKER GRILLES
The Axis AxV60/AxV80 speakers are supplied with two grille choices: round or square.
The grille and frames are one piece and can’t be separated. Additionally, each grille
has an acoustically transparent scrim cloth attached to the inside of the grille for
hiding components when installed. The scrim cloth can be removed and reinstalled,
if desired, after painting. The adhesive used is a special formula that provides a
tacky feel strong enough to hold the grille in place but easily removed and reapplied.
First, carefully remove the scrim cloth from any corner and slowly pull the grille
cloth away from the metal grille. The grille can now be quickly prepared for painting.
The grille and frame can be painted without primer. It is recommended to use a
paint thinner and compressed air to paint the grille. Paint will not affect the magnetic
grille or its abilities to maintain a strong hold to the baffle. The magnets are very
strong and are located in the baffle. Finally, replace the scrim cloth after painting
to prevent the speaker components from showing through.
Leon Speakers’ custom paint shop can also produce professional paint matched
results. Consult your Leon Speakers sales representative for more information.
INSTALLATION (CONTINUED)