Page 1 of 3
© 2020 Leotek Electronics USA LLC. GC_CV_EC_Installaon Guide_09-03-2020.
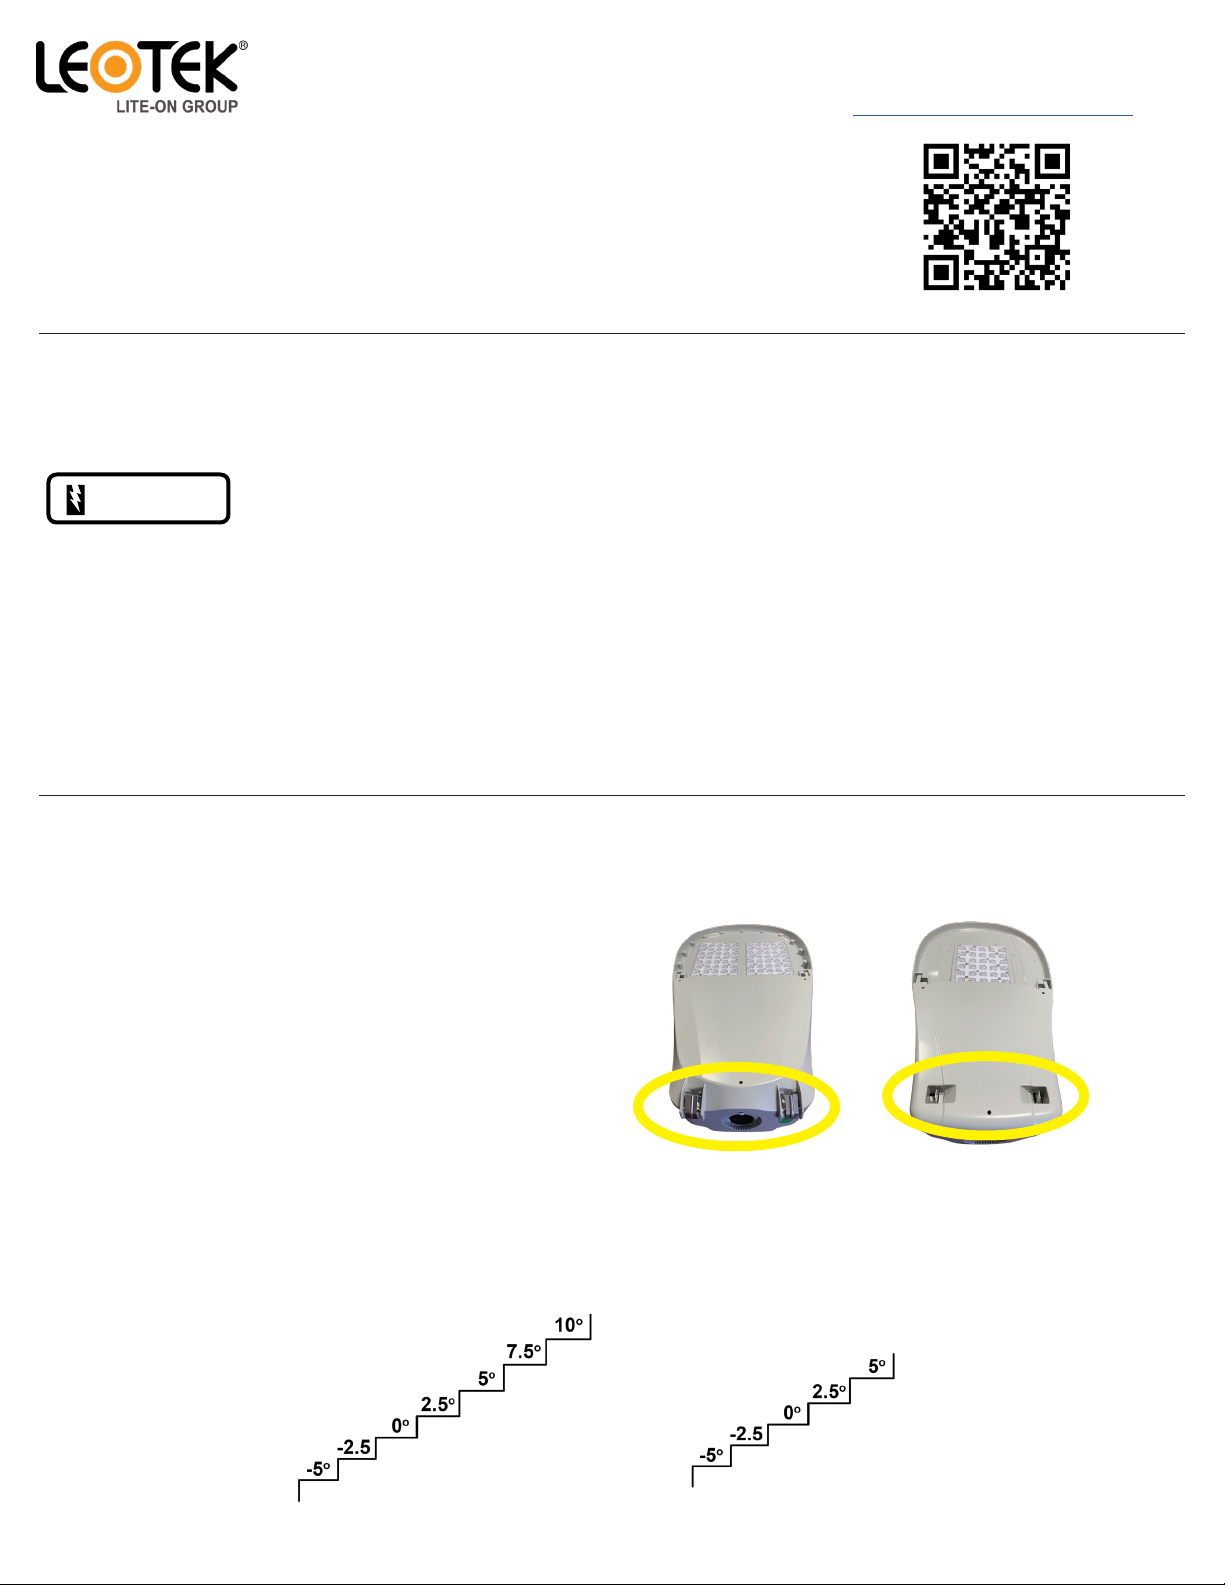
Step 3 Loosen the slip-er bracket bolts and insert the mounng arm. The maximum outside diameter for the mounng
arm is 2-3/8” (60.3mm). The minimum outside diameter for the mounng arm is 1-5/8” (41.28mm). Mounng arm to be
placed “stopped” against appropriate step required to achieve desired degree of lt. Steps vary from from 0o to get no lt
to the opons shown below.
This procedure is designed as an installaon aid. Skilled tradespeople that are familiar with general construcon and electrical installaon
techniques should perform the installaon. Licensed electricians should provide electrical installaon connecons. Installaons and
connecons should be done in accordance with all naonal and local codes and permits. In no way is this document intended to construe
warranty or tness of use of the products described, nor is it intended to provide safety instrucon for those installing the product.
WARNING
Before proceeding with installaon or service maintenance of this product:
• Disconnect power to reduce electrical shock risk.
• Review the enre Installaon Guide.
• Inspect this properly packaged product for any damage that may have occurred during transit.
• Verify product applicaon complies with manufacturer design recommendaons.
• Verify the availability of necessary tools and incidental material.
• Verify applicable code requirements. Field assembly and installaon are subject to acceptance by local inspecon authority.
• Appropriate safety equipment to be determined by end user, per applicable safety standards and precauons.
GreenCobra™ ComfortView™& E-Cobra™
LED Street Light Installaon Guide
Step 1 - Unfasten the power door latches. User-friendly
latches will vary depending on product model.
Luminaire Installaon
Step 2 - Open the door. Power door can be
securely hung or easily removed.
OR
,,
Complete product documentaon
available online at:
hps://leotek.com/lighng-library/


