Level LIS2010-MT-1800/11 User manual

MODEL:LIS2010-MT-1800/11
GUANGDONG LEVEL INTELLIGENT LOCK INDUSTRIAL CO.,LTD
CONTACT US
Address:No.I Pingxi Industrial Park,PingZhou,Nanhai,Foshan,Guangdong,China
E-mail:info@levellock.com
Web:www.levellock.com
USER GUIDE
KEYPAD FINGERPRINT LOCK
LIS2010-MT-1800/11
KEYPAD FINGERPRINT LOCK

CONTENTS
Chapter 4 Maintenance
4.1. Batteries Replacement
4.2. Daily maintenance
4.3. Trouble Shooting
Chapter 1 Product Introduction 01-05 Chapter 3 Operations 15-24
25-26
1.1. Lock Model and Shape
1.3. Lock Components
1.2. Basic Functions
1.4 . Lock body dimensions
1.5 . Mortise dimensions
1.6 .Exploded diagram
Chapter 2 Installation of lock 06-14
2.1. Installation Requirement
2.2. Lock Direction
2.3. Installation Steps
3.4.1. Operation of setting master fingerprint
3.4.2.Operation of setting other fingerprints with master fingerprint
3.4.3.Operation of setting code with master fingerprint
3.4.4. Operation of deleting fingerprint with master fingerprint
3.4.5. Operation of deleting code with master fingerprint
3.5. Code Setting
3.6. Code Resetting
3.7. Unlock with Fingerprint
3.8. Unlock with Code
3.9.Deletion of One code
3.10. Deletion of One Fingerprint
3.11. System Initialization
3.12. Passage Mode
3.13. System Self-locked Function
3.14. Low battery alarm and external power supply
3.4 .Master Fingerprint
3.1. Finger placement
3.2. Light and Sound Prompt
3.3. Fingerprint Enrollment

Chapter 1 Product Introduction
Product Model
LIS2010-MT-1800/11
Finishing
CCR, PVD
Net Weight
2.76kg
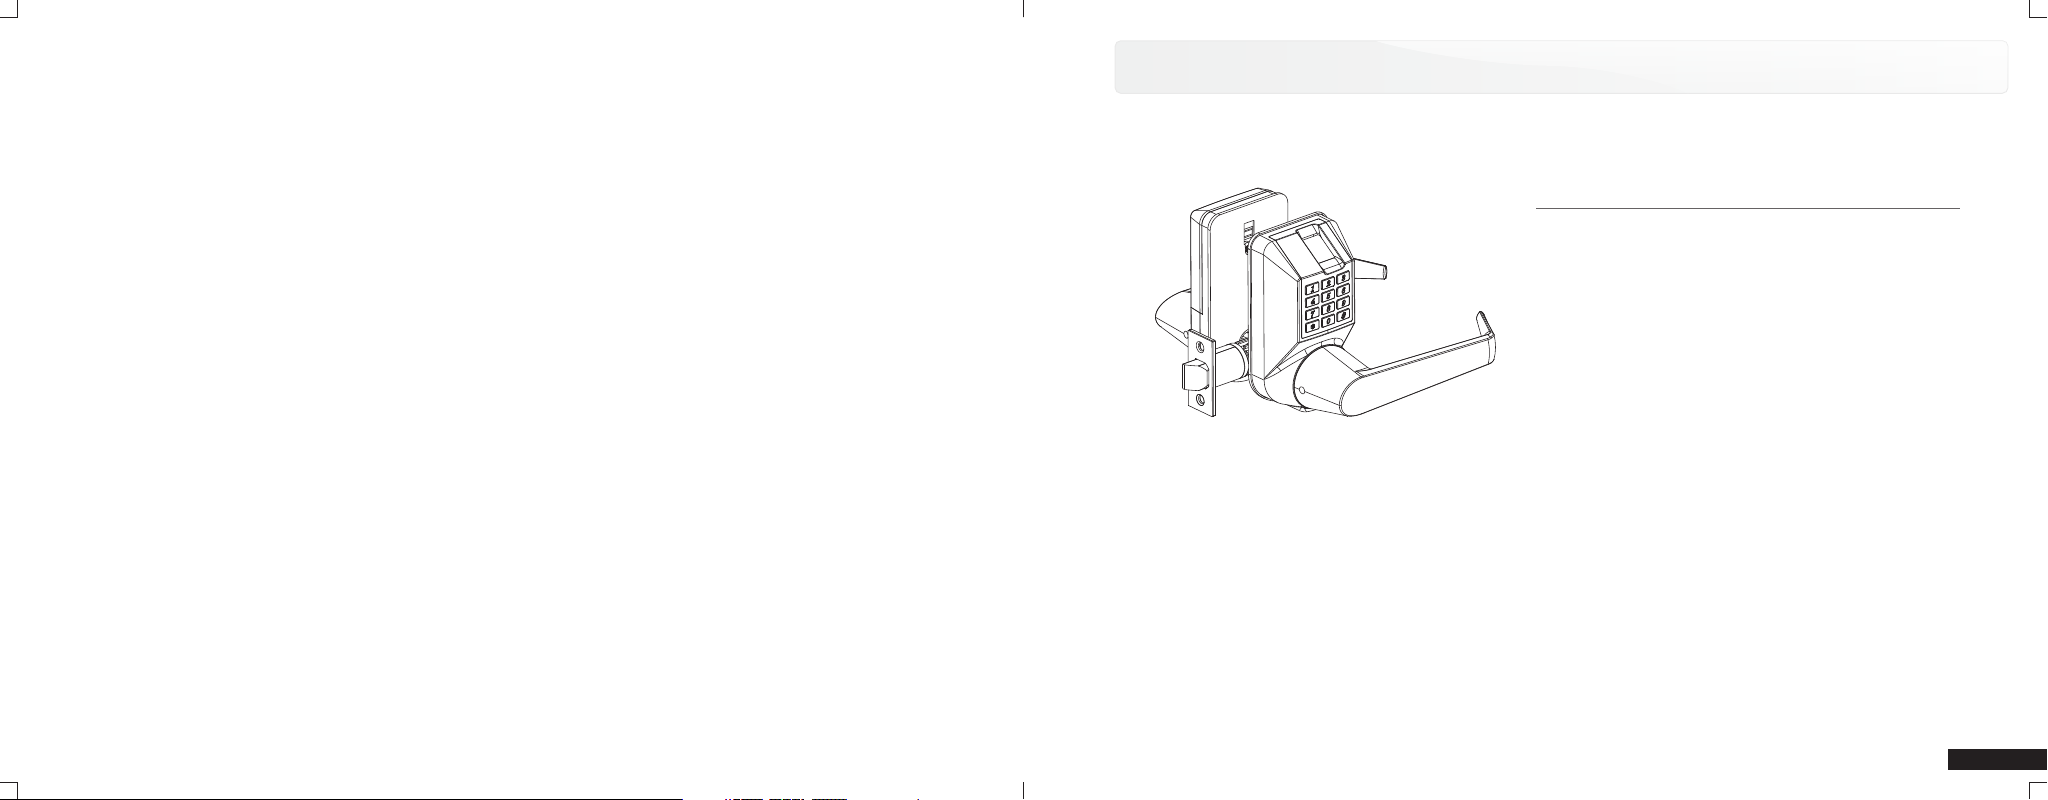
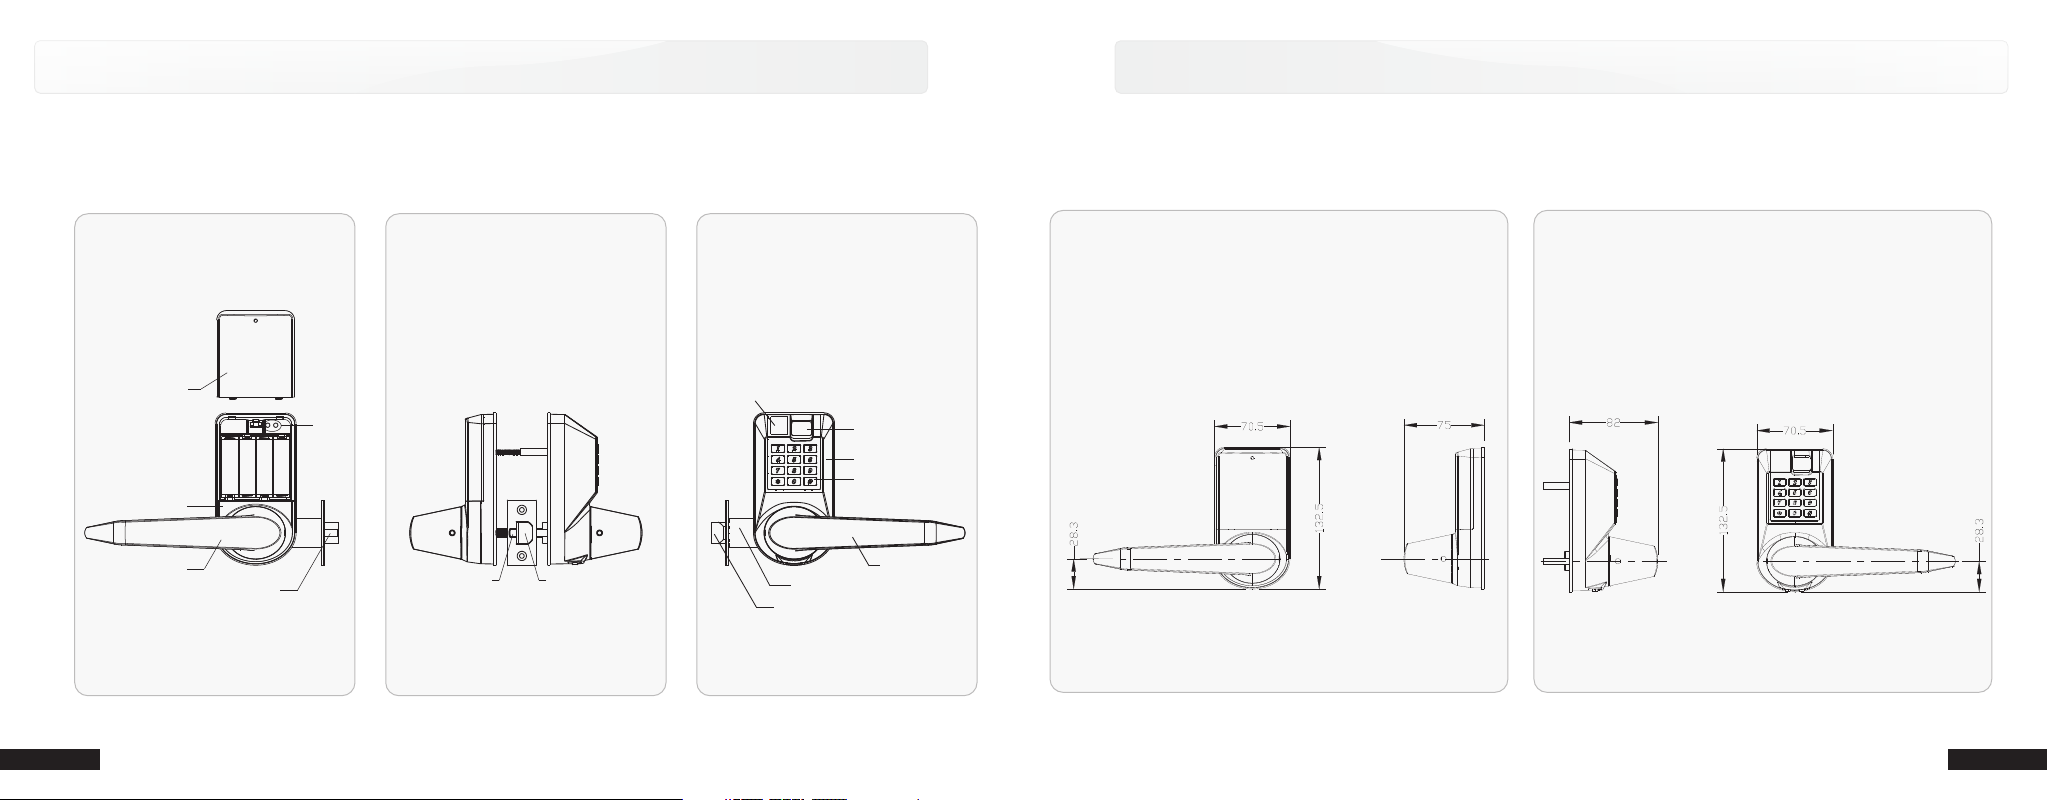
1.1 Lock Model and Shape
1.2 Basic Functions
A perfect combination of Mechanical & Electrical Integration and biometric technology.
3 unlocking ways: fingerprint, code and mechanical key.
International standard mortise, flexible using and good expansiveness.
Reversible handle design, either left or right direction to open.
Large capacity, 100pcs fingerprints can be enrolled, and two groups of codes can be set.
Can delete certain fingerprint separately.
Low power waste: 4 alkaline batteries for power supply, 20000 times unlocking.
Low voltage alarm: when battery voltage is low, use finger or code to open, beeps warning sounded to remind for battery
replacement.In this case still will be opened 100 times
Extra power supply: in case of low voltage, standard port is provided for 9V handy battery.
Passage mode: easily set the lock to passage mode for conference purpose.
Self-lock function: when wrong fingers and code was input for 10 times, fingerprint reader # will be locked for a certain period and
With light, sound and LED indication for easy operation.
1
2
3
4
5
6
7
8
9
10
11
12
01

03
02
Chapter 1 Product Introduction Chapter 1 Product Introduction
1.3 Lock Components
BACK ELEVATION BACK ELEVATION
Battery box cover
Back panel
No.11 handle
SIDE ELEVATION
Anti-attrition latch Latch
FRONT ELEVATION
Latch
Digital display
Fingerprint window
Front panel
Keypad
Single-latch mortise (for 60/70)
No.11 handle
Anti-attrition latch
Set
Switch
1.4 Lock body dimensions
FRONT ELEVATION

05
04
Chapter 1 Product Introduction Chapter 1 Product Introduction
battery box cover
Door
Back lock panel
battery box
face plate Mortise
front lock panel
Cylinder
1.6 Exploded diagram
single-latch mortise(for 60)
single-latch mortise(for 70)
1.5 Mortise dimensions

08
Chapter 2 Installation of lockChapter 2 Installation of lock
2.1 Installation Requirement
Door Substance: wooden door and steel burglarproof door (Steel door, the hold should be cut by door supplier.)
Door thickness: 35-55mm
If the door is decorated, the dimension between the door edge and decoration should be at least 100mm.
2.2 Lock Direction
Left handle door
INSIDE OPEN DOOR
Right handle door
Scaling3:1Scaling3:1
move leftwards
move rightwards
Minimal 100mm between the
door edge and decoration
Minimal 110mm between the
door edge and decoration
Door
thickness:
35-55mm
Door
thickness:
35-55mm
07
When standing outside the room and facing the door, the hinge is on the left hand side.
Left-handle
Right handle
When standing outside the room and facing the door, the hinge is on the right hand side.
Inside open When standing outside the room and facing the door, one has to push forward to open the door.
Outside open
When standing outside the room and facing the door, one has to pull out to open the door.
Left handle door
OUTSIDE OPEN DOOR
Right handle door
Scaling3:1Scaling3:1

Chapter 2 Installation of lockChapter 2 Installation of lock
2.3 Installation Steps
2.3.1. Hole-making
Drill and cut the hole according to the installation drawings or hole-making templates to locate the
mortise and lock body. It's recommended to locate the handle center line 100cm from the ground.
door
datum line
hole-making template
Distance between
handle and ground
shall be 1000mm.
Mortise
template
strike plate template
three central lines should be in one
09
08
hole-making chart for door
hole-making chart for strike
box and strike plate.

Chapter 2 Installation of lockChapter 2 Installation of lock
Install the lock following (1) to (7).
STEP 2 Install the lock panels
(7)
head screw
35mm Philips
60/70 single-latch mortise
(6)back panel
(5)rubber pad
(3)square shaft
(1)front panel
(2)rubber pad
Door
Square shaft should be
inserted into this Square
Hole completely
Warning
(4)Connect these two pin
11
10
2.3.2. Lock Installation.
(3)square shaft
(1)Single-latch Mortise (60/70)
(2)
single-latch mortise
Hole for installing
Plan view of Single-latch Mortise (60/70)
move leftwards move rightwards
Install 60/70 single-latch mortise
based on the left fig.
STEP 1 Install the mortise
When single-latch mortise is 60
or 70mm, the position of mortise
square hole for installing Square
Shaft is different (Refer to Fig
“Plan view of 60/70 single-latch
mortise”).
Note:

Chapter 2 Installation of lockChapter 2 Installation of lock
Fig1: To set Passage Mode, turn mechanical key 72° lockwise. In this
case, the lock can be opened by turning handle directly outside door.
Fig2: Turn mechanical key 72° counter-clockwise to key's initial
position, pull out the key and install No.11 Handle.
Fig2 Fig1
Mechanical key
A
No.11 Handle
M5 screw
2.5 Allen key
Insert 2.5 Allen key into Locating hole
could help to fix Back handle head
and release your hand for installing
screws.
Note:
Fig :
install 2pcs 55mm Philips head screws.
3 Turn Front handle, back handle head turns correspondingly, two screw holes exposed, and
Put in batteries and install battery box cover.
Fig3
AA alkaline batteries
Battery box cover
2.5 Allen key
Back handle head
Locating hole
Screw hole
Turn 72° clockwise
Turn 72°
counter-clockwise
B
A
B
13
12
STEP3 Set passage mode, install screws to fix lock body and put in batteries.

Chapter 3 Operations
Chapter 2 Installation of lock
Turn 55°
counter-clockwise
STEP 4 Cancel Passage Mode
Turn mechanical key 55° counter-clockwise, Passage Mode is cancelled. Turn
mechanical key 55° clockwise to return to its initial position, pull out the key. In this
case, front handle will be in free-moving state.
Cancel Passage Mode
Install strike plate and strike box
STEP 5
Put strike box and strike plate into
door frame, fix them with 2 screws.
14

Chapter 3 Operations
3.1 Finger placement
3.2 Light and Sound Prompt
3.2.1 Instruction
Sound prompt: the sound given out by the buzzer in the lock.
Light prompt: the light seen on the front panel of fingerprint lock.
3.2.2 Light and Sound Prompt Illustration
Operation Sound Prompt Light Prompt Digital display Remark
Fingerprint
enrollment
Code
setting
Unlock with
fingerprint
Unlock with
code
Invalid
fingerprint
Invalid code
Cannot detect
fingerprint
Passage
mode
Low power
state
Fingerprint
sensor is
damaged
Self-locked
state
“Di.Di ” one short and one long
sounds
…
“Di.Di ” one short and one long
sounds
…
Blue light on 00-99 00-99 indicates the fingerprint position
Blue light on n0 n0-n2 indicates that the code belongs
to group 0-2
“Di ” short sound. one
Blue light on 00-99 00 indicates the fingerprint position
Blue light on n0 n0 indicates that the code belongs to
group 0
“Di” one short sound Red light on
Red light on
-- When use invalid fingerprint to open
“Di, Di” two short sounds
“Di.Di.” two short sounds
Red light on When use invalid code to open
“Di…” one long sound Blue light on Blue light flashes every 4 seconds
“Do, Re, Mi” three music sounds Red light on When use fingerprint and code to open
“Wu, Wu, Wu” three sounds alarm Red light on The state will be cancelled
automatically after 5 minutes
“Di” short sound Red light fl-
ashes 3 times
--
-- --
--
--
--
-- --
To capture a clear fingerprint image,
place the finger flat and tight on the
sensor surface and give a proper
pressure (User should not press the
sensor hard. The notification will not
repeat again hereinafter).
it is correct to place finger as
Picture a (side) and Picture b
(face), while none of Picture c, d,
e, f is correct.
Note:
A B C
D E F
Fingerprint
memory is full “Di.Di.Di.Di.” four short sounds Red light on Fingerprint memory is full
FU
17
16

Chapter 3 Operations
19
18
3.4 Master Fingerprint
The three fingerprints of “00-02” are read as master fingerprints
Functions of master fingerprint
1. Unlock the door
2. Set code/fingerprint
3. Delete code/fingerprint
3.4.1 Operation of setting master fingerprint
Remove the Battery Box Cover, press the Set Switch, a long “Di…” sounded, red and blue light flashes alternately,
press “#” once, enter position number of master fingerprint”00-02” ,then press “#” again to confirm, and fingerprint
window lights up, indicating the lock is under the state of master fingerprint setting.
3.3 Fingerprint Enrollment
Remove the Battery Box Cover, press the Set Switch, a long “Di…” sounded, digital display shows “00” (stands for
the registered total fingerprint number). Red and blue light flashes alternately, continually press “#” twice. Red light
turns on, digital display shows any number from “03 to 99” (stands for the smallest position number of a new
fingerprint. If you want to enroll the fingerprint in a specific position, please press “#” first and input the specific
position number.) , fingerprint window lights up blue, indicating the lock is under fingerprint enrollment state.
Put the finger onto the fingerprint window. When a short “Di” is sounded, the first fingerprint identification succeeds. Do
not remove finger until a long “Di” is sounded, blue light flashes once, and digital display firstly shows“03”and then
black out, which indicates the success of the enrollment operation, and the fingerprint has been registered in“03” .
A.
Following instruction A, but the red light flashes once, digital display shows “00” together with two short “Di. Di”. It
means the operation fails.
B.
If the same fingerprint is enrolled for the second time, its previously registered position number will be shown on digital
display, blue light flashes one time and a long “Di…” sounded, and then exit fingerprint enrollment state.
C.
Put the finger onto the fingerprint window. When a short “Di-” is sounded, the first fingerprint identification succeeds.
Do not remove finger until a long “Di-”is sounded, blue light flashes once, and digital display firstly shows”00”and then
black out, which indicates the success of the enrollment operation, and the position of this master fingerprint is “00”.
Following instruction A, but the red light flashes, together with two short “Di-Di-”.It means the operation fails.
A.
B.
3.4.2 Operation of setting other fingerprints with master fingerprint
Put the finger onto the fingerprint window. When a short “Di-” is sounded, the first fingerprint identification succeeds.
Do not remove finger until a long “Di-”is sounded, blue light flashes once, and digital display firstly shows “03”and then
black out, which indicates the success of the enrollment operation, and the fingerprint has been registered in the
position of “03”.
A.
Press “#” continuously for 3 seconds, a long “Di…” sounded, red light and fingerprint window lights up. Put the master
finger onto the fingerprint window, after a long “Di…”is sounded, red and blue light flashes alternately, continually
press “#” twice, red light on, digital display shows any number from“03-99”(stands for the smallest position number of
a new fingerprint. If you want to enroll the fingerprint in a specific position, please press “#” first and input the specific
position number), fingerprint window lights up, indicating the lock is under fingerprint enrollment state.
Following instruction A, but the red light flashes, together with two short “Di-Di-”.It means the operation fails.
B.
3.4.3 Operation of setting code with master fingerprint
Input an eight-digit code started with 01 or 02, press “#” to confirm, digital display shows correspondingly “n1”or”n2”,
accompanied with a short “Di-”from buzzer. Re-input the code again and confirm it by pressing”#”, a long “Di–-”
sounded, blue light flashes once ,and “n1”or “n2” is shown again. It means the success of the setting operation
(Note: “n1”or “n2” is the corresponding code position)
A.
Press “#” continuously for 3 seconds, a long “Di…” sounded, red light and fingerprint window lights up. Put the master
finger onto the fingerprint window, after a long “Di-”is sounded, red and blue light flashes alternately, then press “#”
once, red light on, digital display shows “--”

Chapter 3 Operations
21
20
B.
Input an eight-digit code started NOT with 01 or 02, press “#”to confirm, digital display shows”n0”, accompanied with a
short “Di-” from buzzer. Re-input the code again and confirm it by pressing “#”, a long “Di---”sounded, blue light
flashes once, and “n0” is shown again. It means the success of the setting operation.
Input the code to be deleted, for example “01******” (* stands for any number, which means code could be deleted even
forgot it), and press “#” to confirm. If the buzzer gives out a long “Di—”, and digital display flickers “n1”, it means the
deletion operation succeeds.
A.
B.
If the buzzer gives out two short “Di-”, and red light flashes once, it means the deletion operation fails.
C.
If not sure the code input, or any other accidental circumstance, press “*” to return and stop the operation, buzzer gives
out two short “Di.Di.” by the mean time. If no further operation is made in 10 seconds, the system will get out of the
deletion state automatically, accompanied with two short “Di—” from the buzzer.
3.4.4 Operation of deleting fingerprint with master fingerprint
Press “#” continuously for 3 seconds, a long “Di…” sounded, red light and fingerprint window lights up. Put the master
finger onto the fingerprint window, after a long “Di-”is sounded, red and blue light flashes alternately, then press
“*”once, red light on, digital display shows”--” indicating under fingerprint deletion state. Then input the fingerprint
position number you want to delete, for example: “08”, digital display shows “08', press “#” to confirm. If the buzzer
gives out a long ”Di-”,and blue light flashes once, it means deletion operation succeeds.
3.4.5 Operation of deleting code with master fingerprint
Press “#” continuously for 3 seconds, a long “Di…” sounded, red light and fingerprint window lights up. Put the master
finger onto the fingerprint window, after a long “Di-”is sounded, red and blue light flashes alternately, then press
“*”once, red light on, digital display shows”--” , indicating under fingerprint deletion state.
3.5 Code Setting
Remove the Battery Box Cover, press the Set Switch, a long “Di…” sounded. Red and blue light flashes alternately, press “#” once.
Red light turns on, digital display shows “--” and flashes, indicating the lock is under code setting state.
Input an eight-digit code started with 01 or 02, press “#” to confirm, digital display shows correspondingly “n1” or “n2”,
accompanied with a short “Di” from buzzer. Re-input the code again and confirm it by pressing “#”, a long “Di”…
sounded, blue light flashes once more, and “n1” or “n2” is shown again. It means the success of the setting operation.
A.
Input an eight-digit code started NOT with 01 or 02, press “#” to confirm, digital display shows “n0”, accompanied with a
short “Di” from buzzer. Re-input the code again and confirm it by pressing “#”, a long “Di”… sounded, blue light flashes
once more, and “n0” is shown again. It means the success of the setting operation.
B.
Following the above instructions, but the red light flashes, digital display shows “--”, together with two short “Di. Di”. It
means the setting operation fails.
C.
If two groups of codes should be set, start with 01 or 02, that is 01****** and 02******; if one group of code should be
set, DO NOT start with 01 or 02.
D.
Note: Every time the Set Switch is pressed, only one fingerprint or one code can be enrolled or set.
3.6 Code Resetting
Following the above steps, and input a new code started with “01” or “02”, then the new 01****** code will cover the old 01 code ;
similarly, 02****** will cover the old 02 code.
A.
If the “01” or “02” code has been set or existed, but another code started NOT with “01” and “02” is needed, in this case, user has
to initialize the system to empty the existing codes.
B.
If code started NOT with “01” or “02” has been set or exited, but “01” and “02” codes are needed, user has to initialize the system
to empty the existing code.
C.
Following the above instructions, but the red light flashes together with two short “Di-Di-”.It means the setting
operation fails.
C.
If two groups of codes should be set, start with 01or 02, that is 01******and 02******, if one group of code should be
set, DO NOT start with 01or 02.
D.

3.9 Deletion of One code
Remove the battery cover, press the Set Switch, a long “Di…” sounded, red and blue light flashes alternately, press “*”, the red
light turns on, and the digital display shows “--” and flickers, which indicates the lock is under deletion state.
A.
Input the code to be deleted, for example “01******”
, and press “#” to confirm. If the buzzer gives out a long “Di…”, and digital display flickers “n1” and then get
static, it means the deletion operation succeeds.
(* stands for any number, which means code could be deleted even
forgot it)
B.
If the buzzer gives out two short “Di.Di.”, and red light flashes once, it means the deletion operation fails.
C.
If not sure the code input, or any other accidental circumstance, press “*” to return and stop the operation, buzzer gives out two
short “Di.Di” in the mean time. If no further operation is made in 10 seconds, the system will get out of the deletion state
automatically, accompanied with two short “Di.Di.” from the buzzer.
D.
3.10 Deletion of One Fingerprint
Remove the battery cover, press the Set Switch, a long “Di…” sounded, red and blue light flashes alternately, press “*”, the red
light turns on, and the digital display shows “--” and flickers, which indicates the lock is under deletion state.
A.
If the buzzer gives out two short “Di.Di.”, and red light flashes once, it means the deletion operation fails.
C.
Then input the fingerprint position number to be deleted, for example “08”, digital display shows “08” and flickers, press “#” to
confirm. At hearing a long “Di” and static “08” shown on digital display, it means the fingerprint deletion succeed.
B.
Chapter 3 Operations
3.11 System Initialization
Through initialization operation, all information in the system can be deleted. In this case, any fingerprint can open the lock.
Remove the battery cover, take off one of the four batteries, and press any one key to run out the left power.
A.
Keep pressing the Set Switch and hold on, put back the battery, after about 5 seconds, one long “Di…” sounded and
red light turns on which stands for all codes are cleared.
B.
If keep pressing the Set Switch and hold on, after another about 5 seconds, red light turns off, fingerprint window turns
on and one long “Di…” sounded. Loose the Set Switch and wait for another 1 or 2 seconds, “n n” will be shown on
digital display, which means all fingerprints are cleared.
C.
23
22
Chapter 3 Operations
Input one valid 8-digit code (at most 30 numbers can be input for hiding the real code, but the valid 8-digit code must be input
continuously), when hearing a short “Di” and seeing blue light flickers, digital displays shows the code number, for example “n1”,
then turn the handle to open the door.
A.
If input an invalid code, the buzzer gives out two short “Di.Di.”, red light flickers, and turn the handle, the door is not opened.
B.
3.8 Unlock with Code
3.7 Unlock with Fingerprint
When the lock is still (no code or fingerprint inside) Press “#” key, at hearing
short “Di” and seeing “n n” on the digital display, as the fingerprint window turns on blue, . Buzzer gives
out a reminding short “Di” and blue light flickers once, in this case, turn the handle to open the door. However, if the fingerprint is
not read properly, the buzzer gives out one short “Di.”, red light flickers, and the door is not opened.
under factory mode any fingerprint could open it.
put any fingerprint on it
A.
When the lock is set up with fingerprint(s), press “#”, at hearing a short “Di” and seeing the fingerprint window light up, put the
valid fingerprint on it. Buzzer gives out a short “Di”, blue light flickers, and the fingerprint position number, for example “09”, will
be shown on the digital display. At this moment, turn the handle to open the door. If the fingerprint is not properly read, buzzer
gives out one short “Di.” and red right flickers, and turn the handle, the door is not opened.
B.
There is NO initial code in factory mode.
C.

25
24
Passage Mode: door can be opened from outside by simply turning the handle. Under passage mode, blue light flickers every 4
seconds alternately.
3.12 Passage Mode
Unlock the door with code, and press “*” before the motor turns back to the original place, buzzer gives a long “Di…”, blue
light flickers every 4 seconds, the lock is under passage mode.
A.
Unlock the door with fingerprint, and press “*” before the motor turns back to the original place, buzzer gives a long “Di…”,
blue light flickers every 4 seconds, the lock is under passage mode.
B.
3.12.1 How to Set Passage Mode
Unlock the door with either fingerprint or code, the passage mode is canceled.
3. 12.2 How to Cancel Passage Mode
3.13 System Self-locked Function
When enter wrong codes continuously for 10 times, buzzer gives three “Wu, Wu, Wu” alarm, red light flickers, the keypad will be
locked for 5 minutes. At this time, keypad can be released by unlocking the door with valid fingerprint.
A.
When input invalid fingerprint continuously for 10 times, buzzer gives three “Wu, Wu, Wu” alarm, red light flickers, fingerprint reader
will be locked for 5 minutes. At this time, fingerprint reader can be released by unlocking the door with valid code.
B.
If both keypad and fingerprint reader are locked by wrong operation, system will be locked for 5 minutes. After that, the system works
again.
C.
Turn mechanical key 72° clockwise to set Passage Mode.
C.
A.
Turn mechanical key 55°counter-clockwise to cancel Passage Mode.
B.
3.14 Low battery alarm and external power supply
When the sound “do-re-mi-” is heard during opening the lock, it indicates the lock in low battery state. The lock can still be
opened about 100 times by fingerprint or code in this state. Is the power if run out (neither fingerprint nor code can open),
external power supply or mechanical key can make open the lock. It is strongly recommended to replace battery when it is low.
Chapter 3 Operations Chapter 4 Maintenance
4.1. Battery Replacement
Insert a small tool into the Hole for opening Battery Box Cover (Fig1),
press it and move upwards to open the cover (Fig2).
(Fig1) (Fig2)
Tool
Hole for opening Battery Box Cover
Battery Box Cover
A.
B.
Chage batteries

Promised and Guaranteed by GUANGDONG LEVEL INTELLIGENT LOCK INDUSTRIAL CO.,LTD
Product Model
Serial number
Purchased
Installation date
Seller(company name)
User's name
User's address
User's contact telephone number and email box
GUARANTEE CARD
(For Users' Reference)
(DD/MM/YYYY)/ /
Chapter 4 Maintenance
1. Keep the lock from corrosive material, to protect the lock finishing and keep the lock surface glossy.
2. Do not hang things on handles, so as to keep good flexibility of handle.
3. If the door is distorted and latches are difficult to go into the strike plate, please adjust the position of the strike plate.
4. After long-term using, the fingerprint window will be cumulated dirt, please clean the fingerprint window with soft cloth.
5. Please immediately change the batteries when the low-power alarming is given out.
6. When changing the batteries, please make sure the correction of batteries' positive and negative terminal.
7. It is recommended to enroll 2 fingerprints for each user for standby, in case of any accidental circumstance.
8. It is recommended to put the mechanical keys and other accessories together for safekeeping.
4.3. Trouble Shooting
4.2. Daily Maintenance
Phenomenon Reason Solution
Fail to unlock the door with fingerprint,
red light flickers and buzzer gives out
one short “Di”
Unlock the door with valid fingerprint,
but fail, together with flickers of red
right, and one short “Di” from buzzer
1.Invalid fingerprint
2.The fingerprint has been deleted. Unlock with valid fingerprint.
1.The deviation of the valid fingerprint is too big.
2.The fingerprint is worn out or injured.
adjust the position of the fingerprint as
accurately as possible.
Unlock with other valid fingerprint .
1.
2.
26
Table of contents
Popular Lock manuals by other brands

Borglocks
Borglocks BL2615MG Parts List, Installation and General Information

W Box Technologies
W Box Technologies 600 LB HOLDING FORCE installation instructions

wink haus
wink haus blueSmart Rhino operating instructions

GARANT
GARANT G-ELS Series user manual

Kaba Mas
Kaba Mas X-09 1F installation instructions

VIZILOK
VIZILOK C7FS manual