manuals.online logo
Brands
  1. Home
  2. •
  3. Brands
  4. •
  5. LevelOne
  6. •
  7. Security Camera
  8. •
  9. LevelOne FCS-5030 User manual

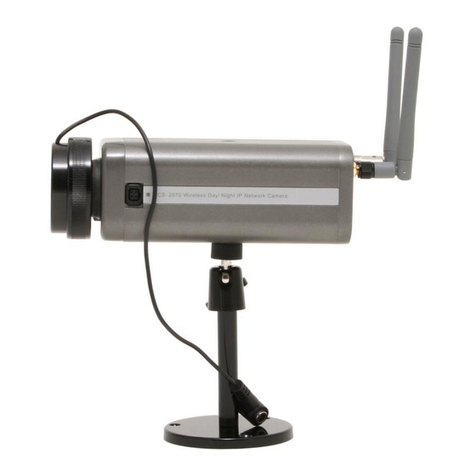
LevelOne FCS-5030 User manual

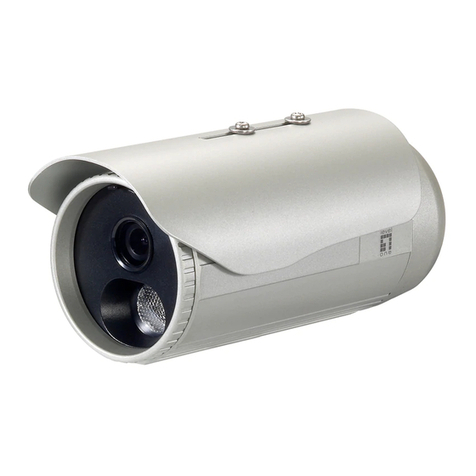
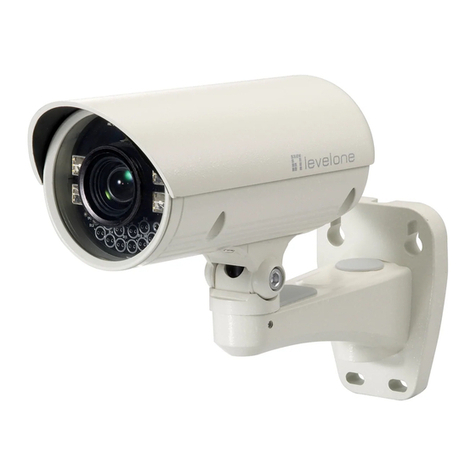
LevelOne
FCS-5030
IP Network Camera w/ Infrared LEDs
User Manual
er 1.2.0 – 1106
Before You Use This Product
The use of surveillance devices may be prohibited by law in your country. The Network Camera
is not only a high-performance web-ready camera but also can be part of a flexible surveillance
system. It is the user’s responsibility to ensure that the operation of such devices is legal before
installing this unit for its intended use.
It is important to first verify that all contents received are complete according to the list in the
"Package Contents" chapter. Take notice of the warnings before the Network Camera is
installed, then carefully read and follow the instructions in the “Installation” chapter to avoid
damages due to faulty assembly and installation. This also ensures the product is used
properly as intended.
The Network Camera is a network device and its use should be straightforward for those who
have basic network knowledge. The “Troubleshooting” chapter in the Appendix provides
remedies to the most common errors in set up and configuration. You should consult this
chapter first if you run into a system error.
The Network Camera is designed for various applications including video sharing, general
security/surveillance, etc. The “How to Use” chapter suggests ways to best utilize the Network
Camera and ensure proper operations. For the creative and professional developers, the "URL
Commands of The Network Camera" chapter serves to be a helpful reference to customize
existing homepages or integrating with the current web server.
For paragraphs preceded by the reader should use caution to understand
completely the warnings. Ignoring the warnings may result in serious hazards or
injuries.
Table of Contents
Package Content ......................................................................................... 5
Installation ................................................................................................. 6
Hardware installation .................................................................................... 6
Software installation ................................................................................ 9
How to Use Installation Wizard ........................................................... 10
Using Installation Wizard ................................................................... 12
Initial Access to the Network Camera ......................................................... 29
Check Network Settings ................................................................... 29
Add Password to prevent Unauthorized Access ....................................... 29
How to Use ........................................................................................ 29
Authentication................................................................................ 0
Installing plug-in ................................................................................... 1
Primary user’s capability ......................................................................... 2
Main Screen with Camera iew .......................................................... 2
Digital Zoom .................................................................................. 4
MP4 Recording .............................................................................. 5
Snapshot ..................................................................................... 5
Local Settings ................................................................................ 6
Digital output ................................................................................. 8
Administrator’s capability ........................................................................ 9
Fine-tuning for Best Performance ........................................................ 9
Opening accounts for new use ............................................................ 41
Build a security application ................................................................ 42
Software revision upgrade ................................................................. 4
Definitions in Configuration ........................................................................... 44
Basic-Network ..................................................................................... 44
Network type ................................................................................. 44
Audio and ideo .................................................................................. 46
ideo Settings ............................................................................... 46
Audio settings ................................................................................ 47
Image Settings ............................................................................... 48
Privacy Mask ................................................................................. 50
System ........................................................................................ 52
User Management ................................................................................ 5
Advanced-Network ............................................................................... 54
DDNS ............................................................................................... 55
HTTP .......................................................................................... 55
Two way audio ............................................................................... 56
FTP ............................................................................................ 56
RTSP Streaming............................................................................. 56
IP Filtering ......................................................................................... 58
Motion detection .................................................................................. 59
Event Setup ........................................................................................ 60
Event .......................................................................................... 61
Server ......................................................................................... 62
Media Setting ................................................................................ 64
Recording .......................................................................................... 66
Peripherals ......................................................................................... 68
System log ......................................................................................... 69
Maintenance ....................................................................................... 70
Appendix ................................................................................................. 71
A. Troubleshooting................................................................................ 71
Reset and restore ........................................................................... 71
B. URL commands of the Network Camera .................................................. 9
Overview ...................................................................................... 9
Style convention ............................................................................. 9
General CGI URL syntax and parameters .............................................. 94
Security level ................................................................................. 94
Get server parameter values .............................................................. 94
Set server parameter values .............................................................. 96
Available parameters on the server ...................................................... 97
Drive the digital output.................................................................... 117
Query status of the digital input ......................................................... 118
Query status of the digital output ....................................................... 119
Capture single snapshot ................................................................. 120
Account management .................................................................... 120
System logs ................................................................................ 121
Upgrade firmware ......................................................................... 122
IP filtering ................................................................................... 122
RTSP SDP ................................................................................. 12
D. Specifications ................................................................................ 125
Package Content
1. FCS-5030
2. Power Adapter
3. Camera Stand
4. CD Manual/Utility
5. Quick Installation Guide
Installation
In this manual, "User" refers to whoever has access to the Network Camera, and "Administrator"
refers to the person who can configure the Network Camera and grant user access to the camera.
Hardware installation
WARNING: o not mount the camera on a soft material. The camera may fall and be
damaged.
1. Choose the location on the wall to place the camera. Use the bracket as a guide and
drill four holes into the wall. Hammer the supplied plastic anchors into the holes.
2. Place the Network Camera on the bracket and use two screws to secure it to the
bracket.
3. The user needs the four screws which are included in the product package and a
screwdriver. Mount the bracket on the wall and position the four screw slots over the
plastic anchors. Insert the screws into the holes and use the screwdriver to tighten the
screws clockwise until they are secure.
4. Adjust the angle of the bracket so that the camera is facing the desired surveillance
area.
To install in Ethernet
Make sure the Ethernet is firmly connected to a switch hub. After attaching the Ethernet cable plug
in the power adapter. If the LED turns out to blink orange-color, go to next paragraph “Software
installation”.
This Network Camera provides a general I/O terminal block with one digital input and one digital
output device control. The pin definition is as below.
Consult with the dealer of the peripherals for correct installation.
1 SW_NOPEN OUTPUT (Max. 400mA, 12 DC ±5%)
2 SW_COMMON OUTPUT (open from SW_OPEN at
initial state) (close with SW_OPEN when set DO to ON)
3 DI+ INPUT (Max. 50mA, 12 DC)
4 DI- INPUT (Initial state of DI is low)
Make connections
Waterproof Process
To completely avoid the camera from water sock, apply waterproof process if necessary.
Utilize silicone clay or similar waterproof material applied to the screws, screw holes and other
necessary portions.
Tape the junction points of the connecters on the cable.
Reset Button
Software installation
At the end of the hardware installation, users can use Installation Wizard program included in the
product CDROM to find the location of the Network Camera. There may be many Network
Cameras in the local network. Users can differentiate the Network Cameras with the MAC
address . The MAC address is printed on the label which is on the bottom of the Network
Camera body. Please refer to the Quick installation guide of Installation Wizard for details.
Once installation is complete, the Administrator should proceed to the next section "Initial
Access to the Network Camera" for necessary checks and configurations.
How to Use Installation Wizard
Installation
The following are steps for the software installation.
STEP 1: Put the Installation disk into the CD-ROM drive, and the installation should start
automatically. If the installation does not start, click on “Start” on the lower left corner of your
screen, open “My Computer” and double click on the CD-ROM->Installation_Wizard.exe. The
Installation Wizard Installation Window will appear.
Installation Wizard Installation Window
STEP 2: Please read the license agreement first, and then click on “I Agree” to continue the
installation process. The install process will go on and then the below window will appear. This
page is for you to select the additional component you want to install. The component “Create
shortcut on desktop” will create a shortcut on the desktop. It is more convenient for you to launch
Install Wizard 2. After selecting the components, please click on the “Next” Button to continue.
Select components to install for the Installation Wizard
STEP 3: Select the installation directory for this application software and click on “Install” button.
You can also change the installation directory by clicking on “Browse” button. After the proper
directory chose, please click on the “Install” button to continue.
Destination Location for Installation
STEP 4: After clicking “Install” button, the install system will install the Installation Wizard to your
computer, and a progress bar will display on the dialog. After completed the installation, please
click on the “Close” button.
Completed
Using Installation Wizard
User Interface
Once you run the Installation Wizard, after a short searching time, you will see the
user interface as below. “Manual Setup” button, a “Refresh evices” button and
an arrow button on the left panel of your user interface. When you click on the arrow
button, you will see more advanced functional buttons: “Firmware Upgrade”,
“Restore efault” and “About IW”. You can select your device by double-clicking
it in the device list. The left three buttons (“Manual Setup”, “Firmware Upgrade”,
and “Restore efault”) won’t be enabled until you select at least one device.
User interface of Installation Wizard
Installation Wizard allows you to setup one device at one time and upgrade
multiple devices (of the same model) at the same time. If you selected
different models, then the “Firmware Upgrade” button would be disabled.
User interface of Installation Wizard after clicking on the arrow button
Action buttons
Refresh devices
Clicking on the “Refresh evices” button will refresh the device list and search all
devices on the LAN again. Refreshing the device list will take several seconds.
If you want to link to your device, double-clicking it on your device list will lead you to
the browser for operating your device.
Function buttons
Function buttons
Click on this button to modify the setting of the selected devices. For more detail,
please refer to 0 Manual Setup.
Click on this button to upgrade the firmware of the selected devices. For more detail,
please refer to 0 Upgrade
Click on this button to restore the selected device to factory default.
Click on this button to get version information of the Installation Wizard .
Manual Setup
When you select one device in the selection list, the “Manual Setup” button
will be enabled. Click on it to modify the settings of the selected device. After clicked
on the “Manual Setup” button, Installation Wizard would try to connect to the
selected device.
The default Administrator’s password is blank and the Network Camera initially
will not ask for any password. If the authentication is failed, there would be a pop-up
dialog window to ask for correct password. If you failed three times, the Installation
Wizard would show you a warning dialog window and abort the connecting to the
selected device.
Authentication Dialog Window
Authentication error
System Setting
After connected to the selected device, the Installation Wizard will switch to system
setting page as below.
System setting page
Click on this button to cancel the setup progress.
Click on this button to keep the present setting and go to the next page.
Change Host Name
The “Hostname” is used for the homepage title of main page and is displayed as the
title in the video window of the main page. The maximum string length is 40
characters or 20 characters in double-byte-character-systems like Chinese or
Japanese. But for some models supported Unicode, the maximum string length
depends on the characters you input, and it may less than 20 characters.
Change root pass ord
To change the administrator’s password, type the new password in both “Password”
and “Confirm Password” text boxes identically. What is typed will be displayed as
asterisks for security purposes. The maximum password depends on the server you
connected.
Adjust date and time
Date/Time setup
There are three ways to adjust system date and time:
1. "Synchronize with computer time": The easiest way is to make device
synchronized with your computer time.
2. “Set date and time manually”: Set the date and time manually by entering
new values. Notice the format in the related field while typing.
3. “Synchronize to network time server automatically”: Make device
automatically synchronize with timeservers over the Internet every hour.
If you want to keep the current date and time, please choose “Keep current date
and time”.
Net ork Setting
The Installation Wizard can help you to setup the network connection with LAN or
PPPoE. After you clicked on the “Next” button on the System page, the Installation
Wizard would lead you to the PPPoE setting page. If you want to connect your
server to Internet via PPPoE, please click on “Yes” to start the PPPoE setting
process, or click on “No” to invoke the LAN setting.
Choosing the network type
PPPoE Setting
Network setting for PPPoE
If you click on “Yes” in the “Network Type” dialog window, you will be led to the
PPPoE setting page. In this page, you can input the “PPPoE username” and
“PPPoE password” provided by your ISP, and then the server will be set to PPPoE
mode rather than LAN mode when the setup is completed. If you don’t know the
account information, please contact your ISP. After inputting the account information,
please click on the “Next” button to continue your next step.

Other manuals for FCS-5030

2

Other LevelOne Security Camera manuals

LevelOne FCS-1010 User manual

LevelOne

LevelOne FCS-1010 User manual

LevelOne FCS-3051 User manual

LevelOne

LevelOne FCS-3051 User manual

LevelOne CamCon WCS-2030 User manual

LevelOne

LevelOne CamCon WCS-2030 User manual

LevelOne FCS-1132 User manual

LevelOne

LevelOne FCS-1132 User manual

LevelOne FCS-1122 User manual

LevelOne

LevelOne FCS-1122 User manual

LevelOne CamCon FCS-4020 User manual

LevelOne

LevelOne CamCon FCS-4020 User manual

LevelOne FCS-5061 User manual

LevelOne

LevelOne FCS-5061 User manual

LevelOne FCS-1150 User manual

LevelOne

LevelOne FCS-1150 User manual

LevelOne WCS-0010 User manual

LevelOne

LevelOne WCS-0010 User manual

LevelOne FCS-3071 User manual

LevelOne

LevelOne FCS-3071 User manual

LevelOne CamCon FCS-1070 User manual

LevelOne

LevelOne CamCon FCS-1070 User manual

LevelOne FCS-1121 User manual

LevelOne

LevelOne FCS-1121 User manual

LevelOne FCS-4102 User manual

LevelOne

LevelOne FCS-4102 User manual

LevelOne FCS-5056 User manual

LevelOne

LevelOne FCS-5056 User manual

LevelOne CamCon FCS-1070 User manual

LevelOne

LevelOne CamCon FCS-1070 User manual

LevelOne FCS-3062 User manual

LevelOne

LevelOne FCS-3062 User manual

LevelOne FCS-0031 User manual

LevelOne

LevelOne FCS-0031 User manual

LevelOne WCS-2010 User manual

LevelOne

LevelOne WCS-2010 User manual

LevelOne FCS-1131 User manual

LevelOne

LevelOne FCS-1131 User manual

LevelOne FCS-5057 Instructions for use

LevelOne

LevelOne FCS-5057 Instructions for use

LevelOne CamCon FCS-1060 User manual

LevelOne

LevelOne CamCon FCS-1060 User manual

LevelOne FCS-5041 User manual

LevelOne

LevelOne FCS-5041 User manual

LevelOne CamCon FCS-3000 User manual

LevelOne

LevelOne CamCon FCS-3000 User manual

LevelOne FCS-3091 User manual

LevelOne

LevelOne FCS-3091 User manual

Popular Security Camera manuals by other brands

Philips M100D user manual

Philips

Philips M100D user manual

V-TAC VT-5125 Installation instruction

V-TAC

V-TAC VT-5125 Installation instruction

Eneo IED-62F0036M0A user manual

Eneo

Eneo IED-62F0036M0A user manual

PRAXIS PE-8141IP quick start guide

PRAXIS

PRAXIS PE-8141IP quick start guide

Hawking Net-Vision HNC800PTZ user manual

Hawking

Hawking Net-Vision HNC800PTZ user manual

Bosch NDN-498 FlexiDome2X Brochure & specs

Bosch

Bosch NDN-498 FlexiDome2X Brochure & specs

ADT CTRT2812W(G) User instructions

ADT

ADT CTRT2812W(G) User instructions

Vitek VTD-MH2910 user guide

Vitek

Vitek VTD-MH2910 user guide

Dahua AVS-5MD4021-IR-M user manual

Dahua

Dahua AVS-5MD4021-IR-M user manual

ATV B7T3I instruction manual

ATV

ATV B7T3I instruction manual

Security Camera King CVIPTZ-EL2L12X-F user manual

Security Camera King

Security Camera King CVIPTZ-EL2L12X-F user manual

SVA CDR-1202 Specification sheet

SVA

SVA CDR-1202 Specification sheet

Hitachi Kokusai Electric KP-HD20A Series Specifications

Hitachi Kokusai Electric

Hitachi Kokusai Electric KP-HD20A Series Specifications

Axis AXIS P3304 Specifications

Axis

Axis AXIS P3304 Specifications

Allied Vision Prosilica GT Technical manual

Allied Vision

Allied Vision Prosilica GT Technical manual

Sony SNCEM602R Specification sheet

Sony

Sony SNCEM602R Specification sheet

COMPRO CS530 Quick installation guide

COMPRO

COMPRO CS530 Quick installation guide

Dahua Technology IPC-HFW5449T1-ASE-D2-0360B quick start guide

Dahua Technology

Dahua Technology IPC-HFW5449T1-ASE-D2-0360B quick start guide

manuals.online logo
manuals.online logoBrands
  • About & Mission
  • Contact us
  • Privacy Policy
  • Terms and Conditions

Copyright 2025 Manuals.Online. All Rights Reserved.