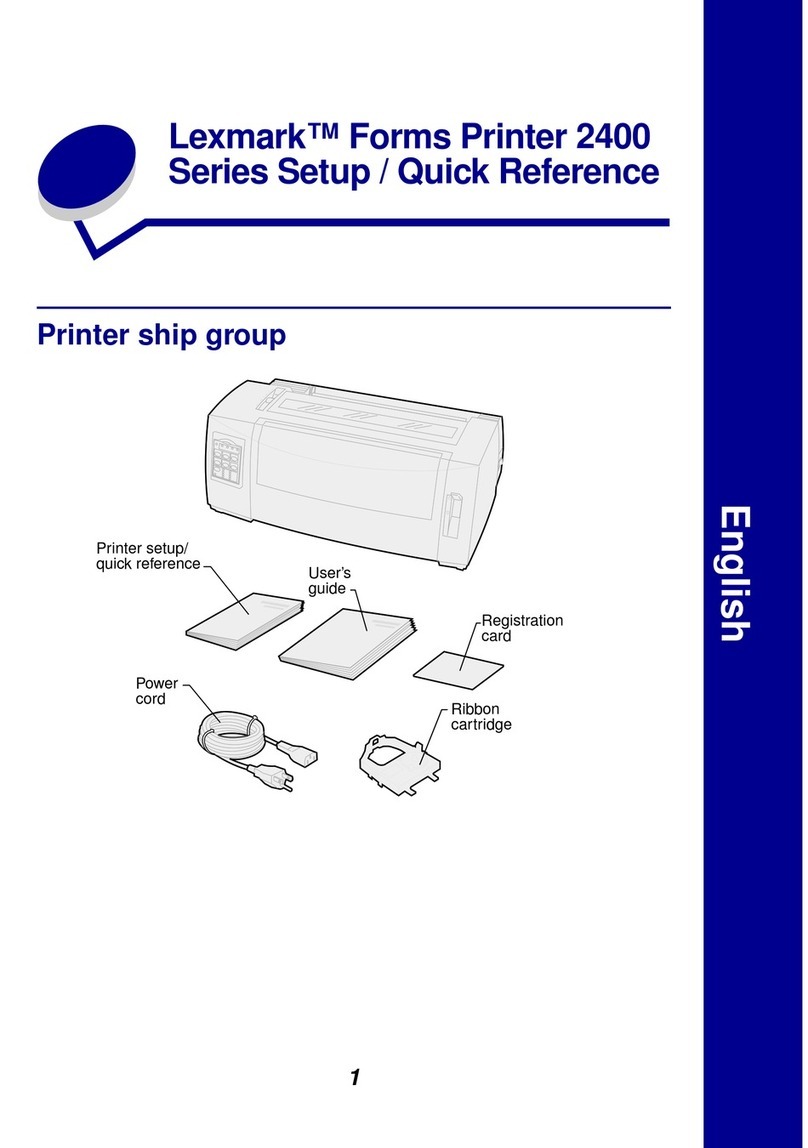
Lexmark Z51 Color Jetprinter User manual

User’s Guide for Windows NT 4.0
Lexmark Z51
Color Jetprinter

First Edition (October 1998)
The following paragraph does not apply to any country where such provisions are inconsistent with
local law: LEXMARK INTERNATIONAL, INC. PROVIDES THIS PUBLICATION “AS IS” WITH-
OUT WARRANTY OF ANY KIND, EITHER EXPRESS OR IMPLIED, INCLUDING, BUT NOT
LIMITED TO, THE IMPLIED WARRANTIES OF MERCHANTABILITY OR FITNESS FOR A PAR-
TICULAR PURPOSE. Some states do not allow disclaimer of express or implied warranties in certain
transactions, therefore, this statement may not apply to you.
This publication could include technical inaccuracies or typographical errors. Changes are periodically made to the information herein; these
changes will be incorporated in later editions. Improvements or changes in the products or the programs described may be made at any time.
Lexmark, Lexmark with diamond design, and ColorFine are trademarks of Lexmark International, Inc., registered in the United States and/or
other countries.
Color Jetprinter is a trademark of Lexmark International, Inc.
Windows is a registered trademark of Microsoft in the U.S. and other countries.
PCL®is a registered trademark of the Hewlett-Packard Company. PCL 3 is Hewlett-Packard Company's designation of a set of printer
commands (language) and functions included in its printer products. This printer is intended to be compatible with the PCL 3 language. This
means the printer recognizes PCL 3 commands used in various application programs, and that the printer emulates the functions
corresponding to the commands.
Other trademarks are the property of their respective owners.
© Copyright Lexmark International, Inc. 1998.
All rights reserved.
UNITED STATES GOVERNMENT RESTRICTED RIGHTS
This software and documentation are provided with RESTRICTED RIGHTS. Use, duplication or disclosure by the Government is subject to
restrictions as set forth in subparagraph (c)(1)(ii) of the Rights in Technical Data and Computer Software clause at DFARS 252.227-7013
and in applicable FAR provisions: Lexmark International, Inc., Lexington, KY 40550.
Contents iii
Contents
Chapter 1 - Understanding your printer . . . . . . . . . . 1
Using the parts of the printer . . . . . . . . . . . . . . . . . . . . . . . . . . . . . . . . . . . . . . . . .2
Using the printer's buttons and lights . . . . . . . . . . . . . . . . . . . . . . . . . . . . . . . . . .5
Chapter 2 - Using the printer software . . . . . . . . . . . 7
Using the Control Program . . . . . . . . . . . . . . . . . . . . . . . . . . . . . . . . . . . . . . . . . .8
Using the Printer Properties . . . . . . . . . . . . . . . . . . . . . . . . . . . . . . . . . . . . . . . .11
Chapter 3 - Printing on plain paper. . . . . . . . . . . . . 13
Loading paper . . . . . . . . . . . . . . . . . . . . . . . . . . . . . . . . . . . . . . . . . . . . . . . . . . .13
Checking printer settings . . . . . . . . . . . . . . . . . . . . . . . . . . . . . . . . . . . . . . . . . .14
Printing on both sides of a sheet of paper . . . . . . . . . . . . . . . . . . . . . . . . . . . . . .15
Chapter 4 - Printing on specialty media . . . . . . . . . 20
Printing transparencies . . . . . . . . . . . . . . . . . . . . . . . . . . . . . . . . . . . . . . . . . . . .21
Printing envelopes, index cards, or postcards . . . . . . . . . . . . . . . . . . . . . . . . . . .23
Printing on customized paper sizes . . . . . . . . . . . . . . . . . . . . . . . . . . . . . . . . . . .25
Printing greeting cards . . . . . . . . . . . . . . . . . . . . . . . . . . . . . . . . . . . . . . . . . . . .27
Printing iron-on transfers . . . . . . . . . . . . . . . . . . . . . . . . . . . . . . . . . . . . . . . . . .28
Printing banners . . . . . . . . . . . . . . . . . . . . . . . . . . . . . . . . . . . . . . . . . . . . . . . . .29
Printing photos . . . . . . . . . . . . . . . . . . . . . . . . . . . . . . . . . . . . . . . . . . . . . . . . . .31

Contents
iv
Printing specialty media from the manual feeder . . . . . . . . . . . . . . . . . . . . . . . .34
Chapter 5 - Caring for your printer . . . . . . . . . . . . . 35
Installing or replacing a print cartridge . . . . . . . . . . . . . . . . . . . . . . . . . . . . . . . .36
Improving print quality . . . . . . . . . . . . . . . . . . . . . . . . . . . . . . . . . . . . . . . . . . . .37
Appendix. . . . . . . . . . . . . . . . . . . . . . . . . . . . . . . . . . .47
Installing the printer software . . . . . . . . . . . . . . . . . . . . . . . . . . . . . . . . . . . . .47
Printing from DOS . . . . . . . . . . . . . . . . . . . . . . . . . . . . . . . . . . . . . . . . . . . . .47
Warranty . . . . . . . . . . . . . . . . . . . . . . . . . . . . . . . . . . . . . . . . . . . . . . . . . . . . .49
Notices. . . . . . . . . . . . . . . . . . . . . . . . . . . . . . . . . . . . . . . . . . . . . . . . . . . . . . .50
Safety information. . . . . . . . . . . . . . . . . . . . . . . . . . . . . . . . . . . . . . . . . . . . . .51
Energy Star . . . . . . . . . . . . . . . . . . . . . . . . . . . . . . . . . . . . . . . . . . . . . . . . . . .53
Index. . . . . . . . . . . . . . . . . . . . . . . . . . . . . . . . . . . . . . . . . . . . .54

Understanding your printer 1
Understanding your
printer
Your printer is a general purpose color inkjet printer that provides high quality text and graphics.
This User’s Guide describes how to use your new printer with Windows NT 4.0.
Using the parts of the printer 2
Using the printer’s buttons and lights 5
Using the buttons 5
Understanding the lights 6
Inkjet
A non-impact printing
technology that creates
characters and graphics by the
composition of programmed
patterns of ink dots.
Quick Fix
Printer has missing or
damaged parts
Contact your point of
purchase.
Glossary
For information about: See page:
Chapter 1

Chapter 1
2
Using the parts of the printer
This illustration shows the front parts of the printer:
AMedia guide Align the automatic feeder to the correct
paper size.
BMedia support Keep paper and specialty media straight
in the automatic feeder.
BC
G
E
F
D
A
Use the: When you want to:

Understanding your printer 3
CAutomatic feeder Automatically load paper and specialty
media. The automatic feeder holds up to:
•100 sheets of paper
•25 sheets of photo paper
•25 iron-on transfers
•25 sheets of labels
•10 transparencies or glossy film
•10 envelopes, greeting cards,
postcards, or index cards
DManual feeder Manually load paper and specialty media
one sheet at a time. You can also use the
manual feeder when paper feeds incor-
rectly from the automatic feeder.
EButtons and lights •Check the printer status.
•Turn the printer on or off.
•Eject paper from the printer.
For more information, see “Using the
printer's buttons and lights” on page 5.
FFront cover •Install or change print cartridges.
•Clear paper jams.
GPaper exit tray Stack paper after printing.

Chapter 1
4
The following illustration shows the back parts of the printer:
HBanner paper support
(located inside the
banner paper holder)
Feed the banner paper correctly
(maximum 10 sheets).
IBanner paper holder Print on banner or continuous form paper.
JPower supply Supply power to the printer.
KParallel cable
(not supplied)
Connect the printer to the computer for
bidirectional communication.
LUSB (Universal Serial
Bus) port Connect your USB cable (not supplied) to
the printer.
(Windows 98 only)
H
K
I
JL
Use the: When you want to:
Parallel cable interface
problems occur
For help, refer to
“Bidirectional
Communicationsproblems”in
the Control Program Help. To
view this topic, see the
instructions below.
Intermittent printing
occurs
For help, refer to
“Bidirectional
Communicationsproblems”in
the Control Program Help. To
view this topic, click:
1Start.
2Programs.
3Lexmark Z51 Series Color-
fine.
4Control Program.
5The Help button.
6The Control Program bar.
7Troubleshooting.
Quick Fixes
Interface
A data conversion device
(such as a parallel cable) that
allows communication
between the printer and the
computer.
Glossary

Understanding your printer 5
Using the printer's buttons and lights
Your printer has two groups of buttons and lights.
Using the buttons
Your printer has a Power button and a Paper Feed button.
Turn the printer on or off.
•Eject paper from the printer.
•Load the automatic or manual sheet
feeder with paper after running out.
•Continue printing.
Quick Fix
The Power light is on
and the Paper Feed
light is blinking
The printer may be out of
paper or have a paper jam.
Check your screen for any
error messages.
•If the printer is out of paper:
1 Load paper.
2 Press the Paper Feed but-
ton.
•If the printer has a paper
jam, try removing the paper
from the automatic feeder. If
the paper is lodged too far
into the printer and can’t be
removed, see “Paper jams”
on page 14.
•If the problem persists, you
may be using a wrong or
damaged cable. For help,
refer to “Bidirectional
Communications problems”
in the Control Program
Help. To view this topic,
click:
1 Start.
2 Programs.
3 LexmarkZ51SeriesColor-
fine.
4 Control Program.
5 The Help button.
6 The Control Program bar.
7 Troubleshooting.
Use the: When you want to:
Power button
Paper Feed button

Chapter 1
6
Understanding the lights
Your printer has a Power light and a Paper Feed light.
Both lights are Off
Is Off.
Power light is On
Paper Feed light is Off
Is On and ready to print.
Both lights are On
Is printing.
Power light is On
Paper Feed light is blinking
May be out of paper or have a paper
jam. For help, see the “Quick Fix”
topics on page 5.
Power light is blinking
Paper Feed light blinks twice
Has an error. For help, see the “Quick
Fix” topics on this page.
The Power light is
blinking and the
Paper Feed light
blinks twice
The print cartridge carrier
has stalled or you have a
paper jam. Check your
screen for any error
messages.
•If the print cartridge
carrier has stalled:
1 Turn the printer off.
2 After waiting a few
seconds, turn the
printer back on.
•If you have a paper jam,
try removing the paper
from the automatic
feeder. If the paper is
lodged too far into the
printer and can’t be
removed, see “Paper
jams” on page 14.
Both lights are on, but the
printer is not printing
•Your paper is loaded, but
your cable connections
may not be secure.
1 Unplug the power sup-
ply from the electrical
outlet.
2 Make sure all cable
connections are con-
nected.
3 Plug the power supply
back in.
Quick Fixes
If your printer lights look
like this: Then the printer:

Using the printer software 7
Using the printer
software
This chapter describes how to use the printer software with Windows NT 4.0.
The software you installed for your printer includes several applications that enable you to perform
printing tasks with superior printing results.
Control Program 8
Printer Properties 11
Software application
Any program loaded on your
computer used to perform a
specific task; for example, a
word processing or
spreadsheet program.
Glossary
For information about
using this application: See
page:
Chapter 2

Chapter 2
8
Using the Control Program
The Control Program includes four tabs: Status, Cartridge, Options, and About. Each tab contains
settings relating to the operation of your printer and its software.
The Control Program appears (or runs minimized) each time you send a print job. Use the Control
Program when you want to:
•Monitor print jobs and view cartridge ink levels
•Install or replace print cartridges
•Align print cartridges for best quality
•Print a test page
•Control when and how the Control Program appears
•Perform cartridge maintenance
•Disable bidirectional communications
•Order supplies directly from Lexmark’s World Wide Web site
Turning the voice off
You may turn the sound
effects that accompany
printer software messages
off. To turn the sound
effects off:
1Open the Control Pro-
gram.
2Click the Options tab.
3Make sure Sound Effects
Enabled is not selected.
Glossary
Run Minimized
Prevents the Control
Program from appearing on
your computer screen each
time you send a job to print.
To set the Control Program
to Run Minimized:
1Open the Control Pro-
gram.
2Click the Options tab.
3Select Run Minimized.
Tip
ClickHelpformore
information about
the items on each
tab.

Using the printer software 9
Opening the Control Program
1From the Start menu, click Programs.
2Click Lexmark Z51 Series ColorFine.
3Click Control Program.
Using the printer software to order supplies
With Internet access:
Click the About tab.
Click Lexmark On The
Web.
The Lexmark Worldwide
supplies page appears.
This page has a link to the
region where you want to
order supplies.

Chapter 2
10
Without Internet access:
1Insert the Lexmark Z51 Color JetPrinter CD into your CD-ROM drive.
2If nothing appears on the screen after a few moments, follow these instructions:
aFrom the Start menu, choose Run.
bIn the Open: text box, type the letter of your CD-ROM drive, followed by :\setup (for
example, d:\setup), then click OK.
3When the Lexmark Z51 Printer Software menu screen appears:
4Follow the instructions on your screen.
Click Contact
Lexmark.
Click Supplies Information.
A Supplies Information Help
window appears with
instructions on how to order
supplies.

Using the printer software 11
Using the Printer Properties
The Printer Properties includes 3 tabs. You can use the Page Setup, Color, and Features tabs to change
your printer settings.
Use the Printer Properties (or Document Defaults) when you want to:
•Adjust color usage
•Adjust print quality/speed
•Choose different sizes or type of media
•Choose page orientation
•Choose a paper source
•Reset document defaults
Click Help for more information about the items on each tab
and for additional troubleshooting items.
This area of the Printer Properties summarizes
the settings you’ve chosen for each item.
When you rest your cursor on an item, “Hot Spot Help” appears here to describe the item.
Reverse Order
Printing
Select Reverse Order
Printing to begin printing with
the last page of the document.
The first page of your
document will be on top of
the output tray when your
print job is complete.
Collate Copies
Use this option when you are
printing multiple copies so all
pages of one copy are printed
before the next copy begins
printing.
Adjust Print Quality/
Speed
If you are creating text-only
documents, a high speed
setting and a black print
cartridge produce excellent
documents. For documents
containing color graphics or
for photos, a low speed setting
and a color or photo cartridge
give the best results.
Glossary
Tip
Adjust Print Quality/
Speed
If you are creating text-only
documents, a high speed
setting and a black print
cartridge produce excellent
documents. For documents
containing color graphics or
for photos, a low speed setting
and a color or photo cartridge
give the best results.

Chapter 2
12
•Print on both sides of your paper
•Choose reverse order printing
•Choose to collate copies
•Choose number of copies
Opening the Printer Properties from your application
You can open the Printer Properties from almost any application. This lets you change printer settings
for the document you are currently creating. To open the Printer Properties:
1Open the application's File menu.
2Choose Print (or Printer) Setup.
3In the Printer Setup dialog box, click the Properties, Options, or Setup button (depending on
the application).
4Change settings as needed.
Setting Default Document Properties for all print jobs
1From the Start menu, choose Settings, then choose Printers.
2From the Printers folder, right-click the printer icon for your printer.
3Choose Document Defaults from the sidebar menu.
Learning more about your printer software
To learn more about the printer setting options, click the Help button at the bottom of each tab in the
printer software.
Note
Glossary
Printer driver
A program that translates
the language of a software
application into the
language of the printer so
the two can communicate
data.
Some software
applications may override
the Paper Source, Paper
Size, and Orientation
settings in your printer
software.

Printing on plain paper 13
Printing on plain paper
Paper feeds multiple
sheets at a time
•Make sure the paper is
aligned against the right
side of the automatic feeder.
•Make sure the media guide
is against the edge of the
paper.
•Make sure the top of the
paper aligns with the appro-
priate marks at the top of
the paper support.
•Try printing on the other
side of the paper.
Quick Fixes
Paper fails to feed
1Align the paper against the
right side of the automatic
feeder.
2Make sure no more than 100
sheets are loaded.
3Slide the media guide against
the edge of the paper.
4Raise the front cover.
5Remove any obstructions
inside the printer.
6Close the front cover.
7Press the Paper Feed button.
Loading paper
You can load up to 100 sheets of paper, depending on the thickness, into the printer. To load the
paper:
1Place the paper against the right side of the automatic feeder, with the print side facing you.
Chapter 3

Chapter 3
14
2Squeeze the release tab and the media guide together and slide the media guide to the edge of
the paper.
Checking printer settings
If you are using plain, letter-sized paper, and you want normal print quality and speed, all you need to
do is print the document. The printer software defaults are set for this type of document.
To check your printer settings each time you print:
1Open your application's File menu.
2Choose Print (or Printer) Setup.
3In the Printer Setup dialog box, click the Properties, Options, or Setup button (depending on
the application).
Paper jams
1Press the Power button to
turn the printer off.
2Pull firmly on the paper
to remove it. If you can-
not reach the paper
because it is too far into
the printer, raise the front
cover and pull the paper
out from the front of the
printer.
3Close the front cover.
4Press the Power button to
turn your printer on.
5Resendyour document to
print.
Quick Fix
•When you change the
printer settings from
your application, the set-
tings apply only to that
print job. To make your
changes apply to all print
jobs, see “Setting
Default Document Prop-
erties for all print jobs”
on page 12.
•Select High Speed to
print quickly, or High
Quality for the best print
results.
Tips
Release tab Media guide

Printing on plain paper 15
Printing on both sides of a sheet of paper
Your Lexmark printer lets you print on both sides of a sheet of paper and format the binding edge for
your print job. This feature is helpful when you want to print booklets, tablets, or to save paper.
Understanding binding edge options
When you choose to print on both sides of the paper, you may also choose how to bind your
documents. To understand the binding edge options, read the following descriptions:
Long edge binding
Long edge binding lets you bind (attach) all your sheets of paper along the long edge of the page (the
left edge of a portrait-printed page and the top edge of a landscape-printed page). For example, the
pages in your printed User’s Guide are portrait-printed using a long edge binding.
The following illustration shows a long edge binding:
Portrait
Back of
sheet Front of
next sheet
Landscape
Front of next
sheet
Back of sheet

Chapter 3
16
Short edge binding
Short edge binding lets you bind (attach) all your sheets of paper along the short edge of the page (the
top edge of a portrait-printed page and the left edge of a landscape-printed page). For example, the
pages in your Getting Started booklet are landscape-printed using a short edge binding.
The following illustration shows a short edge binding:
Portrait
Landscape
Back of sheet
Front of
next sheet
Back of sheet Front of next
sheet
Other manuals for Z51 Color Jetprinter
3
Table of contents
Other Lexmark Printer manuals

Lexmark
Lexmark C770 User manual

Lexmark
Lexmark C935dn User manual

Lexmark
Lexmark X 2600 Specification sheet

Lexmark
Lexmark CS510 Series User manual

Lexmark
Lexmark X746de Manual

Lexmark
Lexmark C 760 User manual

Lexmark
Lexmark Z52 User manual

Lexmark
Lexmark C782dn XL User manual

Lexmark
Lexmark C925 User manual

Lexmark
Lexmark W840 User manual

Lexmark
Lexmark M1145 User manual

Lexmark
Lexmark MS531 User manual

Lexmark
Lexmark B3340 User manual

Lexmark
Lexmark 6500E Manual

Lexmark
Lexmark MS610dn User manual

Lexmark
Lexmark C2132 User manual

Lexmark
Lexmark X945 User manual

Lexmark
Lexmark T642dtn User manual

Lexmark
Lexmark E260d Series User manual

Lexmark
Lexmark Z600 User manual