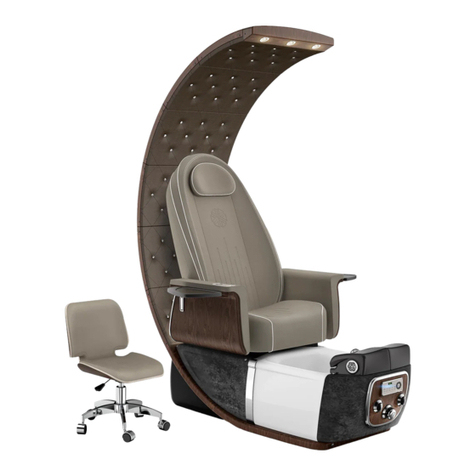
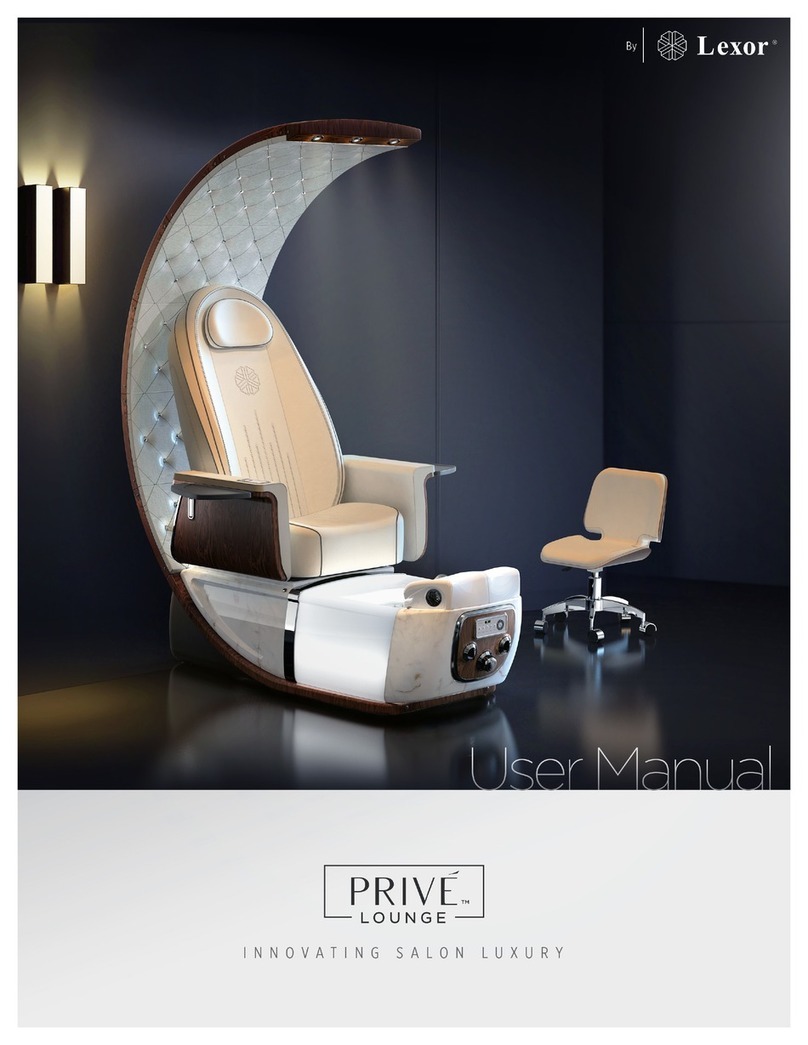
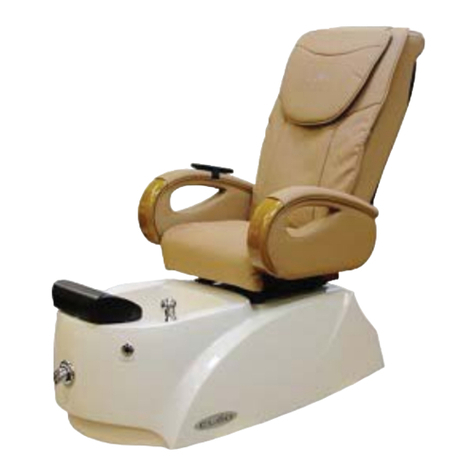
Lexor PRIVE PEDICURE SPA User manual


THE KEY TO SALON SUCCESS
PRIVE PEDICURE SPA USER MANUAL
WARNING: 1.This product is for indoor use only & is not recommended for use on carpet or wood floor.
2.This product must be connected to a circuit outlet protected by a class A GFCI.
3. O NOT USE if you have poor circulation, or if any area of your feet or legs has an open sore.
4. Maximum temperature of the water should never exceed 100 degrees F.
5. O NOT STEP or STAN IN THE FOOT BASIN.
6. O NOT operate any electrical devices near the pedicure spa.
PLEASE SAVE THESE INSTRUCTIONS FOR FUTURE REFERENCE
Table of Contents
IDENTIFYING PARTS FOR PRIVE® MODEL 2
WALL CLEARANCE & SPA TO SPA RECOMMENDED CLEARANCE 3
INSTALLATION OF PEDICURE SPA DOME 4
INSTALLATION OF PEDICURE SPA SEAT 5
INSTALLATION OF PLUMBING SYSTEM 8
INSTALLATION OF VENTILATION SYSTEM OPTIONAL) 11
ELECTRICAL AND PEDICURE SPA COMPONENT SPECIFICATIONS 12
PRE-OPERATIONAL SETUP 13
OPERATE AUTO-FILL / JET SWITCH 15
OPERATE DIGITAL CONTROL PANEL 16
RESET WATER SENSOR AND WATER LEVEL 17
MASSAGE SYSTEM & REMOTE CONTROLLER 19
DOME SPOTLIGHT REPLACEMENT
STEAMER REPLACEMENT
24
25
AF-CONTROL BOX REPLACEMENT
26
7. Maximum load in the spa chair is 250lbs (114kg).
PROPER INSTALLATION ACCOR ING TO THIS MANUAL IS REQUIRE . FAILURE TO O SO MAY RESULT IN
SERIOUS INJURY AN /OR WARRANTY WILL BE NULL. YOU MUST HAVE A LICENSE PLUMBER TO CONNECT THE
SPA AN WATER SYSTEM IN PLACE SAFELY.
STATES’ NOTICE
In the commonwealth of most states, all pedicure spas installed for commercial usage are required to have a
backflow preventer at the salon’s cost. This device shall be installed between the water inlet hose and the spout
RECEIVING AN INSPECTION: If missing parts or damages are found, please notify the carrier at once and
insist on a notation of the damage on the bill of lading. O NOT ISCAR THE SHIPPING BOX. If you give
the carrier a clear receipt for goods that have been damaged in transit, you do so at your own risk and expense.
DRAIN KNOB & AUTO-FILL /JET KNOB
REMOVING THE FRONT PANEL
FAUCET ASSEMBLY INSTRUCTION
21
22
20
1
REMOVING THE FOOTREST 27

Pedicure Spa with Massage System
1
2
3
4
5
6
10 12
15
17
19
18
14
21
13
7
9
11
8
16 20
16
1. ome spotlight
2. ome
3. Pillow
4. Back cushion with massage
5. Massage remote control
6. Armrest cushion
7. Seat cushion
8. Footrest with calf support
9. igital control panel
10. rain knob
11. Hot/Cold water mixer valve
12. Auto-fill/Jet knob
13. Aurora bowl
14. Handbag (purse) hook
15. Manicure tray
16. Hand spray spout
17. Ventilation inlet
18. ECOJETTM Magnetic drive
19. Safety device for steamer
20. Air ring therma Jet
21. Low profile pedicure stool prive
2
Identifying Parts for PRIVE® Model
IDENTIFYING PARTS

WALL CLEARANCE & SPA TO SPA RECOMMENDED CLEARANCE
3
VERY IMPORTANT:The wall clearance for dome-to-wall 0.5 inch / 1.25cm and base-to-wall
10 inch / 25.4cm are mandatory to give enough space for the unobstructed chair recline and
plumbing system connections. Failure to follow may result in serious damage to the spa
component and void the warranty.
INSTALLATION

INSTALLATION OF PEDICURE SPA DOME
1. L WER D ME ASSEMBLY
Step 1: Install lower-dome by inserting 2 mounting rods from lower dome into spa base frame
then secure 2 M8 x 45 bolts (attached on base). Locate and connect both ends of spotlight
power cables.
Step 2: Open the panel labeled “UPPER”. Install upper-dome by inserting 2 mounting rods from
upper-dome to lower-dome frame then secure 2 M8 x 20 bolts (in the accessory bag). Locate and
connect both ends of spotlight power cables. Re-install the panel.
2. UPPER D ME ASSEMBLY
Panel labeled
“UPPER”
2 M8 x 45 bolts
4
INSTALLATION

INSTALLATION OF PEDICURE SPA SEAT
1. F LD & UNF LD BACK-REST MASSAGE
“CLICK”
5
Raise the backrest until a “click” is heard. Make
sure the lever is locked before operating.
To fold down the backrest: Lift up lever handle
and push the backrest downward.
INSTALLATION

2. BACK CUSHI N ASSEMBLY
2
2
NOTE:
Wire & connector number 2 must be routed under the seat frame.
DON’T plug the +) connector of the number 2 into the -) connector of the number 1.
Install the back cushion by engaging the 2 bottom hooks
of cushion onto the shaft of massage frame. Position the
top of back cushion, then snap the fit joint of back
cushion to the crossbar of massage frame, press the
back cushion firmly on the massage frame to secure it.
Install the seat cushion by engaging the 2-rear hooks of
seat cushion onto the seat frame.
Position the seat cushion then snap the fit joint of seat
cushion to the seat frame. Press the seat cushion firmly
on the seat frame to secure it.
Connect the 2 connectors labeled “2” from the seat
cushion to the spa base.
3. SEAT CUSHI N ASSEMBLY
6
INSTALLATION

Position and line up both markers of the armrest and
seat frame connectors. Engage both sides into guide
joints. Horizontally rotate armrest counter clockwise
(clockwise with right armrest) to lock it in place.
Connect 2 connector labeled “1” between Right
Armrest and Spa Base.
lever of locking
device
Press
& Hold
1
1
A. Armrests Assembly
B. ArmRests Removal
4. ARMRESTS ASSEMBLY
isconnect the connector of the right armrest
labeled “1”.
Vertically rotate left armrest clockwise (counter
clockwise with right armrest). Press and hold lever
locking device to unlock the mechanism and
continue to rotate armrest clockwise (counter
clockwise with right armrest) to remove the
armrest.
Line-up markers
NOTE: Locate the maker line before assembling.
1
1
7
INSTALLATION

INSTALLATION OF PLUMBING SYSTEM
NOTE: The drainage and water supply system installation require a licensed plumber. etailed
instructions can be found in the manual book. Instructions and local plumbing codes need to be
carefully complied to pass the city inspections.
1. GRAVITY DRAIN
8
GRAVITY RAIN
1-¼” flex hose with removable connector is provided for easy
installation (optional)
Backflow preventer (not included)
(Optional device based on local
plumming code)
½” I cold water
½” I hot water
Vent
rainage pipe connect to waste system through
P-trap and vent.
Connect to sanitaryConnect to sanitary
Underground P-trap
1-½” drainage pipe
The gravity drainage installation should comply with SECTION 701.0, 2018 UPC.
P-trap, vent, and connectors should comply with SECTION 1001.1 and 1001.2 UPC.
An alternative code needs to be complied with by the states not adopting UPC.
●rainage system: SECTION 701.2 and 702.2 IPC (or local plumbing code).
●P-trap, vent, and connectors: SECTION 1002.1 and 1002.2 IPC (or local plumbing code).
The installer/plumber is responsible for obtaining and complying with the local plumbing code for
inspection. If any assistance is required from the vendor’s side, please contact our customer service.
PLUMBING SYSTEM

2. P WER DRAIN
The power drainage installation should comply with SECTION 807.1, 2018 UPC.
P-trap, vent, and connectors should comply with SECTION 1001.1 and 1001.2 UPC.
An alternative code needs to be complied with by the states not adopting UPC.
●rainage system: SECTION 701.2 and 702.2 IPC (or local plumbing code).
●P-trap, vent, and connectors: SECTION 1002.1 and 1002.2 IPC (or local plumbing code).
The installer/plumber is responsible for obtaining and complying with the local plumbing
code for inspection. If any assistance is required from the vendor’s side, please contact
our customer service.
9
½” I cold water ½” I hot water
¾” PVC drain
¾” drain pipe
¾” coupling
Check valve
PLUMBING SYSTEM

3. DRAIN SYSTEM REC MMENDATI N
4. H T/C LD WATER SUPPLY SYSTEM
NOTE: The drainage and water supply system installation require a licensed plumber. Instructions
and local plumbing codes need to be carefully complied to pass the city inspections.
10
New constructions: drain a good amount of water in
a bucket to remove all debris from the new hot/cold
water pipes before connecting to new spa chairs
(figure 1).
Replacement Spas: Make sure to use new hot/cold
water hoses to replace old ones before installing a
new Spa chair. The old debris, rubber, or plastic chips
could clog the water inlet system.
** Failure to do so will void the warranty.
Height needs to be adjusted
Based on your salon setup
1-½” drain pipe
¾” to 1-½” T-connector
Wall
Connect to main drain
Check valve
6o slop to the end drainage
etail A
PLUMBING SYSTEM

11
(The spa comes with a preinstalled ventilation system.Please contact your state department for the
requirements and regulations).
HỆ THỐNG THÔNG KHÍ
Connect the 2 vent pipes as needed.
INSTALLATION OF VENTILATION SYSTEM (OPTIONAL)
VENTILATION SYSTEM
1-1/2” Vent pipe kit supplied.
1-1/2” Vent pipe
(pre-installed in spa base).

ELECTRICAL AND PEDICURE SPA COMPONENT SPECIFICATIONS
SPECIFICATIONS LIST FOR PRIVE SPA CHAIR
Spa imensions
& Weights
Spa :
Net Weight:
Shipping Weight:
Max. Handling Load:
L=71”(180cm)
W=31”(79cm) w/ Tray =49”(126cm)
H=84”(214cm)
~ 310 lbs.
~ 350 lbs.
~ 330 lbs.
Steamer Rating 120V AC
Max 850W
Adjustable Stool Pedicure Stool:
Manicure Stool:
12” – 13”.
16.25” – 20”
Spa Water Capacity ~ 4 US Gallon
Jet Motor 120 VAC. At 85W 60Hz
Massage, Motors, Seat
Sliding & Reclining
24V C, 120W Max
ischarge Pump Motor – 120V at 85W 60 Hz Maximum vertical lift: 3ft . Flow rate
400 GPH @ floor level
Power source 125 VAC, 60HZ, 15A. The power needed per spa chair = 9 Amp
Electrical Switches
One (1) electro-mechanical knob for the Whirlpool rated at 5A
contacts.
One (1) electro-mechanical knob for the rain. Rated at 5A contact.
Safety Pedicure Spa is UL Listed.
12
All electrical connections MUST be made by a licensed electrician following Local & National
Electrical and Building Codes.
SPECIFICATIONS

PRE-OPERATIONAL SETUP
1. STEAMER SET UP
Drain Stopper
Clamps
The air ring stand should face
down. Press down the air ring to lock it
into the drain shoe.
Drain Shoe
Air ring stand should face up
press down air ring to lock it into the
drain stopper knob.
Note: The drain stopper will punch
through the plastic liner for draining the
water later.
Turn safety cap cover clockwise to
open the safety device, next Insert the
Air Tube into the safety device.
NOTE:
Remove air ring before drain water.
Air tube will get hot when system is running - system will shut off if air tube pops out.
Air Ring Air Tube
Installing Air Tube to Air Ring
1. Not Using the Drain Stopper
2. Using the Drain Stopper
13
OPERATION & CARE
Select 1 of the 2 applications below as needed:

PRE-OPERATIONAL SETUP
2. EC -JET SET UP
The system should be set as the picture above before each service section.
Eco-Jet
Safety evice
For Steamer
Silicon Pipe
Air-Ring
rain
Stopper
Note: To assure the safety for the operator; if the silicon pipe is not connected or
accidentally popped out from the safety connector. The safety device will shut off
the steam system.
14
Liner
OPERATION & CARE

OPERATE AUTO-FILL /JET SWITCH
Locate the control panel at the front of the spa base.
Follow the instructions below to operate the pedicure spa.
*** ECO-JET MUST OFF BEFORE RAINING
THE WATER OUT,
IF NOT THE EVICE WILL BE AMAGE .
Control
Panel
Hot/Cold
Water Knob
rain
Knob Auto Fill /
Jet switch
igital Control
Panel
On/Off Push
Button
Push in button for manually
shut off water
N FF
●By default, Eco-Jet will automatically turn on
when the water level is full. To turn off the Eco-
Jet, click the “Whirlpool button” on the
digital control panel or twist Auto-Fill/Jet switch.
15
*** The Hot/Cold water control knob should be turned off at the end of the day to prevent
water leakage.
●Twist Auto-Fill/Jet switch clockwise then release to start auto-fill. Water will automatically shut
off when it reaches the preset water sensor level.
●Turn the Auto-Fill/Jet switch again to turn off the water pump (also turn off Eco-Jet).
●Twist drain knob clockwise to start draining. Twist it back when the draining is done.
●Use “Hot/Cold water knob” to manually adjust the water temperature.
●Push button on the Hot/Cold Water Knob to turn On/Off main water valve.
OPERATION & CARE

OPERATE DIGITAL CONTROL PANEL
NOTE: Press and hold the Steam Heat Button for ‘’3s’’. The system will activate
the Air Jet without the steamer.
16
Backward/Forward
Recline/Incline
On/Off
Steam Heat
On/Off
Eco-Jet
On/Off Massage
Water temp in basin
System status
Up/ own
Seat Movement
Control
Bowl Light
- Turn on: Click by hand (or by Autofill On)
- Select color: Click unit satisfied
(a loop of 8 color styles and the finish is off)
- Turn off: press & hold 2s
(or turn off in select color loop | Autofill Off)
- 1st click: Comfortable light
- 2nd click: Bright light
- 3rd click: Turn off
Spot Light
WARNING:
DO NOT TURN “ON” THE ECO-JET UNLESS ADEQUATE WATER IS IN THE TUB. OR
IT MAY DAMAGE THE JET AND CAUSE NOISE.
WARNING:
DO NOT TURN “ON” THE DRAIN PUMP UNLESS ADEQUATE WATER IS IN THE TUB.
THE WARRANTY IS VOID IF THE PUMP WAS RUNNING DRY.
●The Blue/White LE light indicates the current working status.
●Eco-Jet action can cause small amounts of soap or body oil to foam excessively. For this reason,
refrain from using these products during the whirlpool cycle.
●For safety reasons, the steam heat function is off by default. Press the button to turn it on.
OPERATION & CARE

1. RESET WATER SENS R (EMPTY BASIN BEF RE ACTIVATING THIS M DE)
A reset water sensor is required when the water level is out of range.
** Note :
- This will also reset the water level to default = 3.
- Click should be pressed slowly.
- Press and hold the Whirlpool Button for 3 sec to resume system operation or the system will
be automatically resumed if no action is taken in 20 sec
2. ADJUST THE WATER LEVEL F R AUT -FILL
(EMPTY BASIN BEF RE ACTIVATING THIS M DE)
** Note :
- Click should be pressed slowly.
- Press and hold the Whirlpool Button for 3 sec to resume system operation or the system will
be automatically resumed if no action is taken in 20 sec.
RESET WATER SENSOR AND WATER LEVEL
17
1. Press & Hold for 3 sec. The LE will display
Click until appears on the screen
3. Click or to increase
or decrease the water level,
where 1 is lowest and 5 is
highest level
2. The LE will display “ L- ” 4. Click to confirm:
- “ L - x ” will blink if
successful (x=1:5)
- No blink if failed
1. Press & Hold
“Whirlpool” button for
3 sec
3. Click to confirm:
- will blink if the
reset is successful
- No blink if failed
2. Status screen
will display
OPERATION & CARE

3. ADJUST THE STEAMER TIME UT (Turn off all system functions for configuration)
4. RESET T THE FACT RY SETTING
18
1. Press & Hold for 3 sec. The LE will display
Click until appears on the screen
3. Click or to increase or
decrease the timeout setting.
The setting range is 10 mins to
60 mins
2. LE screen will display
the current setting 4. Click to confirm:
- isplay will blink if successful
- No blink if fail
actory Default Parameters
- Water level: 3
- Steamer timeout: 20 mins
- Safety device: Enabled.
- Unit of temperature: F
1. Press & Hold for 3 sec. The LE will display
Click until appears on the screen
2. Click to confirm:
- isplay will blink if successful
- No blink if fail
OPERATION & CARE

MASSAGE SYSTEM & CONTROLLER
1. Press Auto Button to start Auto mode.Within 10 seconds
from start-up there will be 2 options (relax/vigor) by pressing
the 'AUTO' button one more time.
2. Press any button (Rolling/Spot, Kneading,
Tapping,Combine) to enter Manual mode
3. Press Rolling/Spot to stop rolling up/down and stop at the
desired spot.
4. Press the Intensity button to select tapping intensity
5. A Warmer Button is an option. Pressing this button will
start the heated seat.
6. Vibrate Button is an option. Pressing this button will start
the vibration at your seat.
7. Press any chair button (Recline, Incline, Backward,
Forward, Up, own) to move the chair to desired positions.
19
OPERATION & CARE
Table of contents
Languages:
Other Lexor Pedicure Spa manuals