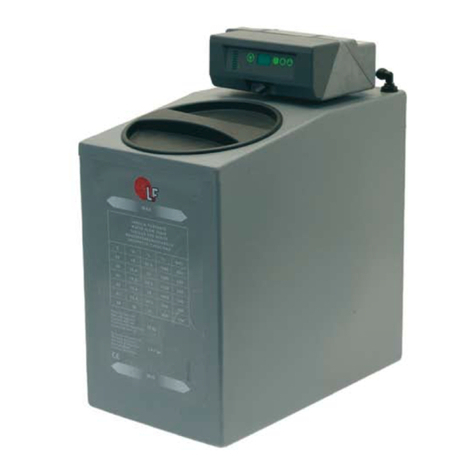
LF MATIC 5 Instructions for use

Istruzioni e Manutenzione ADDOLCITORE
Instructions and Maintenance WATER SOFTENER
Bedienungsanleitung und Einstellungen WASSERENTHÄRTER
Instrucciones y Mantenimiento DEPURADOR
Mode d’emploi et Entretien ADOUCISSEUR
MATIC
con testata cronometrica / with chronometric head /
mit chronometrischer Kopf / con cabezera cronométrica /
avec tête chronométrique
AUTOTROL 460TC

I dati indicati sono forniti dal costruttore e possono subire variazioni senza preavviso e/o conoscenza da parte di LF SpA.
La presente pubblicazione è di esclusiva proprietà LF SpA.
Pertanto, ne è vietata la riproduzione e divulgazione se non espressamente autorizzata da LF SpA.
The data herewith contained are edited by the manufacturer and may dier without notice and/or knowledge by LF SpA.
All rights reserved.
No part of this publication may be reproduced without written permission by LF SpA.
Die hiermit enthaltenen Daten werden vom Hersteller redigiert und können ohne Nachricht und/oder Wissen durch LF SpA sich
unterscheiden.
Alle Rechte vorbehalten. LF SpA, Nachdruck, auch auszugsweise verboten.
Los datos contenidos son proveídos por el fabricante y pueden diferenciar sin aviso y/o conocimiento de LF SpA.
Todos los derechos reservados.
Ninguna parte de esta publicación no se puede reproducir sin el permiso escrito de LF SpA.
Les données indiquées sont fournies par le fabricant et peuvent diérer sans notication et/ou connaissance de part de LF SpA.
Tous droits réservés.
Aucune partie de cette publication ne peut être reproduite sans permission écrite par LF SpA.

ISTRUZIONI D’USO
DESCRIZIONE TIMER A TEMPO AUTOTROL 460TC
L’impianto è dotato di una valvola con un timer, dove sono presenti tutti i comandi di funzionamento.
Comandi
g. 1
A - Led acceso indicatore di ora
pomeridiana
B - Display delle ore
C - Sportello di accesso
D - Linguetta in rilievo
E - Ponticello
F - Ponticello di riserva
G - Connettore presa trasformatore
H - Tasto impostazione orario
I - Spina di blocco del timer
L - Pomello indicatore
REGOLAZIONI
Inserire il trasformatore da parete in una presa elettrica funzionante non controllata da un interruttore.
Collegare il trasformatore all’apposito connettore sul pannello di controllo.
Aprire lo sportello di accesso spingendo la linguetta in rilievo sullo sportello verso sinistra, estraendo al
contempo la linguetta (gura 1).
Una volta impostata l’ora attuale il timer avvierà automaticamente la rigenerazione nei giorni selezionati alle
ore 2:00 del mattino.
Perché la rigenerazione avvenga in orari diversi da quelli prestabiliti, occorre anticipare/posticipare l’ora
mostrata sul display rispetto all’ora attuale.
Per calcolare la frequenza delle rigenerazioni fare riferimento alla tabella seguente tenendo conto della
durezza dell’acqua e del consumo giornaliero.
MODELLO L RESINA
CONTENUTI 30°F 40°F 50°F 60°F
MATIC 5 SERIE 4 L 666 500 400 330
MATIC 8 SERIE 6 L 1000 750 600 500
MATIC 12 SERIE 8 L 1350 1000 800 650
MATIC 16 SERIE 13 L 2150 1620 1300 1080
MATIC 20 SERIE 15 L 2500 1870 1500 1250
Addolcitore MATIC con testata cronometrica AUTOTROL 460TC
1
ITALIANO

Impostazione dell’ora
Con il ponticello sul set di pin accanto alla parola TIME (gura 2), impostare l’ora del giorno sul valore più
prossimo premendo il tasto nero TIME SET. Le ore pomeridiane sono indicate da una spia accanto alle lettere
PM nella nestra del display.
NOTA: Per spostare il ponticello si consiglia di utilizzare una pinzetta.
NOTA: L’unità è preimpostata per eettuare la rigenerazione alle ore 2:00 (antimeridiane).
Se si desidera rigenerare a un orario dierente, impostare l’ora corrente di conseguenza
(ad esempio, anché l’unità rigeneri alle 4.00 - due ore dopo - impostare l’orologio due ore in
anticipo rispetto all’eettiva ora del giorno).
NOTA: Il pin di blocco del timer deve sempre essere in posizione orizzontale (gura 1) durante il
funzionamento.
Impostazione dei giorni
Spostare il ponticello per impostare i pin accanto alla parola DAYS (gura 3).
Premere il tasto nero TIME SET nché sul display non compare il numero di giorni che si desidera impostare
tra le rigenerazioni. L’intervallo previsto è da 1 a 30 giorni.
Impostazione dell’orologio
Spostare il ponticello per impostare i pin accanto alla parola CLOCK (gura 4). Premere il tasto nero TIME SET
nché sul display non compare l’impostazione dell’orologio desiderata. L’intervallo selezionabile per l’orologio
è 0-1. Selezionare 0 per l’orologio standard AM/PM (le ore pomeridiane sono indicate da una spia accanto alle
lettere PM nella nestra del display) oppure 1 per l’orologio a 24 ore.
Rispostare il ponticello sul set superiore di pin accanto alla parola TIME e riposizionare lo sportello di accesso.
Lasciare il ponticello SEMPRE sulla coppia di pin superiore accanto alla parola TIME. Altrimenti, il display
dell’unità potrebbe apparire vuoto.
NOTA: Sul set di pin inferiore è presente un ponticello di riserva.
TIME
DAYS
CL
OCK
A
B
SPARE
TIME
DAYS
CLOCK
A
B
SPARE
TIME
DAYS
CLOCK
A
B
SPARE
g. 2
g. 3
g. 4
Conservazione della memoria
In caso di interruzione di corrente, tutti i dati nella memoria del microprocessore sono conservati in uno speciale
chip elettronico chiamato NOVRAM (Memoria ad accesso casuale non volatile). Tali dati comprendono l’ora
di rigenerazione, frequenza delle rigenerazioni e impostazione AM-PM o 24 ore. La NOVRAM conserva i dati
nella sua memoria. Al ripristino dell’alimentazione di corrente, la NOVRAM riporta i dati al microprocessore e il
funzionamento riprende come se l’interruzione non si fosse mai vericata.
L’ora del giorno sarà posticipata in base alla durata dell’interruzione di corrente.
La maggior parte delle interruzioni di corrente dura meno di un minuto. Pertanto, potrebbero passare mesi o
anni prima che sia necessario reimpostare il display dell’ora. Se l’interruzione di corrente si protrae per oltre
un’ora, si consiglia di reimpostare l’orario.
Non è necessaria alcuna altra programmazione.
Addolcitore MATIC con testata cronometrica AUTOTROL 460TC
2

INSTALLAZIONE
A - Uscita / B - Scarico / C - Entrata / D - Troppo pieno
ATTENZIONE
Non collegare insieme lo scarico e il troppo pieno (B e D) in quanto
potrebbe esserci un ritorno in vasca dell’acqua.
Quindi utilizzare due gomme di scarico distinte.
MESSA IN FUNZIONE
Per un utilizzo in sicurezza dell’impianto è indispensabile seguire accuratamente le indicazioni dei paragra
seguenti, nonché ricontrollare i dispositivi di protezione e di sicurezza prima di ogni nuova
utilizzazione.
Per la messa in funzione dell’impianto, vericare che:
• connessioni idrauliche siano a norma;
• connessioni elettriche siano a norma.
AVVIO IMPIANTO
Terminata l’installazione idraulica ed elettrica dell’addolcitore, si può procedere alla messa in servizio.
Seguendo la procedura qui indicata, rimuovere il coperchio della valvola tirando leggermente verso l’esterno
i due lembi esterni della valvola (g. A).
Le operazioni seguenti richiedono in diversi passi la rotazione in senso antiorario del tasto nero del timer in
diverse posizioni. Tale tasto va prima sempre spinto in fondo con un cacciavite a lama larga nell’apposita
fessura e, tenuto sempre spinto, ruotare in senso antiorario aiutando con la mano l’albero a camme per
facilitarne la rotazione (g. B).
g. A g. B
• Posizionare l’indice del TASTO NERO in posizione BACKWASH .
• Aprire la valvola d’ingresso dell’acqua lentamente e parzialmente per riempire la colonna delle resine.
Quando tutta l’aria sarà uscita dallo scarico, aprire completamente l’ingresso dell’acqua.
• Lasciare scorrere n che l’acqua non apparirà limpida; quindi chiudere la valvola d’ingresso dell’acqua e
attendere 2 minuti anché tutta l’aria intrappolata nelle resine possa uscire.
• Versare nel contenitore salamoia circa 10 L d’acqua ed il sale secondo la portata del contenitore.
Non è strettamente necessario riempirlo sempre, l’importante è garantire comunque una discreta
quantità di sale alle rigenerazioni.
• Posizionare l’indice del tasto nero su FAST RINSE REFILL , riaprire lentamente la valvola di ingresso
dell’acqua e lasciare che il TASTO NERO arrivi in posizione di CONDITIONED WATER automaticamente.
• Vericare che una volta terminate le operazioni di avvio non ci siano perdite allo scarico oppure al
tubino essibile.
Addolcitore MATIC con testata cronometrica AUTOTROL 460TC
3
ITALIANO

TEMPI DI RIGENERAZIONE PER SINGOLE FASI
VERSIONE Fase 1
CONTROCORRENTE
Fase 2-3
INIEZIONE SALE
E RISCIACQUO
Fase 4-5
RIEMPIMENTO VASCA
SALE E LAVAGGIO
ESERCIZIO
Timer 59 min 7 minuti 26 minuti 8 minuti –
ARRESTO
L’impianto può essere arrestato nel modo seguente:
TEMPORANEO
• Staccare la presa di corrente e chiudere i rubinetti dell’acqua.
• Staccare i tubi di allacciamento.
• Svuotare il serbatoio salamoia e lavarlo internamente.
• Pulire l’addolcitore e riporlo in ambiente asciutto al riparo da intemperie e di esclusivo accesso
(evitare di lasciarlo alla portata di minori o di persone incapaci).
DEFINITIVO
Oltre alle operazioni di messa fuori servizio temporanea procedere a:
• imballare la macchina con cartone, polistirolo o altro e consegnarla al personale preposto
(smaltimento riuti autorizzato o ritiro usato).
ATTENZIONE
Evitare la penetrazione di acqua in parti dell’impianto durante i periodi di inutilizzo per evitare pericoli
di corto circuito o malfunzionamenti.
In caso di emergenza/pericolo l’impianto può essere arrestato:
1 - scollegando l’alimentatore di corrente;
2 - chiudendo le valvole d’ingresso/uscita acqua.
In questo modo si ottiene l’arresto immediato dell’impianto.
RIAVVIO DOPO LUNGA INATTIVITÀ
• Far sempre vericare da un tecnico qualicato e specializzato che l’impianto abbia mantenuto l’originario
grado di protezione degli apparati elettrici.
• Dare tensione alla macchina collegando l’alimentatore e vericare il funzionamento del timer.
• Aprire lentamente la valvola d’ingresso dell’acqua quindi avviare una rigenerazione forzata.
• Immettere nell’apposito contenitore sale, 10 L di acqua tiepida e 50 ml di Amuchina.
• Attendere la ne della rigenerazione (comunque non prima di un’ora e mezzo), quindi aprire la valvola di
uscita dell’acqua e chiudere quella di by-pass.
_________________________________________________________________________________________
Addolcitore MATIC con testata cronometrica AUTOTROL 460TC
4

MANUTENZIONE
AVVERTENZE GENERALI
Questo capitolo contiene l’elenco completo dei requisiti e delle procedure relative alla manutenzione da
eettuare.
Una buona manutenzione prevede sia interventi di tipo ordinario, attraverso controlli e veriche condotte
direttamente dall’operatore e/o da personale addestrato alla normale manutenzione, e sia di tipo periodico
che includono le operazioni di pulizia, sostituzione, svolte da personale istruito allo scopo.
Nell’eettuare i lavori di pulizia, manutenzione o riparazione prestare attenzione a non disperdere nell’ambiente
i prodotti utilizzati per le operazioni di pulizia, manutenzione e riparazione, alla ne dei lavori, ripristinare e
ssare correttamente tutte le protezioni e i ripari rimossi o aperti.
AVVERTENZA
Non eseguire nessun intervento, modica o riparazione di qualsiasi genere, all’infuori di quelle indicate
in questo manuale. Solamente il personale tecnico addestrato o autorizzato dal costruttore possiede
la necessaria conoscenza dell’impianto e l’esperienza per eseguire con la tecnica opportuna qualsiasi
intervento.
AVVERTENZA
Tutti i manutentori devono agire nel pieno rispetto delle norme antinfortunistiche e dovranno indossare
guanti e scarpe protettive per spostare o rimuovere oggetti che possono provocare lesioni.
ATTENZIONE
Tutte le operazioni di manutenzione devono essere eseguite con l’impianto in stato di arresto sicuro e
scollegato dalle fonti di energia e alimentazione.
MANUTENZIONE
Si raccomanda di riparare immediatamente eventuali rotture o danneggiamenti agli involucri e alle
apparecchiature elettriche.
INTERVENTI PRIMA DELL’AVVIAMENTO:
• verica visiva generale (evidenti deformazioni o rotture di struttura, protezioni ecc.);
• controllo delle condizioni del cavo elettrico d’alimentazione.
L’addolcitore non richiede alcun tipo di manutenzione ordinaria ma solo il controllo e ripristino del sale
consumato e che l’ora corrisponda a quella impostata.
E’ importante controllare periodicamente l’addolcitore al ne di salvaguardare l’ecienza degli apparecchi
connessi.
Tale assistenza consiste nel controllare la durezza dell’acqua e le portate in entrata e uscita, il corretto
svolgimento delle fasi di lavoro nonché le condizioni delle resine ed eventualmente sostituirle.
PERICOLO
Non eseguire mai le operazioni sopra indicate con le mani umide o bagnate.
Addolcitore MATIC con testata cronometrica AUTOTROL 460TC
5
ITALIANO

VERIFICHE PERIODICHE
DOPO I PRIMI 6-12 MESI, successivamente OGNI 6-12 MESI.
Si raccomanda la pulizia del contenitore del sale eseguendo le seguenti operazioni:
• rimuovere il sale rimasto sul fondo;
• pulire le pareti del contenitore da eventuali depositi fangosi o melmosi e di sale secco;
• lavare diverse volte con acqua corrente servendosi di un disinfettante tipo Amuchina ed una spugna;
• risciacquare nuovamente, aggiungere acqua quanto ve ne era prima e inne aggiungere sale.
Si raccomanda la pulizia periodica della cartuccia lavabile del preltro rimuovendo le impurità depositate nel
fondo e sulla parete della cartuccia stessa. È suciente lavare con acqua corrente.
_________________________________________________________________________________________
RICERCA GUASTI
Inconvenienti cause e rimedi
PROBLEMI CAUSE RIMEDI
La rigenerazione avviene ad
un’ora sbagliata Orologio mal regolato Programmare orologio
Programmatore si ferma nel
ciclo di rigenerazione
Motore bruciato Sostituire motore
Mancanza di corrente Vericare presa di corrente
Voltaggio o frequenza non corretti Vericare tensione e frequenza corretti
Blocco albero a camme Rimuovere corpi estranei da valvola
o albero a camme
Pressione alimento eccessiva Installare regolatore pressione
Il programmatore non
rigenera automaticamente
o quando il pulsante di avvio
rigenerazione viene premuto
Alimentazione elettrica scollegata Collegare alimentazione elettrica
Motore difettoso o bruciato Sostituire motore
Alimentatore bruciato Sostituire alimentatore
Timer in difetto o bruciato Sostituire timer
Il programmatore non
rigenera automaticamente
ma solo mediante il pulsante
di avvio rigenerazione
Troppi giorni tra una rigenerazione
programmata e l’altra Ridurre i giorni tra le rigenerazioni
Motore bruciato Sostituire motore
Ingranaggio interno rotto Sostituire ingranaggio
Addolcitore MATIC con testata cronometrica AUTOTROL 460TC
6

PROBLEMI CAUSE RIMEDI
Mancanza di acqua addolcita
fra due rigenerazioni
Rigenerazione non corretta
Ripetere la rigenerazione vericando
che venga utilizzata la giusta quantità
di sale
Resine inquinate Lavare o sostituire le resine
Errata programmazione quantità di sale Vericare e riprogrammare
Vite miscelatrice troppo avvitata Svitare la vite completamente
e provare la durezza dell’acqua
By-pass aperto Chiudere by-pass
Scarico ostruito Liberare lo scarico
Mancata aspirazione salamoia
Pressione di alimento insuciente Assicurare almeno 1,4 bar
Tubazione di scarico ostruita Assicurare lo scarico libero
Iniettore ostruito Pulire iniettore
Iniettore difettoso Sostituire
Valvola n°2 bloccata in posizione aperta Eliminare le cause del blocco
Tenuta non stagna della serie valvole Sostituire tutta la serie valvole
Il tino salamoia si riempie troppo
La valvola n°1 resta aperta
Azionare manualmente la valvola
stessa per rimuovere l’impurità
che lo blocca
Velocità di riempimento non controllata Smontare e pulire il regolatore salamoia
La valvola n°2 non resta chiusa
durante l’aspirazione salamoia
Azionarla manualmente per
rimuovere l’impurità che la blocca
e rinforzarla con una 2° molla
Aspirazione d’aria nel tubo di
collegamento al tino salamoia Verica dei raccordi e del tubo
Il tubo aspirazione salamoia non
pesca in fondo all’addolcitore
Riposizionare la parte nale
inferiore del tubo azzurro col ltro
in fondo all’addolcitore
Iniettore ostruito o difettoso Pulire o sostituire iniettore
L’addolcitore consuma più o meno
sale rispetto a quanto previsto
Errore di regolazione del regolatore
salamoia Rifare regolazione salamoia
Aspirazione salamoia intermittente
o irregolare
Pressione di alimento insuciente Assicurare almeno 1,4 bar
Iniettore difettoso Sostituire iniettore
Addolcitore MATIC con testata cronometrica AUTOTROL 460TC
7
ITALIANO

PROBLEMI CAUSE RIMEDI
Dopo la rigenerazione l’acqua
non è addolcita
L’addolcitore non ha rigenerato Rifare la rigenerazione identicando
la causa (vedi punti precedenti)
Mancanza di sale nel tino Rabboccare sale nel tino
La valvola 4 è tenuta troppo aperta
dalla vite miscelatrice troppo avvitata
Vericare e regolare svitando la vite
miscelatrice
Valvola di by-pass aperta Chiudere la valvola di by-pass
Portata di controlavaggio eccessiva
o insuciente
Il regolatore è del tipo sbagliato Sostituire correttamente
Il regolatore è ostruito Smontare e pulire
Fuoriesce acqua allo scarico
o nel tino salamoia dopo la
rigenerazione
Le valvole 5 e 6 restano aperte nel
caso fuoriesca acqua dallo scarico
Azionarle manualmente per rimuovere
le impurità che le bloccano
La valvola 1 resta aperta nel caso
fuoriesca l’acqua dal contenitore sale
Azionarla manualmente per rimuovere
le impurità che la blocca
Tralamento di acqua dura con
l’addolcitore in servizio
Cattiva rigenerazione Rifare la rigenerazione
O–ring 44F danneggiato Sostituire
By-pass aperto o vite miscelatrice
mal regolata
Chiudere il by-pass o regolare vite
miscelatrice
_________________________________________________________________________________________
Addolcitore MATIC con testata cronometrica AUTOTROL 460TC
8

INSTRUCTIONS FOR USE
DESCRIPTION OF AUTOTROL 460TC TIMER
The system has a valve with a timer where all operation controls are located.
Controls
Fig. 1
A - Led light on indicator of PM day time
B - Hour Time Display
C - Access Door
D - Raised Tab
E - Jumper
F - Spare Jumper
G - Transformer Plug Receptacle
H - Time Set Button
I - Timer locking pin
L - Indicator Knob
SETTINGS
Plug the wall-mount transformer into a functioning electrical outlet that is not controlled by a switch.
Plug the transformer into the transformer plug receptacle on the control.
Open the access door by pushing the raised tab on the door toward the left while pulling the tab out
(Figure 1).
Once the current time has been set, the timer will automatically start regeneration on the selected days at 2
am. In order to perform regeneration at dierent times from the settings, it is necessary to advance/forward
the displayed hour from the current time.
If you want to calculate regeneration frequency, see the following chart, taking into account water hardness
and daily consumption.
MODEL L RESIN
CONTAINED 30°F 40°F 50°F 60°F
MATIC 5 SERIES 4 L 666 500 400 330
MATIC 8 SERIES 6 L 1000 750 600 500
MATIC 12 SERIES 8 L 1350 1000 800 650
MATIC 16 SERIES 13 L 2150 1620 1300 1080
MATIC 20 SERIES 15 L 2500 1870 1500 1250
Water softener MATIC with AUTOTROL chronometric head 460TC
9
ENGLISH

Time of Day Setting
With the jumper on the set of pins next to the word TIME (Figure 2), set the time of day to the closest hour by
pressing the black TIME SET button. PM hours are indicated by a light next to the letters PM on the display
window.
NOTE: The use of a small needle-nose pliers will aid in moving the jumper.
NOTE: The unit is factory set to regenerate at 2:00 a.m. If you prefer to have the unit regenerate at an earlier
or later time, simply set the current time of day accordingly (e.g., to have the unit regenerate at 4:00
a.m.—two hours later—set the clock two hours earlier than the actual time of day).
NOTE: The Timer Locking Pin should always be horizontal (Figure 1) during operation.
Days Setting
Move the jumper to the set of pins next to the word DAYS (Figure 3).
Press the black TIME SET button until the desired number of days between regeneration is displayed.
The range is from 1 to 30 days.
Clock Setting
Move the jumper to the set of pins next to the word CLOCK (Figure 4). Press the black TIME SET button
until the desired clock setting is displayed. The clock range is 0 to 1. Select 0 for the standard AM/PM clock
(postmeridian hours are indicated by a light next to the letters PM inside the display window) or select 1 for
a 24 hour clock.
Return the jumper to the top set of pins next to the word TIME and replace the access door. The jumper must
NOT be left on any pins other than the top pair next to the word TIME. Otherwise, the unit may show a blank
display.
NOTE: A spare jumper is located on the bottom set of pins.
TIME
DAYS
CL
OCK
A
B
SPARE
TIME
DAYS
CLOCK
A
B
SPARE
TIME
DAYS
CLOCK
A
B
SPARE
Fig. 2
Fig. 3
Fig. 4
Memory Retention
During a power outage, all of the data in the microprocessor’s memory is stored in a special electronic chip
called NOVRAM, Nonvolatile Random Access Memory. Such details include regeneration time, regeneration
frequency and the AM-PM o 24 hour setting. The NOVRAM will maintain the data in its memory. When power
is restored, the NOVRAM returns the data to the microprocessor and operation resumes as if an outage never
occurred.
The time of day will be late by the length of the power outage.
Most power outages are less than one minute in duration. Therefore, it may be months or years before the
time display would require resetting. If an outage of one or more hours occurs, the time of day should be reset.
No other reprogramming is necessary.
Water softener MATIC with AUTOTROL chronometric head 460TC
10

INSTALLATION
A - Outlet / B - Drain / C - Inlet / D - Overow hose
WARNING
Do not connect together the drain and the overow hose (B e D),
because there could be a backow of water into the tank.
It is necessary to use two separate drain hoses.
COMMISSIONING
In order to use the system in a safe way, it is fundamentally important to follow the indications of the next
paragraphs, as well as checking the protection and safety devices before each use.
In order to start operating the system, make sure that:
• water connections are compliant with the standards;
• electrical connections are compliant with the standards.
STARTING OPERATION
Once hydraulic and electrical installation of the softener have been completed, the system can be started.
Remove the cap of the valve by slightly pulling the two external aps of the valve towards
the outsid (pict. A).
In order to perform the following operations, you need to rotate the timer’s black button anticlockwise in
various positions. First, this button will have to be pushed to the end with a wide-blade screw inside the
related slot and then, always keeping it pushed, turn anticlockwise helping the camshaft by hand in order to
facilitate rotation (pict. B).
pict. A pict. B
• Place the reference of the BLACK BUTTON in BACKWASH position.
• Slowly and partially open the water inlet valve in order to ll the resin column.
Once all the air has been discharged, open the air inlet completely.
• Let it run until the water looks clear; then close the water inlet valve and wait for 2 minutes so that all the
air trapped in the resin can go out.
• Pour around 10 l of water and salt into the brine container according to the container capacity.
It is not strictly necessary to ll it all the time; the most important thing is to make sure there is enough
salt for regenerations.
• Position the reference of the black button on FAST RINSE REFILL ; slowly open the water inlet and
let the BLACK BUTTON go to CONDITIONED WATER position automatically.
• Check that, once the starting operations are completed, there is no leakage in the drain or exible pipe.
Water softener MATIC with AUTOTROL chronometric head 460TC
11
ENGLISH

REGENERATION TIME FOR EACH PHASE
VERSION Step 1
COUNTER-WASHING
Step 2-3
SALT INJECTION
AND RINSE
Step 4-5
SALT TANK FILLING
AND WASHING
OPERATION
Timer 59 min 7 minutes 26 minutes 8 minutes –
STOP
The system can be stopped as follows:
TEMPORARY STOP
• Unplug the power and close the water taps.
• Disconnect the connection pipes.
• Empty the brine tank and wash it inside.
• Clean the softener and place it in a dry place, protected from the elements and with restricted
access (keep it out of children’s reach or mentally ill people).
PERMANENT STOP
Repeat the same operations as for temporary stop, then proceed to:
• wrap the machine with cardboard, polystyrene or other materials and deliver it to the sta in charge
(authorized waste disposal or second-hand collection).
WARNING
Make sure water does not get inside the system during out-of-service periods in order to avoid short-
circuits or malfunctioning.
In case of emergency/danger, the system can be stopped as follows:
1 - disconnecting power supply;
2 - closing water input/output valves.
In this way you can immediately stop the system.
RESTART AFTER A LONG PERIOD OF INACTIVITY
• Always ask a skilled and qualied technician to ensure that the system has kept well-protected electrical
equipment.
• Supply voltage to the machine connecting it to the power supply and check the timer.
• Slowly open the water input valve and start a forced regeneration.
• Introduce salt into the related container, 10 l of mild water and 50 ml common water disinfectant.
• Wait till the end of regeneration (however not before an hour and a half has passed), then open the water
output valve and close the by-pass valve.
_________________________________________________________________________________________
Water softener MATIC with AUTOTROL chronometric head 460TC
12

MAINTENANCE
GENERAL WARNINGS
This chapter contains the complete list of requirements and of procedures referring to maintenance.
A good maintenance requires ordinary checks and inspections, performed directly by the operator and/or by
skilled sta, and periodic checks, including cleaning operations and replacement,
performed by skilled sta.
During cleaning, maintenance or repair operations, be careful not to disperse the products used in
the environment. After all maintenance operations restore and correctly fasten all protection removed
or opened.
IMPORTANT
Do not perform any operation, change or repair except those indicated by this manual.
Only skilled technical sta or sta authorized by the manufacturer have the necessary
know-how of the system and the experience to correctly perform any operation.
IMPORTANT
All maintenance sta must comply with safety regulations and must wear protection gloves
and shoes to move or remove objects that could be harmful.
WARNING
All maintenance operations must be performed with the system in the” safety stop” condition and
disconnected from all power and supply sources.
MAINTENANCE
Immediately repair possible failures or damages to covers and electric appliances.
OPERATIONS BEFORE COMMISSIONING:
• General visual inspection (evident warps or damages of structure, protections, etc.);
• Check of the conditions of the power supply cable.
The softener does not require any kind of ordinary maintenance but the check and rell of salt.
The hour set must correspond to current time. It is important to check the softener periodically to safeguard
the eciency of connected devices. These operations include checking water hardness and input and output
capacity, the right execution of the dierent stages and the conditions of resins to replace them if necessary.
DANGER
Never perform the operations above with wet or damp hands.
Water softener MATIC with AUTOTROL chronometric head 460TC
13
ENGLISH

PERIODIC CHECKS
AFTER THE FIRST 6-12 MONTHS, and then EVERY 6-12 MONTHS:
Clean the salt container following the procedure hereunder:
• Remove the remaining salt from the bottom;
• Clean all the walls of the container from muddy, oozy or dry salt deposits;
• Rinse several times with running water using a disinfectant and a sponge;
• Rinse again, add the same quantity of water and then add the salt.
Periodically clean the washable cartridge of the pre-lter by removing all impurities from the bottom and from
the surface of the cartridge. It is sucient to use running water.
_________________________________________________________________________________________
TROUBLE SHOOTING
Problems, causes and solutions
PROBLEMS CAUSES SOLUTIONS
Regeneration starts at a wrong time Timer set up incorrectly Set up the timer
The programmer stops during the
regeneration cycle
Burnt out engine Replace
Power supply failure Check connection
Incorrect voltage or frequency Check the right voltage or frequency
The camshaft is blocked Remove damaging bodies from the
valve or from the camshaft
Excessive supply pressure Install a pressure regulator
The programmer does not regenerate
automatically or when the start up
button is pushed
Power supply disconnected Connect
Damaged or burnt out engine Replace engine
Burnt out feeder Replace feeder
Damaged or burnt out timer Replace timer
The programmer does not regenerate
automatically but only by pushing the
start up button
Too many days between scheduled
regenerations
Reduce amount of days between
regenerations
Burnt motor Replace motor
Internal gear broken Replace gear
Water softener MATIC with AUTOTROL chronometric head 460TC
14

PROBLEMS CAUSES SOLUTIONS
Lack of softened water between two
regenerations
Incorrect regeneration
Repeat the regeneration cycle
checking that the correct amount of
salt is provided
Polluted resins Wash or replace resins
Wrong set-up of the quantity of salt Check and set up again
Mixing screw too tightly fastened Unfasten and check hardness
External by-pass open Close by-pass
Obstructed output Clean output
Failure in brine suction
Insucient input pressure Set at least 1.4 bar
Output pipe blocked Remove obstruction
Obstructed injector Clean injector
Damaged injector Replace
Valve 2 blocked in the open position Remove the cause of the block
Valve line not sealed Replace the whole valve line
An excessive quantity of brine is fed
into the tub
Valve 1 remains open Manually activate the valve to remove
the cause of the block
The input speed has not been checked Remove and clean the adjuster
Valve 2 does not remain closed during
suction
Manually activate the valve to remove
the cause of the block
Air suction in the connection pipe to
the tub
Check the tightness of brine connector
and pipes
The brine suction pipe does not draw
from the bottom of the softener
Reposition the lower end of the blue
pipe with the lter at the bottom of the
softener
Obstructed or damaged injector Clean or replace injector
Salt consumption not corresponding to
what is expected Wrong adjustment of brine adjuster Set up brine again
Intermittent or irregular brine suction
Insucient input pressure Set at least 1.4 bar
Damaged injector Replace injector
Water softener MATIC with AUTOTROL chronometric head 460TC
15
ENGLISH

PROBLEMS CAUSES SOLUTIONS
After regeneration water has not been
softened
The softener did not regenerate Repeat regeneration
Salt shortage in the tub Rell the salt in the tub
Valve 4 is kept too open by the mixing
screw which is too tight Check and adjust the mixing screw
By-pass valve open Close the by-pass valve
Excessive or insucient capacity of the
counter-washing
Wrong type of adjuster Replace
The adjuster is obstructed Remove and clean
After regeneration, water comes out
into the output pipe or the brine tub
Valves 5 and 6 remain open if water comes
out from the output pipe
Activate them manually to remove
impurities
Valve 1 remains open if water comes
out from the salt container Activate it manually to remove impurities
Hard operation water seeping
Wrong regeneration Repeat regeneration
O-ring 44F damaged Replace
External by-pass, if present, open or
mixing screw adjusted incorrectly
Close the by-pass or adjust the mixing
screw
_________________________________________________________________________________________
Water softener MATIC with AUTOTROL chronometric head 460TC
16

BEDIENUNGSANLEITUNG
BESCHREIBUNG DER ZEITGESTEUERTEN ZEITSCHALTUHR
AUTOTROL 460TC
Die Anlage verfügt über ein mit einer Zeitschaltuhr ausgestattetes Ventil, wo Sie alle Bedienelemente nden
können.
Bedienelemente
Abb. 1
A - Led auf - Nachmittagsstundenanzeige
B - Stundenanzeige
C - Abdeckung
D - Vorstehende Lasche
E - Jumper
F - Ersatzjumper
G - Eingangsbuchse für Netzteil
H - Taste für die Uhrzeiteinstellung
I - Verriegelungsstift für die Zeitschaltuhr
L - Drehknopf
EINSTELLUNGEN
Stecken Sie das Wandnetzteil in eine funktionierende Steckdose ohne Schalter. Verbinden Sie das Netzteil mit
der Eingangsbuchse an der Steuerung.
Önen Sie die Abdeckung, indem Sie die vorstehende Lasche an der Abdeckung nach links drücken und die
Abdeckung herausziehen (Abbildung 1).
Nachdem die aktuelle Uhrzeit eingestellt worden ist, wird die Regeneration automatisch an den programmierten
Tagen um 2 Uhr morgens erfolgen.
Damit die Regeneration an anderen Uhrzeiten erfolgt, ist es erforderlich die angezeigte Uhrzeit im Vergleich
zur aktuellen Uhrzeit zu verändern. Um den Regenerationsintervall zu rechnen, beachten Sie die folgende
Tabelle, unter Berücksichtigung der Wasserhärte und des Tagesverbrauchs.
MODELL L BEHALTENES
HARZ 30°F 40°F 50°F 60°F
MATIC 5 SERIE 4 L 666 500 400 330
MATIC 8 SERIE 6 L 1000 750 600 500
MATIC 12 SERIE 8 L 1350 1000 800 650
MATIC 16 SERIE 13 L 2150 1620 1300 1080
MATIC 20 SERIE 15 L 2500 1870 1500 1250
Wasserenthärter MATIC mit chronometrischer Kopf AUTOTROL 460TC
17
DEUTSCH

Einstellen der Uhrzeit
Stellen Sie, mit dem Jumper auf den Pins neben dem Wort TIME (Abbildung 2), die Uhrzeit auf die nächste
volle Stunde ein, indem Sie die schwarze Taste TIME SET drücken. Das 12-Stunden-Zeitformat wird im Display-
Fenster durch ein Lämpchen neben den Buchstaben PM angezeigt.
HINWEIS: Eine Spitzzange erleichtert das Versetzen des Jumpers.
HINWEIS: Der Regenerationszeitpunkt ist werkseitig auf 02:00 Uhr eingestellt. Wenn die Regeneration zu
einem früheren oder späteren Zeitpunkt erfolgen soll, müssen Sie einfach die aktuelle Uhrzeit
entsprechend verstellen (wenn die Regeneration z.B. um 04:00 Uhr — zwei Stunden später —
stattnden soll, müssen Sie die Uhr im Vergleich zur tatsächlichen Tageszeit um zwei Stunden
zurückstellen).
HINWEIS: Der Verriegelungsstift für die Zeitschaltuhr muss während des Betriebs immer waagerecht sein
(Abbildung 1).
Einstellen der Tage
Setzen Sie den Jumper auf die Pins neben dem Wort DAYS (Abbildung 3). Drücken Sie die schwarze Taste
TIME SET, bis die gewünschte Anzahl der Tage zwischen den Regenerationen angezeigt wird.
Sie können zwischen 1 und 30 Tage einstellen.
Einstellen der Uhr
Setzen Sie den Jumper auf die Pins neben dem Wort CLOCK (Abbildung 4). Drücken Sie die schwarze Taste
TIME SET, bis die gewünschte Zeiteinstellung angezeigt wird. Sie können zwischen 0 und 1 wählen. Wählen
Sie 0 für das standardmäßig eingestellte 12-Stundenzeitformat (die Nachmittagstunden werden durch ein
Licht neben den Buchstaben PM im Anzeigefenster angegeben) oder 1 für das 24-Stunden-Zeitformat.
Setzen Sie den Jumper wieder auf die oberen Stifte neben dem Wort TIME und setzen Sie die Abdeckung
wieder ein. Der Jumper MUSS auf dem oberen Stiftepaar neben dem Wort TIME stehen.
Anderenfalls wird evtl. ein leeres Display angezeigt.
HINWEIS: Auf dem unteren Stiftesatz bendet sich ein Ersatz-Jumper.
TIME
DAYS
CL
OCK
A
B
SPARE
TIME
DAYS
CLOCK
A
B
SPARE
TIME
DAYS
CLOCK
A
B
SPARE
Abb. 2
Abb. 3
Abb. 4
Speichererhaltung
Bei einem Stromausfall werden alle Daten im Speicher des Mikroprozessors in einem speziellen elektronischen
Speicherbaustein, einem NOVRAM (nichtüchtiger Speicher mit wahlfreiem Zugri), gesichert. Zu diesen
Daten gehören die Regenerationszeit, die Häugkeit der Regenerationen und die AM-PM oder 24 Stunden
Einstellung. Das NOVRAM hält die Daten in seinem Speicher. Nach der Wiederherstellung der Stromversorgung
werden die Daten aus dem NOVRAM in den Mikroprozessor ausgelesen und der Betrieb wird wieder
aufgenommen, so als ob keine Störung aufgetreten wäre.
Die Uhr geht um die Dauer des Stromausfalls nach. Die meisten Stromausfälle dauern weniger als 1 Minute.
Daher kann es Monate oder Jahre dauern, bis die Zeitanzeige neu eingestellt werden muss.
Bei einem Stromausfall von einer oder mehreren Stunden muss die Uhrzeit allerdings wieder neu eingestellt
werden. Weitere Neuprogrammierungen sind nicht erforderlich.
Wasserenthärter MATIC mit chronometrischer Kopf AUTOTROL 460TC
18
This manual suits for next models
4
Table of contents
Languages:
Other LF Water Dispenser manuals
Popular Water Dispenser manuals by other brands

Whirlpool
Whirlpool HD1000XSW8 Installation Instructions and Use & Care Guide

Breville
Breville HotCup VKJ367 manual

Winterhalter
Winterhalter MonoMatik 3 operating instructions

Crystal Mountain
Crystal Mountain Storm Service manual

BWT
BWT Infinity A Installation and operating manual

Elkay
Elkay EFA4 1G Series Installation, care & use manual

Elkay
Elkay EFA8 2J Series Installation, care & use manual

Zip
Zip 801912UK user manual

Lancaster
Lancaster 7-TFC-50 Installation, operating and service manual

Hankscraft Runxin
Hankscraft Runxin 47010 manual

IBC Water
IBC Water AS0922TC-CL Installation & operating instructions

Glacial
Glacial 8LDIECH-SC-WFC-SSF user manual