F 910 0
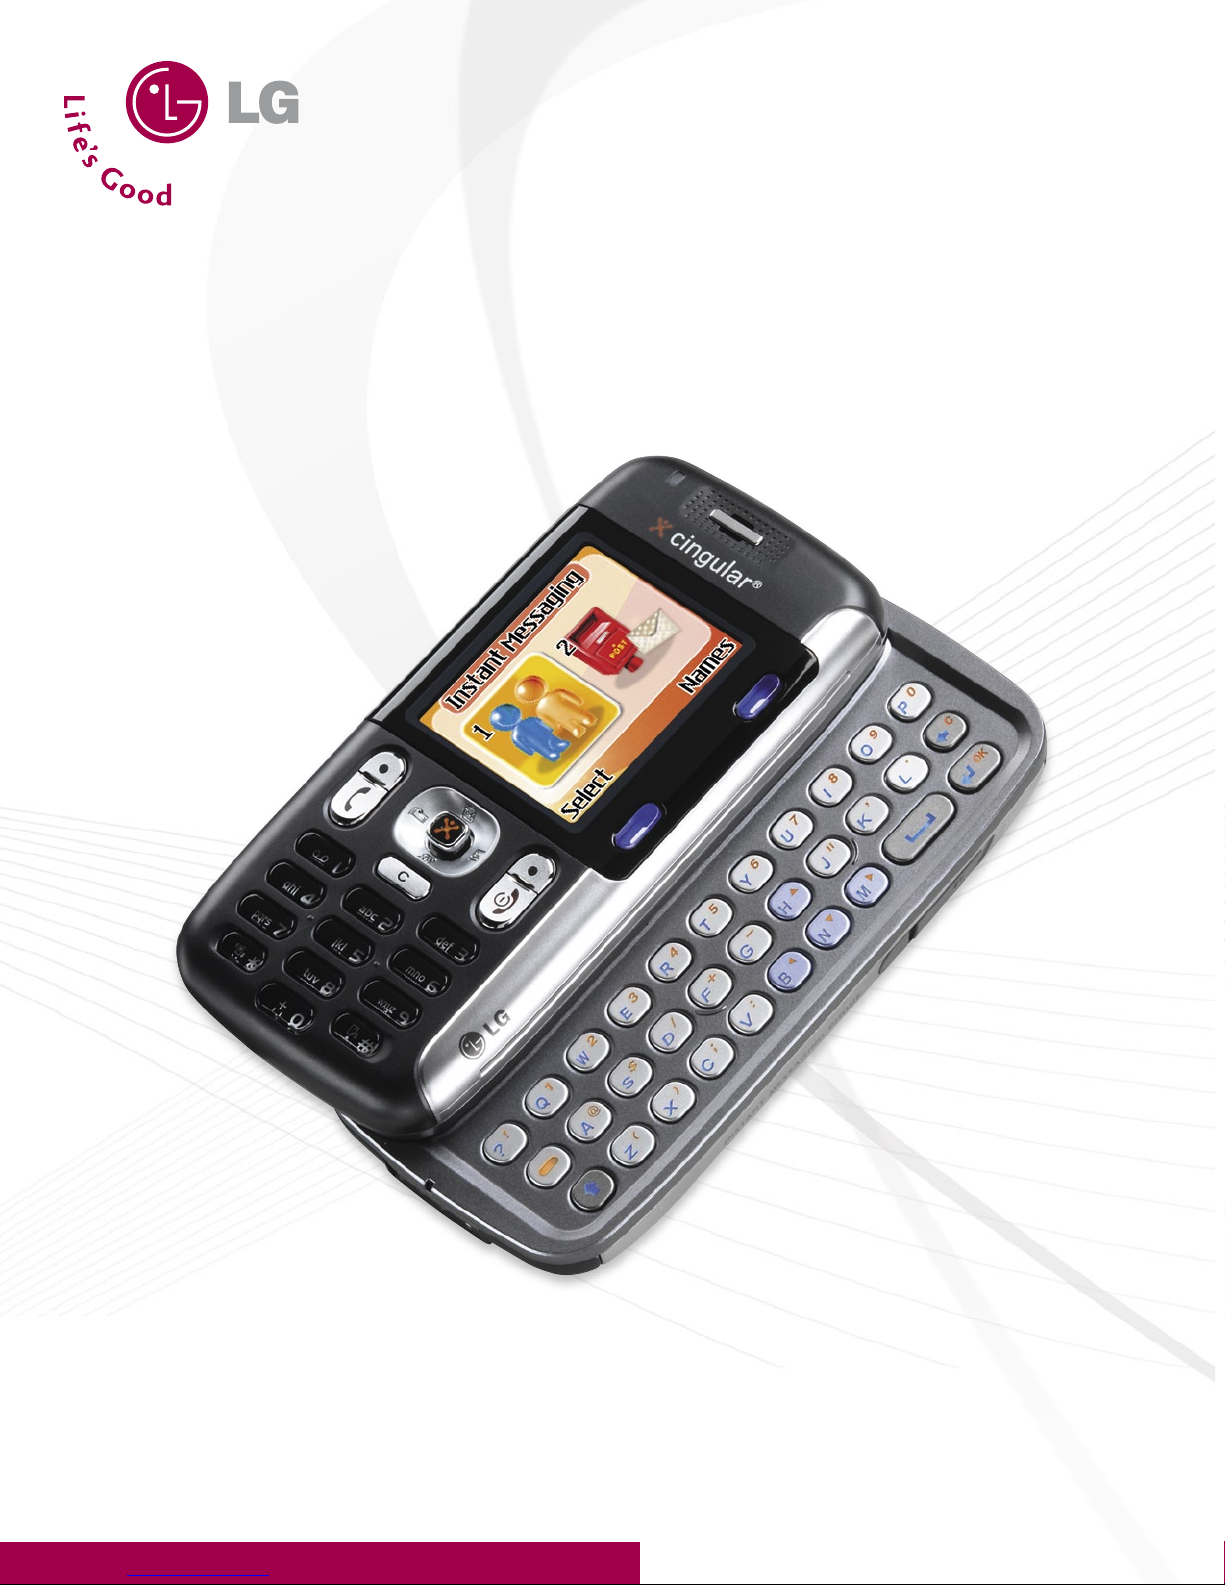
CAMERA FEATURES
4
4
4
CONNECTIVITY FEATURES
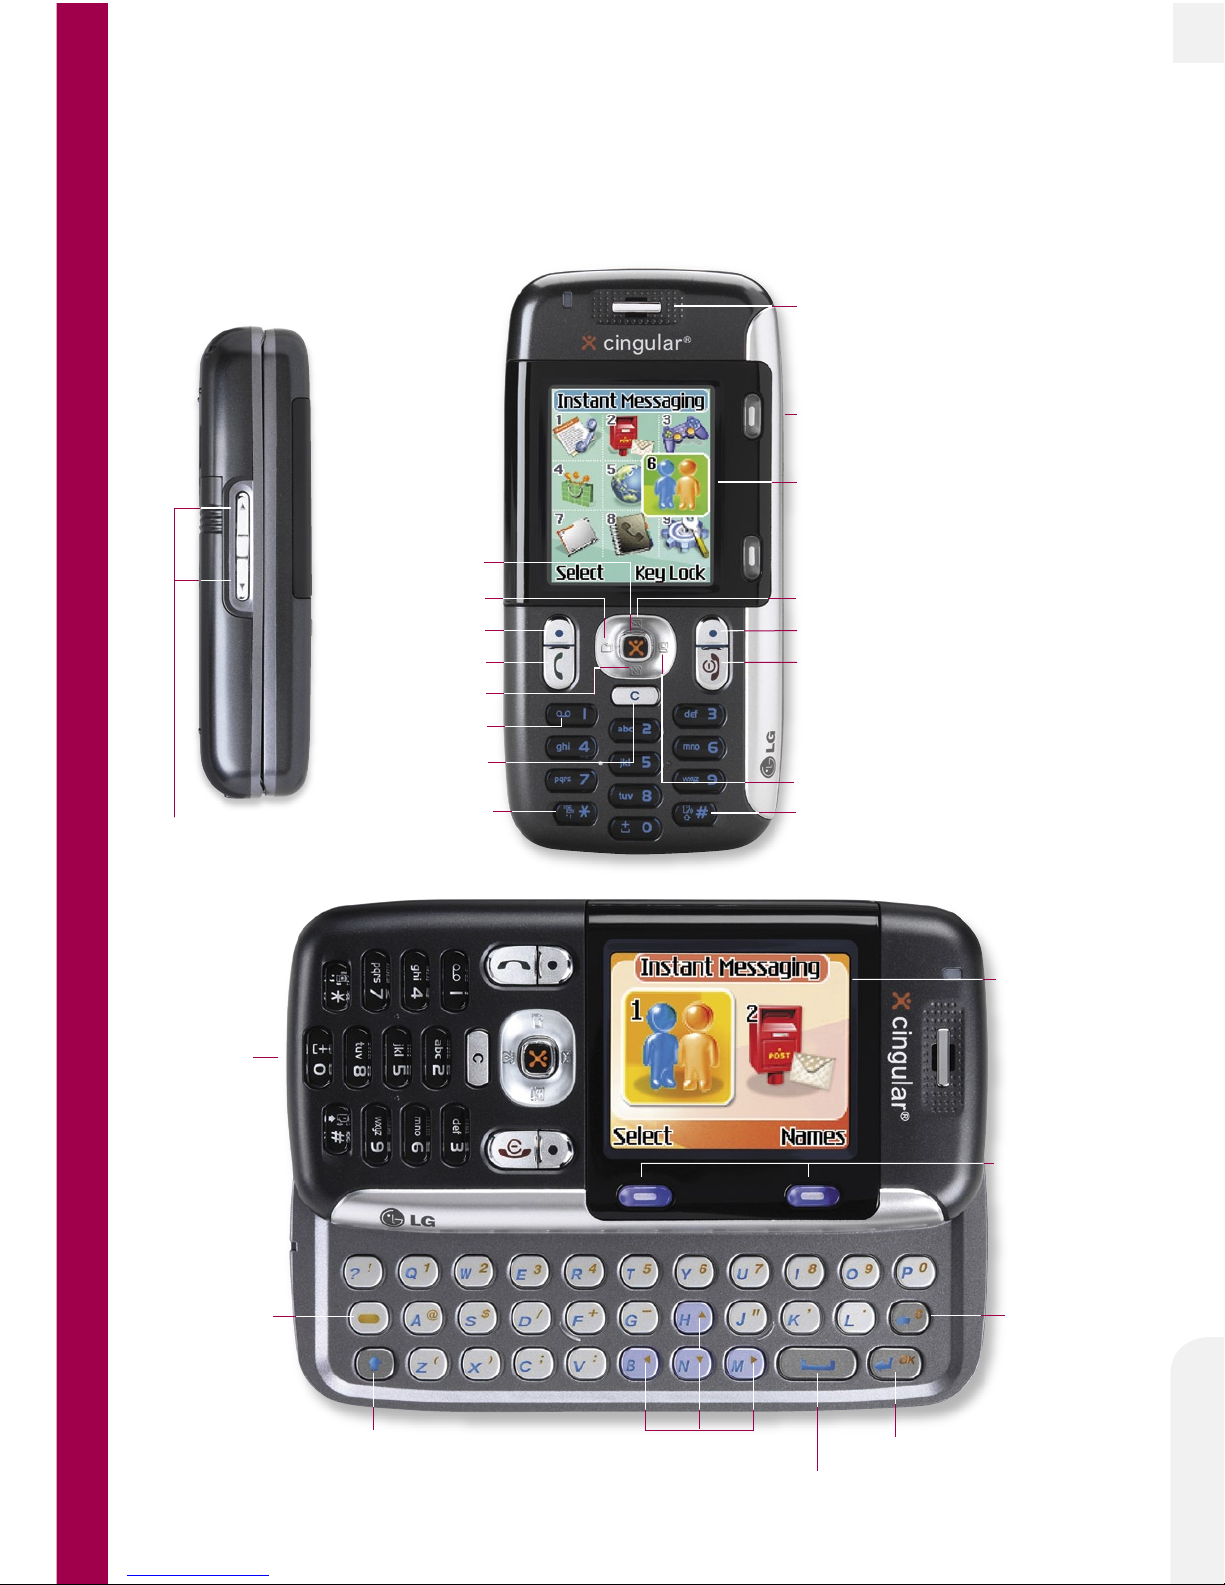
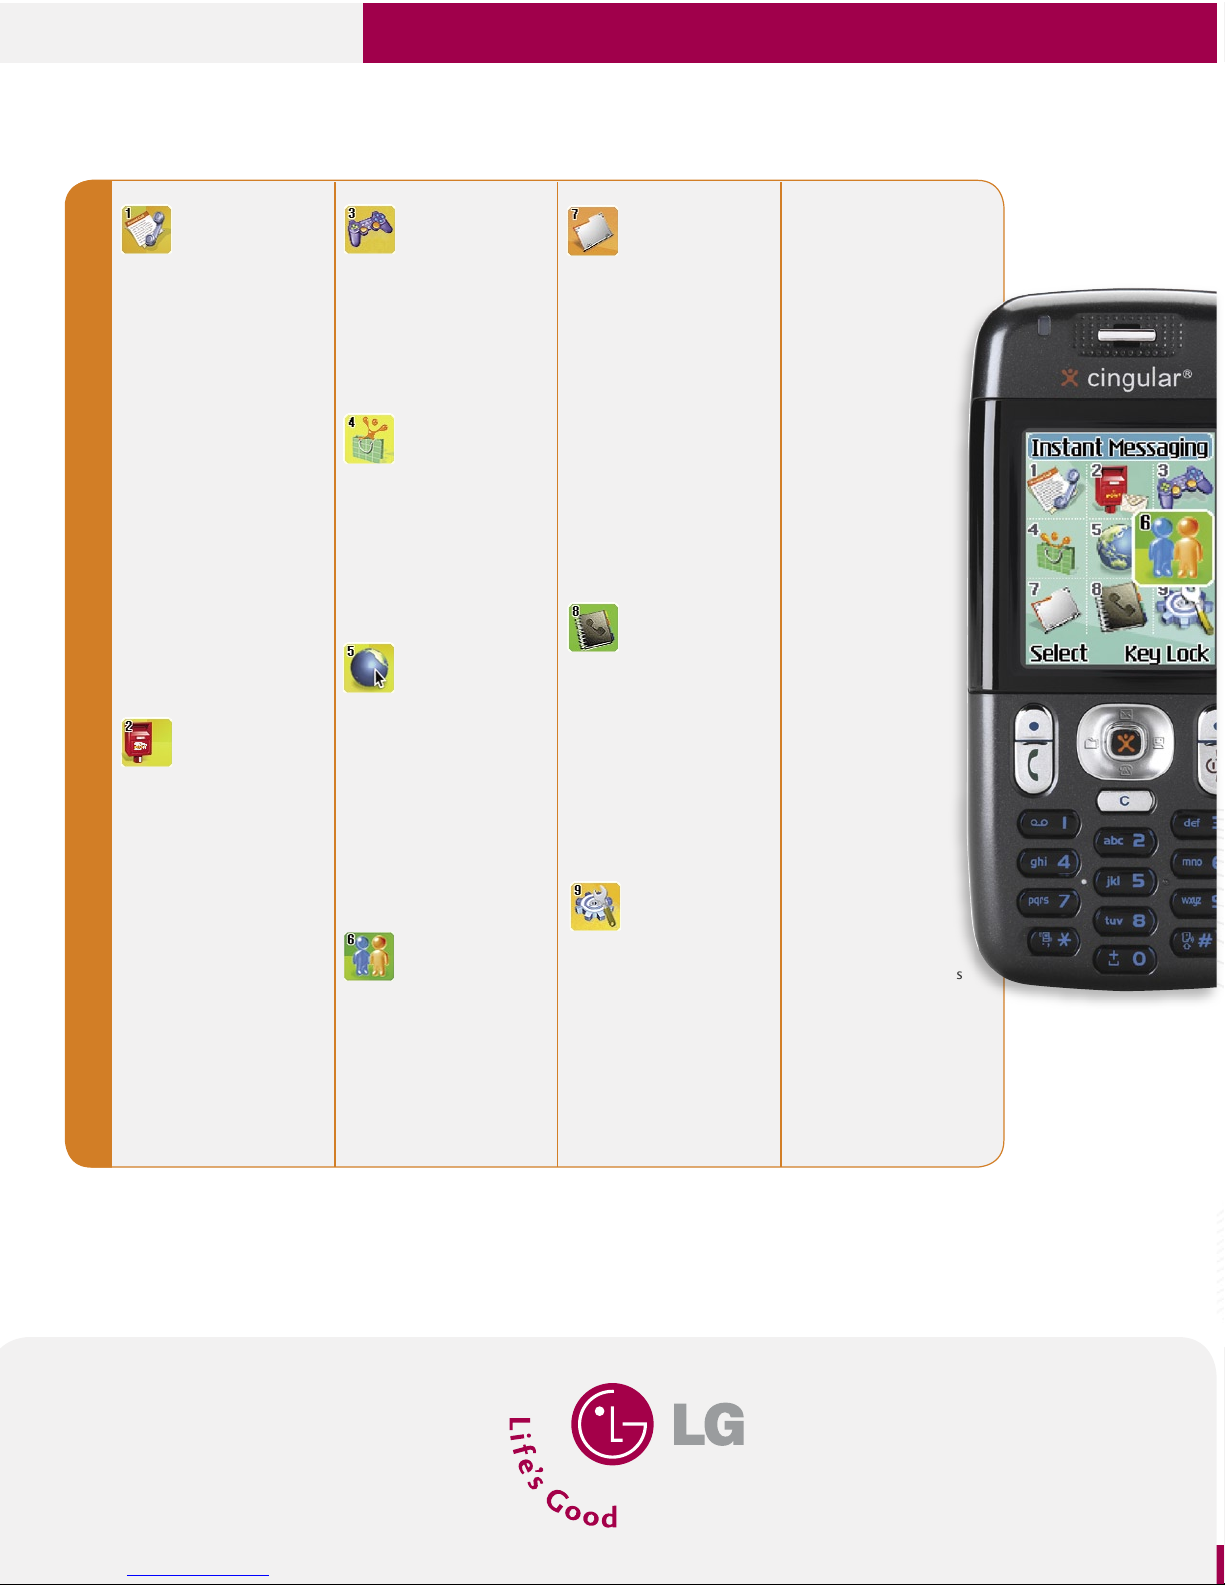
INSTANT MESSAGING
Instant messaging screen wording varies by IM provider; AIM® and Yahoo!® Messenger steps are listed below.
Signing On
1. Slide out the keyboard and press OK ( on Joystick; OK on keyboard) to choose Instant Messaging (1).
2. Use the Joystick to select the IM community with which you would like to connect, then press OK.
3. Choose Sign On (1)/Sign In (1) and press OK.
4. Enter your screen name/ID and password and press OK. (A progress bar will show the status of the
connection while it is being set up. It may take up to a minute to establish a data link.)
Adding an IM Contact to Your List
Once you have connected, the IM contact screen will appear.
1. Highlight Online /Mobile Device and press the Left Soft Key for Options.
2. Choose Add Buddy (2)/Add a Contact (2) and press OK.
3. Enter the screen name/ID press OK. (You can store up to 30 names on your phone.)
Sending an Instant Message
1. From the IM contact screen, select the name you’d like to chat with and press OK.
2. For people not on the contact list, highlight Online/Mobile Device and press the Left Soft Key for Options.
3. Choose Send IM To…(3)/Send to Other (3) and press OK. Enter the screen name/ID and press OK.
4. Enter your message at the bottom of the screen and press OK to send. (Use the key to change
capitalization. Use the key to type orange characters; double click to lock for multiple keystrokes.)
Ending a Chat and Logging Out
1. To end an individual chat session, press the Left Soft Key for Options and select End Conversation (3).
2. To log out of instant messaging altogether, return to your contact screen, press the Left Soft Key for
Options, select Sign Off/Sign Out, and choose Yes.
Incoming Instant Messages
1. An IM message icon will appear in the middle at the top of the main screen.
2. Sign on and select the contact with a new message icon next to the name.
Saving an IM Conversation
1. From the chat screen, press the Left Soft Key for Options.
2. Select Save Conversation (5)/Save Conversation (4) and press OK.
To access the conversation later, go to the contact screen or IM sign on screen.
Blocking Messages (AIM)
1. Select a name from the contact screen and press the Left Soft Key for Options.
2. Select Block Buddy (3) and press OK.
3. Choose Yes to confirm.
TEXT AND MULTIMEDIA MESSAGING
Sending a Text Message
1. Slide out the keyboard, use the Joystick to select Messaging (2), and press OK.
2. Select Text Messages (1) and Write Message (1).
3. Type in your message (up to 918 characters) and press the Left Soft Key for Options.
4. Select Send To Number (1) or Send To Email (2) and press OK.
To send to a phone number or e-mail address…
1. Enter the number or e-mail address, scroll down to add more numbers or e-mail addresses (up to 5 total), then
press the Right Soft Key for Send.
4
4
4
4
4
4
4
To send to an existing contact…
1. Press the Right Soft Key for Contacts.
2. Choose a contact and corresponding number from the list and press OK.
3. Repeat for each contact you want to add as a recipient.
4. Press the Right Soft Key for Send.
Sending a Multimedia Message
1. With the keyboard in the closed position, select the Messaging (2) menu, then Multimedia Messages (2)
and press OK.
2. Choose Write Message (1), then New and press OK.
3. Type in your message, then scroll down to Add Image or Add Sound and press OK.
4. Use the Joystick to select the picture or sound you want to add and press OK.
5. This process completes one slide in your multimedia message. To add another multimedia slide, scroll
down to Slides and right to the + sign, and press OK. Repeat steps 3 and 4 for each new slide.
6. When finished, scroll down to the very bottom of the screen and press the Left Soft Key for Send.
To send to an existing contact…
1. Select Address Book and press OK.
2. Choose a contact and corresponding number from the list and press OK.
3. Repeat for each contact you want to add as a recipient.
4. Press the Right Soft Key for Menu, select Send MMS (1), and press OK to send.
To send to a phone number or e-mail address…
1. Scroll down to enter one or more phone numbers or e-mail addresses and press the Left Soft Key for Done.
(Press the Right Soft Key to change the text input mode: numbers, letters or symbols.)
2. Press the Right Soft Key for Menu, select Send MMS (1), and press OK to send.
DOWNLOADING MEDIA MALL CONTENT
Ringtones, games, applications, utilities and graphics can be downloaded and run on the phone.
Downloading New Content from MEdia Mall
1. With the keyboard in the closed position, select MEdia Mall (4).
2. Select from Shop Ringtones (1), Shop Games (2), Shop Graphics (3), Shop MMS (4) or
Shop Applications (5) and press OK.
3. Once connected, choose the content you want to download.
ACCESSING THE WEB
Connecting to the Internet
1. From the idle screen, press and hold down the Joystick button.
2. Once connected, choose a category and press OK.
3. To access a specific URL, press the Right Soft Key for Menu, select Go to URL (5), and enter the address.
4. Press the End Key to exit or end your browsing session.
CUSTOMIZABLE FEATURES
CUSTOMIZING THE SOUND SETTINGS
Selecting a Ringtone
1. From the Settings (9) menu, select Sounds (1) and press OK.
2. Select Ringtones (2) and press OK.
3. Choose from the list of ringtones and press OK.
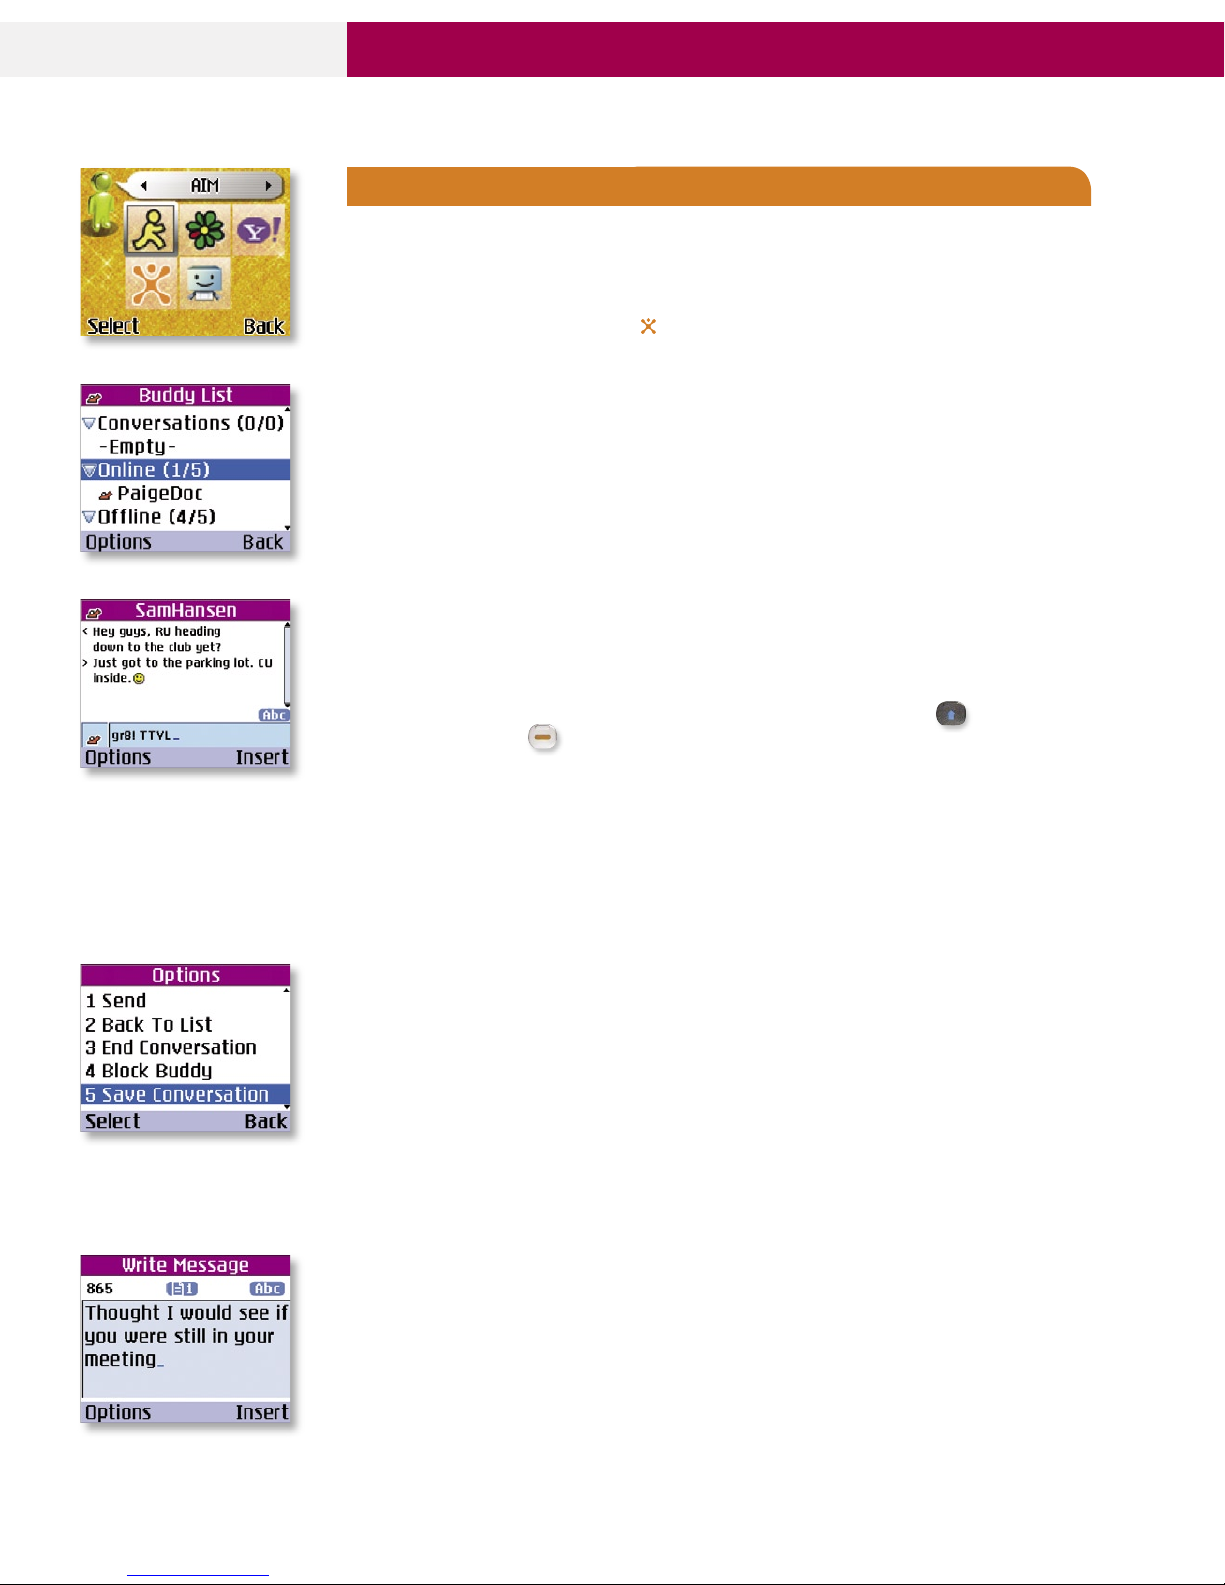
Adjusting Volume Settings
1. From the Settings (9) menu, select Sounds (1) and press OK.
2. Select Volume (3) and press OK.
3. Select Ringtone (1), Key Tone (2), Call (3), Headset (4), or Handsfree (5) and press OK.
4. Use the Joystick to choose the desired volume level and press OK.
Shortcut: To adjust ringtone volume, press the side Volume Control Keys at the idle screen.
To turn on Vibrate Mode, press and hold the * key. To return to Normal Mode, press * again.
CUSTOMIZING THE DISPLAY SETTINGS
Changing the Wallpaper Image
1. From the Settings (9) menu, select Display (2) and press OK.
2. Select My Wallpaper (1) and press OK.
3. Use the Joystick to choose the desired wallpaper and press OK.
PERSONAL INFORMATION TOOLS
RECENT CALLS
Making a Call from Recent Calls
1. From the Recent Calls (1) menu, select Missed Calls (1), Dialed Calls (2), or Received Calls (3).
2. Select the desired number and press the Send Key to call.
Shortcut: Press the Send Key for a mix of the most recent incoming, outgoing and missed calls.
TOOLS
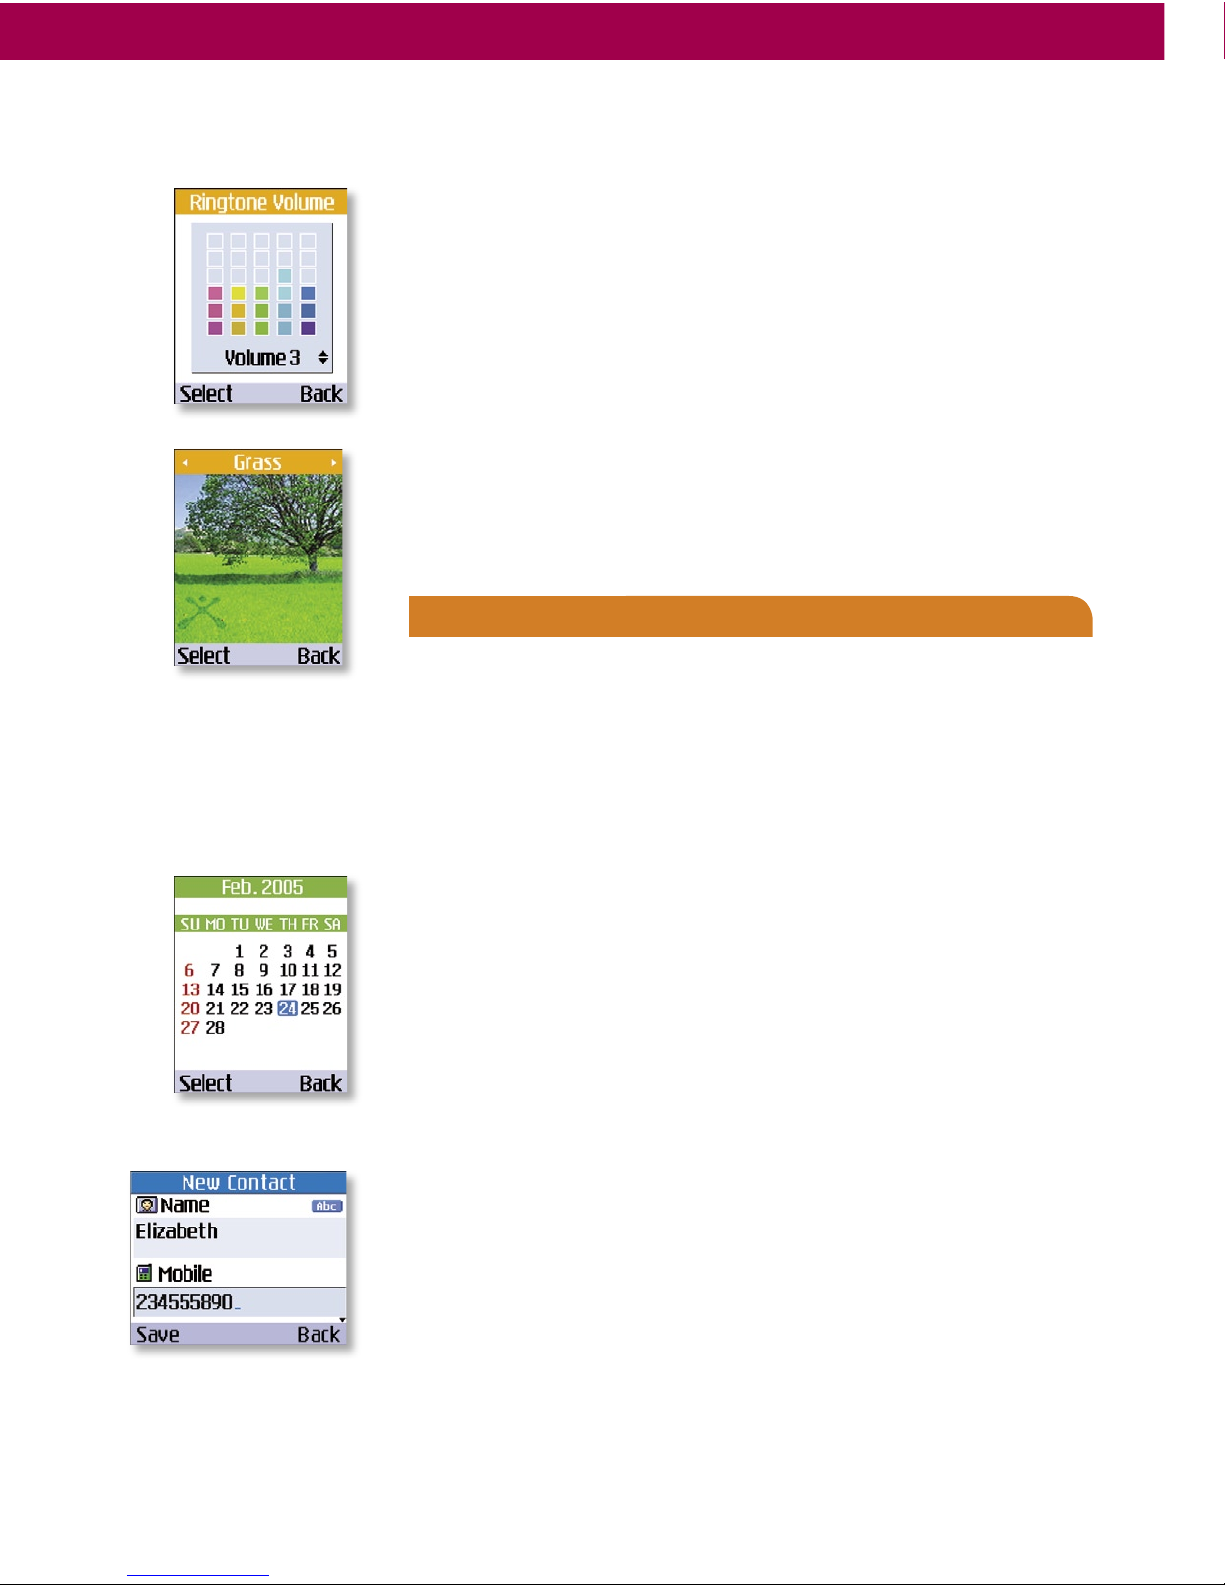
Scheduling an Event
1. Press the Joystick to the left for My MEdia, select Tools (6) and press OK.
2. Select Calendar (2) and press OK.
3. Highlight the date using the Joystick and press OK, then press the Left Soft Key for Options.
4. Select Add New (1) and press OK.
5. Using the phone keypad, enter the subject of the event. Scroll down to the corresponding
fields and enter the information for start time, recurrence (if any), and alarm.
6. When finished, press OK to save.
ADDRESS BOOK
Adding a New Address Book Entry
1. Slide out the keyboard and press the Right Soft Key for Names.
2. Select New Contact (2) and press OK.
3. Enter the name and scroll down to Mobile, Home, Office and E-mail and enter the phone
numbers and e-mail address.
5. Press left or right on the Joystick to assign a Group, or add a note in the memo field.
6. When finished, press OK to save.
Setting a One-Touch Speed Dial
1. From the Address Book (8) menu, select Speed Dials (3) and press OK.
2. Scroll down to an empty slot and press OK.
3. Choose a contact and corresponding number from the list and press OK to assign.
4
4
4
AIM
AIM
AIM