LG GU285f User manual

English
USER GUIDEGU285f
This document is the user guide for the LG GU285f 3G
Video Mobile Phone. All rights for this document are
reserved by LG Electronics. Copying, modifying and
distributing this document without the consent of LG
Electronics are prohibited.
Disposal of your old appliance
1. When this crossed-out wheeled bin symbol is attached to a product it means the
product is covered by the European Directive 2002/96/CE.
2. All electrical and electronic products should be disposed of separately from the
municipal waste stream via designated collection facilities appointed by the
government or the local authorities.
3. The correct disposal of your old appliance will help prevent potential negative
consequences for the environment and human health.
4. For more detailed information about disposal of your old appliance, please contact
your city office, waste disposal service or the shop where you purchased the product.

Part 15.21 statement
" Change or Modifications that are not expressly approved by the manufacturer could void
the user's authority to operate the equipment. “
Part 15.105 statement
This equipment has been tested and found to comply with the limits for a class B digital
device, pursuant to Part 15 of the FCC Rules.
These limits are designed to provide reasonable protection against harmful interference in
a residential installation. This equipment generates uses and can radiate radio frequency
energy and, if not installed and used in accordance with the instructions, may cause harmful
interference to radio communications. However, there is no guarantee that interference will
not occur in a particular installation. If this equipment does cause harmful interference or
television reception, which can be determined by turning the equipment off and on, the user
is encouraged to try to correct the interference by one or more of the following measures:
- Reorient or relocate the receiving antenna.
- Increase the separation between the equipment and receiver.
- Connect the equipment into an outlet on a circuit different from that to
which the receiver is connected.
- Consult the dealer or an experienced radio/TV technician for help.
This device is not intended for sale in the USA.

Part 15 Class B Compliance
This device and its accessories comply with part15 of FCC rules.
Operation is subject to the following two conditions:
(1) This device & its accessories may not cause harmful interference.
(2) This device & its accessories must accept any interference received,
including interference that may cause undesired operation.
Body-worn Operation
This device has been tested for typical body-worn operations
with the distance of 0.79inches (2.0cm) from the user’s body.
To comply with FCC RF exposure requirements, a minimum separation distance
of 0.79inches(2.0cm) must be maintained from the user's body.
Additionally, Belt clips, holsters & other body-worn accessories may not contain
metallic components.

12
Parts of the phone
Open view
GU285f Features
GU285f Features
Earpiece
OK (Conrm) key
Navigation keys
vIn standby mode:
l
Profiles popup
r
Write Text message
u
Quick menu
d
Contact list
vIn menu: Navigates
menus.
Multitasking key
VGA camera
LCD screen
vTop: Icons showing signal
strength, battery level and
various other functions
vBottom: Soft key indications
Camera Hot key
vGo to Camera preview
Alpha numeric keys
vIn standby mode:
Input numbers to dial.
Hold down:
0
for international calls.
1
to dial voice mail centre.
2
to
9
for speed dials.
vIn editing mode: Enter
numbers & characters.

13
GU285f Features
Clear key
You can delete a letter or go back to
previous menu.
Left soft key/ Right soft key
Performs the function indicated at the
bottom of the display.
Send key
vDials a phone number and answers a call.
vIn standby mode: Shows a history of calls
made, received, and missed.
Call End key
vYou can end a call.
vYou can go back to standby mode by
pressing this key when activating the
menu.

14
GU285f Features
GU285f Features
Headset/Charger/
Cable connector
Side keys
Handstrap Hole
microSD card slot
Right side view Left side view

15
GU285f Features
Rear view
Battery cover
Battery
External
camera lens
USIM card
socket

16
Getting Started
Getting Started
Installing the USIM card
and battery
1. Installing the USIM card.
Your USIM card contains your phone
number, service details and contacts
and must be inserted into your handset.
If your USIM card is removed then your
handset becomes unusable (except
for emergency calls) until a valid one is
inserted. Always disconnect the charger
and other accessories from your handset
before inserting and removing your USIM
card. Slide the USIM card into the USIM
card holder. Make sure that the USIM card
is properly inserted and the gold contact
area on the card is facing downwards. To
remove the USIM card, press down lightly
and pull it in the reverse direction.
To insert the USIM card
To remove the USIM card
Note
vThe metal contact of the USIM card
can easily be damaged by scratches.
Pay special attention to the USIM
card while handling. Follow the
instructions supplied with the USIM
card.
vAfter removing the battery, insert
USIM card.

17
Getting Started
2. Installing the battery.
Slide the battery upwards until it snaps
back into place.
3. To remove the battery.
Turn the power off. (If the power is left on,
there is a chance you could lose the stored
telephone numbers and messages.)
Press and hold down the battery release
button and slide the battery down.

18
Getting Started
Getting Started
Charging the Battery
Before connecting the travel adapter to the
phone you must first install the battery.
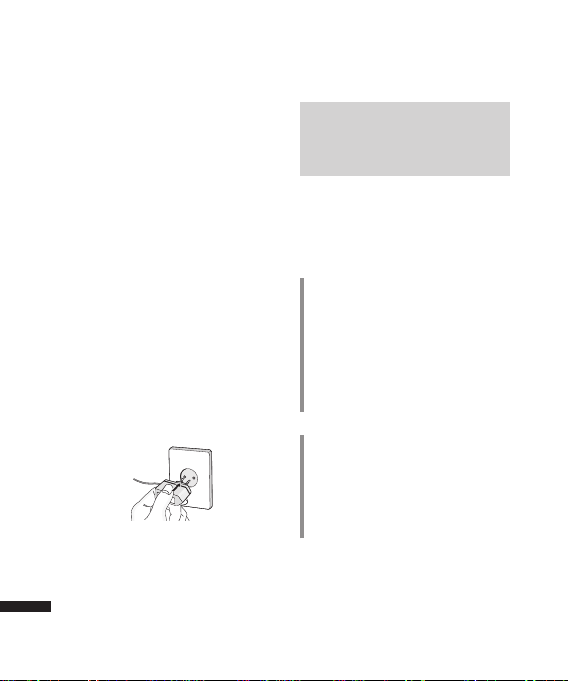
1. With the arrow facing you as shown in
the diagram push the plug on the battery
adapter into the socket on the right side
of the phone until it clicks into place.
2. Connect the other end of the travel
adapter to the mains socket.
Note
vOnly use the charger included in the
box.
3. The moving bars on the battery icon will
stop after charging is complete.
4. Ensure the battery is fully charged before
using the phone for the first time.
CAUTION!
• Do not force the connector as this may
damage the phone and/or the travel
adapter.
• If you use the battery pack charger when
abroad, use an attachment plug adaptor
for the proper configuration.
• Do not remove your battery or the USIM
card while charging.
WARNING!
• Unplug the power cord and charger
during lightning storms to avoid electric
shock or fire.
• Make sure that no sharp-edged items such
as animal teeth or nails, come into contact
with the battery. This may cause a fire.

19
Getting Started
Disconnecting the charger
Disconnect the travel adapter from the
phone as shown in the diagram below.
How to use a microSD
memory card
<MicroSD memory card>
<How to insert a microSD memory card>
1. Turn the phone off. Inserting or removing
the microSD when the phone is on may
damage the files stored in the memory
card.
2. Lift the plastic cover which protects the
microSD slot.
3. Insert the memory card into the slot. The
gold contacts must be kept on the back
of the microSD. Don’t push the microSD
too much. If it doesn't go into the slot
easily, you may be trying to insert it in the
wrong way or there could be a foreign
object in the slot.
4. Once inserted, push the memory card
until you hear a Click, meaning that the
microSD has been correctly engaged.

20
5. Close the plastic slot protection.
6. To remove the memory card, turn the
phone off, open the slot protection and
push the microSD to unlock it. Carefully
extract the memory card.
Attention:
vAvoid using the Flash Memory Card
when the battery is low.
vWhen writing to the card, wait for the
operation to complete before removing
the card.
vThe card is designed to fit easily into the
system one way only.
vDo not bend the card or force it into the
slot.
vDo not insert any memory cards other
than those made by microSD.
vIf the microSD has been formatted using
FAT32, format the microSD using FAT16
again.
For more information on the microSD,
please refer to the memory card instruction
manual.
Memory card formatting
Before you start to use the memory card
you have to format it. After you insert the
memory card, select Menu →Settings →
Memory manager →External memory,
then press
L
the left soft key.
This operation should only be done when
you insert the memory card for the first
time. During formatting various folders will
be created for different data types.
Turning Handset ON/OFF
Turning your handset on
Ensure that your USIM card is in your
handset and the battery is charged. Press
and hold
e
until the power comes on.
Enter the USIM PIN code that was supplied
with your USIM card if the PIN code
request is set to On.
After a few seconds you will be registered
on the network.
Getting Started
Getting Started

21
Turning your handset o
Press and hold
e
until the power goes
off. There may be a few seconds delay while
the handset powers down. Do not turn the
handset on again during this time.
Emergency call function
The right soft key is represented by
“Inactive/ Emergency call” on the screen.
Press the right soft key or dial your
emergency number using the number keys,
and then press
s
to make an emergency
call.
Getting Started

22
General Functions
General Functions
Making and answering
calls
Making a voice call
1. Enter the number including the full area
code.
vTo delete a digit press
c
key.
To delete all digits press and hold
c
key.
2. Press
s
to make the call.
3. Press
e
to finish the call, or close the
handset.
Note
vTo activate the speakerphone during
a call, activate the touch keys and
press
O
.
Making a call from the call logs
1. In standby mode, press
s
and the
latest incoming, outgoing and missed
phone numbers will be displayed.
2. Select the desired number by using
d
/
u
.
3. Press
s
to call the number.
Making a video call
You can make and receive video calls when
both you and the other person have 3G
coverage. To make/answer a video call, do
the following.
1. Input the phone number using the
keypad, or select the phone number
from the calls made/received lists.
vTo correct mistakes, press
c
briefly
to delete the last number, or press and
hold
c
to delete all numbers.
2. If you do not want to use the
speakerphone, ensure you have the
headset plugged in.
3. To start the video function, press the left
soft key [Options] and select Make video
call.
vYou will be notified that you will need
to close other applications to make the
video call.
Note
vThe video call may take some time
to connect. Please be patient. The
connection time will also depend
on how quickly the other party
answers the call. While the video
call is connecting, you will see your
own image; after the other party
has answered, their image will be
displayed on the screen.

23
General Functions
4. Adjust the camera position if necessary.
5. Press
e
to finish the call, or close the
handset.
Making a voice/video call from
Contacts
It is easy to call anyone whose number you
have stored in your Contacts.
1. Press
d
to access the contacts list.
2. Scroll to the contact to make a call.
3. Press
s
to make a voice call. Press the
left soft key and select Make video call
to make a video call.
4. Press
e
to finish the call.
Making international calls
1. Press and hold
0
for the international
prefix. The‘+’character prefixes the
international access code.
2. Enter the country code, area code, and
the phone number.
3. Press
s
.
Answering a call
When you receive a call, the phone rings
and the flashing phone icon appears on the
screen. If the caller can be identified, the
caller’s phone number (or name if stored in
your Contacts) is displayed.
1. Open the slider to answer an incoming
call.
Note
vTo reject an incoming call, press
e
or the right soft key twice.
vIf you set Answer mode as Press send
key (Menu 2.0.4), you can answer the
call by pressing
s
after opening the
slider.
vIf the answer mode is set to Press any
key, any key will answer a call except
for
e
.

24
2. End the call by closing the handset or
pressing
e.
Note
vYou can answer a call while using the
Contacts or other menu features.
vWhen the compatible headset is
connected, you can also answer a call
using the headset key, as well as using
the phone. To reject an incoming call,
press
e
.
vYou can mute the ringtone when a
call comes in by pressing and holding
the volume right soft key.
Shortcut to activate vibrate
mode
You can activate the vibrate only mode
by pressing and holding down
*
after
opening the phone.
Signal strength
You can check the strength of your signal
by the signal indicator on the LCD screen
of your phone. Signal strength can vary,
particularly inside buildings. Moving close
to a window may improve reception.
Entering text
You can enter alphanumeric characters
using the keypad.
For example, storing names in Contacts,
writing a message, creating a personal
greeting or scheduling events in the
calendar all require entering text.
Changing the text input mode
1. When you are in a field that allows
characters to be entered, you will notice
the text input mode indicator in the
upper right corner of the LCD screen.
2. If T9 is on, you can change the mode to
T9Abc, T9ABC, 123, T9abc by pressing
#
. When T9 is off, the mode will be
changed to Abc, ABC, 123, abc.
Using the T9 Mode
The T9 predictive text input mode allows
you to enter words easily with a minimum
number of key presses. As you press each
key, the handset begins to display the
characters that it thinks you are typing
based on a built-in dictionary. As new
letters are added, the word changes to
reflect the most likely candidate from the
dictionary.
General Functions
General Functions

25
General Functions
Using the ABC Mode
Use
2
to
9
to enter your text.
1. Press the key labelled with the required
letter:
vOnce for the first letter.
vTwice for the second letter.
vAnd so on.
2. To insert a space, press
0
once. To
delete letters, press
c
.
Using the 123 (Number) mode
The 123 mode enables you to enter
numbers in a message(a telephone
number, for example). Press the keys
corresponding to the required digits before
manually switching back to the appropriate
text entry mode.
Using the symbol mode
The symbol mode enables you to enter
various symbols or special characters. To
enter a symbol, select Options →Insert →
Symbols. Use the navigation and numeric
keys to select the desired symbol and press
O
.

26
1. Games & Apps
1.1 My games & apps
1.2 Settings
2. Calling
2.1 Make video call
2.2 Call logs
2.3 Call durations
2.4 Data volume
2.5 Call costs
2.6 Call divert
2.7 Call barring
2.8 Fixed dial numbe s
2.9 Call waiting
2.0 Common settings
2.* Video call setting
3. Organiser
3.1 Calendar
3.2 To do
3.3 Memo
3.4 Secret memo
3.5 Date finder
3.6 Settings
4. Multimedia
4.1 Camera
4.2 Video camera
4.3 Music
4.4 Voice recorder
5. Messages
5.1 Create new message
5.2 Inbox
5.3 Mailbox
5.4 Drafts
5.5 Outbox
5.6 Sent items
5.7 My folders
5.8 Templates
5.9 Emoticons
5.0 Settings
You can launch a menu by pressing
O
in the idle screen. Move to the desired item and
press
O
to go into the sub menu.
From the main menu you can also go into a submenu by directly pressing the
corresponding numeric key as follows. The main menu consists of the following top menus
and sub menus.
Overview of Menu Functions

27
Overview of Menu Functions
6. My stu
6.1 My images
6.2 My sounds
6.3 My videos
6.4 My games & apps
6.5 Others
6.6 My memory card
7. Yahoo
8. Contacts
8.1 Add new
8.2 Search
8.3 Speed dials
8.4 Groups
8.5 Service dial numbers
8.6 Own number
8.7 My business card
8.8 Settings
9. Tools
9.1 Quick menu
9.2 Alarms
9.3 Calculator
9.4 Stopwatch
9.5 Converter
9.6 World time
9.7 STK(USIM service)
*. Browser
*.1 Home
*.2 Enter address
*.3 Bookmarks
*.4 RSS reader
*.5 Saved pages
*.6 History
*.7 Settings
0. Connectivity
0.1 Bluetooth
0.2 Server sync
0.3 USB connection mode
#. Settings
#.1 Profiles
#.2 Phone
#.3. Screen
#.4 Date & Time
#.5 Network
#.6 Internet profile
#.7 Access points
#.8 Packet data conn.
#.9 Security
#.0 Memory manager
#.* Streaming setting
#.# Reset settings

28
Games & Apps [Menu 1]
Games & Apps
My games & apps
Menu 1.1
You can easily download games and other
applications in this menu. It may have
two folders, no folders at all, or Games
and Applications. The default folder can
be dependent on the operator/country.
Each folder has an embedded link for
downloading games or applications. Please
note that additional costs may be incurred
when using online services. You can create
a folder using the left soft key [Options].
Settings
Menu 1.2
- profile: You can see profile and add new
profile.
- Certificates list: You can see the
certification list for using java application
Other LG Cell Phone manuals