LG 24lf450u User manual

Please read this manual carefully before operating your
set and retain it for future reference.
www.lg.com
Safety and Reference
OWNER’S MANUAL
LED TV*
* LG LED TV applies LCD screen with LED backlights.
*MFL68702434* P/NO : MFL68702434(1503-REV00)
Printed in Korea

2
ENGLISH
Safety instructions
Please read these safety precautions carefully before
using the product.
WARNING
Do not place the TV and/or remote control in the following
environments:
tA location exposed to direct sunlight
tAn area with high humidity such as a bathroom
tNear any heat source such as stoves and other devices that
produce heat
tNear kitchen counters or humidiers where they can easily be
exposed to steam or oil
tAn area exposed to rain or wind
tNear containers of water such as vases
Otherwise, this may result in re, electric shock, malfunction or product
deformation.
Do not place the product where it might be exposed to dust. This may
cause a re hazard.
Mains Plug is the TV connecting/disconnecting device to AC mains
electric supply.This plug must remain readily attached and operable
when TV is in use.
Do not touch the power plug with wet hands. Additionally, if the cord
pin is wet or covered with dust, dry the power plug completely or wipe
dust o. You may be electrocuted due to excess moisture.
Make sure to connect Mains cable to compliant AC mains socket with
Grounded earth pin. (Except for devices which are not grounded on
earth.) Otherwise possibility you may be electrocuted or injured.
Insert power cable plug completely into wall socket otherwise if not
secured completely into socket, re ignition may break out.
Ensure the power cord does not come into contact with hot objects
such as a heater. This may cause a re or an electric shock hazard.
Do not place a heavy object, or the product itself, on power cables.
Otherwise, this may result in re or electric shock.
Bend antenna cable between inside and outside building to prevent
rain from owing in.This may cause water damaged inside the Product
and could give an electric shock.
When mountingTV onto wall make sure to neatly install and isolate
cabling from rear ofTV as to not create possibility of electric shock /
re hazard.
Do not plug too many electrical devices into a single multiple electrical
outlet. Otherwise, this may result in re due to over-heating.

ENGLISH
3
Do not drop the product or let it fall over when connecting external
devices. Otherwise, this may result in injury or damage to the product.
Desiccant
Keep the anti-moisture packing material or vinyl packing out of the
reach of children. Anti-moisture material is harmful if swallowed. If
swallowed by mistake, force the patient to vomit and visit the nearest
hospital. Additionally, vinyl packing can cause suocation. Keep it out
of the reach of children.
Do not let your children climb or cling onto the TV.
Otherwise, theTV may fall over, which may cause serious injury.
Dispose of used batteries carefully to ensure that a small child does not
consume them. Please seek Doctor- Medical Attention immediately if
child consumes batteries.
Do not insert any metal objects/conductors (like a metal chopstick/
cutlery/screwdriver) between power cable plug and inputWall Socket
while it is connected to the input terminal on the wall. Additionally,
do not touch the power cable right after plugging into the wall input
terminal.You may be electrocuted. (Depending on model)
Do not put or store inammable substances near the product. There is a
danger of combustion/explosion or re due to careless handling of the
inammable substances.
Do not drop metallic objects such as coins, hair pins, chopsticks or wire
into the product, or inammable objects such as paper and matches.
Children must pay particular attention. Electrical shock, re or injury
can occur. If a foreign object is dropped into the product, unplug the
power cord and contact the service centre.
Do not spray water on the product or scrub with an inammable
substance (thinner or benzene). Fire or electric shock accident can
occur.
Do not allow any impact, shock or any objects to fall into the unit,
and do not drop anything onto the screen.You may be injured or the
product can be damaged.
Never touch this product or antenna during a thunder or lighting storm.
You may be electrocuted.
Never touch the wall outlet when there is leakage of gas, open the
windows and ventilate. It may cause a re or a burn by a spark.
Do not disassemble, repair or modify the product at your own
discretion. Fire or electric shock accident can occur.
Contact the service centre for check, calibration or repair.

4
ENGLISH
If any of the following occur, unplug the product immediately and
contact your local service centre.
tThe product has been impacted by shock
tThe product has been damaged
tForeign objects have entered the product
tThe product produced smoke or a strange smell
This may result in re or electric shock.
Unplug the TV from AC mains wall socket if you do not intend to use the
TV for a long period of time. Accumulated dust can cause re hazard
and insulation deterioration can cause electric leakage/shock/re.
Apparatus shall not be exposed to dripping or splashing and no objects
lled with liquids, such as vases, shall be placed on the apparatus.
Do not install this product on a wall if it could be exposed to oil or oil
mist.This may damage the product and cause it to fall.
If water enters or comes into contact withTV, AC adapter or power
cord please disconnect the power cord and contact service centre
immediately . Otherwise ,this may result in electric shock or re.
Only use an authorized AC adapter and power cord approved by
LG Electronics. Otherwise, this may result in re, electric shock,
malfunction or product deformation.
Never Disassemble the AC adapter or power cord. This may result in re
or electric shock.
CAUTION
Install the product where no radio wave occurs.
There should be enough distance between an outside antenna and
power lines to keep the former from touching the latter even when the
antenna falls.This may cause an electric shock.
Do not install the product on places such as unstable shelves or inclined
surfaces. Also avoid places where there is vibration or where the
product cannot be fully supported. Otherwise, the product may fall or
ip over, which may cause injury or damage to the product.
If you install theTV on a stand, you need to take actions to prevent the
product from overturning. Otherwise, the product may fall over, which
may cause injury.
If you intend to mount the product to a wall, attach VESA standard
mounting interface (optional parts) to the back of the product. When
you install the set to use the wall mounting bracket (optional parts), x
it carefully so as not to drop.
Only use the attachments / accessories specied by the manufacturer.
When installing the antenna, consult with a qualied service
technician. If not installed by a qualied technician, this may create a
re hazard or an electric shock hazard.

ENGLISH
5
We recommend that you maintain a distance of at least 2 to 7 times
the diagonal screen size when watchingTV. If you watch TV for a long
period of time, this may cause blurred vision.
Only use the specied type of battery. This could cause damage to the
remote control.
Do not mix new batteries with old batteries. This may cause the
batteries to overheat and leak.
Batteries should not be exposed to excessive heat. For example, keep
away from direct Sunlight , open replace and electric heaters.
Do not place non-rechargeable batteries in charging device.
Make sure there are no objects between the remote control and its
sensor.
Signal from Remote Control can be interrupted due to external/internal
lighting eg Sunlight, uorescent lighting. If this occurs turn o lighting
or darken viewing area.
When connecting external devices such as video game consoles, make
sure the connecting cables are long enough. Otherwise, the product
may fall over, which may cause injury or damage the product.
Do not turn the product On/O by plugging-in or unplugging the power
plug to the wall outlet. (Do not use the power plug for switch.) It may
cause mechanical failure or could give an electric shock.
Please follow the installation instructions below to prevent the product
from overheating.
tThe distance between the product and the wall should be more
than 10cm.
tDo not install the product in a place with no ventilation (e.g., on a
bookshelf or in a cupboard).
tDo not install the product on a carpet or cushion.
tMake sure the air vent is not blocked by a tablecloth or curtain.
Otherwise, this may result in re.
Take care not to touch the ventilation openings when watching theTV
for long periods as the ventilation openings may become hot.This does
not aect the operation or performance of the product.
Periodically examine the cord of your appliance, and if its appearance
indicates damage or deterioration, unplug it, discontinue use of the
appliance, and have the cord replaced with an exact replacement part
by an authorized servicer.
Prevent dust collecting on the power plug pins or outlet.This may cause
a re hazard.
Protect the power cord from physical or mechanical abuse, such as
being twisted, kinked, pinched, closed in a door, or walked upon. Pay
particular attention to plugs, wall outlets, and the point where the cord
exits the appliance.

6
ENGLISH
Do not press strongly upon the panel with a hand or sharp object such
as nail, pencil or pen, or make a scratch on it, as it may causedamage
to screen.
Avoid touching the screen or holding your nger(s) against it for long
periods of time. Doing so may produce some temporary or permanent
distortion/damage to screen.
When cleaning the product and its components, unplug the power
rst and wipe it with a soft cloth. Applying excessive force may cause
scratches or discolouration. Do not spray with water or wipe with a wet
cloth. Never use glass cleaner, car or industrial shiner, abrasives or wax,
benzene, alcohol etc., which can damage the product and its panel.
Otherwise, this may result in re, electric shock or product damage
(deformation, corrosion or breakage).
As long as this unit is connected to the AC wall outlet, it is not
disconnected from the AC power source even if you turn o this unit
by SWITCH.
When unplugging the cable, grab the plug and unplug it, by pulling at
the plug.
Don’t pull at the cord to unplug the power cord from the power board,
as this could be hazardous.
When moving the product, make sure you turn the power o rst.Then,
unplug the power cables, antenna cables and all connecting cables.
TheTV set or power cord may be damaged, which may create a re
hazard or cause electric shock.
When moving or unpacking the product, work in pairs because the
product is heavy. Otherwise, this may result in injury.
Contact the service centre once a year to clean the internal parts of the
product.
Accumulated dust can cause mechanical failure.
Refer all servicing to qualied service personnel. Servicing is required
when the apparatus has been damaged in any way, such as power
supply cord or plug is damaged, liquid has been spilled or objects have
fallen into the apparatus, the apparatus has been exposed to rain or
moisture, does not operate normally, or has been dropped.
If the product feels cold to the touch, there may be a small“icker”
when it is turned on. This is normal, there is nothing wrong with
product.
The panel is a high technology display product with resolution of two
million to six million pixels. You may see tiny black dots and/or brightly
coloured dots (red, blue or green) at a size of 1ppm on the panel.This
does not indicate a malfunction and does not aect the performance
and reliability of the product.
This phenomenon also occurs in third-party products and is not subject
to exchange or refund.

ENGLISH
7
You may nd dierent brightness and color of the panel depending on
your viewing position(left/right/top/down).
This phenomenon occurs due to the characteristic of the panel. It is not
related with the product performance, and it is not malfunction.
Displaying a still image (e.g., broadcasting channel logo, on-screen
menu, scene from a video game) for a prolonged time may cause
damage to the screen, resulting in retention of the image, which is
known as image sticking. The warranty does not cover the product for
image sticking.
Avoid displaying a xed image on your television’s screen for a
prolonged period (2 or more hours for LCD, 1 or more hours for Plasma).
Also, if you watch the TV at a ratio of 4:3 for a long time, image sticking
may occur on the borders of the panel.
This phenomenon also occurs in third-party products and is not subject
to exchange or refund.
Generated Sound
“Cracking”noise: A cracking noise that occurs when watching or turning
o the TV is generated by plastic thermal contraction due to tempera-
ture and humidity. This noise is common for products where thermal
deformation is required. Electrical circuit humming/panel buzzing:
A low level noise is generated from a high-speed switching circuit,
which supplies a large amount of current to operate a product. It varies
depending on the product.
This generated sound does not aect the performance and reliability
of the product.
Do not use high voltage electrical goods near the TV (e.g. electric
mosquito-swatter).This may result in product malfunction.
Preparing
NOTE
tImage shown may dier from your TV.
tYour TV’s OSD (On Screen Display) may dier slightly from that
shown in this manual.
tThe available menus and options may dier from the input source
or product model that you are using.
tNew features may be added to this TV in the future.
tTheTV can be placed in standby mode in order to reduce the power
consumption. And theTV should be turned o if it will not be
watched for some time, as this will reduce energy consumption.
tThe energy consumed during use can be signicantly reduced if the
level of brightness of the picture is reduced, and this will reduce
the overall running cost.
tThe items supplied with your product may vary depending on the
model.
tProduct specications or contents of this manual may be changed
without prior notice due to upgrade of product functions.
tFor an optimal connection, HDMI cables and USB devices should
have bezels less than 10 mm thick and 18 mm width. Use an
extension cable that supports USB 2.0 if the USB cable or USB
memory stick does not t into your TV’s USB port.
A
B
A
B
*A
<
=
10 mm
*B
<
=
18 mm
tUse a certied cable with the HDMI logo attached.
tIf you do not use a certied HDMI cable, the screen may not display
or a connection error may occur. (Recommended HDMI Cable Types)
-High-Speed HDMI®/TM cable (3 m or less)
-High-Speed HDMI®/TM cable with Ethernet (3 m or less)

8
ENGLISH
CAUTION
tDo not use any unapproved items to ensure the safety and product
life span.
tAny damage or injuries caused by using unapproved items are not
covered by the warranty.
tSome models have a thin lm attached on to the screen and this
must not be removed.
tWhen attaching the stand to theTV set, place the screen facing
down on a cushioned table or at surface to protect the screen
from scratches.
tMake sure that the screws are fastened completely. (If they are
not fastened securely enough, theTV may tilt forward after being
installed.) Do not use too much force and over tighten the screws;
otherwise screw may be damaged and not tighten correctly.
Maintenance
Cleaning your TV
Clean yourTV regularly to keep the best performance and to extend the
product lifespan.
tMake sure to turn the power o and disconnect the power cord and
all other cables rst.
tWhen the TV is left unattended and unused for a long time,
disconnect the power cord from the wall outlet to prevent possible
damage from lightning or power surges.
Screen, frame, cabinet and stand
To remove dust or light dirt, wipe the surface with a dry, clean, and
soft cloth.
To remove major dirt, wipe the surface with a soft cloth dampened in
clean water or a diluted mild detergent.Then wipe immediately with
a dry cloth.
tAvoid touching the screen at all times, as this may result in damage
to the screen.
tDo not push, rub, or hit the screen surface with your ngernail or a
sharp object, as this may result in scratches and image distortions.
tDo not use any chemicals as this may damage the product.
tDo not spray liquid onto the surface. If water enters theTV, it may
result in re, electric shock, or malfunction.
Power cord
Remove the accumulated dust or dirt on the power cord regularly.
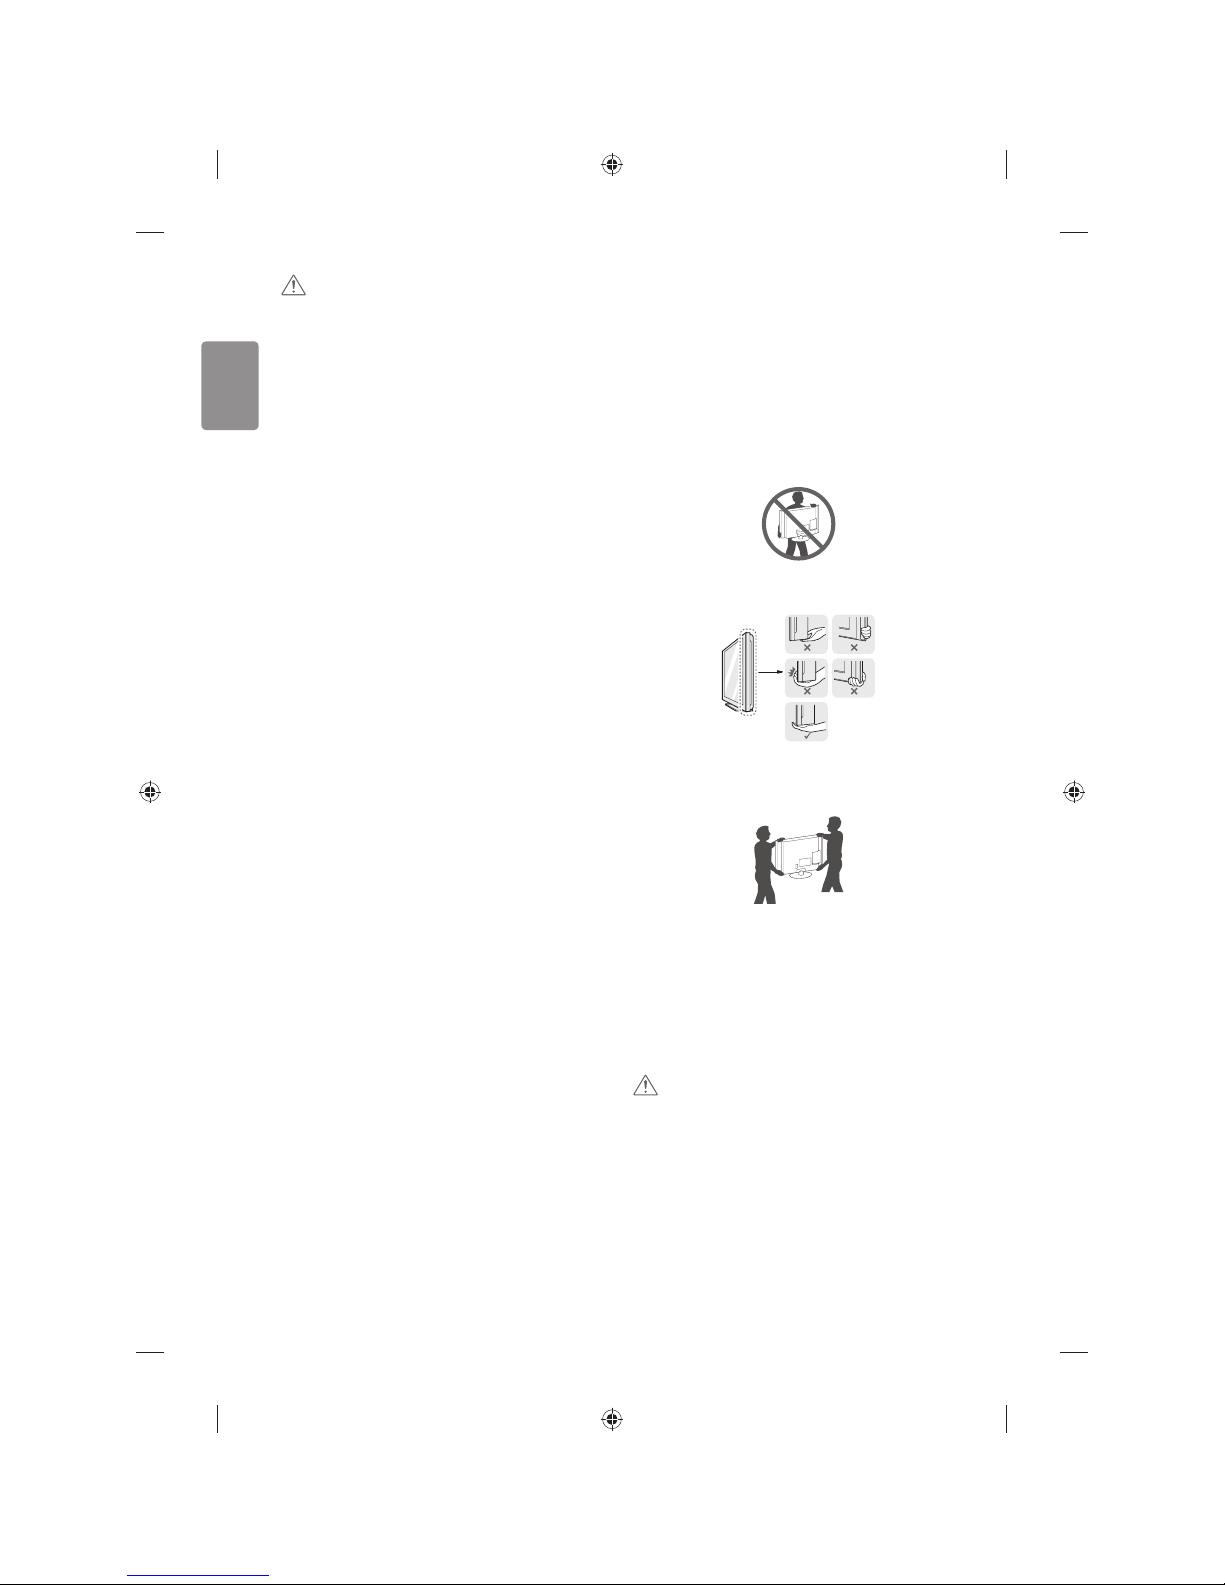
Lifting and moving the TV
Please note the following advice to prevent theTV from being scratched
or damaged and for safe transportation regardless of its type and size.
tIt is recommended to move the TV in the box or packing material
that theTV originally came in.
tBefore moving or lifting theTV, disconnect the power cord and
all cables.
tWhen holding the TV, the screen should face away from you to
avoid damage.
tHold the top and bottom of theTV frame rmly. Make sure not to
hold the transparent part, speaker, or speaker grill area.
tWhen transporting a large TV, there should be at least 2 people.
tWhen transporting the TV by hand, hold theTV as shown in the
following illustration.
tWhen transporting the TV, do not expose the TV to jolts or
excessive vibration.
tWhen transporting the TV, keep the TV upright, never turn theTV
on its side or tilt towards the left or right.
tDo not apply excessive pressure to cause exing /bending of frame
chassis as it may damage screen.
tWhen handling the TV, be careful not to damage the protruding
joystick button.
CAUTION
tAvoid touching the screen at all times, as this may result in damage
to the screen.
tDo not move theTV by holding the cable holders, as the cable
holders may break, and injuries and damage to theTV may occur.

ENGLISH
9
Using the joystick button
(Image shown may dier from your TV.)
You can simply operate the TV functions, pressing or moving the joystick
button up, down, left or right.
Joystick Button
Basic Functions
Power On
When the TV is turned o, place your
nger on the joystick button and
press it once and release it.
Power O
When the TV is turned on, place your
nger on the joystick button and
press it once for a few seconds and
release it. (However, if the Menu
button is on the screen, pressing and
holding the joystick button will let
you exit the Menu.)
Volume
Control
If you place your nger over the
joystick button and move it left or
right, you can adjust the volume level
you want.
Programmes
Control
If you place your nger over the
joystick button and move it up or
down, you can scrolls through the
saved programmes you want.
Adjusting the Menu
When the TV is turned on, press the joystick button one time. You can
adjust the Menu items moving the joystick button up, down, left or
right.
Turns the power o.
Clears on-screen displays and returns to TV viewing.
Changes the input source.
Accesses the main menu.
NOTE
tWhen your nger over the joystick button and push it to the up,
down, left or right, be careful not to press the joystick button. If you
press the joystick button rst, you may not be able to adjust the
volume level and saved programmes.
Mounting on a table
(Depending on model)
1 Lift and tilt the TV into its upright position on a table.
tLeave a 10 cm (minimum) space from the wall for proper
ventilation.
10 cm
10 cm
10 cm
10 cm
10 cm
2 Connect the power cord to a wall outlet.
CAUTION
tDo not place the TV near or on sources of heat, as this may result in
re or other damage.
Using the kensington security
system
(This is not available for all models.)
tImage shown may dier from your TV.
The Kensington security system connector is located at the rear of the
TV. For more information of installation and using, refer to the manual
provided with the Kensington security system or visit http://www.
kensington.com. Connect the Kensington security system cable between
the TV and a table.

10
ENGLISH
Securing the TV to a wall
(This feature is not available for all models.)
1 Insert and tighten the eye-bolts, orTV brackets and bolts on the back
of the TV.
tIf there are bolts inserted at the eye-bolts position, remove the
bolts rst.
2 Mount the wall brackets with the bolts to the wall.
Match the location of the wall bracket and the eye-bolts on the rear
of the TV.
3 Connect the eye-bolts and wall brackets tightly with a sturdy rope.
Make sure to keep the rope horizontal with the at surface.
CAUTION
tMake sure that children do not climb on or hang on theTV.
NOTE
tUse a platform or cabinet that is strong and large enough to
support the TV securely.
tBrackets, bolts and ropes are not provided.You can obtain
additional accessories from your local dealer.
Mounting on a wall
Attach an optional wall mount bracket at the rear of theTV carefully
and install the wall mount bracket on a solid wall perpendicular to
the oor. When you attach the TV to other building materials, please
contact qualied personnel. LG recommends that wall mounting be
performed by a qualied professional installer. We recommend the
use of LG’s wall mount bracket.When you do not use LG’s wall mount
bracket, please use a wall mount bracket where the device is adequately
secured to the wall with enough space to allow connectivity to external
devices.
10 cm
10 cm
10 cm
10 cm
Standard dimensions for the wall mount kits are described in the
following table.
Separate purchase(Wall Mounting Bracket)
Model 22/24LF45** 28LF45**
28LF55**
Wall Mount (A x B) 75 x 75 100 x 100
Standard screw M4 x L10
Number of screws 4
Wall mount bracket LSW140B
A
B
CAUTION
tDisconnect the power rst, and then move or install the TV.
Otherwise electric shock may occur.
tRemove the stand before installing the TV on a wall mount by
performing the stand attachment in reverse.
tIf you install theTV on a ceiling or slanted wall, it may fall and
result in severe injury. Use an authorised LG wall mount and
contact the local dealer or qualied personnel.
tDo not over tighten the screws as this may cause damage to theTV
and void your warranty.
tAny damages or injuries by misuse or using an improper accessory
are not covered by the warranty.
tScrew length from outer surface of back cover should be under 8
mm.
Wall mount Pad
Back Cover
Standard screw
: M4 x L10
Wall mount Pad
Back Cover
Max.8 mm

ENGLISH
11
NOTE
tThe wall mount kit includes an installation manual and necessary
parts.
tThe wall mount bracket is not provided. You can obtain additional
accessories from your local dealer.
tThe length of screws may dier depending on the wall mount.
Make sure to use the proper length.
tFor more information, refer to the manual supplied with the wall
mount.
Connections (notications)
Connect various external devices to theTV and switch input modes to
select an external device. For more information of external device’s
connection, refer to the manual provided with each device.
Available external devices are: HD receivers, DVD players,VCRs, audio
systems, USB storage devices, PC, gaming devices, and other external
devices.
NOTE
tThe external device connection may dier from the model.
tConnect external devices to theTV regardless of the order of the
TV port.
tIf you record a TV program on a DVD recorder orVCR, make sure to
connect the TV signal input cable to theTV through a DVD recorder
or VCR. For more information of recording, refer to the manual
provided with the connected device.
tRefer to the external equipment’s manual for operating
instructions.
tIf you connect a gaming device to theTV, use the cable supplied
with the gaming device.
tIn PC mode, there may be noise associated with the resolution,
vertical pattern, contrast or brightness. If noise is present, change
the PC output to another resolution, change the refresh rate to
another rate or adjust the brightness and contrast on the PICTURE
menu until the picture is clear.
tIn PC mode, some resolution settings may not work properly
depending on the graphics card.
Antenna connection
Connect the TV to a wall antenna socket with an RF cable (75 Ω).
tUse a signal splitter to use more than 2 TVs.
tIf the image quality is poor, install a signal amplier properly to
improve the image quality.
tIf the image quality is poor with an antenna connected, try to
realign the antenna in the correct direction.
tAn antenna cable and converter are not supplied.
tSupported DTV Audio: MPEG, Dolby Digital, Dolby Digital Plus,
HE-AAC
Satellite dish connection
(Only satellite models)
Connect the TV to a satellite dish to a satellite socket with a satellite RF
cable (75 Ω).
CI module connection
View the encrypted (pay) services in digital TV mode.
tCheck if the CI module is inserted into the PCMCIA card slot in the
right direction. If the module is not inserted properly, this can
cause damage to the TV and the PCMCIA card slot.
tIf the TV does not display any video and audio when CI+ CAM is
connected, please contact to theTerrestrial/Cable/Satellite Service
Operator.
Euro Scart connection
Transmits the video and audio signals from an external device to the
TV set. Connect the external device and theTV set with the euro scart
cable.
Output
Type
Current
input mode
AV1
(TV Out1)
Digital TV Digital TV
Analogue TV, AV
Analogue TVComponent
HDMI
1 TV Out : Outputs Analogue TV or Digital TV signals.
tAny Euro scart cable used must be signal shielded.

12
ENGLISH
Adapter connection
CAUTION
tPlease be sure to connect theTV to the AC-DC power adapter
before connecting theTV’s power plug to a wall power outlet.
Other connections
Connect yourTV to external devices. For the best picture and audio
quality, connect the external device and the TV with the HDMI cable.
Some separate cable is not provided.
USB port supports 0.5A electric current. If you need more electric
current in case of HDD, use the separate power adaptor.
Remote control
(Depending on model)
The descriptions in this manual are based on the buttons on the remote
control. Please read this manual carefully and use theTV correctly.
To replace batteries, open the battery cover, replace batteries (1.5
V AAA) matching the and ends to the label inside the
compartment, and close the battery cover. To remove the batteries,
perform the installation actions in reverse.
CAUTION
tDo not mix old and new batteries, as this may damage the remote
control.
tThe remote control will not be included for all sales market.
Make sure to point the remote control toward the remote control sensor
on the TV.
A
B
A
(POWER)Turns the TV on or o.
Selects Radio,TV and DTV programme.
Recalls your preferred subtitle in digital mode.
By pressing the AD button, audio descriptions function will be
enabled.
Turns the PIP mode on or o. (Depending on model)
Selects TV or PC mode.
Changes the input source.
Number buttons Enters numbers.
Accesses the saved programme list.
Returns to the previously viewed programme.
B
Accesses your favourite programme list.
Shows programme guide.
Mutes all sounds.
Adjusts the volume level.
Scrolls through the saved programmes.
Moves to the previous or next screen.

ENGLISH
13
C
D
C
Teletext buttons ( ) These buttons are used for
teletext.
Views the information of the current programme and
screen.
Accesses the main menus.
Accesses the Quick menus.
Navigation buttons (up/down/left/right) Scrolls through menus
or options.
Selects menus or options and conrms your input.
Returns to the previous level.
Clears on-screen displays and returns to TV viewing.
D
Accesses the AV devices connected with the HDMI
cable through HDMI-CEC. Opens the SIMPLINK menu.
Starts to record and displays record menu. (Depending
on model)
Control buttons ( ) Controls the MY MEDIA
menus, or the SIMPLINK compatible devices (USB,SIMPLINK).
Coloured buttonsThese access special functions in some menus.
( : Red, : Green, : Yellow, : Blue)
(Backlight) Adjusts the brightness of the screen by
controlling the screen backlight.
NOTE
tOn MHEG channel, you cannot adjust the backlight with the yellow
or blue key.
Licenses
Supported licenses may dier by model. For more information about
licenses, visit www.lg.com.
Manufactured under license from Dolby Laboratories.
Dolby and the double-D symbol are trademarks of Dolby
Laboratories.
The terms HDMI and HDMI High-Denition Multimedia Interface,
and the HDMI logo are trademarks or registered trademarks of HDMI
Licensing LLC in the United States and other countries.
This DivX Certied® device has passed rigorous testing to ensure it
plays DivX® video.
To play purchased DivX movies, rst register your device at vod.divx.
com. Find your registration code in the DivXVOD section of your
device setup menu.
DivX Certied® to play DivX® video up to HD 1080p, including
premium content.
DivX®, DivX Certied® and associated logos are trademarks of DivX,
LLC and are used under license.
Covered by one or more of the following U.S. patents :
7,295,673; 7,460,668; 7,515,710; 7,519,274.
Open source software
notice information
To obtain the source code under GPL, LGPL, MPL and other open source
licenses, that is contained in this product, please visit http://opensource.
lge.com.
In addition to the source code, all referred license terms, warranty
disclaimers and copyright notices are available for download.
LG Electronics will also provide open source code to you on CD-ROM
for a charge covering the cost of performing such distribution (such
as the cost of media, shipping, and handling) upon email request to
on which you purchased the product.

14
ENGLISH
Settings
Automatically Setting Up Programme
SETTINGS SETUP Auto Tuning
Automatically tunes the programmes.
tIf Input Source is not connected properly, programme registration
may not work.
tAuto Tuning only nds programmes that are currently
broadcasting.
tIf Lock System is turned on, a pop-up window will appear asking
for password.
To adjust picture with Picture Wizard
SETTINGS PICTURE Picture Wizard III
[Depending on model]
Calibrates and adjusts for optimum picture quality using the remote
control and the PictureWizard without expensive pattern devices or
help from a specialist.
To select Picture Mode
SETTINGS PICTURE Picture Mode
Select the picture mode optimized for the viewing environment or the
programme.
tVivid : Heightens contrast, brightness and sharpness to display
vivid images.
tStandard : Displays images in standard levels of contrast,
brightness and sharpness.
tEco/APS : [Depending on model]
The Energy Saver feature changes settings on theTV to reduce
power consumption.
tCinema/Game : Displays the optimum picture for movie, game.
tSport : [Depending on model] Optimizes the video image for
high and dynamic actions by emphasizing primary colours such as
white, grass, or sky blue.
tExpert 1, 2 : Menu for adjusting picture quality that
allows experts and amateurs to enjoy the bestTV viewing.This
is the adjustment menu provided for ISF-certied picture tuning
professionals. (ISF logo can only be used on ISF-certied TVs.)
ISFccc: Imaging Science Foundation Certied Calibration Control
tDepending on input signal, available range of picture modes may
dier.
tExpert mode is for picture tuning professionals to control
and ne-tune using a specic image. For normal images, the
eects may not be dramatic.
tThe ISF function is only available on some models.
To set advanced control
SETTINGS PICTURE Picture Mode Advanced Control /
Expert Control
Calibrates the screen for each picture mode; or adjusts picture settings
for a special screen. First select a Picture Mode of your choice.
tDynamic Contrast : Adjusts the contrast to the optimal level
according to the brightness of the image.
tDynamic Colour : Adjusts colours to make the image appear in
more natural colours.
tSkin Colour : Sets Skin colour spectrum separately to implement
the skin colour as dened by the user.
tSky Colour : Sky colour is set separately.
tGrass Colour : Natural colour spectrum (meadows, hills, etc.) can
be separately set.
tGamma : Sets the gradation curve according to the output of
picture signal in relation to the input signal.
tColour Gamut : Selects the range of colours that can be
expressed.
tEdge Enhancer : Shows clearer and distinctive yet natural edges
of the video.
tExpert Pattern : [Depending on model]
Patterns used for expert adjustment.
tColour Filter : Filters a specic colour spectrum in RGB colours to
ne-tune colour saturation and hue accurately.
tColour Temperature : Adjusts the overall tone of the screen
as desired. In Expert mode, detailed ne-tuning can be set via
Gamma method, etc.
tColour Management System :This is a system that experts use
when they adjust colour with a test pattern.They can select from
six colour areas (Red / Green / Blue / Cyan / Magenta / Yellow)
without aecting other colours. For normal images, adjustments
may not result in noticeable colour changes.
tDepending on input signal or other picture settings, the range of
detailed items for adjustment may dier.

ENGLISH
15
To set additional picture options
SETTINGS PICTURE Picture Mode Picture Option
[Depending on model]
Adjusts detailed setting for images.
tNoise Reduction : Eliminates noise in the picture.
tMPEG Noise Reduction : Eliminates noise generated while
creating digital picture signals.
tBlack Level : Adjusts the brightness and contrast of the screen
to suit the black level of the input picture by using the blackness
(black level) of the screen.
tReal Cinema : Optimizes the screen for movie viewing.
tMotion Eye Care / Smart Energy Saving : [Depending on
model] Saves power consumption by adjusting the brightness
corresponding to the movement of the image on the screen.
tDepending on input signal or other picture settings, the range of
detailed items for adjustment may dier.
To use Energy Saving feature
SETTINGS PICTURE Energy Saving
Reduces power consumption by adjusting screen brightness.
tOff : Turns o the Energy Saving mode.
tMinimum / Medium / Maximum : Applies the pre-set Energy
Saving mode.
tScreen Off : Screen is turned o and only sound is played. Press
any button except Power button on the remote control to turn the
screen back on.
To use TV speaker
SETTINGS AUDIO Sound Out TV Speaker
[Depending on model]
Sound is output through the TV speaker.
To use Headphone
SETTINGS AUDIO Sound Out Headphone
[Depending on model]
Sound is output through the headphone connected to the earphone/
headphone port.
To synchronize audio and video
SETTINGS AUDIO AV Sync. Adjust
[Depending on model]
Synchronizes video and audio directly when they do not match.
tIf you set AV Sync. Adjust to ON, you can adjust the sound output
(TV speakers) to the screen image.
To use SIMPLINK
[Depending on model]
SIMPLINK is a feature that enables you to control and manage various
multimedia devices conveniently via the SIMPLINK menu.
1 Connect the TV’s HDMI IN terminal and the SIMPLINK device’s HDMI
output terminal using an HDMI cable.
2 Select INPUT SIMPLINK.
SIMPLINK menu window appears.
3 In SIMPLINK Setting window, set SIMPLINK function to ON.
4 In SIMPLINK menu window, selects the device you want to control.
tThis function is only compatible with devices with the SIMPLINK
logo.
tTo use the SIMPLINK function, you need to use a high-speed HDMI®
cable (with CEC (Consumer Electronics Control) feature added).
High-speed HDMI® cables have the No. 13 pin connected for
information exchange between devices.
tIf you switch to another input, the SIMPLINK device will stop.
tIf a third-party device with the HDMI-CEC function is also used, the
SIMPLINK device may not work normally.
tIf you select or play media from a the device with a home theatre
function, the HT Speaker(Speaker) is automatically connected.

16
ENGLISH
SIMPLINK function description
tDirect Play : Plays the multimedia device on the TV instantly.
tSelect multimedia device : Selects the desired device via the
SIMPLINK menu to control it from the TV screen instantly.
tDisc playback : Manages the multimedia device with theTV
remote control.
tPower off all devices : When you power o theTV, all connected
devices are turned o.
tSync Power on :When the equipment with SIMPLINK function
connected HDMI terminal starts to play, the TV will automatically
turn on.
tSpeaker : [Depending on model]
Select speaker either on the home theatre unit or theTV.
To set password
SETTINGS LOCK Set Password
Sets or changes the TV password.
The initial password is set to‘0000’.
tWhen France is selected for Country, password is not‘0000’but
‘1234’.
tWhen France is selected for Country, password cannot be set to
‘0000’.
To return Factory Reset
SETTINGS OPTION Factory Reset
All stored information is deleted and TV settings are reset.
TheTV turns itself o and back on, and all settings are reset.
tWhen Lock System is in place, a pop-up window appears and asks
for password.
tDo not turn o the power during initialization.
To remove the USB device
Q.MENU USB Device
Select a USB storage device that you want to remove.
When you see a message that the USB device has been removed,
separate the device from the TV.
tOnce a USB device has been selected for removal, it can no longer
be read. Remove the USB storage device and then re-connect it.
Using a USB storage device - warning
tIf the USB storage device has a built-in auto recognition program
or uses its own driver, it may not work.
tSome USB storage devices may not work or may work incorrectly.
tUse only USB storage devices formatted with the Windows FAT32
or NTFS File System.
tFor external USB HDDs, it is recommended that you use devices
with a rated voltage of less than 5 V and a rated current of less
than 500 mA.
tIt is recommended that you use USB memory sticks of 32 GB or less
and USB HDDs of 2 TB or less.
tIf a USB HDD with power-saving function does not work properly,
turn the power o and on. For more information, refer to the user
manual of the USB HDD.
tData in the USB storage device can be damaged, so be sure to back
up important les to other devices. Data maintenance is the user’s
responsibility and the manufacturer is not responsible for data loss.
My Media supporting le
tMaximum data transfer rate : 20 Mbps (Mega bit per second)
tExternal supported subtitle formats : *.srt (SubRip), *.smi (SAMI),
*.sub (SubViewer, MicroDVD, DVDsubtitleSystem, SubIdx(Vobsub)),
*.ass/*.ssa (SubStation Alpha), *.txt (TMplayer), *.psb (PowerDivX)
tInternal supported subtitle formats: *.dat/*.mpg/*.mpeg/*.
vob (DVD Subtitle), *.ts/*.tp/*.m2ts/ (DVB Subtitle), *.mp4 (DVD
Subtitle, UTF-8 Plain Text), *.mkv (ASS, SSA, UTF-8 Plain Text,
Universal Subtitle Format, VobSub, DVD Subtitle), *.divx/*.avi
(XSUB1, XSUB+)
1 XSUB : Supports internal subtitles generated from DivX6

ENGLISH
17
Supported Video Formats
tMaximum: 1920 x 1080 @ 30p (only Motion JPEG 640 x 480 @ 30p)
t.asf, .wmv
[Video] MPEG-2, MPEG-4 Part2, DivX3.11, DivX4, DivX5, DivX6,
XViD, H.264/AVC, VC1(WMV3, WVC1), MP43
[Audio]WMA Standard,WMA9(Pro), MP3, AAC, AC3, MP3, 3DWMV
Single Stream.
tdivx, .avi
[Video] MPEG-2, MPEG-4 Part2, DivX3.11, DivX4, DivX5, DivX6,
XViD, H.264/AVC
[Audio] HE-AAC, LPCM, ADPCM, MPEG- 1 Layer I, MPEG-1 Layer II,
Dolby Digital, MPEG-1 Layer III (MP3), *DTS
t.ts, .trp, .tp, .mts, .m2ts
[Video] H.264/AVC, MPEG-2, AVS,VC1
[Audio] MPEG-1 Layer I, MPEG-1 Layer II, MPEG-1 Layer III (MP3),
Dolby Digital, Dolby Digital Plus, AAC, HE-AAC, *DTS
t.vob
[Video] MPEG-1, MPEG-2
[Audio] Dolby Digital, MPEG-1 Layer I, MPEG- 1 Layer II, DVD-LPCM
t.mp4, .m4v, .mov
[Video] MPEG-2, MPEG-4 Part2, DivX3.11, DivX4, DivX5, DivX6,
XVID, H.264/AVC
[Audio] AAC, MPEG-1 Layer III (MP3), *DTS
t.mkv
[Video] MPEG-2, MPEG-4 Part2, DivX3.11, DivX4, DivX5, DivX6,
XVID, H.264/AVC
[Audio] HE-AAC, Dolby Digital, MPEG-1 Layer III (MP3), *DTS, LPCM
tmotion JPEG
[Video] MJPEG
[Audio] LPCM, ADPCM
t.mpg, .mpeg, .mpe
[Video] MPEG-1, MPEG-2
[Audio] MPEG-1 Layer I, MPEG-1 Layer II, Dolby Digital, LPCM
tdat
[Video] MPEG-1, MPEG-2
[Audio] MP2
tv
[Video] Sorenson H.263, H.264/AVC
[Audio] MP3, AAC, HE-AAC
t*rm, *rmvb
[Video] RV30, RV40
[Audio] Dolby Digital, AAC, HE-AAC, RA6(Cook)
t3gp, 3gp2
[Video] H.264/AVC, MPEG-4 Part2
[Audio] AAC, AMR(NB/WB)
t*DTS / *rm / *rmvb : Depending on model
Supported Audio Formats
tFile type : mp3
[Bit rate] 32 Kbps - 320 Kbps
[Sample freq.] 16 kHz - 48 kHz
[Support] MPEG1, MPEG2, Layer2, Layer3
tFileType : AAC
[Bit rate] Free Format
[Sample freq.] 8 kHz ~ 48 kHz
[Support] ADIF, ADTS
tFileType : M4A
[Bit rate] Free Format
[Sample freq.] 8 kHz ~ 48 kHz
[Support] MPEG-4
tFile Type : WMA
[Bit rate] 128 Kbps ~ 320 Kbps
[Sample freq.] 8 kHz ~ 48 kHz
[Support] WMA7, WMA8, WMA9 Standard
tFileType :WMA 10 Pro
[Bit rate] ~ 768 Kbps
[Channel / Sample freq.]
M0 : up to 2 Channel @ 48 kHz
(Except LBR mode),
M1 : up to 5.1 Channel @ 48 kHz,
M2 : up to 5.1 Channel @ 96 kHz
[Support] WMA 10 Pro
tFileType : OGG
[Bit rate] Free Format
[Sample freq.] ~ 48 kHz
[Support] OGG Vorvis
Supported Photo Formats
tCategory : 2D (jpeg, jpg, jpe)
[Available le type] SOF0: Baseline,
SOF1 : Extend Sequential,
SOF2 : Progressive
[Photo size] Minimum : 64 x 64,
Maximum : Normal Type: 15360 (W) x 8640 (H),
Progressive Type : 1920 (W) x 1440 (H)
tCategory : BMP
[Photo size] Minimum : 64 x 64, Maximum : 9600 x 6400
tCategory : PNG
[Available le type] Interlace, Non-Interlace
[Photo size] Minimum : 64 x 64, Maximum : Interlace : 1200 x 800,
Non-Interlace : 9600 x 6400
tBMP and PNG format les may be slower to display than JPEG.

18
ENGLISH
To see web manual
To obtain detailed User Guide information, please visit www.lg.com.
External control device
setup
To obtain the external control device setup information, please visit
www.lg.com.
Troubleshooting
Cannot control the TV with the remote control.
tCheck the remote control sensor on the product and try again.
tCheck if there is any obstacle between the product and the remote
control.
tCheck if the batteries are still working and properly installed (
to , to ).
No image display and no sound is produced.
tCheck if the product is turned on.
tCheck if the power cord is connected to a wall outlet.
tCheck if there is a problem in the wall outlet by connecting other
products.
TheTV turns o suddenly.
tCheck the power control settings.The power supply may be
interrupted.
tCheck if the Automatic Standby(Depending on model) / Sleep
Timer / Off Time is activated in the TIME settings.
tIf there is no signal while theTV is on, theTV will turn o
automatically after 15 minutes of inactivity.
When connecting to the PC (HDMI),‘No signal’or‘Invalid Format’is
displayed.
tTurn the TV o/on using the remote control.
tReconnect the HDMI cable.
tRestart the PC with the TV on.

www.lg.com
Bitte lesen Sie dieses Handbuch aufmerksam durch, bevor
Sie Ihr Gerät zum ersten Mal verwenden und bewahren Sie
es zur späteren Verwendung auf.
Sicherheit und Hinweise
BENUTZERHANDBUCH
LED TV*
* LG LED TV verwendet LCD-Bildschirme mit LED-
Beleuchtung.

2
DEUTSCH
Sicherheitshinweise
Bevor Sie das Produkt zum ersten Mal verwenden,
lesen Sie diese Sicherheitshinweise bitte
aufmerksam durch.
WARNUNG
Stellen Sie dasTV-Gerät mit Fernsteuerung nicht in folgenden
Umgebungen auf:
tUnter direkter Sonneneinstrahlung
tIn Bereichen mit hoher Luftfeuchtigkeit, wie z.B. einem
Badezimmer
tIn der Nähe von Hitzequellen, wie z.B. Öfen und anderen
hitzeerzeugenden Geräten
tIn der Nähe von Küchenzeilen oder Befeuchtern, wo das Gerät
leicht Dampf oder Öl ausgesetzt sein kann
tIn Bereichen, die Regen oderWind ausgesetzt sind
tIn der Nähe von Behältern mitWasser, wie z.B.Vasen
Andernfalls kann es zu Bränden, Stromschlägen, Fehlfunktionen oder
Produktverformungen kommen.
Schützen Sie das Gerät vor Staub. Es besteht Brandgefahr.
Wenn Sie das Gerät vom Stromnetz trennen möchten, müssen Sie den
Netzstecker aus der Steckdose ziehen. Dieser Stecker muss jederzeit gut
zugänglich sein.
Berühren Sie den Netzstecker nicht mit nassen Händen. Wenn die
Kontaktstifte nass oder verstaubt sind, trocknen Sie den Netzstecker
vollständig ab, bzw. befreien Sie ihn von Staub. Feuchtigkeit erhöht die
Gefahr eines tödlichen Stromschlags.
Stellen Sie sicher, dass das Stromkabel geerdet ist. (Außer bei Geräten,
die nicht geerdet sind.) Bei Nichtbeachtung besteht die Gefahr von
Verletzungen oder eines tödlichen Stromschlags.
Das Stromkabel muss vollständig in die Steckdose eingesteckt werden.
Ist das Stromkabel nicht fest in die Steckdose eingesteckt, besteht
Brandgefahr.
Das Stromkabel darf nicht mit heißen Gegenständen wie einem
Heizkörper in Berührung kommen. Andernfalls bestehen Brandgefahr
und die Gefahr von Stromschlägen.
Stellen Sie keinen schweren Gegenstand oder das Gerät selbst auf
das Stromkabel. Andernfalls kann es zu Bränden und Stromschlägen
kommen.
Platzieren Sie das Antennenkabel zwischen dem Innen- und
Außenbereich des Gebäudes so, dass kein Regen hereinießen kann.
EtwaigerWassereintritt kann zu Schäden am Gerät und Stromschlag
führen.
Falls das TV-Gerät an derWand montiert wird, darf es nicht an
den Strom- und Signalkabeln auf der Rückseite desTV-Gerätes
aufgehängt werden. Anderenfalls besteht die Gefahr von Bränden oder
Stromschlägen.
Schließen Sie nicht zu viele Elektrogeräte an einer einzelnen Steckdose
an. Andernfalls kann es aufgrund von Überhitzung zu Bränden
kommen.
Other manuals for 24lf450u
1
Table of contents
Languages:
Other LG LCD TV manuals