A-10 SETTING UP THE TV
CAUTION
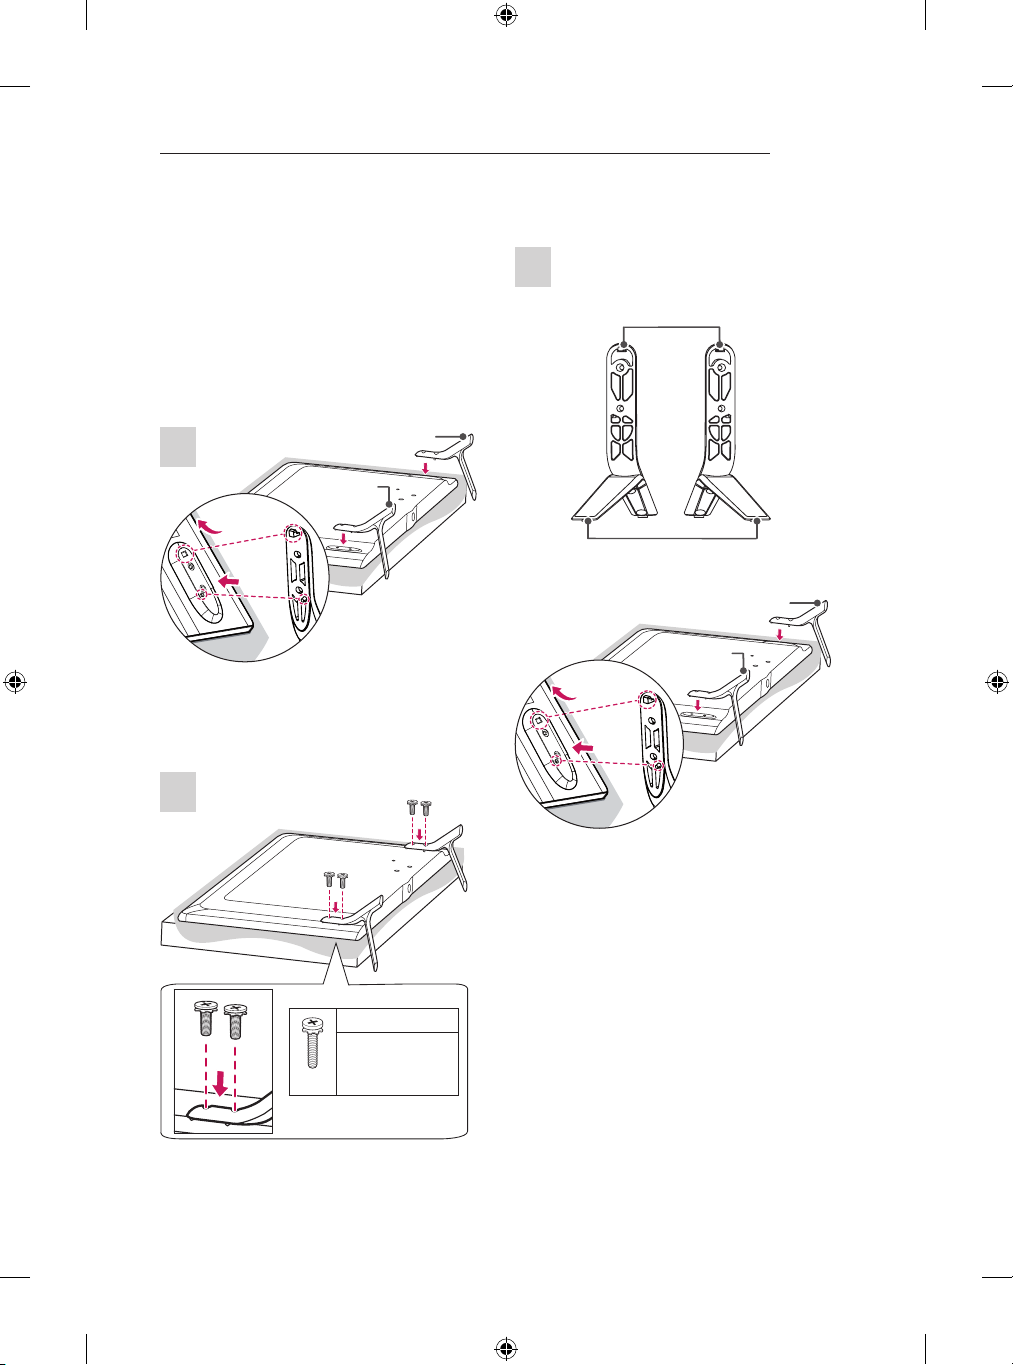
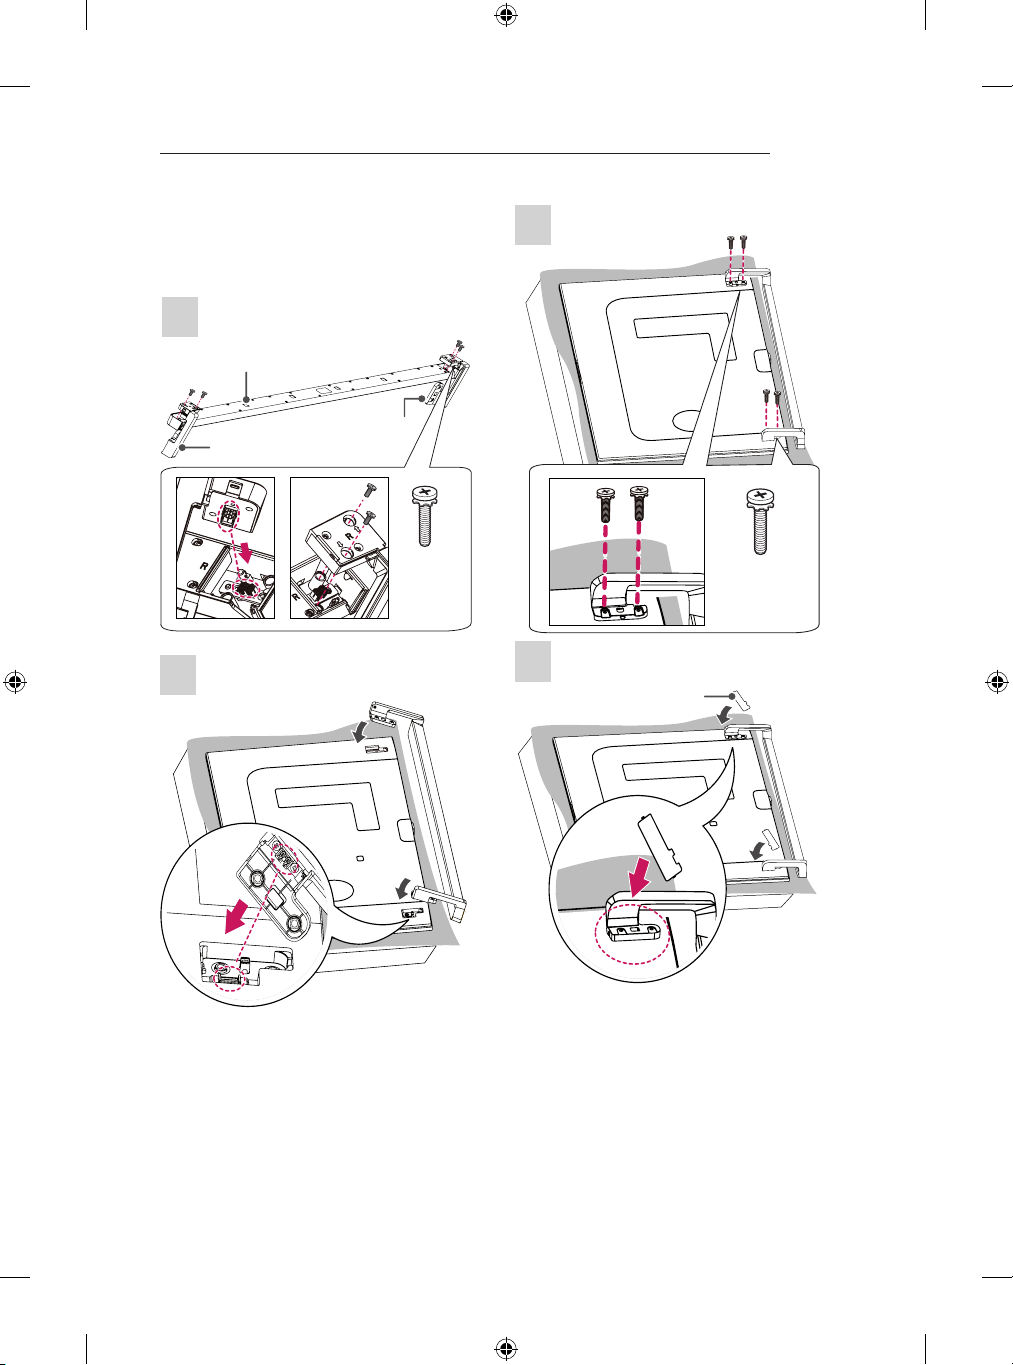
yWhen attaching the sound bar supporter
to the TV set, place the screen facing
down on a cushioned table or flat surface
to protect the screen from scratches.
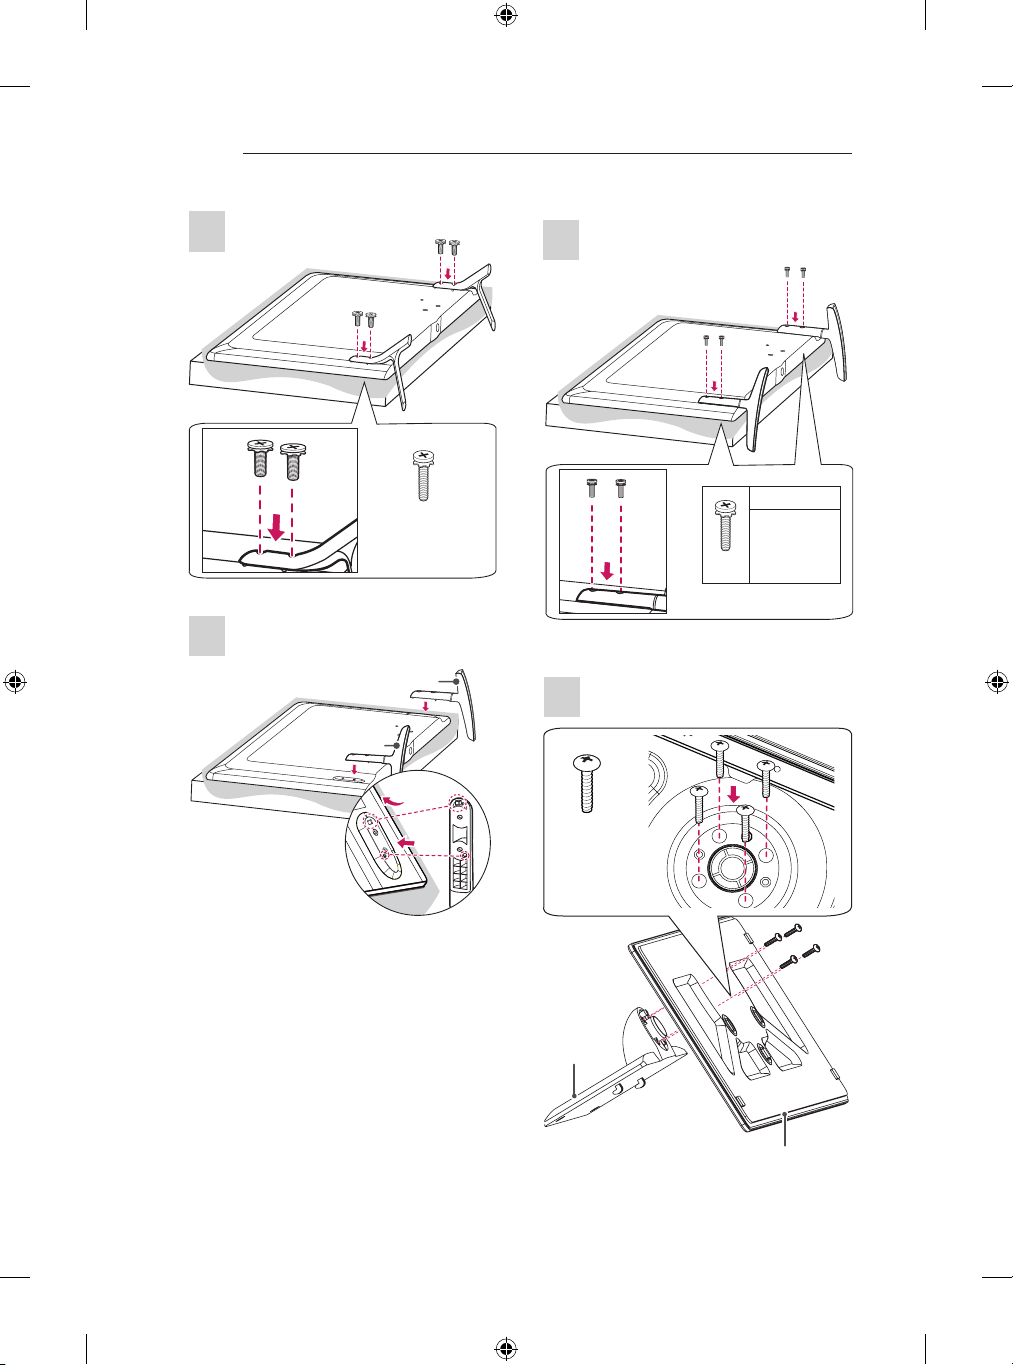
yMake sure that the screws are inserted
correctly and fastened securely. (If they
are not fastened securely enough, the TV
may tilt forward after being installed.)
Do not use too much force and over
tighten the screws; otherwise screw may
be damaged and not tighten correctly.
yThe sound bar supporter only uses for
wall mounting.
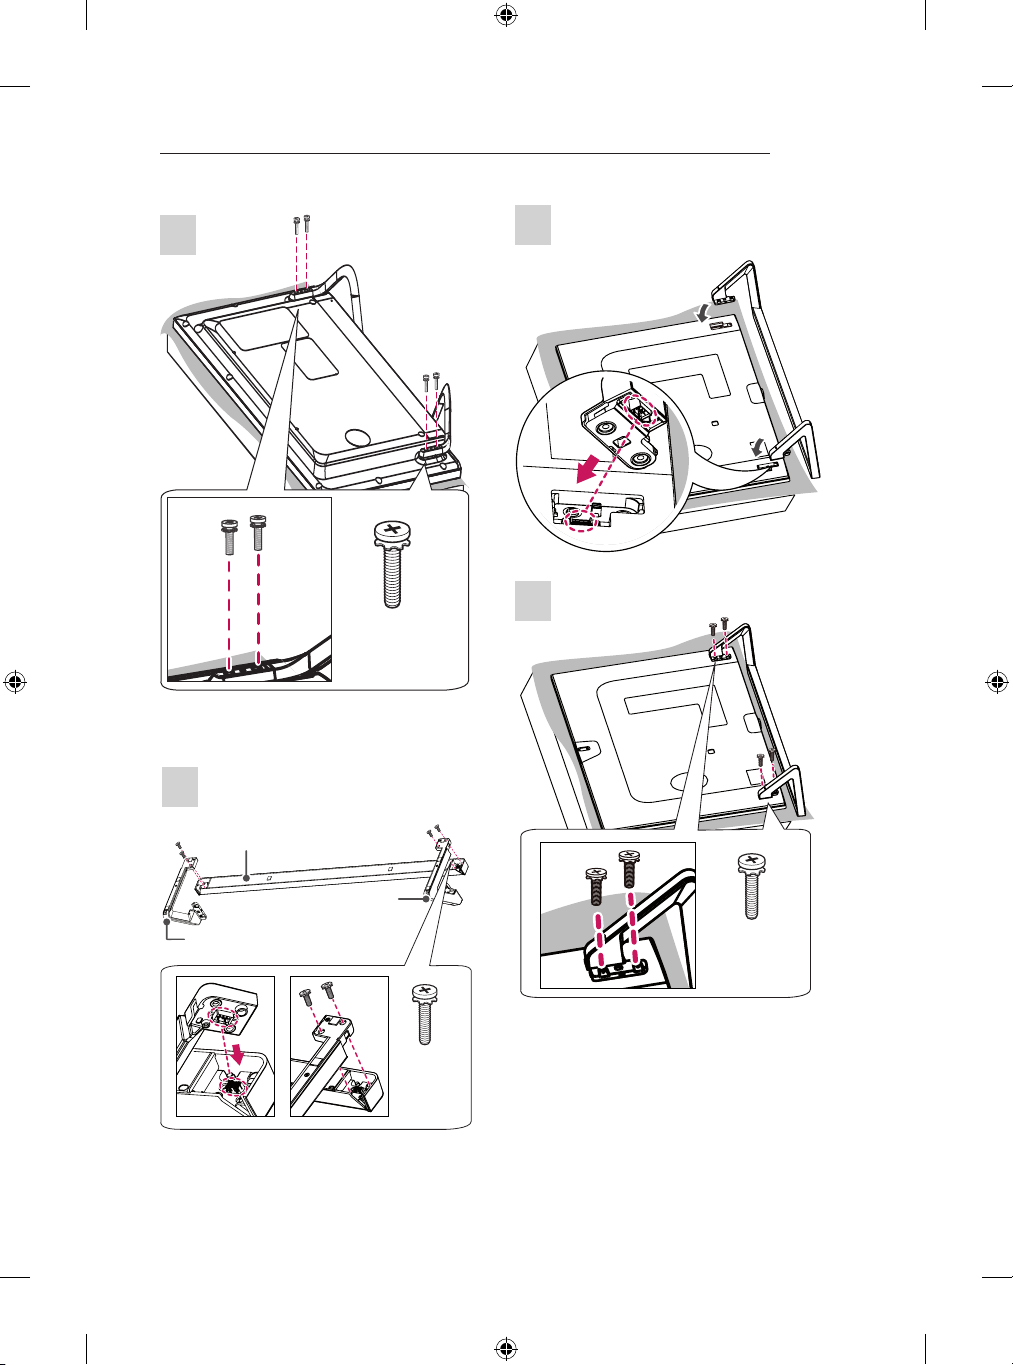
yAfter assembling the Sound Bar Wall
Mount Brackets, do not adjust the angle
of the TV while holding the Sound Bar or
hanging onto the Sound Bar.
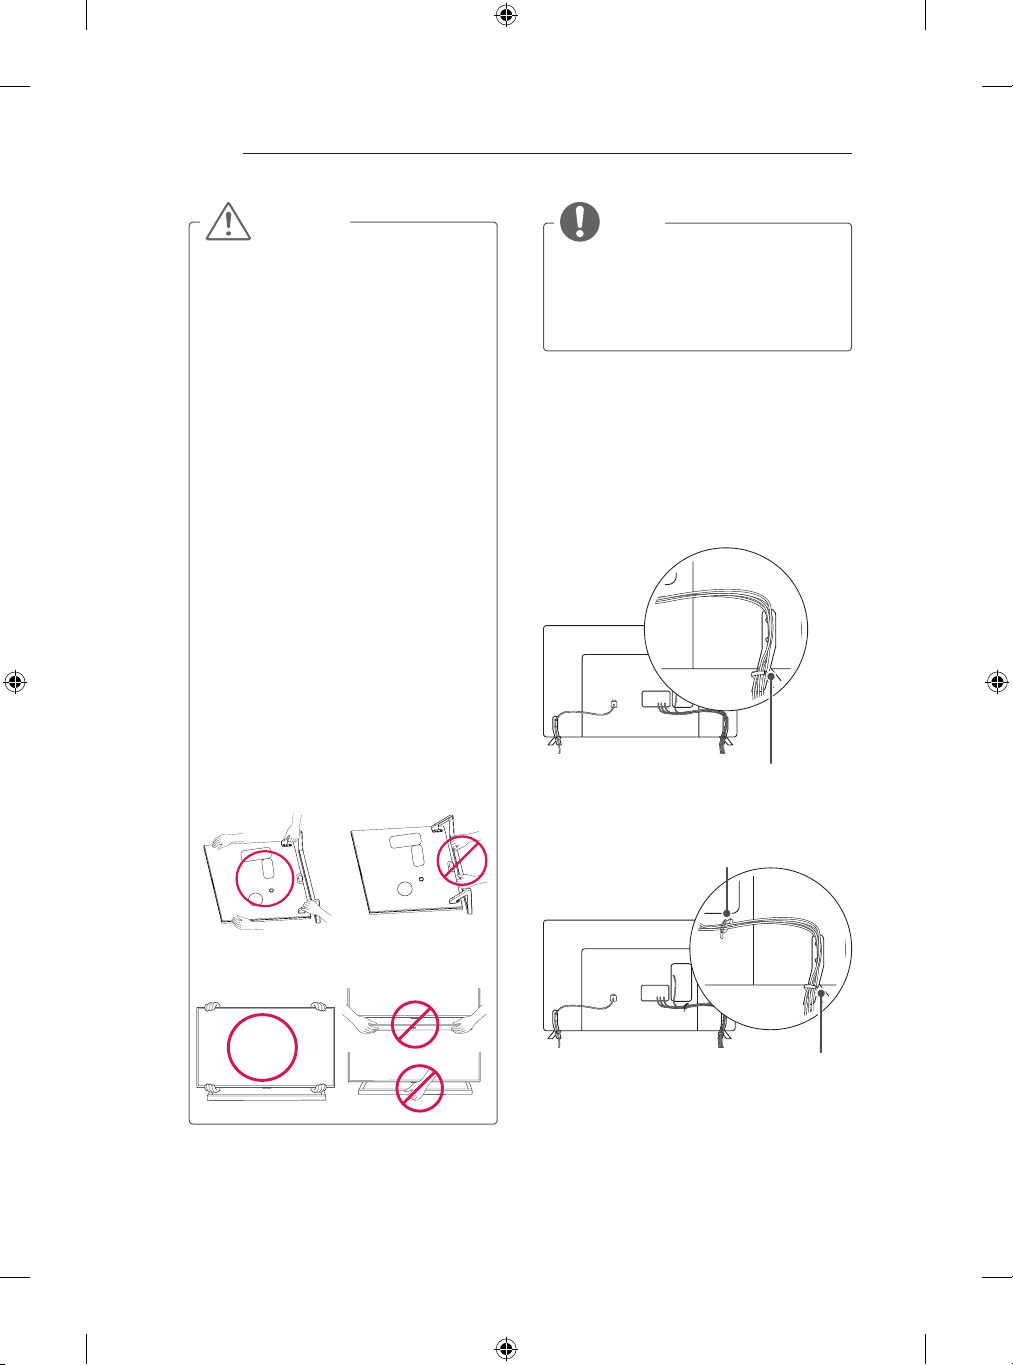
yWhen lifting the product, or moving it,
make sure that two or more people safely
lift it and set it upright on a flat surface.
When there are two people, one person
should stand on the right side of the
product and the other person should
stand on the left side to lift it. When
moving the product, hold the top and
bottom corners.
yWhen lifting the product, or moving it,
do not hold the Sound Bar. If you hold
the Sound Bar when lifting the product,
or moving it, the Sound Bar may be
damaged.
<When lifting the product>
<When moving the product>
NOTE
yRemove the sound bar supporter before
installing the stand by performing the
sound bar supporter attachment in
reverse.
yThe Screw Cover will protect the opening
from accumulating dust and dirty.
Tidying cables
Image shown may differ from your TV.
1 Gather and bind the cables with the Cable
Holder. (Depending on model)
2 Fix the Cable ManagementrmlytotheTV.
(Only 32LB65**-ZA)
Cable Management
(Only LB63**-ZA, 39/42/47/50/55/60LB65**-
ZA, LB67**-ZA/ZB/ZC/ZF, LB68**-ZD, LB69**,
LB73**-ZA)
Cable Holder
Cable Management