LG MFL68062722 User manual

www.lg.com
Please read this manual carefully before operating your set and
retain it for future reference.
Safety and Reference
OWNER’S MANUAL
MFL68062722

ATTENTION:
This product is qualied for the BEE Star rating in the‘Home’Mode.
The Objectives of Star Labeling Program is designed to promote energy ecient products and practices.
When the television is initially set up, it is designed to meet the BEE Star Labeling requirements while maintaining optimum picture quality.
• Changes to certain functionalities of this television (TV Guide, Picture/sound etc) may change the power consumption.
• Depending upon such changed setting (eg., Retail mode), the power consumption may vary which possibly could exceed the stated energy
consumption.
To reset the television to Star rating qualied settings, select‘Home’mode from the initial set-up procedure in‘factory settings’under the
‘Set-up’menu.

1. Factory Reset
1.1 When to do Factory Reset?
When you feel any abnormality in Picture and Sound settings, you can use this
function to reset all the settings to initial condition.
1.2 How to do Factory Reset?
Follow below on-screen instructions for Factory Reset.
1. Press
SETTINGS
and the Navigation buttons to scroll to
OPTION
.
2. Press the Navigation buttons to scroll to the
3. Select
Home Use
mode and press OK.
4.
Auto Tuning
message window will appear press next and follow instructions.
Step 1 Step 2 Step 3 Step 4
Note:
Changing Mode Setting (Home Use
Store Demo) will reset all Channel
Information and need to store all Channel data.
2. Signal Strength Indicator
Use this function to know the quality of RF cable signal.
Signal strength is displayed in channel information window.
A high signal level indicates a good signal quality.
Good Signal Weak Signal
If picture quality is not good or distorted, use this function to check the signal strength.
Note: If signal strength is low then contact your cable operator.
ENGLISH
3

Safety Instructions
Please read these safety precautions carefully before using the product.
WARNING
Do not place the TV and/or remote control in the following
environments:
• A location exposed to direct sunlight
• An area with high humidity such as a bathroom
• Near any heat source such as stoves and other devices that
produce heat
• Near kitchen counters or humidiers where they can easily be
exposed to steam or oil
• An area exposed to rain or wind
• Near containers of water such as vases
Otherwise, this may result in re, electric shock, malfunction or product
deformation.
Do not place the product where it might be exposed to dust. This may
cause a re hazard.
Mains Plug is the TV connecting/disconnecting device to AC mains
electric supply.This plug must remain readily attached and operable
when TV is in use.
Do not touch the power plug with wet hands. Additionally, if the cord
pin is wet or covered with dust, dry the power plug completely or wipe
dust o. You may be electrocuted due to excess moisture.
Make sure to connect Mains cable to compliant AC mains socket with
Grounded earth pin. (Except for devices which are not grounded on
earth.) Otherwise possibility you may be electrocuted or injured.
Insert power cable plug completely into wall socket otherwise if not
secured completely into socket, re ignition may break out.
Ensure the power cord does not come into contact with hot objects
such as a heater. This may cause a re or an electric shock hazard.
Do not place a heavy object, or the product itself, on power cables.
Otherwise, this may result in re or electric shock.
Bend antenna cable between inside and outside building to prevent
rain from owing in. This may cause water damaged inside the Product
and could give an electric shock.
When mountingTV onto wall make sure to neatly install and isolate
cabling from rear ofTV as to not create possibility of electric shock /
re hazard.
Do not plug too many electrical devices into a single multiple electrical
outlet. Otherwise, this may result in re due to over-heating.
4
ENGLISH

Do not drop the product or let it fall over when connecting external
devices. Otherwise, this may result in injury or damage to the product.
Desiccant
Keep the anti-moisture packing material or vinyl packing out of the
reach of children. Anti-moisture material is harmful if swallowed. If
swallowed by mistake, force the patient to vomit and visit the nearest
hospital. Additionally, vinyl packing can cause suocation. Keep it out
of the reach of children.
Do not let your children climb or cling onto the TV.
Otherwise, the TV may fall over, which may cause serious injury.
Dispose of used batteries carefully to ensure that a small child does not
consume them. Please seek Doctor- Medical Attention immediately if
child consumes batteries.
Do not insert any metal objects/conductors (like a metal chopstick/
cutlery/screwdriver) between power cable plug and inputWall Socket
while it is connected to the input terminal on the wall. Additionally,
do not touch the power cable right after plugging into the wall input
terminal.You may be electrocuted. (Depending on model)
Do not put or store inammable substances near the product. There is a
danger of combustion/explosion or re due to careless handling of the
inammable substances.
Do not drop metallic objects such as coins, hair pins, chopsticks or wire
into the product, or inammable objects such as paper and matches.
Children must pay particular attention. Electrical shock, re or injury
can occur. If a foreign object is dropped into the product, unplug the
power cord and contact the service centre.
Do not spray water on the product or scrub with an inammable
substance (thinner or benzene). Fire or electric shock accident can
occur.
Do not allow any impact, shock or any objects to fall into the unit,
and do not drop anything onto the screen.You may be injured or the
product can be damaged.
Never touch this product or antenna during a thunder or lighting storm.
You may be electrocuted.
Never touch the wall outlet when there is leakage of gas, open the
windows and ventilate. It may cause a re or a burn by a spark.
Do not disassemble, repair or modify the product at your own
discretion. Fire or electric shock accident can occur.
Contact the service centre for check, calibration or repair.
ENGLISH
5

If any of the following occur, unplug the product immediately and
contact your local service centre.
• The product has been impacted by shock
• The product has been damaged
• Foreign objects have entered the product
• The product produced smoke or a strange smell
This may result in re or electric shock.
Unplug the TV from AC mains wall socket if you do not intend to use the
TV for a long period of time. Accumulated dust can cause re hazard
and insulation deterioration can cause electric leakage/shock/re.
Apparatus shall not be exposed to dripping or splashing and no objects
lled with liquids, such as vases, shall be placed on the apparatus.
Do not install this product on a wall if it could be exposed to oil or oil
mist.This may damage the product and cause it to fall.
If water or another substance enters the product (like a AC adapter,
power cord, TV), disconnect the power cord and contact the service
centre immediately. Otherwise, this may result in re or electric shock.
Only use an authorized AC adapter and power cord approved by
LG Electronics. Otherwise, this may result in re, electric shock,
malfunction or product deformation.
Never Disassemble the AC adapter or power cord.This may result in re
or electric shock.
CAUTION
Install the product where no radio wave occurs.
There should be enough distance between an outside antenna and
power lines to keep the former from touching the latter even when the
antenna falls. This may cause an electric shock.
Do not install the product on places such as unstable shelves or inclined
surfaces. Also avoid places where there is vibration or where the
product cannot be fully supported. Otherwise, the product may fall or
ip over, which may cause injury or damage to the product.
If you install theTV on a stand, you need to take actions to prevent the
product from overturning. Otherwise, the product may fall over, which
may cause injury.
If you intend to mount the product to a wall, attachVESA standard
mounting interface (optional parts) to the back of the product. When
you install the set to use the wall mounting bracket (optional parts), x
it carefully so as not to drop.
Only use the attachments / accessories specied by the manufacturer.
When installing the antenna, consult with a qualied service
technician. If not installed by a qualied technician, this may create a
re hazard or an electric shock hazard.
6
ENGLISH
*DependingonModel

We recommend that you maintain a distance of at least 2 to 7 times
the diagonal screen size when watchingTV. If you watchTV for a long
period of time, this may cause blurred vision.
Only use the specied type of battery. This could cause damage to the
remote control.
Do not mix new batteries with old batteries. This may cause the
batteries to overheat and leak.
Batteries should not be exposed to excessive heat. For example, keep
away from direct Sunlight , open replace and electric heaters.
Do not place non-rechargeable batteries in charging device.
Make sure there are no objects between the remote control and its
sensor.
Signal from Remote Control can be interrupted due to external/internal
lighting eg Sunlight, uorescent lighting. If this occurs turn o lighting
or darken viewing area.
When connecting external devices such as video game consoles, make
sure the connecting cables are long enough. Otherwise, the product
may fall over, which may cause injury or damage the product.
Do not turn the product On/O by plugging-in or unplugging the power
plug to the wall outlet. (Do not use the power plug for switch.) It may
cause mechanical failure or could give an electric shock.
Please follow the installation instructions below to prevent the product
from overheating.
• The distance between the product and the wall should be more
than 10cm.
• Do not install the product in a place with no ventilation (e.g., on a
bookshelf or in a cupboard).
• Do not install the product on a carpet or cushion.
• Make sure the air vent is not blocked by a tablecloth or curtain.
Otherwise, this may result in re.
Take care not to touch the ventilation openings when watching theTV
for long periods as the ventilation openings may become hot. This does
not aect the operation or performance of the product.
Periodically examine the cord of your appliance, and if its appearance
indicates damage or deterioration, unplug it, discontinue use of the
appliance, and have the cord replaced with an exact replacement part
by an authorized servicer.
Prevent dust collecting on the power plug pins or outlet. This may cause
a re hazard.
Protect the power cord from physical or mechanical abuse, such as
being twisted, kinked, pinched, closed in a door, or walked upon. Pay
particular attention to plugs, wall outlets, and the point where the cord
exits the appliance.
ENGLISH
7

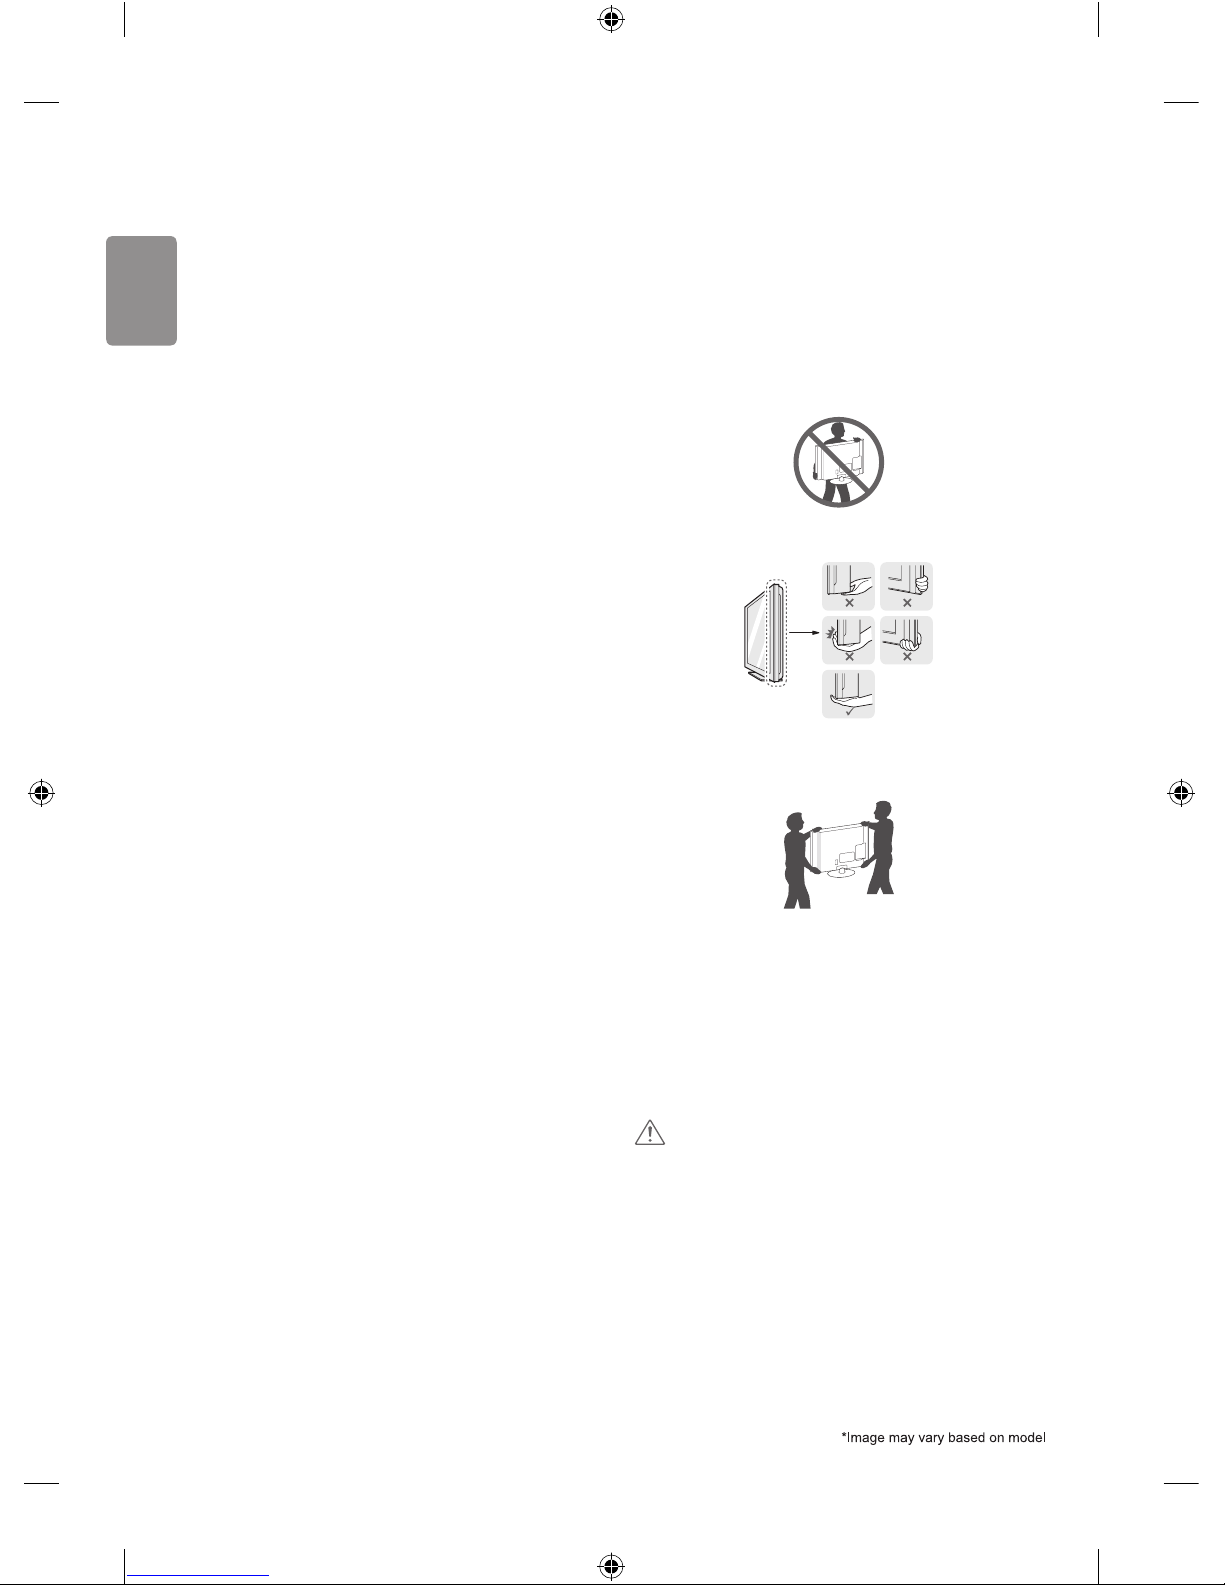
Do not press strongly upon the panel with a hand or sharp object such
as nail, pencil or pen, or make a scratch on it, as it may causedamage
to screen.
Avoid touching the screen or holding your nger(s) against it for long
periods of time. Doing so may produce some temporary or permanent
distortion/damage to screen.
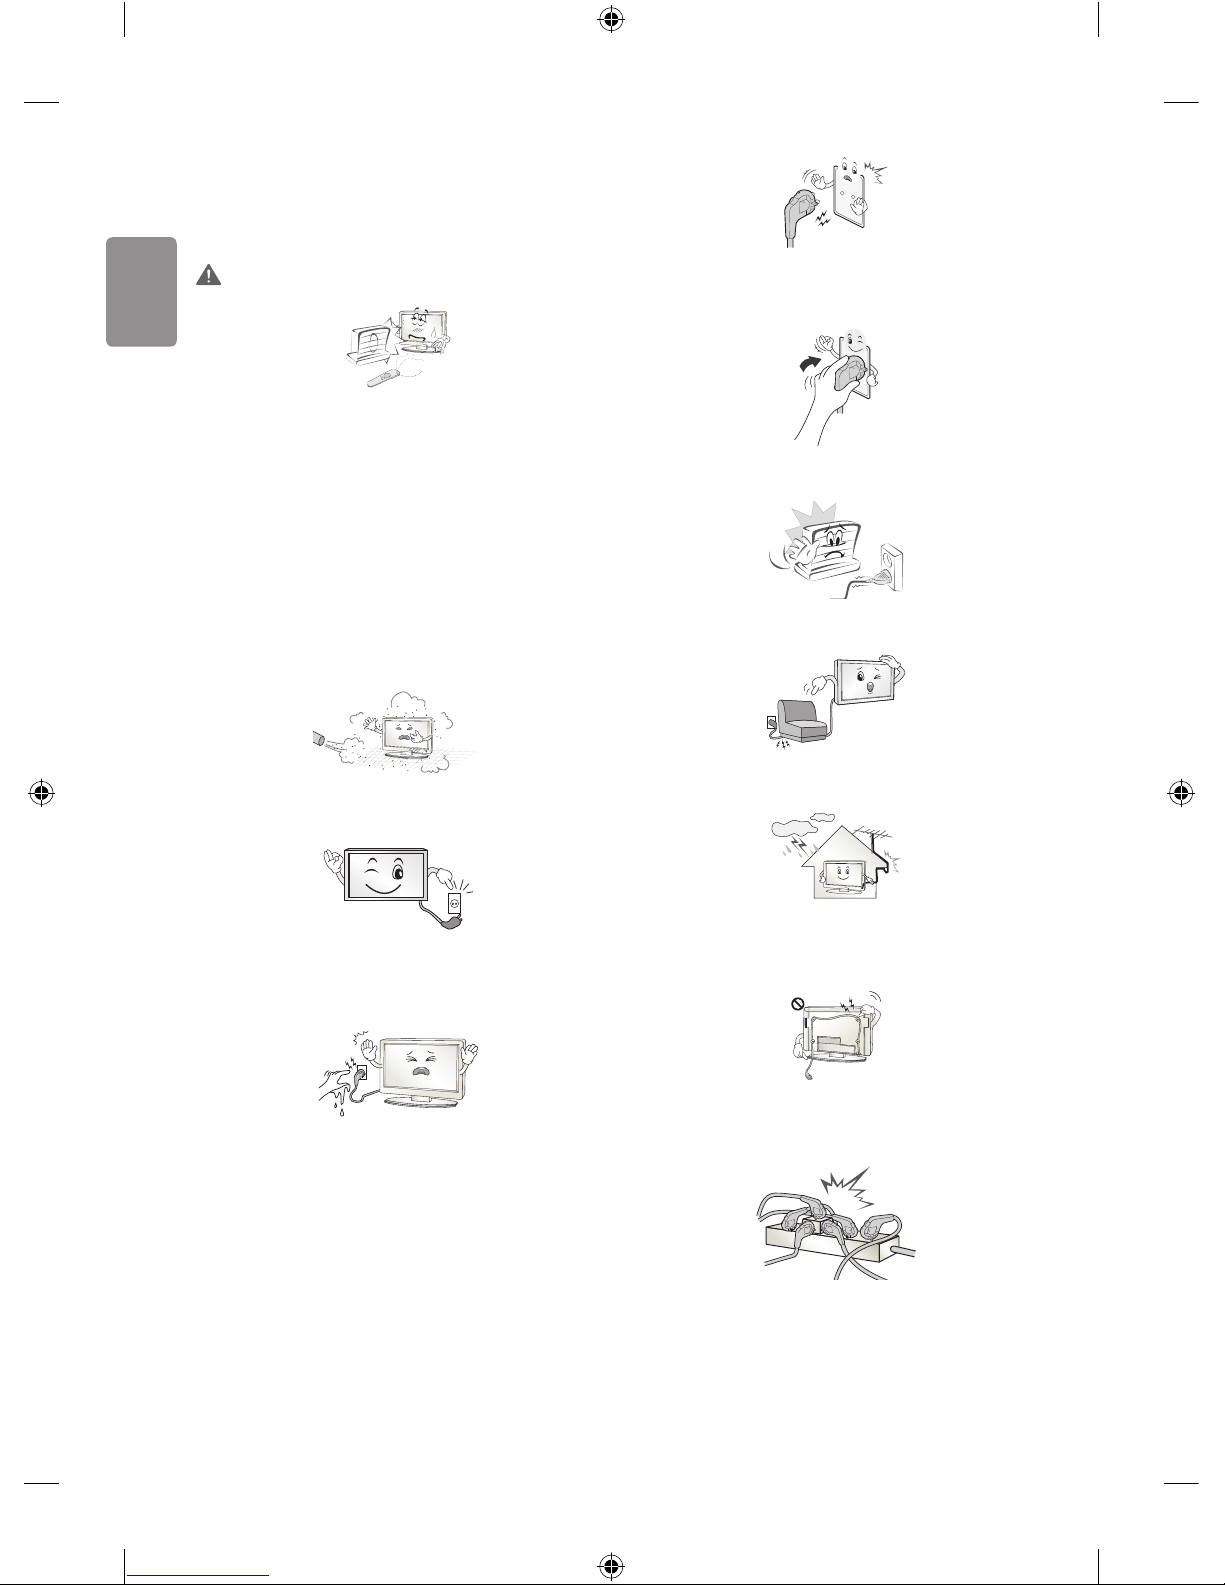
When cleaning the product and its components, unplug the power
rst and wipe it with a soft cloth. Applying excessive force may cause
scratches or discolouration. Do not spray with water or wipe with a wet
cloth. Never use glass cleaner, car or industrial shiner, abrasives or wax,
benzene, alcohol etc., which can damage the product and its panel.
Otherwise, this may result in re, electric shock or product damage
(deformation, corrosion or breakage).
As long as this unit is connected to the AC wall outlet, it is not
disconnected from the AC power source even if you turn o this unit
by SWITCH.
When unplugging the cable, grab the plug and unplug it, by pulling at
the plug.
Don’t pull at the cord to unplug the power cord from the power board,
as this could be hazardous.
When moving the product, make sure you turn the power o rst. Then,
unplug the power cables, antenna cables and all connecting cables.
TheTV set or power cord may be damaged, which may create a re
hazard or cause electric shock.
When moving or unpacking the product, work in pairs because the
product is heavy. Otherwise, this may result in injury.
Contact the service centre once a year to clean the internal parts of the
product.
Accumulated dust can cause mechanical failure.
Refer all servicing to qualied service personnel. Servicing is required
when the apparatus has been damaged in any way, such as power
supply cord or plug is damaged, liquid has been spilled or objects have
fallen into the apparatus, the apparatus has been exposed to rain or
moisture, does not operate normally, or has been dropped.
If the product feels cold to the touch, there may be a small“icker”
when it is turned on. This is normal, there is nothing wrong with
product.
The panel is a high technology display product with resolution of two
million to six million pixels. You may see tiny black dots and/or brightly
coloured dots (red, blue or green) at a size of 1ppm on the panel. This
does not indicate a malfunction and does not aect the performance
and reliability of the product.
This phenomenon also occurs in third-party products and is not subject
to exchange or refund.
8
ENGLISH

You may nd dierent brightness and color of the panel depending on
your viewing position(left/right/top/down).
This phenomenon occurs due to the characteristic of the panel. It is not
related with the product performance, and it is not malfunction.
* Disclaimer
LG LED TVs are LCD TVs with LED backlighting.
Displaying a still image (e.g., broadcasting channel logo, on-screen
menu, scene from a video game) for a prolonged time may cause
damage to the screen, resulting in retention of the image, which is
known as image sticking. The warranty does not cover the product for
image sticking.
Avoid displaying a xed image on your television’s screen for a
prolonged period (2 or more hours for LCD, 1 or more hours for Plasma).
Also, if you watch theTV at a ratio of 4:3 for a long time, image sticking
may occur on the borders of the panel.
This phenomenon also occurs in third-party products and is not subject
to exchange or refund.
Generated Sound
“Cracking”noise: A cracking noise that occurs when watching or turning
o the TV is generated by plastic thermal contraction due to tempera-
ture and humidity. This noise is common for products where thermal
deformation is required. Electrical circuit humming/panel buzzing:
A low level noise is generated from a high-speed switching circuit,
which supplies a large amount of current to operate a product. It varies
depending on the product.
This generated sound does not aect the performance and reliability
of the product.
Do not use high voltage electrical goods near the TV (e.g. electric
mosquito-swatter).This may result in product malfunction.
Preparing
NOTE
• Image shown may dier from yourTV.
• Your TV’s OSD (On Screen Display) may dier slightly from that
shown in this manual.
• The available menus and options may dier from the input source
or product model that you are using.
• New features may be added to thisTV in the future.
• TheTV can be placed in standby mode in order to reduce the power
consumption. And theTV should be turned o if it will not be
watched for some time, as this will reduce energy consumption.
• The energy consumed during use can be signicantly reduced if the
level of brightness of the picture is reduced, and this will reduce
the overall running cost.
• The items supplied with your product may vary depending on the
model.
• Product specications or contents of this manual may be changed
without prior notice due to upgrade of product functions.
• For an optimal connection, HDMI cables and USB devices should
have bezels less than 10 mm thick and 18 mm width. Use an
extension cable that supports USB 2.0 if the USB cable or USB
memory stick does not t into your TV’s USB port.
A
B
A
B
*A
<
=
10 mm
*B
<
=
18 mm
• Use a certied cable with the HDMI logo attached.
• If you do not use a certied HDMI cable, the screen may not display
or a connection error may occur. (Recommended HDMI cable types)
-High-Speed HDMI®/™cable
-High-Speed HDMI®/™cable with Ethernet
CAUTION
• Do not use any unapproved items to ensure the safety and product
life span.
• Any damage or injuries caused by using unapproved items are not
covered by the manufacturer’s warranty.
• Some models have a thin lm attached on to the screen and this
must not be removed.
ENGLISH
9

Maintenance
Cleaning your TV
Clean yourTV regularly to keep the best performance and to extend the
product lifespan.
• Make sure to turn the power o and disconnect the power cord and
all other cables rst.
• When the TV is left unattended and unused for a long time,
disconnect the power cord from the wall outlet to prevent possible
damage from lightning or power surges.
Screen, frame, cabinet and stand
To remove dust or light dirt, wipe the surface with a dry, clean, and
soft cloth.
To remove major dirt, wipe the surface with a soft cloth dampened in
clean water or a diluted mild detergent.Then wipe immediately with
a dry cloth.
• Avoid touching the screen at all times, as this may result in damage
to the screen.
• Do not push, rub, or hit the screen surface with your ngernail or a
sharp object, as this may result in scratches and image distortions.
• Do not use any chemicals as this may damage the product.
• Do not spray liquid onto the surface. If water enters theTV, it may
result in re, electric shock, or malfunction.
Power cord
Remove the accumulated dust or dirt on the power cord regularly.
Lifting and moving the TV
Please note the following advice to prevent the TV from being scratched
or damaged and for safe transportation regardless of its type and size.
• It is recommended to move theTV in the box or packing material
that theTV originally came in.
• Before moving or lifting theTV, disconnect the power cord and
all cables.
• When holding the TV, the screen should face away from you to
avoid damage.
• Hold the top and bottom of theTV frame rmly. Make sure not to
hold the transparent part, speaker, or speaker grill area.
• When transporting a large TV, there should be at least 2 people.
• When transporting the TV by hand, hold the TV as shown in the
following illustration.
• When transporting the TV, do not expose theTV to jolts or
excessive vibration.
• When transporting the TV, keep theTV upright, never turn theTV
on its side or tilt towards the left or right.
• Do not apply excessive pressure to cause exing /bending of frame
chassis as it may damage screen.
• When handling the TV, be careful not to damage the protruding
joystick button.
CAUTION
• Avoid touching the screen at all times, as this may result in damage
to the screen.
• Do not move theTV by holding the cable holders, as the cable
holders may break, and injuries and damage to theTV may occur.
10
ENGLISH

Using the joystick button
You can simply operate theTV functions, pressing or moving the joystick
button up, down, left or right.
Joystick Button
Basic Functions
Power On
When the TV is turned o, place your
nger on the joystick button and
press it once and release it.
Power O
When the TV is turned on, place your
nger on the joystick button and
press it once for a few seconds and
release it. (However, if the Menu
button is on the screen, pressing and
holding the joystick button will let
you exit the Menu.)
Volume
Control
If you place your nger over the
joystick button and move it left or
right, you can adjust the volume
level you want.
Programmes
Control
If you place your nger over the
joystick button and move itforward
orbackward,you can scrolls through
thesaved programmes you want.
Adjusting the Menu
When the TV is turned on, press the joystick button one time. You can
adjust the Menu items moving the joystick button up, down, left or
right.
Turns the power o.
Clears on-screen displays and returns toTV viewing.
Changes the input source.
Accesses the main menu.
NOTE
• When your nger over the joystick button and push it to the up,
down, left or right, be careful not to press the joystick button. If you
press the joystick button rst, you may not be able to adjust the
volume level and saved programmes.
Mounting on a table
(Depending on model)
1 Lift and tilt the TV into its upright position on a table.
• Leave a 10 cm (minimum) space from the wall for proper
ventilation.
10 cm
10 cm
10 cm
10 cm
10 cm
2 Connect the power cord to a wall outlet.
CAUTION
• Do not place the TV near or on sources of heat, as this may result in
re or other damage.
WARNING
If a television is not positioned in a suciently stable location, it can
be potentially hazardous due to falling. Many injuries, particularly to
children, can be avoided by taking simple precautions such as:
• Using cabinets or stands recommended by the manufacturer of
the television.
• Only using furniture that can safely support the television.
• Ensuring the television is not overhanging the edge of the
supporting furniture.
• Not placing the television on tall furniture (for example, cupboards
or bookcases) without anchoring both the furniture and the
television to a suitable support.
• Not standing the televisions on cloth or other materials placed
between the television and supporting furniture.
• Educating children about the dangers of climbing on furniture to
reach the television or its controls.
Sizeofthetableshouldbesufficientenoughtoaccommodate
TVbasestand
*Imagemayvarydependingonmodel
ENGLISH
11

Using the kensington security
system
(Thisfeaturemayvarydependingonmodel)
• Image shown may dier from yourTV.
The Kensington security system connector is located at the rear of the
TV. For more information of installation and using, refer to the manual
provided with the Kensington security system or visit http://www.
kensington.com. Connect the Kensington security system cable between
the TV and a table.
Securing the TV to a wall
(This feature is not available for all models.)
1 Insert and tighten the eye-bolts, or TV brackets and bolts on the back
of the TV.
• If there are bolts inserted at the eye-bolts position, remove the
bolts rst.
2 Mount the wall brackets with the bolts to the wall.
Match the location of the wall bracket and the eye-bolts on the rear
of the TV.
3 Connect the eye-bolts and wall brackets tightly with a sturdy rope.
Make sure to keep the rope horizontal with the at surface.
CAUTION
• Make sure that children do not climb on or hang on theTV.
NOTE
• Use a platform or cabinet that is strong and large enough to
support the TV securely.
• Brackets, bolts and ropes are not provided. You can obtain
additional accessories from your local dealer.
Mounting on a wall
Attach an optional wall mount bracket at the rear of the TV carefully
and install the wall mount bracket on a solid wall perpendicular to
the oor. When you attach theTV to other building materials, please
contact qualied personnel. LG recommends that wall mounting be
performed by a qualied professional installer. We recommend the
use of LG’s wall mount bracket.When you do not use LG’s wall mount
bracket, please use a wall mount bracket where the device is adequately
secured to the wall with enough space to allow connectivity to external
devices.
10 cm
10 cm
10 cm
10 cm
Make sure to use screws and wall mount bracket that meet the VESA
standard. Standard dimensions for the wall mount kits are described in
the following table.
Separate purchase(Wall mounting bracket)
Model
VESA (A x B) 200 x 200 400 x 400
Standard screw M6 M6
Number of screws 4 4
Model 43LF54** 49LF54**
VESA (A x B) 200 x 200 300 x 300
Standard screw M6 M6
Number of screws 4 4
A
B
12
ENGLISH

CAUTION
• Disconnect the power rst, and then move or install the TV.
Otherwise electric shock may occur.
• Remove the stand before installing the TV on a wall mount by
performing the stand attachment in reverse.
• If you install the TV on a ceiling or slanted wall, it may fall and
result in severe injury. Use an authorised LG wall mount and
contact the local dealer or qualied personnel.
• Do not over tighten the screws as this may cause damage to the TV
and void your warranty.
• Use the screws and wall mounts that meet the VESA standard. Any
damages or injuries by misuse or using an improper accessory are
not covered by the manufacturer’s warranty.
NOTE
• Use the screws that are listed on the VESA standard screw
specications.
• The wall mount kit includes a bracket and necessary
parts.
• The wall mount bracket is not provided alongwiththeTVset.
• The length of screws may dier depending on the wall mount.
Make sure to use the proper length.
• For more information, refer to the manual supplied with the wall
mount.
• When attaching a wall mounting bracket to the TV, insert the wall
mount spacers into the TV wall mount holes to adjust the vertical
angle of the TV. (Only when the item of the following form is
provided)
Provided Item
Wall Mount Spacer
Connections (notications)
Connect various external devices to the TV and switch input modes to
select an external device. For more information of external device’s
connection, refer to the manual provided with each device.
Available external devices are: HD receivers, DVD players, VCRs, audio
systems, USB storage devices, PC, gaming devices, and other external
devices.
NOTE
• The external device connection may dier from the model.
• Connect external devices to the TV regardless of the order of the
TV port.
• If you record a TV program on a DVD recorder or VCR, make sure to
connect the TV signal input cable to the TV through a DVD recorder
or VCR. For more information of recording, refer to the manual
provided with the connected device.
• Refer to the external equipment’s manual for operating
instructions.
• If you connect a gaming device to the TV, use the cable supplied
with the gaming device.
Antenna connection
Connect the TV to a wall antenna socket with an RF cable (75 Ω).
• Use a signal splitter to use more than 2 TVs.
• If the image quality is poor, install a signal amplier properly to
improve the image quality.
• If the image quality is poor with an antenna connected, try to
realign the antenna in the correct direction.
• An antenna cable and converter are not supplied.
Antenna Booster
• This feature improves the sensitivity to weak RF Signal
in
poor
reception
areas. LG’s built-in booster is auto-
activated
at
weak
signal level. It strengthens signal level
and
minimizes
picture colour noise.
• This
feature
is
auto-controlled by processor and no user
intervention
required.
Other connections
Connect your TV to external devices. For the best picture and audio
quality, connect the external device and the TV with the HDMI cable.
Some
separate cable is not provided.
ENGLISH
13
*Imagemayvarydependingonmodel
*DependingonModel

Remote control
(Depending on model)
The descriptions in this manual are based on the buttons on the remote
control. Please read this manual carefully and use the TV correctly.
To replace batteries, open the battery cover, replace batteries (1.5
V AAA) matching the and ends to the label inside the
compartment, and close the battery cover. To remove the batteries,
perform the installation actions in reverse.
CAUTION
• Do not mix old and new batteries, as this may damage the remote
control.
• In Analogue TV and some countries, some remote control buttons
may not work.
• The remote control will not be included for all sales market.
Make sure to point the remote control toward the remote control sensor
on the TV.
A
FAV
1 2
A
(POWER) Turns the TV on or o.
Returns to the TV viewing from any mode.
Accesses the Quick menus.
1Changes the image mode. (Depending on model)
1Selects an AV mode. (Depending on model)
2Selects an AV mode. (Depending on model)
2Switches the BOLLYWOOD sound mode.
(Depending on model)
Changes the input source.
Number buttons Enters numbers.
Accesses the saved programme list.
Returns to the previously viewed programme.
B
FAV
C
B
Adjusts the volume level.
Accesses your favourite programme list.
Selects the sound output.
Mutes all sounds.
Scrolls through the saved programmes.
Moves to the previous or next screen.
C
3Teletext buttons These buttons are used for teletext.
Accesses the main menus.
Navigation buttons (up/down/left/right) Scrolls through
menus or options.
Selects menus or options and conrms your input.
Returns to the previous level.
Clears on-screen displays and returns toTV viewing.
Control buttons ( ) Controls the
ENTERTAINMENT menus.
Coloured buttons These access special functions in some menus.
( : Red, : Green, : Yellow, : Blue)
14
ENGLISH

Licenses
Supported licenses may dier by model. For more information about
licenses, visit www.lg.com.
Manufactured under license from Dolby Laboratories.
Dolby and the double-D symbol are trademarks of Dolby
Laboratories.
The terms HDMI and HDMI High-Denition Multimedia Interface,
and the HDMI logo are trademarks or registered trademarks of HDMI
Licensing LLC in the United States and other countries.
DivX Certied®to play DivX®video up to HD 1080p, including
premium content.
DivX®, DivX Certied®and associated logos are trademarks of DivX,
LLC and are used under license.
Covered by one or more of the following U.S. patents:
7,295,673; 7,460,668; 7,515,710; 7,519,274.
Open source software
notice information
To obtain the source code under GPL, LGPL, MPL, and other open source
licenses, that is contained in this product, please visit http://opensource.
lge.com.
In addition to the source code, all referred license terms, warranty
disclaimers and copyright notices are available for download.
LG Electronics will also provide open source code to you on CD-ROM
for a charge covering the cost of performing such distribution (such
as the cost of media, shipping, and handling) upon email request to
opensource@lge.com. This oer is valid for three (3) years from the date
on which you purchased the product.
Watching TV
Turning the TV on for the rst time
When you turn theTV on for the rst time, the Initial setting screen
appears. Select a language and customize the basic settings.
1 Connect the power cord to a power outlet. The Power indicator turns
red and theTV switches to Standby mode.
2 In Standby mode, press the power button on the remote control or
local key to turn theTV on. The Initial setting screen appears if you
turn the TV on for the rst time.
NOTE
• You can also access Factory Reset by accessing OPTION in the main
menu.
3 Follow the on-screen instructions to customize yourTV settings
according to your preferences.
Menu Language Selects a language to display.
Mode Setting Selects Home Use for the home
environment.
Time Setting Sets the time.
Auto Tuning Scans and saves available
programmes automatically.
ENGLISH
15
ABOUT DIVX VIDEO: DivX® is a digital video format created by
DivX, LLC, a subsidiary of Rovi Corporation. This is an official DivX
Certified® device that has passed rigorous testing to verify that it
plays DivX video. Visit divx com for more information and
software tools to convert your files into DivX videos.
ABOUT DIVX VIDEO-ON-DEMAND: This DivX Certified® device
must be registered in order to play purchased DivX Video-
onDemand (VOD) movies. To obtain your registration code,
locate the DivX VOD section in your device setup menu. Go to
vod.divx.com for more information on how to complete your
registration.

NOTE
• To display images in the best quality for your home environment,
select Home Use.
• Store Demo is suitable for the retail environment.
• If you select Store Demo, any customized settings will switch
back to the default settings of Store Demo in 5 minutes.
4 When the basic settings are complete, press the .
NOTE
• If you do not complete the Initial setting, it will appear whenever
the TV turns on.
• Disconnect the power cord from the power outlet when you do not
use the TV for a long period of time.
5 To turn the TV o, press the power button on the remote control.
Watching TV
1 In Standby mode, press (POWER) to turn theTV on.
2 Press INPUT and select TV.
3 To turn the TV o, press (POWER). TheTV switches to Standby
mode.
Managing programmes
Automatically setting up programme
Use this to automatically nd and store all available programmes.
1 Press SETTINGS and the Navigation buttons to scroll to SETUP and
press .
2 Press the Navigation buttons to scroll to Auto Tuning and press
.
3 Press the Navigation buttons to scroll toTo Start and select To Start
to begin auto tuning. TheTV scans and saves available programmes
automatically.
4 When you return to the previous menu, press .
Manually setting up programme
Manual Tuning lets you manually tune and arrange the stations in
whatever order you desire.
1 Press SETTINGS and the Navigation buttons to scroll to SETUP.
2 Press the Navigation buttons to scroll to Manual Tuning.
3 Press the Navigation buttons to scroll to Storage.
4 Press the Navigation buttons or Number buttons to select the desired
programme number.
5 Press the Navigation buttons to scroll to System.
6 Press the Navigation buttons to scroll toTV System.
7 Press the Navigation buttons to scroll to Band.
8 Press the Navigation buttons to scroll to V/UHF or Cable.
9 Press the Navigation buttons to scroll to Channel.
10 Press the Navigation buttons and then select the desired Channel
number with the Navigation buttons or Number buttons.
11 Press the Navigation buttons to scroll to Search.
12 Press the Navigation buttons to scroll and start Searching.
13 Press the OK to store it.
14 When you return to the previous menu, press .
NOTE
• To store another programme, repeat steps 3 to 13.
Assigning a station name
You can assign a station name with ve characters to each programme
number.
1 Press SETTINGS and the Navigation buttons to scroll to SETUP.
2 Press the Navigation buttons to scroll to Manual Tuning.
3 Press the Navigation buttons to scroll to Name.
4 Press the Navigation buttons to scroll to select the position and make
your choice of the second character, and so on. You can use an the
alphabet A to Z, the number 0 to 9, +/ -, and blank and press OK .
5 Press the OK to store it.
6 When you return to the previous menu, press .
Fine Tuning
Normally ne tuning is only necessary if reception is poor.
1 Press SETTINGS and the Navigation buttons to scroll to SETUP.
2 Press the Navigation buttons to scroll to Manual Tuning.
3 Press the Navigation buttons to scroll to Fine.
4 Press the Navigation buttons to ne tune for the best picture and
sound.
5 Press the OK to store it.
6 When you return to the previous menu, press .
16
ENGLISH

Editing your programme list
When a programme number is skipped, it means that you will be
unable to select it using button during TV viewing.
If you wish to select the skipped programme, directly enter the
programme number with the NUMBER buttons or select it in the
Programme edit menu.
This function enables you to skip the stored programmes.
1 Press SETTINGS and the Navigation buttons to scroll to SETUP.
2 Press the Navigation buttons to scroll to Programme Edit.
3 Edit programmes using the following buttons.
Button Description
Red button
Deletes a programme.
Press the Red button twice. The selected
programme is deleted, all the following
programmes are shifted up one position.
Yellow button
Moves a programme.
Press theYellow button again to release this
function.
Blue button
Selects a programme number to be skipped. Press
the Blue button again to release the skipped
programme.
4 When you return to the previous menu, press .
Selecting a programme on the programme
list
1 Press LIST to access the programme list.
2 Press the Navigation buttons to select to desired programme and
press OK .
3 When you return to the previous menu, press LIST.
NOTE
• You may nd some blue programmes. They have been set up to be
skipped by auto programming or in the programme edit mode.
• Some programmes with the programme number shown in the
programme list indicate there is no station name assigned.
Using additional options
Adjusting aspect ratio
Resize an image to view at its optimal size by pressing Q.MENU or
accessing Aspect Ratio in the PICTURE menu.
NOTE
• The available ratio varies depending on the input source.
-16:9 : Resizes images to fit the screen width.
-Just Scan : Displays video images in the original size without
removing parts of the edge of the image. (This function works
in Component/HDMI (720P / 1080i / 1080p) Mode.)
NOTE
• If you select Just Scan, you may see image noises at the edge of the
original signal.
-Original : When yourTV receives a wide screen signal it will
automatically change to the picture format broadcasted.
(4:3 4:3) (16:9 16:9)
-4:3 : Resizes images to the previous standard 4:3.
ENGLISH
17

-14:9 : You can view a picture format of 14:9 or a generalTV
programme in the 14:9 mode. The 14:9 screen is viewed in the
same way as in 4:3, but is moved to the up and down.
-Zoom : Formats an image to fit the screen width.The top and
bottom of the image may not appear.
-Cinema Zoom 1 : Formats an image to the cinemascope ratio,
2.35:1.
To change the ratio of the cinema zoom, press or and its
range is from 1 to 16.
NOTE
• If you enlarge or reduce an image, the image may be
distorted.Using the input list
Using the input list
Selecting an input source
1 Press INPUT to access the input sources.
• The connected device displays on each input source.
2 Press the Navigation buttons or input button to scroll to one of the
input sources and press OK .
* Image shown may dier from yourTV.
Input List
HDMI 1 HDMI 2AV 1 AV 2 Component Antenna
Input source Description
TV Watch TV over the air and cable broadcast.
AV 1/2 Watch video from aVCR or other external
devices.
Component Select it when using the DVD or the Digital
set-top box depends on connector.
HDMI 1/2 Watch video from a HTS or other high
denition devices.
ENTERTAINMENT
(Depending on model)
* Image shown may dier from yourTV.
Connecting USB storage devices
Connect USB storage devices (USB memory) to the TV and use
multimedia features (See“Browsing les”on page 18).
Connect a USB ash memory or USB memory card reader to theTV as
shown on the following illustration.
USB IN
To disconnect a USB storage device,
make sure to end the connection properly to prevent damages to the
TV or les.
1 Press Q.MENU to access the quick menus.
2 Press the Navigation buttons to scroll to Eject and press OK .
3 Disconnect the USB storage device only when the message says that
it is safe to remove.
CAUTION
• Do not turn the TV o or remove a USB storage device while the
USB storage device is connected to the TV, as this could result in
loss of les or damage to the USB storage device.
• Back up your les saved on a USB storage device frequently, as you
may lose or damage the les and this may be not covered by the
manufacturer’s warranty.
18
ENGLISH
(*NotProvided)

Tips for using USB storage devices
• Only a USB storage device is recognizable.
• If the USB storage device is connected through a USB hub, the
device is not recognizable.
• A USB storage device using an automatic recognition programme
may not be recognized.
• A USB storage device which uses its own driver may not be
recognized.
• The recognition speed of a USB storage device may depend on
each device.
• Please do not turn o the TV or unplug the USB device when
the connected USB storage device is working. When such device
is suddenly separated or unplugged, the stored les or the USB
storage device may be damaged.
• Please do not connect the USB storage device which was articially
manoeuvred on the PC. The device may cause the product to
malfunction or fail to be played. Never forget to use only a USB
storage device which has normal music les, image les or movie
les.
• Please use only a USB storage device which was formatted as a
FAT16, FAT32, NTFS le system.
• Please connect a USB storage device with the cable oered by the
device maker.
• Some USB storage devices may not be supported or operated
smoothly.
• Be sure to back up important les since data stored in a USB
memory device may be damaged. We will not be responsible for
any data loss.
• If a USB memory device is connected to a USB multi-card reader, its
volume data may not be detected.
• If the USB memory device does not work properly, disconnect and
reconnect it.
• How fast a USB memory device is detected diers from device to
device.
• The recommended capacity is 1 TB or less for a USB external hard
disk and 32 GB or less for USB memory.
• Any device with more than the recommended capacity may not
work properly.
• USB storage devices below USB 2.0 are supported as well. But they
may not work properly in the movie list.
• Maximum of 999 folders or les can be recognized under one
folder.
• If there are a lot of folders or les all within one folder, the device
may not be able to access these properly.
• For external USB HDDs, it is recommended that you use devices
with a rated voltage of less than 5 V and a rated current of less
than 0.5A.
Browsing les
Access the photo, music, or movie lists and browse les.
1 Connect a USB storage device.
2 Press SETTINGS to access the main menus.
3 Press the Navigation buttons to scroll to ENTERTAINMENT and press
OK .
4 Press Navigation buttons to scroll to PHOTO LIST, MUSIC LIST or
MOVIE LIST and press OK .
PHOTO LIST MUSIC LIST MOVIE LIST
4
1
6
3
25
DriveA Up Folder KY103 09/15/2015
GUU.JPG KY101 04/03/2015 KY104 10/12/2015
KY102 09/03/2015 KY105 11/27/2015
GUU 11/27/2015 JMJ005 11/27/2015
3872x2592, 2604KB
JMJ002 11/27/2015 JMJ006 11/27/2015
JMJ003 11/27/2015 JMJ007 11/27/2015
Up Folder JMJ004 11/27/2015 JMJ008 11/27/2015
ꔂMove ꔉPopUp Menu
ꔵ
Move Page
ꘂMark Exit
PHOTO LIST
USB Device
Free Space 4 GB
Page 1/1 No Marked
4
1
6
3
25
DriveA Title Duration
ꕗ 00:00 / 01:34
Up Folder
ꔂMove ꔉPopUp Menu
ꔵ
Move Page
ꘂMark Option Exit
USB Device
Free Space 4 GB
Page 1/1 No Marked
MUSIC LIST
Top Folder Title Duration
DriveA DriveA
4 folder(s), 2 file(s)
Up Folder
ꔂMove ꔉPopUp Menu
ꔵ
Move Page
ꘂMark Exit
4
1
6
3
25
USB Device
Free Space 4 GB
Page 1/1 No Marked
MOVIE LIST
ENGLISH
19

No. Description
1Moves to the upper level folder.
2Preview: Displays the thumbnail/folder name of the le in
the selected folder.
3Current page/Total pages.
4Total number of marked les.
5Contents under the folder focused on 1.
6Available buttons on the remote control.
Supported file format
Type Supported file format
Photo JPEG
Available size
Baseline : 64 pixel(W) x 64 pixel(H) - 15360
pixel(W) x 8640 pixel(H)
Progressive : 64 x 64 to 1024 x 768
• You can play JPEG les only.
• Non-supported les are displayed in the form
of predened icon.
Music MP3
Bit rate 32 kbps to 320 kbps
• Sampling rate MPEG1 Layer3 : 32 kHz, 44.1
kHz, 48 kHz
• Sampling rate MPEG2 Layer3 : 16 kHz, 22.05
kHz, 24 kHz
• Sampling rate MPEG2.5 Layer3 : 8 kHz, 11.025
kHz, 12 kHz
Movie DAT,MPG,MPEG,VOB,AVI,DIVX,MP4,MKV,TS,TRP,TP,A
SF,WMV,FLV,RM,RMVB
Movie(*.mpg/*.mpeg/*dat/*.ts/*.trp/*.tp/*.
vob/*.mp4/*.mov/*.mkv/*.divx/*.avi/*.asf/*.
wmv/*.v/*.avi(motion-jpeg)/*.mp4(motion-
jpeg)/*.mkv(motion-jpeg)/*.rm/*.rmvb)supporting
le
Video format : DivX 3.11, DivX 4, DivX 5, DivX 6,
Xvid1.00, Xvid1.01, Xvid1.02, Xvid1.03, Xvid1.10
beta-1/beta-2, Mpeg-1, Mpeg-2, Mpeg-4, H.264/
AVC, VC1, JPEG, Sorenson H.263
Audio format : Dolby Digital, AAC, Mpeg, MP3,
LPCM, ADPCM, WMA
Bit rate : within 32 kbps to 320 kbps(MP3)
External Subtitle format : *.smi/*.srt/*.su
b(MicroDVD,Subviewer1.0/2.0)/*.ass/*.ssa/*.
txt(TMPlayer)/*.psb(PowerDivX)
Internal Subtitle format : Only XSUB (It is the
subtitle format used in DivX6 les)
Viewing photos
View image les saved in a USB storage device.The displays on the
screen may dier from the model.
1 Press SETTINGS to access the main menus.
2 Press the Navigation buttons to scroll to ENTERTAINMENT and press
OK .
3 Press the Navigation buttons to scroll to PHOTO LIST and press
OK .
4 Press the Navigation buttons to scroll to a folder/le you want and
press OK .
5 View photos by using the following menus buttons.
Move PopUp Menu
Move Page
Mark Exit
20
ENGLISH
Table of contents
Other LG LED TV manuals