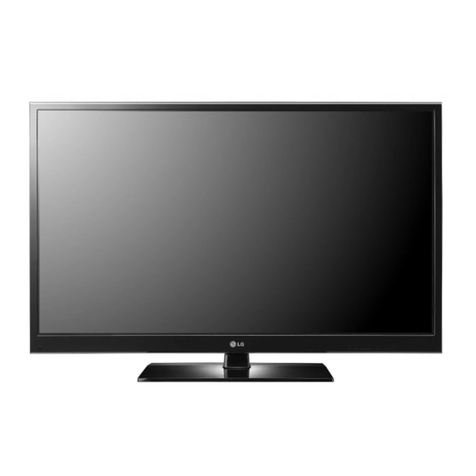
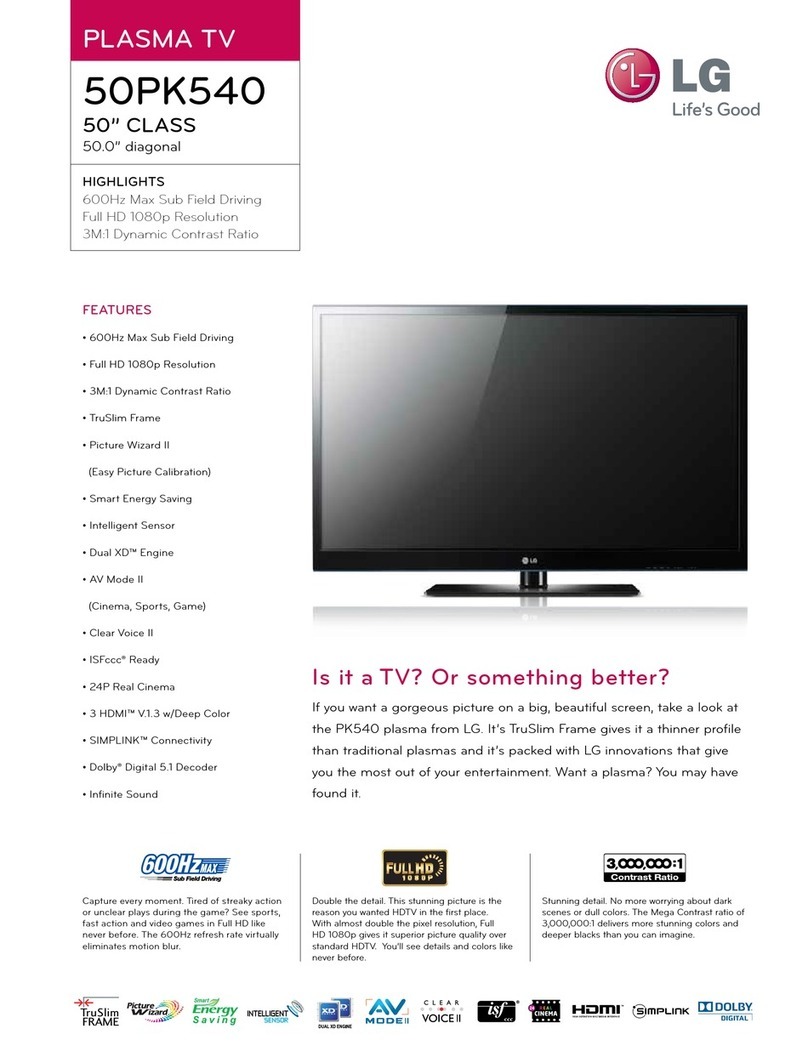
LG 50PC5DC - - 50" Plasma TV User manual

PLASMA TV
SERVICE MANUAL
CAUTION
BEFORE SERVICING THE CHASSIS,
READ THE SAFETY PRECAUTIONS IN THIS MANUAL.
CHASSIS :PA-73E
MODEL : 50PC5DC 50PC5DC-UC
MODEL : 50PC5D 50PC5D-UC
CANADA : http//biz.lgservice.com
USA : http//www.lgservice.com
: http//biz.lgservice.com

- 2 -
SAFETY PRECAUTIONS
Many electrical and mechanical parts in this chassis have special safety-related characteristics. These parts are identified by in
the Schematic Diagram and Replacement Parts List.
It is essential that these special safety parts should be replaced ith the same components as recommended in this manual to
prevent X-RADIATION, Shock, Fire, or other Hazards.
Do not modify the original design ithout permission of manufacturer.
General Guidance
An lsolation Transformer should always be used during
the servicing of a receiver hose chassis is not isolated from
the AC po er line. Use a transformer of adequate po er rating
as this protects the technician from accidents resulting in
personal injury from electrical shocks.
It ill also protect the receiver and it's components from being
damaged by accidental shorts of the circuitary that may be
inadvertently introduced during the service operation.
If any fuse (or Fusible Resistor) in this monitor is blo n, replace
it ith the same specified type.
When replacing a high attage resistor (Oxide Metal Film
Resistor, over 1W), keep the resistor 10mm a ay from PCB.
Keep ires a ay from high voltage or high temperature parts.
Leakage Current Cold Check(Antenna Cold Check)
With the instrument AC plug removed from AC source,
connect an electrical jumper across the t o AC plug prongs.
Place the AC s itch in the on positioin, connect one lead of
ohm-meter to the AC plug prongs tied together and touch other
ohm-meter lead in turn to each exposed metallic parts such as
antenna terminals, phone jacks, etc.
If the exposed metallic part has a return path to the chassis, the
measured resistance should be bet een 1MΩ and 5.2MΩ.
When the exposed metal has no return path to the chassis the
reading must be infinite.
An other abnormality exists that must be corrected before the
receiver is returned to the customer.
Leakage Current Hot Check (See belo Figure)
Plug the AC cord directly into the AC outlet.
Do not use a line Isolation Transformer during this check
Connect 1.5K/10 att resistor in parallel ith a 0.15uF capacitor
bet een a kno n good earth ground (Water Pipe, Conduit, etc.)
and the exposed metallic parts.
Measure the AC voltage across the resistor using AC
voltmeter ith 1000 ohms/volt or more sensitivity.
Reverse plug the AC cord into the AC outlet and repeat AC
voltage measurements for each esposed metallic part. Any
voltage measured must not exceed 0.75 volt RMS hich is
corresponds to 0.5mA.
In case any measurement is out of the limits sepcified, there is
possibility of shock hazard and the set must be checked and
repaired before it is returned to the customer.
Leakage Current Hot Check circuit
CANADA: LG Electronics Canada, Inc. 550 Matheson
Boulevard East Mississauga, Ontario L4Z 4G3
USA : LG Customer Interactive Center
P.O.Box 240007, 201 James Record Road Huntsville,
AL 35824
Digital TV Hotline 1-800-243-0000
1.5 Kohm/10W
To Instrument's
exposed
METALLIC PARTS
Good Earth Ground
such as WATER PIPE,
CONDUIT etc.
AC Volt-meter
IMPORTANT SAFETY NOTICE
0.15uF

- 3 -
DESCRIPTION OF CONTROLS...........................................4
SPECIFICATIONS.................................................................8
ADJUSTMENT INSTRUCTIONS ..........................................9
TROUBLESHOOTING GUIDE............................................19
PRINTED CIRCUIT BOARDS.............................................24
BLOCK DIAGRAM...............................................................27
EXPLODED VIEW...............................................................32
EXPLODED VIEW PARTS LIST .........................................33
REPLACEMENT PARTS LIST............................................34
SCHEMATIC DIAGRAM..........................................................
TABLE OF CONTENTS

- 4 -
FRONT PANEL INFORMATION
Here shown may be somewhat different from your TV.
Front Panel Controls
CH
VOL
MENU
INPUT ENTER
CH
VOL
MENU
INPUT ENTER
Power Standby Indicator
Illuminates red in standby mode.
When the TV is turned on, the indica-
tor blinks green and then illuminates
green before the picture is displayed.
Remote Control Sensor
POWE
R
Button INPUT
Button MENU
Button ENTER
Button VOLUME
(F,G)Buttons
CHANNEL
(E,D)Buttons
Plasma TV Model
DESCRIPTION OF CONTROLS

- 5 -
BACK PANEL INFORMATION
Back Connection Panel
AV IN 2
L/MONO
R
AUDIO
VIDEO
S-VIDEO
( )
( )
S-VIDEO Input
Provides better picture quality than the video
input.
AUDIO Input
VIDEO Input
Connects the video signal from a video device.
R
( )
HDMI IN
HDMI/DVI IN
VIDEO
AUDIO
VIDEO
AUDIO
MONO
()
S-VIDEO
ANTENNA/
CABLE IN
REMOTE
CONTROL IN
RS-232C IN
(CONTROL & SERVICE)
RGB IN
(PC)
AUDIO IN
(RGB/DVI)
DIGITAL AUDIO
OUT
OPTICAL
1
2
SERVICE
COMPONENT IN AV OUT
AV IN 1
2
1
8
3
7
6
95
Plasma TV Model
4
11
10
DESCRIPTION OF CONTROLS

- 6 -
REMOTE CONTROL FUNCTIONS
1 2 3
4 5 6
78
0
9
BACK
VOL CH
MUTE
FAV
BRIGHT -
MENU
BRIGHT +
ENTER
EXIT
TIMER
RATIO
SIMPLINK
POWER
VCR
TV
DVD
AUDIO
CABLE
STB
MODE
TV INPUT
INPUT
When using the remote control, aim it at the remote control sensor on the TV.
MODE
MENU
BRIGHT -/ +
THUMBSTICK
(Up/Down/Left
Right/ENTER)
EXIT
TIMER
RATIO
SIMPLINK
VOLUME UP
/DOWN
MUTE
FAV
CHANNEL
UP/DOWN
— (DASH)
BACK
Select the remote’s operating mode. Defaults to LG
codes, refer to page 70 to reprogram.
Control video cassette recorders or DVD players.
Displays the main menu.
Adjust the brightness on screen.
Navigate the on-screen menus and adjust the sys-
tem settings to your preference.
Clear all on-screen displays and return to TV view-
ing from any menu.
Select the amount of time before your TV turns off
automatically.
Change the aspect ratio.
C?
Increase/decrease the sound level.
Switch the sound on or off.
Scroll through the programmed Favorite channels.
Select available channels.
Used to enter a program number for multiple pro-
gram channels such as 2-1, 2-2, etc.
Tune to the last channel viewed.
VCR/DVD
control buttons
NUMBER but-
ton
Illuminates the remote control
buttons of selected mode.
LIGHT
DESCRIPTION OF CONTROLS

- 7 -
ADJUST
SAP
SOUND
PICTURE
CC
1 2 3
4 5 6
78
0
9
BACK
POWER
TV INPUT
INPUT
Turns your TV or any other programmed equipment on or off, depending on the mode.
In AV 1-2, Component 1-2, RGB-PC, HDMI1/DVI, and HDMI2 input sources, screen
returns to the last TV channel.
External input modes rotate in regular sequence: TV, AV1-2, Component 1-2, RGB-PC,
HDMI1/DVI and HDMI2.
(AV 1-2, Component 1-2, RGB-PC, HDMI1/DVI, and HDMI2 input sources are linked
automatically, only if a device is connected.)
PICTURE
SOUND
SAP
CC
ADJUST
Selects the factory preset picture depend
on the viewing environment.
Selects the factory preset sound for type of
program.
Analog mode: Selects MTS sound (Mono,
Stereo, or a SAP)
DTV mode: Changes the audio language.
Select a closed caption.
(*In DTV/CADTV mode )
Adjust the screen resolution, position, size
and phase.
Inside the Sliding Cover
DESCRIPTION OF CONTROLS

- 8 -
The specifications shown above may be changed without prior notice for quality improvement.
42PC5D
(42PC5D-UC)
50PC5D
(50PC5D-UC)
MODELS
41.3 x 30.2 x 12.2 inches
1048.0 x 766.0 x 310.0 mm
41.3 x 28.1 x 3.3 inches
1048.0 x 713.0 x 83.5 mm
60.8 pounds / 27.6 kg
53.4 pounds / 24.2 kg
48.9 x 34.9 x 14.6 inches
1242.0 x 887.6 x 370.0 mm
48.9 x 32.6 x 3.5 inches
1242.0 x 827.2 x 88.0 mm
86.6 pounds / 39.3 kg
76.3 pounds / 34.6 kg
AC100-240V ~ 50/60Hz
NTSC-M, ATSC, 64 & 256 QAM
VHF 2-13, UHF 14-69, CATV 1-135, DTV 2-69, CADTV 1-135
75 ohm
32 ~ 104°F (0 ~ 40°C)
Less than 80%
-4 ~ 140°F (-20 ~ 60°C)
Less than 85%
Dimensions
(Width x Height x Depth)
Weight
Power requirement
Television System
Program Coverage
External Antenna
Impedance
Environment condition
Including stand
Excluding stand
including stand
excluding stand
Operating
Temperature
Operating Humidity
Storage Temperature
Storage Humidity
SPECIFICATIONS

- 9 -
ADJUSTMENT INSTRUCTIONS
1. Application Object
These instructions are applied to all of the PDP TV, PA73E.
2. Notes
(1) Because this is not a hot chassis, it is not necessary to use
an isolation transformer. However, the use of isolation
transformer will help protect test equipment.
(2) Adjustments must be done in the correct order.
(3) The adjustments must be performed in the circumstance of
25±5°C of temperature and 65±10% of relative humidity if
there is no specific designation.
(4) The input voltage of the receiver be must kept 110V, 60Hz
when adjusting.
(5) The receiver must be operational for about 15 minutes
prior to the adjustments.
OPreliminary action is applied to the test for afterimage
discharge detection, and 100% FULL WHITE PATTERN
must be operated automatically.
1) Pressing Power On key
2) Full Test Pattern(2 min 30sec)
3) Full Black Pattern(30sec)
4)Full White Pattern
O
Pattern Mode is deselected by pressing CH +/-, Exit Key.
[Set is activated HEAT-RUN without signal generator in this
mode.
3. MICOM Download(Option)
3-1. Required Test Equipment
(1) JIG-LEVER TYPE for adjusting: 1EA
(2) PC & MONITOR: 2EA
(3) BOARD for INTERFACE: IIC & ISP BOARD: 2EA
(4) 15P D-SUB CABLE: 2EA
(5) Using the 12/15 line of D-SUB 15P
12-SDA/15-SCL
3-2. JIG Connection
3-3. Establishment Program
(1) Establish LGE Monitor Tools v1.1
(2) The program work and it is opened program window as
seen below.
Test Pattern 2min 30sec
Test Pattern 30sec
If you turn on a still screen more than 20 minutes (Especially
Digital pattern(13 CH), Cross Hatch Pattern), an afterimage
may occur in the black level part of the screen.
connection
to PC connection
to PC

- 10 -
ADJUSTMENT INSTRUCTIONS
(3) Click the first icon shown in fig.9. The window seen in
fig.10 should appear.
3-4. Set Method
(1) MCU Select: MTV512M64
(2) Option
R/W Option: Auto Write(Verity)
Jig Option: Myson
Transmit Speed: Medium
(3) Check: Just do it with blank micom.
(4) PORT
Chose Parallel Port (normal LPT1)
Attention: You must chose EPP when select Rom BIAS at
LPT
3-5. Download Method
(1) Click the Load File.
(2) Locate and select the correct file from your computer.
(*.hex).
(3) Click the Send.
(4) When you see (ISP COMPLETE) the download is
complete.

- 11 -
ADJUSTMENT INSTRUCTIONS
4. USB S/W Download (Option)
4-1. Overview
USB Download enables quick response to S/W upgrading and
helps to configure the panel to the latest updates.
4-2. How to Download
(1) Before starting USB download, ensure that the power is
turned off and the display is turned on.
(2) Once the USB memory stick containing the upgraded file
is connected to the USB port on the main board, the
following picture appears on the screen.
(3) Check the current version at [Current TV Software Version
Information] and the target version at [New Found TV
Software Version Information]. Press Enter on the remote
controller to confirm the upgrade.
(4) The following picture shows the downloading in progress.
Once the download is completed, the power is
automatically turned on and off. (Otherwise, please turn the
power on and off)
(5) Once the download is completed, remove the USB
memory stick from the USB port. Press IN-START on the
remote controller to check the upgraded S/W version at the
top of the screen while the display is turned on.
Do not plug off.
Press EXIT to cancel the upgrade.
<S/W Upgrade Screen>
The software upgrade is now in progress.
Until the whole process if completed, please.
- Do not remove the memory card from the slot.
- Do not plug off.
Reading the file---Done
Upgrading---Done
The TV will restart automatically in 0 seconds.
<Downloading in progress Screen>

- 12 -
ADJUSTMENT INSTRUCTIONS
5. POWER PCB Assy Voltage
Adjustment (Va, Vs Voltage Adjustment)
5-1. Test Equipment : D.M.M 1EA
5-2. Connection Diagram for Measuring
Refer to Fig 1.
5-3. Adjustment(42”/50”)
(1) Va Adjustment
1) Connect + terminal of D.M.M to Va pin of P812(50”:
P805) and connect –terminal to GND pin of P812(50”:
P805).
2) Adjust VR901 voltage to match that of the label on the
Top/Right of the panel. (Deviation : ±0.5V)
(2) Vs Adjustment
1) Connect + terminal of D.M.M to Vs pin of P812(50”:
P805) and connect –terminal to GND pin of P812(50”:
P805).
2) Adjust VR951 voltage to match that of the label on the
Top/Right of the panel. (Deviation : ±0.5V)
5-4. Adjustment(Sanken: EAY32929001)
(1) Va Adjustment
1) Connect + terminal of D.M.M to Va pin of P12 and
connect –terminal to GND pin of P12.
2) Adjust VR951 voltage to match that of the label on the
Top/Right of the panel. (Deviation : ±0.5V)
(2) Vs Adjustment
1) Connect + terminal of D.M.M to Vs pin of P12 and
connect –terminal to GND pin of P12.
2) Adjust VR901 voltage to match that of the label on the
Top/Right of the panel. (Deviation : ±0.5V)
Each PCB Assy must be checked by Check JIG Set before
assembly. (Especially, be careful Power PCB Assy which can
cause Damage to the PDP Module.)
111
Vs ADJ
VR951 VaADJ
VR901
3.3VADJ
VR22 1
T8
01
T9
01
T1
12
T5
01
L6
01
5V
GND
Va
GND
GND
NC
Vs
Vs
P811
111
Vs ADJ
VR951
Vs ADJ
VR951 VaADJ
VR901
VaADJ
VR901
3.3VADJ
VR22 1
T8
01
T9
01
T1
12
T5
01
L6
01
5V
GND
Va
GND
GND
NC
Vs
Vs
P811
<Fig. 1-1> Connection Diagram of Power Adjustment for
Measuring (Power Board): 42”XGA/VGA
VsADJ
VR951
5V
GN D
Va
GN D
GN D
NC
Vs
Vs
P811
1
11
VaADJ
VR901
3.3VADJ
VR221
T8
01
T9
01
L8
51
T5
01
T1
12
L6
01
VsADJ
VR951
5V
GN D
Va
GN D
GN D
NC
Vs
Vs
P811
1
11
VaADJ
VR901
VaADJ
VR901
3.3VADJ
VR221
T8
01
T9
01
L8
51
T5
01
T1
12
L6
01
<Fig. 1-2> Connection Diagram of Power Adjustment for
Measuring (Power Board): 50”
<Fig. 1-3> 50”PSU(Sanken: EAY32929001)

- 13 -
ADJUSTMENT INSTRUCTIONS
5-5. Adjustment(LG IT: EAY32957901)
(1) Va Adjustment
1) Connect + terminal of D.M.M to Va pin of P812 and
connect –terminal to GND pin of P812.
2) Adjust VR951 voltage to match that of the label on the
Top/Right of the panel. (Deviation : ±0.5V)
(2) Vs Adjustment
1) Connect + terminal of D.M.M to Vs pin of P812 and
connect –terminal to GND pin of P812.
2) Adjust VR901 voltage to match that of the label on the
Top/Right of the panel. (Deviation : ±0.5V)
6. ADC-Set Adjustment
6-1. Synopsis
ADC-Set adjustment to set the black level and the Gain to
optimum.
6-2. Test Equipment
Service R/C, 801GF(802V, 802F, 802R) or MSPG925FA
Pattern Generator
(480i/1080i The Horizontal 100% Color Bar Pattern adjust to
within 0.7±0.1Vp-p)
[ADC adjustment (MSPG-925Fx series) Model No. & Pattern No.]
- Model No.: #209(480i adjustment), #223(1080i adjustment)
- Pattern No.: #65(7ColorBar Pattern)
<Fig. 1-4> 50”PSU(LG IT: EAY32957901)
<Fig. 2> Adjustment Mode
<Fig. 3> Adjustment Pattern: 480i/1080i 60Hz HozTV31Bar
Pattern

- 14 -
ADJUSTMENT INSTRUCTIONS
6-3. Adjustment
(1) Select Component1 as the input with 100% Horizontal
Color Bar Pattern(HozTV31Bar) in 480i Mode
(2) After receiving signal for at least 1 second, press the ADJ
Key on the Service R/C to enter the ‘Ez - Adjust’and select
the ‘2. ADC 480i Comp1’.
Pressing the Enter Key to adjust automatically.
(3) When the adjustment is over, 'MST3361 Component
Success’is displayed. If the adjustment has errors,
'MST3361 Configuration Error’is displayed.
(4) Select Component1 as the input with 100% Horizontal
Color Bar Pattern(HozTV31Bar) in 1080i Mode.
(5) After receiving signal for at least 1 second, press the ADJ
Key on the Service R/C to enter the ‘Ez - Adjust’and select
the ‘3. ADC 1080i Comp1/RGB’.
Pressing the Enter Key to adjust automatically.
(6) When the adjustment is over, 'MST3361 Component
Success’is displayed. If the adjustment has errors,
'MST3361 Configuration Error’is displayed.
(7) After the Component MST3361 adjustment is over, convert
the RGB-DTV Mode and display Pattern.
When the adjustment is over, 'MST3361 RGB_DTV
Success’is displayed.
(8) Readjust after confirming the case Pattern or adjustment
condition where the adjustment errors.
(9) After adjustment is complete, exit the adjustment mode by
pressing the ADJ KEY.
7. EDID(The Extended Display
Identification Data)/DDC
(Display Data Channel) Download
This is the function that enables “Plug and Play".
7-1. HDMI EDID Data Input
(1) Required Test Equipment
1) PC, Jig for adjusting DDC. (PC serial to D-sub
Connection equipment)
2) S/W for writing DDC(EDID data write & read)
3) D-Sub cable
4) Jig for HDMI Cable connection
(2) Preparation for Adjustments &
Setting of Device
1) Set devices as below and turn on the PC and JIG.
2) Open S/W for writing DDC (EDID data write & read).
(operated in DOS mode)
7-2. EDID DATA for PA-73E
[42PC5D-UC]
:EDID for HDMI-1 (DDC (Display Data Channel) Data)
EDID Block 0 table =
0 1 2 3 4 5 6 7 8 9 A B C D E F
__________________________________________________
0 | 00 FF FF FF FF FF FF 00 1E 6D 01 00 01 01 01 01
10 | 00 10 01 03 80 73 41 96 0A CF 74 A3 57 4C B0 23
20 | 09 48 4C 2F CE 00 31 40 45 40 61 40 01 01 01 01
30 | 01 01 01 01 01 01 66 21 50 B0 51 00 1B 30 40 70
40 | 36 00 C4 8E 21 00 00 1E 0E 1F 00 80 51 00 1E 30
50 | 40 80 37 00 C4 8E 21 00 00 1C 00 00 00 FD 00 38
60 | 4B 1F 3C 09 00 0A 20 20 20 20 02 20 00 00 00 FC
70 | 00 34 32 50 43 35 44 2D 55 43 0A 20 20 20 01 5D
EDID Block 1 table =
0 1 2 3 4 5 6 7 8 9 A B C D E F
__________________________________________________
0 | 02 03 15 F1 46 84 05 03 02 20 22 23 15 07 50 65
10 | 03 0C 00 10 00 01 1D 00 72 51 D0 1E 20 6E 28 55
20 | 00 C4 8E 21 00 00 1E 01 1D 80 18 71 1C 16 20 58
30 | 2C 25 00 C4 8E 21 00 00 9E 8C 0A D0 8A 20 E0 2D
40 | 10 10 3E 96 00 C4 8E 21 00 00 18 8C 0A D0 8A 20
50 | E0 2D 10 10 3E 96 00 13 8E 21 00 00 18 00 00 00
60 | 00 00 00 00 00 00 00 00 00 00 00 00 00 00 00 00
70 | 00 00 00 00 00 00 00 00 00 00 00 00 00 00 00 A7
:EDID for HDMI-2 (DDC (Display Data Channel) Data)
EDID Block 0 table =
0 1 2 3 4 5 6 7 8 9 A B C D E F
__________________________________________________
0 | 00 FF FF FF FF FF FF 00 1E 6D 01 00 01 01 01 01
10 | 00 10 01 03 80 73 41 96 0A CF 74 A3 57 4C B0 23
20 | 09 48 4C 2F CE 00 31 40 45 40 61 40 01 01 01 01
30 | 01 01 01 01 01 01 01 1D 00 72 51 D0 1E 20 6E 28
40 | 55 00 C4 8E 21 00 00 1E 01 1D 80 18 71 1C 16 20
50 | 58 2C 25 00 C4 8E 21 00 00 9E 00 00 00 FC 00 34
60 | 32 50 43 35 44 2D 55 43 0A 20 20 20 00 00 00 FD
70 | 00 38 4B 1F 3C 09 00 0A 20 20 20 20 20 20 01 0D
EDID Block 1 table =
0 1 2 3 4 5 6 7 8 9 A B C D E F
__________________________________________________
0 | 02 03 15 F1 46 84 05 03 02 20 22 23 15 07 50 65
10 | 03 0C 00 20 00 8C 0A D0 8A 20 E0 2D 10 10 3E 96
20 | 00 C4 8E 21 00 00 18 8C 0A D0 8A 20 E0 2D 10 10
30 | 3E 96 00 13 8E 21 00 00 18 00 00 00 00 00 00 00
40 | 00 00 00 00 00 00 00 00 00 00 00 00 00 00 00 00
50 | 00 00 00 00 00 00 00 00 00 00 00 00 00 00 00 00
60 | 00 00 00 00 00 00 00 00 00 00 00 00 00 00 00 00
70 | 00 00 00 00 00 00 00 00 00 00 00 00 00 00 00 35
PDP TV SET
(or Digital Board)

- 15 -
ADJUSTMENT INSTRUCTIONS
:EDID for RGB-PC
EDID Block 0 table =
0 1 2 3 4 5 6 7 8 9 A B C D E F
___________________________________________________
0 | 00 FF FF FF FF FF FF 00 1E 6D 01 00 01 01 01 01
10 | 00 10 01 03 68 73 41 96 0A CF 30 A3 57 4C B0 23
20 | 09 50 4E A1 08 00 01 01 01 01 01 01 01 01 01 01
30 | 01 01 01 01 01 01 66 21 50 B0 51 00 1B 30 40 70
40 | 36 00 C4 8E 21 00 00 1E 0E 1F 00 80 51 00 1E 30
50 | 40 80 37 00 C4 8E 21 00 00 1C 00 00 00 FD 00 38
60 | 4B 1F 3C 09 00 0A 20 20 20 20 20 20 00 00 00 FC
70 | 00 34 32 50 43 35 44 2D 55 43 0A 20 20 20 00 77
[50PC5D-UC]
:EDID for HDMI-1 (DDC (Display Data Channel) Data)
EDID Block 0 table =
0 1 2 3 4 5 6 7 8 9 A B C D E F
___________________________________________________
0 | 00 FF FF FF FF FF FF 00 1E 6D 01 00 01 01 01 01
10 | 00 10 01 03 80 73 41 96 0A CF 74 A3 57 4C B0 23
20 | 09 48 4C 2F CE 00 31 40 45 40 61 40 01 01 01 01
30 | 01 01 01 01 01 01 66 21 50 B0 51 00 1B 30 40 70
40 | 36 00 C4 8E 21 00 00 1E 0E 1F 00 80 51 00 1E 30
50 | 40 80 37 00 C4 8E 21 00 00 1C 00 00 00 FD 00 38
60 | 4B 1F 3C 09 00 0A 20 20 20 20 02 20 00 00 00 FC
70 | 00 35 30 50 43 35 44 2D 55 43 0A 20 20 20 01 5E
EDID Block 1 table =
0 1 2 3 4 5 6 7 8 9 A B C D E F
____________________________________________________
0 | 02 03 15 F1 46 84 05 03 02 20 22 23 15 07 50 65
10 | 03 0C 00 10 00 01 1D 00 72 51 D0 1E 20 6E 28 55
20 | 00 C4 8E 21 00 00 1E 01 1D 80 18 71 1C 16 20 58
30 | 2C 25 00 C4 8E 21 00 00 9E 8C 0A D0 8A 20 E0 2D
40 | 10 10 3E 96 00 C4 8E 21 00 00 18 8C 0A D0 8A 20
50 | E0 2D 10 10 3E 96 00 13 8E 21 00 00 18 00 00 00
60 | 00 00 00 00 00 00 00 00 00 00 00 00 00 00 00 00
70 | 00 00 00 00 00 00 00 00 00 00 00 00 00 00 00 A7
:EDID for HDMI-2 (DDC (Display Data Channel) Data)
EDID Block 0 table =
0 1 2 3 4 5 6 7 8 9 A B C D E F
___________________________________________________
0 | 00 FF FF FF FF FF FF 00 1E 6D 01 00 01 01 01 01
10 | 00 10 01 03 80 73 41 96 0A CF 74 A3 57 4C B0 23
20 | 09 48 4C 2F CE 00 31 40 45 40 61 40 01 01 01 01
30 | 01 01 01 01 01 01 01 1D 00 72 51 D0 1E 20 6E 28
40 | 55 00 C4 8E 21 00 00 1E 01 1D 80 18 71 1C 16 20
50 | 58 2C 25 00 C4 8E 21 00 00 9E 00 00 00 FC 00 35
60 | 30 50 43 35 44 2D 55 43 0A 20 20 20 00 00 00 FD
70 | 00 38 4B 1F 3C 09 00 0A 20 20 20 20 20 20 01 0E
EDID Block 1 table =
0 1 2 3 4 5 6 7 8 9 A B C D E F
____________________________________________________
0 | 02 03 15 F1 46 84 05 03 02 20 22 23 15 07 50 65
10 | 03 0C 00 20 00 8C 0A D0 8A 20 E0 2D 10 10 3E 96
20 | 00 C4 8E 21 00 00 18 8C 0A D0 8A 20 E0 2D 10 10
30 | 3E 96 00 13 8E 21 00 00 18 00 00 00 00 00 00 00
40 | 00 00 00 00 00 00 00 00 00 00 00 00 00 00 00 00
50 | 00 00 00 00 00 00 00 00 00 00 00 00 00 00 00 00
60 | 00 00 00 00 00 00 00 00 00 00 00 00 00 00 00 00
70 | 00 00 00 00 00 00 00 00 00 00 00 00 00 00 00 35
:EDID for RGB-PC
EDID Block 0 table =
0 1 2 3 4 5 6 7 8 9 A B C D E F
___________________________________________________
0 | 00 FF FF FF FF FF FF 00 1E 6D 01 00 01 01 01 01
10 | 00 10 01 03 68 73 41 96 0A CF 30 A3 57 4C B0 23
20 | 09 50 4E A1 08 00 01 01 01 01 01 01 01 01 01 01
30 | 01 01 01 01 01 01 66 21 50 B0 51 00 1B 30 40 70
40 | 36 00 C4 8E 21 00 00 1E 0E 1F 00 80 51 00 1E 30
50 | 40 80 37 00 C4 8E 21 00 00 1C 00 00 00 FD 00 38
60 | 4B 1F 3C 09 00 0A 20 20 20 20 20 20 00 00 00 FC
70 | 00 35 30 50 43 33 44 2D 55 45 0A 20 20 20 00 78

- 16 -
ADJUSTMENT INSTRUCTIONS
8. Adjustment of White Balance
8-1. The Purpose and Principal of Color
Temperature Adjustment
(1) Purpose: to reduce the difference in color temperature
among modules
(2) Principal: A module is in full dynamic range when RGB
Gain on OSD is 192. To adjust the white balance without
causing full dynamic range and full data, fix one of RGB
Gains at 192 and control the other two by reducing them
from 192.
8-2. Required Equipment
(1) Color Analyzer : CA-100+(CH 10), CA-100(CH 10) or CA-
210(CH 10)
=> To adjust color temperature of Plasma, CS-1000 is the
Color Analyzer and should be set to use CH 10 in which
white, red, green, and blue color are corrected. Conduct
the adjustment according to the coordinates for White
Balance adjustment in the table below.
In the case of using color-corrected CA-100, CA-100+,
and CA-210 (using CH10) to adjust Plasma, there are
differences for CS-1000 in the result due to the
characteristics of a module or filter. The target values of
the color coordinates in the table below are given to
prevent it.
(2) Automatic adjustor (with automatic adjustment necessity
and the RS-232C communication being possible)
8-3. Connection Diagram of Equipment
for Measuring (Automatic Adjustment)
Use the internal pattern to adjust White Balance. The pattern
is automatically given when the automatic adjustment device
is connected or when a user presses ADJ on the remote
controller to start Ez Adjust and then selects 6.White-Balance.
[Requirements for Automatic Adjustment
(1) The illuminance of surroundings
10 lux or less; preventing light in surroundings as much as
possible
(2) The location of the Probe
1) For PDP: place the color analyzer (CA-100, CA-100+,
and CA-210) close to the surface of a module and start
the adjustment.
2) For LCD: place the color analyzer (CA-210) close to the
surface of a module within 10 cm and keep the probe of
the color analyzer at 80°to 100°angle from the surface
of a module.
(3) Aging time
1) Once Aging is started, keep the power on without power
supply interruption for at least 15 minutes for heat run.
2) For PDP, use the internal pattern to adjust White
Pattern.
3) For LCD, use NO SIGNAL or Full White Pattern to
ensure the backlight is turned on.
8-4. Adjustment of White Balance
(Automatic Adjustment)
(1) Turn on the POWER ON(Â) of the remote controller to set
the adjustment and then start the automatic adjustment or
set the Baud Rate to 115200.Â) of the remote controller to
(2) Start the adjustment from “wb 00 00”and complete it at
“wb 00 ff”. (Adjust the offset if necessary)
wb 00 00 the automatic adjustment of White Balance is
started.
wb 00 10 adjusting gain (internal pattern appears) is
started.
ja 00 ff adjusting data
jb 00 c0
...
wb 00 1f adjusting gain is completed.
Adjust the offset (from wb 00 20 to wb 00 2f) if necessary.
wb 00 ff the automatic adjustment of White Balance
(internal pattern disappears) is completed.
CA-100+
COLOR
ANALYZER
TYPE; CA-100+
Full W hite Pattern
RS-232C
Connection Diagram of Automatic Adjustment

- 17 -
ADJUSTMENT INSTRUCTIONS
[RS-232C Command (Automatic Adjustment)
[42PC5D-UC] & [50PC5D-UC]
[WARNING] RGB-Cut fixed value
If the model has a fixed value, the equivalent value
must be applied.
Fix one of three Gains (R Gain, G Gain, and B Gain)
at 192 and control the other two by reducing values
from 192.
8-5. Adjustment of White Balance
(Manual Adjustment)
Required Equipment: CA-100 (CH 10), CA-100+ (CH 10), CA-
210 (CH-10)
--> To adjust color temperature of Plasma, CS-1000 is the
Color Analyzer and should be set to use CH 10 in which
white, red, green, and blue color are corrected. Conduct
the adjustment according to the coordinates for White
Balance adjustment in the table below.
(1) Enter ‘Ez - Adjust’by pressing ADJ KEY on the Service
Remote Control.
(2) Select "9. TEST PATTERN" using CH +/- Key and HEAT
RUN at least 30 minutes by pressing the ENTER Key.
(3) Zero Calibrate of the Color Analyzer, then attach sensor to
PDP module surface when you adjust.
(4) Select ‘6. White-Balance’of ‘Ez - Adjust’by pressing the
ADJ KEY on the Service R/C. Then enter adjustment mode
by pressing the Right KEY (
G
) .
(The internal pattern of full white appears by pressing
G
)
(5) The adjustment is conducted in three levels of color
temperature; COOL, MEDIUM, and WARM.
[WARNING] RGB-Cut fixed value
If the model has a fixed value, the equivalent
value must be applied.
[Color temperature: Cool, Medium, Warm
(1) When R Gain is fixed at 192,
Control G Gain and B Gain by reducing them from 192.
(2) When B Gain is fixed at 192,
Control R Gain and G Gain by reducing them from 192.
(3) When G Gain is fixed to 192,
Control R Gain and B Gain by reducing them from 192.
Fix one of three Gains (R Gain, G Gain, and B Gain) at 192
and control the other two by reducing values from 192 to
prevent it from increasing.
(When RGB Gains are all 192, the module is in full dynamic
range.)
R Gain
G Gain
B Gain
R Cut
G Cut
B Cut
jg
jh
ji
Cool
ja
jb
jc
Mid
RS-232C COMMAND
[CMD ID DATA]
CENTER
(DEFAULT)(Decimal)
jd
je
jf
00
00
00
192
192
192
Warm
Min
Max
(Deci
mal)
64
64
64
Cool
64
64
64
Mid
64
64
64
Warm

- 18 -
ADJUSTMENT INSTRUCTIONS
[White Balanc
High Level : 216gray
[The standard coordinates and color temperature for CS-1000]
[The standard coordinates and color temperature for CA-100/100+ (CH 10)]
[The standard coordinates and color temperature for CA-210(CH 10)]
Mode Temp ∆uv
Color Coordination
Cool
Medium
Warm
11000K
9300K
6500K
0.0000
0.0000
0.0000
x
0.276
0.285
0.314
y
0.283
0.293
0.324
Module Maker Filter Mode
42”
XGA
42X4
LGE
LGE 41%
Glass
41%
Glass
50”
WXGA
50X4
Temp ∆uv
Color Coordination
Cool
Medium
Warm
Cool
Medium
Warm
11200K
9400K
6500K
11100K
9400K
6500K
-0.002
-0.002
-0.002
-0.001
-0.002
-0.001
x
0.276±0.002
0.285±0.002
0.314±0.002
0.276±0.002
0.285±0.002
0.314±0.002
y
0.280±0.002
0.290±0.002
0.321±0.002
0.281±0.002
0.291±0.002
0.322±0.002
Module Maker Filter Mode
42”
XGA
42X3
50” WXGA(50X4) 41% Glass Filter
This model can be adjusted by using the same color coordinates to 42” XGA (42X4) 41% Glass Filter.
LGE 41%
Glass
Temp ∆uv
Color Coordination
Cool
Medium
Warm
11000K
9300K
6500K
0.0000
0.0000
0.0000
x
0.276±0.002
0.285±0.002
0.314±0.002
y
0.280±0.002
0.293±0.002
0.324±0.002

- 19 -
TROUBLESHOOTING GUIDE
TV/CATV doesn’t display
Check TU4001 Pin9(Video output)
Can you see the normal signal?
Check the input(Pin63) of AV switch(IC5003).
Can you see the normal waveform?
Check the output(Pin56) of AV switch(IC5003).
Can you see the normal waveform?
Check the input(Pin1) of LPF(IC4006).
Can you see the normal waveform?
YES
YES
YES
NO Could you measure voltage of TU4001 & IIC
lines?
Are they all normal?
Check the output(Pin8) of LPF(IC4006).
Can you see the normal waveform?
YES
Check the input(PinH26) of BCM3550(IC4006).
Measure waveform at C1010 because it s more
easy to check.
Can you see the normal waveform?
YES
YES
NO You should check power line
& IIC lines.
YES
You should replace TUNER.
NO After checking the Power of AV switch you should
decide to replace AV switch or not.
NO After checking the Power of AV switch you should
decide to replace AV switch or not.
NO After checking the Power of LPF you should decide to
replace LPF or not.
NO After checking the Power of LPF you should decide to
replace LPF or not.
This board has big problem because Main
chip(BCM3550) have some troubles.
After checking thoroughly all path once again, You
should decide to replace BCM3550 or not.

- 20 -
TROUBLESHOOTING GUIDE
Video doesn’t display
Check J5007 Pin3C
Can you see the normal waveform?
Check the input(Pin1 or Pin8) of AV
switch(IC5003). Pin1 is for video1,Pin8 is for
video 2.
Can you see the normal waveform?
Check the output(Pin56) of AV switch(IC5003).
Can you see the normal waveform?
Check the input(Pin1) of LPF(IC4006).
Can you see the normal waveform?
YES
YES
YES
NO J5007 may have problem. Replace this Jack.
Check the output(Pin8) of LPF(IC4006).
Can you see the normal waveform?
YES
Check the input(PinH26) of BCM3550(IC4006).
Measure waveform at C1010 because it s more
easy to check.
Can you see the normal waveform?
YES
YES
NO After checking the Power of AV switch you should
decide to replace AV switch or not.
NO After checking the Power of AV switch you should
decide to replace AV switch or not.
NO After checking the Power of LPF you should decide to
replace LPF or not.
NO After checking the Power of LPF you should decide to
replace LPF or not.
This board has big problem because Main
chip(BCM3550) have some troubles.
After checking thoroughly all path once again, You
should decide to replace BCM3550 or not.
Other manuals for 50PC5DC - - 50" Plasma TV
1
This manual suits for next models
7
Table of contents
Other LG Plasma TV manuals