LG LDG3037ST User manual

Lifds Good
i_J__ii#iiiiii
OWNER'S MANUAL
GAS DOU BLE
ANGE
Please read this guide thoroughly before operating
and keep it handy for reference at all times.
LDG303TST
www.lg.com
MFL33029614

2 TABLE OF CONTENTS
TABLE OF CONTENTS
3PRODUCT FEATURES
4IMPORTANT SAFETY INSTRUCTIONS
10 BEFOREUSE
10 Accessories
11 Components
12 HOW TO USE
12 How to use Gas Surface Burners
12 - Before Use
13 - Gas Burners
13 - Using the Gas Surface Burners
14 - Top-of-Range Cookware
15 - Using the Griddle
16 How to Use the Oven
16 - Before Use
18 - Using the Control Panel
20 Operation Instructions
20 - Convection auto conversion
20 - Temperature
20 - Language
20 - Preheating Alarm light
21 - Oven light
21 - Beeper volume
21 - Fahrenheit or Celsius
21 - Clock
22 - Timer
22 - Lockout
23 Removing and Replacing the Oven Racks
24 BAKE (Upper & Lower Oven)
24 SPEED BROIL (Upper Oven)
28 TIMED COOK (Upper & Lower Oven)
28 DELAYED TIMED COOK (Upper & Lower Oven)
29 How to use convection for the lower oven
29 - CONVECTION BAKE FOR THE LOWER OVEN
30 Preheating and Pan Placement
31 - CONVECTION ROAST FOR THE LOWER OVEN
32 Special Features
32 - KIDS MEAL (Upper Oven)
32 - WARM (Upper & Lower Oven)
33 - PROOF (Lower Oven)
33 - FAVORITE (Lower Oven)
33 - SABBATH (Upper & Lower Oven)
35
35 Gas Surface Burner
35 - Removing and Replacing the Gas Surface
Burner
35 - Burner Heads/Caps
36 - Burner Grates
37 - Cooktop Surface
37 - Stainless Steel Surfaces
37 - Oven Air Vents
37 - Control Panel
37 - Front Manifold Panel and Knobs
38 - Oven Door
38 - Removing and Replacing the Doors
40 Inside of the Oven
40 - SELF CLEAN (Upper & Lower Oven)
42 - easyCLEAN TM
44 - Changing the Oven Light
44 - Broiler Pan and Grid (Sold separately)
44 - Oven Racks
CARE AND CLEANING
45 BEFORE REQUESTING SERVICE
48 WARRANTY

PRODUCT FEATURES 3
MULTIPLE GAS BURNER SIZES
Choose a burner to fit the size of your cookware.
Cooking multiple items at once is possible by using different burners at the same time.
SAFE AND CONVENIENT GAS RANGE
Provides safety and convenience for cooking.
Superboil (17000 BTU) can quickly bring a pot of water to a boil.
UPPER OVEN /LOWER OVEN
Separate upper and lower ovens.
Choose to use either oven, or both, depending on the size of your food.
SELF CLEAN & easyCLEAN TM
Good for easy cleaning.

4- IMPORTANT SAFETY INSTRUCTIONS
IMPORTANT SAFETY INSTRUCTIONS
Always comply with the following precautions to avoid dangerous situations and to ensure the peak performance of your product.
_ WARNING
indicates a hazardous situation which, if not avoided, coutd result in death or serious injury.
_ CAUTION
indicates a hazardous situation which, if not avoided, could result in minor or moderate injury.
WHAT TO DO IF YOU SMELL GAS
1. Open windows.
2. DO NOT try to light any appliance.
3. DO NOT touch any electrical switch.
4. DO NOT use any phone in your building.
5. Immediately call your gas supplier from a neighbor's phone. Follow the gas supplier's
instructions.
6. If you cannot reach your gas supplier, call the fire department.
ANTI-TIP DEVICE
_ WARNING -,,
•ALL RANGES CAN TIP
•INJURYTO PERSONS COULD RESULT
•INSTALL ANTI-TIP DEVICES PACKED WITH RANGE
• SEE INSTALLATION INSTRUCTIONS
DO NOT step or sit on the door. Install the Anti-Tip Bracket packed with this range.
- The range could be tipped and injury might result from spilled hot liquid, food, or the range itself.
- if the range is pulled away from the wall for cleaning, service, or any other reason, ensure that the Anti-Tip Device is properly
reengaged when the range is pushed back against the wall.
Anti-_tip I I Wall plate
racKet'x_l I
Screw must _ I-. "
enterwood I_€_ /I
approximatelyT _ _ or concrete /i/]l V I
0,65"(16,5mm) _[_ v
,.,_\\\\\\\\\\\\\\\\\\\\\\\\\ \ \'_\_\\_\\\\1
. To reduce the risk of the range tipping over, the range must be secured by properly installing the anti-tip devices.
* To check that the anti-tip bracket is properly installed: Remove any items on the cooktop. Grasp the top rear edge of the range
back guard and carefully attempt to tilt it forward. Verify that the ant-kip devices are engaged.
* Remove the warming or storage drawers and visually inspect that the rear leveling leg is fully inserted into the anti-tip bracket.
* Refer to the installation manual for proper anti-tip bracket installatio

IMPORTANT SAFETY INSTRUCTIONS 5
IMPORTANT SAFETY NOTICE
Enforcement Act requires the Governor of California to publish a list of substances known to the state to cause birth defects or
other reproductive harm, and requires businesses to warn customers of potential exposure to such substances.
Gas appliances can cause minor exposure to four of these substances, namely benzene, carbon monoxide, formaldehyde and
soot, caused primarily by the imperfect combustion of natural or LP gas.
Correctly adjusted burners, indicated by a bluish rather than a yellow flame, will minimize imperfect combustion. Exposure to
these substances can be minimized by opening windows or using a ventilation fan or hood.
SAFETY PRECAUTIONS
Have the installer show you the location of the range gas shut-off valve and how to shut it off if necessary.
Make sure your range is properly installed and grounded by a qualified installer, according to the installation instructions.
Any adjustment and service should be performed only by qualified gas range installers or service technicians.
Plug your range into a 120-volt grounded outlet only. Do not remove the round grounding prong from the plug. If in doubt
about the grounding of the home electrical system, it is your personal responsibility and obligation to have an ungrounded
outlet replaced with a properly grounded, three-prong outlet in accordance with the National Electrical Code. Do not use an
extension cord with this range.
DO NOT use an adapter plug, an extension cord, or remove the grounding prong from the electrical power cord to prevent
fire hazard or electrical shock. Failure to follow this warning can cause serious injury, fire or death.
To prevent poor air circulation, place the range out of kitchen traffic path and out of drafty locations.
DO NOT attempt to repair or replace any part of your range unless it is specifically mentioned in this manual. All other ser-
vices should be referred to a qualified technician.
Make sure that alt packaging materials are removed from the range before operating it to prevent fire or smoke damage
should the packaging materiat ignite.
Make sure your range is properly adjusted by a qualified service technician or installer for the type of gas (natural or LP) that
is to be used. Your range can be converted for use with either type of gas. See the installation instructions.
• In an emergency situation or if you want to shut off the gas supply, remove the packing rubber from the regulator in the backside,
and then close the regulator's valve by positioning the lever as shown in the figure below.
Lever's open position Lever's open position Lever's close position
(without packing lever)
WARNING
These adjustments must be done by a qualified service technician according to the manufacturer's instructions and all codes and
requirements of the authority having jurisdiction. Failure to follow these instructions could result in serious injury or property dam-
age. The qualified agency performing these adjustments assumes responsibility for the conversion.
After using your range for a long time, high floor temperatures may result and many floor coverings will not withstand this
kind of use.
NEVER install the range over vinyl tile or linoleum that cannot withstand such type of use. Never install it directly over inte-
rior kitchen carpeting.
CAUTION
Items of interest to children should not be placed in cabinets above a range or on the backsplash of a range--children climbing on
the range to reach items could be seriously injured.
DO NOT leave children alone or unattended where a range is hot or in operation. They could be seriously burned.
DO NOT let anyone climb, stand or hang on the oven door, warming drawer or cooktop. They could damage the range and
even tip it over, causing severe personal injury.

6 IMPORTANT SAFETY INSTRUCTIONS
WARNING
•This product contains chemicals known to the State of California to cause cancer. Wash hands after handing.
_ WARNING
• NEVER use your range as a space heater to heat or warm the room. Doing so may result in carbon monoxide poisoning and over-
heating of the oven.
• NEVERwear loose fitting or hanging garments while using the appliance. Be careful when reaching for items placed in cabinets
over the range. Flammable materials could be ignited if brought in contact with flame or hot oven surfaces and may cause severe
burns.
• DO NOT place flammable materials in the oven or near the cooktop.
• DO NOT place or use combustible materials such as gasoline or other flammable vapors and liquids in the vicinity of this or any
other appliance.
• DO NOT allow cooking grease or other flammable materials in or near the range.
• DO NOT use water on grease fires. Never touch a flaming pan. Turn the controls off. Smother a flaming pan on a surface burner
by covering the pan completely with awell-fitting lid, cookie sheet or flat tray. Use a multi-purpose dry chemical or foam-type fire
extinguisher.
A grease fire can be put out by covering it with baking soda or, if available, by using a multi-purpose dry chemical or foam-type fire
extinguisher.
Flame in the upper oven or lower oven can be smothered completely by closing the oven door and turning the control to off or by
using a multi-purpose dry chemical or foam-type fire extinguisher.
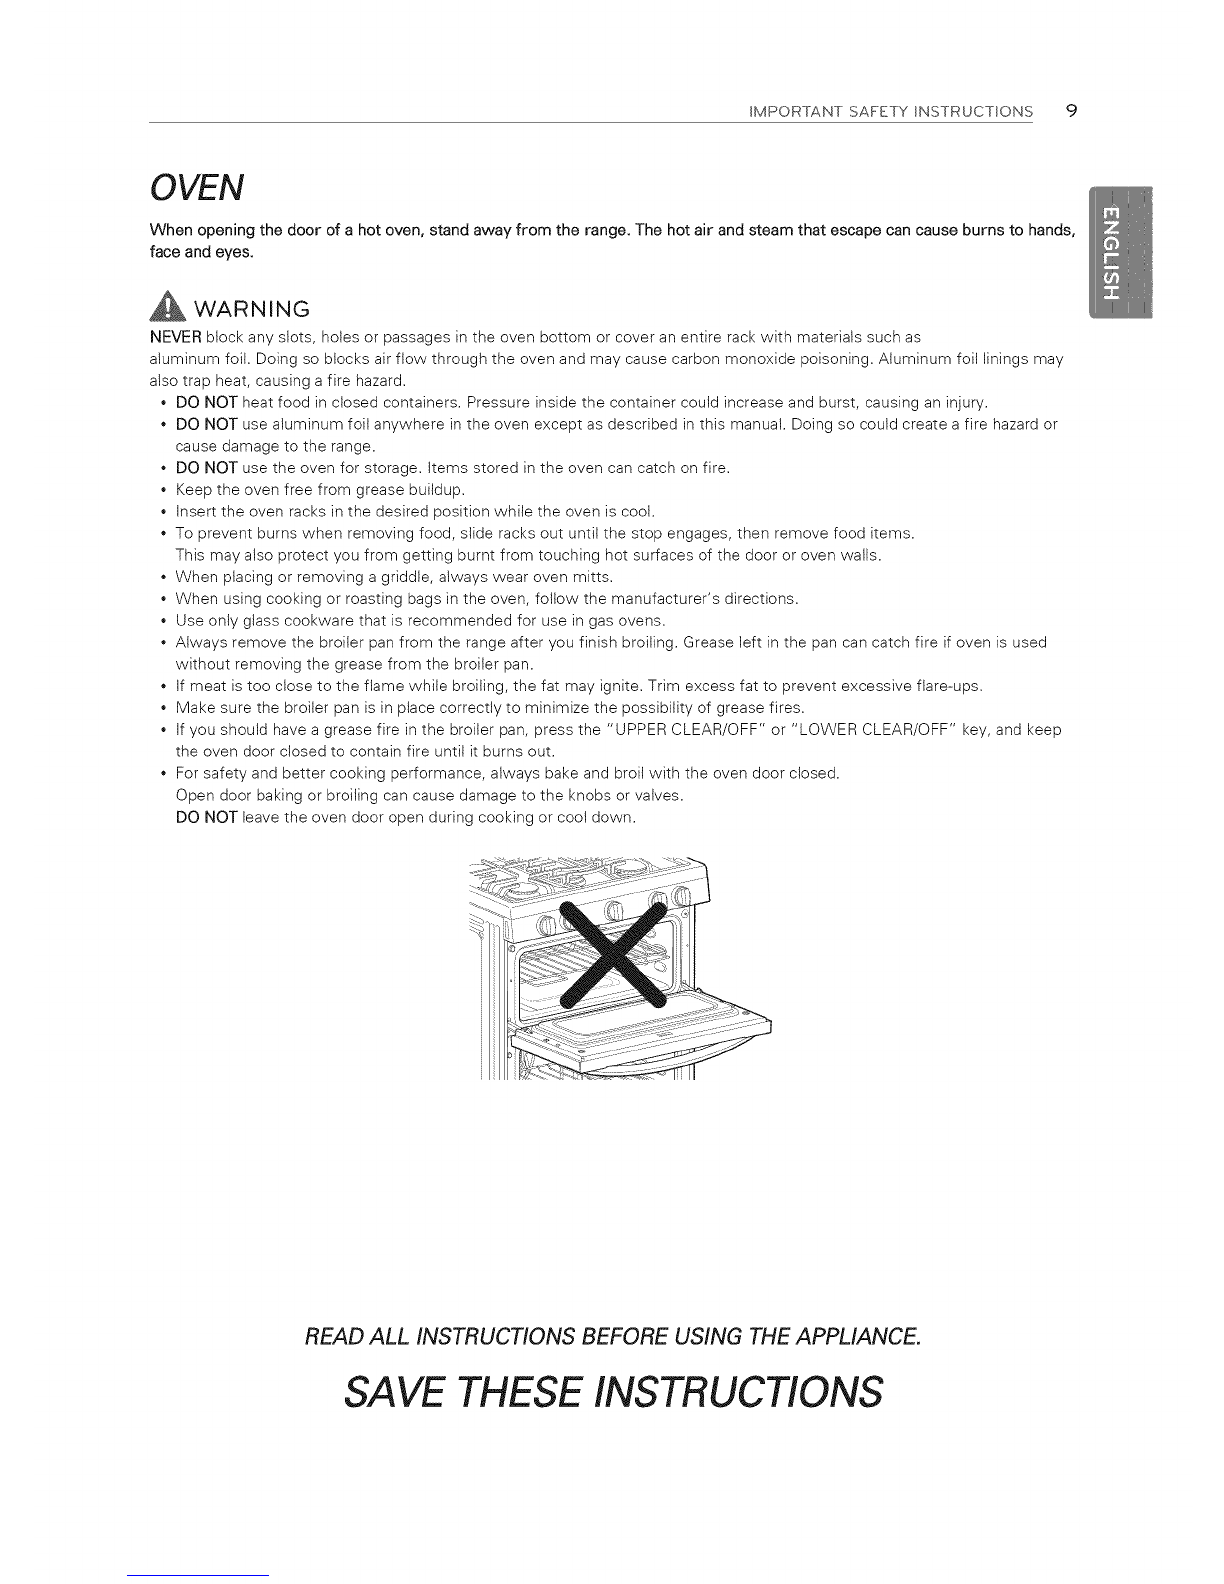
• DO NOT use the oven or the drawer for storage.
• Let the burner grates and other surfaces cool before touching them.
• NEVER block the vents (air holes) of the range. They provide the air inlet and outlet that are necessary for the range to operate
properly with correct combustion. Air openings are located at the rearof the cooktop, at the top and bottom of the oven door, and
at the bottom of the range.
• NEVER cover any slots, holes or passages in the oven bottom or cover an entire rack with materials such as aluminum foil. Doing
so blocks air flow through the oven and may cause carbon monoxide poisoning. Aluminum foil linings may also trap heat, causing
a fire hazard.
• NEVER obstruct the flow of combustion and ventilation air by blocking the oven vent or air intakes. Doing so restricts air to the
burner and may result in carbon monoxide poisoning.
• Large scratches or impacts to glass doors can lead to broken or shattered glass.
• Stepping, leaning or sitting on the doors or drawers of this range can result in serious injuries and also cause damage to the range.
Do not allow children to climb or play around the range. The weight of a child on an open door may cause the range to tip, result-
ing in serious burns or other injury.
• Gas leaks may occur in our system and result in a dangerous situation. Gas leaks may not be detected by smell alone. Gas sup-
pliers recommend you to purchase and install a UL approved gas detector. Install and use in accordance with the gas detector
manufacturer's instructions.
• Leak testing of the appliance shall be conducted according to the manufacturer's instructions.
• DO NOT use commercial oven cleaners on the oven finish or around any part of the oven. They will damage the finish of parts.
• To prevent staining or discoloration, clean appliance after each use.
• DO NOT attempt to open or close the door or operate the oven until the door is properly installed.
• NEVER place fingers between the hinge and front oven frame. Hinge arms are spring mounted. If accidentally hit, the hinge will
slam shut against the oven frame and could injure your fingers.
CAUTION
• DO NOT use the oven for storing food or cookware.
• To prevent damage to the oven door, do not attempt to open the door when Lock is displayed.
• DO NOT place excessive weight or stand on an open door. This could cause the range to tip over, break the door, or injure the
user.
• DO NOT use delayed baking for highly perishable foods such as dairy products, pork, poultry, or seafood.
WARNING
• Disconnect electrical supply before servicing the appliance.
• NEVER use appliance door as a step stool or seat, as this may result in possible tipping of the appliance and serious injuries.
• This product should not be installed below ventilation type hood systems that directs air in a downward direction.
Doing so may cause ignition and combustion problems with the gas burners resulting in personal injury and may affect the cook-
ing performance of the unit.

IMPORTANT SAFETY INSTRUCTIONS 7
SURFACE BURNERS
WARNING
• Even if the top burner flame goes out, gas is still flowing to the burner until the knob is turned to the "OFF" position. If you
smell gas, immediately open a window and ventilate the area for five minutes prior to using the burner. Do not leave the
burners "ON" unattended.
Use proper pan size - DO NOT use pans that are unstable or that can be easily tipped. Select cookware with flat bottoms
large enough to cover burner grates. To avoid spitlovers, make sure the cookware is large enough to contain the food prop-
erly. This will both save cleaning time and prevent hazardous accumulations of food, since heavy spattering or spillovers left
on the range can ignite. Use pans with handles that can be easily grasped and remain cool.
CAUTION
Be sure that all surface controls are set in the "OFF" position prior to supplying gas to the range.
NEVER leave the surface burners unattended at high flame settings. Boilovers may cause smoke and greasy spillovers that
may catch on fire.
Always turn the knobs to the "LITE" position when igniting the top burners and make sure the burners have ignited.
Control the top burner flame size so it does not extend beyond the edge of the cookware. Excessive flame is hazardous.
Only use dry pot holders--moist or damp pot holders on hot surfaces may result in burns from steam. Do not let pot hold-
ers come near open flames when lifting cookware. Do not use towels or other bulky cloth items. Use a pot holder.
Using glass cookware--make sure the cookware is designed for top-of-range cooking.
To prevent burns from ignition of flammable materials and spillage, turn cookware handles toward the side or back of the
range without extending over adjacent burners.
NEVER leave any items on the cooktop. The hot air from the vent may ignite flammable items and will increase pressure in
closed containers, which may cause them to burst.
Carefully watch foods being fried at a high flame setting.
Always heat fat slowly, and watch as it heats.
* tf frying combinations of oils and fats, stir together before heating.
Use a deep fat thermometer if possible to prevent overheating fat beyond the smoking point.
Use the least possible amount of fat for effective shallow or deep-fat frying. Filling the pan with too much fat can cause
spiltovers when food is added.
DO NOT cook foods directly on an open flame on the cooktop.
DO NOT use a wok on the surface burners if the wok has a round metal ring that is placed over the burner grate to support
the wok. This ring acts as a heat trap, which may damage the burner grate and burner head. It may also cause the burner
to work improperly. This may cause carbon monoxide levels which are higher than what is allowed by current standards,
resulting in a health hazard.
Foods for frying should be as dry as possible. Frost or moisture on foods can cause hot fat to bubble up and spillover the
sides of the pan.
NEVER try to move a pan of hot fat, especially a deep fat fryer. Wait until the fat is cool.
DO NOT place plastic items on the cooktop--they may melt if left too close to the vent.
Keep all plastics away from the surface burners.
To prevent burns, always be sure that the controls for all burners are in the "OFF" position and all grates are cool before
attempting to remove them.
If you smell gas, turn off the gas to the range and call a qualified service technician. Never use an open flame to locate a
leak.
Always turn the knobs to the "OFF" position before removing cookware.
DO NOT lift the cooktop. Lifting the cooktop can cause damage and improper operation of the range.
If the range is located near a window, do not hang long curtains that could blow over the surface burners and catch on fire.

8 IMPORTANT SAFETY INSTRUCTIONS
BROILER
Always use a broiler pan and a grid for excess fat and grease drainage. This will help to reduce splatter, smoke, and flare-ups.
The igniter for the infrared ceramic broil burner on the ceiling of the oven will glow orange periodically during normal broil opera-
tion.
WARNING
When using your broiler, the temperature inside the oven will be extremely high. Take caution to avoid possible burns by:
• Keeping the door closed when broiling (refer to Broil section of the manual)
• Always wear oven mitts when inserting or removing food items
CAUTION
The infrared ceramic broiler will generate intense heat and will sear foods faster compared to regular bar type broilers. This broil
system is designed to be operated under consumer-use conditions only. To avoid overheating and damaging the oven, do not
use this broiler continuously for more than 45 minutes at a time.
Do not attempt to spray the broiler and its igniter with any type of cleaners or try to scrub it. This will damage the broiler system.
The ceramic plates of your broiler do not need to be manually cleaned. Any grease or splatter on the ceramic from cooking and
baking will burn clean by simply turning on your broiler for about 10 minutes.
COOK MEAT AND POULTRY THOROUGHLY
To protect against foodborne illnesses, cook meat and poultry thoroughly. The USDA has indicated the following as safe mini-
mum internal temperatures for consumption:
• Ground beef, veal, pork, or lamb: 160 °F
• Poultry: 165 °F
• Beef, veal, pork, or lamb: 145 °F
• Fish/seafood: 145°F
SELF CLEANING OVEN
Make sure to wipe off excess spillage before operating the self clean function,
CAUTION
• DO NOT leave food, cooking utensils, racks, etc. in the oven during the self clean cycle.
• DO NOT use oven cleaners. No commercial oven cleaner or oven liner protective coating of any kind should be used in or
around any part of the oven. Residue from oven cleaners will damage the inside of the oven when the self clean cycle is
used.
• Remove oven racks and other items from both upper and lower ovens before starting the self clean cycle.
• Only clean the parts listed in this manual.
• DO NOT clean the door gasket. The door gasket is necessary for a good seal. Care should be taken not to rub, damage or
move the gasket.
• If the self cleaning mode malfunctions, turn the range off and disconnect the power supply. Have it serviced by a qualified
technician.
• It is normal for parts of the oven to become hot during a self clean cycle.
• Avoid touching the door, window or oven vent area during a clean cycle.

IMPORTANT SAFETY INSTRUCTIONS 9
OVEN
When opening the door of a hot oven, stand away from the range, The hot air and steam that escape can cause burns to hands,
face and eyes,
WARNING
NEVER block any slots, holes or passages in the oven bottom or cover an entire rack with materials such as
aluminum foil. Doing so blocks air flow through the oven and may cause carbon monoxide poisoning. Aiuminum foil linings may
also trap heat, causing a fire hazard.
* DO NOT heat food in closed containers. Pressure inside the container could increase and burst, causing an injury.
* DO NOT use aluminum foil anywhere in the oven except as described in this manual. Doing so could create a fire hazard or
cause damage to the range.
* DO NOT use the oven for storage, items stored in the oven can catch on fire.
* Keep the oven free from grease buildup.
* insert the oven racks in the desired position whJb the oven is cool.
* To prevent burns when removing food, siide racks out until the stop engages, then remove food items.
This may also protect you from getting burnt from touching hot surfaces of the door or oven waNs.
* When placing or removing a griddle, always wear oven mitts.
* When using cooking or roasting bags in the oven, follow the manufacturer's directions.
* Use oniy glass cookware that is recommended for use in gas ovens.
*Aiways remove the broiler pan from the range after you finish broiling. Grease left in the pan can catch fire if oven is used
without removing the grease from the broiler pan.
* if meat is too close to the flame while broiling, the fat may ignite. Trim excess fat to prevent excessive flare-ups.
* Make sure the broiier pan is in place correctly to minimize the possibility of grease fires.
* if you should have a grease fire in the broiler pan, press the "UPPER CLEAR/OFF" or "LOWER CLEAR/OFF" key, and keep
the oven door closed to contain fire untit it burns out.
* For safety and better cooking performance, always bake and broil with the oven door closed.
Open door baking or broiling can cause damage to the knobs or valves.
DO NOT leave the oven door open during cooking or cool down.
READ ALL INSTRUCTIONS BEFORE USING THE APPLIANCE.
SAVE THESE INSTRUCTIONS

10 BEFORE USE
BEFORE USE
Accessories
Make sure that all parts are included after purchasing this product.
Racks Offset rack Griddle plate
(2) (1) (1)
Owner's manual installation manual
Cooktop nozzles (5) Oven nozzles (4) installation guide
LP nozzle conversion kit
(_ uuuuuuuuuuuuuuuuuuu_,,_
TemplateAnti-tip Screws (6) Anchors (6)
Anti-tip kit
Gas double oven range
Spray bottle (1) Plastic Scraper (1) Sponge (1)
Non-scratch easyCLEAN
Scouring Pad (1) Quick Reference Guide
Sold Separately
Broiler pan Grid
-@ NOTE
• Contact LG Customer Service if any accessories are missing.
For your safety and extended product life, only use authorized components.
The manufacturer is not responsible for product malfunction or accidents caused by the use of separately purchased,
unauthorized components or parts.
The images in this guide may be different from the actual components and accessories, and are subject to change by the
manufacturer without prior notice for product improvement purposes.

BEFORE USE 11
Components
Make sure to understand the names and function of each part.
* Throughout this manual, the features and appearance may vary depending on your model.
Control panel
Oven vent
Ovalburner I_
Medium burner I
Large burner
Knobs (B) I
Automatic oven light switch I
Grates
Small burner
Extra large burner
Self clean latch
Rack
Upper oven door
Convection fan
Rack
Lower oven door
_@ NOTE
* The modet and serial tag is located behind the control panet.
k

12 HOWTO USE
HOW TO USE
Gas Surface Burners
Before use
Read all instructions before using.
aOG Make sure that all burners are properly placed.
Make sure that all grates are properly placed before using the burner.
,-_ CAUT ON
DO NOT operate the burner for an extended period of time without cookware on the
grate. The finish on the grate may chip without cookware to absorb the heat.
\
Make sure that the burners and grates are cooled clown before touching
them and also before placing any other object like a pot holder or a cleaning
cloth, etc.
Touching grates before cooling down may cause burns.
_CAUTION
WHAT TO DO IFYOU SMELL GAS
I.Open windows.
2.DO NOT trytolightany appliance.
3. DO NOT touch any electrical switch.
4. DO NOT use any phone in your building.
5. Immediately call your gas supplier from a neighbor's phone.
Follow the gas supplier's instructions.
6. If you cannot reach your gas supplier, call the fire department.
Ew@NOTE
lectric spark igniters from the burners causethe clicking noise,Atl the sparkigniters on the cooktop
ill activate when igniting just one burner,

HOWTO USE 13
Gas burners
Your gas range cooktop has five sealed gas burners.
These can be assembled and separated. Follow the guide
below.
O
Using the gas sur{ace burners
Be sure that all of the surface burners are placed in the
correct positions.
Put the cookware on the burner. (Example: pot, frying
pan, etc.)
3 Push and turn the control knob to the "LITE" position.
D Medium and Large Burner
The medium and large burners are the primary burners
for most cooking. These general purpose burners can be
turned down from "HI" to "LO" to suit a wide range of
cooking needs.
Q Oval burner
The oval burner (center) is for use with a griddle or oval
pots.
Small Burner
The smallest burner is used for delicate foods such as
sauces or foods that require low heat for a long cooking
time.
Extra large burner
The extra large burner is the maximum output burner. Like
the other four burners, it can be turned down from "HI" to
"LO" for a wide range of cooking applications. This burner
is also designed to quickly bring large amounts of liquid to
a boil. It can be used with cookware 10 inches or larger in
diameter.
4
You will hear a clicking noise from the electric spark
ignition system.
Turn the control knob to control the flame size.
©© ©©
superBo//
_ _ CAUTION
DO NOT attempt to disassemble or clean around any
burner while another burner is on. When turning a burner
to "LITE", all the burners spark. An electric shock may re-
suit, which could cause you to knock over hot cookware.
Selecting the Flame Size
Watch the flame, not the knob, as you reduce heat. When
fast heating is desired, the flame size on a gas burner should
match the cookware that you are using.
J-L
r _CAUTION
NEVER let the flames extend up the sides of the cook-
ware.

14 HOWTO USE
In Case of Power Failure:
In case of a power failure, you can light the gas surface burn-
ers on your range with a match.
Surface burners in use when an electrical power failure
occurs will continue to operate normally.
1Hold a lit match to the burner, then push in the control
knob.
2Turn the control knob to the "Lo" position.
-_CAUTION -.,
Use extreme caution when lighting burners with a match.
It can cause burn and damage.
\
Top-of-range cookware
Aluminum Medium-weight cookware is
recommended because it heats
quickly and evenly. Most foods
brown evenly in an aluminum
skillet. Use saucepans with tight
fitting lids when cooking with
minimum amounts of water.
Cast-Iron If heated slowly, most skillets will
give satisfactory results.
Stainless Steel This metal alone has poor
heating properties and is usually
combined with copper, aluminum
or other metals for improved heat
distribution. Combination metal
skillets work satisfactorily if they
are used with medium heat as the
manufacturer recommends.
Enamelware
Glass
Heatproof Glass
Ceramic
Under some conditions, the
enamel of this cookware may melt.
Follow cookware manufacturer's
recommendations for cooking
methods.
There are two types of glass
cookware - those for oven use only
and those for top-of-range cooking.
Can be used for either surface or
oven cooking. It conducts heat
very slowly and cools very slowly.
Check cookware manufacturer's
directions to be sure it can be used
on gas ranges.
Using a Wok:
If using a wok, it is recommended that you use a 14-inch or
smaller flat-bottomed wok. Make sure that the wok bottom
sits flat on the grate.
Use a flat-bottomed wok.
_-_CAUTION
DO NOT use a wok support ring. Placing the ring over the
burner or grate may cause the burner to work improp-
erly, resulting in carbon monoxide levels above allowable
standards. This can be hazardous to your health.
Using Sfove-fop Grills:
Do not place stove-top grills on the burner.
_ _CAUTION
DO NOT use stove top grills on your surface burners.
Using a stove top grill on the surface burner will cause
incomplete combustion and can result in exposure to
carbon monoxide levels above allowable current stan-
dards. This can be hazardous to your health.

HOWTO USE 15
Using fhe Griddle
Your non-stick coated griddle provides an extra-large cooking
surface for meats, pancakes or other food usually prepared in
a frying pan or skillet.
@NOTE
It is normal for the griddle to become discolored over
time.
How to Place the Griddle: The griddle can only be used
with the center burner. The griddle must be properly placed
on the center grate, as shown in the below illustration.
Preheat the griddle according to the guide below and
adjust for the desired setting.
Type of Food Preheat Conditions Cook setting--
Warming Tortillas none 5 (MED)
Pancakes HI 3 min. HI
Hamburgers HI 5 rain. HI
Fried Eggs HI 5 rain. HI
Bacon HI 3 min. HI
Breakfast Sausage HI 5 rain. HI
Links
Hot Sandwiches HI 4 rain. HI
/_i@ NOTE
Griddle settings may need to be adjusted if the griddle
is used for an extended time.
\,
IM PORTANT NOTES:
• Avoid cooking extremely greasy foods, grease spill over can
occur.
• The griddle can become hot when surrounding burners are
in use.
• DO NOT overheat the griddle. This can damage the non
stick coating.
• DO NOT use metal utensils that can damage the griddle sur-
face. Do not use the griddle as a cutting board.
• DO NOT place or store items on the griddle.
@NOTE I
• DO NOT remove the centergratewhen usingthe
griddle,
,-_CAUTION -,
DO NOT remove the griddle plate until the cooktop
,-_CAUTION
The griddle plate on the cooktop may become very hot
when using the cooktop, oven or broiler systems.
Always use oven mitts when placing or removing the
griddle plate.

16 HOWTO USE
How to Use the Oven
Before USe
Read all instructions before using.
Make sure the electrical power cord and the gas valve are properly
connected.
Check it for safety.
Check the correct use of the range depending on the type of food you will
cook.
Make sure you know how to use the oven (temperature setting, time setting and recipe) for
best results.
_CAUTION
WHAT TO DO IF YOU SMELL GAS
1. Open windows.
2. DO NOT try to light any appliance.
3. DO NOT touch any electrical switch.
4. DO NOT use any phone in your building.
5. immediately call your gas supplier from a neighbor's phone.
Follow the gas supptier's instructions.
6. If you cannot reach your gas supplier, call the fire department.
.... Choose the upper or lower oven for proper cooking.
Use the upper oven to cook a small amount of food.
(_ N OTE oven]
_When using an oven thermometer in the oven cavity, temperatures may differ from the actual set
temperature with all mode.

HOWTO USE 17
Do not block, touch or place items around the oven vent during
cooking.
Your oven is vented through ducts at the center above the burner grate. Do not block the oven vent
when cooking to allow for proper air flow. Do not touch vent openings or nearby surfaces during the
use of any cooking operation.
__CAUTION
• DO NOT place plastic or flammable items on the cooktop--they may melt or ignite if left too
close to the vent.
DO NOT place closed containers on the cooktop. The pressure in closed containers may in-
crease, which may cause them to burst.
Metal items will become very hot if they are left on the cooktop, and could cause burns.
• Handles of pots and pans on the cooktop may become hot if left too close to the vent.
Do not cover rack or bottom with aluminum foil.
As your oven heats up, the temperature increase of the air in the oven
may cause water drops to occur on the door glass.
These water drops are harmless and will evaporate as the oven continues to heat up.
in case of power failure, do not use the oven.
The oven and broiler can not be used during a power outage, if the oven is in use when a power failure
occurs, the oven burner shuts off and cannot be re-lit until power is restored. Once power is restored,
you will need to reset the oven (or broil function).
_CAUTION
DO NOT attempt to operate the electric ignition during an electrical power failure.
NOTE
PF(Power Failure) /Flashing time
Depending on the modet of your range, the display will either show "PF" or a flashing clock. This
means that the product has just been plugged in, or that it has experienced a power interruption.
To clear the "PF" message, press the "Clear/Off" key on the oven controls. If your oven displays a
flashing clock, then press the "Clock" key and reset the time, or press any key to stop flashing.

"18 HOWTO USE
Using fhe Confrol Panel
@ @ @
................................Cony.
Lower Rake
Oven Warm
Coo!
@@
@
Cony. Bake _ Proof
Roast
Favodt,
....................s,o;i.............._ so,t,°0
@
@ @ @
Display
@ @ @
@ @
@ @ @ @ @
Upper Oven:
@ Bake Traditional bake function. Refer to "Bake" in the How To Use section.
@ Speed Broil Infrared broil function. Refer to "Speed Broil" in the How To Use section.
Warms food in the oven.
@ Warm Refer to "Warm" in the How To Use section.
Use it cook kids meal such as frozen pizza and chicken nuggets.
@ Kids Meal Refer to "Kids Meal" in the How To Use section.
Upper Light Turns on/off the upper oven light.
Sets, starts or cancels the timer function of the upper oven.
Upper Timer On/Off Refer to "How to use the timer" in the How To Use section.
Cleans the inside of the upper oven automatically.
@ Upper Self Clean Refer to "Self Clean" in the How To Use section.
Cleans a lightly soiled upper oven automatically.
@ Upper EasyClean Refer to "EasyClean" in the Care and Cleaning section.
Upper CLEAR/OFF Stops cooking or cancels the setting in the upper oven.

HOWTO USE 19
Using the Control Panel (continued)
Lower Oven:
To use the Convection Baking function, Refer to "Convection Bake" in the How To Use
@ Conv.Bake section.
To use the Convection Roast function, Refer to "Convection Roast" in the How To Use
@ Conv.Roast section.
0 Bake Traditional bake function. Refer to "Bake" in the How To Use section.
@ Proof To proof bread dough. Refer to "Proof" in the How To Use section.
Warms food in the oven.
@ Warm Refer to "Warm" in the How To Use section.
@ Favorite Use it to store 3 favorite types of food. Refer to "Warm" in the How To Use section.
@ Lower Light Turns on/off the lower oven light.
Sets, starts or cancels the timer function of the lower oven.
Lower Timer On/Off Refer to "How to use the timer" in the How To Use section.
@ Lower Setf Clean Cleans the inside of the lower oven automatically.
Cleans a lightly soiled lower oven automatically.
@ Lower EasyClean Refer to "EasyClean" in the Care and Cleaning section.
Lower CLEAR/OFF Stops cooking or cancels the setting in the lower oven.
Common Functions:
Name
@ Cook Time
Start Time
0 Clock
@ Setting
NUMBER KEY
@ START (Oven Lock)
Description
Sets the cooktime length, it is automatically turned off if the desired cook time is reached.
Sets the desired cooking start time. The oven automatically starts cooking at the set time.
Sets the time of the day.
Refer to "How to set the clock" in the Operating instructions section.
Sets various functions.
Use to set the time, timer, temperature and all times.
Starts all functions except for the timer. To activate Oven Lock, press and hold for three sec-
onds.

20 HOWTO USE
Operafing Insfrucfions
The setting value can be changed by pressing the "Setting"
key.
The items are different from each model. Refer to "Setting
item chart"
SETTING ITEM CHART
Operating Instruction
Convection Auto Conversion Once
Temperature Setting (Lower oven) Twice
Temperature Setting (Upper oven) Three times
Language Four times
Preheating Alarm light On/off Five times
Beeper Volume Six times
Fahrenheit or Celsius Seven times
How fo sef fhe convecfion aufo
conversion {uncfion for fhe lower
over
When using convection bake and roast, the convection auto
conversion feature will automatically convert entered regular
baking temperatures to convection baking temperatures.
This feature is activated so that the display will show the
actual converted temperature. For example, if you enter a
regular recipe temperature of 350°F and touch the STARTkey,
the display will show the converted temperature of 325°F.
1 Press the Setting key once. 0n Ru ko will appear in the
display.
2Press 1 for auto conversion On, or press 2 for auto conver-
sion Off.
3Press the STARTKey to accept the change.
How fo adjusf fhe femperafure
seffings:
You may find that your new oven cooks differently than the
one it replaced. Use your new oven for a few weeks to be-
come more familiar with it before changing the temperature
settings. After familiarizing yourself with the new oven, and
you still think that it is too hot or too coid, you can adjust the
thermostat yourself.
-_X\ CAUTION
DO NOT use thermometers, such as those found in
grocery stores, to check the temperature setting of your
oven. These thermometers may vary 20-40 degrees.
\,
Determine which oven you would like to adjust (upper or
lower).
Press Settingkey 2 times for the lower oven, L-RJ will ap-
pear in the disptay.
Press Setting key 3 times for the upper oven, U-R" will will
appear in the disptay.
Using the number keys, enter the amount of degrees that
you wish to adjust the oven up or down. To adjust the
temperature down, press the Setting key after keying in
the numbers. Example:
To adjust the oven temperature up 15 degrees, press 1, 5.
To Adjust the oven temperature down 15 degrees, press 1,
5, Setting
Press the STARTkey to accept the change.
@ NOTE
*This adjustment will not affect the broiling or the Setf
Clean temperatures. The adjustment will be retained in
memory after a power failure. The oven temperature
can be increased (+) or decreased (-) as much as 35°F or
19°C.
*To decrease or increase temperature during cooking
1. Using the number keys, enter the new temperature.
2. Press the Setting key once.
3. Press the STARTkey to accept the choice.
How fo selecf language
The default language of the oven's display is English. It can
be changed to Spanish or French.
1 Press the Settingkey 4 times. Lr, 9 (Language) will
display.
2Press the number key to select language.
i LanguageS..........................______..............__ French
Number key 3 j
3 Press the STARTkey to accept the change.
How fo Sef Preheafing Alarm Lighf On/
Off
When the oven reaches its set-temperature, the preheating
alarm ligth will flash until the oven door is opened. You can
activate or deactivate the preheating alarm light.
1Press the Setting key 5 times. PrE will display.
2Press the number 1 key to select On, or press 2 to select
Off.
3 Press the STARTkey to accept the change.
Other manuals for LDG3037ST
3
Table of contents
Languages:
Other LG Range manuals

LG
LG PrintProof LTGL6937 Series User manual

LG
LG Studio LSES302ST User manual

LG
LG PrintProof LTGL6937 Series User manual

LG
LG LSEL6331 Series User manual

LG
LG LDE3017ST User manual

LG
LG LRE3023ST User manual

LG
LG LRE30451 Use and care manual

LG
LG LRG3095S User manual

LG
LG LSG4513BD User manual

LG
LG LSGL5833 Series User manual