4
The model and serial numbers are found on the inner case on the back
or one side of the refrigerator compartment of this unit. These numbers
are unique to this unit and are not available to others. You should record
requested information here and retain this guide as a permanent record of
your purchase. Staple your receipt here.
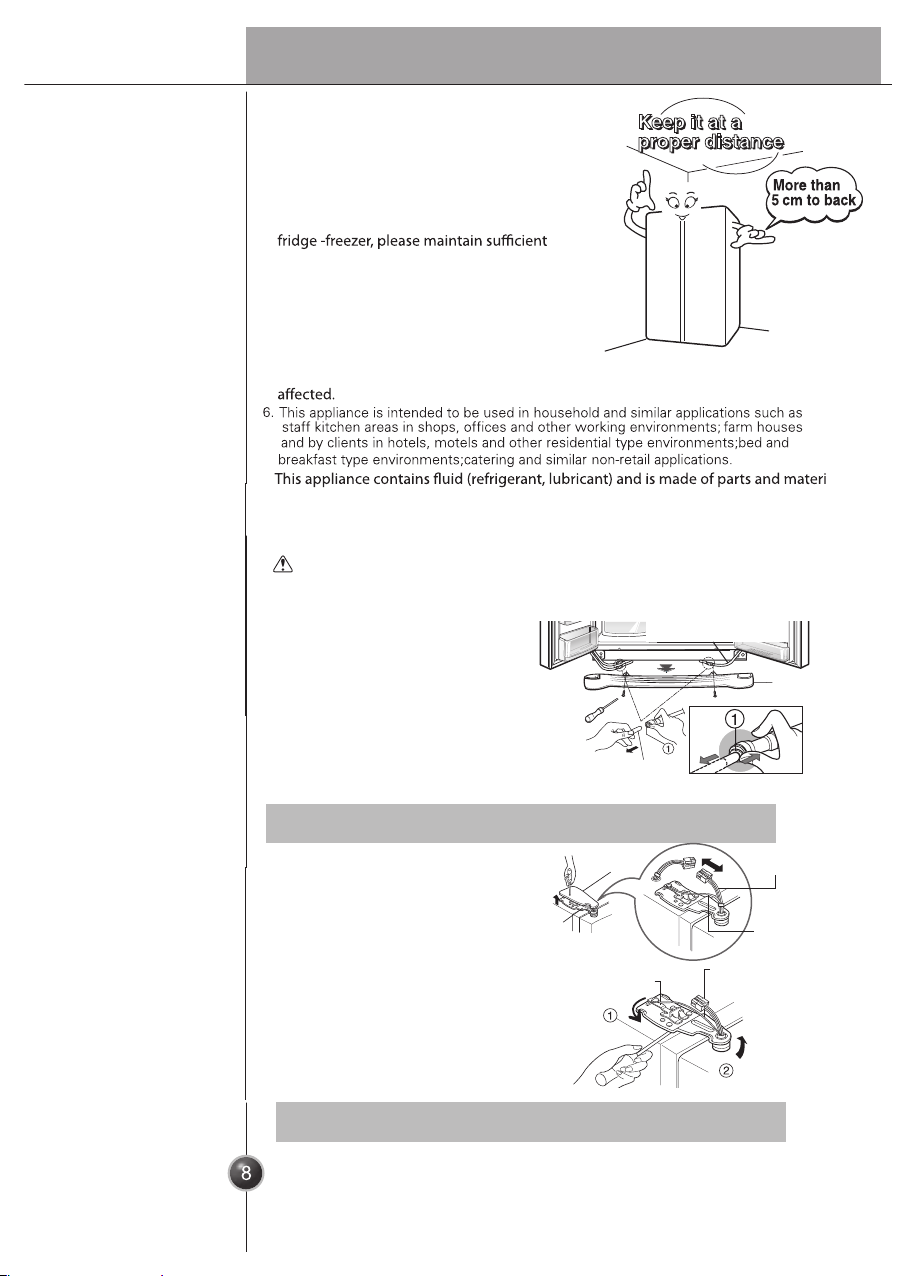
Before it is used, this refrigerator must be properly installed and located in accordance with
the installation instructions in this document. This Refrigerator is intended for Domestic
indoor use only.
Never unplug your refrigerator by pulling on the power cord. Always grip plug rmly and
pull it straight out from the outlet.
When moving your appliance away from the wall, be careful not to roll over the power
cord or to damage it in any way.
After your refrigerator is in operation, do not touch the cold surfaces in the freezer
compartment, particularly when your hands are damp or wet. Skin could adhere to these
extremely cold surfaces.
Unplug the power cord from the power outlet for cleaning or other maintenance. Never
touch the appliance with wet hands as you may receive an electric shock or injure yourself.
Never damage, press, severely bend, pull or twist the power cord as damage to the cord
may cause re or electric shock. Never touch the cord if you are uncertain if the appliance
is correctly earthed.
Never place glass items in the freezer as they may break due to expansion of their contents
on freezing.
Never put your hands into the storage bin of the automatic ice maker as you could be
injured during its operation.
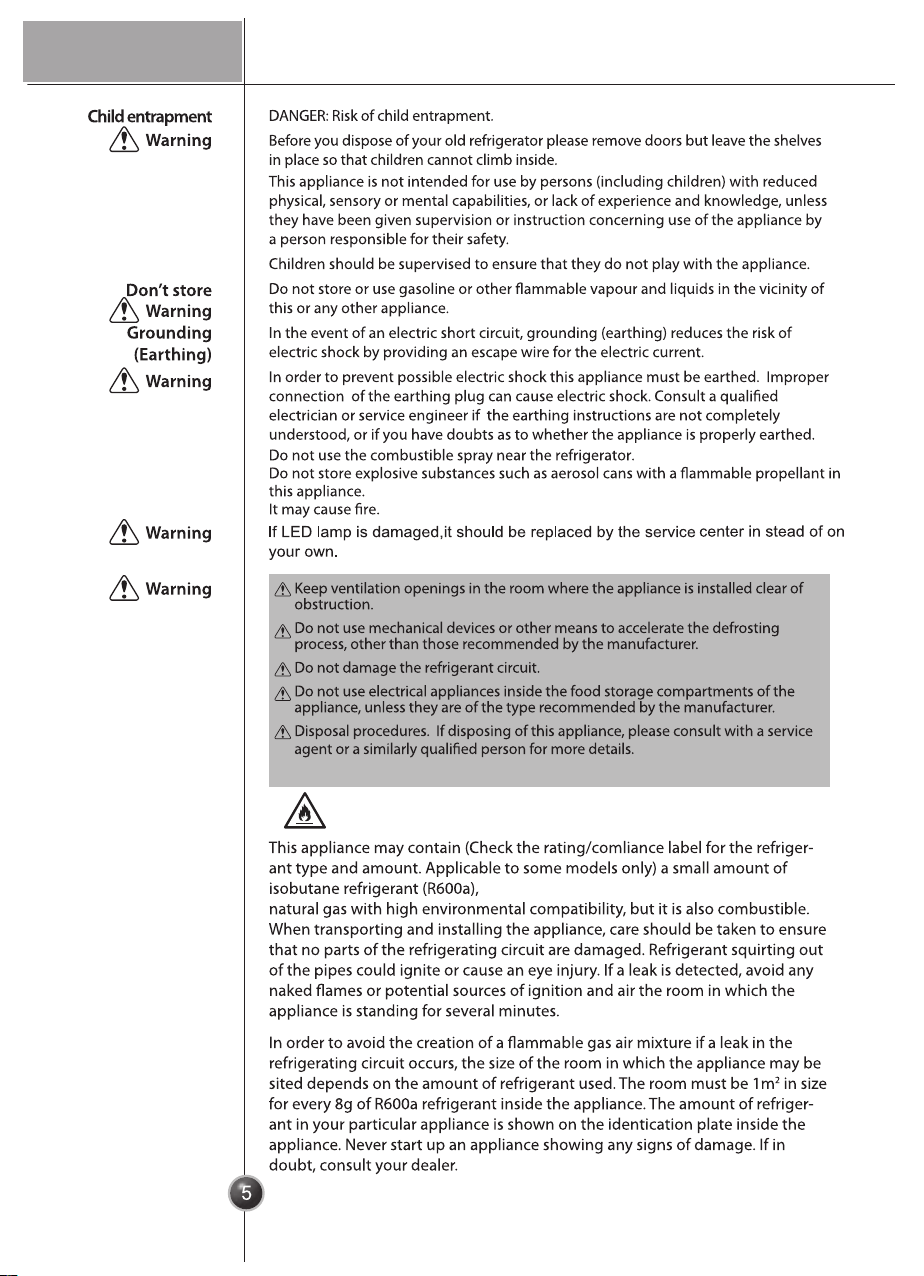
The appliance is not intended for use by young children or inrm persons without
supervision.
Young children should be supervised to ensure that they do not play with the appliance.
Never allow anyone to climb, sit, stand or hang on the refreshment centre door. These
actions may damage the refrigerator and even tip it over, causing severe personal injury.
It is advised that this appliance should be connected through an independent power
socket to prevent it and other appliances from overloading the circuit and causing a power
outage.
The appliance should be positioned so that the supply plug is easily accessible for quick
disconnection should an accident occur.
If the supply cord is damaged, it must be replaced by the manufacturer or its service agent
or a similarly qualied person in order to avoid a hazard.
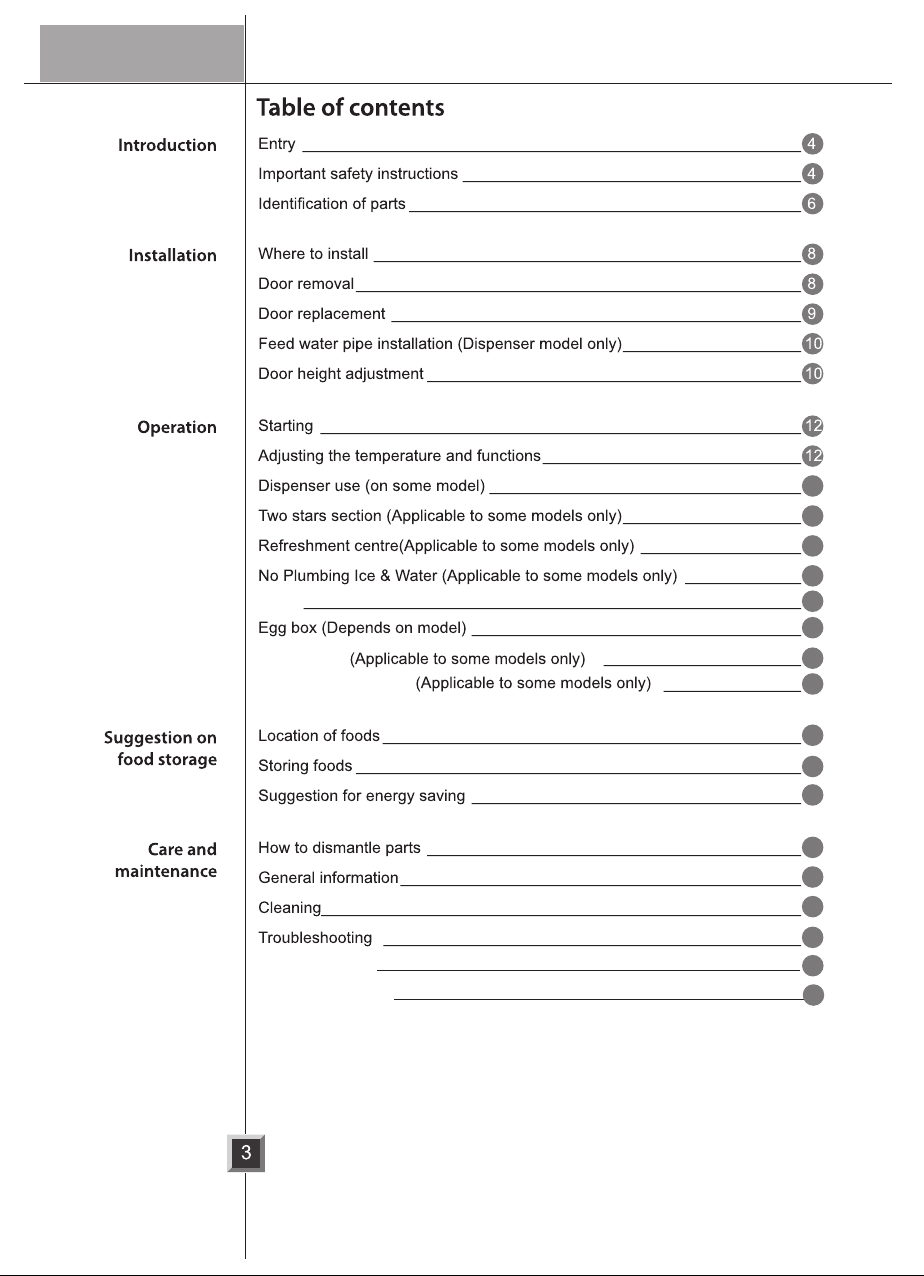
Entry
Important safety instructions
Date of purchase :
Dealer purchased from :
Dealer address :
Dealer phone no. :
Model no. :
Serial no. :
Do not modify or extend the Power Cord length.
It may cause electric shock or re.
Don’t use an
extension cord
Accessibility
of Supply Plug
Supply Cord
Replacement
Warning
Introduction
Introduction