1-6
Copyright © 2017 LG Electronics Inc. All rights reserved.
Only for training and service purposes.
SECONDARY UNIT CONNECTION
LED indicator of Secondary unit
You can check the connected status of Primary unit
and Secondary unit by LED indicator of Secondary
unit.
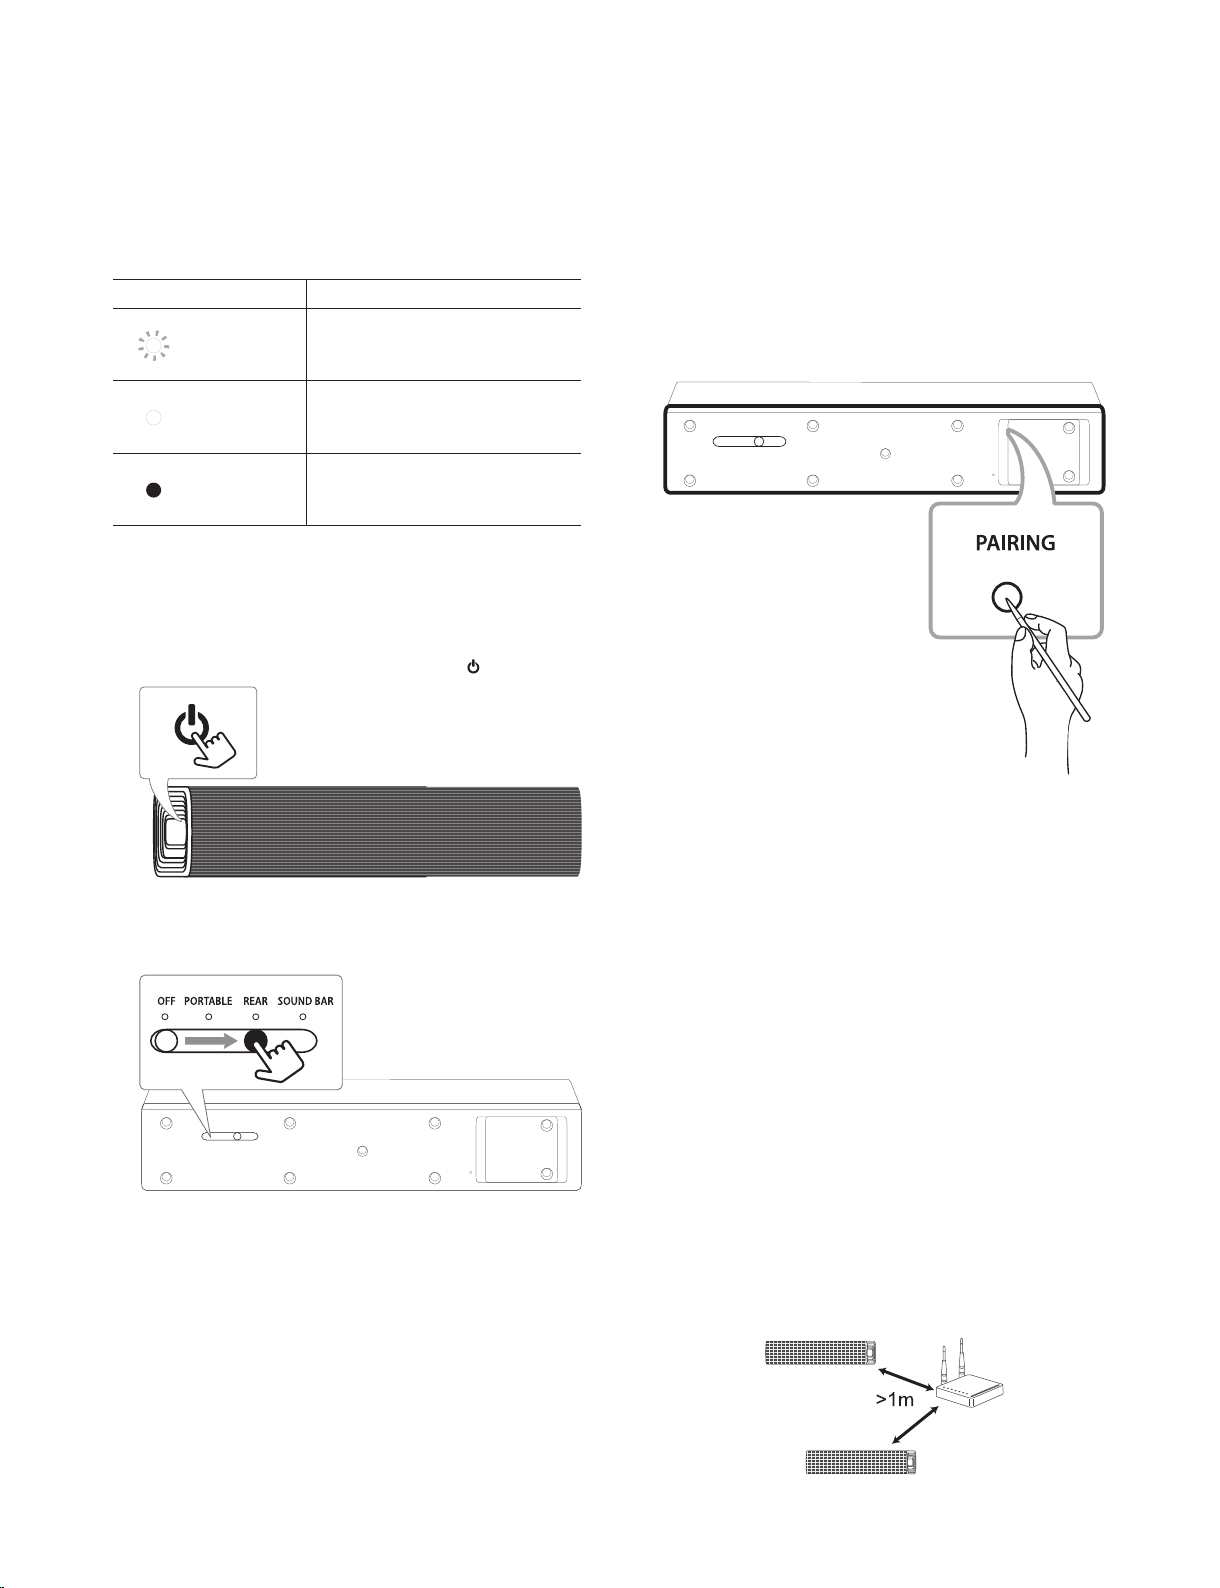
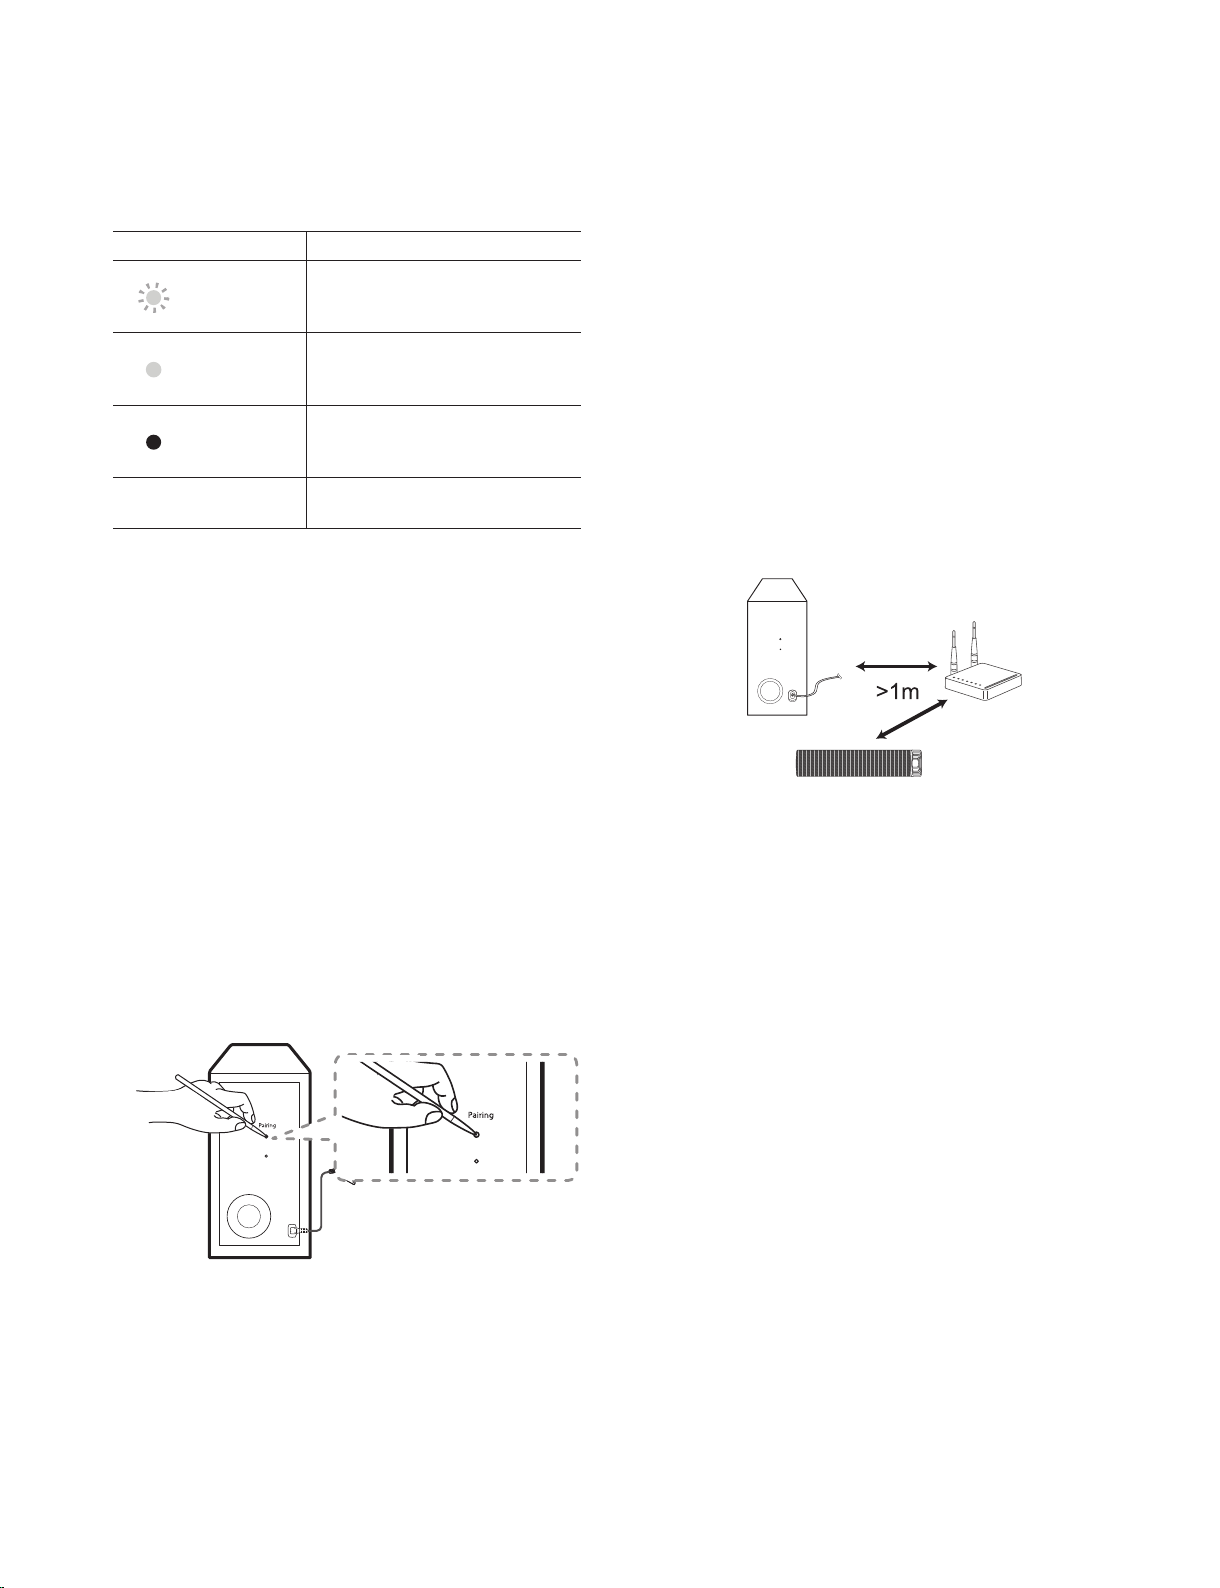
LED Color Status
White (Blink)
Attempting to make connection.
White The connection is completed.
Red
The Secondary unit is in
standby mode or the connection
is failed.
Connecting the Primary unit and
Secondary unit
1. Connect the power cord to the Primary unit and
plug the power cord into a power outlet.
2. Turn on the Primary unit by pressing .
3. Turn on the Secondary unit by switching the
Usage Mode Switch to REAR or SOUND BAR.
4. The Primary unit and Secondary unit will be
automatically connected.
- When this unit is successfully connected,
SOUND BAR or REAR appears in the display
window of Primary unit.
- White LED on the front of Secondary unit turns on.
Note
:
If the connection is failed or disconnected, the LED
indicator turns on red.
Manually pairing Secondary unit
When the pairing operate abnormally, you can check
red LED on the Secondary unit and the Secondary
unit does not make sound. To solve the problem,
follow the steps below.
1. Turn off the Primary unit.
2.
Press PAIRING button on the rear of the Secondary
unit.
- The white LED on the front of the Secondary unit
blinks.
3. Turn on the Primary unit.
4. Pairing is completed.
- The white LED on the front of the Secondary unit
turns on.
Note
:
•It takes a few seconds (and may take longer) for the
Primary unit and the Secondary unit.
to communicate
with each other and make sounds.
•The closer the Primary unit and the Secondary unit.,
the better sound quality. It is recommended to install
the Primary unit and the Secondary unit as close as
possible and avoid the cases below.
- There is an obstacle between the Primary unit and
the Secondary unit.
- There is an device using same frequency with this
wireless connection such as a medical equipment,
a microwave or a wireless LAN device.
- Keep the Primary unit and Secondary unit away
from the device (ex. wireless router, microwave
oven, etc.) over 1m (3 feet). to prevent wireless
interference.