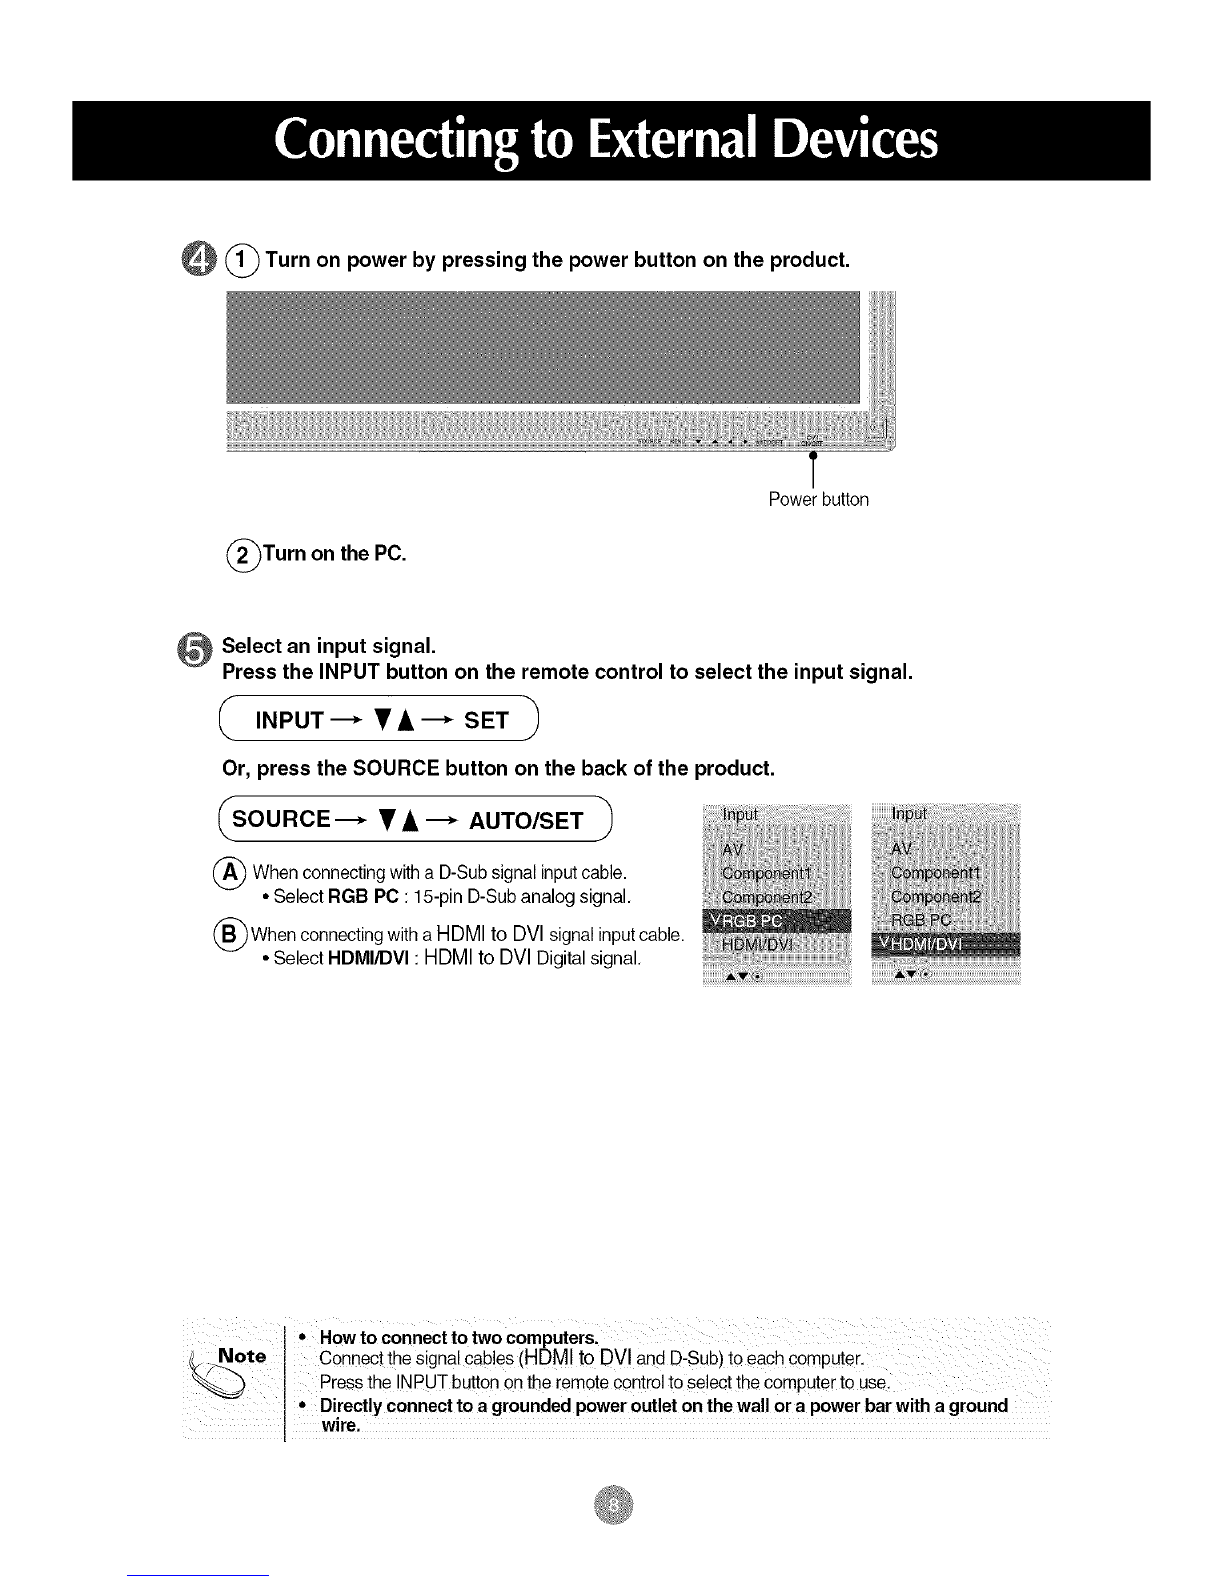
_Turn on power by pressing the power button on the product.
(_Turn on the PC.
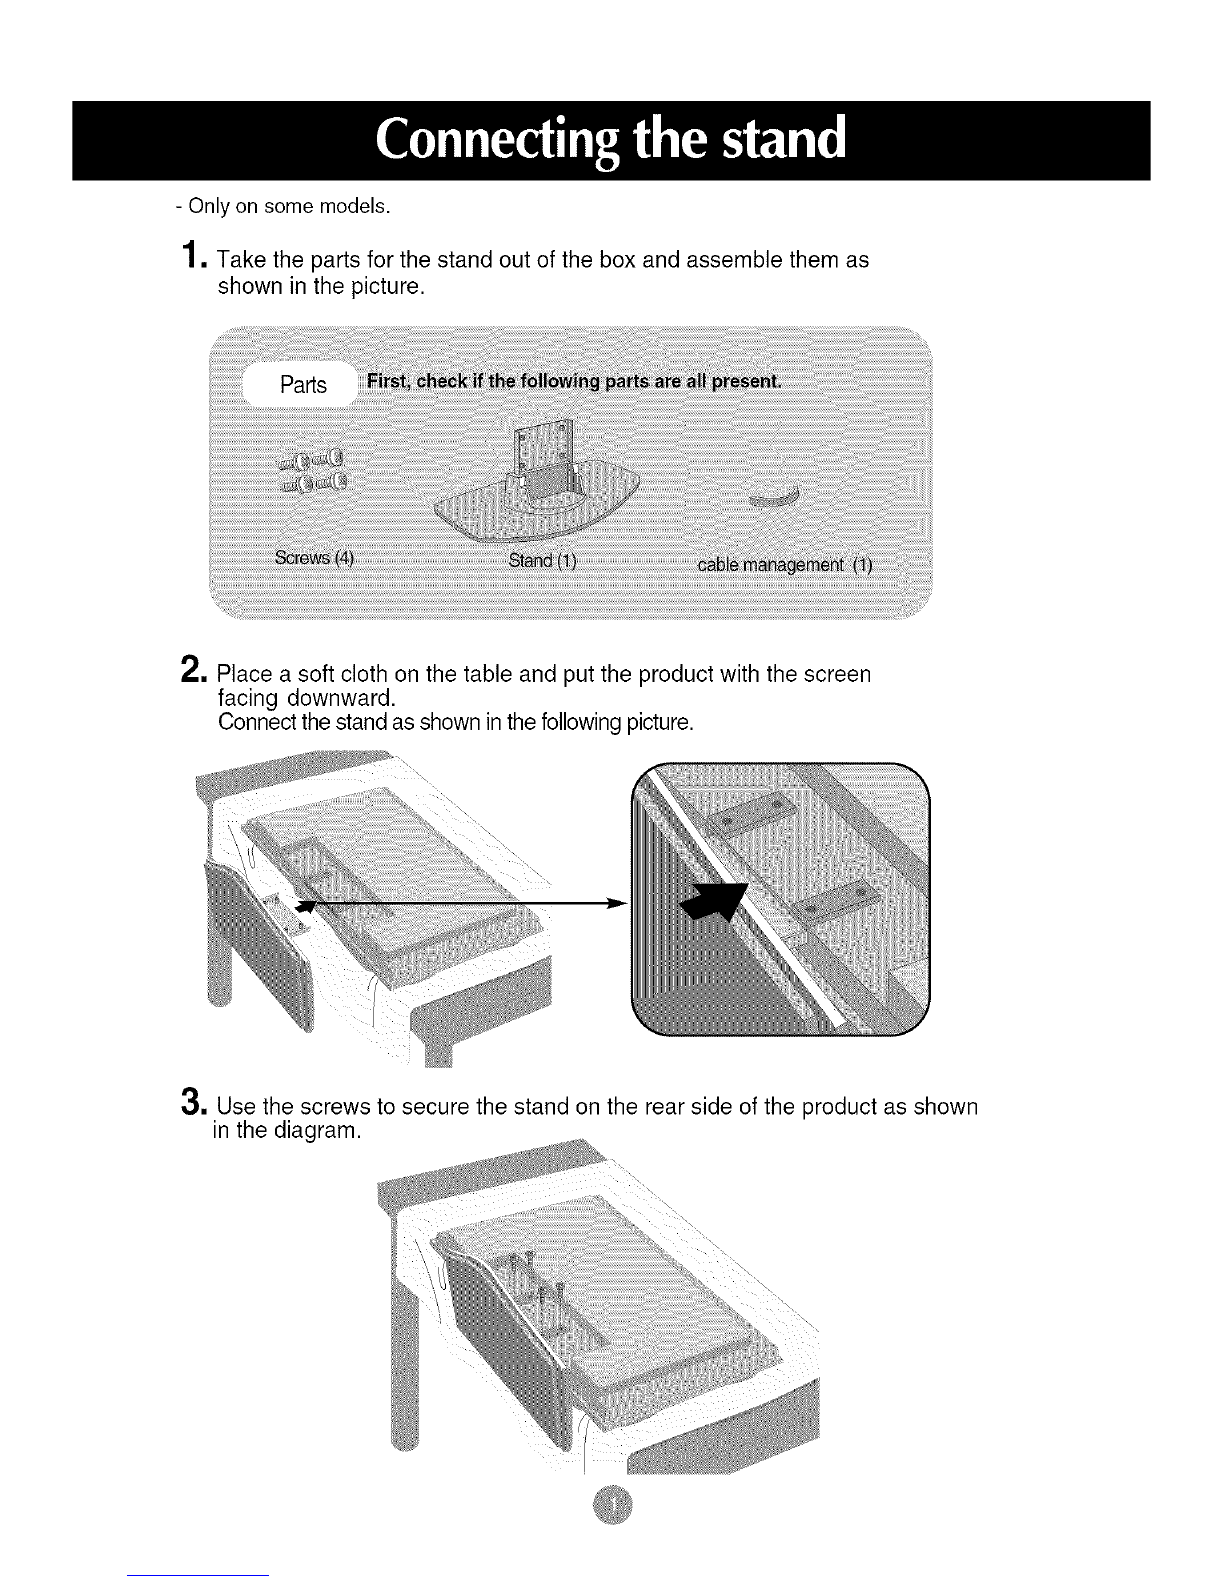
T
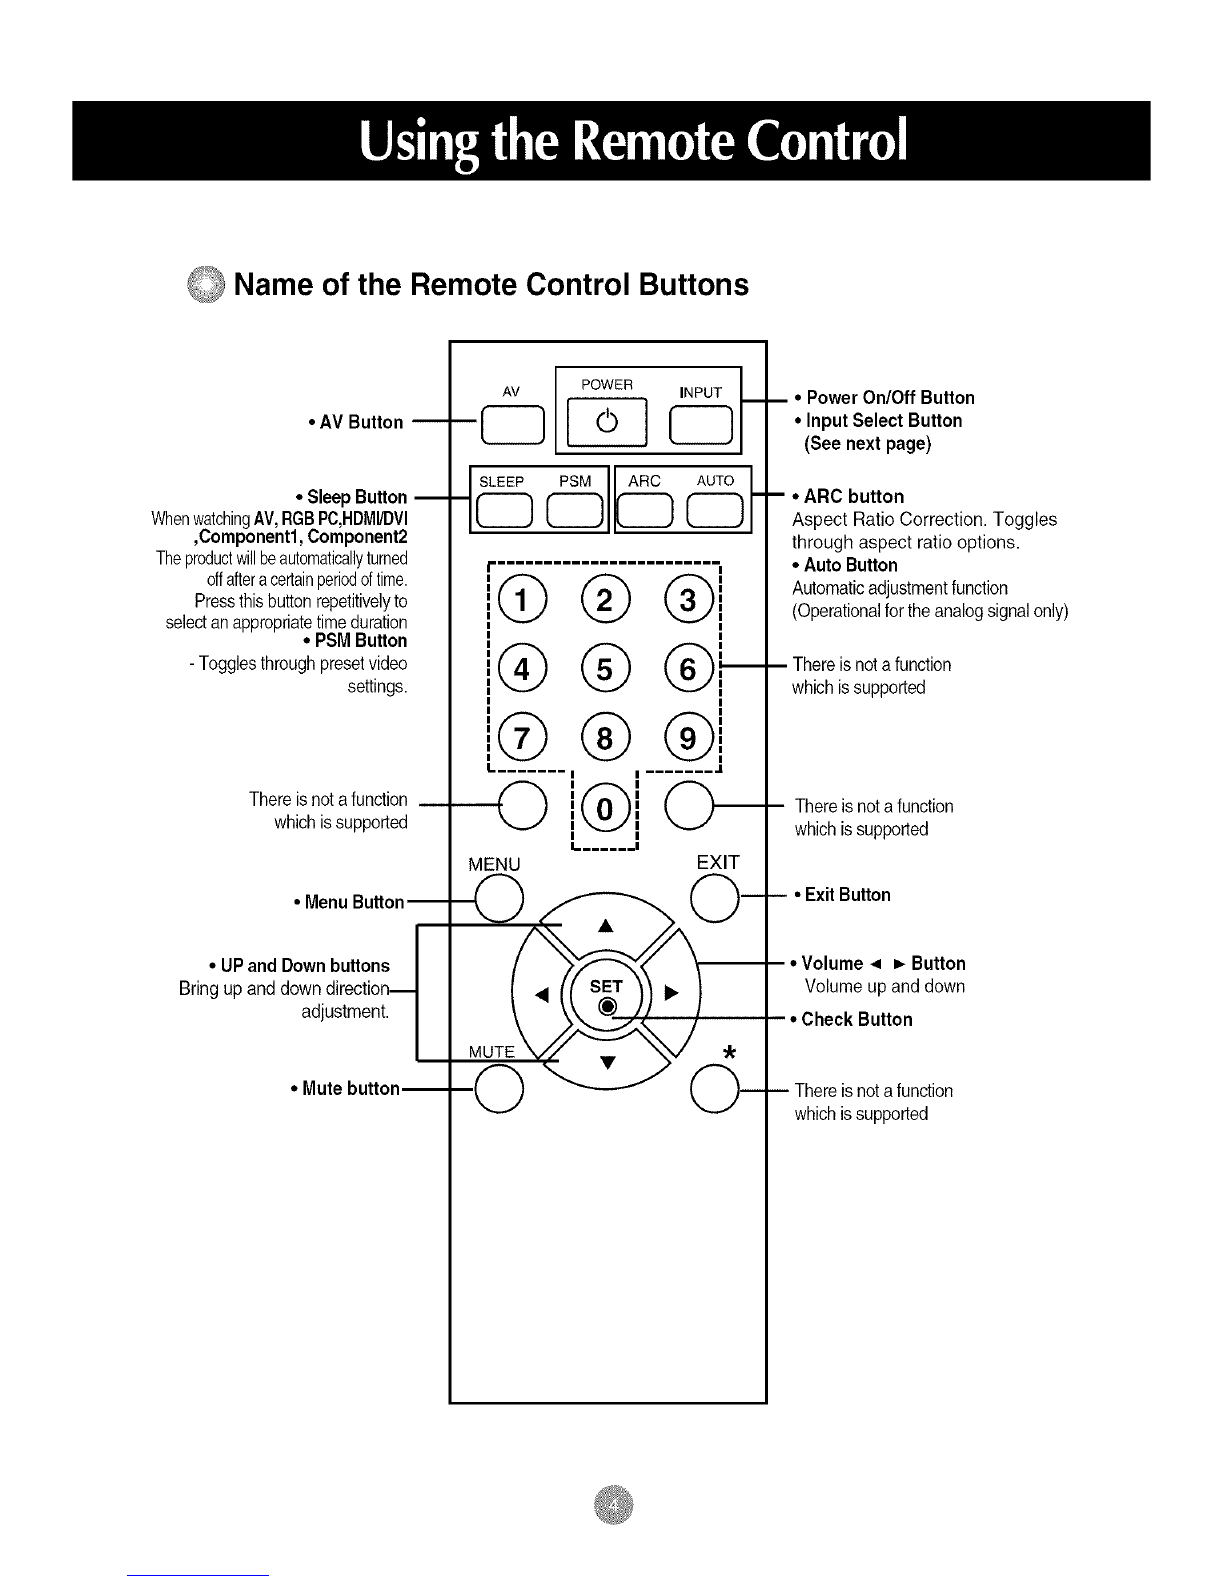
Power button
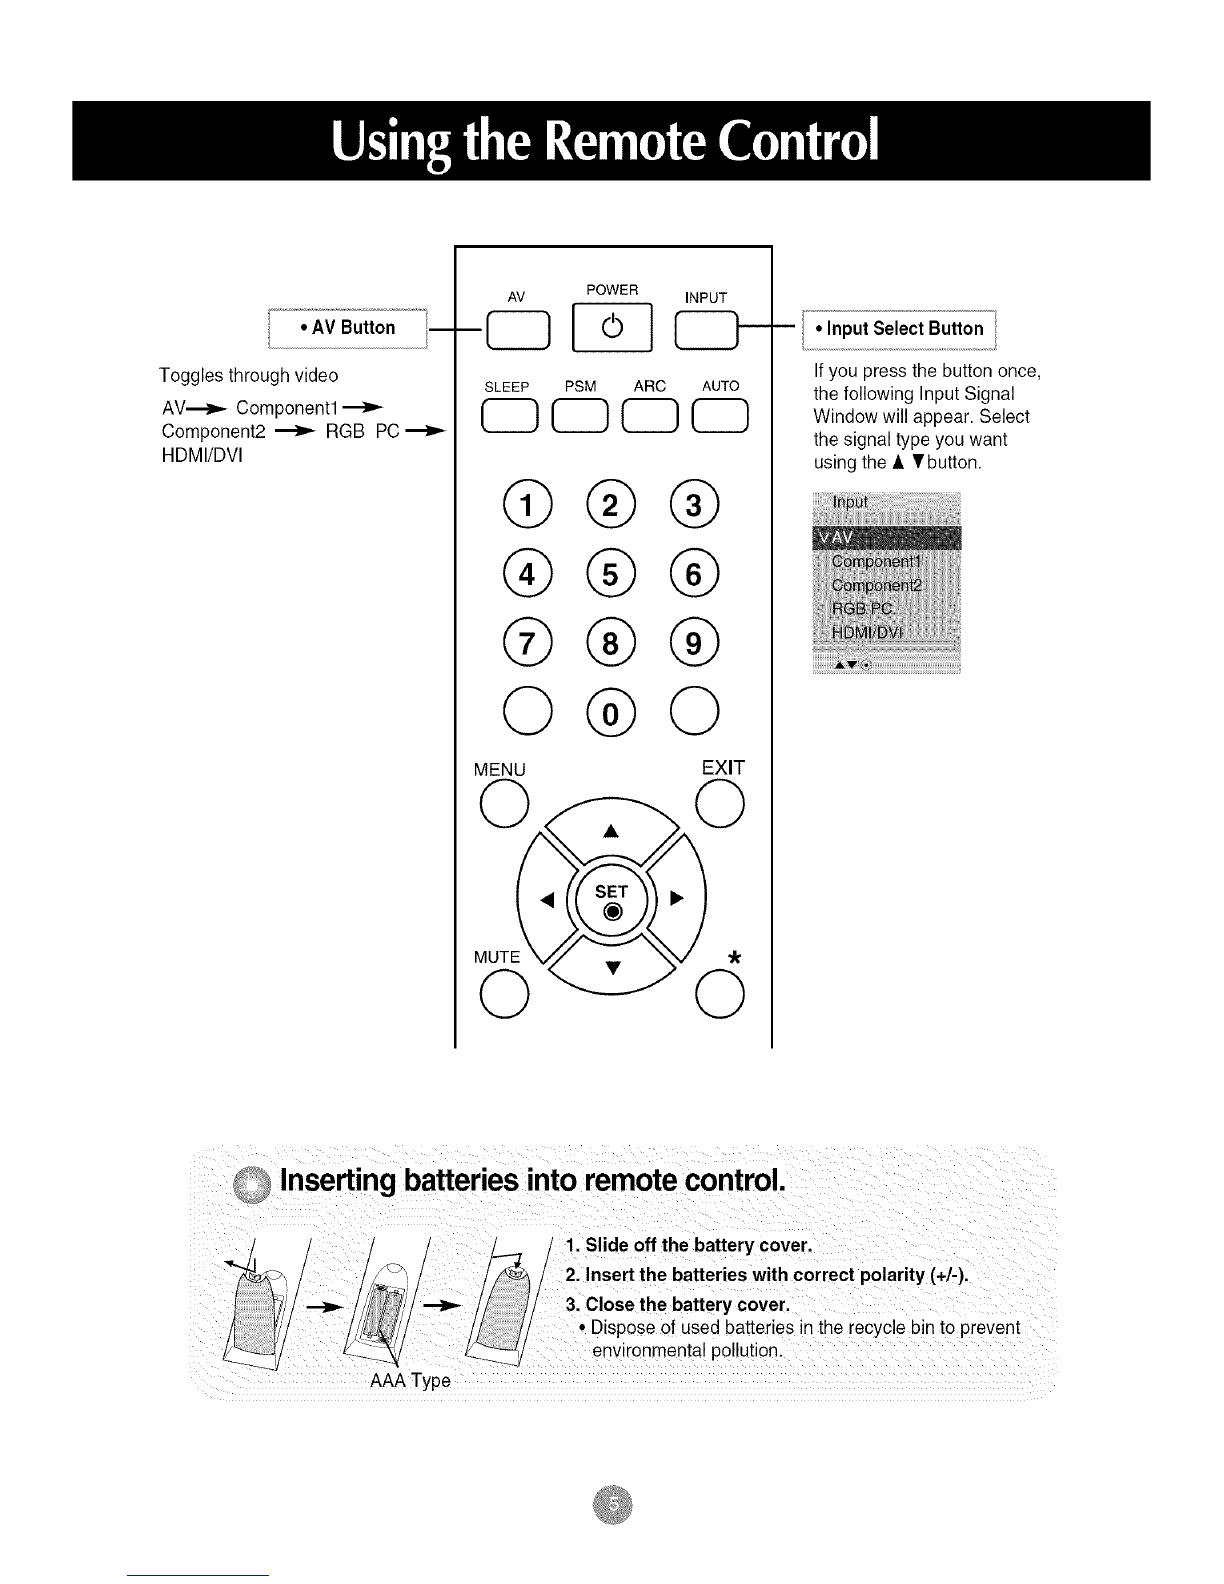
Select an input signal.
Press the INPUT button on the remote control to select the input signal.
(INPUT _•,&--* SET ")
J
Or, press the SOURCE button on the back of the product.
SOURCE ---* • A ---_ AUTO/SET )'il/ iiiiii]i!iiiiiiliiii!iiiliiiiilHliHlliii i iiii!iiiiiii/iiJiii!! i t!iiijiHiilHi!!!/i!li]!
(_ When connecting with a D-Sub signal input cable. _ _" ] ]
•Select RGB PC: 15-pin D-Sub analog signal.
(_When connecting with a HDMI to DVl signal input cable.
•Select HDMIiDVI : HDMI to DVI Digital signal.
I• Howto connect to two computersl
/Note I Connect the signal cables (HDM! to DV! and D,Sub)to each computert
I Press the !aPUT button on the [emote control to select the computer to use_
° Directly connect to a grounded power outlet on the wall or a power bar with a ground
w!re: