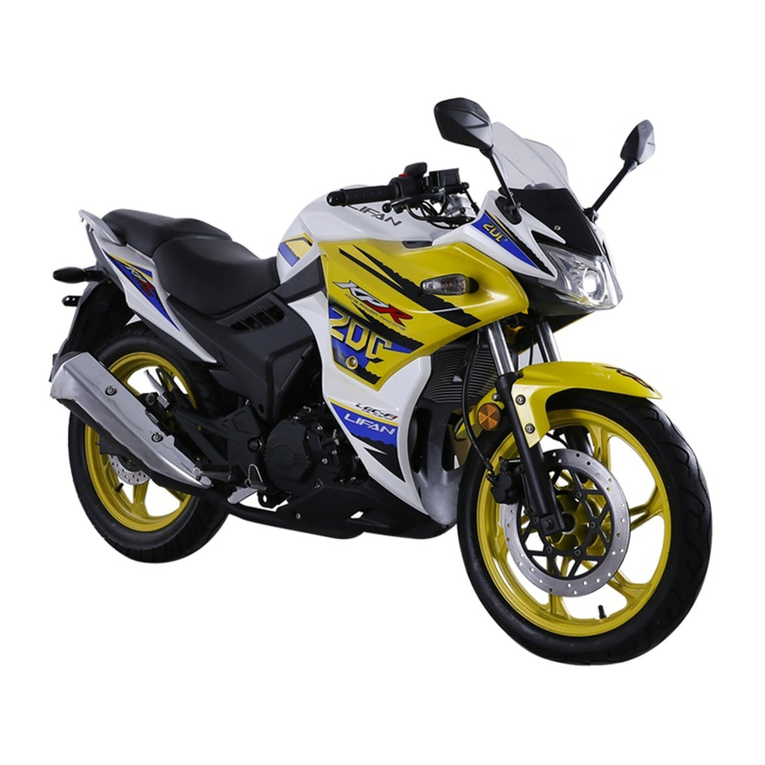
Lifan 2006 250 V User manual

PREFACE
Thank
you
forchoosing
amotorcycleofthecompany.May
you
enjoyddingallthetime.
Themanual
containsthenecessarybstuctions and
guidance
with respecttotheopemtionandmaintenanc€of themotorcycle,andBE SURETOREAD IT CARI-
FULLY BEFOREYOU RIDE THEMOTORCYCLE. Proper
operationandmaintenancecan
guarantee
asaferiding to minimizetroubles
ofthe motorcycleandkeepit in
asoundcondition,whichcanextendthe
engineservicelife. Yourdealerwill provideyou
withtechnicalinquiryandafter-sales
service.
Thetechnicaldatainthemanualarethelatest,
andwereserve
absolute
righttoamendthem.Themanualissubjecttochangewithoutnotice.Pleasecheckcarefully
the
product
nameplate,
VIN record
andenginecod€in themotorcycle,whichyouhave
bought,andtheyarehelpfulforyoutoget
themotorcyclealicense
plate
andfor future
inquiry.
Important Notice
Operatorand
passenger
Thismotorcycleisdesignedtocarrytheopemtorandone
passenger.
Neverexceedtbemaximumloadingcapacityasspecifiedin themanual-
Maximumload
150kg.
On-roaduse
Thismotorcycleisdesignedto beusedonly ontheroad.
READ TIIIS OWNER'S MANUAL CAREFULLY
. Pay
special
attention
to statements
preceded
bythefollowing words:
AWARNING
Indicat€sastrong
possibility
ofsever€
personal
injury or deathifinstructionsarenotfollowed.
CAUTION
Indicatesapossibility
ofpersonalinjury or equipmenldamag€if instructions
arenotfollowed.
Note:
Cives
helpful
information.
Thismanualshouldbeconsidercdasapermanentpartofthe motorcycleand
shouldremainwith themotorcyclewhenresold.
CONTENTS
MOTORCYCLE SATERIDING 2 Main Switch
Safe Riding Rules
Protective
Cloths
Refitting
LoadingandAccessories
PARTSLOCATION AND VIN RECORD
PartsLocation
VIN Record
2
2
2
2
3
3
4
4
Instruments and Indicator
HaDdlebarContsols
ClutchLever
FrontBmkeLever
Gearshift
Pedal
FuelFiller
Cap
RearBrakePedal
FuelCock 5
CONTROL FIJNCTION Chokelever

SteeringLock Selection
S€at
Cushion
HelmetLock Check and Replace
Adjustmentof FrontBruke
RemovingofRight SideCover Adjusment of RearBrake
R€arShockAbso.ber Adjustrn€nt
ofBlake Light Switch
HowtoUse
Brake
WearIndicaton
PRX-RIDDLNSPECTION 13
13
BrakeSystem CheckofBrakeFluidfevel
LeakofBrak€ Fluid ReplacementofBrake
Adjustment
of Clutch
ThrcttleGrip
Clutch
Chain
Wheel
Lights
6
6
'7
7
,7
,7
9
9
9
9
9
10
l0
10
l0
ll
11
I2
I2
12
Fuse
Drive
Chain t4
l4
Engine
Oil Check
of Lubdcationofcables
Lubrication
of ChokeCableand
ClurchLever
RearBrak€
andG€arshiftPedal
FrontBrake
andClutchLever
Parts,{Fastene$
l4
15
15
16
16
l6
t7
l7
I7
t'7
17
l7
l8
t8
I9
20
2l
SideStand
Switches RearSuspension
Battery Check ofFrcnt Fork
Fuel Adjustmed ofRear Shock Absorber
OPERATION GUIDE Checkof SteeringDevice
StartingtheEngine Wheel
Beaxing
StartingProcedure
ofWarmedEngine Battery
Gearshifting
Breaking-in Replacementof HeadlightBulb
Dismantlement
of FrontWheel
Riding
Braking
Pa*ing Mountingof FmntWheel
Dismantlement
of Rear
meel
MAINTENANCE Mounting ofRear Wleel
ToolKit Troubleshooting
Maintenance Schedule Troubleshooting
BlockDiagram
Torsion
Specification CleaDing
Engineoil
AiI Cleaner StorugeGuide
IdleSpeed Removalftom
Storage.....
SPECIFICATIONS
REPORTING
SAFETYDEFECTS
Adjushnent
SparkPlug of ThrcttleCable CDIAGRAM

MOTORCYCLE SAFE RIDING
Aw,r.nNrNc
Motorcycle riding requir€s specialefforts on your part to ensureyour safety.Knorv theserequirements below befbreyou ride.
SAFf, RIDING RULES
l.Always makeapre-ride
inspectionbefore
yolr start
theengine. You mayprevent
accidentor cquipmentdarnage.
2,Manyaccidentsinvo]veinexperienccdriders.Mostcouni|ieSrequireaspccialmotorcycleridingtestorlicense'
your motorcycleto an inexperienced
rider.
3.Many automobilc/motorcycle
accidentshappen
becausetheaulomobiledriver docsnot "see"themotorcyclist.
Make yourscllconspicuousto helpavoid theaccidcntthatwrsn't your fault:
a Wear
bdghl or reflectiveclothing-
aDon't ride in anothcr
motorist's"blind spo."
4-Obeyall nationalandlocal laws andregulations.
Exccssivespeedisa facto. in nany accidenis. Obeythe speed
limits, andNEVER tmvel fasterthancondilionswanant.
Signalbeloreyou makc a tum or lanechangeto draw othcrnlotorists'attention..
5.Don't letothermotorists
surprise
you.
Useextncaulion atintersections,parkirg lot entrancesandexits,andalwaysrememberto ride with both handsandkeep
borhfeeton llrc ridcr foorrestswhile the
passengergrasp
therearhandrailwith both feeton thc passenger
footrests.
PROTECTIVE
CLOTHS
1'MoStmotorcycleaccidcnt1.ata]itieSareduetoheadinjurieS'ALwAYSwearahelmet'YouShou1da]sowea|alaceshie1dandprotec1ivcclothing.
same
Prolection.
2.ThccxiauStSystembeconrcslrotduringoperation.anditremainshotforawhi1ea1ierstoppingt
clothingthatfully covers
your legs.
3.Do notwear looseclothing thatcouldcatchon thecontroi leve$, kick-stater, footrestsor wheels.
REFITTING
I\WARNING
Relitting
ofthe motorcycle,or r€moval
oforiginal
parts,
maymakethevehicle
unsafeor ill€gal.
Obey
all national
andlocalequipmentregulations.
LOADING AND ACCESSORIES
I\WARNINC
To
prevent
anaccident,take
extremecarelvhenadding.ccessories
andcargoandridingwiththem.
Additionofaccessoriesandcargomayreducea
motorcycle's
stability'
performance
and
safeoperatingspeed.Rememberthese
perlbrmances
maybereduced
byinstallation
ofthe rccessoriesnot
produced
by
thecompany,
improperloading,
worn tyreandoverallmotorcycleconditions,
poorroador weatherconditions.
These
general
guidelines
mayhelp
youd€cide
whetheror howtoequip
your motorcycle,andhowto loadit safely.
Loading
l.Keepcalgoandaccessory
weightlowandclosetothecenter
ofthemotorcycle.
Lod weight
equallyonbothsidestonlininizeimbalance.Asweight
islocatedfurthcr
liomthemotorcycle's
cenlerofgravity,handlingis
proportionally
affected.
2.Adjusit)'rc
prcssure
andrear
suspension
tosuitloadwcightandridingconditions.
-

r.\'ehiclehandlingandstabilirycanbeadverselyaffectcdby loosccargo. Rcchcck
cargosccurityandaccessorymountsfrequently.
.1.Do
notattachitemsto thehandlebars,Iork, or fcndcr. Unstable
handling
or slow steering
responsemay produce.
ce[uine accessoriesofthe companyhavc bccn spccifically designed
andtestcd
on the motorcycle. Becausethe factory cannolteslall otheracccssories.
you are
personally
responsiblefor seleciion.installation.anduseofaccesso es
notproduced
by thecompany. Always lollow lhe guidelines
underloading,andthesebelow:
LCarefully inspectthea
cortroloperatron.
]'Largc1brkmountcdfairingsor1vindshiclds.orpoorlydesignedorimproper1ymorrntedfairingscanproduceaerdyn
inslall fairingsthatdecreasccooling air flowing to the engine.
i.Accessoriesmay increasethetirnelhat handsof feetoperatccontrols,
resulting
in incrcascdrcaction
time in anemergency.
.+.Do
Dotaddelectical equipmcntthatwill cxcccdthemotorcycle'selectricalsystemcapacity.
i.This motorcycleis notdesignedtopull asidecaror trailcr. Handlingmay beseriouslyimpairedif soequipped.
PARTLOCATION AND VIN RECORI)
PARTS
LOCATION (Fig.
l-l , 1-2&l-3)
Fig.1-1
G)
Taillight/Brakelight O Reartumsignallamp @ Seatcushion
@,A.ir
cleaner
6Front tumsignallamp @)
Rearbrake
pedal eil
Footrest
Fig.l-2
@ Headlight @ Fueltank [0Helmcl holdcr ORearwheel
@lMain switch @Ceurshilt pedal @Front wheel

NOTEA1lvays
sctthemain switch isOFF andrenlovcthekeyrvhen
themotorcycle
isnot kept in use-
Fig.l-3
f,tClutch
level
@
Handlebar
switch
@M.t..
LJq
I rOntbraKele!ef
!9 Tlfoulc grip
VIN RECORD
(Fig.
2& 3)
Pleasefill the VIN and engine codeofyour motorcycle in blank below.
They will help order spare parts and find out the vehicle oncestolen.
Fig.3
tlrrrngrne
cooc
vIN: *m*
ENCINE
CODE:
*fTfT_fT_I-f-[-l *
NOTE
fD TheVIN is slampedon thesteering
pipe(Fig. 2).
O The enginecodeis slampedon thecrankcase
(Fig. 3).
O Thevehiclenaneplateis fixed on the let ofthc steering
pipe.
Fig.2
Ovnt
INSTRUMENTS
ANDINDICATORS
(Fig.
s)
s,/l\ Description Function
oTurn
signalindicatorFlashesrvheneitheroftum
sienalisoperatcd.
at Neutralindicalor Lishts$henlhetnnsmission
isinneutnl.
HighbeanindicatorLighlswhentheheadlighl
isonhilhbeam.
@Odomelcr Showsaccumuldredmileagc.
Tdpmelel Showsmileagcpertrip.
TripneterrcsetknobReset
thetripmcterlo0.
HANDLEBARCONTROLS
(Fig.
6& 7)
Passing
Lamp Button
Depress
thebuttonto controlthepassing
lamp.
HeadlightDimmer
Setthedimmerto -it (HI) toselecthighbeam
:i 10
selectlow beaD.
Turn Signal Button
Move the
buttonto <- (L) tosignalaleft turnandto
-"."f (R) to signal a right turn. Releasingthe button. lct il
retum to center
position. By depressingthebutton.thesig-
nallighl is put out.
Horn Button
Pressthc butlon|<r- to soundthehom.
trmergency Switch
Inanemcrgency,depressingthe
switchto"8" (OFF)
will stall
thecngineatonce;in normalcase.settheswilch at
-o" (oN).
Light Snitch
P::The taillight,position
lightandinsfirmentlights
arcbrjght
Q)Turn signalindicator
O Ncutral indicator
l3i High beamindicator
@ odometer
ru Inf meteffesetknob
Fig.6
OPassiDg
lampbutton
OHcadlightdimmer
E Iunl slgDrllswrrcn
@ Hom button
CONTROL
FUNCTION
MAIN SWITCH(Fig.
4)
Themain switch isusedfor controlling ignition aDdillumina-
tion systems,thecontrolis asfollows:
" ry" (OFF):
meansthat
(he
circuitisoff, andthekeycan
be
removed.
" O " (ON): meansthatthecircuit is on, enginecanbeoperatedand
thekey cannotberemoved.
PARKING
Iltaillight and
position
light
areon.othercircuitshouldbeoff, forwhich ii: Theheadlightandthe
said
lights
arebrighr
purpose: Electric
StarterButton
Setthekeyto
OFF,and
prcss
it intotheignitionswitchandreleasc
thekey Depressthe
butfon
O tostartuptheengine.
This
done,tumthekey
counterclockwisetoPARKING
position
andtakc
it out.To I\WARNINC
cancel
parkjng
position,
tum
tbekeyclockwise. 4 Referto relatedinstructions
belbrestartingfhe
Fig.7
@Emcrgencyswitch
(0 Light
switch
O Electric
starcrbutlon
engine.

CLUTCII LE\'ER
Locatcdon the left handlebaf,theclutch levcr bears
siarting s'vitch. Hold
liImly thelcvcr to the handlebar,disengage
theclutch,while loosethelcver to en-
.rage
theclutch.
GEARSIIIFTPEDAL(Fig.
8)
With5 speed,the
gearshiftpedal
locatcdonthe
left
of
cngrnc.The
pedal
shouldbeused
togetherwilhtheclutchwhen
thetransmissionisoperated..
FRONTBRAKE LEVER
The fiont bmkc lcvcr is fitted on the right handlebar.
Opcratcit will stop
thefront wheel-
REARBRAKE PEDAL
engineis inseNice or oulofservice. Fuelshouldbc fillcd il'the tuel tank is empty.
The tuel cockshouldbesetto ON wbentheenginehasis startcd.
NOTEThc fuel cock will function undff vacuumby the enginewhen thc former is
set
to ON or RES. llthc pipe is not connectedwith thc carburetor
and its intake
manifold.or leakageofixel occuls.
thefucl cockwill work improperly.
CHOKE LEVER (Fig.
1l)
The chokc lever is positioned
on lhe lcfl handlebar. It is
designedto help stating lhc cngine
in cool condition,for rvhich
puryose,put thc knob to left. When the engincis warmed up.
theleveris backto odginal position-
STEERING
LOCK (Fig.
12)
To lock the steeringhead,
hrrn the handlebarto right as
far as it will go, then insert thc lock into key slol and turn il
counterclockwiscby l/8 ofa revolution. To openthc stccring
lock,just tum thekey clockwise.
SEATCUSHION
(Fig.
13
)
Toremovetheseatcushion.unscrew
thebolt. Toreinstall
theseatcushion.
insertthe lug ofseat into the holc in themain
fiame,thentightenup thebolt.
NOTEMakc surethattheheseat
cushionismountedsecurely.
HELMET LOCK (Fig.
14)
To open
thehelmellock, insertfhekey into lock slot.and
tum it as
shown
in fig. 14. Tolock it.
just turnthekeyio original
pPsrron.
,/l\WARNINC
Do not ride th€ motorcycle if the helmet is locked to-
getherwith it, otheriyise,thehelmet may knock somethingto
caus€the vehicleto be out ofcontrol or happen an accident.
REMOVINGOF
RIGHTSIDECOVER(Fig.1s&16)
Pull outthecoverasshownin Fig. 16,then.
removeit by
slippingfrontward.
To installihe cover,fit thc ring ofthe side
coveronto the
hook of main 1iame,ihen put it to positior.
REARsHoCK ABSORBER
(Fig.
u)
Thc shock
absorberhas5 adjustmcnl
positions
for differ
Fig. li
O Gearshifi
pedal
N. Neutral
F::-:---l
- -ilrr lf"l-l
-"rdE?
rw
Fig.l1
O Choke
lever
Z-rst
7,q {l
\\i ' \l
Fig.12
O Steering
lock
]'--_---1t
l! -'la.l
]\rVl
Fig.13
f.\l,Va l.]
.44,.-
5%1
a--a
l:'4ffi-^l
Fig.1'l
Thepedal
islocatedon theright sidcofvehicle. Depressingthe
pedal
by foot,
therearbrakewill work.
FUELFILLER CAP(Fig.
9)
OPEN
lnscrtthc key,tum ii cloclflvise
by 1/4ofa revolution,the
capmay Deopeneo.
CLOSE
Coverthecapandinscrtthe
key.tumittooriginal
position. qe. 9
Awenntuc Gl
o'cn
The fuel filler cap must be locked bcfore the motorcycle is used.
FUELCOCK (Fig.
10)
Fuel in ihe fuel tank is iiltered via thc vacuum cock to
cnterinlothe
carburetor-
Thefuelcockhas3positions
asfollows:
ON With the
fucl cockin theON position,
tuelwill flow from
themain luel supply to the carburetor. lfthe cngjneis not in
use.tuelwillnotflow. Fig.lo
RES Meansrcscrvctucl. with thefuelcockin theRES
position.
fuelwill flow
from
the
resewefuel
supply
tothecarburetor.Usethe
reservcfuelonlywhenthe
rnainsupplyisgone,
forwhich
purpose,
setthecocttoPRI
position
andstartthc
engine.
thentumittoRES
posilion.
Refillthetank
as
soon
as
possible
afterswitch-
ing
toRES.Thisdone,
thetuelcockshouldbcsct
toON
position.
PRI
(fil1ing)
Withlhcl'uclcockinlhis
positiod,
firelmayflowinthe
system
wheneverthe 5

entloads
or idirg conditions. Foriirthcr dclail.relerto ADJUSTMENT OF
REAR SIIOCK ABSORBER hereinaticr.
Fig.15 Fig.
17
O edju"t.'
Checkthe
front brakeleverandrearbrakc
pcdalibr proper
freeplay. Adjust
thern
iIDecessary.Checkthe brake
systcmat low speedjustthevehicleis started.
lfyou feelsoft*'hen operatingtheb.akclever,it rneansthebmkesystem
isin
dangerouscondition. In fhiscasccontact
your dealer
for assistancc.
BRAKE FLUID
Checkthc brakefluid for 1evel.
addit ifneccssary.
Brake fluid rccornmended:
DOT#4
NOTE
.Iffluid DOT#4
isunavailable.DOT#3may
beusedinstcad.
aCheck
theliningofdisc
brakc.
aChcck thcbrakeshoe.
aContact your dealcrfor assistanceifyou cannot
corrcctthc problem.
LEAK OF'BRAKEFLUID (FRONT)
Check
the
brakcsystemfbr leakagefro pipc uni!orblakecylinclerbyapply-
ing thebrakelor fe$' minutes.
I\WARNINC
Brake fluid may cause
irritation, Avoid contacfing \lifh skin or eyes. In
caseofcontact, flush thoroughly with water and call a doctor ifyour eyeswere
cxposed.KEEP OLIT
OF Rf,ACH OF CHILDREN.
C-4.UTION
aHandle brake fluid with carebecauseit can damage
plasticand painled
oWhen adding brake fluid, besurethe brake fluid tank is horizontal before the
cap is removed, or brake fluid may spill ouf.
oUse only specifiedbrake fluid from a sealedcontainer.
ONever allow contaminants such asdirt or water to entcr the brake fluid tank,
CLUTCH
Checkthe clutch lever for propcr lrcc play and tunctioning- Adjust the frcc
play ifnecessary.
THROTTLE GRIP
Turning the grjp. check it for pfoper ftrnctioning and lrcc play. Adjust the
fiee play ifnecessary.
Make surcthatthegrip is backto originalpositionactuatedby torsionspring.
Ifnot so,contact
your dealerfor adjustment.
ENGINEOIL (Fig.
18)
Thequaliiy ofthc engineoii piaysavitalrole in dccidingtheengine
perfbr-
mance
andservicclile. Engineoil mustbesclcctcdin accordancewith therules
belorvandothcroils, suchasordinary machine
oil. gear
oii andvegetableoi1,are
Fig.16
O)Stana
O Ltook
PRE-RIDEINSPECTION
I\WARNING
lf the Pre-ridc inspectionis not perlbrmed, sevcre
personal iniury or ve-
hicle damagemay result.
lnspectyour nrotorcycleeverydaybeforeyou ridc it. The itemslistedhere
will only take a fcw mirutes to inspect.and in thc long run they can savetinc,
expcnsc,and
possiblyyorr life.
ITEM ROUTINECHECK
Frontbrake Checkitfor
properfunction.
free
play,leak
ofbrakel'luid.
Add
brakefluidDOT#.1(or
DOT#l)ifnecessary.
Rearbrake Chec\irforfur,riolJndfrcc
plcl,
dJtu..
rin<ce.sdn.
Clutch Checkitibrfunclionandfreeplay,adjustit ifnecessary.
Throttlelever ( hcJkrrlo".moorh
oper
rg.
ori
erw
,c
adlLr:r
dnd
.rb-."reir.
Ensincoil ChcckuIle!el,rddrheorlifneces$ry.
Dri!echain Checkrtfor
troper
rension.
oradiLrstirifnecessrry.
Tye/uheel Checkitforprcssurc,won,damageandspokelighiness.
Control/m€tercable The
operationshouldbesmoolh,orlubricdteit i[necessary.
Brake
&gearslrift
pedalpin The
operarionshoJldbe.muolf.ofIrb-cxrel rtIe.
Lc,rf).
Brake& clutchcol]trolpi|otTheoperationshoxldb€
smooth,orllrbricalcit ifnecessary.
Iheone?rion
'hould
bc
srnoorh,
or1-bri(drcililnece,d-\.
( hLc(
Jllullhen.orlrfl-renunoraousr
rhe
ni' ncccq.an.
Fueltank Checktuelamount.
or
additiIncccs\i4.
fightsand
irgnal
lamp Checkthenforproper
irnciioning.
Batlcry Chccktheelectrolyteamount,
oradddistilledwaterif necessary.
NOTE
Concct anydiscrepancy
belbre
youridc. Contact
your dealerfor assistance
if
you cannotcorrect
thcproblen.
BRAKESYSTEM
BRAKE LEVERANDPEDAL

lbrbiddcn
tobcused.
Engine
oilrccommended:
gasoline
engine
oil Class
SAEI5W/40-SEorclass
SE,SF,SCfromAPIService
Classification.
Thevehicle
hasbeerfilledwiththccngincoil Class
SAEl5W40-SE
beforedelivcrcd.anddrelubricantis
only
\ itableatatemperature
rangcfrom40C to
-10'c. Ifother
engine
oilis10beusedinstead,thealtemative
mustbetech
nically
cquivalentin everyrespect.Viscosityvarieswith Fig.l8
regionsandtempcraturcs,
sothelubricanthasto beselectedaccordingto ourrccom,
mcndation
(see
Fig.l8). lfthegasolineeigineoilClassSAE15W40-SEcannot
be
obtainedwhen in nced,the gasolineengineoil No.HQB-l0 (or No.HQB-6 in re,
gions
whercthelenperature is -10"Cor lower) may beuscd.
Belbre replacing
theLubricant,
please
draintheoil out completelyremaining
inthccmnkcase,and
cleantheinsidebycleansingkerosene,theniill newoneinstead.
Oil amount: Total: L8L Changeoil: l.4L Oil filter: l.6L
CAUTION
Running the enginewith insufiicientoil can causeserious
damage
to
engine,
CHAIN
Checkthechainfor conditionsandtensionbelbreusingthemotorcycle. Ad-
just andlubricate
it ifnecessary.
TYRT
Propertyre
pressurc
will
provide
maximumstability.riding
comfbrt
andtlrelife.
Checktyre
pressure
frequently
andadjustifnecessary.
S€lecttherightreplacementlyresinaccordance
withthcspecificationsshown
Table 1
tyrereliability
maybeimpaired.
almpropertyreinflationwill causeabnormaltreadwear
andcreateasafetyhazard.Underinflationmayresult
in thetyre
slippingon,orcomingofffromtherim caus-
ingtyre
deflationthatmayresultin alossof vehicle
control.
aOperation
withexcessivelyworntyresishazardousand
will adverselyaffecttractionandhandling.
oThe useoftvresotherthanthoselistedonthetable1
mayadvers€lyatlecthandling.
Fig.l9
OTread depth
g sidewall
O Min. treadline
Whcn thc trcad dcpth in the middle sectionoftyres (F'ig. l9) reachesthe
limits in table2 below, ptease
replacetyres.
WHEEL
AwLnNlNc
The wheelol basicmodelis designednot to usetubeless
tyre. Never
altempt to employ tubelesstyre asbasic model.
Forgoodfeature,long serviceandsafeconirol. payattentionto asfollows:
l.Check thcwhccl for crack,bendingor deformation. Iffound any. contactyour
dealerfor help.
2.If.eplace oneoftyres or whccls,makesurethatwlreelbaianceis kept. Ifnot so,
operationmay bedifficult andtheservicelife oltyre may beshortened.
3.A11ermountingthe
tyre,
you shouldridethemotorcycleevenly
so
asto letthetyre
fit to rim. Othenvise.troublemay occur,evenrcsultin injury or damage-
PARTSiTASTENERS
Checkchassis
partsandfaslenersfor fitling tightness.
LIGHTS
Checkto seethattheheadlight,tail/brakelight,
tumsignals,etc.function
properly.
SWITCHES
Checktoseethathcadlight
switch,
tumsignalswitch,brakeswitch,horn
switch,cic.function
properly.
BATTERY
Check
the
batteryelecirol)'tcfor propcr
lcvcl. Add distilledwaterifnecessary.
FUEL
Z Chcckto sccthal l'uelin the fuel tank is enough.
Table 2
Tread limits
in thetable L
Tyrepressure
shouldbechcckedbefore
you ride while the tyresare"cold".
Chcckthetyresfor cuts,embeddednails,or olhersbaryobjects. Checktherims for
dentsor defonnation. See
your dealer
for changeofdamagcd tyrcsor punctured
inner
fubcs.
l\$ARNrNc
aDo
notattemptto
patch
r damage.d_gre
orjnnertube.Wheelbalancrand
andone
Dassenger(
of>90ks)| 200 225

i Fuel Selection
Fuel is a key factor in deciding the exhaustemissionsftom the engine,so
sel€ctionoffuelmustfollowtherules
below.
Selectedfuelmust
beunleadedorlowleaded
gasoline
withtheoctaneNO.
RQ-90orhigher.
_ Thefueltankcapacityis 12.IL includingthe
reservesupplyof2.6L.
AWARNING
aGasoline
isexlremelyflammableandisexplosiveundercerfainconditions.
Refuelin arvell-ventilated
areawith theenginestopped.Donotsmoke
or
allowflamesor sparksin theareai,vhere
gasoline
isstoredor where
thefuel
tankisrefueled.
aBefore
refueling,make
sureto filter fuelfirst.
aDo notoverfill the tank (there
shouldbenofuelin thefiller neck). After
refueling,makesurethefuelfiller csp
iscloseds€curely.
oBe carefulnotto spill fuel whenrefueling. Spilledfuelor fuelvrpor may
ignite. If anyfuelisspilled,makesuretheareais dry beforestartingthe
engine.
OAvoid
repeatedor prolonged
contactwith skinor bre|thingo{vapor.KEEP
OUTOFREACHOFCHILDREN.
WiththetuelcockintheRES
position,
tuelwill flow from
the
reservetuel
supply
tothe
carburetor.Usethereservefuelonlywhenthemainsupply
isgone.
R.efill
th€tankassoonas
possible
after
switching
toRES.
AWARNING
aTo avoidrunningoutoffuel that mayresultin asuddenstop,learnhow
to
operatethefuelcockwh€n
fiding themotorcycle.
aBecarefulnottouchanyhotengin€
pa swhileoperatingthefuelcock,
NOTERemembertocheckthat
thefuelcockisinONposition
eachtime
you
ride.
lfthe cockisleftinRES
position,you
mayrunoutoftuelwithno
rcsenie.
OPERATIONGUIDE
NOTE
You
shouldbefullfamiliarwiihallofcontrolsandftnctions.IfanvDroblem.
please
contact
yoLu
d€alerfor help.
STARTING THE ENGINE
, Always
followthe
proper
starting
prccedure
describedbelow.
I\WARNING
oNever
run theenginein snenclosedarca.Theexhaust
contrins
poisonous
carbon nonoxide (CO) gasthat can causelossof consciousnessand lead to
d€ath.
aAttempting to start the engine with the transmission in gear and the clufch
engagedmay result in injury or damage.
Preparation
NOTE
lset thetuel cock to ON.
2.Setthe main switch to ON, put the enginestopswitch to 'O (ON).
3.Slipthegearshift
intoNEUTRAL (neutral
indicatorlight on).
4.Pushthechokelever all theway to its fully closed
positionandclosethethrottle
grip tully.
5.Starttheengineby startbutton.
NOTE For protecting the battery,do not usethe electric starterfor more than5
secondsata time. Releasethe starterbutton for approximately 10secondsbefore
pressing
it again.
6.After startingtheengine,keepit at aspeedof2500 - 3500r/min by adjustingthe
throttlelever.
NOTE The engine should be wa.med up for prolonging its service life. Don't
forcefully accelemte
theengine.
7.Pushthechokeleverallthewaytoitsopen
position
afterwarmingup
the
engine.
NOTE
As a rule, with the choke in full closed condition, if the engine respondsto the
choke, it means that the engine is warmed up.
STARTING PROCEDURE OF WARMED ENGINf,
*; To rellarl awarm ensine.donot usethechole.
w
Checktheclutchforfunctionbeforeconductins
steDsbelow.
Checktheclutchforfunction
If the
transmission
isinneuhal If rherransmissionis ensased
Theenginewill bestartedbyde-
pressing
thestartbutton Byholdingtheclutchleverand
depressingthe
start
button,the
enginewill bestarted.
Withdrawthesidestand,engage
thetransmission
Allow to ridethemotorcycle Allowroridethemotorcycle

'Don'trlipthe vehicle inertly lor longtime,
evenwith thetransmission
in l.Fornornalbraking,gradualtyapplyboththefrontandrearbrakeswhiledown-,
n€utral whenthe engineisclosed. Bccrusethe gearshift
may beproperly shifting
tosuityourioad
speed.
lubricated as the engine runs. Operation with insufficient lubrication will 2. For maximum dccelemtion,
closethcthrottleandapplythe front andrearbrakes
damagethe gearshift firmly. Pull in theclutchleverbeforccoming to a completestoFto prcvent
srall-
aAhvays usethe clutch during gear
shifting. lf noaso,mechanical
damage ^
ingthe
engine.
mry occur, becausethe engine,gearshift and drive system.an not be subjecl I\WARNING
CAUTION
aSnapping
thethrottle
or fast
idlingfor morethan
abont5minutes
ntnormal
air temperature
maycauseexhaustpipe
discoloration.
aE\tended
useolthc choke
mayimpair
piston
andcvlinder
walllubrication
and
damagethe
engine.
GEARSHIFT
The
gearshift
isdesjgnedtocontrol
themotorcycle
at
given
speedlorstarting,
rccelerating
andclimb.To
shiftthetransrnission
intoneutral.
reDeatedlvsteD
onthe
:<"-shili
pedxl
un l ir
rcachesl\r
gear.
then
.lrghtl)
stcn
onrhefearfedal
ro
neutral
I\WARNINC
toshockduetoforcegear-shifting.
BREAKING-IN
Help assure
your motorcycle'sfuturcreliability andpcrformance
by paying
exlraaltcrtron to how you ride during thefirst 1000
km.
During thisperiod,avoidfirll thrortleriding andloadingtheengjneheaviiy,
besurcto drive at a speednot more than60% ofcach gearand to keepchanging
spced.
NOTEAfter thetunning-in period,besurcto conduct
maintenanceaccording
to the
maintenance
scheduleso asto keepthe motorcycle at an optimal statcwith high
pcrfbrmance.
which will extendtheservice
life ofthe enginc
obviously.
RIDING
1\w'rnr,{INc
Review MOTORCYCLE SAFE RIDtNc before you ride.
I Afier the
engiie has
beenwarmedup.thc motorcycleis ready
lbr riding.
I While theengineis idling, pull in theclulch leverandircad rhe
gearshiftpedalto
shift into lst (low) gear.
I Slolvly relcase
theclutch lcver and at thc sane time gradually increase
engine
sfeedby openingthethrottle. Coordinationofthe throttlcwjth clutch levcrwill
assure
a smooth
andposiiive sta .
1 \\rhen
themotorcycleattains
a steady
spccd,closetheihrottle,pull in theclutch
lcverandshift to 2nd gear
by treadingthegcarshift
pedat. 9
This sequcnce
isrepeatedtoprogressively
shifl to3rd,4rh and5rh(top) gears.
5.Coordinate
thethrottlewith brukesfor smoothdeceleraiion.
6- Both front and rearbrakesshould be usedat thc sametime and should not be
applicd strongly enoughto lock thewheel, or braking cffectivenesswill be re-
duced
andcontrol ofthe motorcyclebe difficult.
CAUTION
It is forbidden to gearshift up or down when the throtfle is still not
descreased
and the chufch is in,otherwise,damageto the enginejdrive chain or
olherparrl mayhappen.
BRAKING
alndependent useofonly the ftonf or rear brake reduces
stoppingperformance.
Extreme braking may causeeither wheel
to lock, reducinqcontrol of the
motorclcle.
aWhen possibl€,
reduce
speedor brake befor€enteringa turn; closing
the
throttle or braking in mid-turn may causeryheet
slip. Wheel slip will reduce
control of the motorcvcle.
oWhen riding in wet or rainy conditions, or on loosesnrfaces, the ability to
maneuver
and stopwill bereduced. All ofyour actions
shouldbesmoolh
under fhese
conditions.
Rapid acceleration,
braking or turning mry cause
loss
ofcontrol. For your safety,exercise
extreme caution when braking, ac-
celeraling
or turning.
aWhen descendinga long,steep
grade,
useenginecompression
braking by
downshifting, with intermittent use
ofboth brakes. Continuous brake appli-
cation can overheat the brakes and reduce their effectiveness.
aRiding with your foot resting on the brake pedat or your hands on the brake
lever may actuatethe brake light, giving a fatse
indication to oaherdrivers. tt
may alsooverheat thc brake, reducing €ffectiveness.
PARJqNG
L After
stoppirgthemotorcycle,
shiftthetransmission
intoneutral,
tumthe
steer-
ing
barfullytothe
right,andthenlock
thcsteeringlock,
atlast,remove
thckey.
2.Usethe
sidestandtosupport
themotorcyclewhilc
parked.
CAUTION
Park
themotorcycle
onthefirm,level
ground
to
prevent
it fromf:tlling
over.

I\WARNING
Park themotorcycle
awayfrom foot passenger
andchildrenas
far as
possible,
becaus€theexhaust
mumerisveryhotevenalongtimeafter
stopping
theengine. MAINTENANCE
TheMaintenance
Schedulespecifieshowoften
you
should
have
your
motor-
cycleserved,
andwhatthingsneedattention.lt is
essentialthat
your
motorcycle
be
se edasscheduledtoretainitshighlevelofsafety,dependability,and
emission
control
perfomance.
Thesc
instructionsarebasedontheassumptionthat
themotorcyclewill be
usedexclusivelyfor itsdesigned
purpose.
Sustainedhighspeedoperation,
oropera-
tionin unusuallywet
ordustyconditions,will requiremorefrequert
serviceihan
specifiedin
theMAINTENANCESCHEDULE.
Consult
yorrdealerforrccommen-
dationsapplicableto
your
individual
needsanduse.
rool, KIT (Fig.
20)
Someroadsiderepairs,minoradjustments
and
part
replacementcanbe
per-
formed
withthetoolscontainedinthekit.
O Screwdriverhandle @open-endedspannerllx
@Double-endscrew
driver@ Open-endedspannerl?x 15
t9
The following MainteDance
Schedulespecifiesall maintenaDcerequiredto
keep your motorcycle in a somd condition. Maintenarce work should beperfomed
byproperl)
narnedandequippedIechnicians
MAINTENANCE SCHEDULE
O spdrk
ptug
urenthtbx 8
@
AlenkeyNo.5
O€XO@O@OqO@O O
83li:"H::'"ilx:l!i
,Yili:i[:i\:3
l,!'' ,il
r
rtrf
(0)
open-endedspanner12
x l4(? Tool
bae
MAINTENA}ICE SCHEDULE FiS.2O
+INTHEINTERIST OFSAFETY,
WERECOMMENDTHESEITEMSARESER-
VICEDONLYBY YOURDEALER.
**Copper
disulphide
grease ***Lithium
grease
NOTES
l.Se icemorefiequentlywhenridinginunusually
wetordustyarcas.
2.Athigherodometerreadings,
stillfollowthefiequencyintervalestablishedhere.
TORQUE
SPECIFICATION
(Fig.
21)
By using a torsion wrench, tighten up items below. We rccommend ihat these
iremsshouldbechecked,
especiallybeforelong tour.
IIE}I TORQUE
Nm Kg In
Spark
plug l-l 1.3
Drain
plug
ofengine 34
Plus of oil filter 70.1
Fixingbolt
offront
wheel
axle 20 2.0 CI)?
Fuelfilter Checkfor condition.reDlaceifnecessarv
Engine
oil Replace
(pre-warmup theenginebefore
dlainins) (_) ao
Oittilter* Replace
Frontbrake* Ch€ck
ior functronandleak,adjustfnec-
essary o
Rear
brake Checklbrfunchon,adjustiinecessary
Check
for
function.adiustifn€cessarv
Clutch
Keararmprvot" Ch€ck
lorlooseness,
correctrtnecessary.
Refititevery12000kmorl2months+* o
lneck tur balance,damage,dlameterrun-
out.reDairifnecessarv o o
Wheelbearins*Checktbr looseness.reDlaceif necessarv o
Steenng
bearrng' uDecKlor looseness,conectrinecessary.
Refit it everyI2000kmor 12months**t o o o
tiontlork* Lneckrcrrunclon,leaK,Kepafrlneces- o o
RearshockabsorbertLh€cklorlunctlon,leak.Kepal.li
neces- c a
Drivechain Checkfbrslack.Adiustifnecessary Every500km
Checkallofthem.
Repairif necessary
Sidestand* Chec}forfunction.Repairifnecessary
Battery* LnecKelecrolye rcrsp€cnc
gmvlF/,
cneck
theductfor function. Corect ifnecessarv o o
Fig.2l

NUTA NUTB BASICTORQUE
6
.5
,1
ENGINE
OIL
CHECK
OFOILLEVEL
(Fig.
22)
l.Placethe motorcycle on theevengrourd andkeepit in
vertical
position- Thensiarttheengineandrunit atidle
spcedfbr a lbw minutes-
Lstop the engineso asto let the oil levelbe stable,then,
check
theoil levelthroughthe
checkwindow [ocatedon
thc lowerpartofright crankshaftcase.
I.The level must bemaintained between the upper and lower
levelmarks. Add theengine
oil ifnecessary.
CILA.NGE
OFENGINEOIL AI{D OIL FILTER (Fig.23,24& 25)
The
qualiry
ofengineoilisthechieffactor
afectingtheengineservicelife-
ahangetheengine
oil asspecifiedin themaintenance
schedule.
NOTEChangetheengineoil with the engineat normal operatingtemperatureand
lhemotorcycle
on thestandto assurecomplete
andrapid draining.
Lstart theengine
andrun it atidle speedfor afew minutes,
thenstallit.
I To dlain the oil, placean empty oil tray underthe engine,and removethe filter
I\WARNING
A warmed-up engine and the oil in it are hot; be careful not lo burn
tourselL
l.Tum offthe drainplug
-l.Take
outthe filter element.
5.Reinstall
thedrainplug with atorqueof34N.m (3.4kg.m).
6 lnstalla new filter element
andO,ring, thenfit thecoverto original position and
secureit with bolts.
Torque
ofoil filter bolt: 7N.m (0.7kgm)
': - tt-"-.;_'1l;'".-'n
Y ft== l-d ar-l
'/€t,',,, ll#l'*,4 | @]]"@@l
/ QDrainplugl lOorarnplr-sl:--=E= | l'" ry4-'\ |
CAUTION Fis.25
RuntringtheenginewithinsulTicieni
oilcancauseseriousinginedamage.
NOTE
aWhen
runningin very
dustyconditions,oil changesshouldbe
pedomed
more
frequently
thanspecifiedin themaintenanceschedule.
aPlease
disposeof usedengineoil in amannerthatisconpatiblewiththe
environment.Wesuggest
you
takeit inas€aledcontainerto
your
localrecycling
centeror servicestationfor reclamation.Do notthrow it in therubbish
orpourit
onthe
$ound
ordownadrair.
AIR CLEANER(Fig.26,27,28,29,30
& 3l)
Theaircleanershouldbeservicedatregularintenals
asspecifiedinthemain-
tenance
schedule.Servicemorelrequentlywhenridingin unusually
wet
ordusty
arcas.See
your
dealerforfurther
information.
Maintaintheaircleanerinthefollowinssequencel
LLoosenthe
clamp(Fig.26).
2.Remove
thebolt(Fig.2?).
3.Takeoulthehoseandtheaircleanercasing(Fig.28).
4.Removethecover(Fig.29)-
s.Alongthe
guide
rod,withdrawthefilt€r€lement(Fig.30),washitwithclean,non-
flammableorhighflash
point
solvent.Thisdone,
squeeze
it toremove
there
mainedsolvent.
6-Soakthe
aircleanerfilter elementin gasoline
engineoil of 15W40QE
until
saturated,andth€nsqueezeouttheexcessoil soasto letit keepwetwithout
Fig.22
O Checkwindow
@Upperlevelmark
@Lowerlevelmark
\orF. t- _'- -il
Mrke .ufe
rhal
lhc
O ringfsfir
propefl)
. I G{ )l
\dd specifiedengine
oil il necessar). | -..-" 6-l
..\l"n lheenginefora
fe\ minure..
theckirforleakoroil.lfanv..rallilandfind ll ,| - |
rhc(ause. @.ol:rOrol,
drainins(Fis.3I
).
f ---;-_t11 i: -.i-
l.lt I lw'l
t>sl ll \9
Fig.26 Fig.28
Oscrew O screw @
ffi
Fig.30
O Filterelement
O cuiderod
-
tY,
w
j
Fig.31
Fig.29
OHose

CHECK AND REPLACE r 4-,
LDisconneclrhe
spark
plug
capfiomrhe.park
plug. | =l
2.Cleanan)dlrrfiomaroundrhe
spark
plug
ba.e.Remor
e
rhe I r =l
spark
plug
uirngthe
plugwrench
containingintheroolkir. lo 147 I
l.lncpecrthe
electrodesandcenrer
porcelain
for
deposirs.ero | | |
sionorcarbonfouling.Ifthe erosionordepositisheavy,re- F*'34
place
the
plug.Cleanacarbon
or
wet-fouled
plug
witha
plug O"Spa.k
pluggap
cleaner.oruseawire
brush.
4.Checkthespa* pluggap
usingawire-tlpe feeler
gauge.
Ifadjustment
isnecessary,
bendthe
sideelectodecarcfully.
The
spark
pluggap
shouldbe0.6
- 0.7mm.
Makesurethe
plug
washerisingood
condition.
s.Withthe
plug
washerattached,thrcadthe
spark
plug
inbyhandfirsttoprevent
crossthreading,
andthenbythespark
plug
wrench.
Torque
ofspark
plug:
l3N.m
(1.3
kg.m)
6.Reinstallthespark
plug
cap.
NOTE
Ifthere isnotorquewrenchwhen
fittingthespark
plug,
following
wayis
availabler
tightenthespark
plug
byyour
hand,thentumit additionally
by l/4 - 1/
2ofa revolution.The
spark
plug
shouldbetightenedto
specifiedtorqueassoonas
dristoolisobtained.
CAUTION
aThe sparkplugmustbesecurelytighlened.An improperlytightened
plug
canbecome
veryhotand
possibly
damagethe
€ngine.
oNever
useaspark
plug
withanimproperheatnnge,otherwisesevereengine
O Locknut
Oaalser to- lsmm
Adjustitasfollows:
2.Tumthe
adjustersoastoshifttherod
endaclearanceof l0 - 15mm
beforethe
adjuster
bearsagainstthe
piston
ofmaincylinder.
NOTECheckthefreeDlav
ofbrake rod.andmake
surethatthebrakerodfunctions
6$properly.
I\WARNING
Never
use
gasoline
orlowflash
point
solventsforcleaningthe
afucle|ner.
A fireor explosioncouldresult.
T..Installtheremoved
parts
inthercveneorderofremoval.
NOTE
^ Makesurethattheelementisfit properlyin thefilter casing.
I\WARNING
Neveroperatethe€ngine
withoutfilter element,
otherwise,thepiston/
cylinderwallmay
bewornexcessively.
IDLE SPEED
(Fig.
32)
The engine
must be atnormal operatingtemperahfe
for accurateidle speedadjustment-
NOlE Donotattempttocompensatefor faultsin other
sys-
tems
byadjustingidle
speed.See
your
d€alerforregularly
scheduled
carbuetoradiustments.
l.Wam upthe
engine,shifttoneuhaland
place
themotorcycleonitscenter
stand.
2.Adjust
idlespeedwiththethrottle
stopscrewtosetidle
speed
at
about1250
-
135Or/min.
Tumthethrottlefixing screwclockwise
(in thedirectionofthe arrowhead
A)
will increase
idlespeedwhile
will decrcaseittumingcounterclockwise
(in
thedirec-
tion
ofthearrowheadB)-
3.Whenthe
enginehasnoidle
speedorruns
atadecrcasedspeed,setthe
throttle
stopscrewinthemiddle
betweenthetwolimitpositions
tohelpmixairandfuel.
4.Runthe
engineagain;readjust
thethrottlestopscrcwifnecessary.
ADJUSTMENT
oF THROTTLE CABLE (Fig.
33)
NOTE
The idle speedmustbesetbeforeadjustingthefteeplay
of thrcttlecable.
l.Check the thrcttle gdp for smooth rotation from the tully open
lolhefullyclo\ed
posirioo
alboLhfull
\reeringposirions.
2.Measurc the throttle grip ftee play at the throttle gdp flange.
The standardfreeplay shouldbeapprox.:3 - 5rnm.
To adjust the tee play, loosen the lock nut and tum the
adjuster.
SPARKPLUG(Fig.
34)
SELECTION
damage
col|ldresult.
ADJUSTMENT
OFFRONTBRAKE (Fig.
35)
As fte brake padswear, brake fluid level dmps. There is
no adjustment
toperform,butfluid leveland
padwearmustbe
inspectedpedodically. The systemmust be inspected ftequently
to ensurethercareno fluid leaks. Ifthe bnke lever freeDlav
becomese\cessive
andlbe brafte
pad\ arenol wom beyondii'
minimum depth,thereisprobablyair in thebrakesystemandit
mustbebled. See
your dealerfor this service.
The lree play offront bmke rod end should be 2- 5 mm.
l.Unscrew thelock nut.
@Throttle
fixing
screw
Ol-ock
nut
@
Adjusler
Free
play
Standard
plug:CR6HSA
(NGK) orU2oFSR-UCNIPPONDENSO)

\DJUSTMENT OF REAR BRAKE (Fig. 36, 37 & 38) contact,llusbthoroughly
withwaterandcattadoctorif your
eycswere
\. ,t
I rrposed,
werccommended
thatiheitem
should
beconducted
byyour
dcaler 'Kf,EP-OUT oF REACHOFCHILDREN.
CAUTION
PIII)AL HEIGHT ause only specified brake fluial from ;sealed container.
llnscrcw the lock nut f ,E--_!11 rig:r aNever allow contaminants suchasdirt or warer to €nter the brake fluid tank.
ll'nlllcrJiu'lerclockwiseorcoLrirrefclockr"r.c
] *l '-f lOedJr.'.r LLoc.fle'hc\ehr(teb\
irssrdc.randon"
tevctground.
rhen.cr
| - |
, .crrhe
ncdclposirior
. | lt tl I
.,sr.,e,,up,herL,L.knur. | /il:{ I jj.l];l;}''""""te|'nrhelcvcrpo\irionbvconrrorrrns
re F€-Al
:'l::i":' , . .. ,ffi::lr*p,r t l"Xl,l;,:-u" lluid$irh
carebccausei(
candamase
plastic
and
painred
2 Pcddrherghl:
4) - SSmm ,j{,ff Olock nur
lX:",:ll"::-' awhen
addingbrake
fluid.besurerhe
brakefluidtrnk
h horizontrt
beforerhe
()Ficenli):20'J0mm I -- - ^.r"',.' cspi\remored.
orbralenuid
mavioi
out,
\')TF 2.Throuih
theriewwindow
Inrhe
brakcmarncytrndcr
tosee
Theliee
play
ol brake
pcdal
should
bcadjusted
afterthe
pedat
height
isser. thebrakeft
uidlcvel;if the
fluidlevel
jsbelowthcL0 w ER
TREE
PLAY
Adjusrtherieeplay
to20-30
nm
afthcbrake
pedal
cndasrouows:rum
the 5",ilfii};ll:"r"JiJ,;'ltow' specified
brakefluid"., o" 3,?"1"t".
*,0"",
':lullapplication
ofthebrake.the
brakeshoesmusthe G)
Brake
wearindicator Ifsuchadjustment
isstillunsatisfactory,
contactyour
dealer
forhclp.
-::.lrced. @
Limir
line
^lruster
clockwisetodecrcasethe
frcc
play.
whilelum it counterclockwise
toin- 3.Tumloosc
thescrewsand
thenremovethe
cytindercover.add
brakefuid uptothe
.fd.rsethe
free
play. uppER
lcvelmarkofihe vicwwindow.
(.\UTION
Ihe
pcdal
height
shouldbechecked
afterthe
chainrsfeinstattcd
orudrusred. REPLACEMENT OF BRAKE FLUID
i The
brakelighi
shoul<lbechecked
for
proper
iun"n."r"g ut". tir"tr"r."". "at,.r.t"a. I Replacement
ofal
Ibrakefluid
shouldbccanied
outby
your
dealer.
\DrusrMENr
oFBRAKE
LrcHr
swriclr
irig.
js)
-- ';fjTi:;l",;;i':"*i1"":.11tr""r"
J,fJ;,,r*:""i?',il$:j',:[:iT*""
*-"-
Adjust
thcbrake
li8htswitch
bvshifnng t-tal l ",^ ". r.Reptacc
all;f therubber
ri,rgs
euei,2 ycars.
:hc
brake
pedal,
forwhich
purpose:
tumthca{i- ll, .,p, , lXa"::., b.Replace
allofrhehose.u".i+ yeais.
rustinsnutwlrile
holdinsthe
bodyuntilthe
tishr Ii&, ," IH:?"v. ADJUSTMENT OF C-LUTCH (F ig.42 & 43)
' qlilhl
JU-r
l'clorcrhe
brdlc
.rad.
engacrng. l !! ) Z)Adlu'trng
nul
How ro usE BRAKEWEAR TNDtcAToRS(Fig.
40) "n",,oYii"J'iti'r",i,11,"h
reverrree
prav
atthecrutch
leverflanse
rheriee
prav
Thefront andrearbrakes
areequipped
rvithbrake f _.- t-lJ To makeadjusrmenr,tum loose
thelock nurat rhetop ofrhc clurchcabte
of
'':'li!liJi",t"*f
,sdpp,ied,apoinrera,rached.to
]/4 ] ::,lH*,'l;i::*#:f"'."JjlF,:,:;lJ.H:".H""1i:mff:*li.:l:",:"tll:
:.Lnake.*novesiowardareferenccmarkonthebraxe ^ .^l^;1 | reqriremcnt,
tbisdone;tighten
upthelock;ut
'r.icover. lfthe pointcralignswith therefe.encc
mark Fig.40 I v- | NOTE
(HECK
oFBRAKE
FLLTD
LEVEL
(Fis.4r
) f$l t,*;;;*
",, lhj];l lEl:
'\\\R\l\c | 1 U @Aur-,rrrEnu,
I.ecpta.
ffi
.Brate
fluid
matcause
irrirarion.
Avoidconrac*irhstinoreyes.
Incaseof13 ::'- t0 15rr , i l/2\Adju'lin8nul

DRN'E CHAIN
Thesewicelifeofthedrivechain
isdependentupon
proper
ltrbrication
and
adjustment,Poormaintenance
cancause
premature
wearordamagetothe
drive
chainandsprockets.
Thedrivechainshouldbecheckedandlubricat€dasDartofthe Pre-ride
inspeclion.Undersevereusage.orwhenLhemolorcyclersndde;
inunuluall)
dust)
ormuddyareas,moreftequentmaintenancewill benecessary.
INSPECTION (Fis. 44)
NOTE
Bytumingthewheel,findthemosttightpart,
wherecheck
forslack.
Lstall the
engine,
place
bothwheelsonthe
ground
withthe
motorcycleinthev€rtical
position,
andshift
theEansmission
into neutral. Fig.4l
a.l0 ^- 20rnm
2.Checkslackinthelowerdrivechainrunmidwaybetween
the
sprockets.
Ddvechainslackshouldbeadjustedtoallowthefollowi[g verticalmove-
ment
byhand:I
0- 20
mm
3.Rotatetherearwheelandthenstop.Checkthedrivechainslack.Repeatthis
procedure
severaltimes.Drivechainslackshouldremainconstant.Ifthe chainis
slackonly
incertainsections,some
linksarekinkedandbinding.
Binding andkinking canfiequentlybeeliminatedby lubdcation.
4.Insp€ctthesprocketteethfor
possible
weardamage.Replace
ifnecessary.
s.Ifthedrivechainorsprccketsareexcessivelywomordamaged,
they
shouldbe
replaced.
Neveruseanewchainwithwomsprockets;
rapid
chain
wearwill result.
ADJUSTMENT (Fig. 45 & 46)
Drivechainslackshouldbecheckedandadjusted,ifnecessary,every1,000
km. Whenopemtedat sustainedhighspeedsor underconditions
of frequent
rapid
acceleration,thechainmayrequiremorcftequentadjustment.
Ifthe drivechainrequiresadjustment,the
procedure
isasfollows:
l.Loosen
theadjusterofrearbrake.
2.Loosenthea,{leDut.
3.Loosen
thelocknutsforthedrivechainadjusters.
4.Tumbothadjustingboltsatthesametimeuntil bothleft andright adjustersalign
withtheindex
mark,andthenreinstalltheaxle
nut. Tokeepacorrectconcentriciry,
rctationofbothadjusten
should
beidentical.Chainslackshouldbe10^,20mm.
f-Vi:T\--T!] Fio 46
io"oli^,* ElqlU,Sl A"A"'""'
l--t$ .lSPl Qeajuster
| (\\ 1_-.,/^dp j (:l,Lock nur
h - .---o<-' g , (O Inde\ rnarr
s.Checkthedrivechainslack.
6-Oncethealrivechainslackischanged,itisnecessarytorclocat€the
rear
wheel,for
adjustmentwill affecttherearbrake
pedal
fteeplay.
LUBRJCATION
Use
engineoil oracommercially
prepared
drivechainlubricantsill pr€fer-
ence
tomachineoil orother
lubricants.Saturateeachchainlinljoint sothatthe
lubricant
penetrates
betweenthelinkplates,pins,
bushings,androllers.
R.EMOVALANDCLEANING
men thedrivechainbecomes
dirty, it shouldberemovedandcleaned
priorto
lubrication.
l.Withtheengrneoff,caretully
removethechainclip.
2.Cleanthe
drive
chaininhighflash-pointsolventandallowit todry. Inspectthe
ddvechainforpossible
wearor damage.
Replaceanychainthathasdamaged
rollen, loosefitting links,or appeaNunse.viceable.
3.Inspectthe
sprocket
teethforpossiblewearordamage.Replaceifnecessary.Never
useanewddvechainonbadlywomsprockets.Bothchainandsprockets
must
be
ingood
conditioqorthenewr€placementchainorsprocket
will wearrapidly.
4.Lubricatethedrivechain.
s.Passthechainoverthesprocketsand
jointheendsoftbe chain
withthemaster
link. Foreaseofassembly,holdthechainendsagainstadjacentrearsprocket
teeth
.while
insertingthemast€rlink.
I\WARNING
Installthechainclipsothatth€closedendofth€ clipwill facethedirec-
tionof fonvard{heel rutation.
6.Adjustthedrivechainandrearbrake
pedal
freeplay.
CHECKAIID LUBRICATIONOFCABLDS
CAUTION
Damagedflexible tubemay causecorrosioninside,
which affects
themove-
mentofthe cable. Checkthebrakecablefor kinks or signsofwear thatcouldcause
sticking or failure. In this caseth€ flexible cable should be replacedassoonas
posslole,
Lubricate the cable with a cornrnercially available cable lubricant to prcvent
premature wear and corrosion.
Contact your dealer for help if you cannot conect the problem
Recommendedlubricant: engineoil Classl5W40Q
LUBRICATION OFCHOKE CABLE AND THROTTLE GRIP
To lubricate the moving part ofthe choke, remov€ the scrc% hold the end of
cableandslightpull it out,thenapply few dropsof lubricantto it.rndslightpull it out,thenapplyfewdropsof lubricantto it.
Tolubricatethethrottlegdp cable,fiIst disassemblethegrip, thencoat
the
surfacesofthrottle gip with g€neml-purposegrease.

ffi
Fig.47
REAR BRAKE AND GEARSHIFT PEDAL
Themovingparts
suchas
pivots
and
pins
should
belubricated.
Recommended
lubricant: engine
oil of l5w40e
FRONTBRAKE AND CLUTCH LEVER
Themovingparts
suchaspivots
andpins
shouldbelubricated.
Recommended
lubricant:
€ngine
oilof l5w40e
SIDE
STAND
Tle movingpa(ssuchas
pivots
and
pins
should
belubricated.
Check
tosee
rhatthe
movement
ofsid€
standissmooth.
Recommended
lubricanrengine
oil of l5w40e
CAUTION
Contactyour dealerfor helpif theside
standfunctions
improperlv.
REAR
SUSPENSION
Themovingparts
such
as
pivots
andpins
shouldbelubricated.
Recommended
lubricant:
lithium
grease.
CHECKoF FRONTFORK (Fig.
4?)
CAUTION
Thevehicle
shouldbe
supported
firmlyagainst
being
Lcheckthe
tube
forscratches
oroilhackfiomftont
fork. 2.Place
themotorcycl€on the smooth
groundwith it in verticalposition.aD_
ply the&ont
brake
se\emltimes.
andthen
swingrhe
frontfork upanddownrepearedly.
NOTEContact the dealer for assistance if any damage or uneven movement in the
iiont fork is found.
CHECKOFSTEERING
DEVICE(Fig.
49)
. Periodically
checktfie
sleeri0gdevice
for funclioning. Op-
emtron
wlh the\4omor loose
sleeringbearing
isdangercus.
Make
thecheck
astottowst suppon
lhemotorcycle
on the
stand.
Iin up
thefronrwheelotl the
gound. Attemptio movethefioni rtreei p;q,49
ADJUSTMENT
OFREARSHOCK
ABSORBER 48)
toand
frowhile
holding
it. Contact
thedealer
forhelpifany free
play
is
present.
Removing
oftheftont
wheelwill help
thecheck.
WHEEL BEARING
,- The $r'heel
bearing should be checked as per the MAINTENANCE
SCHEDULE. Contactthedealerfor assistance
if any_backlash
in theftont or r€ar
wheelbearingis found or whe€lrotationisuneven.
BATTERY(Fig.
s0
& sl)
Battery
elechol)1e
ispoisonous,
sobe
surenottodiscardit atwill. Handl€in
accordance
withnational
orlocalenvironmental
protection
rul€s.
Mainrainthe
baltery
inaccordance
wilh
lhemainlenance
schedulein
the
manual.The
battery
electrolytelevelshould
bebetweentheUppERlevelmarkand
the.LOWER
levelmark. Ilbattery electrol)4e
levet
isbelowthe
LOWERlevelmark,
add
proper
distilled
water
uprothe
UPPERtevelmark.
MH-*:i*."
Fig.51
O Upperlevelmark
(2)
Lowerlevelmark
CAUTION
awhen themotorcycle
isto bestored
for atr
extended
period
oftime. r€move
thebarrer]
fromthe
mororcycle
andchrrge
it fuUy:
andthen
sto;€ii in a
cool,dry place.If thebat'tery
isto b€leftin themoiorcycle,
disconnect
the
negative
lead
from tbebatteryt€rminal
first and
thencometotheDositive
lead.
aThe vent
hoseshould
be
placedproperly
whenthe
batteryischecked.
Ifnot
so.gases
fromthebaitery
or electrolyte
leakage
$ill causecorrosion
ofthe
"mainframeand
damage
itssurfaces.
I\WARNING
aThe
battery
gives
offexplosivegases:
keep
sparks,
llames,eod
cigarenes
awav.
Proride
adequatevenrilation
when
charging
orusingrhe
batt]erl
in anen_
closed
space.
aThebatt€ry
contains
sulfuricacid(electrolyte).
Contactingwith skin
or eyes
may
causes€vere
burns. Wear
protective
clothing
andafaceshi€ld.
(Fig.
The
shockabsorber
is
provided
with
preloaded
springadjuster.Toadjust
the
spring
to load
which
youexcept,
tum the
adjuster
in (Ddirection to increase
pr€load,
while turn it in @ direction
to d;crease
preload.
CAUTION
The
shockabsorbers
shouldbe
setto Fig.48
O decrease
O Incr€ase
lhe
same
preload,
otherwise,
it may
cause
outofconhol
or
problem.

lfelectrolyte
gets
in yourskin,
flushrvithwater.
If el€ctrolyte
g€ts
in your eyes,
flushwith waterfor tt least15minutes
andcallr physician
immediately.
aflectrol)'te
is
poisonous.
If swallowed,
drink large
quantities
ofwateror milk
andfollowwith milk ofmagnesiaorvegetable
oil andcallaphysician.
.KEEP OUTOFRNACHOFCHILDREN
FUSE
The vehicle is equipped with a self-recovercd overload protector. The protec-
tor will cut offthe circuit automatically in the caseoftroubles such as a short circuit
or an overload troubl€, and it will switch on the circuit automatically a lew seconds
later after you tum on the power switch in the caseof houbleshooling.
The fusemay be usedrepeatedly
forlhousandstimes.
REPLACEMENT
OFHEADLIGHT
BULB
(Fig.
s2
& s3)
If theheadtightbulbisbumt out,replacementshouldbedoneasfollows:
disc
ftomtheclipperAssy.
MOUNTING OFFRONTWHEEL (Fig.
55)
Reinstallationshould
becarriedoutin thereverseorder
of dismantlement,butpayattentiontopointsbelow:
l.Makesulethat
thewheelcas€shouldbe
engagedwiththe
gear
device
ofspeedometer
properly.
2.Theclearancebetween
theliningsshouldbeenough
before
thebrakedisc
isfit to
position.
3.Makesure
thatthesloiintheoutside
ofgear
shouldbeen-
gage
withthebossofftonlleft shockabsorber
properly.
4.Tighlenuptbeaxle
nurro
.pecified
torsion
Torsionofftontwheel
axl€:5.8N.m
(5.skg'm)
4.Loosen
thelock nutsandchainadjustersat both sides.
WH?Iv-
L Loosenoffthescrew
fromth€headlight
Assy.
2. Tumoffthe leadingwire ofheadlight,takethe
headlightAssyoutofthe bracket,
ihenremovethechimney,
3. R€movethesocketby tumingit counterclockwise,
withdrawthedamagedbulb.
NOTE
Becar€fulnotto bumyourselfandkeepflammable
materialsawaybecaus€
thebulbis veryhotduringoperation
4.Fita
new
bulb
to
position
andsecureit withsocket
spring.
5.Reinstallthechimneyand
headlightAssy.
Contactthedealerforhelpifthe lightbeam
needtobeadjusted.
DISMANTLEMENT OFFRONTWHEEL (Fig.
54)
NOTE
Contact
thedealerfor assistance,iffiont wheelneedto berepaired.
CAUTION
Please
support
tbevehiclewith astand
toprev€nt
it fromfalling
ov€r.
l. Remove
the
alrive
cableofspeedometerfrom
the
side
offrontwheel.
2. Loosen
the
bolt
andaxle.
3. PutablockundertheengiDe
tomisethefiont wheeloffthe ground.
W'ffiAH
IW
CAUTION
Withdraw the wheel a-xleand remove the wheel Assy.
Wl *rr*
cab,eorspeedometer
W E
F,.x?i,:$',.
4. Removetheboltand
extracttheaxle.
NOTE
Don'tholdthehandlebar
toclampthefiictionlining
whenwithdrawthebrake
WM
Fig.55
@
s.Check
theftont foik forproper
functioningbeforcfixing theclampbolt.
6.Tigltenup
thebolttospecifiedtorsioD-
Tolsionofclampbolt:
20N.m
(2.okg.m)
DISMANTLEMENT OFREARWHEEL @ig.
s6& 57)
NOTE
We recornnend ihat this item should be done by your dealer
Fig.57
O Nut ofaxle
@ Lock nut
@ Adjuster
@ Align mark
Pleasesupportthevehicle
with astandto prevent
it fromfallingover.
1.Place
ablockundertie engine
tomisetherear
wheel.
2.Putoutthesplit
pin
ftom
thebmketie-rod,unscrew
thenutandtie-rod
bolt.
3.Remove
thebmkeadjuster
andrcd.

\OTEThechain
maynotbedismantled
whentherearwhe€l
is dismounted.
\{OUNTING OF RIAR WHEEL
Reinstaliation
should
becaried outin thereverse
order
ofdismantlement.
but
pay
aftentrontopoints
below:
LAdjust
thedrive
chain.
Lcheck toseeifthe parts
beloware
tightenedpropetly,
and
secured
wiih anewsplit
prn, Torsion
ofaxle
nur 80N.m(8.0
kg.m)
Torsion
oftie-rod
botr 20N.m(2.0
kg.m)
l.Adjust
the
rear
brake-
NOTE
Checkrhebrake
light for functionafteradjusting
therearbrake.
TROUBLESHOOTING
BLOCK DIAGRAM
_Trouble
may
occur
during
operation
though
themotorcycle
has
b€eninspected
strictlybefore
delivery. Any problem
fromfuel,compression
andignition sistems
!\
illcause
abnormal
loss
ofpolrer. Therroubleshootrng
table
givisproduces
for
rnorng rnereasons.ptease
contaclyour dealeriflhe vehrcle
needs
lo bereDaired
3. IGNITION
4.BATTERY
SYSTEM Ffrq
lDamoedHi 'l''' I
lioding thereasons-
Please
contactyour deal€rifthe repared.
Aumqrxc
Donot
smoke
orallow
flames
orsparks
in th€
areawhere
th€fuel
svstem
issubject
to
check.
TROIJBLESHOOTING
BLOCK DIAGRAM
CAUTION
Do not dismstrtle or maintain the vehictewithout the Drof$sional
knonledge.
CLEANING
. Cleanyourmotorcycle
regularly
toprotect
the
surfacefinishes
and
inspectfor
damage,
wear,
and
oil orblakefluid leakage,
andtoprolongservicelife ofparts.
CAUTION
High-pressur€
water
(orair)can
damage
certrin
parts
ofthemotorcvcle.
Avo;d
spmying
higl-pres"ure
water
atrhe
followins
areas.
Wheel
Hubs.
lgnition
Swilch.
Carbureror.
tnstrumintr.
Handtebar
Suirches,
Muffler Outlets,
UnderFuet
Tank,Ddve Chain,
UnderSeat,etc.
I.Wash
thevehicle
completely
witha
geatdealofwater
NOTE
. Clean
theheadlight
lens
and
other
plasticparts
usingaclothorsponge
damp-
ened
with asolution
of mild deteryent
andwater.
2.Dryupthemotorcycle,
starttheengine,
andletit runfor several
minutes.
I\WARNING
Braking€fficiency
msyb€temporarily
impaired
just aft€rwashinq
the
motorc\(le.
], COMPRESSION
longer
stopping
distance
toavoid
apossibl€
accialent.

3.Test
thebmkesbefore
riding themotorcycle. Severalapplicationsmay beneces-
saDtore\torenormal
bmking
perlormance.
4.Lubricate the drive chain immediately after washing and drying the motorcycle.
STORAGEGUIDE
Some
measures
should
betakenfor storingalongterm-unusedvehiclesoas
toreducethebadinfluenceonitsperformance.
Beforcthestorage,
mak€
necessary
maintenanceto ensDrethevehiclehigl performance
aft€r-storage.
Storage
Lclean anddry upthevehicleandwaxits surface.
2.Emptythefuel insidethef eltankandcarburetor,spraysomeantirust.
I\WARNING
Gasolineis€xtremelyflammableandisexplosiveund€rcertainconditions,
Performthisoperation
in awell-ventilated
arer with theengile stopped.Do
notsmokeor allowflamesor sparksin thear€awhere
gasolineisdrainedor
storedandwherethefueltankisrefueled.
3.Driveoff thespark
plugto fill aspoonof engineoil (aboutI5- 20millilite) into
thecylinder;turnoffthe ignitionswitchandruntheengineseveraltimesby prcss-
ingthestarterbuttonto scatterevedy drcoil insidethecylinder,
andthen
reinstall
thespa* plug.
4.Cleanandoil thedrivechain.
5.Dismantlethebatteryandstorcin adry,coolandwell-ventilated
place
without
beingshonedirectly.
CAUTION
When
dismantling
the
batt€ry,
dismantleth€negativeleadfirst,andthen
the
positive
lead,Wheninstallingit,the
procedure
is
justopposite.Duringthe
operations
above,theignition
srvitch
mustbeturnedoff.
6.Sealthemuffler outletwith plasticclothtoprevent
thefomer ftom moisture.
?.Cover
themotorcycle
(don't
use
plastic
oroth€r
coatedmaterials)andstoreinan
unheatedarea,fteeof dampness.Donotstorcthemotorcyclein directsunlight.
REMOVAL FROM STORAGE
LTakeoffthecovershieldingth€vehicleandclean
it.
2.Charge
thebatteryasrequired.Installthebattery
3.Clearawaytheantirustinsidethefueltank,andfill freshgasoline
instead.
4.Performall Pre-rideInspectionchecks.Try themotorcycleatlow speedsin asafe
ridineareaawavfromhamc,
SPECIFICATIONS 250//125-C
DIMENSIONS
Ovemlllength
Overall
width
Overall
height
Seat
height
Groundclearance
Min.tumcircledia.
Wheelbase
Steeringbar
angle
Max-
speed
Gradeability
WEIGHT
Dry weight
CAPACITIES
Passengercapacity
Max.weightcapacity
ENGINE
Model
Type
Borcandstroke
Compression
ratio
Displacement
Startmode
Lubrication
Carburetor
tpe/No.
Spark
plug
Spark
pluggap
Ignitionsystem
ENGINEOIL
Type/Class
2215mm
780mm
1140mm
685mm
150mm
5600mm
1495mm
> 90km/h
> 18"
137kgll l42kg
Operatorandone
passenger
150kg
2V49FMM// 2V4IFMI
4-stroke,
V-twin
cylinder
withair-cooled
49x 66mmll4lx 4'7mm
10tlll 10.2:1
248cm3/l 124.1cnnl
El€ctricstarter
Press/splash
BD526/1
CR6HSA,/IU2OFSR-U
0.6-0.7
mm
CDt(digital)
SEA20W40.SEclassorSFAlowl0-St
class

OIL CAPACITY
Regularreplacement
of oil
Replacement
ofoil infilter
Total
FUEL
Octane
No.
Fuel
tankcapaciry
Reserve
supply
SUSPENSION
Tyre
size,front
T)Te
size,rear
Frcntbraket,?e
Rear
brak€t pe
Front
suspension
Rear
suspension
Front
shockabsorb€r
Rear
shockabsorber
POWIR TRANSMISSION
Clutchl,T'e
Transmission
Primary
rcdrction system
Primary
reduction
Secondreduction
system
Secondreduction
Gearratio, lst
2nd
3rd
4th
5th
CHASSIS
Mainftame
1.4L
1.6L
1.8L
RQ-90and
higher
9.5L
2.6L
3.00-18
5.00-18
Disctlpe by hand,RH
Drumt ?e by foot,RH
Telescopic
fork tlpe
Swingaxlnfr?e
Hydraulicdrive
SPring,thydraulic
drive
Weftypeandmulti-plated
Five-speed,gearbox
Spur
gear
3.130t/3.4
Chah driving
2.812/t3.615
2.642
1.684
|.260
r.000
0.821
Dual-tube
craalle
Casrerangle
ELECTRICAL
Batterytype
Batterycapacity
Magneio
LIGHTS
Headlight
Tail,/brakelight
Tumsignallight
lnstrumentindicator
Neutrallight
Highbeamindicator
Sub-headlight
OTHER
Air cleaner
Tyre pr€ssure ( in cold position)
Max. load (without vehicl€ weight) I50 kg
32.05'
GMl0-3A-2
12V-10A
Permanent
magn€tic
12V-3sW35W
// 12V-60W55W
l2v-3sw
/2rw// 12y
-5w
/2rw
l2y-t5wl/ t2v-2tw
I2V-1.7W// t2V-3W
12v-1.1W
l2v-3w
12V-3W
Wet-element fi/pe
Loaddistribution
A+
Frontwheel
Rearwheel
LoaddishibutionB*
Frontwheel
Rearwheel
0-90kg
175
KPa
200Kpa
90
- 150kg
200Kpa
225
Kpa
Not€: Theloadmeans
goods,
alriver/passenger
andother.
Table of contents
Other Lifan Motorcycle manuals