LifeFone At-Home and On-The-Go GPS User manual

Saves Lives When Seconds Count®
At-Home and On-The-Go GPS
with Optional Fall Detection
User’s Guide
MEDICAL ALERT SERVICES
STEP 1
STEP 2
STEP 3
COMPLETE AND MAIL BACK
THE ENCLOSED EMERGENCY
CARE PLAN AGREEMENT
Follow these 3 steps to activate your device.
PLUG-IN THE LIFEFONE BASE UNIT,
AND CHARGE THE MOBILE DEVICE
CALL TO ACTIVATE! 1-800-940-0262

We thank you for choosing LifeFone’s
Emergency Alert System and we
welcome you to the LifeFone family.
Congratulations on making a smart choice!
If you have any questions during the setup
process, please call Customer Service 24/7 at
1-800-940-0262.
MEDICAL ALERT SERVICES

LifeFone At-Home & On-The-Go GPS User’s Guide 1
Table of Contents
What’s in the Box........................................................... 2
About Your Base Unit and Pendant Button ................... 3
Mobile Device Overview ............................................... 4
Optional Fall Detection Pendant Features.................... 5
STEP 1: Installing Your LifeFone Equipment................. 6
STEP 2: Activate Your LifeFone System ........................ 8
Testing Your Help Buttons ............................................. 9
STEP 3: Send LifeFone Your Emergency Plan............. 10
Putting on the Optional Fall Detect Pendant.............. 11
Minimizing False Alarms While Sleeping..................... 12
Fall Detection Indicator Lights .................................... 13
Mobile Device and Charger Notes.............................. 14
Setting Up Your Mobile Device Equipment ................ 15
Testing Your Mobile Device ........................................ 16
Placing an Emergency Call with Mobile Device.......... 17
Location Based Services and Mobile Device Lights.... 18
Base Unit Announcements .......................................... 19
Battery Indicator.......................................................... 20
FCC Information.......................................................... 21
QUESTIONS? Call our 24-Hour Customer Service 1-800-940-0262
2
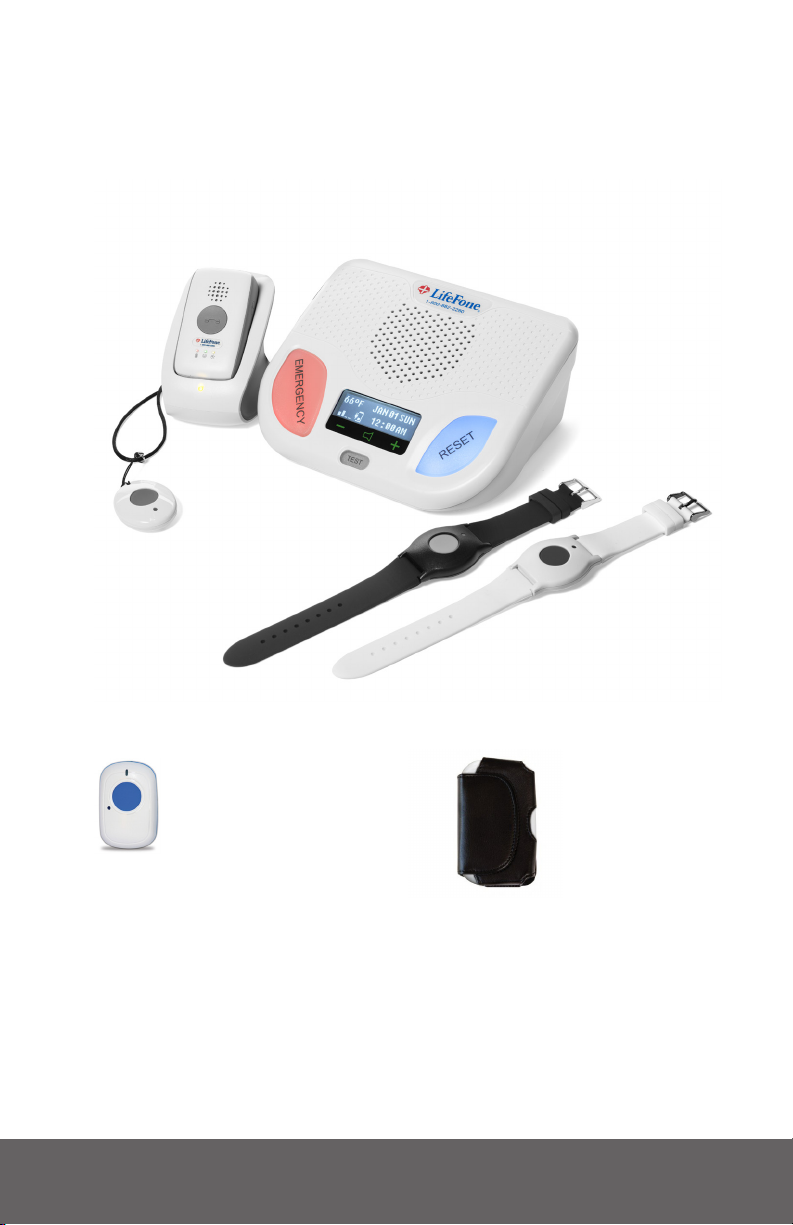
What’s in the Box
Your LifeFone At Home & On The Go Emergency Alert
System with Fall Detection includes a base unit, a help
button pendant on a necklace, a Fall Detection Button
with a blue button, and a Mobile Device with a Cradle
Charger, Power Cord and Mobile Case.
LifeFone At Home
Base Unit
Help Button
Pendant on
Necklace
Fall Detection Button
Pendant on Necklace
(optional)
Mobile Device
Carrying Case
Mobile Device,
with Charging Cradle
and Power Cord
LifeFone also offers
a Wristband as an
additional help button
option, in white or black.

LifeFone At-Home & On-The-Go GPS User’s Guide 3
LifeFone System Base Unit
Push Button
Pendant on
Necklace
Push Button
Pendant on
Wristlet
The system includes a waterproof push-button
pendant on a necklace or wristband.
Fall Detection
Pendant on
Necklace (optional)
Emergency
Button Speaker
Test
Button
Date & Time
ON/OFF
Switch
(Back)
Volume
Signal
Strength
Indicator
Temperature
Battery Charge
Indicator
Microphone
Reset Button
Pendant Button
Mobile Device
Carrying Case

QUESTIONS? Call our 24-Hour Customer Service 1-800-940-0262
4
LifeFone Mobile Device Overview
On/Off
Power
Button
(on the
side)
Speaker
Help
Button
LED
Indicator
Lights (3)
Battery
Light
Cellular
Light
GPS
Light
LifeFone
Mobile Device
Charging Cradle
with Power Cord
Test
Button
“T”
(on the side)
LifeFone At-Home & On-The-Go GPS User’s Guide 5
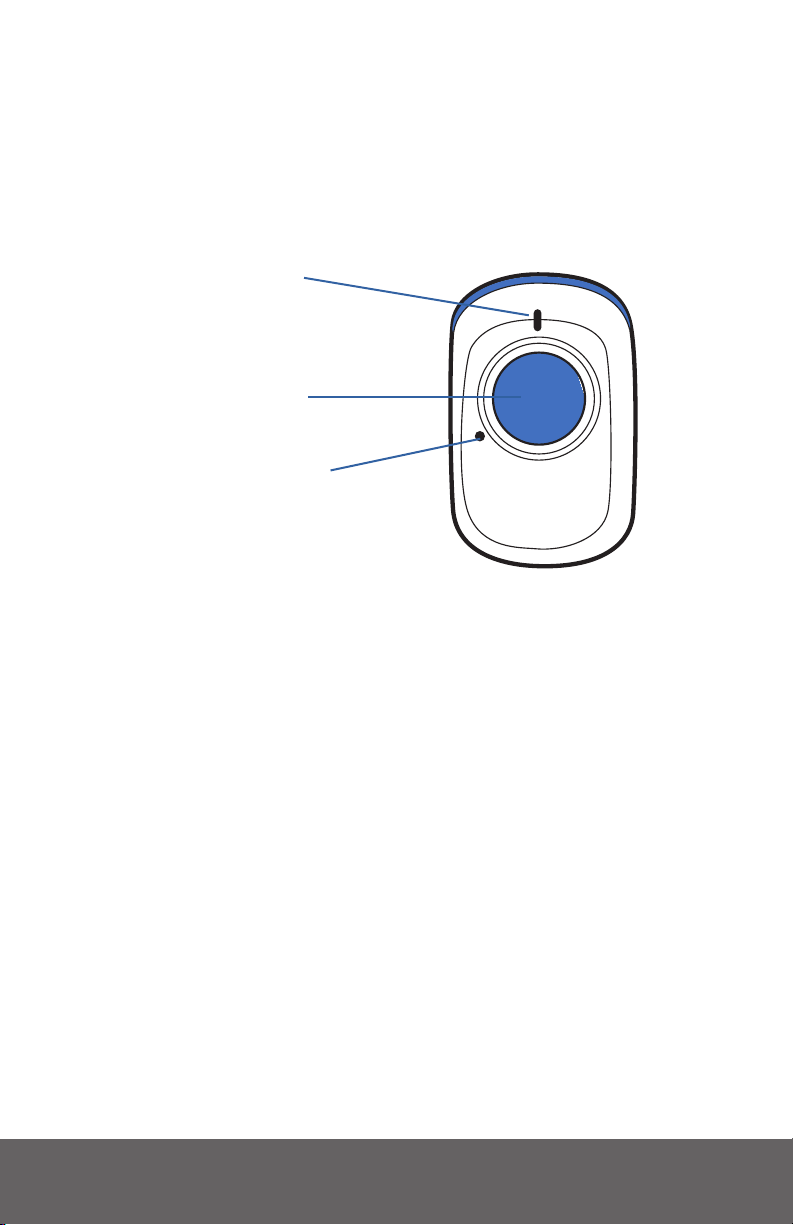
Optional: Fall Detection
Pendant Features
Multi-color
indicator
Emergency Help
Button
Piezo Buzzer Alert
Your LifeFone Fall Detect button is compatible with your
System. It has all of the features of our standard help
buttons, allowing you to call for help when you need it
by pressing the emergency button.
The Fall Detection Button also provides extra protection
by automatically calling for help if you fall and are unable
to push your button.
QUESTIONS? Call our 24-Hour Customer Service 1-800-940-0262
6
Installing Your
LifeFone Equipment
Follow these simple steps to get your system
set up and tested:
Select a Location
• We recommend you place the Base Unit near the
center of your home, such as your living room, family
room or kitchen area.
• Place it near an electrical outlet.
• Do not place any object in front of the Base Unit.
• Do not place near any appliances that make noise.
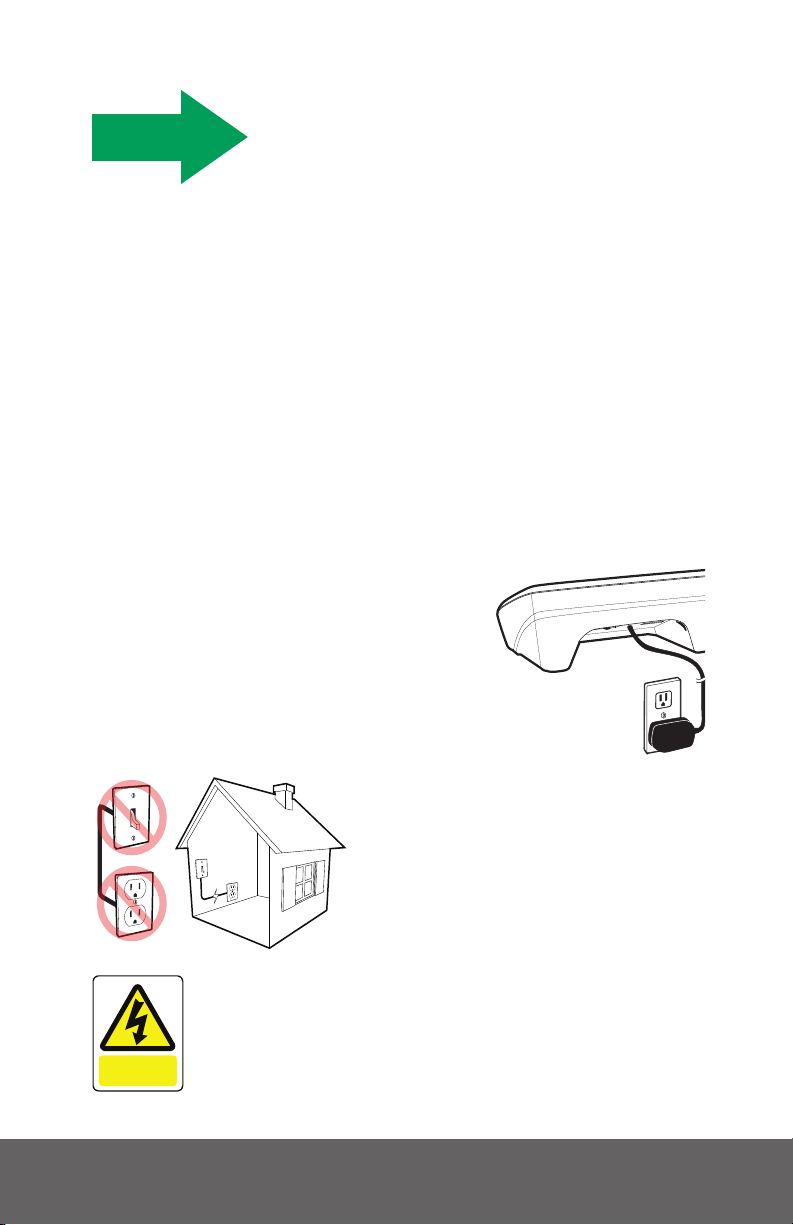
Plug in the Power Cord
Plug the power cord that is
attached to the back of the Base Unit
into an electrical outlet that is not
controlled by a light switch.
To avoid accidentally turning
off the Base Unit, DO NOT
plug it into an electrical
outlet that is controlled by a
light switch.
WARNING
To prevent electrical shock please keep the
system away from wet locations.
DANGER
Electric
shock risk
STEP 1

LifeFone At-Home & On-The-Go GPS User’s Guide 7
Turn on your Base Unit
• Turn on your Base Unit using the on/off switch
located on the back.
• If the Base is set up correctly, the Base Unit will say
“system ready.”
• The emergency and reset buttons will illuminate.
• The display screen will turn on.
• You can use the volume control buttons on the front
of the unit under the display screen if the voice is too
loud or too soft.
• Make sure your Base Unit is connected to the cellular
network by checking for the signal strength bars on
the display screen.
• Within a few minutes of turning on the system, the
Base Unit will obtain the date and time from the
cellular network and will appear in the display area.
You are not able to set the date and time manually.
In order to serve you better and make sure your
equipment is working properly, please call our support
team 24/7 at 1-800-940-0262.
ON/OFF Switch
OFF ON USB
Model Number: WBS GEN1.0
Serial Number: WB1XPD224Z
FCC ID:PXTWBS-01
IC ID:10876A-WBS01
IMEI Number:355306040196802

QUESTIONS? Call our 24-Hour Customer Service 1-800-940-0262
8
Call to Activate!
1-800-940-0262
To Test your Base Unit:
• Press and hold the test button for 3 seconds.
• After the button lights up green, the Base Unit
will announce “user auto-test.”
• The Base Unit will instruct you to “press the
emergency button or pendant.”
• Once you push a button, it will say “test call sent
to emergency response center” several times.
• Next you will hear an announcement thanking you for
testing your device. And nally it will say “user auto-
test completed.”
• If you did push your button when prompted to do so
and the Base Unit announced “user auto-test failed,
please contact support” please contact customer
support 24/7 at 1-800-940-0262.
STEP 2
Table of contents
Other LifeFone Security System manuals

Popular Security System manuals by other brands


Secure
Secure USAB-1 operating instructions

B&B
B&B 480 SERIES Operation & maintenance manual

ADEMCO
ADEMCO VISTA-20P Series Installation and setup guide

Inner Range
Inner Range Concept 2000 user manual

Johnson Controls
Johnson Controls PENN Connected PC10 Install and Commissioning Guide

Aeotec
Aeotec Siren Gen5 quick start guide


