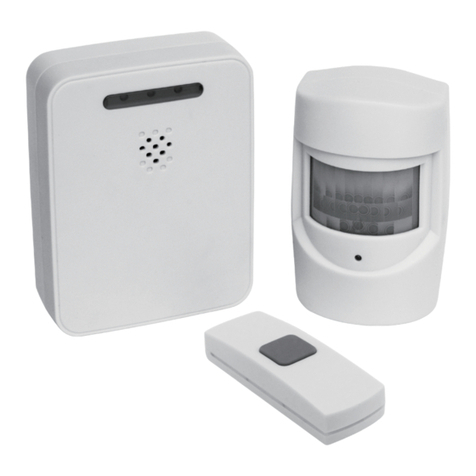
Vibrating Pager (1601P)
Remove battery cover on the rear of the pager unit and insert 2xAAA batteries, observing the
correct polarity. Replace the battery cover. Slide power switch on the side to the ‘on’ position.
Adjust Volume
The volume button is located under the
belt clip, which can be removed by sliding
downwards. Press the upper button to cycle
the volume between the 4 sound levels.
Chime Selection
See Bellpush / SOS Button.
Flashing Chime (1601C)
Plug the chime unit into any mains socket and switch the socket ‘on’.
Adjust Volume
Press the upper button to cycle the volume between the 4
sound levels and mute option.
Chime Selection
See Bellpush / SOS Button.
Pairing and Melody Selection
A bellpush or SOS button can be paired to multiple units, each with its own melody. This is
usefull to distinquish between the bellpush or an SOS alert, or when you have multiple points
of entry.
This section uses volume (upper button) and melody (lower button) selection on each unit.
The buttons are location on the left of flashing chime unit. On the vibrating pager unit the
buttons are below the belt clip, which can be removed by sliding the clip downwards.
Melody Selection
Repeatedly press the melody button until you reach the desired melody. This must be locked
in by immediately following the pairing proceedure below.
Pairing
Enter pairing mode by holding the volume button for 5 seconds, the unit will sound a two-
tone chime and the light will begin to flash. Press the bellpush or SOS button to complete the
pairing process and to lock-in the current melody.
Repeat the above process for each bellpush or SOS button you wish to pair - you may change
the melody for each button.
www.lifemaxuk.co.uk / info@lifemaxuk.co.uk
Installation and Operation
The wireless range of this product is 250-300 metres in an open area. This range will be
reduced by building structures and furniture.
A common range in a typical home could be 30-150 metres. Optimal performance can be
achieved by choosing shorter, straight line distances between the bell push and receivers.
Avoid placing receivers close to induction cookers, televisions, speakers or strong magnets
which may cause interference.
The bell push should ideally be mounted in an area protected from extremes of weather. To
maximise range, avoid mounting the bell push on metal door frames.
Always check a suitable range exists before mounting any equipment.
Mounting the Bellpush
Check a suitable range exists before mounting the bell push. The bell push should ideally be
mounted in an area protected from extremes of weather.
Mount using provided screws (preferred):
Remove the cover of the bell push using a small, flat head screwdriver and remove battery.
Locate the two mounting holes and use these as a template to mark the mounting surface.
Drill two holes in the marked position and mount the bell push using the screws and wall
plugs provided. Replace battery in the bell push and re-attach the cover observing correct
orientation.
Mount using adhesive pad:
Thoroughly clean the area for installation and affix the adhesive pad to the bell push. Firmly
push the bell push against the area for installation and hold for 10 seconds.
Helpline: 01635 874323
Bellpush (1601B) and SOS Button (1601S)
Remove the small, white tab battery tab.
Battery Replacement - Bellpush (1601B)
Remove the front cover by depressing the clip below the pushbutton. Remove the depleted
battery and replace with 1x23A battery, observing the correct polarity. Replace cover.
Battery Replacement - SOS Button (1601S)
Remove the small rubber bung and hidden screw on the rear of the unit below the lanyard
cut-out. The bung can be removed using a small pin or needle and it may be necessary to
remove the lanyard to allow the cover to separate.
Carefully remove the internal circuit and slide the depleted batteries from the holder. Replace
with 2xCR2016 batteries, observing the correct polarity. Replace circuit and cover.
Volume / Set
Melody
Volume / Set
Melody
On / Off
Cover Release
23A Battery
Rubber Bung / Screw
Safety and Warnings
• Do not use the device if it is damaged or modified. Damaged or modified batteries may
exhibit unpredictable behavior resulting in fire, explosion or risk of injury.
• Do not disassemble the device
• Do not expose the battery to liquid, fire or temperature above 60°C may cause explosion
• Keep all batteries away from each of children.
• Use of a faulty adaptor to the device may result in a risk of fire or injury to the user.


