manuals.online logo
Brands
  1. Home
  2. •
  3. Brands
  4. •
  5. Uniden
  6. •
  7. Security System
  8. •
  9. Uniden WDVR4-2 HDD User manual

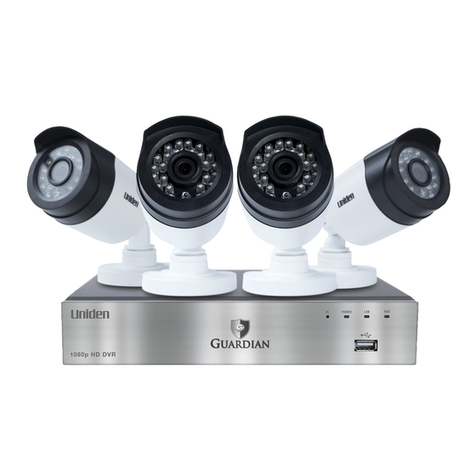
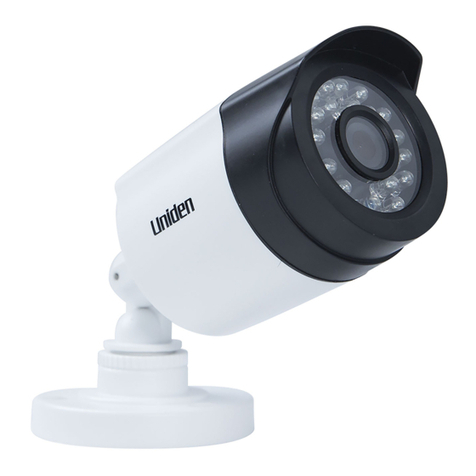
Uniden WDVR4-2 HDD User manual

Other manuals for WDVR4-2 HDD

1

Other Uniden Security System manuals

Uniden UDW20553 Service manual

Uniden

Uniden UDW20553 Service manual

Uniden Guardian UDRC57 User manual

Uniden

Uniden Guardian UDRC57 User manual

Uniden Guardian G455 User manual

Uniden

Uniden Guardian G455 User manual

Uniden Guardian G455 User manual

Uniden

Uniden Guardian G455 User manual

Uniden GDVR 43 Series User manual

Uniden

Uniden GDVR 43 Series User manual

Uniden UDW-10003 Service manual

Uniden

Uniden UDW-10003 Service manual

Uniden UDW-10003 User guide

Uniden

Uniden UDW-10003 User guide

Uniden UDW20055 User manual

Uniden

Uniden UDW20055 User manual

Uniden G7404D1 User manual

Uniden

Uniden G7404D1 User manual

Uniden GUARDIAN G766 User manual

Uniden

Uniden GUARDIAN G766 User manual

Uniden Guardian G455 User manual

Uniden

Uniden Guardian G455 User manual

Uniden UDRC24 User manual

Uniden

Uniden UDRC24 User manual

Uniden GDVR 4A Series User manual

Uniden

Uniden GDVR 4A Series User manual

Uniden G17xx Series User manual

Uniden

Uniden G17xx Series User manual

Uniden UDW20553 User manual

Uniden

Uniden UDW20553 User manual

Uniden Guardian B6440D1 User manual

Uniden

Uniden Guardian B6440D1 User manual

Uniden wdvr42hdd User manual

Uniden

Uniden wdvr42hdd User manual

Uniden G17xx Series User manual

Uniden

Uniden G17xx Series User manual

Uniden UDVR45x4 User manual

Uniden

Uniden UDVR45x4 User manual

Uniden UDR744 User manual

Uniden

Uniden UDR744 User manual

Uniden GDVR 20 Series User manual

Uniden

Uniden GDVR 20 Series User manual

Uniden UDR780HD User manual

Uniden

Uniden UDR780HD User manual

Uniden GDVR 42 Series User manual

Uniden

Uniden GDVR 42 Series User manual

Uniden G2701 User manual

Uniden

Uniden G2701 User manual

Popular Security System manuals by other brands

Polon-Alfa 4000 Installation and maintenance manual

Polon-Alfa

Polon-Alfa 4000 Installation and maintenance manual

Nexcom NViS 14162 Series user manual

Nexcom

Nexcom NViS 14162 Series user manual

Eminent EM8670 Quick install

Eminent

Eminent EM8670 Quick install

urmet domus alpha 1060 INSTALLATION AND USE BOOKLET

urmet domus

urmet domus alpha 1060 INSTALLATION AND USE BOOKLET

SmartPool YardGuard YG03 manual

SmartPool

SmartPool YardGuard YG03 manual

DSC PC5964 Mounting instructions

DSC

DSC PC5964 Mounting instructions

Secure USAB-1 operating instructions

Secure

Secure USAB-1 operating instructions

B&B 480 SERIES Operation & maintenance manual

B&B

B&B 480 SERIES Operation & maintenance manual

ADEMCO VISTA-20P Series Installation and setup guide

ADEMCO

ADEMCO VISTA-20P Series Installation and setup guide

Inner Range Concept 2000 user manual

Inner Range

Inner Range Concept 2000 user manual

Johnson Controls PENN Connected PC10 Install and Commissioning Guide

Johnson Controls

Johnson Controls PENN Connected PC10 Install and Commissioning Guide

Aeotec Siren Gen5 quick start guide

Aeotec

Aeotec Siren Gen5 quick start guide

Swann SW-P-MC2 Specifications

Swann

Swann SW-P-MC2 Specifications

Ecolink Siren+Chime user manual

Ecolink

Ecolink Siren+Chime user manual

EDM Solution 6+6 Wireless-AE installation manual

EDM

EDM Solution 6+6 Wireless-AE installation manual

Siren LED GSM operating manual

Siren

Siren LED GSM operating manual

Detection Systems 7090i Installation and programming manual

Detection Systems

Detection Systems 7090i Installation and programming manual

FRIEDLAND MA10 Installation and operating instructions

FRIEDLAND

FRIEDLAND MA10 Installation and operating instructions

manuals.online logo
manuals.online logoBrands
  • About & Mission
  • Contact us
  • Privacy Policy
  • Terms and Conditions

Copyright 2025 Manuals.Online. All Rights Reserved.

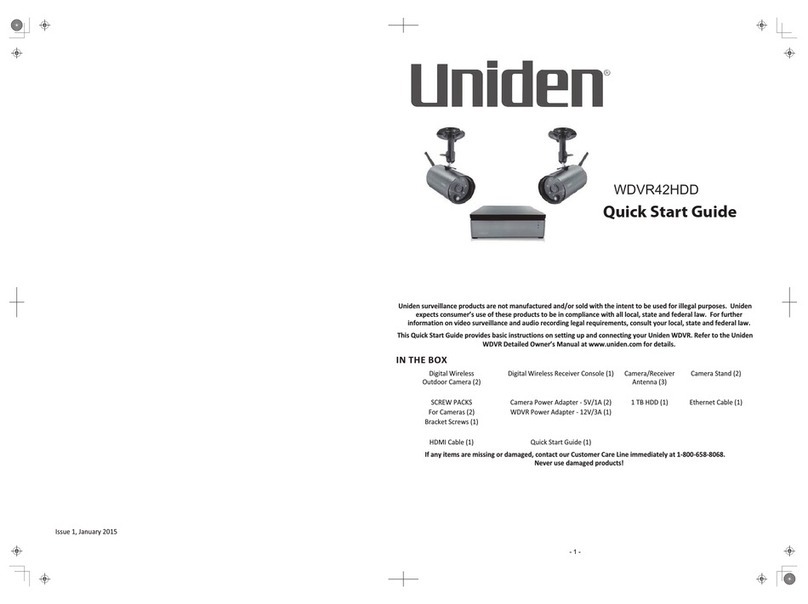
WDVR4-2 HDD
Quick Start Guide
Uniden surveillance products are not manufactured and/or sold with the intent to be used for illegal purposes. Uniden
expects consumer’s use of these products to be in compliance with all local, state and federal law. For further
information on video surveillance and audio recording legal requirements, consult your local, state and federal law.
This Quick Start Guide provides basic instructions on setting up and connecting your Uniden WDVR. Refer to the Uniden
WDVR Detailed Owner’s Manual at www.uniden.com for details.
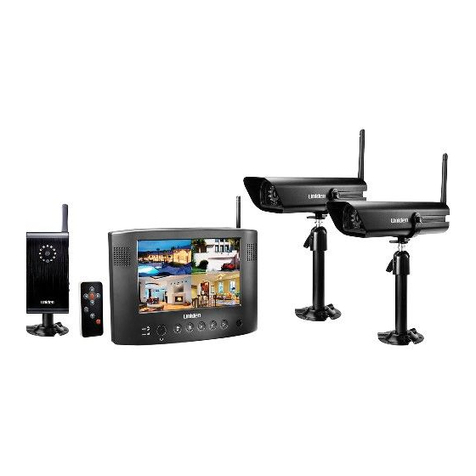
IN THE BOX
Digital Wireless
Outdoor Camera (2)
Digital Wireless Receiver Console (1) Camera/Receiver
Antenna (3)
Camera Stand (2)
SCREW PACKS
For Cameras (2)
Bracket Screws (1)
Camera Power Adapter - 5V/1A (2)
WDVR Power Adapter - 12V/3A (1)
1 TB HDD (1) Ethernet Cable (1)
HDMI Cable (1) Quick Start Guide (1)
If any items are missing or damaged, contact our Customer Care Line immediately at 1-800-658-8068.
Never use damaged products!
Issue 1, January 2015
- 1 -

1. Connect antenna to the back of WDVR.
2. Connect Ethernet cable from WDVR to router.
3. Connect HDMI cable from WDVR to TV/Monitor HDMI connector (optional).
4. Connect WDVR to power source.
5. Turn on TV/Monitor and switch to proper HDMI inout source (if applicable).
6. Turn on WDVR.
7. Attach antennas to cameras and connect to power.
RouterTV
Mouse Port
Power Jack
Reset Button
Power Switch
microSD Card
Always insert or remove the
microSD card when the WDVR
is powered o. The WDVR will
not read microSD cards that
are inserted when the unit is
powered on.
Connect the WDVR directly
through the router, not through a
hub /switch. Enable DHCP and
UPnP on your router. Verify that TCP
port numbers 80 and 6000 are
open.
Camera image quality may
vary among TV brands and
models. Use the TV remote
controller to adjust the audio
and alarm volume and the
camera image color
saturation/brightness/
sharpness, etc.
Internet Mobile Device

1. Download Uniden WDVR app from Apple App Store. Launch the
app.
2. Tap to add your WDVR. The Device List screen displays.
3, Tap in the upper right corner of the screen. The Device Setup
screen displays.
4. Enter a name for your system. Tap Scan QR. Scan the QR code on the bottom of the WDVR.
5. Enter the default password (123456) and tap Save. The Device List
displays again with your WDVR listed.
6 Select your device. Connection screen displays.
7Press and Live video displays. It may take a few seconds to access the remote video depending on your
network environment.
WDVR allows a maximum of 3 remote viewers on the system. The fourth connection will be rejected. When a local
user is operating in the Setup menu, remote users will be temporarily denied WDVR access until the local user
leaves the Setup menu.
WDVR requires a minimum 1.5Mbps connection bandwidth per connection for best streaming viewing quality. If
bandwith is below 1.5Mbps, set camera resolution and quality to Low to improve streaming remote
image quality.
LIVE SCREEN ICONS
When live video displays, an icon bar displays across the bottom of the app screen.
ICON  
Device List Displays a list of devices on this app.
Tools Sets up the camera, recorder, system, and storage.
Enable Push Notification When enabled, this will send you an email notification when
the system detects motion.
Storage Access recorded files on your storage device(s).
Record Begins recording. If already recording, then “X” displays. Tap
this to stop recording.
Play Plays recorded files. If already playing, then “X” displays. Tap
“X” to stop playing..
Snapshot Takes a snapshot of your video image.

Tap the Live View screen (or right click on the monitor screen) and the Quick Select icon bar displays in the center of
the screen. These icons help you set up your system.
QUICK SELECT ICONS
ICON  
Channel number Selects a specific channel to view.
Main Menu selection Accesses the Main Menu.
Quad Channel display Displays the channels in Quad mode with all 4 screen display
sizes equal.
- 2 - - 3 -
ICON  
Smart-Quad display Displays the channels in Smart-Quad mode, with one main
screen and the other active screens smaller.
Single Channel Recording Indicates when Single Channel recording is on or off.
All Channel Recording Indicates when multiple channel recording is on or off.

Tap for Quad style display or for Smart-Quad style display.
Quad Style
In Quad style display, all 4 channels display at the same time in equal size
displays. Tap on a quadrant of the screen and that channel becomes full
screen. Tap on the image and all 4 video channels display. If channels are
not turned on, they will not display but a blank image displays in its place.
Smart-Quad
In Smart-Quad style, the screens display in a 2/3 - 1/3 ratio: one channel
displays in 2/3 of the screen and the other channels display, stacked, in the
remaining 1/3 of the screen.
If channels are not turned on, the remaining channels adjust to fill the 1/3
screen section.
For complete operation instructions, refer to the online Detailed User Manual at www.uniden.com

Mount the Camera Base
1. Hold the base of the camera stand where you
want to mount it and mark the location of the screw holes.
2. Use the included screws and anchors to attach the base to the wall
or ceiling. You can also screw the base into a flat surface such as a
tabletop if needed.
3. Before attaching the camera, tug gently on the stand to make sure
it is securely in place.

1. Attach the camera bracket to the mounting screw. You can attach
the stand to the top or the bottom of the AppCam Outdoor HD as
needed. Tighten it a few turns, then turn the AppCam Outdoor HD
to face the direction you want.
2. Tighten the camera brace up against the AppCam Outdoor HD to
secure it into place.
3. Unlock the mounting post by turning the wingnut to the left a few
turns.
4. Set the mounting post to the correct angle, then tighten the wingnut
until the post is locked into place.
5. After the camera is installed, reconnect power.
Turn CH2/CH3 oTurn CH2 o
1
2
4
3
Loosen the
wingnut to
unlock the
mounting
post.
Attach the camera
to the mounting
screw and turn it
to the desired
direction.
Adjust the post to
the correct angle,
then tighten the
wingnut to lock the
post into place.
Tighten the brace against
the camera to
secure it
in place.
- 4 - - 5 -
- 6 - - 7 -