LIFEPLUS BLF-T09 Operating manual

If you have any questions, please contact us.
service@lifepluspro.com
PRODUCT USE GUIDE
BLF-T09
BLADELESS COOLING FAN

Thank you for choosing a LIFEPLUS fan.
This owner's manual will provide you with valuable
information necessary for the proper care and
maintenance of your new product.
Please take a few minutes to read it.
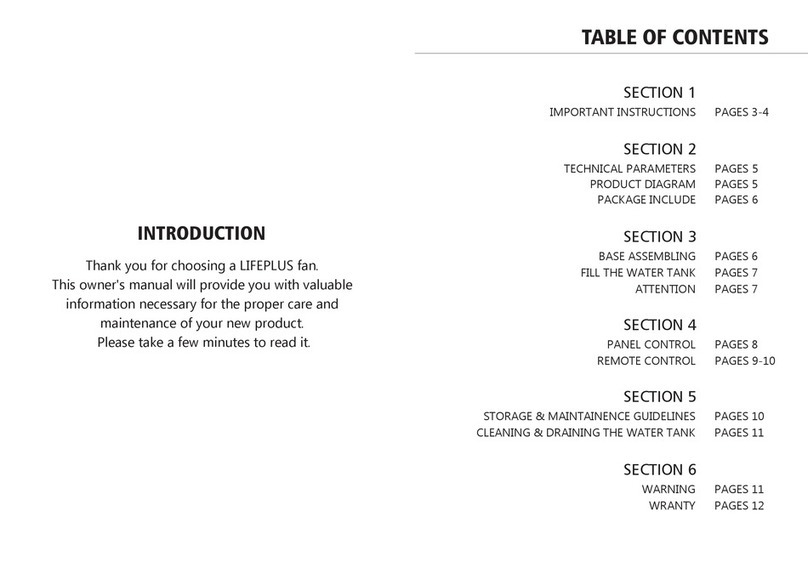
IMPORTANT INSTRUCTIONS PAGES 3-4
INTRODUCTION
SECTION 1
TECHNICAL PARAMETERS PAGES 5
PACKAGE INCLUDE PAGES 5
PRODUCT DIAGRAM PAGES 6
SECTION 2
FILL THE WATER TANK PAGES 7-8
SECTION 3
HOW TO USE ICE BOX PAGES 9
ATTENTION! PAGES 9
PANEL CONTROL PAGES 9-10
SECTION 4
TROUBLESHOOTING PAGES 11
REMOTE CONTROL PAGES 11
GUIDELINES FOR USE OF BATTERIES PAGES 12
DISPOSE OF THE BATTERY PAGES 12
PRECAUTIONS FOR USE PAGES 12
SECTION 5
FAULT AND SOLUTION PAGES 13
STORAGE & MAINTAINENCE GUIDELINES PAGES 13
CLEANING & DRAINING THE WATER TANK PAGES 14
WARNING&WRANTY PAGES 14
SECTION 6
TABLE OF CONTENTS

NOTICE Please read and keep these instructions
Read all instructions before operating this fan.
This fan is for indoor and household use only and not intended for commercial or industrial use.
This fan must be placed on an even, horizontal surface with clearance on all sides.Never insert fingers, pencils,
or any other objects through the fan housing when the fan is running. Unplug the fan when moving it from one
location to another.
DO NOT operate this fan in rooms with bathtubs, showers, swimming pools, wash basins or water connections.
DO NOT expose the fan to water or other liquids. Please use extreme caution when children are near the fan.
DO NOT connect the fan to a power sources other than a 120V alternating current polarized outlet.
DO NOT touch moving parts.
This product contains a button cell battery. If swallowed, it could cause severe injury or death in just 2 hours.
Seek medical attention immediately.
DO NOT use if the fan housing is removed or damaged.
To reduce the risk of electric shock, DO NOT use the fan by a window. Unplug if the device is not in use.
Disconnect the fan before assembling, disassembling or cleaning.
The rules about cord and plug are as below:
(1) This product employs fuse for overload protection. A tripped fuse indicates an overload or short-circuit
situation. If the fuse trips, unplug the product from the outlet. Replace the fuse as per the user servicing
instructions. If the replacement fuse trips, the product should be discarded or returned to an authorized service
facility for examination and / or repair.
(2) DO NOT operate any fan with a damaged cord or plug. Discard fan or return to an authorized service facility
for examination and / or repair.
(3) DO NOT run cord under carpeting. DO NOT cover cord with throw rugs, runners, or similar coverings.
(4)DO NOT route cord under furniture or appliances. Arrange cord away from traffic area and where it will notbe
tripped over.
(5)Consult a qualified electrician when there is a loose fit between the AC outlet and plug. It may cause
overheating of the plug.
(6)Use this fan only as described in this instruction. Any other use not recommended by the manufacturer could
result in electrical shock, fire or injury to person or property and may void the warranty.
(7)DO NOT use this fan near flammable liquids or gases as there is a danger of explosion.
(8)The device may only be connected to a socket that is correctly installed and grounded.
(9)DO NOT touch the main plug with wet hands. To unplug, always grasp the plug and pull it out from the wall
outlet.
(10)DO NOT pull on cord.
(11)DO NOT bend, crush, pull or drive over the power cable. Protect the cable from sharp edges, oil, and heat.
(12)DO NOT lift the device using the cable or use the cable for purposes other than intended.
(13)DO NOT use any fan with a damaged cord or plug, after a malfunction, or if it has been dropped or
damaged in any manner.
(14)To reduce the risk of fire, electrical shock and injury to a person or property, DO NOT connect this product
into extension cords. The extension cord could overheat.
(15)If using an extension cord is necessary, use a short extension cord that is UL or ETL listed to reduce the
chance of overheating.
(16)DO NOT plug the fan inlo any devices with connected cord. This includes surge protectors, multiple outlet
adapters, and power strips.
Check the plug and cable before each use.
(17)To reduce the risk of fire or electrical shock, DO NOT use this fan with any solid state speed control device.
(18)This appliance has a polarized plug (one blade is wider than the other). To reduce the risk of electric shock,
this plug is intended to fit in a polarized outlet only one way. If the plug does not fit fully in the outlet, reverse the
plug. If it still does not fit, contact a qualified electrician. Do not attempt to defeat this safety feature.
(19)Do not leave the fan running unattended.
IMPORTANT INSTRUCTIONS
!
- 3 - - 4 -

d
Model No.
Item Name
Rated Voltage
Rated Power
3 mode fan speeds
3 breeze modes
Timer
Water Tank Capacity
Product Size
BLF-T09
Bladeless Cooling Fan
120V(60HZ)
Low/Mideum/High
Normal/Natural/Sleep
12 hours
5L
13.7x9.5x31.2inch
TECHNICAL PARAMETERS
PACKAGE INCLUDE
PRODUCT DIAGRAM
- 6 -- 5 -
PRODUCT USE GUIDE
BLF-T09
BLADELESS COOLING FAN
1 X Owner's Manual
1X Humid Mouth4x Ice Box
1 X Bladeless Cooling Fan1 X Remote Control
Speed
Timer
Humi
Osc
Cool
On/
Standby
①. Humid mouth
②. Osc outlet
③. Front cover housing
④. LED window
⑤. Buttons
⑥. Wheels
⑦. Back cover housing
⑧. Back housing
⑨. Filter net
⑩. Water tank
90W

FILL THE WATER TANK
- 7 - - 8 -
Step 1: Open the bottom water tank on the back of the fan.
Step 2: Fill the water tank with cold and clean water slowly. Make sure that water level is
between “Min” minimum level and “Max” maximum level.(Fill about 1 gallon of water)
Step 3: To increase the cool effect insert the ice box in the water tank. Before use ice box,
they must be filled by water and put into the freezer for a while.
Step 4: Install the white basket back, then close the water tank, and turn on the cooling
mode

HOW TO USE ICE BOX
- 9 - - 10 -
Put the ice box into the refrigerator to freeze, and then put it into the water tank to reduce
the water temperature, so that the wind blows out is cool. It is strictly prohibited to open
the ice crystal box and swallow it. The ice box can be used continuously.
1.Make sure the product is unplugged from the mains before filling or refilling the water.
2.Only use water in the water tank. Do not add any chemicals ,oils or other additives.
3.Only use cold water in the water tank(previously boiled)
4.Make sure the water level in the water tank is between minimum level .( indicated by
“Min”)and maximum level(indicated by “Max”)
Plug in the power, the cooler make a buzzing sound, and the power indicator light is on,
cooler enter standby mode.
Press the " " button to start the cooler machine, the power indicator light will be on,
and the fan will run at medium speed automatically; the medium speed light will be on,
the display screen will show the current room temperature.
ON/OFF
Press the " " button, the wind speed will cycle from medium to high to strong to low.
The first light will be on at low speed, the second light will be on at medium speed, the
third light will be on at high speed, and the fourth light will be on at strong speed.
FAN SPEED
Press the " " button, with the 1-12 hour timing shutdown function, will be added for one
hour by pressing each time. Determine the timing in a few seconds.
TIMER MODE
Press the " " button, the Osc outlet will starts to run, press again to stop the rotation,
the direction of rotation is random.
OSCILLATION
Press the " " button, and the water pump starts to work. When the water tank is short
of water, the cooler machine will give buzzing alarm, and then the "Cool" indicator will
flash. After adding some water, then press the "Cool" button, stop the buzzing alarm.
COOL MODE
Press the " " button to start humidification function
(1) When the cooler machine is operating with the "Cool" function, and press the "Humid"
button, if the water does not reach the min water level, the buzzing alarm will start, and
then the "Cool" indicator will flash; if the water exceeds the min water level, the
humidification function will start.
(2) When the machine is operating with the normal wind function(no cool), and press the
"Humid" button, if the water does not reach the min water level, the buzzing alarm will
start, and then the "Cool" indicator will flash; if the water exceeds the min water level,
the humidification function will start.
(3) Only start humidification function: when the whole machine is in standby mode, press
the "Humid" button, if the water does not reach the min water level, the buzzing alarm will
start, and then the "Cool" indicator will flash; if the water exceeds the min water level, the
humidification function will start.(Note: the water shall not exceed the max water level)
HUMIDIFICATION
ATTENTION!
PANEL CONTROL

d
Speed
Timer
Humi
Osc
Cool
On/
Standby
REMOTE CONTROL
- 11 - - 12 -
For your convenience, the remote control features the same buttons as the fan control
panel. Follow the operations in"USING THE CONTROL PANEL".
GUIDELINES FOR USE OF BATTERIES
· If the remote control will not be used for a long period of time, remove the batteries from
the battery compartment.
· The remote control uses one CR2025 battery.
· Clean battery contacts and those of the device prior to battery installation.
· Remove used and dead/discharged batteries promptly.
DISPOSE OF THE BATTERY
· The battery must be brought to a household hazardous waste collection site for proper
handling.
PRECAUTIONS FOR USE
1. When only start the “Humid” function after plug in, while the machine detected the water
shortage, the buzzer will give an alarm, and the corresponding "Humid" LED will flash.
After adding water, press the "Humid" button to release the alarm.
2. When only start the “Cool” function after plug in, while the machine detected the water.
shortage, the buzzer will give an alarm, and the corresponding "Cool" LED will flash. After
3. If both the "Cool" button and the "Humid" button are turned on, while water shortage is
detected, the buzzer will give an alarm, and the "Cold" led will flash, and press the "Cold"
button to release the alarm after adding water.
4. If the machine has no operation for 2 minutes, the LED screen will be off automatically.
Press any button to restart the LED screen, resume to the last status.
5. Once plug in, the machine will sound buzzing.
6. Normal and effective operation once, the machine will sound buzzing once.
7. When water shortage is detected, the buzzer rings 5 times.
8. When the temperature sensor is open or short circuited, the fault display: constant
temperature display 77°F.
· The remote control must be pointed towards directly the receiver on the fan when using.
· The working range for the remote control is 5 meters. If the remote control is not pointed
directly towards the receiver, the range will be decreased.
· The remote control may not operate in a room where heavy machinery is operating.
· Do not block the line of sight between the remote control and the receive.
· Handle the remote control with care. Do not drop the remote control on the floor or bang
it against hard objects.
Note: Remove the plastic insulation film located underneath the battery before
using the remote.
remove
open
close

Power indicator is on and not working
Low air volume
Power light does not work
No cool air when the power indicator is on
SolutionFault
Check whether the buttons are on
In addition to the possibility of this machine, it is
necessary to check the indoor power supply
Check whether the air inlet is blocked. If there is
any blocks, remove it
FAULT AND SOLUTION
- 13 - - 14 -
STORAGE & MAINTAINENCE GUIDELINES
WARNING: Always switch OFF the Air Cooler and unplug it from the electrical source
before cleaning or maintenance. Cleaning At least once a week, drain the water tank
completely and refill with fresh water. Doing this will greatly reduce mineral deposits and
help to extend the life of the water pad. End of Season Storage If the Air Cooler will not
be used for a long time:
Make sure all parts are dry by running the Fan Only mode for about 30 minutes before
storing (time depends on ambient humidity conditions). Switch OFF the Air Cooler and
unplug from the power supply. Empty/drain all the water from the tank. Clean the water
tank with a damp cloth to wipe away any dust or mineral deposits. Remove the water pad
from the Air Cooler and rinse under fresh water to remove dust and dirty ( Do not rub the
mesh with your hand to avoid deformation and deformation of the net, affecting the wind),
and put it back into the fuselage. See Figure A below . To protect the unit from dust and
scratches, cover with a clean cloth or plastic bag before storing. Coil the power cord and
store it away from the floor to protect it.
CLEANING & DRAINING THE WATER TANK
If the cooler will not be used for a long period of time, please refer to the STORAGE &
MAINTENANCEGUIDELINES located in the separate Safety & Maintenance Guide.
WARNING:
Before cleaning the unit, switch the unit OFF and disconnect from the electrical socket.
unscrew the water pump knob, pull out the water tank, clean the water tank and put it
back, and screw the water pump knob to the water pump. See Figure B below
Refill the water tank with clean water and drain it completely. Refill the water tank with
clean water, up to the maximum level. Use a damp cloth to remove the dirt and dust from
the surface of the unit. Never use corrosive elements or chemicals to clean this product.
When the product is not in use, store the unit in a dry place out of direct sunlight.
WRANTY
After-sales Service Letter of Commitment:
All products purchased in our company are guaranteed to keep in good repair for 1 year.
If quality problems happen in guarantee period, our company will maintain for free or
provide replacement. Additionally, our company provides technical support and fittings for
life. After-sales service isn't restricted by time and hear feedback idea of users and deal
with them in time. If you are caught in some problems when using our products, welcome
to contact us at any time.
Check whether the water tank is well filled, and
the water level shall not exceed the max water
level or be lower than the min water level.
Table of contents
Other LIFEPLUS Fan manuals
Popular Fan manuals by other brands

Hyundai
Hyundai H-SF16-RC03 instruction manual

Mitsubishi Electric
Mitsubishi Electric LOSSNAY VL-220CZGV-EF Handbook

FABRILAMP
FABRILAMP KUSI 173892301 instruction manual

cool blue
cool blue CBL1175 Assembly

LBA Home Appliance
LBA Home Appliance Short LT user manual

Orbegozo
Orbegozo WF 0245 instruction manual