manuals.online logo
Brands
  1. Home
  2. •
  3. Brands
  4. •
  5. Lifetime
  6. •
  7. Outdoor Storage
  8. •
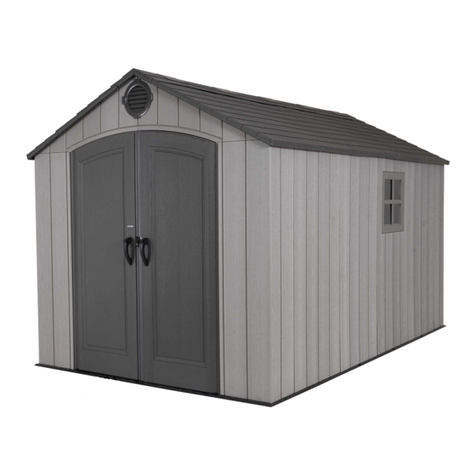
  9. Lifetime 60387 User manual

Lifetime 60387 User manual

TOOLS REQUIRED (NOT INCLUDED—UNLESS OTHERWISE INDICATED*) TABLE OF CONTENTS
7/16 in/po
(≈11 mm)
3/8 in/po
(≈10 mm)
5/16 in/po (≈8 mm) Drill Bit
GHO 5/32 in/po (≈4 mm) Drill Bit (*)
5/16 in/po (≈8 mm) Masonry Drill Bit
CONTACT LIFETIME®CUSTOMER SERVICE:
Call: 1-800-225-3865
7:00 am–5:00 pm (Monday–Friday) MST
and 9:00 am–1:00 pm Saturday MST
(English, French, Spanish)
Live Chat: www.lifetime.com/customerservice
(click on “LIVE CHAT” tab)
For customer service in the United Kingdom and mainland europe:
Email: [email protected]
QUESTIONS?
MODEL# AND PRODUCT ID (both are needed when contacting us)
Model Number: 60387
Product ID:
Pour le français, voir la page 2. Para el español, ver la página 3.
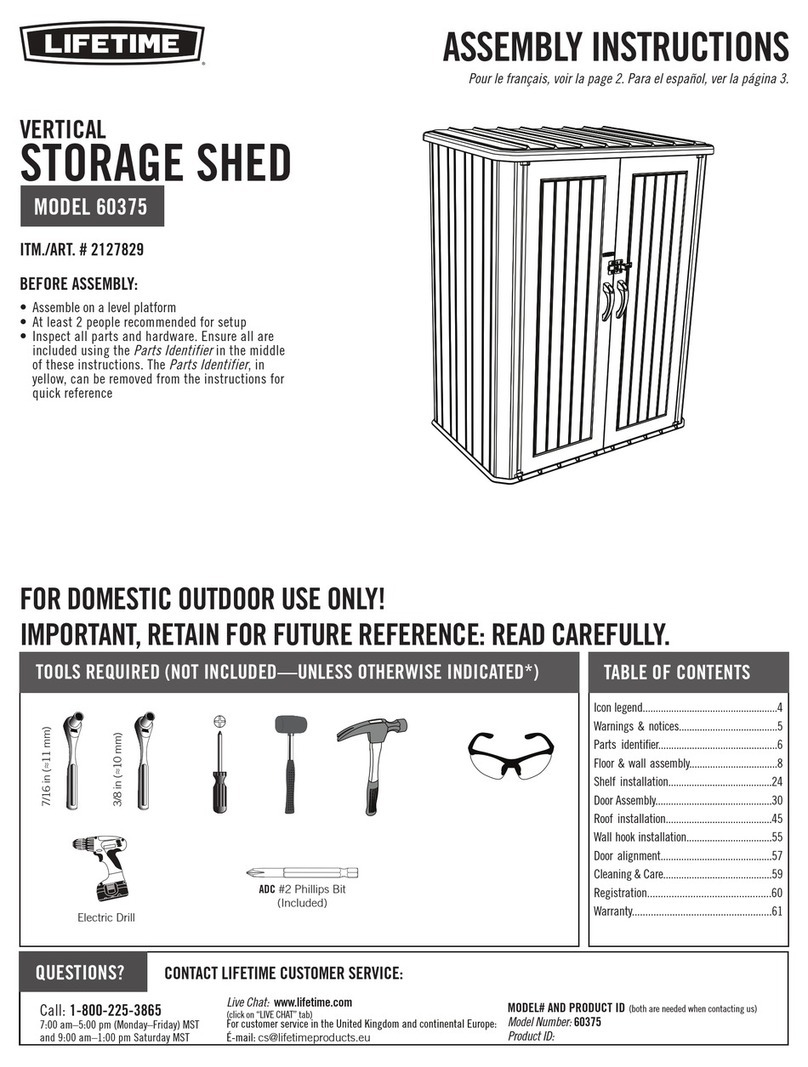
ASSEMBLY INSTRUCTIONS
OUTSIDE
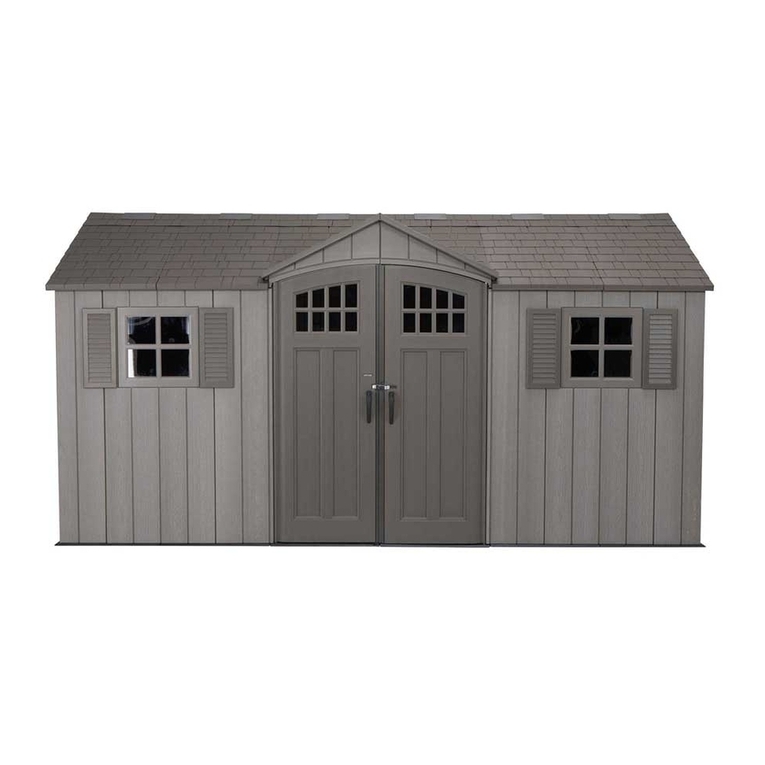
SHED
MODEL 60387
ITM./ART. 1572126
BEFORE ASSEMBLY:
• Assemble on a level platform
• At least 3 people recommended for setup
• Inspect all parts and hardware. Ensure all are
included using the
Parts Identifier
in the middle
of these instructions. The
Parts Identifier
, in
yellow, can be removed from the instructions for
quick reference
Icon Legend..................................................4
Warnings & Notices......................................5
Platform Construction...................................6
Door Assembly.............................................11
Floor Assembly............................................26
Wall Assembly.............................................29
Transom & Gable Assembly........................35
Shelving Installation...................................49
Parts Identifier...........................................i–iv
Roof Assembly............................................52
Wall Hook Installation................................84
Door Alignment.........................................86
Shed Anchoring.........................................88
Cleaning & Care.......................................94
Registration............................................95
Warranty.................................................96
FOR OUTDOOR DOMESTIC USE ONLY!
IMPORTANT, RETAIN FOR FUTURE REFERENCE: READ CAREFULLY
ADC (x1)*
AIW (x1)*
3/8 in/po
(≈10 mm)
Scan the code, or visit go.lifetime.com/60387-fullassembly
WATCH THE HOW-TO ON YOUTUBE
YouTube®and the YouTube logo are trademarks of Google, LLC.
2
CONTACTER LES SERVICES À LA CLIENTÈLE LIFETIME®:
Composer le 1-800-225-3865
Du lundi au vendredi 7 h – 17 h (HNR)
et samedi 9 h – 13 h (HNR)
(anglais, français, espagnol)
Chat en direct: www.lifetime.com/customerservice
(cliquer sur la languette « LIVE CHAT »)
Pour les services à la clientèle au Royaume-Uni et sur le continent européen :
Courriel : [email protected]
QUESTIONS ?
N° DE MODÈLE ET RÉFÉRENCE DU PRODUIT
(il faut avoir les deux lors de nous contacter)
N° de modèle : 60387
Référence du produit :
ITM./ART. 1572126
AVANT L’ASSEMBLAGE :
• Assembler sur une plate-forme nivelée
• Nous recommandons, au moins, 3 adultes pour
l’assemblage
• Examiner toutes les pieces et quincaillerie. Vérifier
qu’elles sont incluses en utilisant l’
Identificateur
de pièces
au milieu de ces instructions. Il est posssible
enlever l’
Identificateur de pièces
, en jaune, des
instructions pour référence rapide
For English, see page 1. Para el español, ver la página 3.
INSTRUCTIONS D’ASSEMBLAGE
MODÈLE n° 60387
OUTILS REQUIS (NON INCLUS — SAUF INDICATION CONTRAIRE*) SOMMAIRE
5/16 po (≈8 mm) Foret
5/16 po (≈8 mm) Foret à maçonnerie
ABRI
EXTÉRIEUR
GHO 5/32 po (≈4 mm) Foret (*)
POUR USAGE DOMESTIQUE EN EXTÉRIEURS SEULEMENT !
IMPORTANT, À CONSERVER POUR DE FUTURS BESOINS DE RÉFÉRENCE :
À LIRE SOIGNEUSEMENT
7/16 po (≈11 mm)
3/8 po (≈10 mm)
Légende des icônes......................................4
Avertissements et avis.................................5
Assemblage de la plate-forme.....................6
Assemblage des portes..............................11
Assemblage du plancher............................26
Assemblage des murs................................29
Assemblage de l’imposte et des pignons...35
Installation du rayonnage..........................49
Identificateur de pièces............................i–iv
Assemblage du toit....................................52
Installation des crochets muraux...............84
Alignement des portes..............................86
L’ancrage de l’abri.....................................88
Nettoyage et entretien...............................94
Enregistrement.........................................95
Garantie....................................................96
ADC (x1)*
AIW (x1)*
3/8 po
(≈10 mm)
Scanner le code, ou visiter go.lifetime.com/60387-fullassembly
REGARDER LA VIDÉO SUR YOUTUBE
YouTube®et le logotype YouTube sont des marques déposées de Google, LLC.
3
PONERSE EN CONTACTO CON LOS SERVICIOS DE CLIENTES LIFETIME®:
Marcar : 1-800-225-3865
De lunes a viernes 7:00 h–17:00 h (MST)
y sábado 9:00 h–13:00 h (MST)
(inglés, francés, español)
Chat en vivo: www.lifetime.com/customerservice
(cliquear en la lengüeta «LIVE CHAT»)
Para nuestros servicios a clientes en el Reino Unido y el contiente europeen:
Correo electrónico: [email protected]
¿PREGUNTAS?
MODEL E ID DEL PRODUCTO
(se necesitan los dos al contactarnos)
Número de modelo: 60387
ID del producto:
ITM./ART. 1572126
ANTES DE ENSAMBLAR:
• Ensamblar sobre una plataforma nivelada
• Recomendamos, al menos, 3 adultos para el
ensamblaje
• Inspeccionar todas las piezas y el herraje. Verificar que
todos están incluidos usando el
Identificador de piezas
en el medio de estas instrucciones. Se puede quitar el
Identificador de piezas
, en amarillo, de las instrucciones
para referencia rápida
For English, see page 1. Pour le français, voir la page 2.
INSTRUCCIONES DE ENSAMBLAJE
CASETA
EXTERIOR
INSTRUMENTAL REQUERIDO (NO INCLUIDO, SALVO INDICACIÓN CONTRARIA*) ÍNDICE
5/16 in (≈8 mm) Broca
5/16 in (≈8 mm) Broca de albañilería
MODELO n° 60387
GHO 5/32 in (≈4 mm) Broca (*)
¡SÓLO PARA EL USO DOMÉSTICO EN EXTERIORES!
IMPORTANTE: CONSERVE PARA FUTURA REFERENCIA. LEA CUIDADOSAMENTE
Leyenda de íconos..................................................4
Advertencias y avisos............................................5
Ensamblaje de la plataforma...............................6
Ensamblaje de las puertas.................................11
Ensamblaje del piso............................................26
Ensamblaje de los muros....................................29
Ensamblaje del travesaño y de las fachadas...35
Instalación de la estantería................................49
Identificador de piezas.......................................i–iv
Ensamblaje del tejado.........................................52
Instalación de los ganchos murales..................84
Alineación de la puertas...................................86
Anclaje de la caseta...........................................88
Limpieza y cuidado............................................94
Registro................................................................95
Garantía...............................................................96
7/16 in (≈11 mm)
3/8 in (≈10 mm)
ADC (x1)*
AIW (x1)*
3/8 in
(≈10 mm)
Escanear el código, o visitar go.lifetime.com/60387-fullassembly
MIRAR EL VIDEO EN YOUTUBE
YouTube®y el logotipo YouTube son marcas registradas de Google, LLC.
4
• Indicates the parts/no parts required for a section.
• Indique les pièces à utiliser/qu’aucone pièce n’est requise pour une section.
• Indica las piezas que se usarán/que no necesitan en una sección.
• Indicates special heed should be taken when reading.
• Indique qu’une attention spéciale doit être portée à la lecture.
• Indica que uno debe prestar atención al leer.
• Indicates the hardware to be used for a section.
• Indique la quincaillerie à utiliser pour une section.
• Indica los artículos de ferretería que se usarán para una sección.
• Indicates the tools to be used for a section.
• Indique les outils à utiliser pour une section.
• Indica las herramientas que se utilizarán para una sección.
• Indicates no hardware required for a specific page or section.
• Indique qu’aucun matériel n’est requis pour une page précise.
• Indica que no se necesitan los artículos de ferretería para una página específica.
• Indicates to use/not use an electric drill for a specific step.
• Indique quand utiliser une/que ne pas utiliser de perceuse électrique pour une étape précise.
• Indica la utilización de/que no utilizar un taladro eléctrico para un paso específico.
ICON LEGEND / LÉGENDE DES ICÔNES / SIGNIFICADO DE LOS ÍCONOS
• These nuts are centerlock nuts. They are designed to be tight; therefore, they will be harder to tighten. Tighten until flush
with the metal or plastic.
• Ces écrous sont des écrous de blocage central. Ils sont conçus pour être serrés; de ce fait, ils seront plus difficiles à
resserrer. Serrer jusqu’à ce qu’ils soient au ras du métal ou du plastique.
• Estas tuercas son tuercas de bloqueo central. Están diseñadas para estar apretadas; por lo tanto, serán más difíciles de
apretar. Apriételas hasta que estén al ras del metal o plástico.
1223394 2/17/2022
5
English:
•Failure to follow these warnings may result in serious injury or property damage and will void warranty.
• To ensure safety, do not attempt to assemble this product without following the instructions carefully.
• Consult all local building codes to verify if the shed requires a building permit.
• Verify the foundation is completely level before assembling the shed.
• Be aware that plastic pieces can be damaged by overtightening the screws. To avoid damage, we strongly recommend
the use of a drill with a low torque setting. A #2 Phillips screwdriver may also be used.
• Three capable adults are required for assembly.
• All who participate in the assembly process should wear safety glasses throughout the assembly.
• If using a ladder during assembly, use extreme caution.
• In heavy snowfall areas, we recommend removing snow from the roof. Remove the snow from the roof when the
depth of snow equals the length of your hand.
• Do not use or store hot objects near the product.
• Proper and complete assembly are essential to reduce the risk of accident or injury.
• When drilling through metal, beware of burrs, shavings and other sharp edges.
• During and after assembly, do not slide or lift the shed by pushing up on the roof. Move the shed by pushing on the
corner panels only.
• We strongly recommend anchoring your shed when it is finished. The last section, Shed Anchoring, in this manual shows
the hardware you will need to complete the anchoring. You can find the hardware at your local hardware store.
• Most injuries are caused by misuse and/or not following instructions. Use caution when using this product.
Français :
• Ne pas suivre ces avertissements peut entraîner des blessures graves ou des dommages à la propriété et annulera la garantie.
• Afin d’assurer la sécurité, ne pas tenter d’assembler ce produit sans suivre attentivement les instructions.
• Consulter tous les codes du bâtiment afin de vérifier si l’abri nécessite un permis de construire.
• Vérifier que la fondation est complètement à niveau avant l’assemblage de l’abri.
• Ne pas oublier que les pièces de plastique peuvent être endommagées en serrant trop les vis. Afin d’éviter les
dommages, nous recommandons fortement l’utilisation d’une perceuse à faible couple. Un tournevis cruciforme nº 2
peut aussi être utilisé.
• Trois adultes en bonne condition physique sont nécessaires pour l’assemblage.
• Tout ceux qui participent au processus de l’assemblage doivent porter des lunettes de sécurité tout au long de
l’assemblage.
• Si une échelle est utilisée pour l’assemblage, il faut être extrêmement prudent.
• Dans les zones de fortes tombées de neige, il est recommandé de dégager le toit. Enlever la neige du toit quand la
profondeur est égale à la longueur de la main.
• Ne pas utiliser ou entreposer des objets très chauds près de ce produit.
• Un bon assemblage complet est nécessaire pour réduire le risque d’accident ou de blessure.
• En perçant le métal, faire attention aux bavures, copeaux et autre bords aiguisés.
• Pendant et après l’assemblage, ne pas faire glisser ou soulever l’abri en poussant le toit vers le haut. Déplacer l’abri en
poussant les panneaux muraux angulaires seulement.
• Il est fortement recommandé d’ancrer l’abri lorsque l’assemblage est terminé. La dernière section, Ancrage de l’abri, de ce
manuel indique les matériaux nécessaires pour l’ancrage. Les matériaux se trouvent dans la quincaillerie locale.
• La majorité des blessures sont causées par une mauvaise utilisation et/ou le non suivi des instructions. Étre prudent en utilisant ce produit.
Español:
• No seguir estas advertencias puede resultar en lesiones graves o daños a la propiedad y anulará la garantía.
• A fin de garantizar la seguridad, no intentar ensamblar este producto sin seguir cuidadosamente las instrucciones.
• Consultar todos los códigos de construcción locales para verificar si la casetao requiere un permiso de construcción.
• Verificar que el concreto esté nivelado completamente antes de ensamblar la caseta.
• Tener en cuenta que las piezas de plástico pueden dañarse si los tornillos se aprietan de más. A fin de evitar daños, lo
exhortamos a que use un taladro con función de torque bajo. También puede usarse un desatornillador Phillips no. 2.
• Se necesitan tres adultos para el ensamble.
• Todos los que participen en el proceso de ensamble debe usar anteojos de seguridad durante todo el ensamble.
• Si se usa una escalera durante el ensamblado, es preciso tener cuidado.
• En áreas de nevadas fuertes, recomendamos retirar la nieve del techo. Quitar la nieve del tejado cuando la
profundidad de ella es igual a la longitud de la mano.
• No usar ni guardar objetos calientes cerca del producto.
• El ensamblaje correcto y completo son esenciales para reducir el riesgo de accidente o lesión.
• Al perforar metal, tenga cuidado las rebabas, virutas y otros bordes afilados.
• Durante y después del ensamblaje, no deslizar ni levantar la caseta para empujar en el tejado. Mover la caseta para
empujar los paneles murales angulares solamente.
• Lo exhortamos a anclar la caseta al terminar el ensamble. La última sección, Anclaje de la caseta, en este manual muestra
el herraje necesaria para terminar el anclaje. Se encuentra el herraje en la ferretería local.
• La mayoría de las lesiones suceden a causa del mal uso y/o por no seguir las instrucciones. Tener precaución al usar este producto.
WARNINGS & NOTICES / AVERTISSEMENTS ET AVIS / ADVERTENCIAS Y AVISOS
6
PLATFORM CONSTRUCTION / CONSTRUCTION DE LA PLATE-FORME / CONSTRUCCIÓN DE LA
PLATAFORMA
1
• You must provide a platform on which to assemble your shed. Proper building permit documentation may be
required in your neighborhood. Consult all local building codes prior to assembling the shed. Before beginning
assembly, you must pour or construct a platform. There are two types:
• Concrete
• Wood Frame
Select the type, but know the surface must be leveled and flat before installation. If the surface is not properly leveled and
flat, the shed will not assemble correctly. Proper surface leveling will save you time in the long run, so please do not ignore
this step. We recommend a Concrete platform. It will be the most durable and long-lasting choice. The platform you choose must be built above
ground in order to avoid water pooling inside the shed. All lumber must be rated for outdoor use!
• Il faut construire une plate-forme sur laquelle vous devez assembler votre abri. Il est possible que votre quartier
exige une documentation visant les permis de construire. Consultez tous les codes du bâtiment locaux, ainsi
que les décrets des villes et comtés, pour vérifier que la construction de l’abri extérieur n’exige pas un permis de
construire. Avant de commencer l’assemblage, il faut couler ou construire une plate-forme. Il y à deux styles :
• Béton
• Cadre à bois
Sélectionnez le style, mais sachez que la surface d’installation doit être de niveau et plate. Si la surface n’est pas
correctement de niveau et plate, l’assemblage de l’abri ne se fera pas correctement. Vous gagnerez du temps sur le long
terme grâce à une surface bien de niveau, ne négligez donc pas cette étape. Nous recommandons une plate-forme en Béton.
Ce choix sera le plus durable. La plate-forme que vous choisissez doit être construite au-dessus du sol afin d’éviter l’accumulation d’eau à
l’intérieur de l’abri. Tous le bois d’oeuvre doit être approuvé pour l’usage à l’extérieur !
• Es preciso construir una plataforma sobre la cual usted debe ensamblar su caseta. Puede suceder que en su
vecindario se requiera la documentación apropiada de un permiso de construcción. Consulte todos los códigos
locales de construcción y los reglamentos de la ciudad y el municipio para asegurarse de que la construcción de la
caseta no requiere un permiso de construcción. Antes de comenzar el ensamblaje, es necesario verter o construir
una plataforma. Hay dos clases:
• Concreto
• Armazón de madera
Seleccione la clase, mas sepa que la superficie debe estar nivelada y plana antes de comenzar el armado. Si la superficie
no está nivelada y plana de manera adecuada, el caseta no podrá armarse correctamente. La nivelación de la superficie le
ahorrará tiempo de trabajo, por lo tanto, le pedimos que no ignore este paso. Recomendamos una plataforma hecho de concreto.
Será la elección más perdurable. La plataforma debe ser construida arriba del suelo para evitar el aflujo de agua dentro de la caseta. ¡Toda la
madera debe estar clasificada para el uso externo!
7
XSECTION 1 (CONTINUED) / SECTION 1 (SUITE) / SECCIÓN 1 (CONTINUACIÓN)
1 yd3(0,77 m3)
1
!
CONCRETE REQUIRED / BÉTON REQUIS / CONCRETO REQUERIDO
CONCRETE PLATFORM / PLATE-FORME EN BÉTON / PLATAFORMA DE CONCRETO
1.1
• The concrete should be approximately 4” (10,2 cm) thick. The actual dimensions of the shed, at its widest
and longest points, are 96” x 60” (2,44 m x 1,52 m). Ensure you select a site that will accommodate these
measurements. The floor dimensions are a bit smaller than those of the roof; therefore, you will need to builld a level surface of
93 1/2” x 58” (2,38 m 1,47 m).
• Le béton doit être un épaisseur de 10,2 cm (4”). Les dimensions réelles de votre abri, aux points les plus large et
long, sont 2,44 m x 1,52 m (96” x 60»). Assurez-vous de sélectionner un site qui accommodera ces dimensions.
Les dimensions du plancher de votre abri sont plus petites que le toit; ensuite, il faut créer une surface horizontal de 2,38 m x 1,47
m (93 1/2” x 58”).
• El concreto debe tener, por lo menos, 10,2 cm (4”) de espesor. Las dimensiones reales de la caseta, a sus
puntos más ancho y largo, son 2,44 m x 1,52 m (96” x 60”). Asegúrese de seleccionar un sitio que acomodará
estas medidas. Las dimensiones del piso de la caseta son más pequeñas que el tejado; entonces, necesitará crear una
superficie nivel de 2,38 m 1,47 m (93 1/2” x 58”).
4” (10,2 cm)
96” (2,44 m)
60” (1,52 m)
58” (1,47 m)
93 1/2” (2,38 m)
8
XSECTION 1 (CONTINUED) / SECTION 1 (SUITE) / SECCIÓN 1 (CONTINUACIÓN) 1
WOOD PLATFORM / PLATE-FORME EN BOIS / PLATAFORMA DE MADERA
1.2
WOOD REQUIRED / BOIS REQUIS / MADERA REQUERIDA
RIDA
58” (1,47 m)
93 1/2” (2,38 m)
60” (1,52 m)
96” (2,44 m)
• All lumber must be rated for outdoor use! The actual dimensions of the shed, at its widest and longest points, are 96” x
60” (2,44 m x 1,52 m). Ensure you select a site that will accommodate these measurements. The floor dimensions are
a bit smaller than those of the roof; therefore, you will need to builld a level surface of 93 1/2” x 58” (2,38 m 1,47 m).
• Tous le bois d’oeuvre doit être approuvé pour l’usage à l’extérieur ! Les dimensions réelles de votre abri, aux points les
plus large et long, sont 2,44 m x 1,52 m (96" x 60". Assurez-vous de sélectionner un site qui accommodera ces
dimensions. Les dimensions du plancher de votre abri sont plus petites que le toit; ensuite, il faut créer une surface horizontal de
2,38 m x 1,47 m (93 1/2" x 58")
• ¡Toda la madera debe estar clasificada para el uso externo! Las dimensiones reales de la caseta, a sus puntos más ancho
y largo, son 2,44 m x 1,52 m (96" x 60"). Asegúrese de seleccionar un sito que acomodará estas medidas. Las
dimensiones del piso de la caseta son más pequeñas que el tejado; entonces, necesitará crear una superfi cie nivel de 2,38 m x 1,47
m (93 1/2" x 58")
9
XSECTION 1 (CONTINUED) / SECTION 1 (SUITE) / SECCIÓN 1 (CONTINUACIÓN)
x8
1
!
TOOLS, PARTS, AND HARDWARE REQUIRED / OUTILS, PIÈCES, ET QUINCAILLERIE REQUIS/ INSTRUMENTAL, PIEZAS, Y ACCESORIOS
REQUERIDOS
• Ensure all lumber is treated and approved for outdoor use. Build frame to 93 1/2” x 58” (2,38 m x 1,47 m)
(outside dimensions). You can also use the plywood as a flat surface when building this frame.
• Vérifiez que votre bois d’œuvre à été traité et approuvé pour l’utilisation à l’extérieur. Contruisez un cadre de
2,38 m x 1,47 m (93 1/2” x 58”) (dimensions extérieures). Vous pouvez aussi utiliser le contreplaqué comme une surface
plate pendant l’assemblage de ce cadre.
• Asegure que use madera tratada y aprobada para el uso externo. Construye el armazón a 2,38 m x 1,47
m (93 1/2” x 58”) (dimensiones exteriores). Se puede también usar el contrachapado
como una superficie plana al ensemblar este armazón.
• To ensure studs are in the correct location for nailing plywood in the next step, start measuring from the corner 16”
(40,1 cm), and then measure from center to center.
• Pour être sûr d’avoir assez de montant pour clouer le contreplaqué dans le prochaine étape, commencez à mesurer
à partir de cette montant 40,1 cm (16”) vers le centre du deuxième montant. Ensuite, mesurez de centre à centre
pour les montants restants.
• Para asegurarse que los montantes están en las ubicaciones correctas para el contrachapado en el paso siguiente,
comience a medir desde el borde del montante hasta el centro del próximo montante 40,1 cm (16”). Luego, tome
la medida de centro a centro en los montantes restantes.
WOOD PLATFORM / PLATE-FORME EN BOIS/ PLATAFORMA DE MADERA
1.2.1
1.2.2
93 1/2” (2,38 m)
58” (1,47 m)
55” (1,38 m)
x20
16” (40,1 cm) 16” (40,1 cm)
16” (40,1 cm) 16” (40,1 cm) 16” (40,1 cm)
Start Here / Commencez ici /
Comence aquí
2” x 4” x 93 1/2” (5,1 cm x 10,2 cm x 2,38 m) (x2)
2” x 4” x 55” (5,1 cm x 10,2 cm x 1,38 m) (x7)
16d 3” (16 mm diam. x 7,62 cm) (x28)
10
XSECTION 1 (CONTINUED) / SECTION 1 (SUITE) / SECCIÓN 1 (CONTINUACIÓN) 1
!
• Drainage Holes
• Trous de drainage
• Agujeros para el
drenaje
TOOLS, PARTS, AND HARDWARE REQUIRED / OUTILS, PIÈCES, ET QUINCAILLERIE REQUIS / INSTRUMENTAL, PIEZAS, Y ACCESORIOS
REQUERIDOS
!
• Square the frame, measuring from corner to corner. Measurement A & B should be about the same length.
• Carrez le cadre en mesurant d’angle à angle. La mesure « A » et « B » doivent être à peu près la même longeur.
• Cuadre el armazón midiendo de esquina a esquina. La medida «A» y «B» deben ser approximadamente el mismo largo.
• Using nails, fasten the plywood to the frame. Then, drill 5/16” holes for drainage.
• En utilisant des clous, attachez bien le contreplaqué au cadre. Ensuite, percez des trous de 8 mm pour le
drainage.
• Usando unos clavos, sujete el contrachapado al armazón. Entonces, taladre agujeros de 8 mm para el
drenaje.
1.2.3
1.2.4
A
B
10” x 93 1/2” x 3/4”
(25,4 cm x 2,38 m x 19,1 mm)
48” x 93 1/2” x 3/4”
(1,22 cm x 2,38 m x 19,1 mm)
x42
x18!
8d 1 1/2” (8 mm diam. x 3,81 cm) (x42)
48” x 93 1/2” x 3/4”
(1,22 m x 2,38 m x 19,1 mm) (x1)
10” x 93 1/2” x 3/4”
(25,4 cm x 2,38 m x 19,1 mm) (x1)
11
BDJ (x1)
EOY (x1)
AAB (x2)
AEB (x2)
AEE (x3)
ACH (x2)
FXA
Metal Parts / Pièces en métal / Piezas de metal
Hardware Bags / Sacs de quincaillerie / Bolsas de herraje
Plastic Parts / Pièces en plastique / Piezas de plástico
PARTS REQUIRED / PIÈCES REQUISES / PIEZAS REQUERIDAS
HARDWARE REQUIRED / QUINCAILLERIE REQUISE / HERRAJE REQUERIDO
BYR (x1)
DHN (x1)
FVW (x1)
EDW (x1)
TOOLS REQUIRED (NOT INCLUDED—UNLESS INDICATED OTHERWISE*) / OUTILS REQUIS (NON INCLUS — SAUF
INDICATION CONTRAIRE*) / INSTRUMENTAL REQUERIDO (NO INCLUIDO, SALVO INDICACIÓN CONTRARIA*)
ADC (x1)*
7/16 in/po
(≈11 mm)
74 5/8 in/po (≈1,90 m)
BBH (x1) ENP (x2)
ENN (x1) ENM (x1)
Upper / Supérieur / Superior Lower / Inférieur /Inferior
BYS (x1)
BYZ (x2)
ADW (x1)
ENO (x4)
DHL ADZ (x14) EPH (x1)
LEFT DOOR ASSEMBLY / ASSEMBLAGE DE LA PORTE GAUCHE / ENSAMBLAJE DE LA PUERTA IZQUIERDA
2
GHO (x1)
ADC (x1)
12
TOOLS AND HARDWARE REQUIRED / OUTILS ET QUINCAILLERIE REQUIS / INSTRUMENTAL Y HERRAJE REQUERIDOS
XSECTION 2 (CONTINUED) / SECTION 2 (SUITE) / SECCIÓN 2 (CONTINUACIÓN)
EDW
BBH
BDJ
• Align these holes
• Aligner ces trous
• Alinear estos agujeros
• Holes
• Trous
• Agujeros
• Slide a square tube (EDW) into the square hole at the bottom of the left door (BDJ) until about 6" (≈15 cm) of the tube
hang out of the hole.
• Faire glisser un tube carré (EDW) dans le trou carré au bord inférieur de la porte gauche (BDJ) jusqu’à ce que environ
≈15 cm (6 po) étendent du trou.
• Deslizar un tubo cuadrado (EDW) en el orificio cuadrado a la parte inferior de la puerta izquierda (BDJ) hasta que unos
≈15 cm (6 in) cuelguen del agujero.
• Insert the end cap (BBH) into the end of the square tube and continue inserting the tube until it is flush with the
bottom of the door. Align the two holes in the tube with the two holes in the door. If necessary, gently tap with a
rubber mallet.
• Insérer un capuchon (BBH) dans l’extrémité du tube carré et continuer à insérer le
tube jusqu’à ce qu’il soit à ras del borde inférieur de la porte. Aligner les deux
trous dans le tube avec les deux trous dans la porte. Si besoin, frapper
soigneusement avec un maillet en caoutchouc.
• Insertar un tapón (BBH) en el extremo del tubo cuadrado y
continuar a insertar el tubo hasta que esté al ras del borde
inferior de la puerta. Alinear los dos agujeros en el tube
con ellos en la puerta. Si es necesario, golpear
cuidadosamente con un mazo de goma.
2.1
2.2
BBH (x1)
http://go.Lifetime.com/compactmodernshed-section2
• In case of troubles with this section, scan the QR code below to view a video on its assembly.
• En cas d’avoir des problèmes avec cette section, scanner le code QR en dessous pour voir un vidéo de l’assemblage.
• En caso de tener problemas con esta sección, escanear el código QR debajo para ver un video del ensamblaje.
13
TOOLS AND HARDWARE REQUIRED / OUTILS ET QUINCAILLERIE REQUIS / INSTRUMENTAL Y HERRAJE REQUERIDOS
XSECTION 2 (CONTINUED) / SECTION 2 (SUITE) / SECCIÓN 2 (CONTINUACIÓN)
• Attach the door latch bracket (EOY) to the door using the hardware indicated. Only hand-tighten for now.
• Attacher le support du loquet de la porte (EOY) à la porte à l’aide de la quincaillerie indiquée. Serrer à la main en ce
moment seulement.
• Fijar el soporte del cerrojo de la puerte (EOY) a la puerta usando el herraje indicado. Apretarlo sólo a mano en este
momento.
2.3
AAB
AEB
AAB
AEB
EOY
ACH ACH
EOY (x1)
AAB (x2) AEB (x2)
ACH (x2)
14
TOOLS AND HARDWARE REQUIRED / OUTILS ET QUINCAILLERIE REQUIS / INSTRUMENTAL Y HERRAJE REQUERIDOS
XSECTION 2 (CONTINUED) / SECTION 2 (SUITE) / SECCIÓN 2 (CONTINUACIÓN)
2.4 • Flip the door over. Secure the upper and lower latches (ENN and ENM) with a spacer (ENP) to the door using two (2)
screws (ENO) each. The spacers are labelled “UP” and “DOWN” for correct placement. The latches should move
freely. If not, loosen the screws a bit.
• Retournez la porte. Attachez les loquets supérieur et inférieur (ENN et ENM) avec une cale d’espacement (ENP) à la
porte à l’aide de deux (2)vis (ENO) pour chacun. Les cales d’espacement sont marquées «HAUT» et «BAS»
pour assurer un positionnement correct. Les loquets doivent pouvoir bouger librement. Si ce n’est pas le cas,
desserrez les vis un peu.
• Voltee la puerta. Asegure a la puerta los pestillos superior e inferior (ENN y ENM) con un espaciador (ENP) usando dos
(2) tornillos (ENO) para cada uno. Los espaciadores están etiquetados como “SUPERIOR” e “INFERIOR” para una
colocación correcta. Los pestillos deben moverse libremente. Si no es así, afloje un poco los tornillos.
ENP
ENO
ENO
ENO ENO
ENP
ENO (x4)
ENN(x1) ENM (x1)
Upper / Supérieur / Superior Lower / Inférieur /Inferior
ADC
ENM
ENN
ENP (x2)
15
TOOLS AND HARDWARE REQUIRED / OUTILS ET QUINCAILLERIE REQUIS / INSTRUMENTAL Y HERRAJE REQUERIDOS
XSECTION 2 (CONTINUED) / SECTION 2 (SUITE) / SECCIÓN 2 (CONTINUACIÓN)
2.5 • Attach the front and rear handle pieces (BYS and BYR) together. Secure the handle to the door using the hardware indicated.
• Attacher les parties avant et arrière de la poignée (BYS et BYR). Bien fixer la poignée à la porte à l’aide de la quincaillerie indiquée.
• Conectar las piezas delantera y trasera del picaporte (BYS yBYR). Fijar bien el picaporte a la puerta usando el herraje indicado.
BYS
BYR
BYZ (x2)
BYZ
BYZ
ADW
AEE
AEE
AEE
AEE (x3)
ADW (x1)
BYR (x1) BYS (x1)
16
TOOLS AND HARDWARE REQUIRED / OUTILS ET QUINCAILLERIE REQUIS / INSTRUMENTAL Y HERRAJE REQUERIDOS
XSECTION 2 (CONTINUED) / SECTION 2 (SUITE) / SECCIÓN 2 (CONTINUACIÓN)
2.6 • Slide a hinge tube (FVW) into the hole at the bottom of the door. If necessary, use a rubber mallet to gently tap the tube into
place. This tube has a hole at both ends.
• Faire glisser un tube de charnière (FVW) dans le trou au fond de la porte. Si besoin, employer un maillet en caoutchouc
pour taper le tube en place. Ce tube a une trou à chaque extrémité.
• Deslizar un tubo de bisagra (FVW) en el orificio al fondo de la puerta. Si es necesario, usar un mazo de goma para golpear
el tube en su lugar. Este tubo tiene una agujero a cada extremo.
FVW
• Holes
• Trous
• Agujeros
17
TOOLS AND HARDWARE REQUIRED / OUTILS ET QUINCAILLERIE REQUIS / INSTRUMENTAL Y HERRAJE REQUERIDOS
XSECTION 2 (CONTINUED) / SECTION 2 (SUITE) / SECCIÓN 2 (CONTINUACIÓN)
• There is a narrow groove (illustrated in black) running along the outside of the window on the back of each door.
Starting at the top, left corner of the groove in the left door, lay the butyl tape (EPH) into the groove. Do not worry about
getting the tape completely into the groove just yet—simply lay the tape over the groove. Do not press the tape into the groove. Do
not stretch the tape. Work your way downward (1) and, as you get to each corner, peel off the paper backing from the
tape you just laid (peel off backing at each corner). Go along the bottom (2) of the window. Curve your way upward
(3) and then along the top (4) of the window until you’re back where you started. Clip off the excess.
• Une rainure étroite (illustrée en noir) se trouve le long de l’extérieur de la fenêtre à l’arrière de chaque porte.
Partant du coin supérieur gauche de la rainure de la porte gauche, étendre de ruban de butyl (EPH) dans la rainure.
Ne pas s’inquiéter si le ruban n’est pas complètement dans la rainure en ce moment, ne faire que déposer le ruban sur la rainure.
Ne pas étirer le ruban. Ne pas pousser le ruban dans la rainure. Travailler vers le bas (1) et, en approchant chaque
courbe, retirer le papier protecteur du ruban qui à été étendé (retirer le papier protecteur a chaque courbe).
Étendre le ruban le long du bas (2) de la fenêtre. Courber vers le haut (3), puis le long du haut (4) de la fenêtre
jusqu’à ce qu’il soit au point de départ. Couper l’excédent.
• Hay una ranura angosta (ilustrada en negro) bordeando la ventana en la superficie posterior de cada puerta.
Comenzando desde arriba, en la esquina izquierda de la ranura en la puerta izquierda, aplicar de de cinta butílica
(EPH) en la ranura. Ne preocuparse por poner la cinta completamente en la ranura, mas solamente sobre la ranura. No presionar
la cinta dentro de la ranura. No estirar la línea. Seguir hacia abajo (1) y, al acercar cada ángulo, quitar el papel protector
de la cinta que apenas aplicó (quitar el papel protector a cada ángulo). Seguir a lo largo del borde inferior (2) de la
ventana. Curvearla hacia arriba (3) y, entonces, a lo largo del borde superior (4) de la ventana hasta estar al punto
de partida. Cortar el exceso.
Groove / Rainure / Ranura
EPH (x1)
12
3
4
2.7
18
TOOLS AND HARDWARE REQUIRED / OUTILS ET QUINCAILLERIE REQUIS / INSTRUMENTAL Y HERRAJE REQUERIDOS
XSECTION 2 (CONTINUED) / SECTION 2 (SUITE) / SECCIÓN 2 (CONTINUACIÓN)
ADZ (x14)
DHN
ADZ
ADZ ADZ
ADZ
ADZ
ADZ
ADZ
ADZ ADZ ADZ
ADZ ADZ ADZ ADZ
• Align the holes in the pane with those in the door, and gently set a window pane (DHN) down onto the Door.
• Aligner les trous dans le carreau avec ceux de la porte, et, avec douceur, mettre le carreau (DHN) sur la porte.
• Alinear los agujeros en la hoja con los de la puerta, y colocar ligeramente la hoja de ventana (DHN) en la puerta.
• Secure the pane to the door using fourteen (14) screws (ADZ).
• Fixer le carreau à la porte en utilisant quatorze (14) vis (ADZ).
• Fijar la hoja a la puerta usando catorce (14) tornillos (ADZ).
2.8
2.9
DHN
19
EOZ (x1)
FWZ
Hardware Bag / Sac de quincaillerie / Bolsa de herraje
HARDWARE REQUIRED / QUINCAILLERIE REQUISE / HERRAJE REQUERIDO
Metal Parts / Pièces en métal /Piezas de metal
Plastic Parts / Pièces en plastique / Piezas de plástico
PARTS REQUIRED / PIÈCES REQUISES / PIEZAS REQUERIDAS
BDK (x1)
BBH (x1)
AEE (x3)
EPA (x1)
AAB (x2) EPC (x2)
ACH (x2)
GHO (x1)*
TOOLS REQUIRED (NOT INCLUDED—UNLESS INDICATED OTHERWISE*) / OUTILS REQUIS (NON INCLUS — SAUF
INDICATION CONTRAIRE*) / INSTRUMENTAL REQUERIDO (NO INCLUIDO, SALVO INDICACIÓN CONTRARIA*)
BYZ (x2)
BBI (x1)
ADW (x1)
AEB (x2)
CXK (x2)
BYS (x1)BYR (x1)
FVW (x1)
74 5/8 in/po (≈1,90 m)
EDW (x1)
7/16 in/po
(≈11 mm)
3/8 in/po
(≈10 mm)
ADZ (x14)
DHL
EPH (x1)
DHN (x1)
RIGHT DOOR ASSEMBLY / ASSEMBLAGE DE LA PORTE DROITE / ENSAMBLAJE DE LA PUERTA DERECHA
3
CHK (x1)
20
TOOLS AND HARDWARE REQUIRED / OUTILS ET QUINCAILLERIE REQUIS / INSTRUMENTAL Y HERRAJE REQUERIDOS
XSECTION 3 (CONTINUED) / SECTION 3 (SUITE) / SECCIÓN 3 (CONTINUACIÓN)
3.1
3.2
BBH (x1)
BDK
EDW
BBH
• Slide a square tube (EDW) into the square hole at the bottom of the right door (BDK) until about 6" (≈15 cm) of the
tube hang out of the hole.
• Faire glisser un tube carré (EDW) dans le trou carré au bord inférieur de la porte droite (BDK) jusqu’à ce que environ
≈15 cm (6 po) étendent du trou.
• Deslizar un tubo cuadrado (EDW) en el orificio cuadrado a la parte inferior de la puerta derecha (BDK) hasta que unos
≈15 cm (6 in) cuelguen del agujero.
• Insert the end cap (BBH) into the end of the square tube and continue inserting the tube until it is flush with the
bottom of the door. Align the two holes in the tube with the two holes in the door. If necessary, gently tap with a
rubber mallet.
• Insérer un capuchon (BBH) dans l’extrémité du tube carré et continuer à insérer le tube jusqu’à ce qu’il soit à ras
del borde inférieur de la porte. Aligner les deux trous dans le tube avec les deux trous dans la porte. Si besoin,
frapper soigneusement avec un maillet en caoutchouc.
• Insertar un tapón (BBH) en el extremo del tubo cuadrado y continuar a insertar el tubo hasta que esté al ras del
borde inferior de la puerta. Alinear los dos agujeros en el tube con ellos en la puerta. Si es necesario, golpear
cuidadosamente con un mazo de goma.
• Align these holes
• Aligner ces trous
• Alinear estos agujeros
http://go.Lifetime.com/compactmodernshed-section3
• In case of troubles with this section, scan the QR code below to view a video on its assembly.
• En cas d’avoir des problèmes avec cette section, scanner le code QR en dessous pour voir un vidéo de l’assemblage.
• En caso de tener problemas con esta sección, escanear el código QR debajo para ver un video del ensamblaje.

This manual suits for next models

1

Other Lifetime Outdoor Storage manuals

Lifetime 6426 User manual

Lifetime

Lifetime 6426 User manual

Lifetime 60340 User manual

Lifetime

Lifetime 60340 User manual

Lifetime 6426 User manual

Lifetime

Lifetime 6426 User manual

Lifetime 60013 User manual

Lifetime

Lifetime 60013 User manual

Lifetime 60059 User manual

Lifetime

Lifetime 60059 User manual

Lifetime 60079 User manual

Lifetime

Lifetime 60079 User manual

Lifetime 60028 User manual

Lifetime

Lifetime 60028 User manual

Lifetime 60356 User manual

Lifetime

Lifetime 60356 User manual

Lifetime 60392 User manual

Lifetime

Lifetime 60392 User manual

Lifetime 60334 User manual

Lifetime

Lifetime 60334 User manual

Lifetime 60089 User manual

Lifetime

Lifetime 60089 User manual

Lifetime 125 User manual

Lifetime

Lifetime 125 User manual

Lifetime 60025 User manual

Lifetime

Lifetime 60025 User manual

Lifetime 60066 User manual

Lifetime

Lifetime 60066 User manual

Lifetime 60005 User manual

Lifetime

Lifetime 60005 User manual

Lifetime 60299 User manual

Lifetime

Lifetime 60299 User manual

Lifetime 6402 User manual

Lifetime

Lifetime 6402 User manual

Lifetime 60211 User manual

Lifetime

Lifetime 60211 User manual

Lifetime 60212 User manual

Lifetime

Lifetime 60212 User manual

Lifetime 60042 User manual

Lifetime

Lifetime 60042 User manual

Lifetime 60374 User manual

Lifetime

Lifetime 60374 User manual

Lifetime 60028 User manual

Lifetime

Lifetime 60028 User manual

Lifetime 60296 User manual

Lifetime

Lifetime 60296 User manual

Lifetime 60018 User manual

Lifetime

Lifetime 60018 User manual

Popular Outdoor Storage manuals by other brands

SPACEMAKER EL64 Assembly instructions

SPACEMAKER

SPACEMAKER EL64 Assembly instructions

Décor et Jardin Elite Assembly Notice

Décor et Jardin

Décor et Jardin Elite Assembly Notice

Playcore ultra site CH-R32AU manual

Playcore

Playcore ultra site CH-R32AU manual

Arrow NP101267 Owner's manual & assembly instructions

Arrow

Arrow NP101267 Owner's manual & assembly instructions

ABSCO SHEDS J30082SK Assembly instructions

ABSCO SHEDS

ABSCO SHEDS J30082SK Assembly instructions

Backyard Products GRILL SHACK Assembly manual

Backyard Products

Backyard Products GRILL SHACK Assembly manual

Naterial CONQUER manual

Naterial

Naterial CONQUER manual

Arrow ES1014 Owner's manual & assembly instructions

Arrow

Arrow ES1014 Owner's manual & assembly instructions

Duratuf Smart store SS1507 Assembly instructions

Duratuf

Duratuf Smart store SS1507 Assembly instructions

Arrow Storage Products SFA105AN Owner's manual & assembly guide

Arrow Storage Products

Arrow Storage Products SFA105AN Owner's manual & assembly guide

Duratuf Sentry Sheds SL1515 Assembly instructions

Duratuf

Duratuf Sentry Sheds SL1515 Assembly instructions

Alice's Garden CALAISIS manual

Alice's Garden

Alice's Garden CALAISIS manual

garofalo WOODY 200 user manual

garofalo

garofalo WOODY 200 user manual

Palram SanRemo 4x4.25 manual

Palram

Palram SanRemo 4x4.25 manual

Duratuf TUF LOCKER Assembly instructions

Duratuf

Duratuf TUF LOCKER Assembly instructions

EAST OAK DB23001 owner's manual

EAST OAK

EAST OAK DB23001 owner's manual

Biohort Alex Assembly manual

Biohort

Biohort Alex Assembly manual

Gardiun London instruction manual

Gardiun

Gardiun London instruction manual

manuals.online logo
manuals.online logoBrands
  • About & Mission
  • Contact us
  • Privacy Policy
  • Terms and Conditions

Copyright 2025 Manuals.Online. All Rights Reserved.