10
Lindab reserves the right to make changes without prior notice
2021-06-08
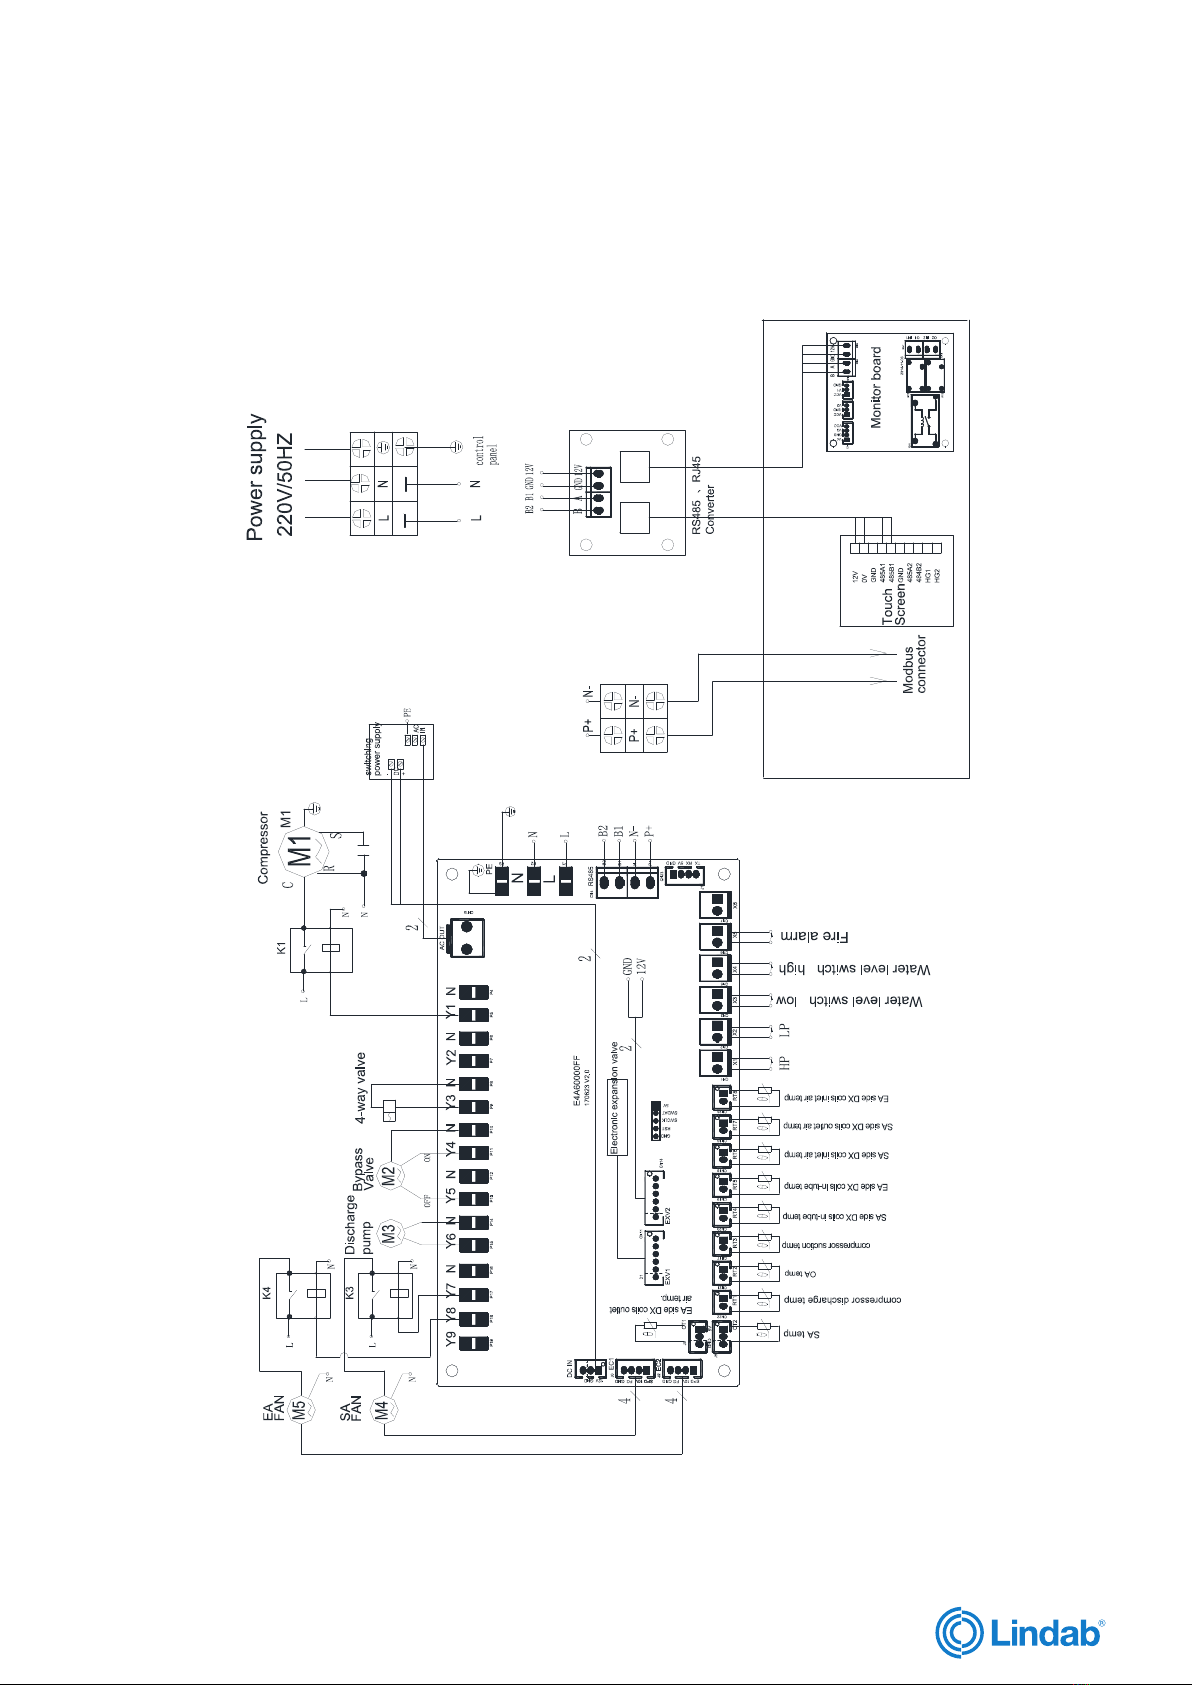
LinAir HPV
Power Cord Requirement
•It is a Class I appliance, be sure to make a reliable
grounding.
•The yellow-green wire is the grounding wire. It must
not be used for other purposes and cannot be cut. To
prevent the risk of electric shock do not use self-
tapping screws.
•Grounding resistance should be in line with the
national standard requirement of GB17790.
•User must provide a reliable grounding power supply.
Please do not connect grounding wire to places like
water pipes, gas canisters, drain outlets and other
unreliable places recognised by professionals.
•Set an appropriate indoor temperature. The indoor
temperature should not be set too high or too low.
The recommended temperature for cooling is
26-28deg.C, and 18-23deg.C for heating to make
most people feel comfortable.
•Windows and doors should be closed, otherwise, it
will affect the effectiveness of air conditioning.
•Equipment like TVs, radios etc. should be at least
one meter away from the machine, otherwise, they
will interfere with the image and make noise.
•The power of the machine should be shut down if it
is not used for a long time.
•To protect the machine, the power should be
connected for 24 hours before it is used.
•If it is shut down in winter, please clean the machine
and dry it. To protect from dust, please cover the
machine, open the outlet valve to drain out the water
in the heat exchanger and pipes, to prevent frosting.
It is recommended to inject anti-freeze into the pipes.
•Any windows should have curtains or shutters, to
avoid direct sunshine.
•Dry articles should not be put under the machine,
because when the ambient temperature is high or the
drainage is blocked, the machine may drip.
User Cautions
Specification 3 X 1.5 mm2
Model No. 60245 IEC57(YZW)
Grounding Requirements
1. If any abnormality is found (like a
scorching smell), shut down the power,
and contact Lindab, if use is continued
the machine may be damaged and
cause electric shock or fire,
maintenance can only be conducted by
a professional. The power should be
disconnected before touching the wiring
device
2. The machine can be cleaned only when
the power is disconnected, otherwise, it
may cause damage or injury. Don’t
wash the machine with water, or it may
cause electric shock, Stand on a firm
platform when cleaning ceiling air
conditioner