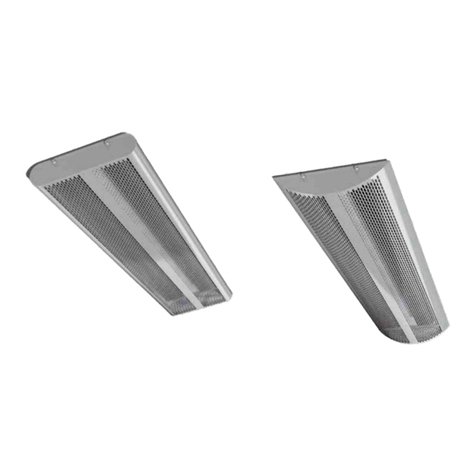
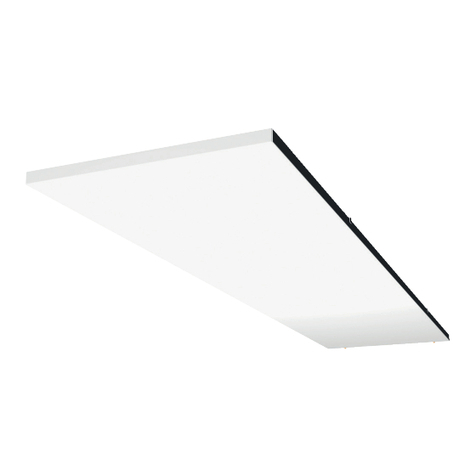
Lindab Atrium Plana 40 User manual

lindab | we simplify construction
Atrium Plana
Service & maintenance

2We reserve the right to make changes
2013-05-29
We reserve the right to make changes
2013-05-29
lindab | we simplify construction
Service & maintenance Atrium Plana
1.0 Installation
1.1 Product description
Lindab’s heating and cooling panel Atrium Plana can be mounted almost anywhere
in the ceiling or on the wall and primarily provide heating/cooling by radiation. The
radiation share for the panels exceeds 50% to 60%, compared to approx. 5% for
conventional finned products. Since the air velocities can be kept low, this result in a
draught-free environment. Radiant heating can also be used with high ceiling heights
since the radiant heating, despite the high placement, heats the underlying surfaces
directly without any losses to the air.
1.2 Handling
The panel must be handled with care, ensuring that the panel does not sustain dents,
scratches or bends during installation.
Always seek to lift the panel at multiple points.
– Do not lift in pipes
– Do not lift in edges
– Each panel is equipped with protective film to avoid any damage during transport
and handling at building site. The film needs to be removed before commissioning
the products.
1.3 Mounting instruction
– Please visit www.lindqst.com
• Select Documentation Finder
• Select “Atrium Plana”
• Select “Mounting”
1.4 Connection description water
Flow indication arrows are shown on the inlet and return pipes in order to assist the
installer. If the panel has been ordered with integrated valves, a special direction
of the flow must be upheld to ensure correct flow through the thermostatic valve. If
the panel has been delivered without integrated valves, the flow can be reversed,
depending on the location of the retrofitted valve. Please note the flow direction indi-
cator on the valve to insure correct installation in relation to the desired flow.

3
We reserve the right to make changes
2013-05-29
lindab | we simplify construction
Service & maintenance Atrium Plana
1.4.1 Push-on fittings
– Please ensure that all pipes and fittings are undamaged, as even small dents and
scratches potentially pose a risk of leakage in the system. Always remember to do
a pressure test after assembly of the pipe work.
– Both flow and return pipe is covered by a plastic or rubber protection cover, which
should be removed before installation.
After removing the protection cover, make sure that the pipe is intact and undamaged,
especially at the pipe end. Crocked or in other ways imperfect pipe ends will result
in leaks. Deburr the pipe on the inside and the outside, using a deburring tool before
installation
– Mount a push-on fitting to the pipe. Make sure to press the fitting all the way onto
the pipe. Consult the installation guide for the specific fitting for further details on
proper installation.
Push-on fitting

4We reserve the right to make changes
2013-05-29
We reserve the right to make changes
2013-05-29
lindab | we simplify construction
Service & maintenance Atrium Plana
Push-on valve
Notice! The connection pipes are internally soft-welded why it’s not allowed to solder
the panel to the pipes.
1.4.2 Compression fitting
– Please ensure that all pipes and fittings are undamaged, as even small dents and
scratches potentially pose a risk of leakage in the system. Always remember to do
a pressure test after assembly of the pipe work.
– While mounting a compression fitting, the pipe will be exposed to a big amount
of force, creating a risk of crushing the pipe. To ensure that the pipe won’t be
crushed when mounting the compression fitting, a copper insert should be
inserted into the pipe.
– Both flow and return pipe is covered by a plastic or rubber protection cover during
transport, which must be removed before installation.
– After removing the protection cover, make sure that the pipe is intact and undam-
aged, especially at the pipe end. Crocked or in other ways imperfect pipe ends will
result in leaks. Deburr the pipe on the inside and the outside, using a deburring
tool before installation

5
We reserve the right to make changes
2013-05-29
lindab | we simplify construction
Service & maintenance Atrium Plana
– The copper insert should be placed inside the pipe on the panel. Always support
the copper pipe coil when inserting the copper insert into position.
– Mount a compression coupling and/or a valve to the pipe. Don’t stress the nut too
much, since this may crush the pipe.
Notice! The connection pipes are internally soft-welded why it’s not allowed to solder
the panel to the pipes.
1.4.3 Flex hoses
Our flexible hoses can be used with both compression and Tectite fitting. We recom-
mend using Tectite fittings, for easier and faster mounting.
– Please ensure that all pipes and fittings are undamaged, as even small dents and
scratches potentially pose a risk of leakage in the system. Always remember to do
a pressure test after assembly of the pipe work.
– Both flow and return pipe is covered by a plastic or rubber protection cover, which
should be removed before installation.

6We reserve the right to make changes
2013-05-29
We reserve the right to make changes
2013-05-29
lindab | we simplify construction
Service & maintenance Atrium Plana
After removing the protection cover, make sure that the pipe is intact and undam-
aged, especially at the pipe end. Crocked or in other ways imperfect pipe ends will
result in leaks. Deburr the pipe on the inside and the outside, using a deburring tool
before installation
– Mount a push-on fitting to the pipe. Make sure to press the fitting all the way onto
the pipe. After mounting the push-on fitting, mount the flexible hose. Make sure
that the flexible hose is pushed fully into the fitting. Consult the installation guide
for the specific fitting for further details on proper installation.
Push-on fitting
Push-on valve
Notice! The connection pipes are internally soft-welded why it’s not allowed to
solder the panel to the pipes.

7
We reserve the right to make changes
2013-05-29
lindab | we simplify construction
Service & maintenance Atrium Plana
2.0 Commissioning
2.1 Product labeling
Label location exterior (On insulation, above water connection)
Label location interior (Under insulation, above water connection).
On the label you’ll find:
– Order: Order identification number.
– Pos: Order position.
– Product: Product configuration.
– Project: Project name.
– Mark: Marking noted on order.
– Nozzles: Number of nozzles.
– Plugs: Number of plugged nozzles.
– Product ID: Product number.
– Sign: To be signed when checked and commissioned on site.

8We reserve the right to make changes
2013-05-29
We reserve the right to make changes
2013-05-29
lindab | we simplify construction
Service & maintenance Atrium Plana
3.0 Maintenance
The interval of cleaning depends on the indoor environment where the panel is placed.
Under optimal conditions the Atrium Plana panels only need cleaning every 5 years.
3.1 Cleaning instructions
– Only use lukewarm water and a mild detergent.
4.0 Product and system specification
4.1 Material data
Atrium Plana 40 Atrium Plana 60
Dry weight, kg/m 2.1 3.0
Water content, l/m 0.40 0.8
Copper pipes, quality EN12735-2 CU-DHP EN12735-2 CU-DHP
Pressure class PN10 PN10
4.2 Environmental declaration
– Please visit www.lindqst.com
• Select Documentation Finder
• Select “Atrium Plana ”
• Select “Environmental declaration”
4.3 Working and test pressure
– Lindab’s waterborne products have been manufactured and tested according to
the Pressure Equipment Directive 97/237EC. The products are classified as SEP –
Sound Engineering Practice.
– Pressure table
Pressure class PN10
Max. working pressure 10 bar
Max. recommended dynamic pressure 0.2 bar
Max. test pressure 16 bar
– Even though the battery of the chilled panel can withstand a very high static
working pressure, we recommend a much lower dynamic working pressure, to
avoid noise issues from the valves.

9
We reserve the right to make changes
2013-05-29
lindab | we simplify construction
Service & maintenance Atrium Plana
4.4 Water quality
– The water preparation and maintenance for the panel water circuit should be
handled by a specialist.
– To prevent corrosion, the water circuit must be airtight.
– The water system must also be equipped with aerators to remove any build-up air
in the system.
– The water should be oxygen free, to prevent corrosion.
– The water system must be filled with potable water that complies with the “EC
directive 98/83/EC”.
– pH value of water must be between approximately 6-9 pH
– The water velocities should not exceed 1m/s, and should be kept as close to the
nominal flow as possible to minimize noise and optimize the energy yield
– There should be used in-line strainers to remove dirt particles from the water.
– If the water contains any additive inhibitor this must be appropriate to use with
copper and solder.

Support
Hjælp
Hjälp
Tuotetuki
Unterstützung
Supporto
UK - Here you can find product updates/mounting instruc-
tions and support telephone number/mail.
www.lindab.com
Right to alterations reserved.
DK - Her kan du finde seneste produkt opdateringer/mon-
tagevejledninger samt support tlf. nr/mail.
www.lindab.dk
Ret til ændringer forbeholdes.
SE - Här kan du alltid hitta senaste produktuppdater-
ingarna/montageanvisningarna samt support tel. /e-mail.
www.lindab.se
Rätt till ändringar förbehålles.
FI - Täältä löydät uusimmat tuotetiedot ja asennusohjeet
sekä tuotetuen yhteystiedot.
www.lindab.fi
Oikeus muutoksiin pidätetään.
DE - Hier finden Sie aktuelle Produktinformationen/ Mon-
tageanleitungen und Telefonnummer/ E-Mail-Adressen der
Ansprechpartner.
www.lindab.de
Änderungen vorbehalten.
IT - Qui potete trovare istruzioni di montaggio, informa-
zioni sul prodotto ed un supporto tecnico qualificato
www.lindab.it
Soggetto a modifica senza obbligo di preavviso.
FR - Vous trouverez les fiches produits ou de montage
actualisées ainsi que les coordonnées du support télépho-
nique à l’adresse suivante :
www.lindab.fr
Toutes modifications réservées.
Do you have trouble finding your local contacts
please go to:
www.lindab.com
Atrium Plana - 29052013
This manual suits for next models
2
Table of contents
Other Lindab Heater manuals