2
Before you start
It is the total area of the roof that
decides the dimensions of the roof
drainage system. The bigger the roof,
the more water the system must take
care of. It will pay in the long run to be
careful when you measure your roof
and calculate dimensions. Take your
calculation to your local dealer, who will
help you to pick out all the components
you need. Please, also visit our web
site for dimensioning help.
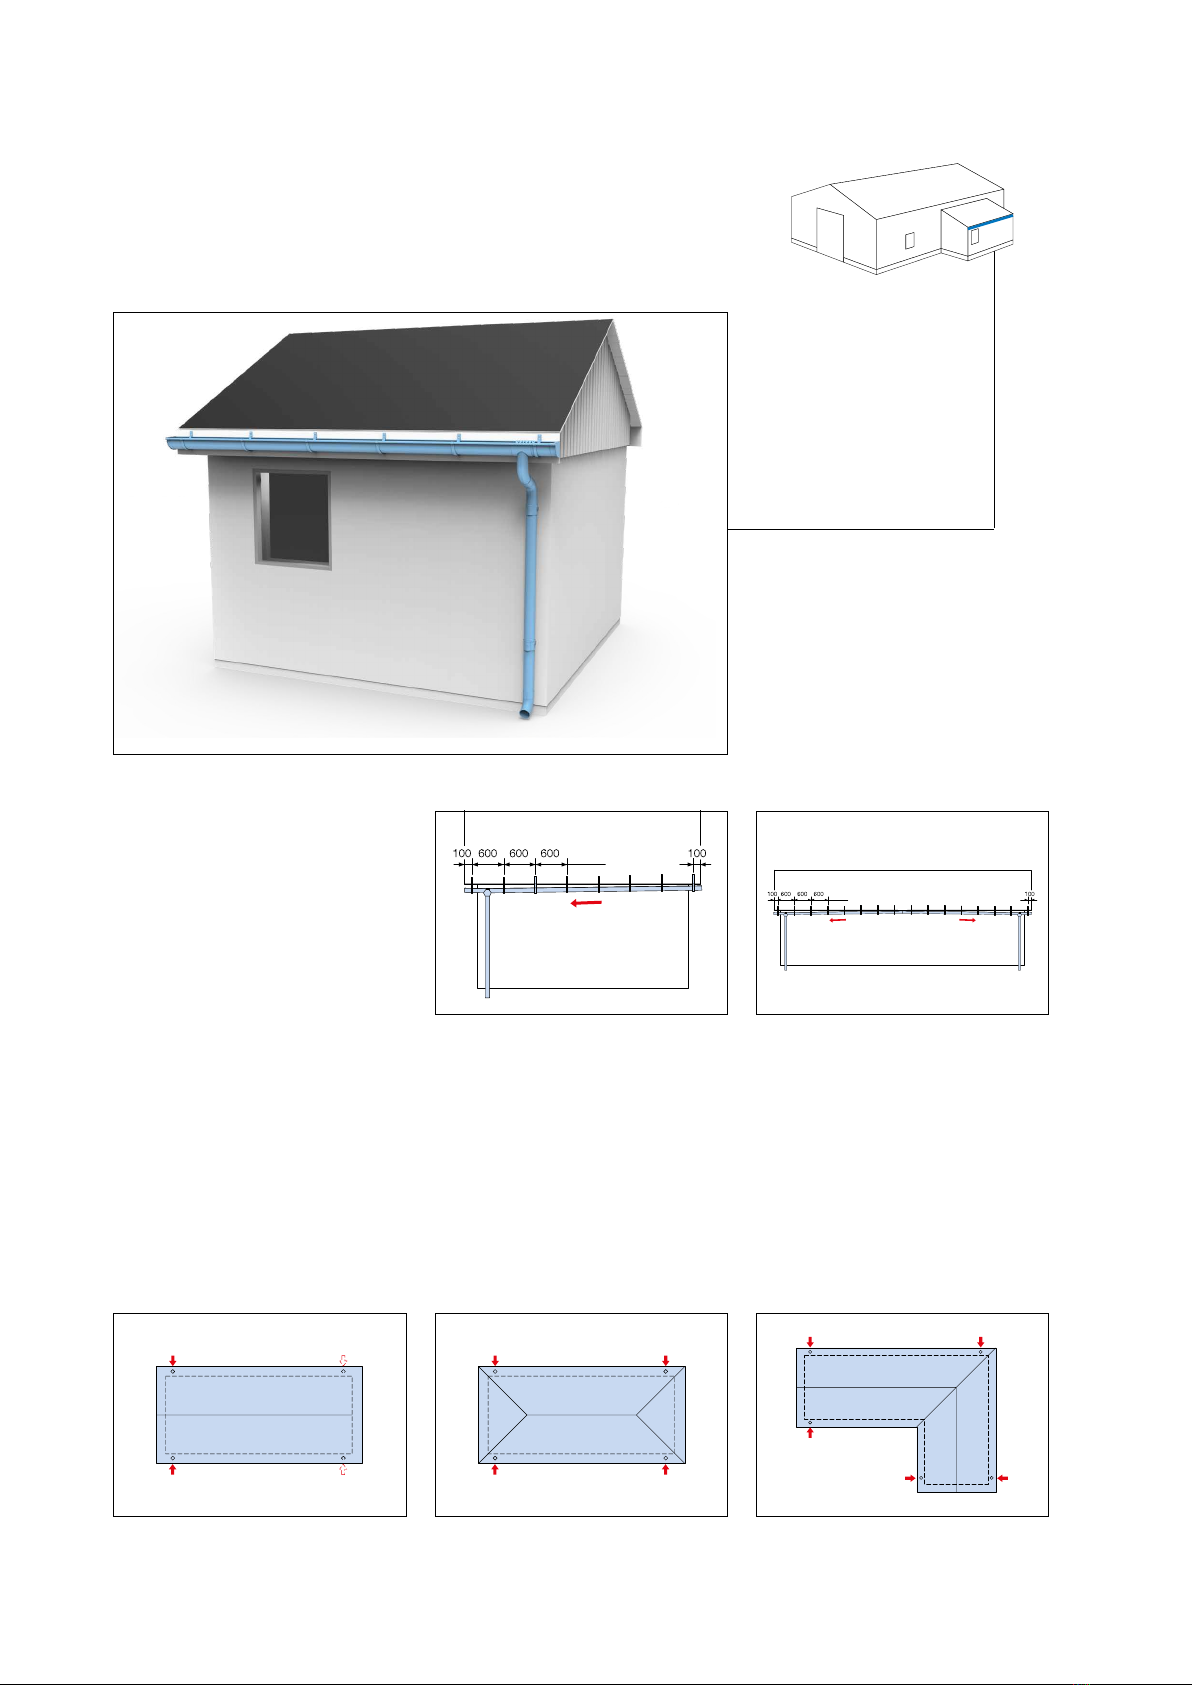
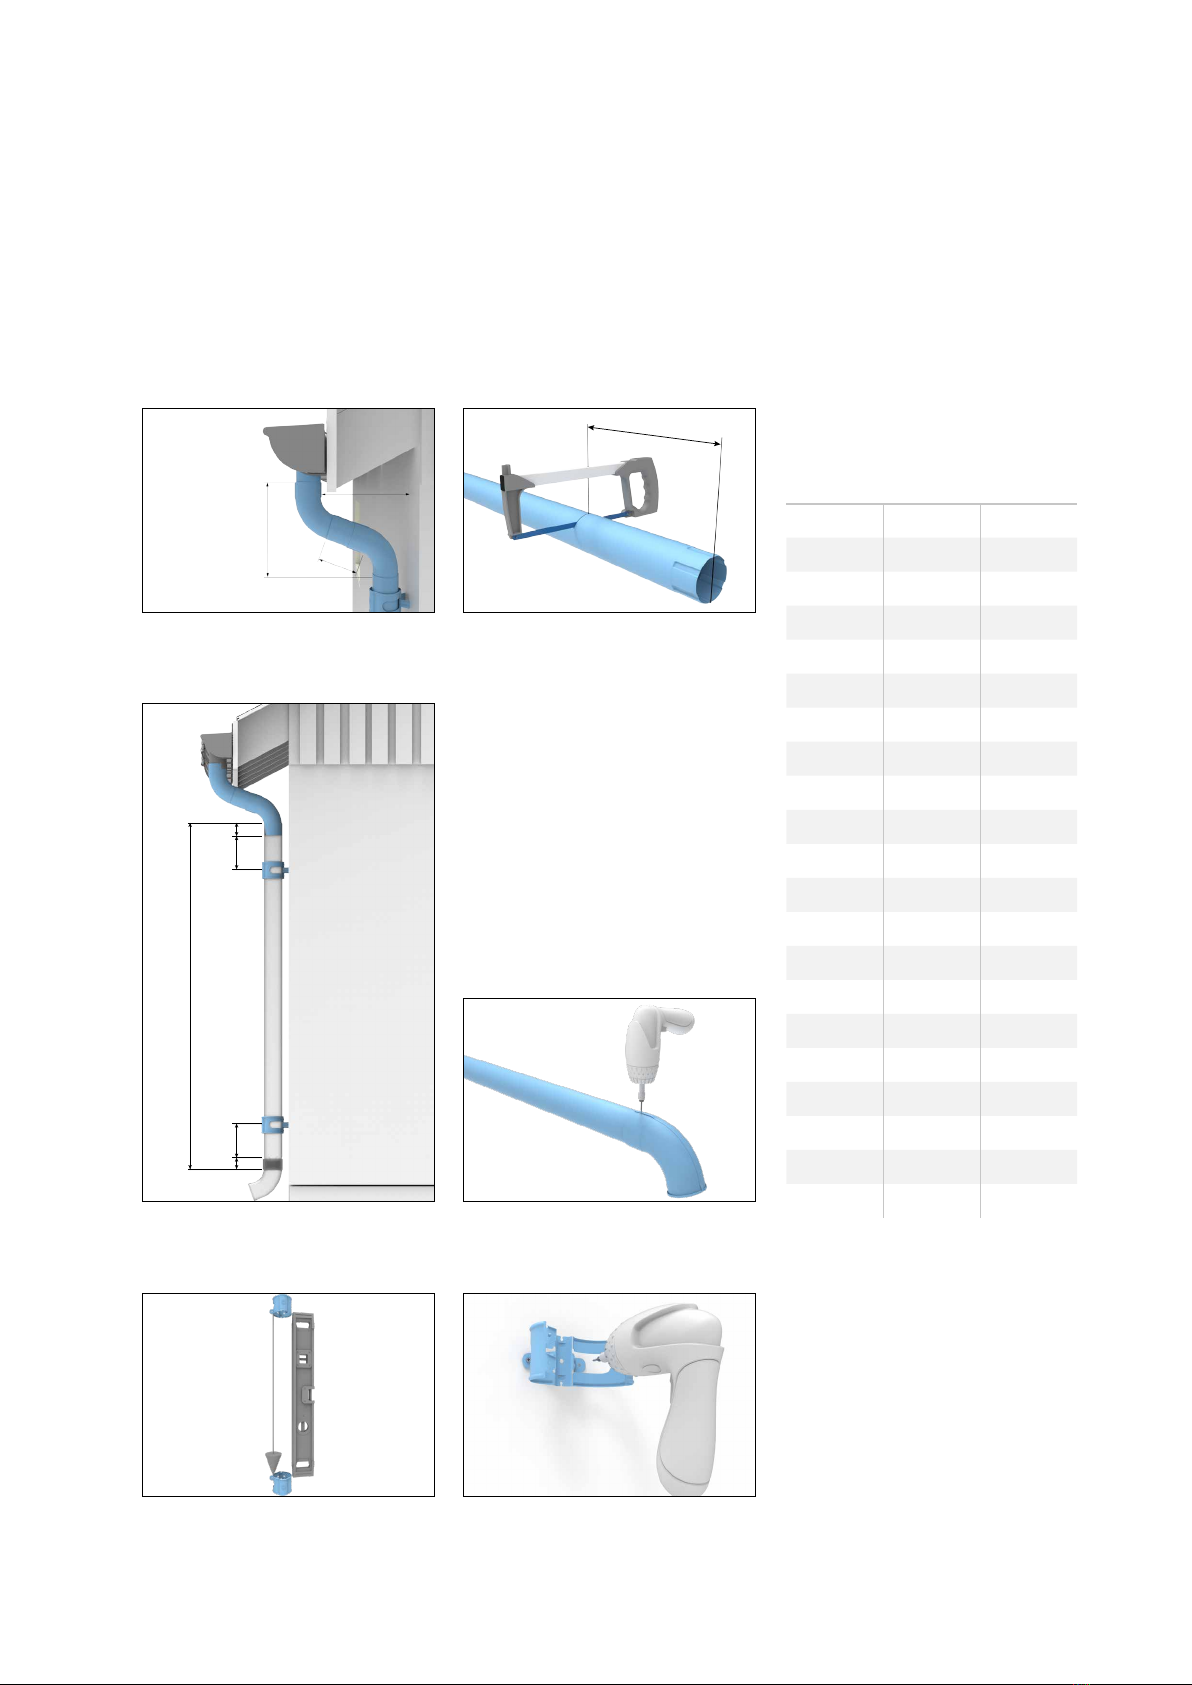
Measure the roof area
There are various types of roofs but
measure each roof part by multiplying
the roof length with the roof width. If
the area is less than 50 m² use
gutters with 100 mm width and pipes
with 75 mm diameter. If the area is
between 50-100 m² use gutters with
125 mm width and pipes with 87 mm
diameter. If the area is larger than
100 m² there are gutters with
150 mm width and pipes with
100 mm diameter or 190 mm gutters
and 111/120 mm pipes. If there are
different roof sizes on the same
building the largest roof part is dimen-
sional.
Transport, storage, unpacking
Make sure that the roof drainage
components are handled with care
during transport, storage and
unpacking. If not, the coating may be
damaged or the pipes and gutters
dented. Store pipes and gutters on a
plane and stable surface. Non coated
components must be unpacked and
stored in a dry and ventilated place.
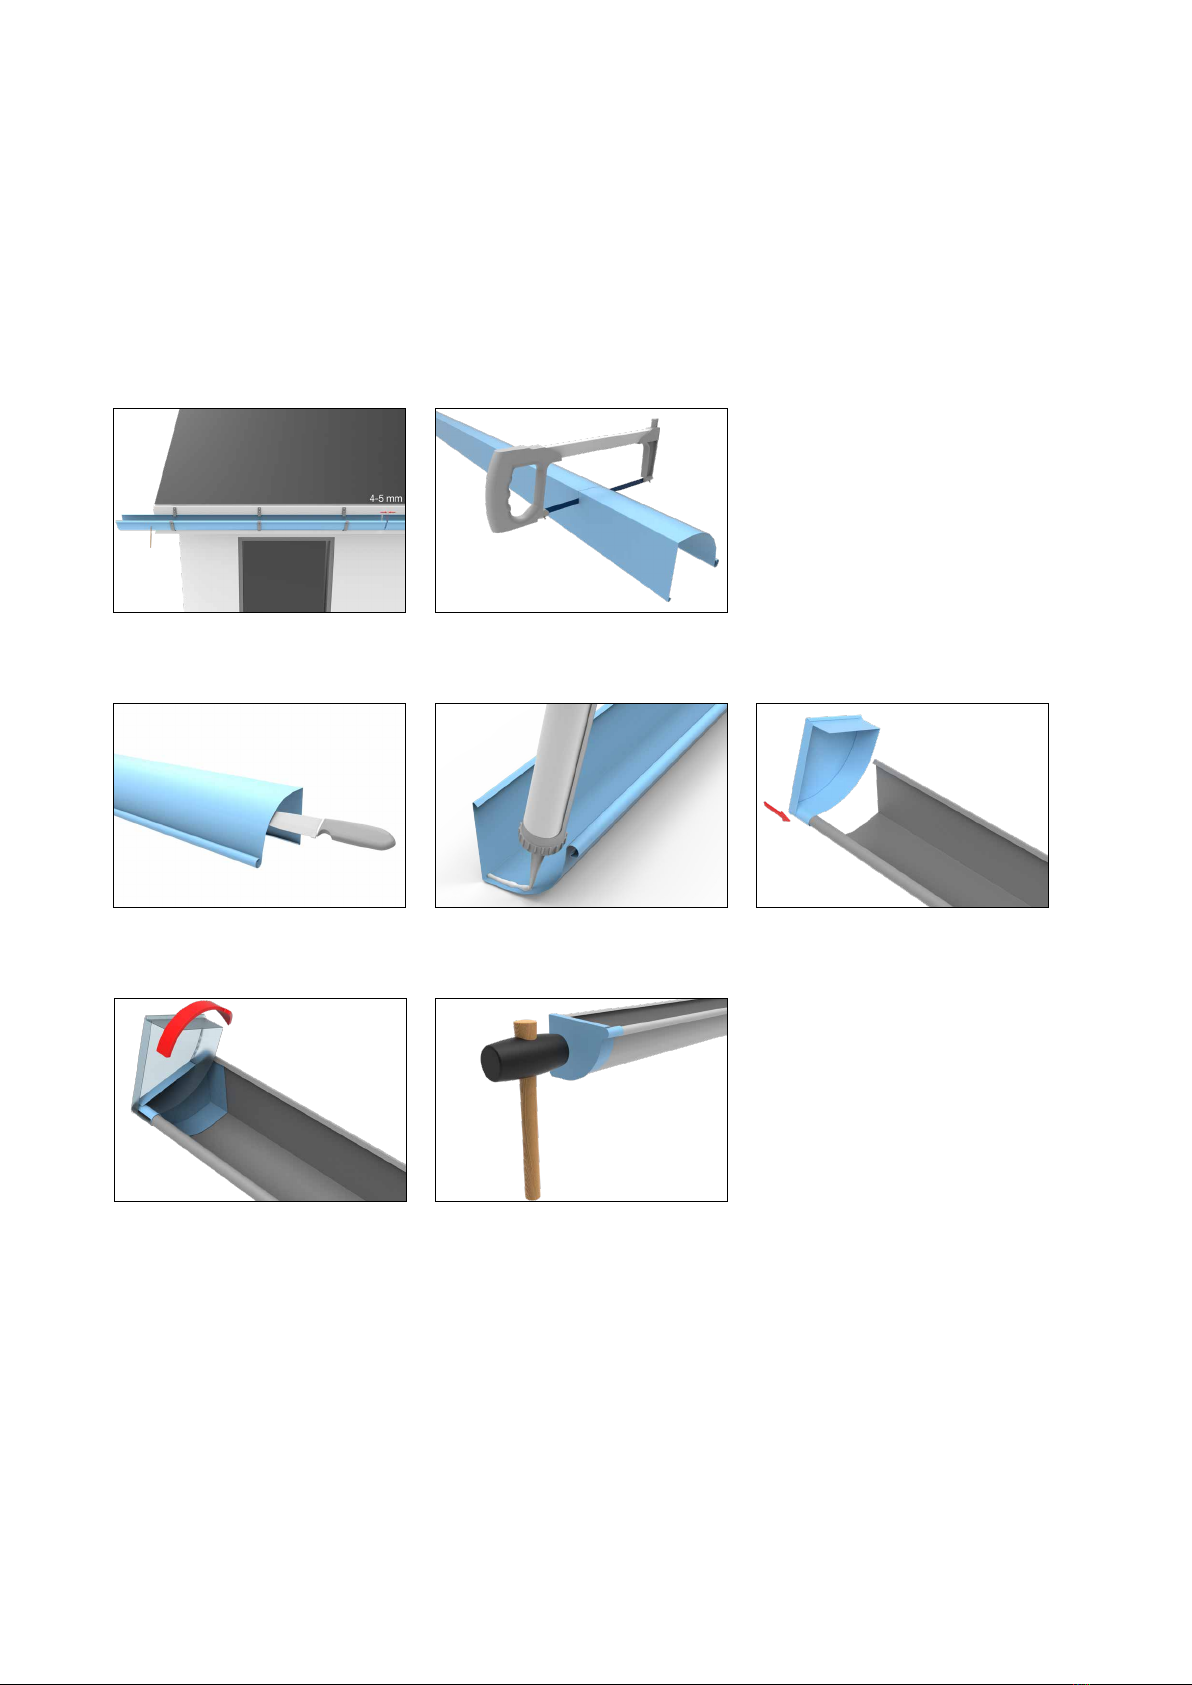
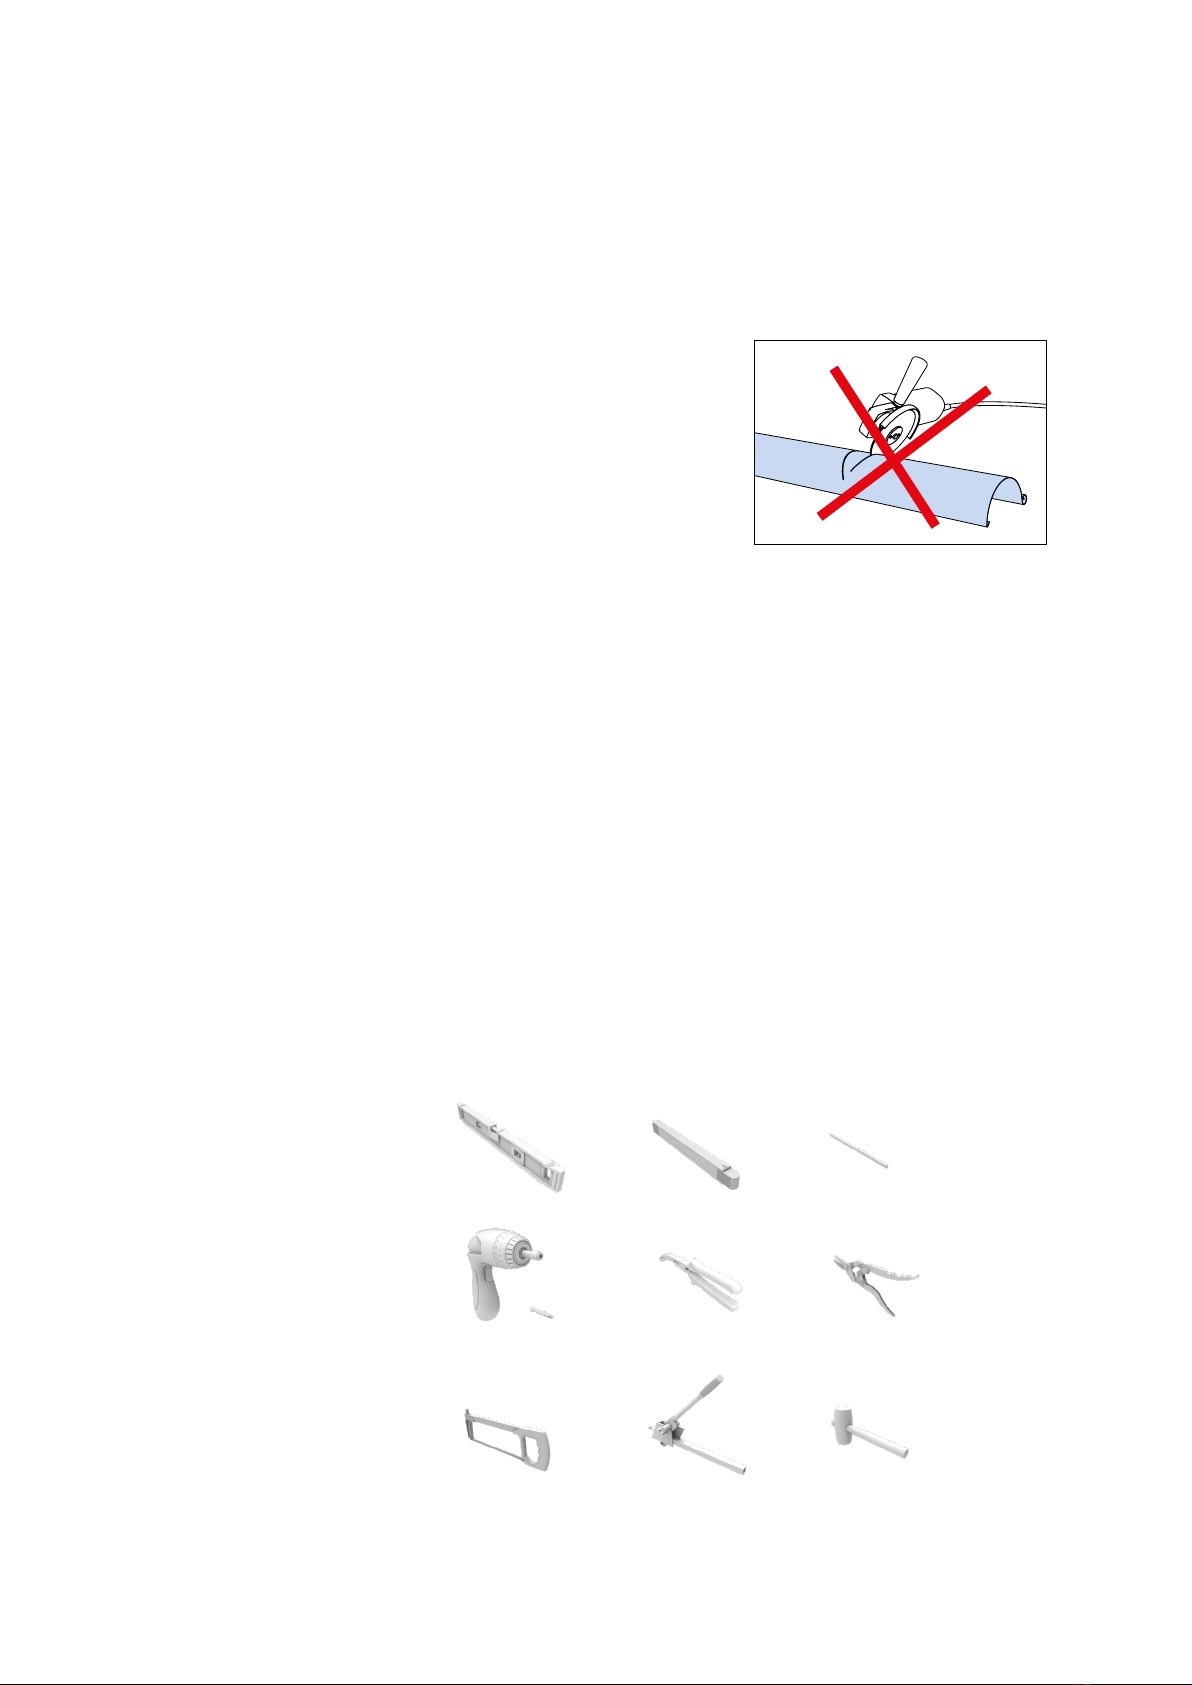
Cutting
Cut the gutters and pipes with plate
shears or a hacksaw on a firm
underlay on the ground. Never use an
angle grinder. It heats the steel up up
and thus destroyes the galvanization.
The coating may also be scorched by
hot chips or filings.
After-treatment
If the coating has been damaged,
paint it with Lindab’s repair paint to
prolong the lifespan of the roof
drainage system.
Maintenance
If you want to keep the roof drainage
system in mint condition, give the
system an overhaul a couple of times
a year. Clean the gutter and pipes
from leaves and twigs. Wash with
water and a mild detergent. Don’t use
a high pressure washing appliance.
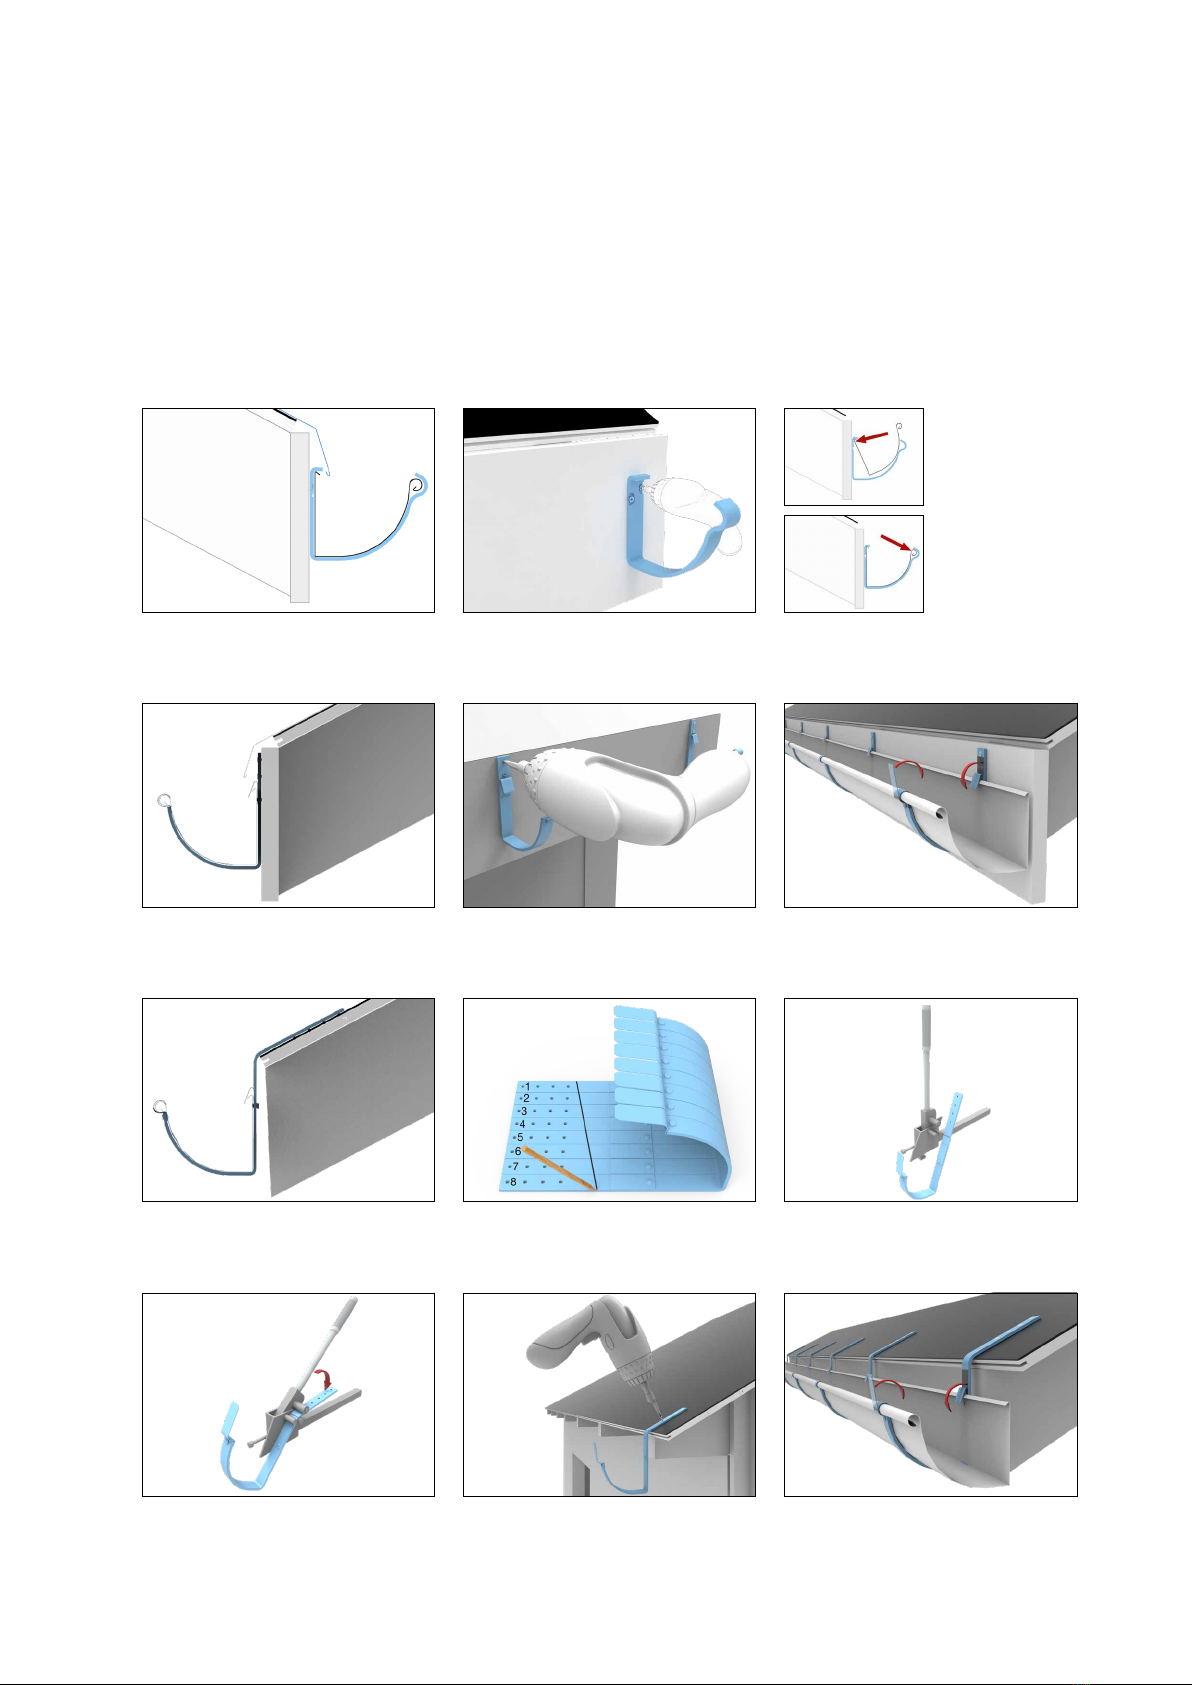
Preparation
Tools
Lindab’s roof drainage system can be
mounted with ordinary hand tools like
pliers, hammer, hacksaw, screwdriver,
folding rule and string. For bending
brackets, you need a bracket bender.
Contact your local dealer and they
will lend you one.
Fastening
The fasteners you need are for
fastening the brackets and the pipe
holders. We always recommend that
you use stainless screws and use the
right screws intended for each
material. The pipe holders are
mounted on the house façade. Check
if it´s wood, concrete or bricks.
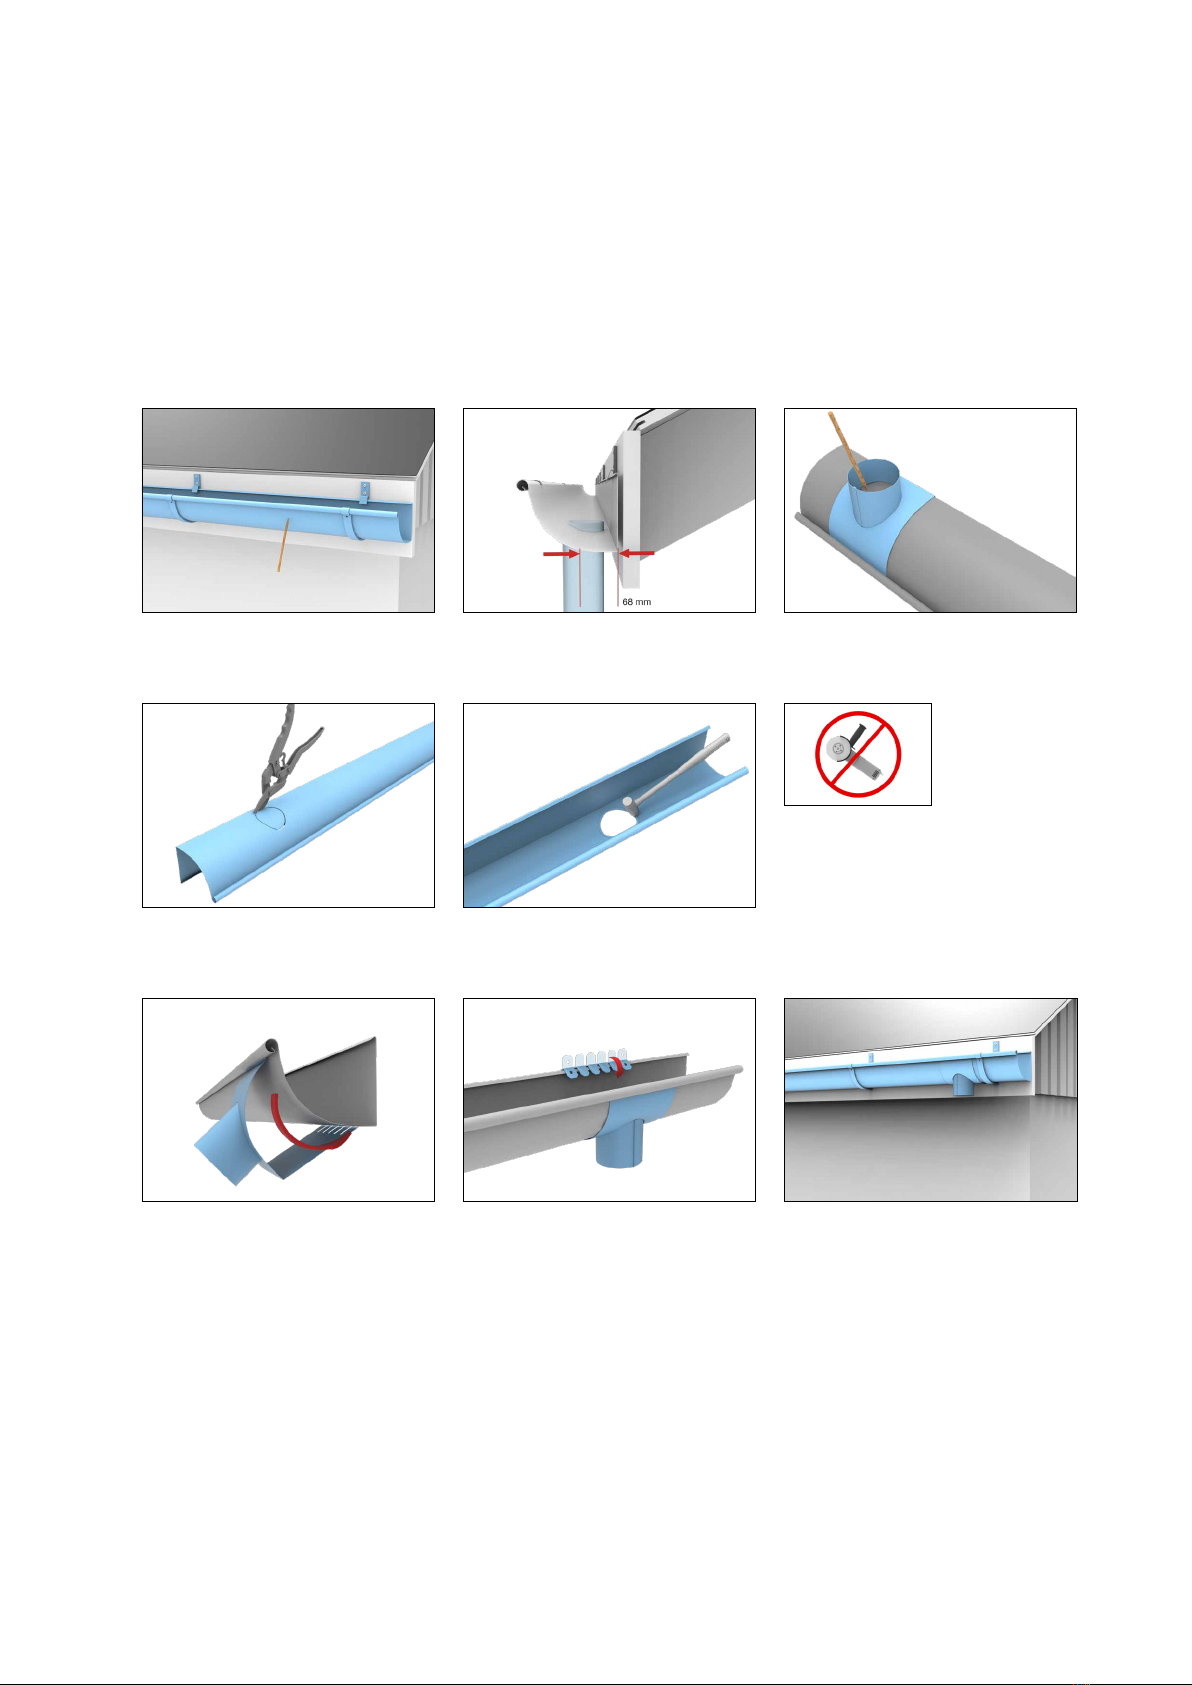
Never use an angle grinder
Spirit level
Screw driver
Hack saw
Folding rule
Seam plier
Bracket bender
Pencil
Steel scissors
Rubber hammer