manuals.online logo
Brands
  1. Home
  2. •
  3. Brands
  4. •
  5. Lindy
  6. •
  7. Matrix Switcher
  8. •
  9. Lindy 38042 User manual

Lindy 38042 User manual

© LINDY ELECTRONICS LIMITED & LINDY-ELEKTRONIK GMBH - FIRST EDITION (MAR 2009)
For Home and Office Use
Tested to Comply with
FCC Standards
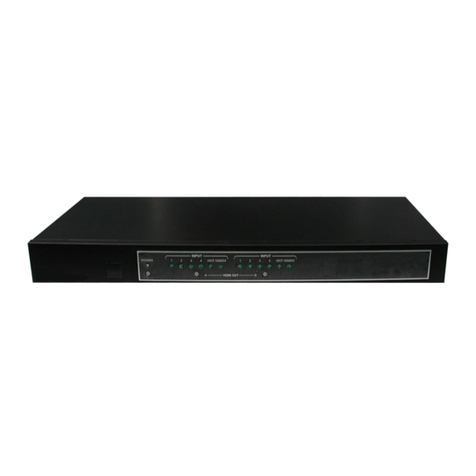
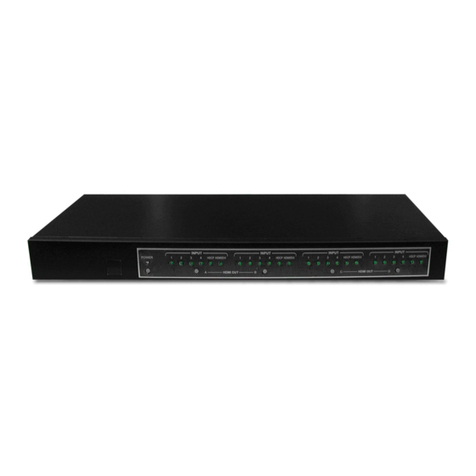
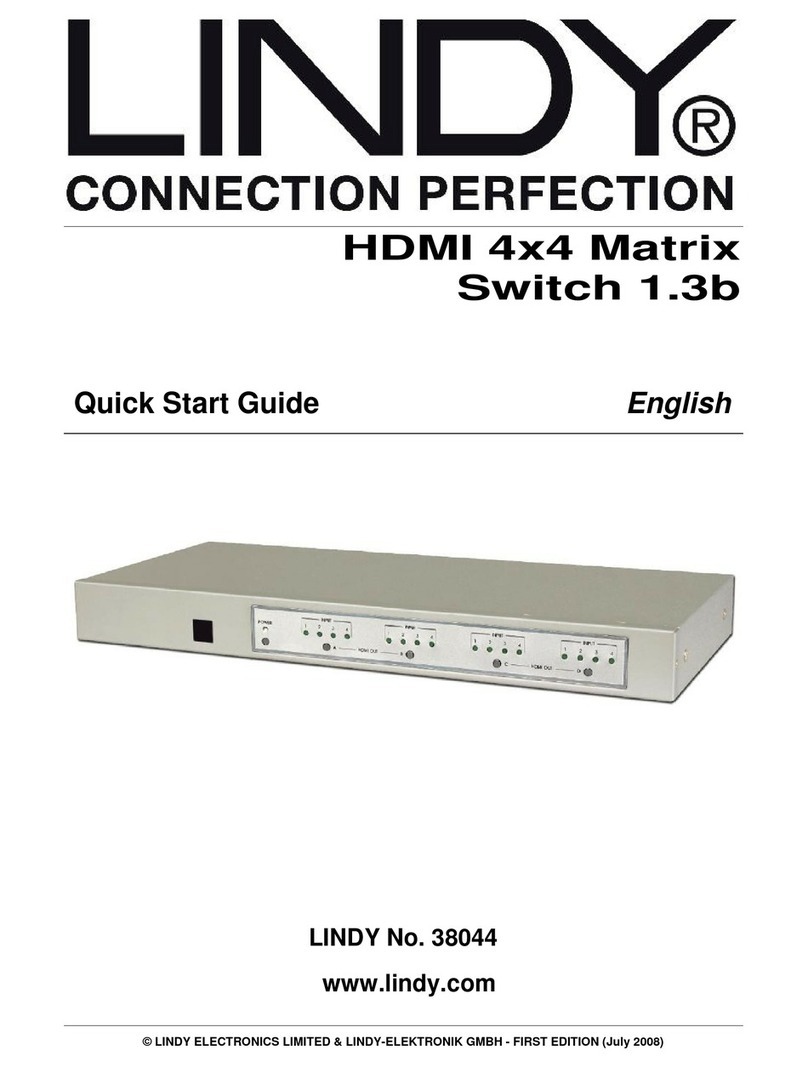
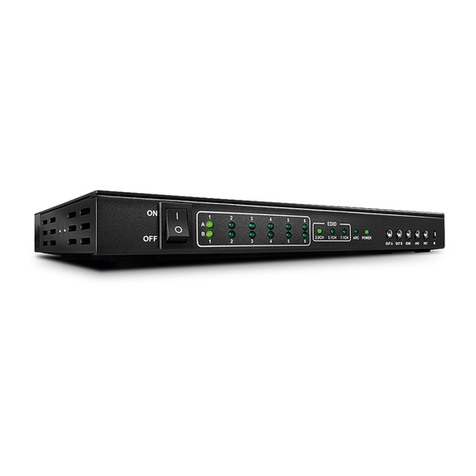
HDMI 4x2 Matrix Switch 1.3b
User Manual English
Benutzerhandbuch Deutsch
Manuel Utilisateur Français
Manuale d’uso Italiano
LINDY No. 38042
www.LINDY.com
English Manual
English 1
1. Introduction
Thank you for purchasing the LINDY HDMI 4 x 2 Matrix Switch 1.3b with remote control. This high
performance switch offers you the maximum convenience in HDMI signal distribution when you have
multiple HDMI sources and displays to connect together. The switch features 4 input ports and 2
output ports, any of the inputs can be sent to either of the outputs. When the HDMI signal is
progressed through the switch it is retimed and level compensated, so that the output is a
regenerated HDMI signal that can travel another 10 metres. The switch can also be cascaded to
multiple levels.
2. Features
•HDMI 1.3b, HDCP 1.1 and DVI 1.0 compliant
•Supports 12 bit deep colour on each channel
•Supports lossless compressed Dolby TrueHD, Dolby Digital Plus and DTS-HD Master Audio
•HDMI input is compensated, clock / phase adjusted and jitter eliminated so the output is a new
standard HDMI signal
•Input source LED indicators
•Supports a wide range of PC and HDTV resolutions from VGA to UXGA and 480i to 1080p
•RS-232 control
•IR remote control (battery included)
3. Package Contents
•4x2 HDMI 1.3b Matrix
•Remote Control (with battery)
•IR Receiver
•Power Cord
•5V DC PSU
•LINDY Manual
4. Operation Control
Front Panel
1. Remote control sensor
2. Power switch and LED indicator (LED will illuminate when power is turned on)
3. Input select indicators:
Press the HDMI out A or B buttons repeatedly to switch to your desired source, the LED will
illuminate to indicate which input source is selected and routed to the appropriate display. The
HDCP & HDMI/DVI LEDs will illuminate when an HDCP or HDMI/DVI signal is detected on the
selected port
4. HDCP LED: This will illuminate when the input source supports HDCP
5. HDMI/DVI LED: This will illuminate when the source is HDMI. No LED will indicate a DVI source
1
2
3
3
4
5
English Manual
English 1
Rear Panel
1. EDID control switch:
Default setting is TV, change this setting to STD if you have problems displaying a picture on the
screen
2. RS-232 communication port:
Connect to the COM port of your PC for control over the RS-232 channel
3. HDMI outputs:
Connect each of these outputs to the HDMI inputs of your display
4. HDMI inputs:
Connect your HDMI sources, such as DVD player or set top box, to these inputs
5. Power:
Plug the 5VDC power supply into the unit and connect the PSU to the wall outlet
6. IR in socket:
Plug the optional IR extender in to the socket for IR extension control
5. Remote Control
1. Power:
Turn the unit on/off
2. Input select for HDMI out A:
Press 1, 2, 3 or 4 to select the desired input to
be displayed
3. Input select for HDMI out B:
Press 1, 2, 3 or 4 to select the desired input to
be displayed
Note: C & D are not used with this product
6. RS-232 Control Protocol
•
4x2 HDMI Matrix Remote Controller
1 3 4 5 6
2
4x2 HDMI Matrix
Remote Control
Deutsches Benutzerhandbuch
1. Einführung
Dieser leistungsstarke HDMI mit 4x2 Switch mit Fernbedienung bietet ihnen das volle Potential der
HDMI 1.3 Schnittstelle. Er unterstützt vier Eingangs- und zwei Ausgangsports, wobei jeder der
beiden Ausgänge individuell und unabhängig mit jedem Eingang verbunden werden kann.
Das HDMI Eingangssignal wird durch den Switch aufbereitet und verarbeitet, sodass das
Ausgangssignal ein neu erzeugtes HDMI Signal mit neuer HDCP Verschlüsselung ist, das wiederum
über 20 Meter übertragen werden kann.
Der Switch ist daher auch kaskadierbar.
2. Eigenschaften
•HDMI 1.3b, HDCP 1.1 und DVI 1.0 kompatibel
•Unterstützt auf jedem Kanal 12 Bit Farbtiefe
•Unterstützt verlustfrei komprimiertes Dolby TrueHD, Dolby Digital Plus und DTS-HD Master Audio
•HDMI Eingangssignal wird kompensiert und aufbereitet, Takt und Phase werden korrigiert,
sodass das Ausgangssignal ein neues sauberes HDMI Signal ist
•LED Anzeige für aktive Eingangsports
•Unterstützt eine weite Auswahl von PC- und HDTV-Auflösungen von VGA bis UXGA und von
480i bis 1080p
•RS-232 Kontrollport zur Fernbedienung
•IR Fernbedienung (inklusive Batterie)
3. Bedienung
Frontansicht
1. Fernbedienungssensor
2. EIN/AUS-Schalter mit LED-Anzeige
3. Eingangs-Wahlschalter und Anzeige: Drücken sie den HDMI Ausgang/Out A oder B Knopf
mehrfach um zwischen den Eingängen/Quellen zu wechseln, die LED Anzeige leuchtet und zeigt
den gerade gewählten Port an. HDCP und HDMI/DVI LEDs:
4. HDCP LED: Leuchtet wenn die Eingangsquelle HDCP unterstützt
5. HDMI/DVI LED: Leuchtet, wenn die Quelle ein HDMI Signal ist. Dunkle LED: DVI Signal.
4. IR-Fernbedienung
1. Power: Schaltet das Gerät an/aus
2. Eingangswahlschalter für Ausgang A:
i. Drücken sie 1,2,3 oder 4 um die gewünschte Quelle auf
dem Bildschirm anzeigen zu lassen
3. Eingangswahlschalter für Ausgang B:
i. Drücken sie 1,2,3 oder 4 um die gewünschte Quelle auf
dem Bildschirm anzeigen zu lassen
Anmerkung: Eingangswahlschalter C und D werden bei diesem
Switch nicht verwendet
1
2
3
3
4
5
Benutzerhandbuch Deutsch / Manuel en français
1 3 4 5 6
2
1 2 3 3 4 5
5. Anschlüsse Rückseite
1. EDID Control Schalter: Standardeinstellung ist TV, änderen Sie die Einstellung zu STD wenn
Probleme bei der Bildwiedergabe am Bildschirm auftreten.
2. RS-232 Kommunikationsport: Zur Steuerung über dem COM-Port
3. HDMI Ausgänge: Unabhängige Ausgänge HDMI 1.3 zu Ihren Geräten
4. HDMI Eingänge: Für ihre HDMI Signalquellen wie DVD Player, SAT oder Set Top Box
5. Power: 5 Volt Netzteil-Anschluss
6. Verbinden sie den optional verwendbaren Infrarot-Empfänger mit dem Anschluss "IR extension
control" wenn Sie den Switch versteckt betreiben wollen
Manuel en français
FR
1. Introduction
Merci d’avoir choisi le switch LINDY Matrix HDMI 1.3b 4 x 2 avec télécommande. Ce switch haute
performance vous offre le maximum de confort pour la distribution de signal HDMI lorsque vous
avez plusieurs sources HDMI et d’écrans à connecter ensembles. Ce switch propose 4 entrées et 2
sorties, n’importe quelle entrée peut être envoyée vers n’importe quelle sortie. Si le signal HDMI est
progressif (/p) à travers le switch, il est recalé dans le temps et le niveau de sortie est réamplifié, le
signal HDMI régénéré peut être utilisé jusqu’à 10 mètres. Le switch peut être cascadé sur plusieurs
niveaux.
2. Caractéristiques
•HDMI 1.3b, HDCP 1.1 et DVI 1.0
•Supporte la fonction deep colour sur 12 bits, pour chaque canal
•Supporte le format compressé Dolby TrueHD, Dolby Digital Plus et DTS-HD Master
•L’entrée HDMI est compensée, l’horloge / la phase est ajustée et les erreurs (jitter) éliminées,
ainsi la sortie est un nouveau signal standard HDMI
•LED indicateurs de source d’entrée
•Supporte une large gamme de résolutions PC/HDTV, du VGA au UXGA et 480i à 1080p
•Contrôle RS-232
•Télécommande infrarouge (piles fournies)
3. Utilisation
Vue de face
1. Capteur de la télécommande
2. Interrupteur OFF/ON et LED d’indication (la LED s’allumera si le boîtier est alimenté)
3. Sélecteur di signal d’entrée: Pressez plusieurs fois les boutons HDMI out A ou B, pour sélectionner
la source désirée, la LED s’allumera pour signaler quelle source d’entrée est sélectionnée et routée
vers l’écran approprié. Les LEDs HDCP & HDMI/DVI s’allumeront si un signal HDCP ou HDMI/DVI
est détecté sur le port sélectionné
4. LED HDCP: elle s’allumera si la source d’entrée supporte le HDCP
5. LED HDMI/DVI: elle s’allumera si la source est HDMI. Sinon, ce sera une source DVI
Manuel en français / Manuale in italiano
1 3 4 5 6
2
Vue de dos
1. Switch avec contrôle EDID: Le paramètre par défaut est TV, changez ce paramètre vers STD si
vous avez des problèmes pour afficher une image sur l’écran
2. Port de communication RS-232: Connectez à un port COM pour le contrôle RS-232
3. Sorties HDMI: Connectez chacune des sorties aux entrées HDMI de votre écran
4. Entrées HDMI: Connectez vos sources HDMI, comme un lecteur DVD ou récepteur satellite, à ces
entrées
5. Alimentation: Connectez l’alimentation 5VDC à l’unité puis connectez l’alimenation au secteur
6. Infrarouge: Connectez l’extnder infrarouge optionnel à la prise prévue
Télécommande
1. Alimentation: Allumer/éteindre l’unité
2. Sélection de l’entrée pour HDMI out A:
Pressez 1, 2, 3 ou 4 pour sélectionner l’entrée
désirée
3. Sélection de l’entrée pour HDMI out B:
pressez 1, 2, 3 ou 4 pour sélectionner l’entrée à
afficher
Note: C & D ne sont pas utilisés pour ce produit
Manuale in italiano
1. Introduzione
Grazie per aver scelto il LINDY HDMI 4 x 2 Matrix Switch 1.3b con telecomando. Questo switch ad
alte prestazioni vi offre la possibilità di gestire la distribuzione di più segnali HDMI a più Monitor
HDMI. Sullo switch vi sono 4 ingressi e 2 uscite, ogni segnale in ingresso può essere inviato ad un
monitor in uscita. Quando il segnale HDMI viene processato dallo switch viene risincronizzato e i
livelli vengono nuovamente compensati, quindi il segnale HDMI può essere ritrasmesso per altri 10
metri. Inoltre lo switch può anche essere collegato in cascata.
Manuale in italiano
1 3 4 5 6
2
1 2 3 3 4 5
2. Caratteristiche
•HDMI 1.3b, HDCP 1.1 e DVI 1.0 compatibile
•Supporto 12 bit deep colour su ogni canale
•
Supporto lossless compressed Dolby TrueHD, Dolby Digital Plus e DTS-HD Master Audio
•Ingressi HDMI compensati in fase / sincronia con eliminazione di rumori di fondo per ottenere in
uscita un segnale pienamente corrispondente allo standard HDMI
•Indicatori LED
•
Supporta una vasta gamma di PC e risoluzioni HDTV da VGA a UXGA e da 480i a 1080p
•Porta RS-232
•Telecomando (batterie incluse)
3. Funzionamento
Pannello
frontale
1. Sensore per telecomando
2. Tasto di accensione e indicatore LED (il LED si illumina quando il tasto è su ON)
3. Indicatori ingressi:
i.Premete i tasti HDMI out A o B ripetutamente per commutare le sorgenti desiderate, si illuminerà
quindi il LED corrispondente all’ingresso selezionato che verrà visualizzato sul monitor
appropriato. I LED HDCP & HDMI/DVI si illumineranno quando viene individuate un segnale
HDCP o HDMI/DVI sulla porta selezionata
4. LED HDCP: si illumina quando la sorgente in ingresso supporta l’HDCP
5. LED HDMI/DVI: si illumina quando la sorgente è HDMI, se la sorgente è DVI il LED non si
illuminerà
Telecomando
1. Power:Accendere e spegnere l’unità
2. Selezione ingressi per uscita HDMI A: Premete 1, 2, 3 o 4
per selezionare l’ingresso che desiterate visualizzare
3. Selezione ingressi per uscita HDMI B: Premete 1, 2, 3 o 4
per selezionare l’ingresso che desiterate visualizzare
C & D non sono attive per questo prodotto
Pannello sul retro
1. EDID control switch: Di Default è impostato su TV, in caso di problemi sul segnale video spostare
l’interruttore su STD
2. Porta RS-232: Collegarla alla porta COM del PC per gestirlo tramite il canale RS-232
3. Uscite HDMI: Collegare monitor HDMI ad ognuna di queste porte
4. Ingressi HDMI: Collegare le sorgenti HDMI come lettori DVD, set top box, ecc.. ad ognuna di
queste porte
5. Alimentazione: Collegare l’alimentatore da 5VDC
6. Porta IR: Collegare l’extender IR (opzionale)
Radio Frequency Energy, Certifications
FCC Warning
This device complies with part 15 of the FCC Rules.
Operation is subject to the following two conditions:
1. This device may not cause harmful interference, and
2. This device must accept any interference received, including interference that may cause undesired operation.
CE Statement, EMC Compatibilty
This device complies with EN Standards EN55022 and EN55024 according to the relevant EC EMC Directive. It
must be used with shielded cables only to maintain EMC compatibility.
Dieses Produkt entspricht den einschlägigen EMV Richtlinien der EU und darf nur zusammen mit abgeschirmten
Kabeln verwendet werden.
LINDY Herstellergarantie
LINDY gewährt für dieses Produkt über die gesetzliche Regelung hinaus eine zweijährige Herstellergarantie ab
Kaufdatum. Die detaillierten Bedingungen dieser Garantie finden Sie auf der LINDYWebsite aufgelistet bei den
AGBs.
WEEE (Waste of Electrical and Electronic Equipment),
Recycling of Electronic Products
In 2006 the European Union introduced regulations (WEEE) for the collection and recycling of all waste electrical
and electronic equipment. The wheelie bin symbol shown indicates that this product must not be disposed of with
household waste. Instead the product must be recycled in a manner that is environmentally friendly. For more
information on how to dispose of this product, please contact your local recycling centre or your household waste
disposal service. Each individual EU member state has implemented the WEEE regulations into national law in
slightly different ways. Please follow your national law when you want to dispose of any electrical or electronic
products.
More details can be obtained from your national WEEE recycling agency.
Germany / Deutschland
Die Europäische Union hat mit der WEEE Direktive umfassende Regelungen für die Verschrottung und das
Recycling von Elektro- und Elektronikprodukten geschaffen. Diese wurden von der Bundesregierung im Elektro-
und Elektronikgerätegesetz – ElektroG in deutsches Recht umgesetzt. Dieses Gesetz verbietet vom 24.März
2006 an das Entsorgen von Elektro- und Elektronikgeräten über die Hausmülltonne! Diese Geräte müssen den
lokalen Sammelsystemen bzw. örtlichen Sammelstellen zugeführt werden! Dort werden sie kostenlos entgegen
genommen. Die Kosten für den weiteren Recyclingprozess übernimmt die Gesamtheit der Gerätehersteller.
LINDY No 38042
1
st
Edition, March 2009
www.lindy.com
Other Lindy Matrix Switcher manuals

Lindy 38152 V2 User manual

Lindy

Lindy 38152 V2 User manual

Lindy 38051 User manual

Lindy

Lindy 38051 User manual

Lindy 38152 User manual

Lindy

Lindy 38152 User manual

Lindy HDMI 8x8 Matrix Switch 1.3c User manual

Lindy

Lindy HDMI 8x8 Matrix Switch 1.3c User manual

Lindy 38334 User manual

Lindy

Lindy 38334 User manual

Lindy 38084 User manual

Lindy

Lindy 38084 User manual

Lindy 38089 User manual

Lindy

Lindy 38089 User manual

Lindy 38247 User manual

Lindy

Lindy 38247 User manual

Lindy 38245 User manual

Lindy

Lindy 38245 User manual

Lindy 38153 User manual

Lindy

Lindy 38153 User manual

Lindy 38042 User manual

Lindy

Lindy 38042 User manual

Lindy 38302 User manual

Lindy

Lindy 38302 User manual

Lindy 38160 User manual

Lindy

Lindy 38160 User manual

Lindy 38245 User manual

Lindy

Lindy 38245 User manual

Lindy 38048 User manual

Lindy

Lindy 38048 User manual

Lindy 32595 User manual

Lindy

Lindy 32595 User manual

Lindy 38248 User manual

Lindy

Lindy 38248 User manual

Lindy 38088 User manual

Lindy

Lindy 38088 User manual

Lindy 38248 User manual

Lindy

Lindy 38248 User manual

Lindy 38350 User manual

Lindy

Lindy 38350 User manual

Lindy 38049 User manual

Lindy

Lindy 38049 User manual

Lindy 38162 User manual

Lindy

Lindy 38162 User manual

Lindy 38238 User manual

Lindy

Lindy 38238 User manual

Lindy 38313 User manual

Lindy

Lindy 38313 User manual

Popular Matrix Switcher manuals by other brands

Ocean Matrix OMX-SW5x5 instruction manual

Ocean Matrix

Ocean Matrix OMX-SW5x5 instruction manual

Converters.TV 15437 Operation manual

Converters.TV

Converters.TV 15437 Operation manual

Monoprice Blackbird 44568 quick start guide

Monoprice

Monoprice Blackbird 44568 quick start guide

AMX AVS-OP-2404-340 Specifications

AMX

AMX AVS-OP-2404-340 Specifications

AMX Precis instruction manual

AMX

AMX Precis instruction manual

Key Digital KD-MLV4x2Pro operating instructions

Key Digital

Key Digital KD-MLV4x2Pro operating instructions

Kramer VS-44HN user manual

Kramer

Kramer VS-44HN user manual

AMX Modula instruction manual

AMX

AMX Modula instruction manual

Audio Authority Avatrix AVM-562 quick start guide

Audio Authority

Audio Authority Avatrix AVM-562 quick start guide

Shinybow USA SB-5688LCM-CT instruction manual

Shinybow USA

Shinybow USA SB-5688LCM-CT instruction manual

Key Digital KD-MSVA4X4 FatBOY operating instructions

Key Digital

Key Digital KD-MSVA4X4 FatBOY operating instructions

Planet Networking & Communication IKVM-210 M Series user manual

Planet Networking & Communication

Planet Networking & Communication IKVM-210 M Series user manual

Extron electronics CrossPoint 124 user manual

Extron electronics

Extron electronics CrossPoint 124 user manual

Matrix Switch Corporation MSC-XE4832S product manual

Matrix Switch Corporation

Matrix Switch Corporation MSC-XE4832S product manual

Lightware MX32x32HDMI-Pro user manual

Lightware

Lightware MX32x32HDMI-Pro user manual

PTN MRG1616A user manual

PTN

PTN MRG1616A user manual

Kramer VS-42H user manual

Kramer

Kramer VS-42H user manual

CYP OR-44-4K22 Operation manual

CYP

CYP OR-44-4K22 Operation manual

manuals.online logo
manuals.online logoBrands
  • About & Mission
  • Contact us
  • Privacy Policy
  • Terms and Conditions

Copyright 2025 Manuals.Online. All Rights Reserved.