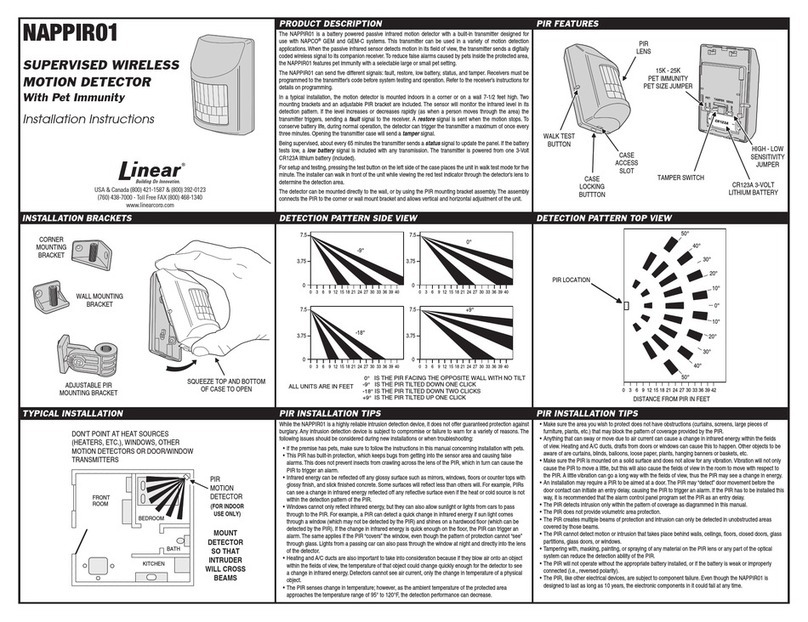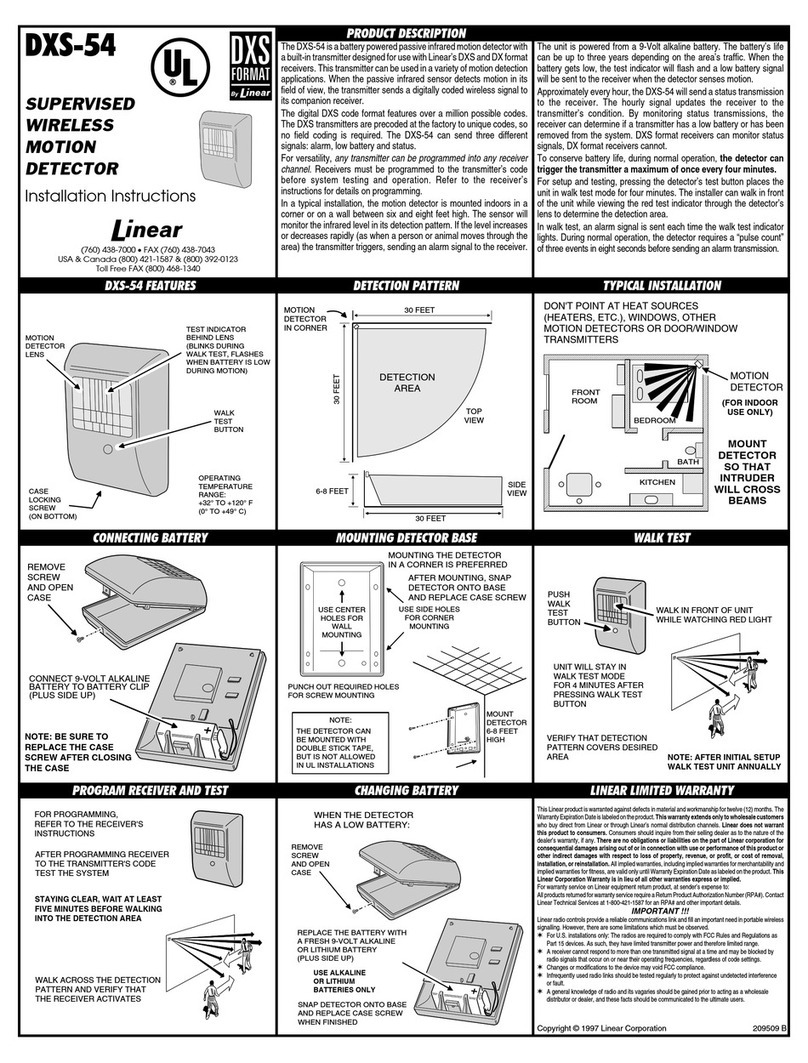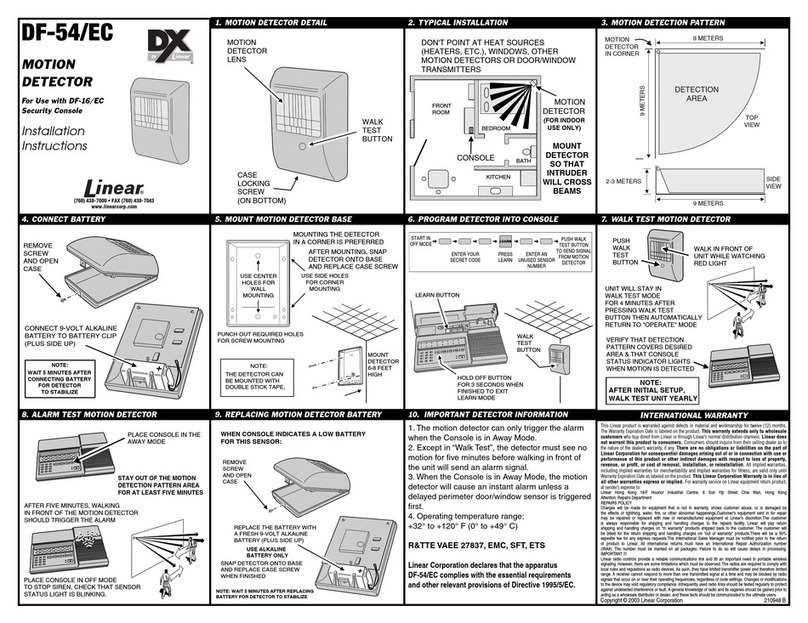
Copyright © 2014 Linear LLC 1
2GIG-GB3-433
GLASS BREAK DETECTOR
INSTALLATION INSTRUCTIONS
The2GIGGlassBreakDetector(2GIG‐GB3‐433)isafully‐supervised,
tamper‐protected,ceiling‐orwall‐mountedunit.Itcommunicates
withthecontrolpanelusingthe433MHzfrequency.Thedetector
providesa15ft(4.6m)maximumdetectionrange,360°maximum
horizontalsensingangle,anddual‐stageglassbreakdetection.
Box Contents
Verifythatthepackageincludesthefollowing:
•1—GlassBreakDetector(withMountingBase)
• 2—LithiumBatteries
• 3—PlasticWallAnchorswithScrews
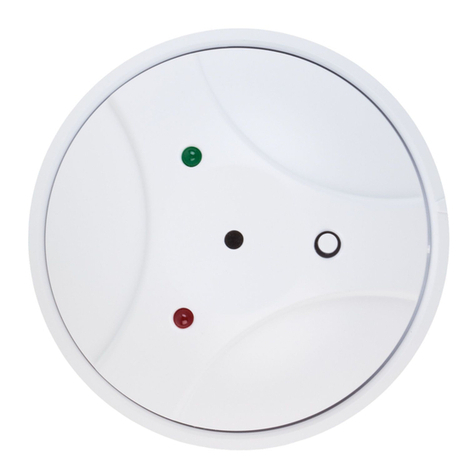
Figure 1 LED Indicators
Inserting and Replacing the Batteries
Toinsertorreplacethebatteries:
1Unwrapthedetector.
2Holdingthecoverandbase,twistthecoverinacounter‐clockwise
motion.Whentheimprintedarrowsonthesideofthedetector
arealigned,separatetheunit.
3Removetheoldbatteries.
IMPORTANT: Alwaysdisposeand/orrecycleusedbatteriesin
accordancewiththehazardouswasterecoveryandrecycling
regulationsforyourlocation.Yourcity,state,orcountrymay
alsorequireyoutocomplywithadditionalhandling,recycling,
anddisposalrequirements.
4Insertthebatteriesinthecompartment.Alwaysmatchtheplus(+)
signonthebatterywiththeflatsideofthecompartmentandthe
minus(‐)signonthebatterywiththespringsideofthe
compartment.
Ittakesapproximatelyfive(5)secondsforthedetectortopower
ON.
Figure 2 Glass Break Detector—Base
NOTE: Ifclosingthedetectorwhenbatteriesarenotpresent,
gentlypushtheREDtabsonthebacksideofthebaseaway
fromthedetector(seeFigure1above).
5Holdingthecover,aligntheimprintedarrowsonthedetectorand
thentwistthecoverinaclockwisemotiontoclosetheunit.
WARNING: Failuretofollowthesewarningsandinstructionscan
leadtoheatgeneration,rupture,leakage,explosion,fire,or
otherinjury,ordamage.Donotinsertthebatteryintothe
compartmentinthewrongdirection.Alwaysreplacethe
batterywiththesameorequivalenttype(see"Specifications"
onpage2).Neverrechargeordisassemblethebattery.Never
placethebatteryinfireorwater.Alwayskeepbatteriesaway
fromsmallchildren.Ifbatteriesareswallowed,promptlysee
adoctor.
Wall Mounting
Whenwallmounted,thedetectorprovidesprotectioncoverageon
theoppositeoradjacentwindow.Windowsonthesamewallasthe
detectorarenotprotected.
Tomountthedetectortoawall:
1Ifnotalreadyinstalled,insertthebatteries(seeInsertingand
ReplacingtheBatteries).
2Withthecoveroff,placethebaseofthedetectorontheadjacent
oroppositewallfromthewindowbeingprotected.
3Usethethree(3)PlasticWallAnchors(provided)tomountthe
baseofthedetectortothewall.
IMPORTANT: AlwaysmountthedetectorsotheTestbuttonisin
thedownwardposition.
4Holdingthecover,aligntheimprintedarrows.Thenusea
clockwisetwistmotiontolockthecoverintoplace.
AREDLED
BGREENLED
CTESTbutton
DImprintedarrow(foralignmentofcoverandbase)
ATamperswitch
BBatterycompartments(REDtabslocatedbehindcompartments)
