LinkTv Media LK7100 User manual

user manual
hd android iptv box

0
LK7100
User Manual
CONTENTS
CONTENTS.......................................................................................................................0
1SAFE CAUTION ............................................................................................................ 2
2PRODUCT APPEARANCE.......................................................................................... 3
3REMOTE CONTROL..................................................................................................... 5
4BASIC OPERATIONS .................................................................................................. 6
5SYSTEM SETTING...................................................................................................... 16
5.1 WI-FI NETWORKS................................................................................................. 16
5.2 ETHERNET .............................................................................................................. 18
5.3 DATA USAGE.......................................................................... 18
5.4 SOUND................................................................................... 19
5.5 DISPLAY ................................................................................. 21
5.6 STORAGE................................................................................ 21
5.7 APPS SETTING ......................................................................... 22
5.8 PERMISSION .......................................................................... 22
5.9 LOCATION................................................................................................................23
5.10 SECURITY SETTINGS ........................................................................................ 24

1
5.11 LANGUAGE &INPUT.......................................................................................... 24
5.12 BACKUP &RESET.................................................................. 25
5.13 ACCOUNT............................................................................................................. 26
26
5.14 DATA&TIME ..................................................................................................................
5.15 ABOUT THE BOX ................................................................................................ 27
6TROUBLESHOOTING ............................................................................................................28
7SPECIFICATION ......................................................................................................................29

2
1 Safe Caution
NOTICE: To prevent fire and electric shock, do not expose this
receiver to rain or moisture. In order to avoid any possible risk of
electric shock, never attempt to open the unit. In case of the unit
breaking down, repair of the unit should be carried out by qualified
technicians. No part of this unit should be repaired by users.
WARNING!
!Presence of live parts inside the unit! Do not open. Risk of electric shock! No part should
be repaired by users.
!The maintenance of the receiver should be carried out exclusively by qualified persons.
!If the power cord is damaged, it must be replaced or repaired by the manufacturer, its
after-sales service, qualified electrician or persons of similar qualification in order to avoid
possible danger.
!The product must be installed in accordance with national regulations.
!The used batteries must be disposed of safely. Throw them in appropriate rubbish bins in
order to protect the environment.
Proper Installation
!Place the receiver on a flat, firm and stable surface. Do not put it on a carpet or rug.
!Do not place the receiver on top of another device, such as an amplifier. This may lead to
overheating.
!Do not put anything above the unit (for example, CDs or magazines).
Sufficient Ventilation
!Place the receiver in a well-ventilated location to prevent accumulation of internal heat.
Allow a gap of at least 10cm to the rear and the top of the unit, as well as a space of 5cm
to both sides to avoid overheating.
!Do not obstruct any ventilation openings with items such as newspapers, tablecloths,
curtains, etc.
Protecting the Receiver from High Temperatures, Humidity, Water and Dust
!The receiver should not be exposed to dripping water or splashing.
!No objects filled with liquids, such as vases, shall be placed on the unit.
!Do not place any objects that might damage your unit near it (e.g. liquid filled objects or
candles).
!Do not place any source of flames such as lit candles on the receiver.
Electricity Supply
!Please unplug the receiver in case of prolonged non-use.
!If the power cord is damaged, it must be replaced or repaired by the manufacturer, its
after-sales service, qualified electrician or similar qualifications to those to avoid possible
danger.
!The plug must remain readily accessible after the installation of the product.
3
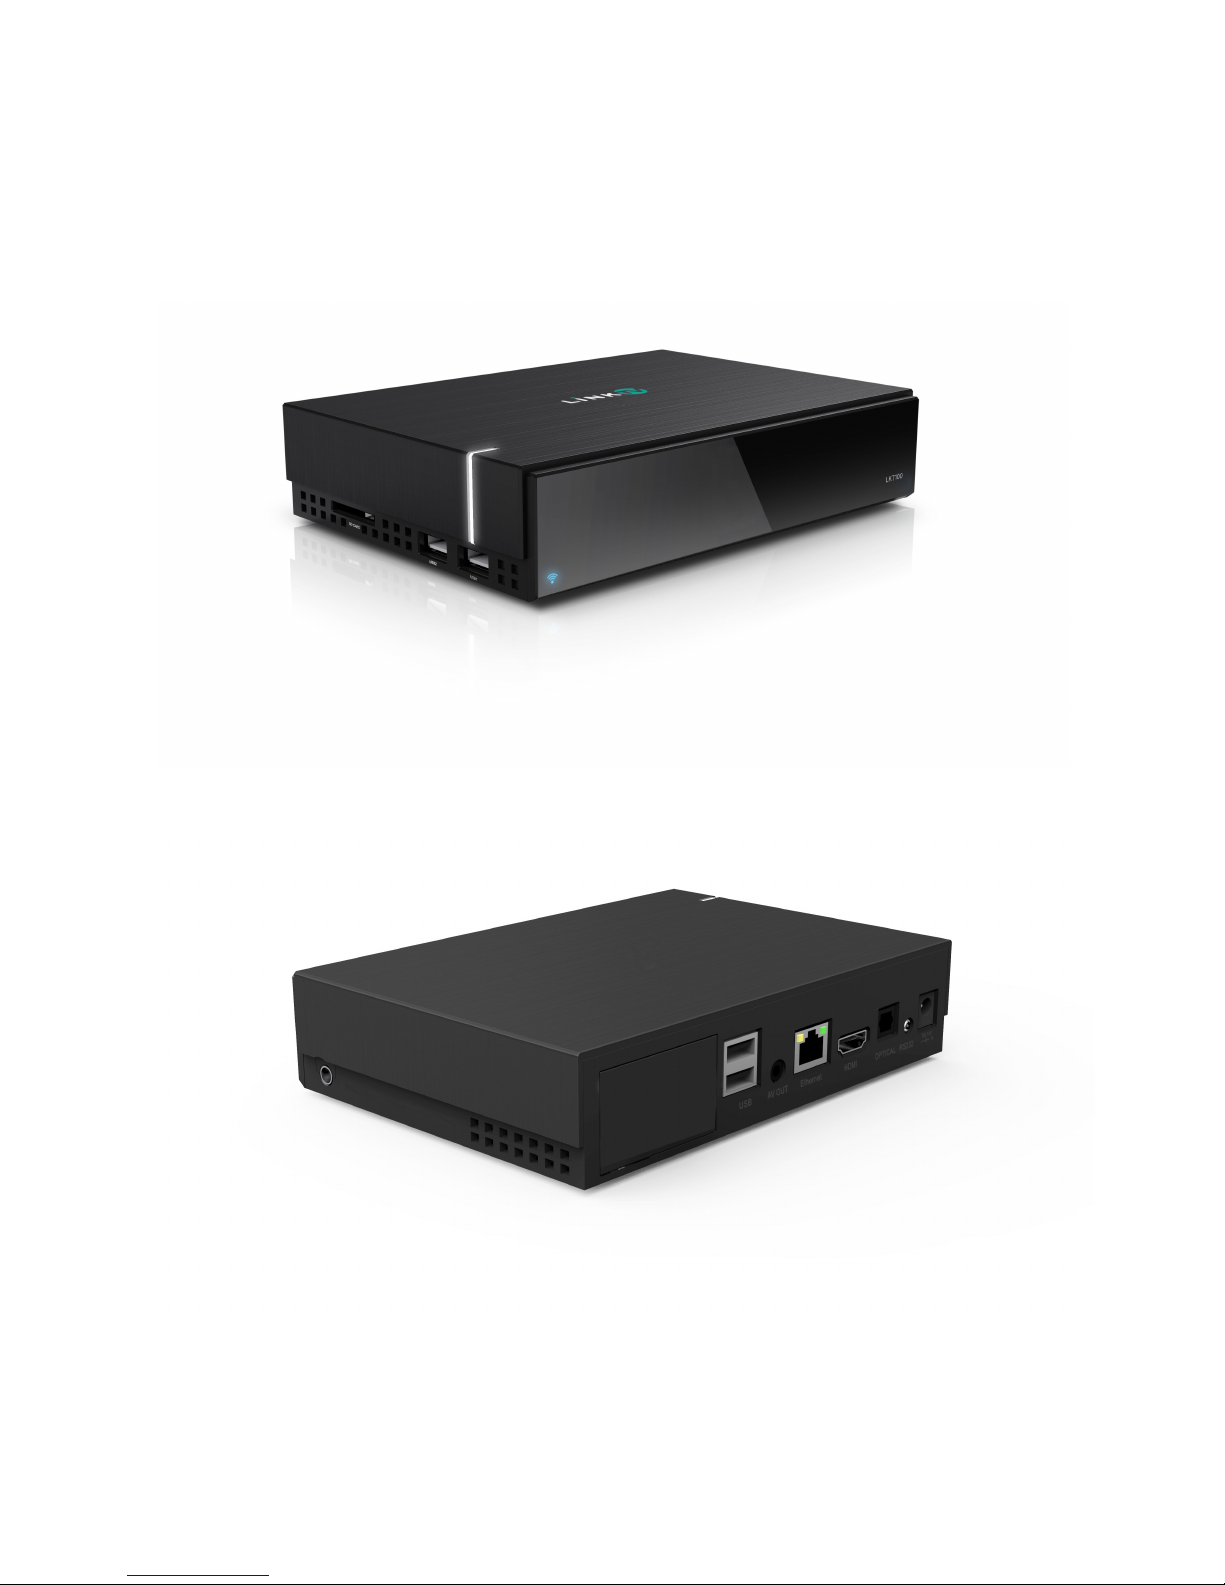
2 Product appearance
The pictures show what our product looks like:
Front panel:
Rear panel:
NOTICE: The pictures are for references only; please make the object as the standard

4
Devices Connection
As shown, connect the interfaces on the television with the corresponding interfaces on
the product (such as connect the product with TV sets through the HDMI cable), then after
the power is connected, turn on the switch and you can use the product.
NOTE: If you connect the device with AV cable, then you must choose “HDMI 576i”
option inside “SETTINGS>DISPLAY>Output Mode”
NOTICE: The picture is for references only, please make the object as the standard.

5
3 Remote control
NOTICE: The picture is for references only, please make the object as the standard.

6
4 Basic Operations
When you open the home screen, it shows like below:
After you turn on your Box, Home opens. There are 6 items (SETTING, HELP, RADIO,
YOUTUBE, MOVIES, ANDROID) on the screen. There are the classifications of some
apps.
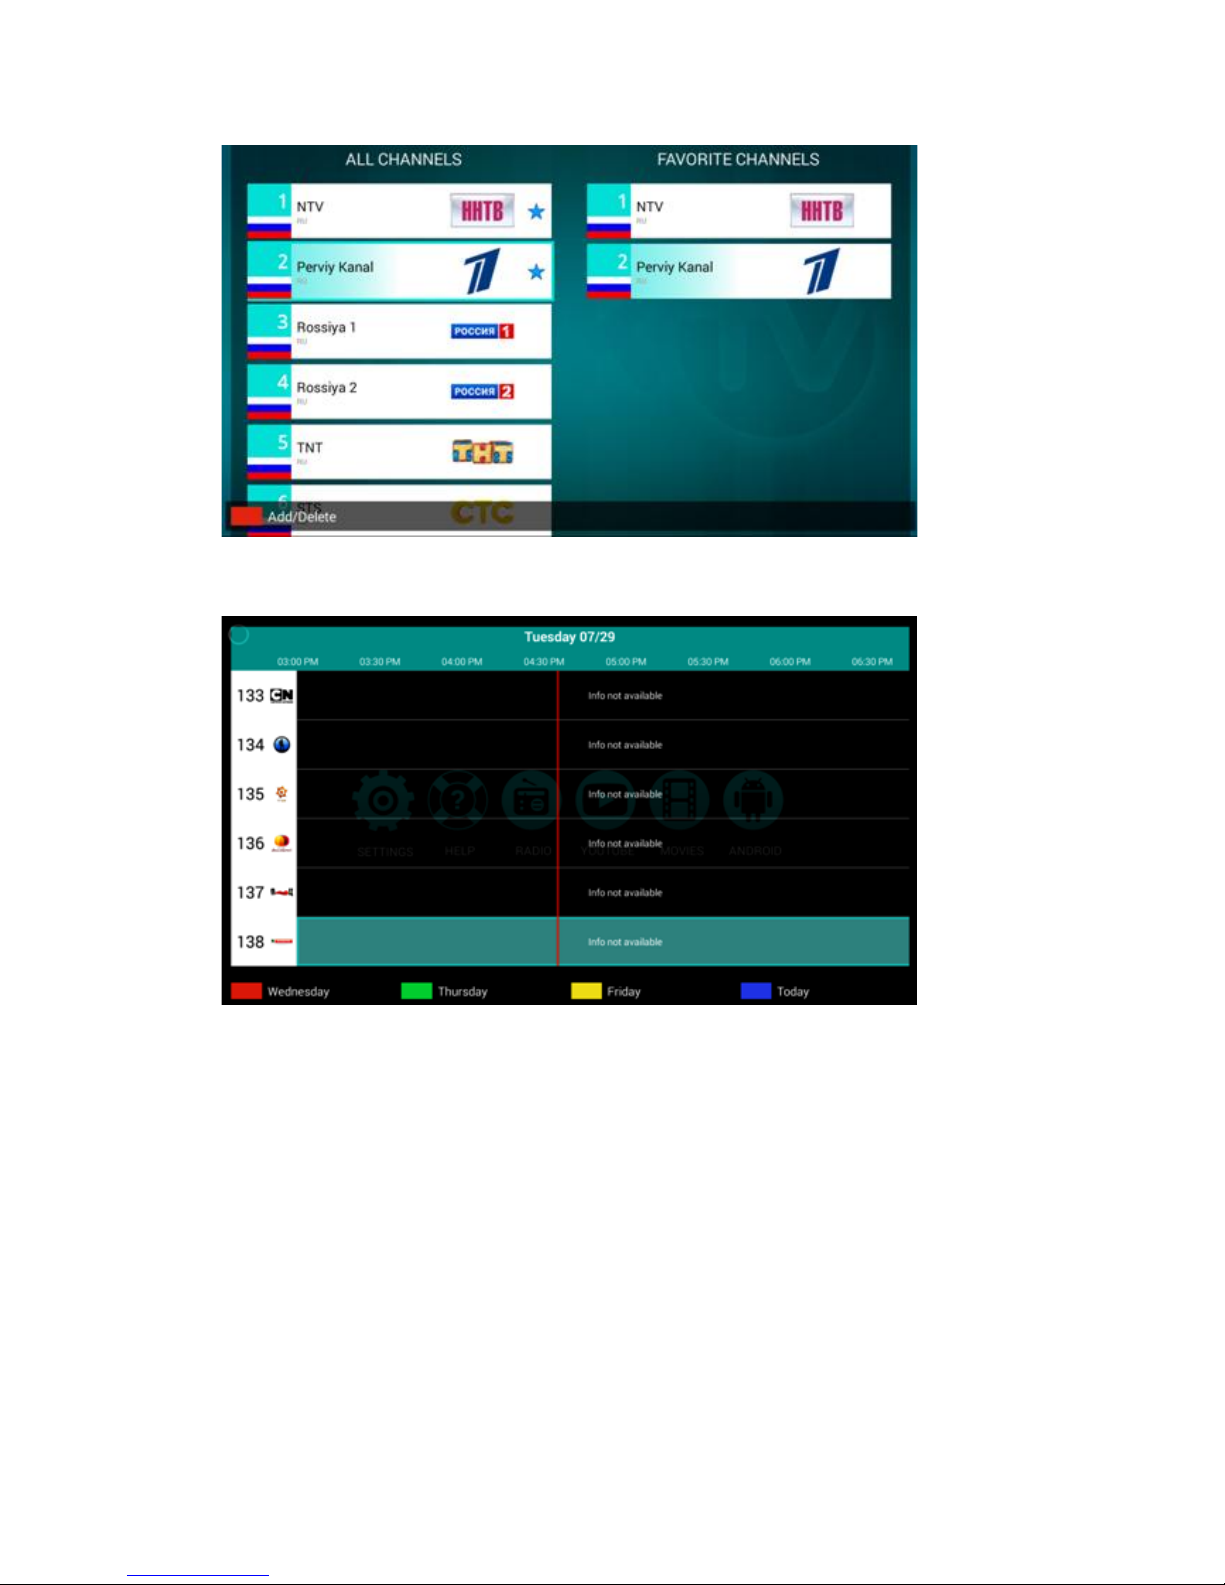
If you press the Blue button on your controller Open Fav List ,you will see below :
You can press the red button on your controller to add or delete the channels to your
favorite channels:
7
Click EPG on your controller,you can see the EPG as below,:
In the SETTING item, you can see 4 selections,General Setting, Choose Coutry, Manage
Favorites, Switch to Favorite Channels, press general Setting to do some basic setting of
your devices

8
In the SETTING item,if you click Choose Country ,this picture will appear.
9
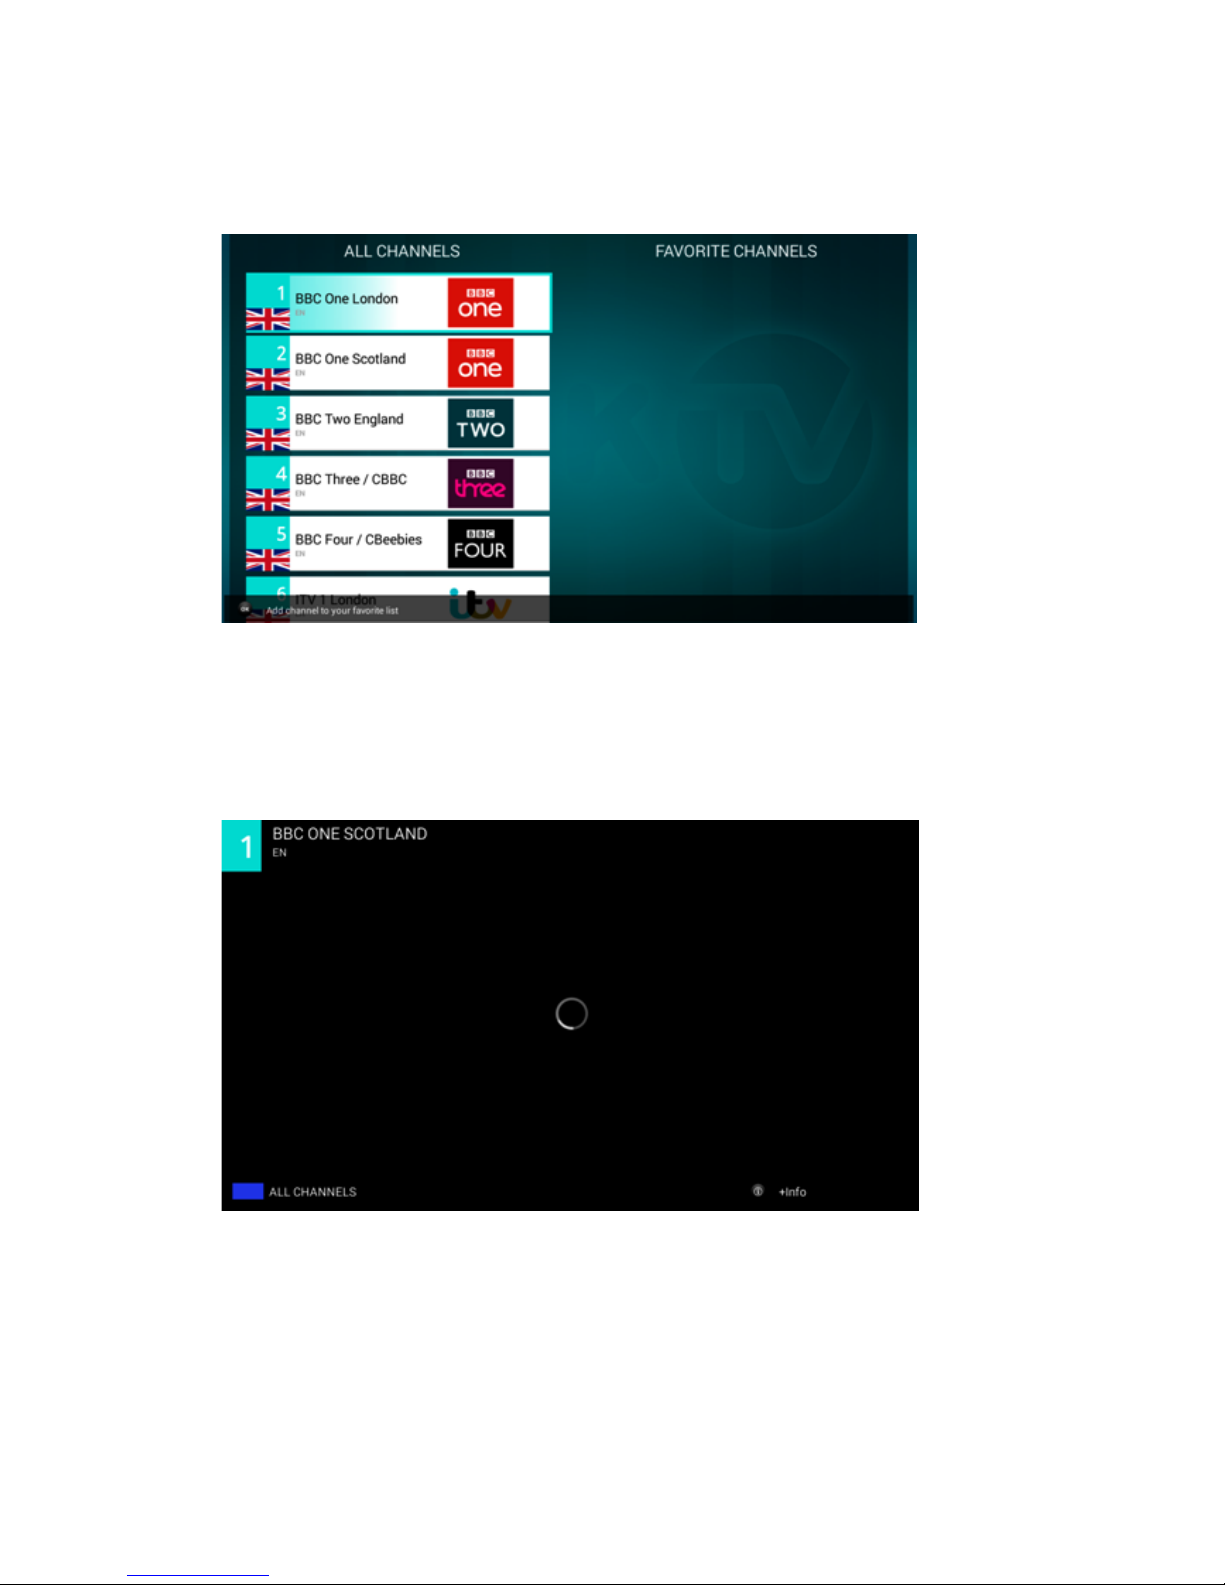
In the SETTING item, if you click Manage Favorites ,you can manage your favorite
channels ,add or delect your preferred channel to the list,
In the SETTING item,if you click Switch to Favorite Channels ,your favorite channel will
appear on the screen,and you can press the blue button on your control to back to all
channels.
10
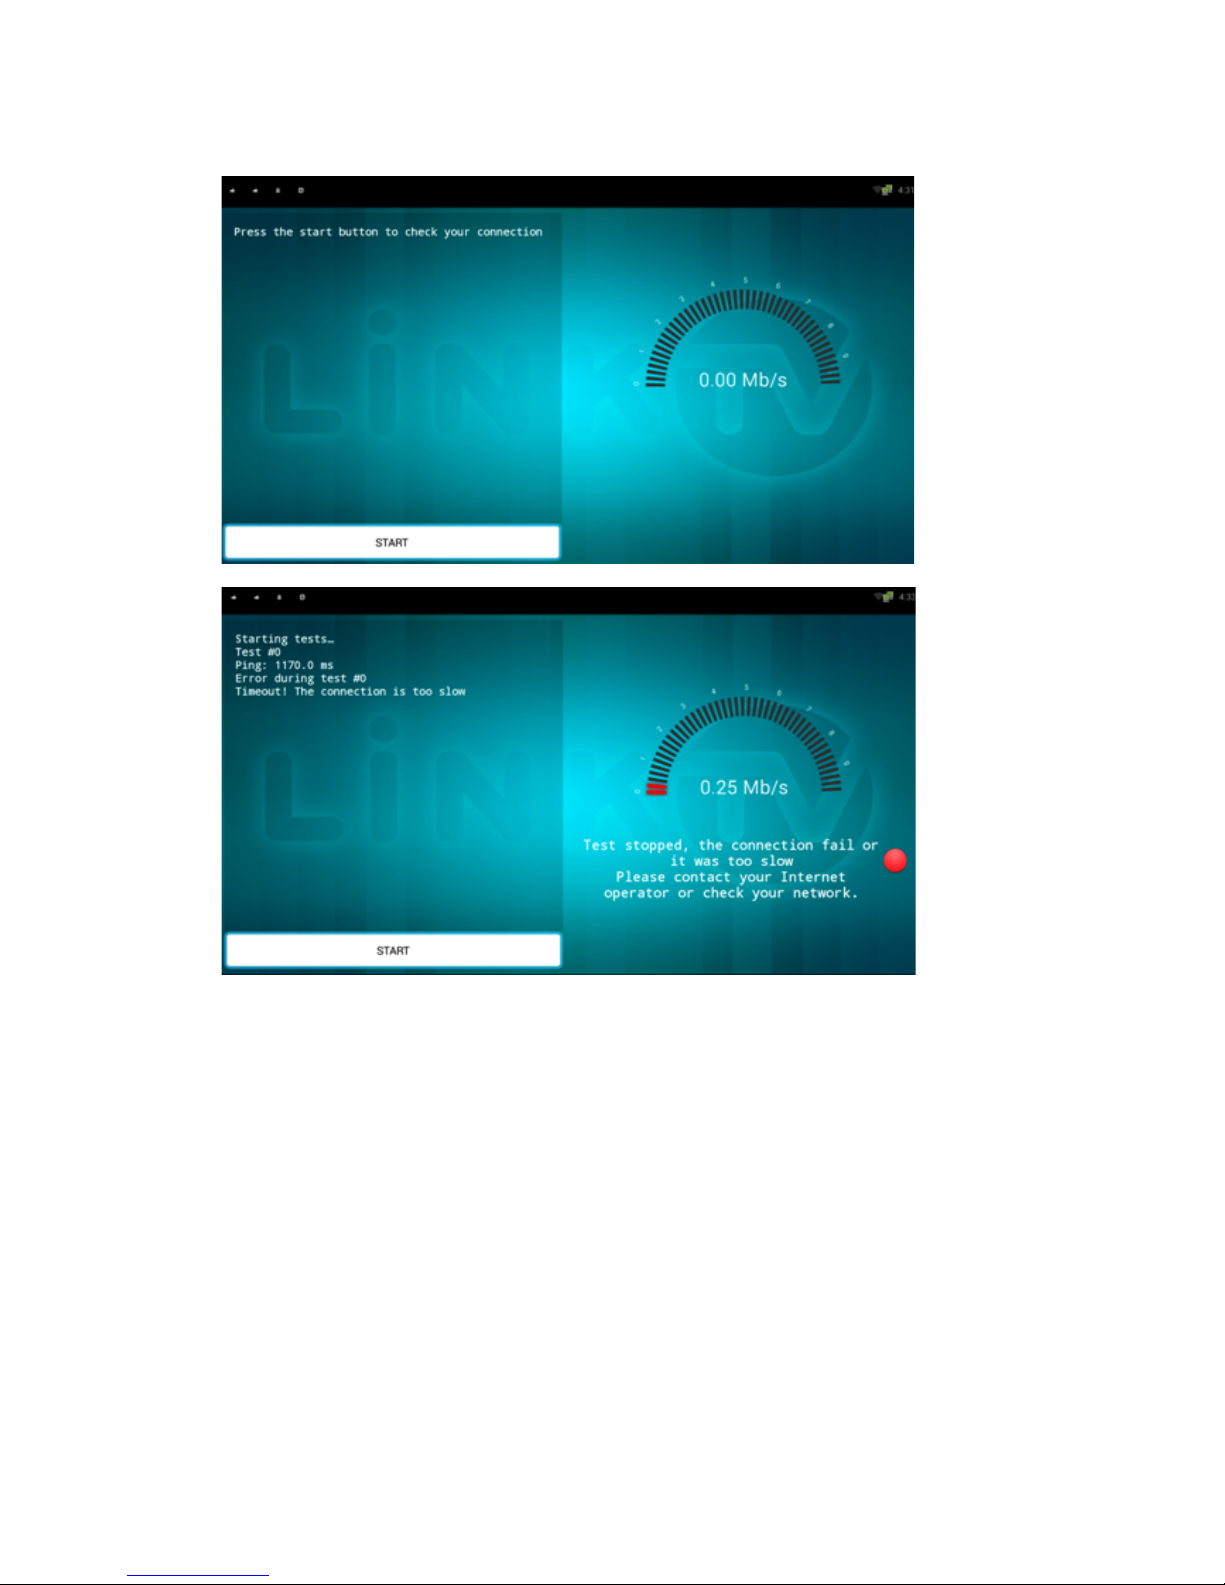
In the HELP item, it will show if you press START can check your connection.
11
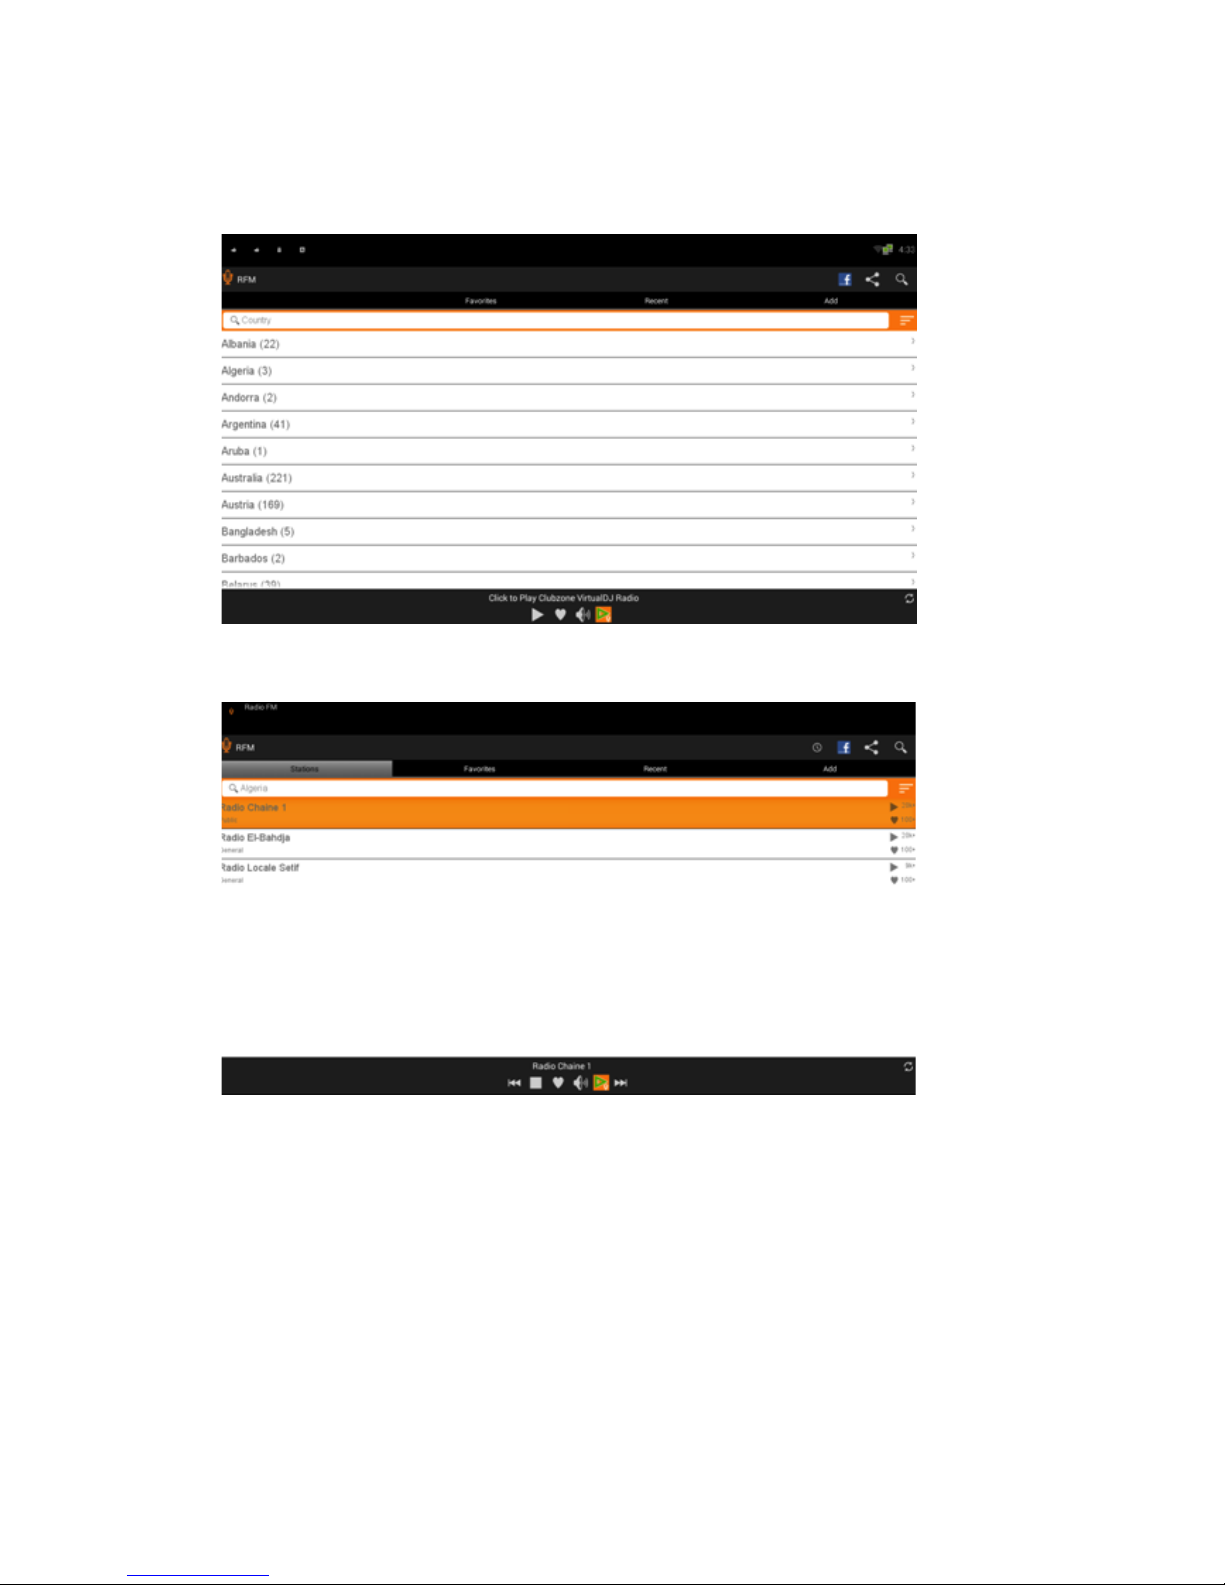
In the RADIO item, there will have quantity of RFM from different, countries .choose from
one station ,you can listen to the radio immediately.
12
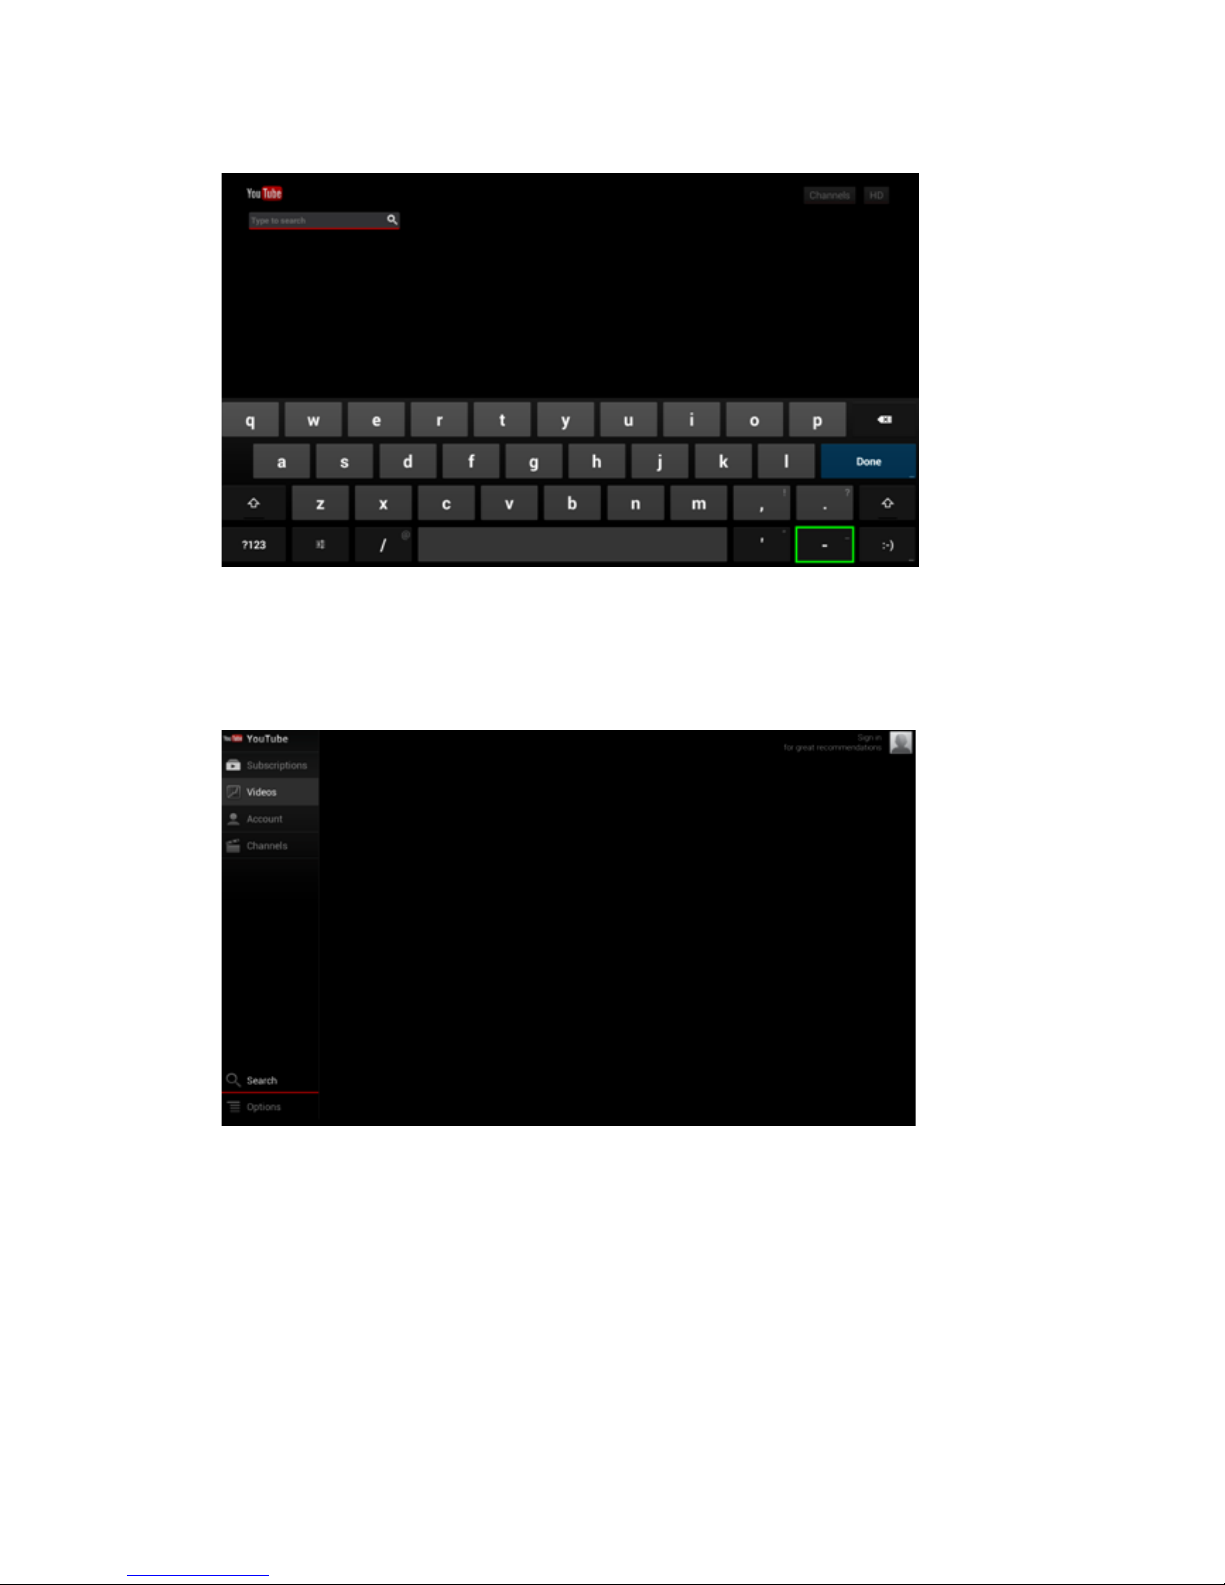
In the YOUTUBE item, you can search for videos,audios,etc

13
In the MOVIES item, there has a lot of online movies for your reference,
14
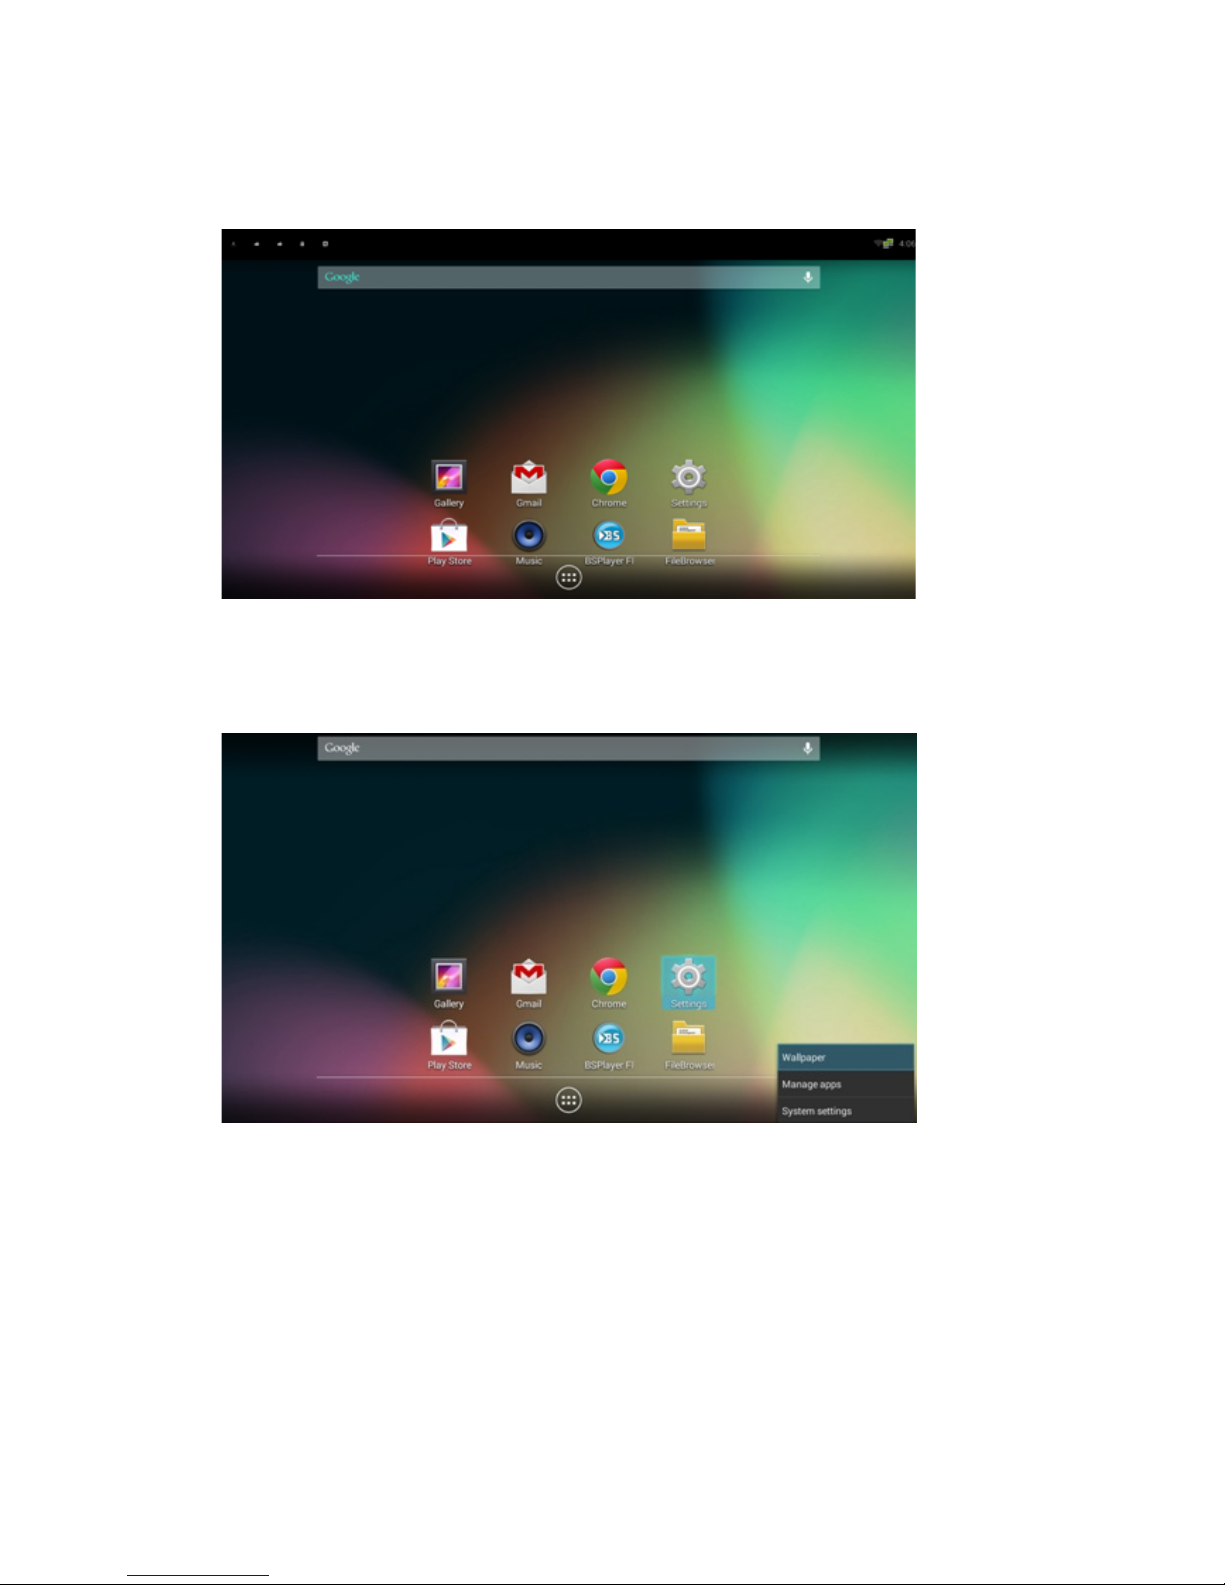
In the ANDROID Button,you can see 8 buttons as Gallery,Gmail,Chrome,Settings,Play
Store,Music,BSPlayer Free,FileBrower.
And when you see the screen above,if you press MENU on your controller,it will show 3
selection,Wallpaper to change your wall paper.manange apps to to some configuration of
your apps,and press system setting to back to the general setting.
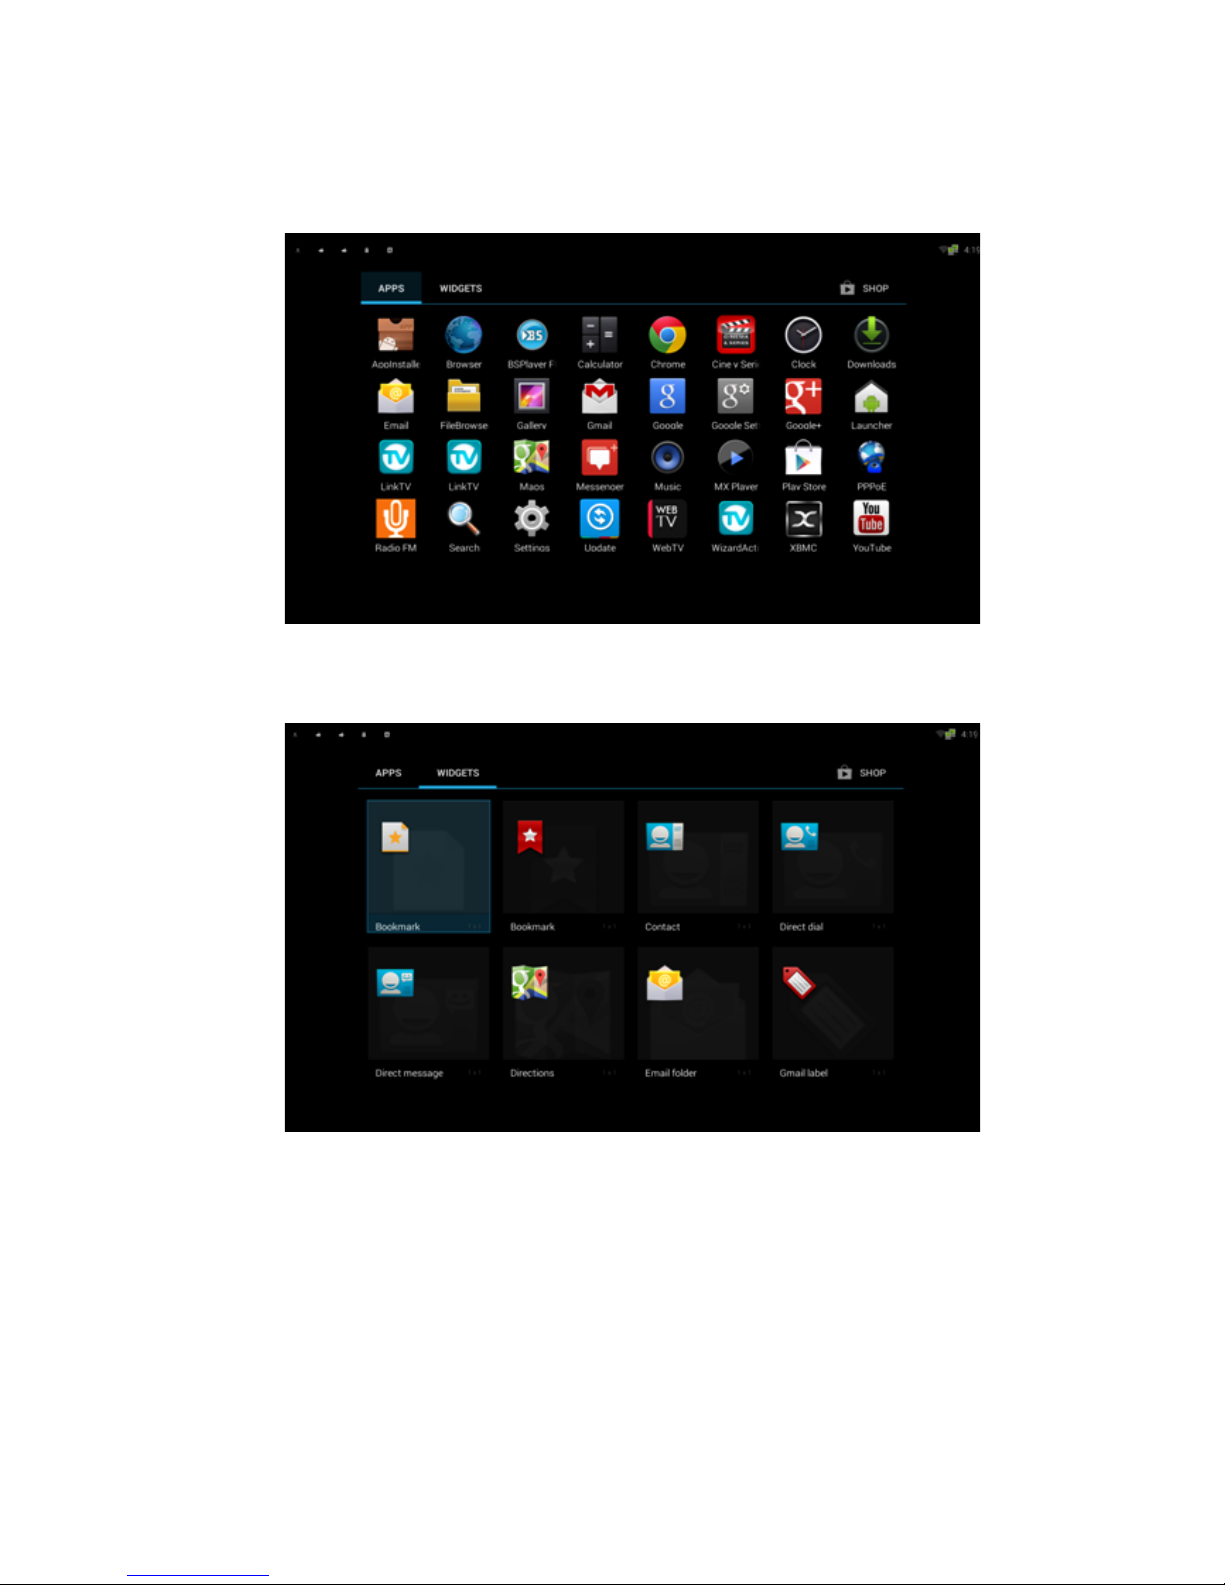
On the buttom of the screen, there are six icons appeared which were what you have
used recently. . And there are 3 grew icons——MY APPS, WIDGETS, and the SHOP
15
The MY APPS contains all apps install in your product, open it and you can see all
apps in your Box.
The WIDGETS contains some apps such the clock display. Click the icon for a while
and you can change its place.

16
And if you choose to click the SHOP icon, you can see the screen like below:
5 System setting
This part is about the Android Setting. Click the icon Android Setting and you can see
the screen like this.
5.1 Wi-Fi networks
Connect to the Wi-Fi network.
Wi-Fi is a wireless networking technology that can provide Internet access at distances
of up to 100 meters, depending on the Wi-Fi router and your surroundings. To use
Wi-Fi, you connect to a wireless access point, or "hotspot." Some hotspots are open
and you can simply connect to them. Others implement security features that require
other steps to set up, such as digital certificates or other ways to ensure that only
authorized users can connect.
17
To extend the life of your battery between charges, turn off Wi-Fi when you're not using
it. You can also set your device to disconnect automatically from Wi-Fi networks when
it's sleeping.
Turn Wi-Fi on and connect to a Wi-Fi network
If you're adding a Wi-Fi network when first setting up your device, Wi-Fi is turned on
automatically.
1、Click the Settings icon “setting” on a Home or All Apps screen.
2、Click the icon More, then choose Wi-Fi.
3、Slide the Wi-Fi switch to the On position. The device scans for available Wi-Fi
networks and displays the names of those it finds. Secured networks are indicated with
a Lock icon. If the device finds a network that you connected to previously, it connects
to it.
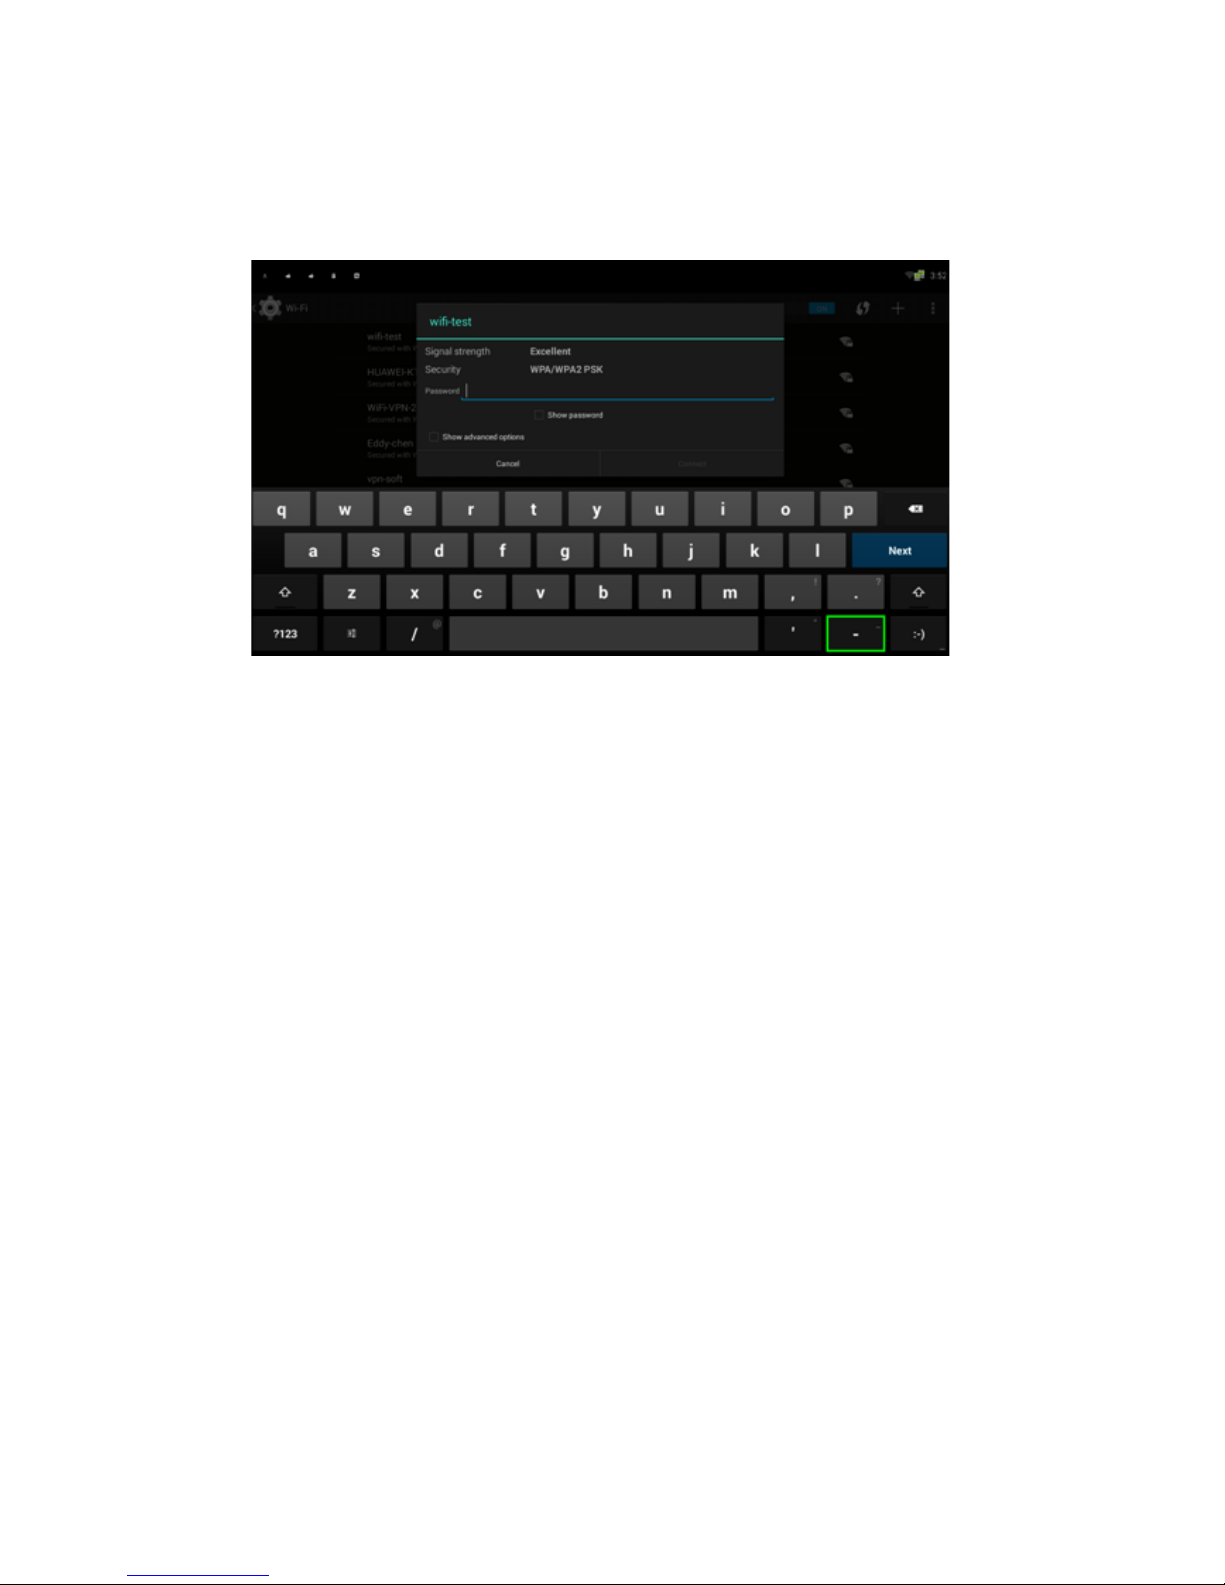
4、Click a network name to see more details or connect to it. If the network is secured,
you're prompted to enter a password or other credentials. (Ask your network
administrator for details.
To modify a network's settings, Click & hold the network name.
Forget the Wi-Fi network.
You can make the device forget about the details of a Wi-Fi network that you added;
for example, if you don't want the tablet to connect to it automatically or if it's a network
that you no longer use.

18
1、Turn on Wi-Fi, if it's not already on.
2、In the Wi-Fi settings screen, Click the name of the network.
3、Click Forget in the dialog that opens.
When you connect to a Wi-Fi network, the stick obtains a network address and other
information it needs from the network, using the DHCP protocol.
5.2 Ethernet
First, click the item More, then you can see the icon Ethernet on the right side. Here you
can choose to use the Ethernet. Then connect you Ethernet and you can use it.
Table of contents


