LinMot H Series User manual

Installation Guide
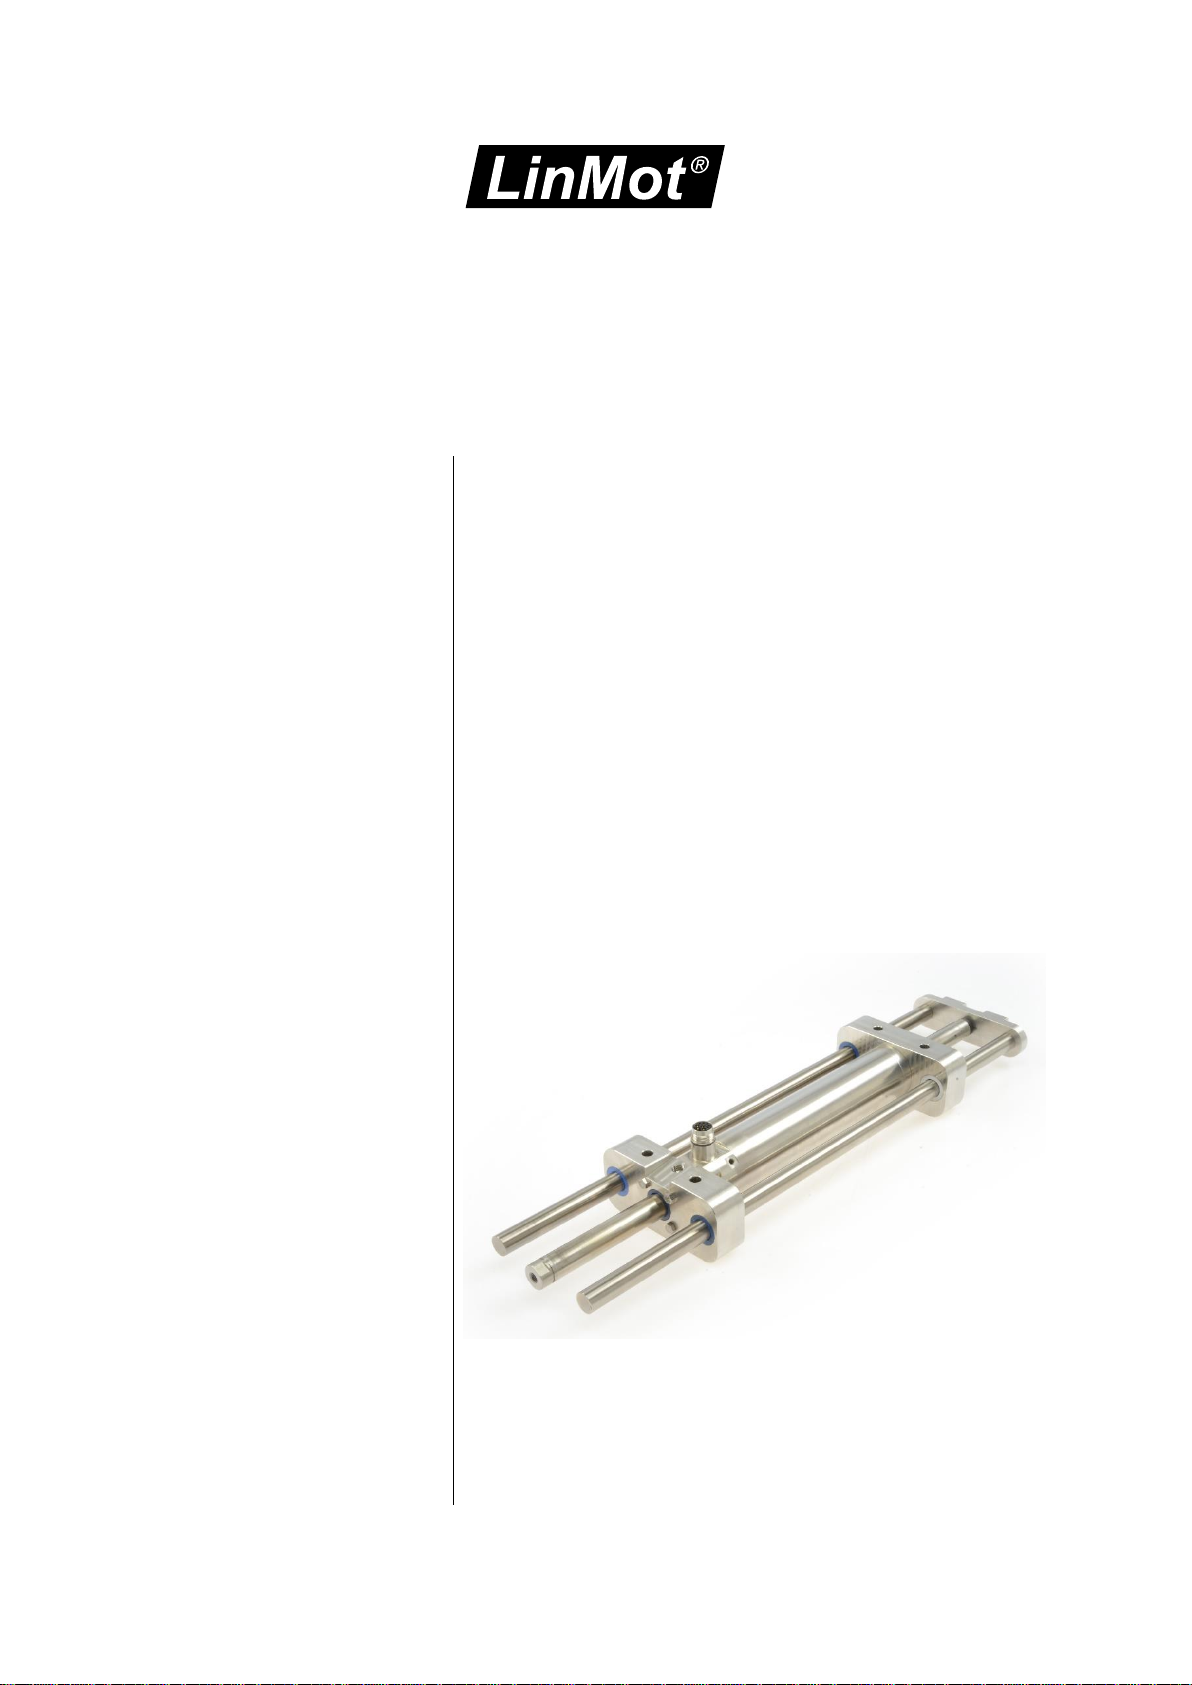
LinMot H-Linear Guides
Type: H01-37-SSC
H01-48-SSC
Montageanleitung
LinMot H-Linearführungen
Typ: H01-37-SSC
H01-48-SSC

Version 1.2 / Mi 20160523 Dok.-Nr. 0185-1125-E-D

Installation guide
NTI AG / LinMot®www.LinMot.com 1
Content
1General information......................................... 2
1.1 Introduction......................................... 2
1.2 Explanation of symbols....................... 2
1.3 Liability................................................ 3
1.4 Copyright............................................. 3
2Safety instructions ........................................... 4
3Product Overview ............................................ 7
3.1 H01-37…-SSC Guide ......................... 7
3.2 H01-48…-SSC Guide ......................... 9
4Ordering information......................................11
4.1 H01-37-SSC Guides without fluid
cooling............................................... 11
4.2 H01-37-SSC Guides with fluid
cooling............................................... 11
4.3 H01-48-SSC Guides without fluid
cooling............................................... 12
4.4 H01-48-SSC Guides with fluid
cooling............................................... 12
5Installation instructions .................................. 13
5.1 Operating conditions.........................13
5.2 Instructions for installing the guide and
motor.................................................13
6Maintenance.................................................. 16
6.1 Maintenance instruction.................... 16
6.2 Cleaning............................................16
6.3 Lubrication ........................................ 17
7Storage, transport, installation altitude.......... 18
8Dimensions H01-37 –SSC.............................19
9Dimensions H01-48 –SSC............................20
10 Mass.......................................................21
Inhalt
1Allgemeines......................................................2
1.1 Einleitung.............................................2
1.2 Symbolerklärung..................................2
1.3 Haftung................................................3
1.4 Urheberschutz .....................................3
2Warnhinweise...................................................4
3Produktübersicht ..............................................7
3.1 H01-37…-SSC Führung ......................7
3.2 H01-48…-SSC Führung ......................9
4Bestellinformation.......................................... 11
4.1 H01-37-SSC Führungen ohne
Flüssigkeitskühlung .......................... 11
4.2 H01-37-SSC Führungen mit
Flüssigkeitskühlung .......................... 11
4.3 H01-48-SSC Führungen ohne
Flüssigkeitskühlung .......................... 12
4.4 H01-48-SSC Führungen mit
Flüssigkeitskühlung....................................... 12
5Montagehinweise .......................................... 13
5.1 Betriebsbedingungen........................ 13
5.2 Montageanleitung Führung und
Motor................................................. 13
6Wartung......................................................... 16
6.1 Wartungshinweis .............................. 16
6.2 Reinigung.......................................... 16
6.3 Schmierung....................................... 17
7Lagerung, Transport, Aufstellhöhe................ 18
8Dimensionen H01-37 –SSC.......................... 19
9Dimensionen H01-48 –SSC.......................... 20
10 Massen................................................... 21

Montageanleitung
2 www.LinMot.com NTI AG / LinMot®
1 General information
1 Allgemeines
1.1 Introduction
1.1 Einleitung
This manual includes instructions for the assembly, installation, maintenance, transport, and
storage of linear motors.
Two language versions are included in this manual. The English version is characterized by
regular font. The German version has a grey background and the font is italic.
The document is intended for electricians, mechanics, service technicians, and warehouse
staff.
Be sure to observe the general safety instructions as well as those in each chapter at all times.
Keep this manual accessible to the assigned staff.
Dieses Handbuch beschreibt den Zusammenbau, die Montage, die Wartung sowie den
Transport und Lagerung von Linearmotoren.
Es sind zwei Sprachversionen (englisch, deutsch) in dem Handbuch eingeschlossen. Englisch
ist durch eine reguläre Schrift gekennzeichnet. Die deutsche Übersetzung ist anhand der
grauen Umrahmung und der kursiven Schriftart erkennbar.
Das Dokument wendet sich an Elektriker, Monteure, Servicetechniker und Lagerpersonal.
Halten Sie die allg. Sicherheitshinweise sowie jene im betreffenden Abschnitt jederzeit ein.
Bewahren Sie diese Betriebsanleitung zugänglich auf, und stellen Sie sie dem beauftragten
Personal zur Verfügung.
1.2 Explanation of symbols
1.2 Symbolerklärung
Triangular warning symbols warn against a danger.
Dreieckige Warnzeichen warnen vor einer Gefahr.
Round command symbols tell what to do.
Mit dem runden Gebotszeichen werden bestimmte Verhaltensweisen vorgeschrieben.

Installation guide
NTI AG / LinMot®www.LinMot.com 3
1.3 Liability
1.3 Haftung
NTI AG (as the manufacturer of LinMot and MagSpring products) is not responsible for any
damage caused by improper use, application, or handling of materials manufactured or
supplied by NTI AG and is not responsible for any consequential damages of any sort relating
to the use of LinMot or MagSpring products.
NTI AG’s warranty is limited to repair or replacement as stated in our standard warranty policy
as described in our "terms and conditions" previously supplied to the purchaser of our
equipment (please request copy of same if not otherwise available). Product warranties are
void if products are used with stators, sliders, or servo drives not manufactured by NTI AG
unless such use was specifically approved by NTI AG.
Further reference is made to our general terms and conditions.
NTI AG (als Hersteller von LinMot Linearmotoren und MagSpring Produkten) lehnt jede
Haftung für Schäden ab, die durch die unsachgemässe Handhabung der Linearmotoren
entstehen. Ebenso entfällt jeglicher Garantieanspruch beim Einsatz bzw. in Kombination mit
Fremdprodukten wie Statoren, Läufer und Servo Drives. Mit dem Kauf bestätigen Sie, dass Sie
die in der Montageanleitung aufgeführten Warnungen gelesen und verstanden haben. Zu jeder
Lieferung wird ein Hinweis-Blatt mit demselben Inhalt geliefert. Bitte fügen Sie dieses
Hinweisblatt auch bei, falls Sie LinMot Motoren als Komponenten oder in Maschinen
weiterverkaufen.
Im Übrigen verweisen wir auf unsere "Allgemeinen Geschäftsbedingungen" in der jeweils
gültigen Ausgabe.
1.4 Copyright
1.4 Urheberschutz
This work is protected by copyright.
Under the copyright laws, this publication may not be reproduced or transmitted in any form,
electronic or mechanical, including photocopying, recording, microfilm, storing in an information
retrieval system, not even for training purposes, or translating, in whole or in part, without the
prior written consent of NTI AG.
LinMot® is a registered trademark of NTI AG.
Dieses Werk ist urheberrechtlich geschützt.
Alle Rechte, auch die der Übersetzung, des Nachdrucks und der Vervielfältigung des
Handbuches oder Teilen daraus, sind vorbehalten. Kein Teil des Werks darf ohne schriftliche
Genehmigung von NTI AG in irgendeiner Form (Fotokopie, Mikrofilm oder einem anderen
Verfahren), auch nicht für Zwecke der Unterrichtgestaltung, reproduziert oder unter
Verwendung elektronischer Systeme verarbeitet, vervielfältigt oder verbreitet werden.
LinMot® ist ein registriertes Markenzeichen von NTI AG.

Montageanleitung
4 www.LinMot.com NTI AG / LinMot®
2 Safety instructions
2 Warnhinweise
Contusions
Sliders contain neodynium magnets and have a strong attractive force.
Careless handling could cause fingers or skin to become pinched between sliders. This may
lead to contusions, bruises, and bone fractures.
Wear heavy protective gloves when handling sliders.
Quetschungen
Läufer bestehen aus Neodym Magneten und haben eine starke Anziehungskraft.
Bei unvorsichtiger Handhabung können Sie sich die Finger oder Haut zwischen zwei Läufern
einklemmen. Das kann zu Quetschungen, Blutergüssen bis zu Knochenbrüchen an den
betroffenen Stellen führen.
Tragen Sie bei der Handhabung von Läufern dicke Schutzhandschuhe.
Pacemaker / Implanted heart defibrillator
Sliders could affect the functioning of pacemakers and implanted heart defibrillators. For the
duration of a strong approach to a magnetic field, these devices switch into test mode and will
not function properly.
If you wear one of those devices keep the following distances between the pacemaker /
defibrillator and slider:
- Min. 250 mm (10ʺ) for slider diameters 27 mm and 28 mm (PL01-27 / 28)
- Min. 150 mm (6ʺ) for slider diameters 19 mm and 20 mm (PL01-19 / 20)
- Min. 100 mm (4ʺ) for slider diameter 12 mm (PL01-12)
Warn others who wear these devices to avoid getting too close to sliders.
Herzschrittmacher / Implantierter Defibrillator
Läufer können die Funktion von Herzschrittmachern und implantierten Defibrillatoren
beeinflussen. Für die Dauer einer zu starken Annäherung an ein Magnetfeld, schalten diese
Geräte in einen Testmodus und funktionieren nicht richtig.
Als Träger eines dieser Geräte halten Sie zwischen Herzschrittmacher bzw. Defibrillator und
Läufer folgende Mindestabstände ein:
- Min. 250 mm bei Läufer-Ø 27 und 28 mm (PL01-27 / 28)
- Min. 150 mm bei Läufer-Ø 19 und 20 mm (PL01-19 / 20)
- Min. 100 mm bei Läufer-Ø 12 mm (PL01-12)
Warnen Sie Träger solcher Geräte vor der Annäherung an den Läufer.
Magnetic field
Magnets integrated in the sliders produce a strong magnetic field. They could damage TVs and
laptops, computer hard drives, credit and ATM cards, data storage media, mechanical
watches, hearing aids, and speakers.
Keep magnets away from devices and objects that could be damaged by strong magnetic
fields.
Please keep a minimum distance of 250 mm (10ʺ) from the above mentioned objects.
Magnetisches Feld
Die in den Läufern verbauten Magnete erzeugen ein starkes Magnetfeld. Sie können unter
anderem Fernseher und Laptops, Computer-Festplatten, Kreditkarten und EC-Karten,
Datenträger, mechanische Uhren, Hörgeräte und Lautsprecher beschädigen.
Halten Sie Magnete von allen Geräten und Gegenständen fern, die durch starke
Magnetfelder beschädigt werden können.
Halten Sie für die oben genannten Objekte einen Sicherheitsabstand von min. 250 mm ein.

Installation guide
NTI AG / LinMot®www.LinMot.com 5
Burn hazard
The sliders of LinMot motors can reach temperatures of 80 °C, which may cause burns upon
contact.
Verbrennungsgefahr
Im Betrieb kann sich der Läufer bis auf 80 °C erwärmen, was bei Berührung zu Verbrennungen
führen kann.
Fast-moving machine parts
The sliders of LinMot linear motors are fast-moving machine parts. The user must take all
necessary precautions to prevent access during operation (provide covers, guards, etc.)
Bewegte Maschinenelemente
LinMot Linearmotoren sind hochdynamische Maschinenelemente. Der Kunde muss alle
notwendigen Vorkehrungen treffen, um Berührungen im Betrieb durch Abdeckungen,
Verschalungen, etc. auszuschliessen.
Mechanical handling
Neodymium magnets are brittle, heat-sensitive, and easily oxidized.
Colliding magnets could crack. Sharp splinters could be catapulted for several meters and
cause eye injury.
When drilling or sawing a magnet with improper tools, the magnet may break.
The heat that arises may demagnetise the magnet.
The magnet will oxidise and disintegrate due to the damaged coating.
Machining the sliders and the magnets they contain is not permitted.
Mechanische Bearbeitung
Neodym-Magnete sind spröde, hitzeempfindlich und oxidieren leicht.
Wenn zwei Magnete kollidieren können sie zersplittern. Scharfkantige Splitter können
meterweit geschleudert werden und Ihre Augen verletzen.
Beim Bohren oder Sägen eines Magneten mit ungeeignetem Werkzeug kann der Magnet
zerbrechen.
Durch die entstehende Wärme kann der Magnet entmagnetisiert werden.
Wegen der beschädigten Beschichtung wird der Magnet oxidieren und zerfallen.
Das mechanische Bearbeiten von Läufern und den darin enthaltenen Magneten ist nicht
gestattet.
Combustibility
When machining magnets, the drilling dust could easily ignite.
Machining the sliders and the magnets they contain is not permitted.
Entflammbarkeit
Beim mechanischen Bearbeiten von Neodym-Magneten kann sich der Bohrstaub leicht
entzünden.
Das Bearbeiten von Läufern und den darin enthaltenen Magneten ist nicht gestattet.

Montageanleitung
6 www.LinMot.com NTI AG / LinMot®
Slider
Linear Motor sliders must be handled with care, especially when not mounted inside the stator.
Damaging or warping the slider can result in shortened life and/or failure of the motor. The
slider is essentially a high-precision machine component consisting of neodymium magnets
and plastic materials assembled in a thin steel tube. Do not use sliders which are already
damaged on the surface (scratches, deformation, etc.). This can cause further damage to the
stator.
Läufer
Läufer bestehen aus einem hochpräzisen, dünnwandigen Edelstahlrohr in dem die
Antriebsmagnete untergebracht sind. Die LinMot Läufer sind mit Vorsicht zu behandeln.
Vermeiden Sie den Kontakt zu anderen Läufern oder Eisenteilen, da dadurch die Magnete und
die Läuferoberfläche beschädigt werden kann. Läufer mit bereits beschädigter Oberfläche
(Kratzer, Verformungen, etc.) sollten nicht weiterverwendet werden (kann zu Beschädigung
des Stators führen).
Effects on people
According to the current level of knowledge, magnetic fields of permanent magnets do not
have a measurable positive or negative effect on people. It is unlikely that permanent magnets
constitute a health risk, but it cannot be ruled out entirely.
For your own safety, avoid constant contact with magnets.
Store large magnets at least one meter away from your body.
Wirkung auf Menschen
Magnetfelder von Dauermagneten haben nach gegenwärtigem Wissensstand keine messbare
positive oder negative Auswirkung auf den Menschen. Eine gesundheitliche Gefährdung durch
das Magnetfeld eines Dauermagneten ist unwahrscheinlich, kann aber nicht vollkommen
ausgeschlossen werden.
Vermeiden Sie zu Ihrer Sicherheit einen dauernden Kontakt mit den Magneten.
Bewahren Sie grosse Magnete mindestens einen Meter von Ihrem Körper entfernt auf.
Temperature resistance
Keep slider away from unshielded flame or heat.
Temperature of greater than 120°C will cause demagnetization.
Temperaturbeständigkeit
Halten Sie die Läufer vor offener Flamme und Hitze fern.
Bei Temperaturen ab 120°C wird der Läufer entmagnetisiert.

Installation guide
NTI AG / LinMot®www.LinMot.com 7
3 Product Overview
3 Produktübersicht
3.1 H01-37…-SSC Guide
3.1 H01-37…-SSC Führung
Pos.
Item
Produkt
Description
Beschreibung
Material
Material
Part-No.
Artikel-Nr.
1
PS01-37x120F-HP-SSC…
Stator Stainless Steel IP69
1.4404 / 316 L
see chapt. 4.1 / 4.2
s. Abschn. 4.1 / 4.2
2
PL01-19x…
Slider 'high clearance'
Läufer 'untermassig'
1.4301 / 304
see chapt. 4.1 / 4.2
s. Abschn. 4.1 / 4.2
3
HL01-16x…-SSC
H-Guide-stainless steel rod 16h6
Führungswelle SSC 16h6
1.4435 / 316 L
H01-37x304/190-SSC
H01-37x304/290-SSC
H01-37x304/390-SSC
HL01-16x500-SSC
HL01-16x600-SSC
HL01-16x700-SSC
0150-5268 (2x)
0150-5269 (2x)
0150-5270 (2x)
4
HS01k-GL25x19.14x20
Back side plain bearing for H01-37-SSC
Gleitlager hinten für H01-37-SSC
Techtron HPV
PPS Food
Grade
*
5
HS01k-GL25x19.25x20
Front side plain bearing for H01-37-
SSC
Gleitlager vorne für H01-37-SSC
Techtron HPV
PPS Food
Grade
*
6
ST-G1/8x9.5-SSC
Hexagonal plugs for HS01-37/48-SSC
1.4404 / 316 L
(2x) 0160-0336
1
4
5
6
6
7
2
12
9
13
14
11
8
8
310
15

Montageanleitung
8 www.LinMot.com NTI AG / LinMot®
Sechskantstopfen für HS01-37/48-SSC
7
M5x35
Stainless steel screws
Schrauben INOX A4
1.4401 / 316
(8x) 0230-0240
8
HS01k-GL24x16x28
Plain bearings for H01-37-SSC
Gleitlager für H01-37-SSC
Techtron HPV
PPS Food
Grade
*
9
HS01k-37FP1-SSC
Front plate for H01-37-SSC
Frontplatte zu H01-37-SSC
1.4401 / 316
0160-0518
10
M8x25
Stainless steel screws
Schrauben INOX A4
1.4401 / 316
(2x) 0230-0253
11
HS01k-37EP-SSC
End plate for H01-37-SSC
Endplatte zu H01-37-SSC
1.4404 / 316 L
(2x) 0160-0515
12
Conical washer 8x3,2
Kugelscheibe 8x3,2
Stainless steel 1.4301
Stahl rostfrei 1.4301
1.4301 / 304
0160-0793
13
Washer M8
Scheibe M8
Stainless steel washer
Scheibe INOX A4
1.4401 / 316
0230-0330
14
M8x20
Stainless steel screws
Schrauben INOX A4
1.4401 / 316
0230-0242
15
M8x25
Stainless steel screws
Schrauben INOX A4
1.4401 / 316
0230-0253
* Parts 4, 5 and 8 are only available as kit:
Plain bearing kit for H01-37-SSC PB01-H01-37-SSC Part-No 0150-5299
* Die Teile 4,5 und 8 sind nur als Kit erhältlich:
Lagersatzkit zu H01-37-SSC PB01-H01-37-SSC Art.-Nr. 0150-5299

Installation guide
NTI AG / LinMot®www.LinMot.com 9
3.2 H01-48…-SSC Guide
3.2 H01-48…-SSC Führung
Pos.
Item
Produkt
Description
Beschreibung
Material
Material
Item-No.
Artikel-Nr.
1
PS01-48x240F-SSC-
C……
Stator Stainless Steel IP69
1.4404 / 316 L
see chapt. 4.3 / 4.4
s. Abschn. 4.3 / 4.4
2
PL01-27x…
Slider 'high clearance'
Läufer 'untermassig'
1.4301 / 304
see chapt. 4.3 / 4.4
s. Abschn. 4.3 / 4.4
3
HL01-20x…-SSC
H-Guide-stainless steel rod 20h6
Führungswelle SSC 20h6
1.4435 / 316 L
H01-48x401/210-SSC
H01-48x401/300-SSC
H01-48x401/390-SSC
H01-48x401/510-SSC
HL01-20x620-SSC
HL01-20x710-SSC
HL01-20x800-SSC
HL01-20x920-SSC
0150-5486..(2x)
0150-5275 (2x)
0150-5276 (2x)
0150-5270 (2x)
4
HS01k-GL34x27.1x20
Back side plain bearing for H01-48-SSC
Gleitlager hinten für H01-48-SSC
Techtron HPV
PPS Food
Grade
*
5
HS01k-GL34x27.25x20
Front side plain bearing for H01-48-SSC
Gleitlager vorne für H01-48-SSC
Techtron HPV
PPS Food
Grade
*
6
ST-G1/8x9.5-SSC
Hexagonal plugs for HS01-37/48-SSC
Sechskantstopfen für HS01-37/48-SSC
1.4404 / 316 L
(2x) 0160-0336
1
4
5
6
6
7
2
12
9
13
14
11
8
8
310
15

Montageanleitung
10 www.LinMot.com NTI AG / LinMot®
7
M6x35
Stainless steel screws
Schrauben INOX A4
1.4401 / 316
(8x) 0230-0254
8
HS01k-GL28x20x28
Plain bearings for H01-48-SSC
Gleitlager für H01-48-SSC
Techtron HPV
PPS Food
Grade
*
9
HS01k-48FP1-SSC
Front plate for H01-48-SSC
Frontplatte zu H01-48-SSC
1.4401 / 316
0160-0521
10
M8x25
Stainless steel screws
Schrauben INOX A4
1.4401 / 316
(2x) 0230-0253
11
HS01k-48EP-SSC
End plate for H01-48-SSC
Endplatte zu H01-48-SSC
1.4404 / 316 L
(2x) 0160-0520
12
Conical washer 10x4
Kugelscheibe 10x4
Stainless steel 1.4301
Stahl rostfrei 1.4301
1.4301 / 304
0160-0794
13
Washer M10
Scheibe M10
Stainless steel washer
Scheibe INOX A4
1.4401 / 316
0230-0331
14
M8x20
Stainless steel screws
Schrauben INOX A4
1.4401 / 316
0230-0242
15
M10x25
Stainless steel screws
Schrauben INOX A4
1.4401 / 316
0230-0255
* Parts 4, 5 and 8 are only available as kit:
Plain bearing kit for H01-48-SSC PB01-H01-48-SSC Part-No 0150-5300
* Die Teile 4,5 und 8 sind nur als Kit erhältlich:
Lagersatzkit zu H01-48-SSC PB01-H01-48-SSC Art.-Nr. 0150-5300

Installation guide
NTI AG / LinMot®www.LinMot.com 11
4 Ordering information
4 Bestellinformation
4.1 H01-37-SSC Guides without fluid cooling
4.1 H01-37-SSC Führungen ohne Flüssigkeitskühlung
Führung
Guide
Item-No.
Artikel-Nr.
Stator
Stator
Item-No.
Artikel-Nr.
Läufer
Slider
Part-No.
Artikel-Nr.
H01-37x304/190-SSC
0150-5272
PS01-37x120F-HP-SSC-R
0150-1282
PL01-19x500/420
0150-1455
H01-37x304/290-SSC
0150-5273
PS01-37x120F-HP-SSC-R
0150-1282
PL01-19x600/520
0150-1456
H01-37x304/390-SSC
0150-5274
PS01-37x120F-HP-SSC-R
0150-1282
PL01-19x700/620
0150-1457
4.2 H01-37-SSC Guides with fluid cooling
4.2 H01-37-SSC Führungen mit Flüssigkeitskühlung
Führung
Guide
Item-No.
Artikel-Nr.
Stator
Stator
Item-No.
Artikel-Nr.
Läufer
Slider
Part-No.
Artikel-Nr.
H01-37x304/190-SSC
0150-5272
PS01-37x120F-HP-SSC-R-FC
0150-1283
PL01-19x500/420
0150-1455
H01-37x304/290-SSC
0150-5273
PS01-37x120F-HP-SSC-R-FC
0150-1283
PL01-19x600/520
0150-1456
H01-37x304/390-SSC
0150-5274
PS01-37x120F-HP-SSC-R-FC
0150-1283
PL01-19x700/620
0150-1457
Order sample H01-37-SSC Guide
Bestellbeispiel H01-37-SSC Führung
1 pc 0150-5272 H01-37x304/290-SSC H01 Guide
1 pc 0150-1282 PS01-37x120F-HP-SSC-R Stator (without fluid cooling)
1 pc 0150-1455 PL01-19x600/520 Slider
1 Stk 0150-5272 H01-37x304/290-SSC H01 Führung
1 Stk 0150-1282 PS01-37x120F-HP-SSC-R Stator (ohne Wasserkühlung)
1 Stk 0150-1455 PL01-19x600/520 Läufer

Montageanleitung
12 www.LinMot.com NTI AG / LinMot®
4.3 H01-48-SSC Guides without fluid cooling
4.3 H01-48-SSC Führungen ohne Flüssigkeitskühlung
Führung
Guide
Item-No.
Artikel-Nr.
Stator
Stator
Item-No.
Artikel-Nr.
Läufer
Slider
Part-No.
Artikel-Nr.
H01-48x401/210-SSC
0150-5280
PS01-48x240F-SSC-C
0150-1267
PL01-27x620/540
0150-1470
H01-48x401/300-SSC
0150-5281
PS01-48x240F-SSC-C
0150-1267
PL01-27x710/630
0150-1471
H01-48x401/390-SSC
0150-5282
PS01-48x240F-SSC-C
0150-1267
PL01-27x800/720
0150-1472
H01-48x401/510-SSC
0150-5283
PS01-48x240F-SSC-C
0150-1267
PL01-27x920/840
0150-1447
4.4 H01-48-SSC Guides with fluid cooling
4.4 H01-48-SSC Führungen mit Flüssigkeitskühlung
Führung
Guide
Item-No.
Artikel-Nr.
Stator
Stator
Item-No.
Artikel-Nr.
Läufer
Slider
Part-No.
Artikel-Nr.
H01-48x401/210-SSC
0150-5280
PS01-48x240F-SSC-C-FC
0150-1268
PL01-27x620/540
0150-1470
H01-48x401/300-SSC
0150-5281
PS01-48x240F-SSC-C-FC
0150-1268
PL01-27x710/630
0150-1471
H01-48x401/390-SSC
0150-5282
PS01-48x240F-SSC-C-FC
0150-1268
PL01-27x800/720
0150-1472
H01-48x401/510-SSC
0150-5283
PS01-48x240F-SSC-C-FC
0150-1268
PL01-27x920/840
0150-1447
Order sample H01-48-SSC Guide
Bestellbeispiel H01-48-SSC Führung
1 pc 0150-5283 H01-48x401/510-SSC H01 Guide
1 pc 0150-1268 PS01-48x240F-SSC-C-FC Stator (with fluid cooling)
1 pc 0150-1447 PL01-27x920/840 Slider
1 Stk 0150-5283 H01-48x401/510-SSC H01 Führung
1 Stk 0150-1268 PS01-48x240F-SSC-C-FC Stator (mit Wasserkühlung)
1 Stk 0150-1447 PL01-27x920/840 Läufer

Installation guide
NTI AG / LinMot®www.LinMot.com 13
5 Installation instructions
5 Montagehinweise
5.1 Operating conditions
5.1 Betriebsbedingungen
Maximum ambient temperature limits : -10 °C…80 °C
Internal temperature sensor error occurs at 90 °C.
Die Grenze der Umgebungstemperatur liegt im Bereich von -10 °C…80 °C.
Die maximale Sensortemperatur liegt bei 90 °C.
5.2 Instructions for installing the guide and motor
5.2 Montageanleitung Führung und Motor
Please attend to the safety instructions in chapter 2 during the assembling!
Use thread-locking compound (e. g. Loctite 243) on every screw connection.
Beachten Sie unbedingt die Sicherheitshinweise im Kapitel 2 während der Montage!
Schraubensicherung (z. B. Loctite 243) bei jeder Schraubverbindung verwenden.
1a. Mount end plate (backside).
Insert the “backside plain bearing”(plain bearing
without notch) for the slider into the middle hole of
the end plate.
Insert the two plain bearings for the rods into the
right and left hole of the end plate.
Screw hexagonal plug into the end plate.
Note! Plate with “backside plain bearing”for the slider
will be used only in the back of the guide.
1a. Endplatte (hinten) montieren.
„Gleitlager hinten“ (Lager ohne Rille) für den Läufer
in das mittlere Loch der Endplatte einpressen.
Die beiden äusseren Gleitlager für die
Führungswellen in die Endplatte einpressen.
Sechskantstopfen mit der Endplatte verschrauben.
Hinweis! Endplatte mit Gleitlager (hinten) nur als hintere
Endplatte benutzen.

Montageanleitung
14 www.LinMot.com NTI AG / LinMot®
1b. Mount end plate (frontside).
Insert the”frontside plain bearing” (plain bearing
with notch) for the slider into the middle of the end
plate.
Insert the two plain bearings for the rods into the
right and left hole of the end plate.
Screw hexagonal plug into the plate.
Note! Plate with”frontside plain bearing”will be used
only in the front of the guide.
1b. Endplatte (vorne) montieren.
Gleitlager (vorne) (Lager mit Rille) in die Mitte der
Endplatte einpressen.
Gleitlager der Führungswellen in die Endplatte
einpressen.
Sechskantstopfen mit der Endplatte verschrauben.
Hinweis! Endplatte mit Gleitlager (vorne) nur als
vordere Endplatte benutzen.
2. Mounting Stator.
Mount plates to the stator.
Gradually tighten diagonally opposite screws in
sequence
Note! Back side plate (see step 1a) must be mounted to
the stator side with the connector, hexagonal plug facing
the top. Front side plate (step 1b) must be mounted with
hexagonal plug facing the bottom.
Note! Both plates must be mounted absolutely parallel
to each other to maintain smooth movement. Use flat
mounting platform
2. Stator befestigen.
Endplatten an den Stator montieren.
Diagonal liegende Schrauben schrittweise,
nacheinander festziehen.
Hinweis! Endplatte für hinten (siehe Schritt 1a) muss an
der steckerseite des Stators mit dem Sechskantstopfen
nach oben montiert werden.
Endplatte für vorne (1b) muss mit dem
Sechskantstopfen nach unten montiert werden.
Hinweis! Beide Platten müssen absolut parallel
zueinander montiert werden, damit eine reibungsarme
Bewegung sichergestellt ist.
Montage auf einer
ebenen Grundplatte.
3. Insert rods.
Insert the rods into the guide with the thread
showing to the front side.
3. Führungswellen einführen.
Führungswellen in die Führung, mit den Gewinden
nach vorne zeigend, einführen.

Installation guide
NTI AG / LinMot®www.LinMot.com 15
4. Mounting front plate.
Move rods to the front side plate and align both rods
that the connected rods run smoothly. Tighten the
rods. If the unit doesn’t run smoothly repeat the
process.
4. Frontplatte befestigen.
Frontplatte mit Führungswellen fest verschrauben.
Dazu Wellen bis zum Anschlag einschieben und so
lange ausrichten, bis sich die montierte Einheit leicht
bewegen lässt. Vorgang evtl. mehrfach wiederholen.
5. Mounting slider.
Important! Mount slider into the stator with serial
number showing to the front.
Place conical washer between end plate and slider
and put screw through end plate and conical
washer.
Pull slider lightly to the tip and screw slider firmly.
Test if unit runs smooth else repeat process several
times.
5. Läufer befestigen.
Wichtig! Läufer in den Stator so einführen, dass
das Läuferende mit der Serienummer vorne ist.
Kugelscheibe zwischen Frontplatte und Läufer
halten und die Schraube durchführen.
Läufer etwas nach oben ziehen und festschrauben
Auf leichten Lauf prüfen. Vorgang gegebenfalls
mehrfach wiederholen.
6. Screw safety washer.
Screw safety washer to slider.
6. Sicherungscheibe montieren.
Ausfallsicherung (Sicherungscheibe) festschrauben.

Montageanleitung
16 www.LinMot.com NTI AG / LinMot®
6 Maintenance
6 Wartung
6.1 Maintenance instruction
6.1 Wartungshinweis
The guides must be inspected weekly. If there is no lubrication film on the rods and on the
slider, a cleaning and lubrication process has to be performed. If the bearings show wear or if
the rods show an excessive clearance, the bearings must be exchanged. In case that the rods
show linear grooves, the rods have to be replaced as well.
Die Führungen sind wöchentlich auf genügende Schmierung und Abnutzung zu überprüfen. Ist
kein Schmierfilm mehr vorhanden, ist eine Schmierung mit vorgängiger Reinigung vorzusehen.
Zeigen sich an den Lagern Abnützungserscheinungen bzw. haben Wellen ein übermässiges
Spiel sind die Lager auszutauschen. Falls die Führungsstangen starke Rillen aufweisen, sind
diese ebenfalls zu ersetzen.
6.2 Cleaning
6.2 Reinigung
The guide can be cleaned with pressurized water or any common cleaning solutions which are
used in the food industry. The inside of the stator can be flushed as shown in the picture below.
After the cleaning process the guide must be lubricated (see 6.3 Lubrication).
Die Führung kann mit Wasser (unter Druck) oder mit den üblichen Reinigungsmitteln, in der
gewohnten Konzentration und Menge wie in der Lebensmittelindustrie üblich, gereinigt werden.
Mithilfe der Bohrungen in den Führungsendplatten kann der eingebaute Stator von innen
zusammen mit dem Läufer durchgespült werden. Siehe Schnittzeichnung unten.
Nach erfolgter Reinigung sollte die Führung geschmiert werden (siehe 6.3 Schmierung).

Installation guide
NTI AG / LinMot®www.LinMot.com 17
6.3 Lubrication
6.3 Schmierung
After the cleaning process the rods and the slider must be lubricated with LU07 grease. The
motor slider bearing can be used in dry operation. In this case the life time will be reduced
depending on the application. Particularly in applications with velocities over 0.8 m/s or heavier
mass the guides should not be used without lubrication.
Nach der Reinigung sind die Wellen sowie der Läufer des Linearmotors mit LU07
Schmiermittel leicht einzufetten.
Grundsätzlich können die Gleitlager auch im Trockenlauf betrieben werden, allerdings
reduziert sich dadurch die Lebensdauer der Lager. Insbesondere bei hohen
Geschwindigkeiten (>0.8 m/s) oder grossen Lastmassen sollten die Führungen nicht im
Trockenlauf betrieben werden.
Ordering information
Bestell-Informationen
Item
Produkt
Description
Beschreibung
Item-No.
Artikel-Nr.
LU07-400
Interflon Food Grease 2* (400 ml Cartridge)
Interflon Food Grease 2* (400 ml Kartusche)
0150-2744
*LinMot LU07 Lubricant corresponds to INTERFLON Food Grease 2, which was developed for the food
processing industry.
*LinMot Fett LU07 ist identisch mit INTERFLON Food Grease 2, welches für die Lebensmittelindustrie
entwickelt wurde.

Montageanleitung
18 www.LinMot.com NTI AG / LinMot®
7 Storage, transport, installation altitude
7 Lagerung, Transport, Aufstellhöhe
Sliders are to be stored and transported only in the plastic containers (with cardboard inlay)
provided for this purpose, or already installed and secured in LinMot P stators.
Remove the slider from this plastic containers only for assembling.
The storage area must be dry, dust-free, frost-free and vibration-free.
Prescribed storage temperature: -15 °C…70 °C
The motor must be protected against extreme weather conditions.
The air in the storage area must not contain any harmful gases.
The max. installation altitude is 4'000 m above sea level.
From 1'000 m, derating of 1 °C per 100 m is to be considered for air cooling.
LinMot Läufer dürfen ausschliesslich in der Orginalverpackung transportiert und gelagert
werden.
Die Läufer sollten erst beim Einbau aus der Verpackung genommen werden.
Der Lagerraum muss trocken, staubfrei, frostfrei und erschütterungsfrei sein.
Vorgeschriebene Lagertemperatur: -15 °C…70 °C
Der Motor muss vor extremen Witterungen geschützt werden.
Die Raumluft darf keine aggressiven Gase enthalten.
Die maximale Aufstellhöhe beträgt 4'000 m ü. M.
Ab 1'000 m ist bei Luftkühlung ein Derating von 1 °C pro 100 m zu berücksichtigen.
This manual suits for next models
2
Table of contents