manuals.online logo
Brands
  1. Home
  2. •
  3. Brands
  4. •
  5. Linn
  6. •
  7. Media Player
  8. •
  9. Linn MAJIk DS-I User manual

Linn MAJIk DS-I User manual

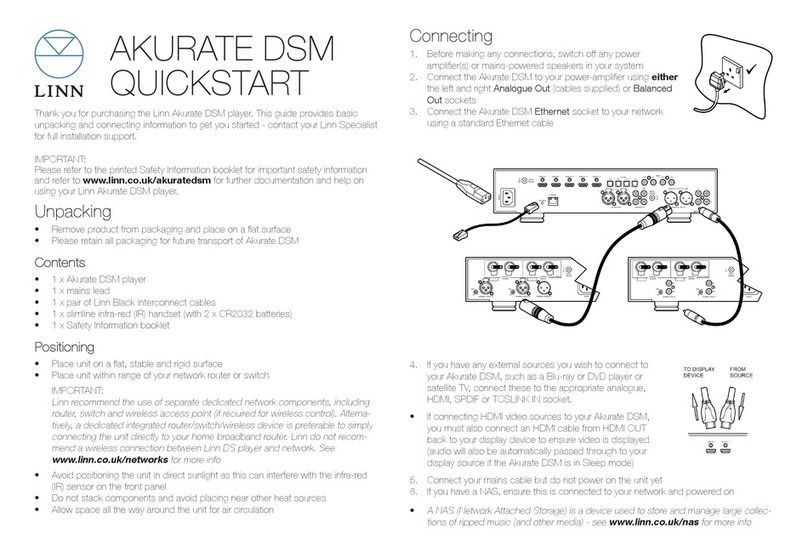
Connecting
Connect each left and right channel on the Majik DS-I to the equivalent terminal on1.
your loudspeaker using your preferred connection method (spade / banana plug / bare
wire) and ensuring a good tight connection is made in each case
Connect the Majik DS-I2. Ethernet socket to your network using a standard Ethernet
cable
Connect any additional source components to the back panel using your preferred3.
connection method (phono or balanced) - use socket 4/PH for any turntable you wish
to connect (and do not connect line level source components to this socket)
Your Majik DS-I is congured as an MM (Moving Magnet) phono stage as default - •
please contact your Linn Specialist if you wish to change this to MC (Moving Coil) or
convert socket 4/PH to line level
Connect your mains cable but do not power on the unit yet4.
If you have a NAS or ripping NAS then you should also ensure this is connected to5.
your network and powered on (
see www.linn.co.uk/nas for more info)
Thank you for purchasing the Linn Majik DS-I player. This guide provides basic unpack-
ing and connecting information to get you started - contact your Linn Specialist for full
installation support.
IMPORTANT:
Please refer to the printed Safety Information booklet for important safety information
and the online manual available at www.linn.co.uk/majikdsi for full instructions on
using your Linn Majik DS-I player.
Unpacking
Remove product from packaging and place on a at surface•
Please retain all packaging for future transport of Majik DS-I•
Contents
1 x• Majik DS-I player
1 x mains lead•
1 x luminous infra-red (IR) handset (with 2 x AAA batteries)•
1 x Safety Information booklet•
Positioning
Place unit on a at, stable and rigid surface•
Place unit within range of your network router or switch•
IMPORTANT:
Linn recommend the use of separate dedicated network components, including
router, switch and wireless access point (if required for wireless control). Alterna-
tively, a dedicated integrated router/switch/wireless device is preferable to simply
connecting the unit directly to your home broadband router. Linn do not recom-
mend a wireless connection between DS player and network. See
www.linn.co.uk/networks for more info
Avoid positioning the unit in direct sunlight as this can interfere with the infra-red•
(IR) sensor on the front panel
Do not stack components and avoid placing near other heat sources•
Do not block vents or site the unit in a cabinet which prevents air owing from front •
to back
Allow at least 4” (10 cm) all the way around the unit for air circulation•
MAJIK DS-I
QUICKSTART
Setup
Step 1 - add Majik DS-I
to network
1.1 Connect the Majik DS-I as shown overleaf and power the
unit on using the switch on the rear of the unit
1.2 The Majik DS-I should display a ashing blue dot for sev-
eral seconds before changing to a Linn logo
1.3 Press the Standby button to come out of standby mode - if you have a large X
displayed on the front panel then there is no active network connection
Go to• www.linn.co.uk/networks if you have any problems or questions
Step 2 - run Kong
2.1 Install Linn Kong on your computer from www.linn.co.uk/kong
2.2 Launch Kong and conrm that your Majik DS-I is visible
2.3 Kong will also display any media servers or other Linn devices you have connect-
ed to the network - if you can’t see these devices in Kong then you will be unable
to nd music on your NAS etc.
2.4 Select your Majik DS-I within Kong and choose the Conguration tab to begin
conguring your sources, including renaming them, changing volume settings and
dening a startup source (select Help from Kong for more info)
Go to• www.linn.co.uk/networks if you have any problems or questions
Step 3 - play music
3.1 Install KinskyDesktop on your computer from www.linn.co.uk/kinskydesktop
3.2 Launch KinskyDesktop and it will detect any DS players connected to the network
and automatically select the rst discovered DS player - check the Rooms menu -
if no Room is available, refer back to
Step 2
above
3.3 Select the Radio source from the top-right menu and double-click on an internet
radio station to play (internet connection required)
3.4 Select the Playlist source (if you have music les stored on your computer) and
go to your computer’s music folder and drag any track(s) into your KinskyDesktop
playlist and press Play
3.5 Ensure all connected sources are powered on and play music on each one to
conrm correct setup, selecting the appropriate source from the Sources menu
in KinskyDesktop or using Source -/+ to change sources on your front panel or
remote control handset
3.6 iTunes users - simply select iTunes from the Home page to browse your iTunes
library and playlists, and select and play tracks as normal
Go to• www.linn.co.uk/kinskydesktop for a short demo or further help
Step 4 - rip music
4.1 If you have a ripping NAS, simply insert the disc and ripping will start automatically (this
should take around 5 - 10 minutes and the disc will be ejected once complete)
4.2 If you are using a standard (non-ripping) NAS or computer to store your music les, rip
your music as normal and ensure you prompt your Media Server to update
A Media Server is required to manage your music collection and provide access for
•
your Linn DS player - see www.linn.co.uk/mediaserver for more info
4.3 Select Library from the Home page in KinskyDesktop to view available media servers
(e.g. Asset UPnP, Twonky) and double-click on a media server to browse and select
music
Go to• www.linn.co.uk/ripping for more info on ripping music discs, including a
beginner’s guide to ripping and software recommendations
Step 5 - add wireless device
5.1 Simply add a wireless device or smartphone to your network as normal
5.2 Download a suitable DS control app for that device
5.3 Launch the software on your wireless device and it should auto-detect your DS player
and music library, and allow you to select and play tracks
Go to• www.linn.co.uk/wireless for more info on wireless control of your DS and a
list of recommended devices and software - wireless is only recommended by Linn for
control of your DS player, not for actual streaming of music
Online Manual
Please visit www.linn.co.uk/majikdsi to view the latest Online Manual for Linn
Majik DS-I, which includes full instructions on conguring your network, ripping and down-
loading music, and controlling your DS player using a range of devices.
Warranty
Please visit www.linn.co.uk/warranty within 30 days of purchase to register your prod-
uct for an extended 5 year warranty.
Linn Records
Please visit www.linnrecords.com for a selection of recordings available as Studio Mas-
ter downloads, CD/SACD or 180g vinyl.
Linn Products Limited
Glasgow Road, Waterfoot, Eaglesham,
Glasgow G76 0EQ, Scotland, UK
• Phone: +44 (0)141 307 7777 • Fax: +44 (0)141 644 4262
• Helpline: 0500 888909 • Email: [email protected]
• Website: www.linn.co.uk
Pack 1585 Copyright © 2010 Linn Products Limited

Other manuals for MAJIk DS-I

1

Other Linn Media Player manuals

Linn KLIMAX DS User manual

Linn

Linn KLIMAX DS User manual

Linn Majik DSM User manual

Linn

Linn Majik DSM User manual

Linn SNEAKY MUSIC DS User guide

Linn

Linn SNEAKY MUSIC DS User guide

Linn SNEAKY MUSIC DS User manual

Linn

Linn SNEAKY MUSIC DS User manual

Linn AKURATE DS User guide

Linn

Linn AKURATE DS User guide

Linn MAJIk DS-I User manual

Linn

Linn MAJIk DS-I User manual

Linn KLIMAX DS User guide

Linn

Linn KLIMAX DS User guide

Linn Akurate DSM User manual

Linn

Linn Akurate DSM User manual

Linn UNIDISK SC PLAYER User manual

Linn

Linn UNIDISK SC PLAYER User manual

Linn Majik DS User manual

Linn

Linn Majik DS User manual

Linn Akurate DSM User manual

Linn

Linn Akurate DSM User manual

Linn Majik DSM User manual

Linn

Linn Majik DSM User manual

Linn KLIMAX DS User manual

Linn

Linn KLIMAX DS User manual

Linn SNEAKY MUSIC DS User manual

Linn

Linn SNEAKY MUSIC DS User manual

Linn AKURATE DS User manual

Linn

Linn AKURATE DS User manual

Popular Media Player manuals by other brands

ViewSonic VMP71 user guide

ViewSonic

ViewSonic VMP71 user guide

UCView SignEdge installation manual

UCView

UCView SignEdge installation manual

audiophile Aurender N100 quick start guide

audiophile

audiophile Aurender N100 quick start guide

Conceptronic CM3PVRL user manual

Conceptronic

Conceptronic CM3PVRL user manual

Eaget PLAY M18 user guide

Eaget

Eaget PLAY M18 user guide

MyGica ATV310B user manual

MyGica

MyGica ATV310B user manual

Logitech Squeezebox duet user guide

Logitech

Logitech Squeezebox duet user guide

KETRON SD 80 instruction manual

KETRON

KETRON SD 80 instruction manual

Hyundai H-CCR8191M instruction manual

Hyundai

Hyundai H-CCR8191M instruction manual

ViewSonic VMP73 user guide

ViewSonic

ViewSonic VMP73 user guide

Mini HD Media Box user guide

Mini

Mini HD Media Box user guide

PXM PX376 user manual

PXM

PXM PX376 user manual

ViewCast Niagara 2120 quick start guide

ViewCast

ViewCast Niagara 2120 quick start guide

Russound XZone4 installation manual

Russound

Russound XZone4 installation manual

Boss Audio Systems MGR150B user manual

Boss Audio Systems

Boss Audio Systems MGR150B user manual

Bellman & Symfon Maxi Pro TV Streamer BE2022 manual

Bellman & Symfon

Bellman & Symfon Maxi Pro TV Streamer BE2022 manual

MultiSound 40/TM instruction manual

MultiSound

MultiSound 40/TM instruction manual

Gogen DXDB 215 user manual

Gogen

Gogen DXDB 215 user manual

manuals.online logo
manuals.online logoBrands
  • About & Mission
  • Contact us
  • Privacy Policy
  • Terms and Conditions

Copyright 2025 Manuals.Online. All Rights Reserved.