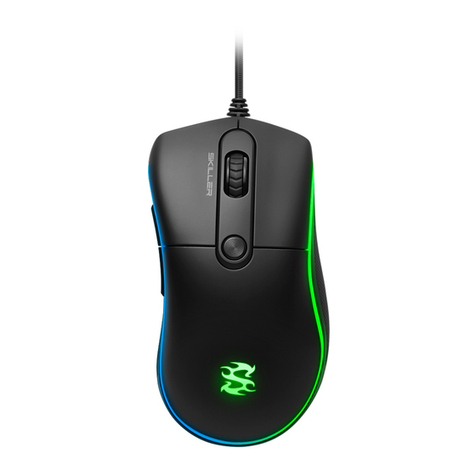
Lioncast LM60 User manual

LM60
PRO GAMING MOUSE
USER MANUAL
ENGLISH

2
LIONCAST LM60 PRO GAMING MOUSE
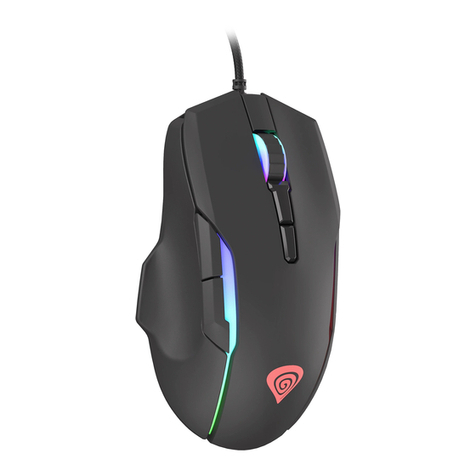
The LM60 is the rst absolute high-end gaming mouse from Lioncast. We use
only the best components available on the market.
The optical PixArt PMW3389 sensor ensures the nest, awless scanning on
almost any surface.With its speed of 400IPS, acceleration of up to 50G, and sam-
pling rate of up to 15,000 FPS, it‘s ready to precisely capture all your movements.
Omron gaming-grade switches provide durability of up to 50 million clicks and
perfect triggering.The 1000Hz polling rate achieves reaction times of just 1ms.
The internal LED‘s are freely congurable using the available software and can be
saved in proles, just like the DPI settings and button assignments.These proles
are saved in the mouse itself, so they‘re always available – simply by plugging into
a computer.
The outstanding ergonomics, paired with the rubberized side surfaces, guaran-
tees you perfect control over your game.

3
PACKAGE CONTENTS
» LM60 PRO Gaming Maus
» Software available for download at: www.lioncast.com > Support > LM60
SYSTEM REQUIREMENTS
» PC with a free USB port
» Windows 10 / 8 / 7
» Internet connection for installing the driver
TECHNICAL SPECIFICATIONS
» 50-16,000 DPI optical sensor
» High-performance glide feet (PTFE)
» 7 buttons
» Software for programming the buttons and LED‘s
» Gold-plated USB connector
» Size: ca. 12.5 x 6.8 x 3.9 cm
» Weight: 105g

4
1 2 3 4 5 6 7
BUTTONS
Left mouse button
Right mouse button
Mouse wheel / third button
DPI button
Special button
Fourth mouse button
Fifth mouse button
1 5
3 7
2 6
4

5
MOUSE CONFIGURATION
Mouse operation (without software):
When the mouse is used without software, the standard settings apply, which
congure only one prole.The DPI setting can be changed using the DPI button
on the top side (400, 800, and 1600 DPI).
We recommend downloading and using the software to congure the mouse.
This lets you congure proles, LED colors, DPI stages, and many other button
assignments.
Installing the Lioncast LM60 Software:
1. Plug the mouse into a free USB port on your computer.
2. Download the software at: www.lioncast.de > Support > LM60
3. Run the installer and follow the steps shown on the screen.
Lioncast tip:
After the mouse has been congured with the software, all the settings are saved
in the mouse and will be available simply by plugging it into your computer.

6
SOFTWARE - BUTTONS TAB
Here the button assignments of the LM60 can be congured and saved by cli-
cking „Save“.
In addition, there is a button-shift feature which activates the second function of
each button. If this is assigned to a button (e.g. to button 7), the second function
is active as long as the button is held.

7
SOFTWARE - BUTTONS TAB
Disable Button
Deactivates a button.
Default
Standard function for a button.
Mouse functions
Left click
Executes a left-click
Right click
Executes a right-click
Middle click
Executes a mouse-wheel click
Forward
Forward browser function
Backward
Back browser function
Scroll Up
Scrolls one step up.
Scroll down
Scrolls one step down.
Scroll left
Scrolls one step left.
Scroll right
Scrolls one step right.
Custom Hotkey
Assigns a keyboard combination (e.g.
Shift + A or CTRL + SHIFT + A)
DPI
DPI (+)
Switches to the next higher DPI
level
DPI (+) Cycle
Cycles up through the DPI levels
DPI (-)
Switches to the next lower DPI
level
DPI (-) Cycle
Cycles down through the DPI
levels
Fixed DPI
Choose a DPI value which is tem-
porarily active as long as the button
is held.

8
SOFTWARE - BUTTONS TAB
Macro
Choose an Macro which has already
been programmed.
Button-Shift
Switches all mouse buttons to their
second function as long as the but-
ton is held.
Multimedia
Multimedia and audio functions
Proles
Switches or cycles through the
proles in various ways; this corre-
sponds to the prole selector on the
underside of the mouse.
Windows Hotkey
A pre-programmed selection of
Windows shortcuts

9
SOFTWARE - SENSOR TAB
DPI Settings
This lets you congure the sensor settings. Decide whether you would like to use
1, 2, or 3 DPI levels. Each DPI level can be assigned to 50-16,000 DPI.
You can even assign different DPI settings to the X and Y axes.

10
Sensor Lift Off Distance
Choose how quickly the sensor stops tracking when the mouse is lifted.
Low: the mouse pointer stops moving with the tiniest lift of the mouse.
High: the mouse pointer takes somewhat longer to react when the
mouse is lifted.
Angle Snapping
Angle snapping OFF: Deactivates the mouse pointer path
correction
Angle snapping ON: Activates the mouse pointer path correction
You can choose from 16 levels, from very little path correction to much stronger.
USB Polling Rate
Changes the USB polling rate. Recommended setting: 500-1000 Hz
SOFTWARE - SENSOR TAB

11
This lets you separately congure illumination for the different illumination ele-
ments.
Mode
Constant: The assigned colors glow steadily.
Wave: The assigned colors become alternately dimmer and brighter
Pulse: The assigned colors blink on and off
Color ow: The assigned colors are ignored and all LED‘s cycle
through the entire color spectrum.
SOFTWARE - LIGHTS TAB

12
Sleep
Lets you determine how soon the illumination turns off when not in use
Speed
Sets the speed of the pulse effect
Strength
Sets the LED brightness
SOFTWARE - LIGHTS TAB

13
With the Macro manager, a series of commands is executed with perfect timing
by clicking a mouse button.This is useful for all possible applications, so you can
use your imagination to nd the best ways to use it in your games.
Since this is a rather complex topic, it will take some time to become familiar
with it.
Step 1
Click „NEW“ and choose a name for your Macro.
Step 2
Click the Record button „START“ and press a few keys on the keyboard (type
your name, for example), then click „STOP“ to stop recording.
SOFTWARE - MACRO TAB

14
Step 3
Now the Macro will be available in the „BUTTONS“ tab with the button assi-
gnments.
Step 4
Choose the button to which the Macro should be saved.With the cursor, go to
the drop-down menu, hover the mouse over „Macro,“ and choose the Macro
you recorded.The Macro name should now be shown in the mouse button eld.
Click Save to save the Macro to the button.
Step 5
Test your macro, for example in Windows Editor. Open the editor, click in the
window, and press the mouse button to which the macro is assigned. Now the
macro should run and be visible in the editor.
Lioncast tip:
Mouse buttons also can be recorded in real time.
Delay Options
With the options at the upper right, you can automatically insert delays between
button presses.The rst option, „Actual Delay,“ records the delay in real time,
and the second option inserts a xed delay between inputs.This can be entered
in millisecond increments in the applicable eld. Or choose „No Delay“ if you
don‘t want to add a delay between commands.
SOFTWARE - REITER MACRO

15
Repeat Options
With the „Repeat Macro“ function you can trigger the Macro multiple times
successively.
„Run Macro while pressed“ runs the Macro as long as you hold the
mouse button.
„Repeatuntilbuttonispressedagain“letstheMacrorununtilyouclick
the button a second time.
SOFTWARE - REITER MACRO

16
SETTINGS / UPDATES
Proles
Prole settings are found at the bottom.You can choose from ve proles using
the drop-down menu, and you can also rename them. In addition, you can save
proles to your computer, delete them, or load them from your hard drive.The
„Prole default“ command resets the active prole to its standard settings.
Settings
Access settings by clicking the small gear symbol in the upper right corner.
Updates
Here you can update the LMC60 mouse rmware or download a new version
of the software from our website.
SOFTWARE - PROFILE AND UPDATES

17
In the settings under „Updates“ the factory rmware version is displayed as 1.00.
Click „Update“:
A rmware update pop-up window will appear.
Click „Update“:
SOFTWARE - PROFILE AND UPDATES

18
Wait until the progress bar completes. During the ash process, the mouse LED
ashes and the cursor cannot be moved.
DO NOT DISCONNECT THE MOUSE FROM THE PC DURING
THE UPDATE!
A message will appear in the Update pop-up as soon as the rmware update
is complete. Re-plugging the mouse is not necessary; it will automatically begin
working again.The software version is now the most current one, and the Up-
date window can be closed by clicking the X.
SOFTWARE - PROFILE AND UPDATES

19
Factory Default
Clicking „Default“ resets the mouse and all settings to the original factory con-
dition.
Note: All proles will also be reset, so don‘t forget to save them to your PC
before resetting.
Auto Start
This lets you set whether the software automatically runs when Windows starts.
SOFTWARE - PROFILE AND UPDATES

LM60 | GAMING MOUSE
Color: Black
Art.-No.: 15551
Lioncast®is a registered trademark of
Ströer Products GmbH | Torstr. 49 | 10119 Berlin
Made in China
REACH
4250541 921777
Table of contents
Other Lioncast Mouse manuals
