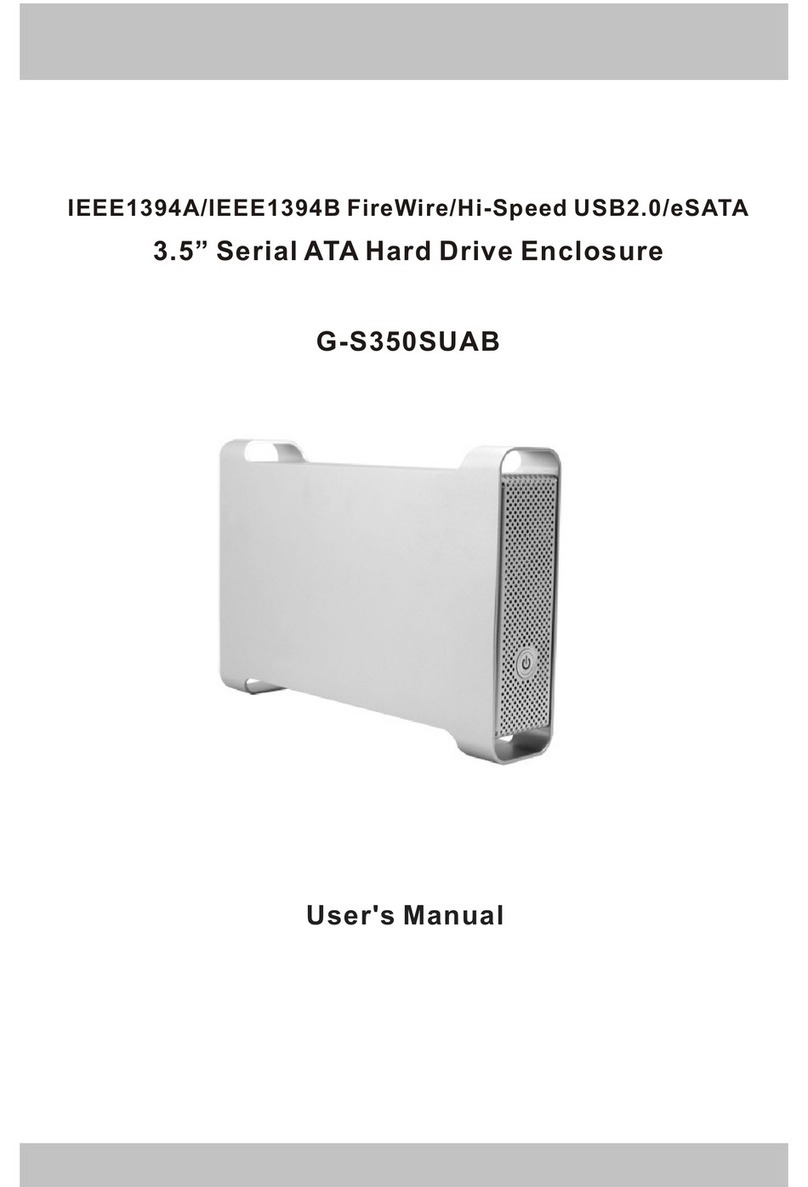
Lippert Components Waste Master 362881 Installation instructions

1
lci1.com 574-537-8900 Rev: 11.11.20
Waste Master®Tubular
Storage Enclosure
Installation and Owner’s Manual
(For Aftermarket Applications)
CCD-0002186
Table of Contents
Introduction ............................................ 1
Safety ................................................... 2
Parts List ................................................ 2
Resources Required ................................... 2
Mounting Options ...................................... 3
Installation .............................................. 3
Enclosure and Door Frame Assembly ................. 3
Storage Tube .......................................... 4
Attaching the Storage Tube to the Enclosure .......... 4
Waste Master®
Tubular Storage
Enclosure
Installation and
Owner’s Manual
(For Aftermarket Applications)
Introduction
This document is intended to provide instruction for the installation,
and use, of the Waste Master®Tubular Storage Enclosure.
Looking for a way to store your new Waste Master hose in your
RV? We have the perfect solution. Our enclosure is custom
molded to hold the nozzle securely and the door comes with a key
and lock for added security.
This storage system can be installed inside of a compartment or
underneath your RV and the enclosure/door can be installed either
vertically or horizontally.
Hose storage tube not included. See Storage Tube section.
NOTE: Images used in this document are for reference only
when assembling, installing and/or operating this product. Actual
appearance of provided and/or purchased parts and assemblies
may differ.
Additional information about this product can be obtained from
drainmaster.com
or by using the myLCI app. Replacement kits can
be ordered from https://store.lci1.com/ or by using the myLCI app.
The myLCI app is available for free on iTunes®for iPhone®and
iPad®and also on Google Play™for Android™users.
iTunes®, iPhone®, and iPad®are registered trademarks of Apple Inc.
Google Play™and Android™are trademarks of Google Inc.
Waste MasterWaste Master®®Tubular Storage KitTubular Storage Kit
Part #Part # Description
362881 Enclosure & Door

2
lci1.com 574-537-8900 Rev: 11.11.20
Waste Master®Tubular
Storage Enclosure
Installation and Owner’s Manual
(For Aftermarket Applications)
CCD-0002186
Safety
Read and fully understand all instructions before installing
or operating this product.
Adhere to all safety labels.
This manual provides general instructions. Many variables
can change the circumstances of the instructions, i.e., the
degree of difficulty, operation and ability of the individual
performing the instructions. This manual cannot begin
to plot out instructions for every possibility, but provides
the general instructions, as necessary, for effectively
interfacing with the device, product or system. Failure
to correctly follow the provided instructions may result
in death, serious personal injury, severe product and/
or property damage, including voiding of the LCI limited
warranty.
NOTE: Part numbers are shown for identification purposes
only. Not all parts are available for individual sale. All parts
with a link to the Lippert Store can be purchased.
Parts List
Resources Required
• 4” x 10’ Sch 40 PVC pipe
• 4” Sch 40 PVC end cap
• Large hose clamp to fit the
4" pipe
• All purpose PVC cement
• Strapping or 12” cable ties to
support storage tube
• Saw with fine-tooth blade for
metal and PVC
• Electric or cordless drill or
screw gun
• Appropriate drill bits
• Appropriate drive bits
• Tape measure
MOVING PARTS CAN PINCH, CRUSH OR CUT. KEEP
CLEAR AND USE CAUTION.
ALWAYS WEAR EYE PROTECTION WHEN PERFORMING
SERVICE OR MAINTENANCE TO THE UNIT. OTHER
SAFETY EQUIPMENT TO CONSIDER WOULD BE HEARING
PROTECTION, GLOVES AND POSSIBLY A FULL FACE
SHIELD, DEPENDING ON THE NATURE OF THE SERVICE.
A B
Aftermarket Kit #362881
Letter PN Description Qty
A 362882 Enclosure Door 1
B 362883 Nozzle Enclosure 1

3
lci1.com 574-537-8900 Rev: 11.11.20
Waste Master®Tubular
Storage Enclosure
Installation and Owner’s Manual
(For Aftermarket Applications)
CCD-0002186
Mounting Options
The enclosure can be mounted in either a vertical (Fig.1A)
or horizontal position (Fig. 1B). Additionally, it can be
installed underneath the RV or inside of a compartment.
Installation
Enclosure and Door Frame Assembly
1. Locate spring latch on the interior side of the enclosure door (Fig.3).
Fig.1
Fig.2
spring latch
A
B
11”
5 ¼”
cut out
area
Fig.3
2. Insert the spring latch through the hole in the lower left
corner of the enclosure (Fig.4).
Fig.4
NOTE: A rectangular opening of 11” x 5 ¼” will need to be
made (Fig.2).
NOTE: Consult the manufacturers manuals or qualified
service technician to determine the best location for
installation.
NOTE: Strapping or cable ties may be used to secure or
support the storage tube once the system is installed.
Fig.5
3. Line up door frame with enclosure and snap on the door (Fig.5A).
A

4
lci1.com 574-537-8900 Rev: 11.11.20
Waste Master®Tubular
Storage Enclosure
Installation and Owner’s Manual
(For Aftermarket Applications)
CCD-0002186
Manual information may be distributed as a complete
document only, unless Lippert Components provides
explicit consent to distribute individual parts.
All manual information is subject to change without
notice. Revised editions will be available for free
download at lci1.com. Manual information is considered
factual until made obsolete by a revised version.
Please recycle all obsolete materials and contact
Lippert Components with concerns or questions.
A
7. With storage tube securely attached to the enclosure,
tighten the hose clamp.
B
C
Storage Tube
The storage tube, end cap, all-purpose cement and hose
clamp will need to be purchased separately from the
enclosure kit. The tube can be purchased from most home
improvement or larger plumbing stores. The tube must be 4”
in diameter and at least 10’ long which can be cut to size.
NOTE: If there is limited access for installation, it may be
necessary to cut the 10' tube into two shorter parts and
join with a coupler to make up the total length needed.
Attaching the Storage Tube to the Enclosure
1. Using a tape measure, mark a 3 1/8” deep by 2” wide
notch on the end of the storage tube (Fig.6B).
NOTE: Orange lines indicate where material is being removed.
2. Using a saw, cut the notch into the storage tube so that
the tube will slide all the way onto the outlet on the back of
the enclosure (Fig.6A). The tube should t snugly.
NOTE: Make sure the saw is equipped with a fine-toothed
blade intended for metal or PVC materials.
3. Using a tape measure, determine the length of storage
tubing needed for storage of the Waste Master sewer hose.
4. Cut the 10' piece of pipe to t the Waste Master sewer
hose when fully collapsed allowing for variation.
5. Apply all-purpose cement to the inside edge of the end
cap and around the newly cut end of the storage tube.
6. Prior to attaching the tube to the enclosure, slide the hose
clamp onto the cut end of the tube. The hose clamp should
be positioned just behind the notch in the tube made in step 2
(Fig. 6C). Do NOT use glue to attach storage tube.
NOTE: Green lines indicate where the hose clamp is positioned.
Fig.6
