Liquid Image Summit Series User manual


ENG-7
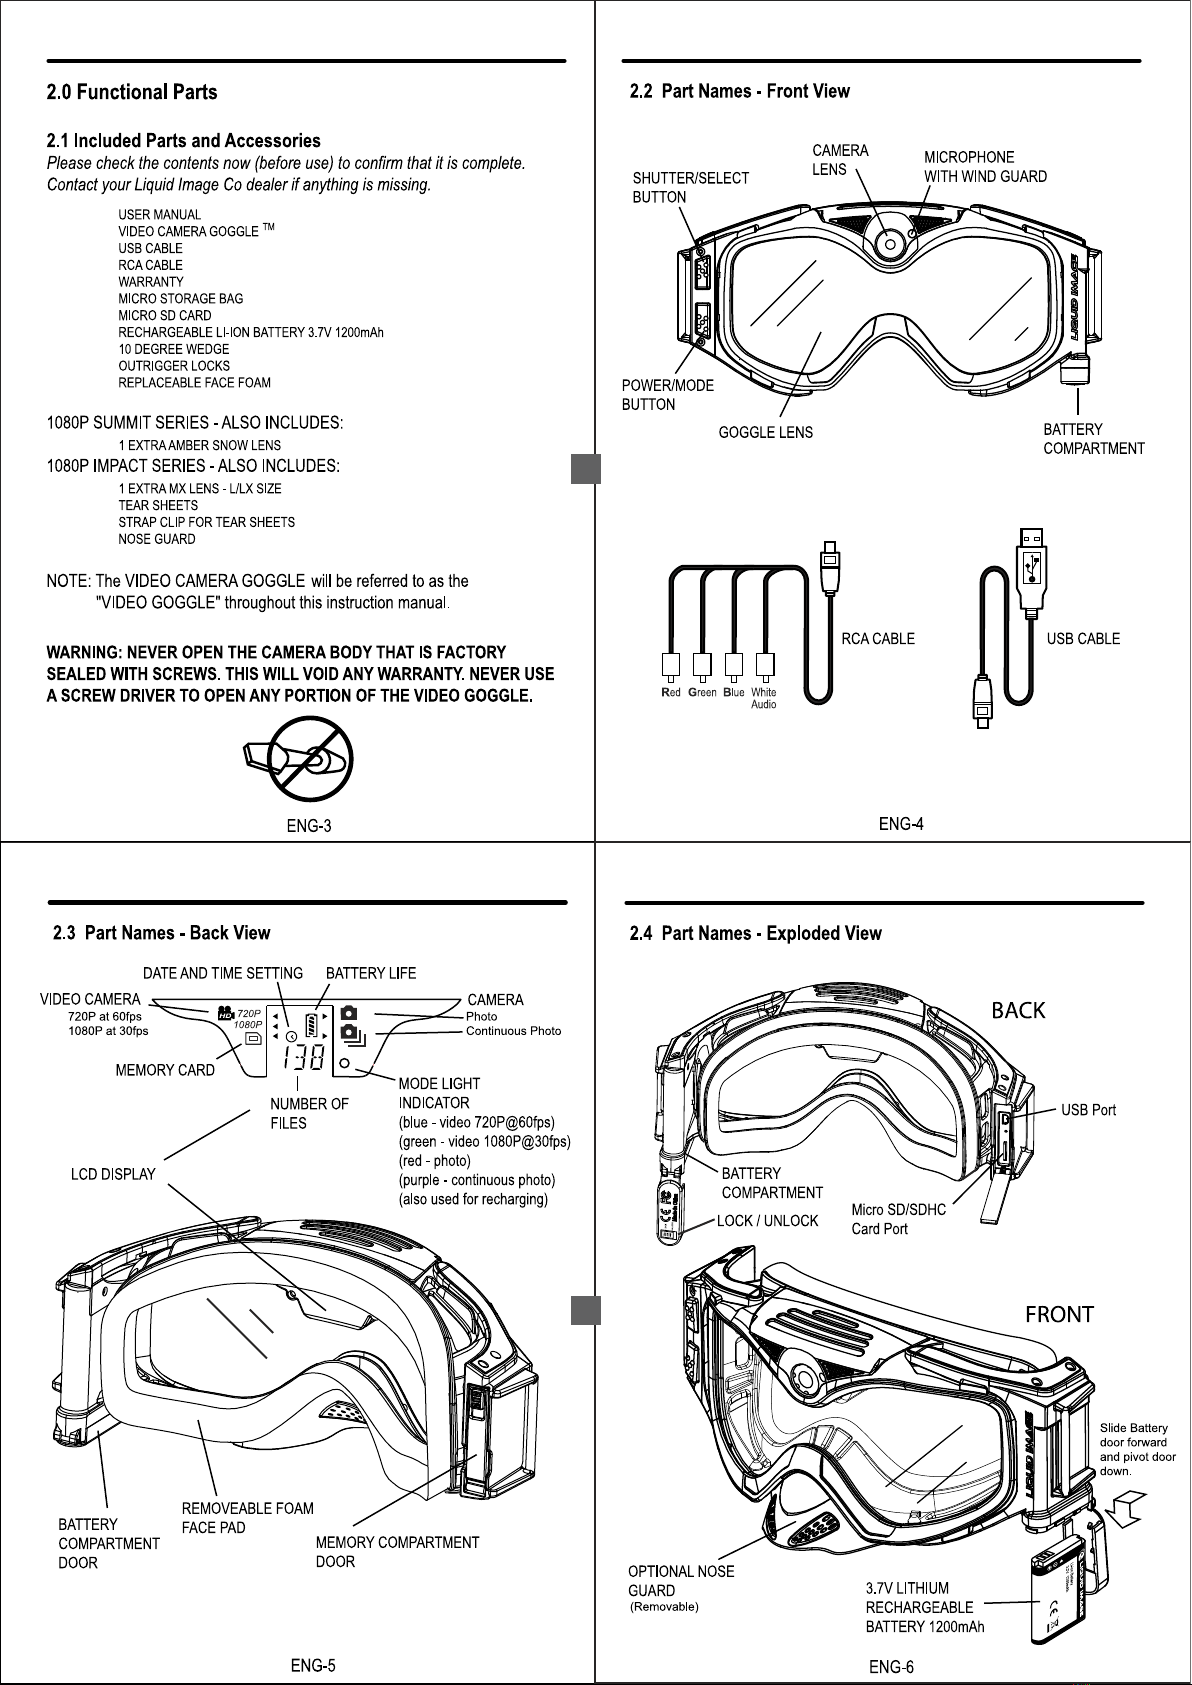
2.5 Outrigger Detail
OUTRIGGERS IN
ENG-8
3.0 VIDEO GOGGLE SETUP
CAUTION: An adult 18 years or older should perform this function. Always
make sure the VIDEO GOGGLE is completely dry before performing these
steps. Set up should always take place in a clean dry space with a controlled
environment. These steps should be performed indoors to avoid exposure to
the elements.
3.1 Recharging or Replacing Li-Ion Battery
NOTE:
Only use a Liquid Image Rechargeable 3.7V 1200mAh Lithium Battery with the
VIDEO GOGGLE.
The LCD indicator shows battery life. When no remaining bars are
displayed, the battery is low and the LCD screen will show the word “LO” and will
make a beeping sound. Recharge or replace battery to continue using. Files on the
Micro SD/SDHC card will not be lost if battery power runs out or during replacement
of the battery.
To insert or replace battery:
1. Unlock and Slide Battery Compartment door forward and then down to Open.
2. Insert the Battery as shown on page ENG-6. Notches on the battery will only
allow you to put the battery in one direction.
3. Close the BATTERY COMPARTMENT door carefully.
3.2 Inserting Micro SD or SDHC Memory Card - Mandatory
NOTE: A Micro SD/SDHC Memory Card may or may not be included with your
VIDEO GOGGLE. It is recommended that you utilize a commercially sold Micro
SD/SDHC Card to add memory storage to your VIDEO GOGGLE. It is best to utilize
a high performance Micro SD/SDHC card as this will improve the performance of
Estimated Battery life for a new 1200 mAh Rechargeable Lithium Battery
Still image mode: up to 2000 pictures
Video clip recording mode: up to 120 minutes
ENG-9
your VIDEO GOGGLE. This VIDEO GOGGLE works with both a Micro SD card or a
Micro SDHC card up to 32 GB (Class 6+). Carefully read the instructions and warnings
that come with the card. If your card is not FAT16 formatted, it will be reformatted once
placed into the Micro SD/SDHC card slot on your VIDEO GOGGLE and the Power is
turned on. Please note that any data on the card will be lost. Make sure to back up
any data on the Micro SD/SDHC Card prior to inserting into the VIDEO GOGGLE.
NOTE: The VIDEO GOGGLE does not have
internal memory to store the images and videos
taken by the VIDEO GOGGLE. You must
insert a Micro SD/SDHC card prior to taking images
and videos. 4GB Micro SDHC Class 6+ is
recommended for peak performance.
Approximate File Storage
Micro SDHC Card 32GB
Images: 20,000
Video: 354 minutes
3.3 Setting the Date and Time Mode
This feature allows you to set the Date and Time to the photo or video file.
1. Press and hold the SHUTTER/SELECT button down. Then press the
POWER/MODE button once. The camera will turn on.
2. Continue holding the SHUTTER/SELECT button down and press the
POWER/MODE button 3 times continuously and then release the
SHUTTER/SELECT button. The LCD screen will access the Time Setting mode.
You will be able to change Year (Y), Month (M), Day (D), Hour (h), and
Minute (m). The first window will be Y for Year. Press the SHUTTER/SELECT
button and the numbers will appear (ie. “11” for 2011). The first number “1” in the
year will start blinking.
3. Press the POWER/MODE button to change the blinking character from 0-9. Press
the SHUTTER/SELECT button to select the number and move onto the next number
“0”. The setting process is from the left to right and will go through the different
settings from Year, Month, Day, Hour, and minute. Once the number is confirmed by
pressing the SHUTTER/SELECT button, the next digit will start blinking. Once
you see the letters again such as M for Month, press the SHUTTER/SELECT
button to move to the numbers representing the month. Continue the process until
you return to Y.
4. To get out of the Date and Time Setting Mode, press and hold the
SHUTTER/SELECT button for 2 seconds. The VIDEO GOGGLE will return to the
Video mode (BLUE LED).
5. In case the battery needs to be replaced or the battery runs out, the date setting
data will be maintained for 24 hours after battery is taken out or runs out.
Note: the BLUE MODE LIGHT INDICATOR is blinking. The light will continue to
blink until the camera stops recording.
3. To stop recording, press the SHUTTER/SELECT button again.
Note: the GREEN MODE LIGHT INDICATOR is blinking. The light will continue to
blink until the camera stops recording.
3. To stop recording, press the SHUTTER/SELECT button again.
cycles through the modes in the following order: 720P Video@60 fps,
1080P Video@30fps, Still Photo, and Continuous Photo. To advance to the next
mode, press the POWER/MODE button one time. The camera will remain on and
ready to use for 180 seconds, after which the VIDEO GOGGLE will turn off
automatically. If you press and hold the POWER/MODE for more than 1 second,
the camera will also turn off.
4.1 720P @ 60 FPS Video Mode - BLUE LIGHT
1. Press the POWER/MODE button for at least 1 second. The camera turns on.
The camera will power up in 720P @ 60 frames per second Video mode.
Note: the BLUE MODE LIGHT INDICATOR is on and the VIDEO GOGGLE is now
in the VIDEO READY mode and set to take Videos. The LCD screen displays the
720P video icon.
2. Press the SHUTTER/SELECT button once. Recording begins.
4.2 1080P @ 30 FPS Video Mode - GREEN LIGHT
1. Press the POWER/MODE button for at least 1 second. The camera turns on.
2. Press the POWER/MODE button again for less than a second to change to
the 1080P @ 30 frames per second Video Mode.
Note: the GREEN MODE LIGHT INDICATOR is on and the VIDEO GOGGLE is now
in the 1080P READY mode and set to take videos.
The LCD screen displays the 1080P Video icon.
ENG-10
4.0 RECORDING PICTURES AND VIDEO
NOTE: The VIDEO GOGGLE has 4 modes and pressing the POWER/MODE button
3. Press the SHUTTER/SELECT button once. Recording begins.
Helmet Compatible Goggles - Pull out
Outriggers to fit different size helmets.
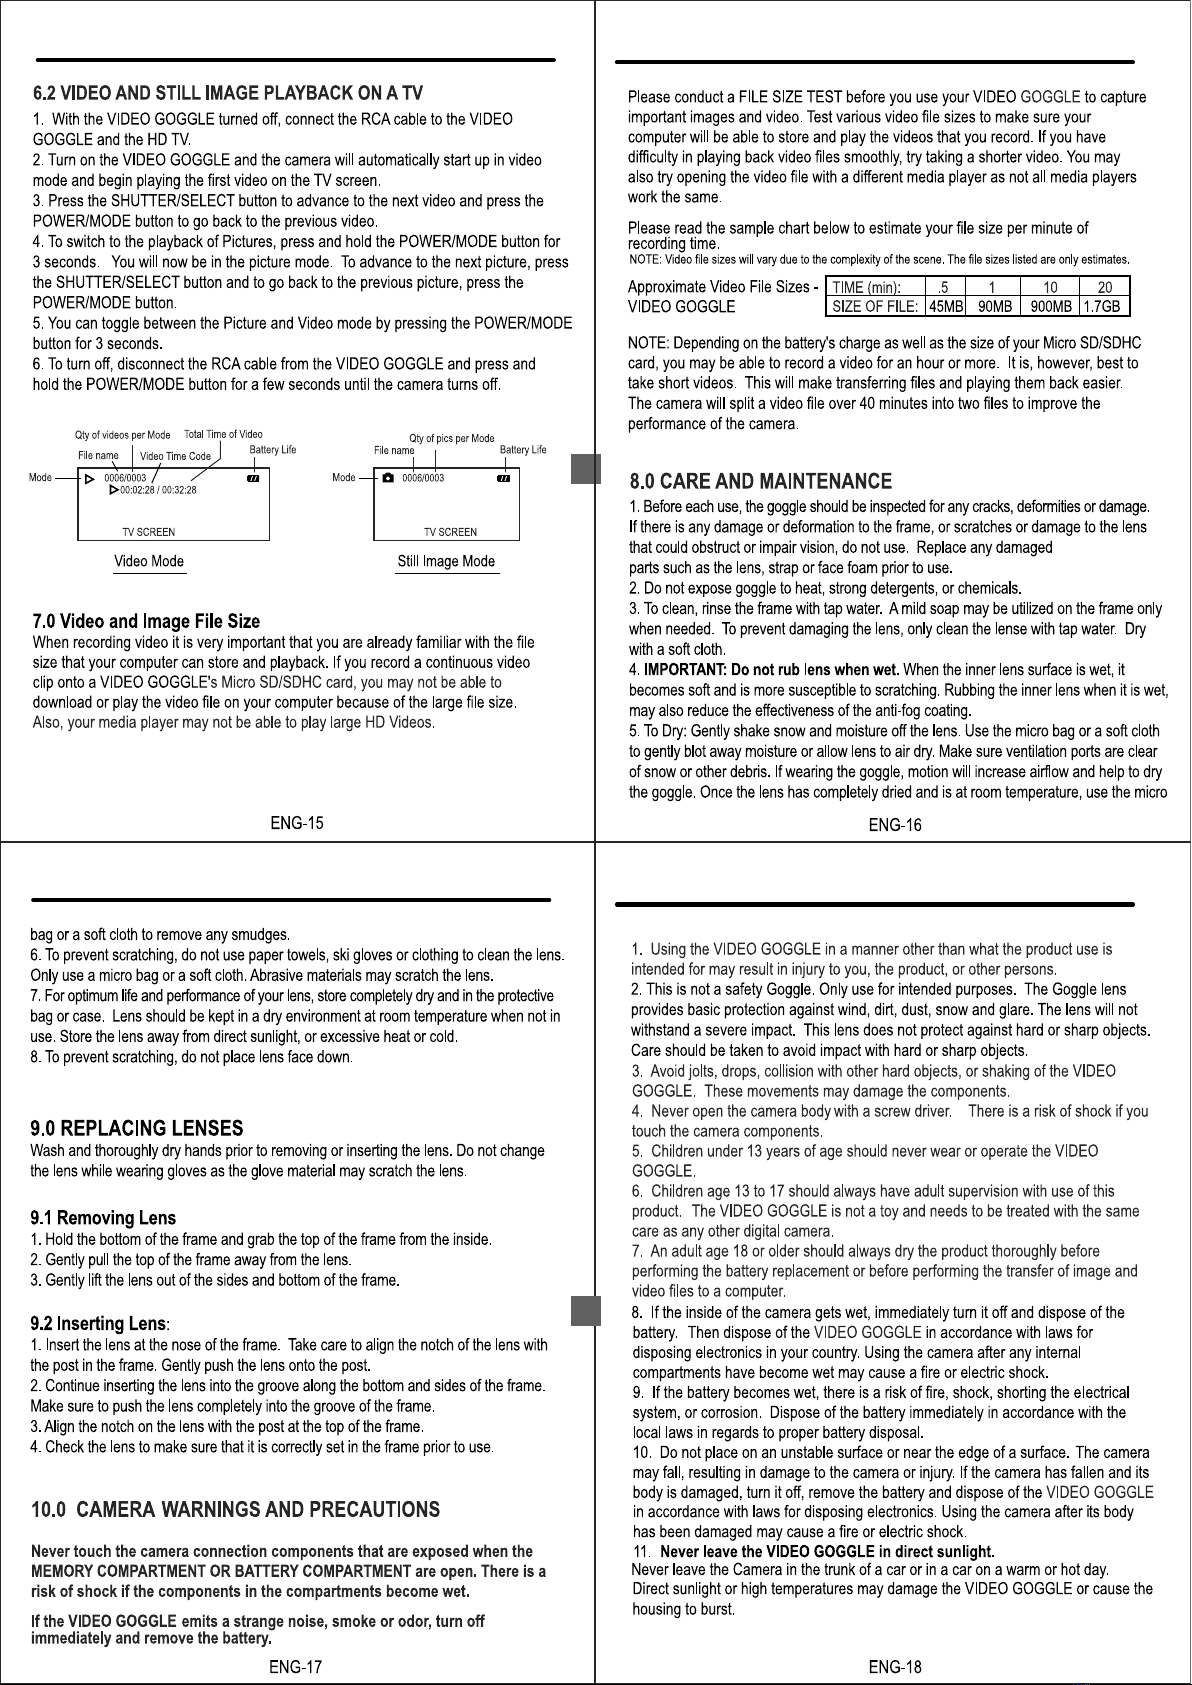
To Recharge Battery:
1) Open MEMORY COMPARTMENT door.
2) Plug USB CABLE into both the USB Port on the VIDEO GOGGLE and the Computer.
The battery will start charging and the RED LED will start blinking. When the charge is
complete, the RED LED will stop blinking and will switch to a solid GREEN LED light.
OUTRIGGERS OUT


This manual suits for next models
3


