manuals.online logo
Brands
  1. Home
  2. •
  3. Brands
  4. •
  5. Liquid Instruments
  6. •
  7. Laboratory Equipment
  8. •
  9. Liquid Instruments Moku:Pro User manual

Liquid Instruments Moku:Pro User manual

©2021 Liquid Instruments Visit liquidinstruments.com or email support@liquidinstruments.com for assistance.
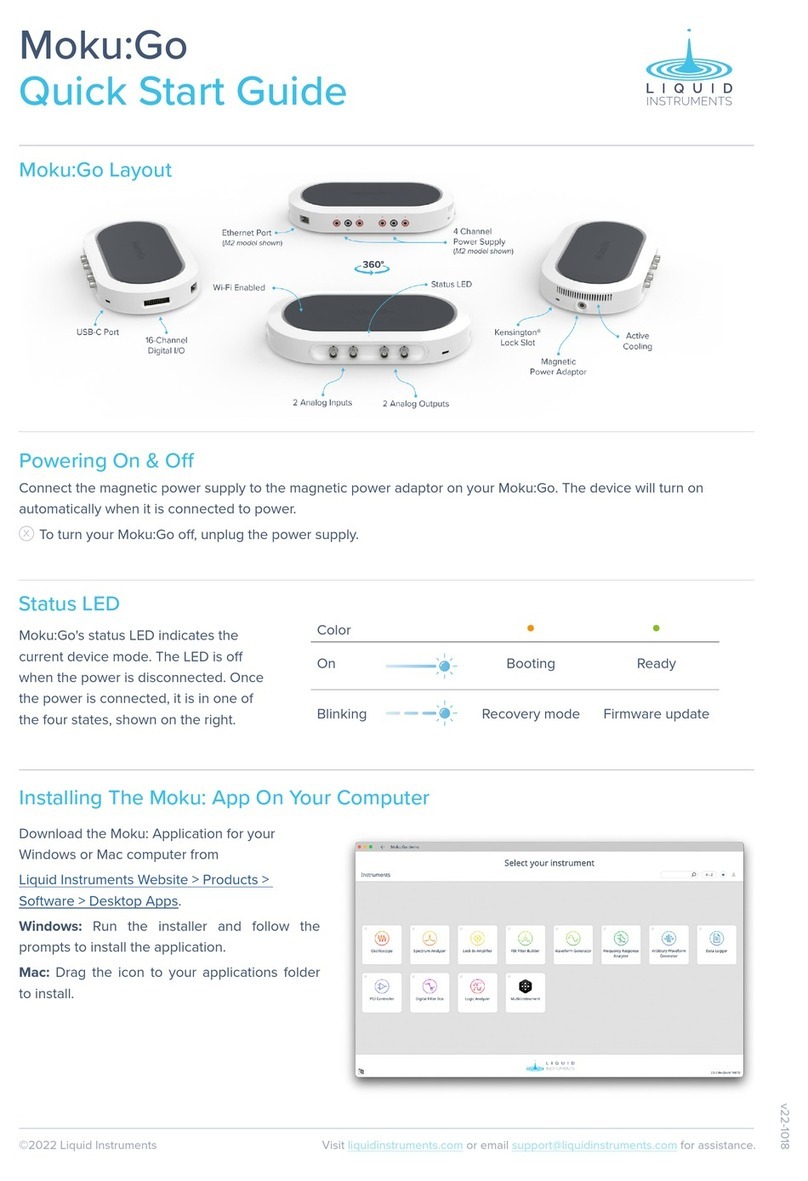
Moku:Pro Layout
Moku:Pro
Quick Start Guide
Powering On & O
1Connect the power cable to the power port at the rear of the Moku:Pro.
2Press and hold the power button for one second until the power status LED turns on.
3Once the power status LED turns solid white, your device is ready to use.
Installing The Moku: App
v21-0910
XTo power o your Moku:Pro, press and hold the power button for one second until the status LEDs turn solid
orange and the UFO LEDs are o. Wait until the device turns o before unplugging the power cable.
iPad App
1Open the App Store on your iPad.
2Search for the Moku: application and verify that the
publisher is Liquid Instruments.
3Download and Install Moku: App on your iPad.
4Open the Moku: App and when prompted for
permission to find and connect to devices on the
local network, grant access to discover and connect
to your Moku:Pro.
Status LEDs
Moku:Pro's status LEDs indicate the current device mode.
Desktop App
1Download the software from Liquid Instruments
Website
Resources > Windows & macOS Apps.
2Windows: Run the installer and follow the prompts
to install the Moku: App.
Mac: Drag the icon to your Applications folder to
install the application.
LED
Device Status
LED 1 green •• • Access point ON
LED 1 blue •• • WiFi connected
LED 1 white ••• • Access point ON
WiFi connected
LED 2 blue •••Ethernet connected
LED 3 blue • • •External 10 MHz
reference locked
LED
Device Status
All LEDs
solid orange • • • Power o
All LEDs
cycling orange • • •Firmware update
All LEDs
flashing red • • • Recovery mode
©2021 Liquid Instruments Visit liquidinstruments.com or email support@liquidinstruments.com for assistance.
Getting Started With The Moku
Once you have connected your Moku:Pro to your iPad or computer, you can start using your device.
1Launch the Moku: App.
2Moku:Pro devices that are connected to the same network as your iPad or computer will show up on the “Select
your device” screen.
3Select your Moku:Pro to start using your device. The default name of your Moku:Pro is “Moku 012345” where
“012345” is the 6-digit serial number printed on the bottom of the device.
4On the “Select your instrument” menu, select an instrument to deploy to your Moku:Pro.
5To discover how to use each instrument, refer to the “Accessing Instrument Manuals”section below.
Configuring Your Moku:Pro To Join An Existing Wireless Network
Factory Resetting Moku:Pro
Moku:Pro must be plugged in and powered on to perform a Factory Reset. You can return your Moku:Pro to its default
network and configuration settings by pressing the Factory Reset button at the back of the device with a paper clip
or small object for two seconds. The Power LED will turn o once the unit reinitialization is completed. You can now
power on your Moku:Pro by pressing and holding down the power button. It will restart in Wireless Access Point
mode with Ethernet enabled.
Connecting To Your Moku:Pro For The First Time
You can connect to your Moku:Pro for the first time via its Wireless Access Point or Ethernet.
Option 1: Wireless Access Point
On your iPad or computer, join the WiFi
network called “MokuPro-012345”,
where “012345” is the 6-digit serial
number of your Moku:Pro printed on
the bottom of the device. The default
password is printed alongside the serial
number, labelled as "WiFi password".
Option 2: Ethernet
Connect your Moku:Pro to a local
wired network (e.g. a router) via an
Ethernet cable. Make sure your iPad
or computer is connected to the same
network.
Once you have connected to your Moku:Pro, you can have it join an existing wireless network.
1Launch the Moku: App.
2iPad App: Tap the icon of your Moku:Pro on the “Select your device” screen, then tap the Settings gear at the
bottom left corner of the screen to configure the Moku:Pro’s settings.
Desktop App: Right click on the icon of your Moku:Pro on the “Select your device” screen, then select “Configure
device”
3Switch to the WiFi tab, select “Join a WiFi network” and type in the name of the WiFi network you would like to
connect to. You will be prompted to enter a password for that network if required.
4Connect your iPad to the same WiFi network. The iPad will search for Moku hardware on the same network.
Accessing Instrument Manuals
Instrument manuals for each instrument are available on Liquid Instruments website.
To access these manuals, visit:
https://www.liquidinstruments.com/resources/supporting-material/product-documentation
Option 3: USB (Desktop only)
Connect your Moku:Pro to the
computer via a USB-C cable.
Other manuals for Moku:Pro

2

Other Liquid Instruments Laboratory Equipment manuals

Liquid Instruments Moku:Go User manual

Liquid Instruments

Liquid Instruments Moku:Go User manual

Liquid Instruments Moku:Go User manual

Liquid Instruments

Liquid Instruments Moku:Go User manual

Liquid Instruments Moku:Go User manual

Liquid Instruments

Liquid Instruments Moku:Go User manual

Liquid Instruments Moku:Go User manual

Liquid Instruments

Liquid Instruments Moku:Go User manual

Popular Laboratory Equipment manuals by other brands

Witeg Wisd MS-20D operating manual

Witeg

Witeg Wisd MS-20D operating manual

Littelfuse PGR-6100 manual

Littelfuse

Littelfuse PGR-6100 manual

WPI CLEANRAY-1000 instruction manual

WPI

WPI CLEANRAY-1000 instruction manual

multivac C250 instruction manual

multivac

multivac C250 instruction manual

Integra VIAFLO Series operating instructions

Integra

Integra VIAFLO Series operating instructions

Agilent Technologies 7890 Series Quick reference guide

Agilent Technologies

Agilent Technologies 7890 Series Quick reference guide

Altronix NetWay1E installation guide

Altronix

Altronix NetWay1E installation guide

Amersham Biosciences TE 70 user manual

Amersham Biosciences

Amersham Biosciences TE 70 user manual

PHYWE Air Track Rail 11202.17 operating instructions

PHYWE

PHYWE Air Track Rail 11202.17 operating instructions

Biobase BBS-H1300 user manual

Biobase

Biobase BBS-H1300 user manual

Raue Ultra 600 instruction manual

Raue

Raue Ultra 600 instruction manual

Cleaver Scientific CSL-UVCAB Series instruction manual

Cleaver Scientific

Cleaver Scientific CSL-UVCAB Series instruction manual

Phcbi MDF-U5412 operating instructions

Phcbi

Phcbi MDF-U5412 operating instructions

RIGGTEK DissoPrep X8 maintenance

RIGGTEK

RIGGTEK DissoPrep X8 maintenance

Hettich MIKRO 120 operating instructions

Hettich

Hettich MIKRO 120 operating instructions

Biosan DEN-1B operating manual

Biosan

Biosan DEN-1B operating manual

Hanna Instruments HI 4008 instruction manual

Hanna Instruments

Hanna Instruments HI 4008 instruction manual

Mind Peak WaveRider operating manual

Mind Peak

Mind Peak WaveRider operating manual

manuals.online logo
manuals.online logoBrands
  • About & Mission
  • Contact us
  • Privacy Policy
  • Terms and Conditions

Copyright 2025 Manuals.Online. All Rights Reserved.