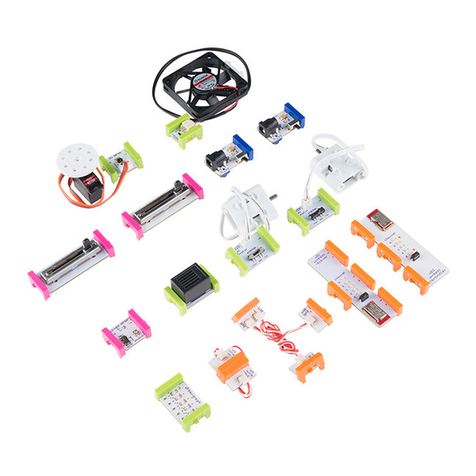
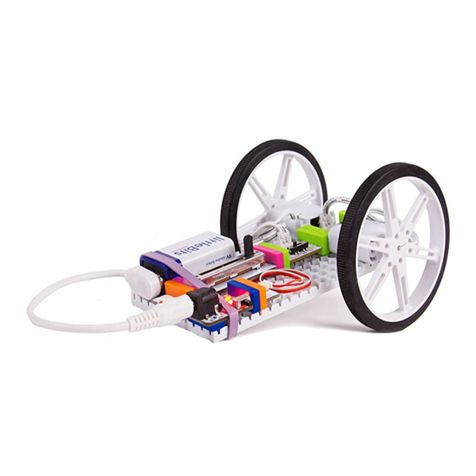
Littlebits PG 24 User manual

I
GIZMOS &
GADGETS KIT
INVENTION GUIDE


1
Start Here!
littleBits Basics
BITTM INDEX
POWER
INPUT
WIRE
OUTPUT
ACCESSORIES
Helpful Tools
& Materials
The littleBits
Invention Cycle
Online
Inventions
Glossary
Trouble-
shooting
INVENTIONS
Start building creations with step-by-step
instructions for 16 inventions. You’ll get
ideas for how to put your own spin on
each invention, and before you know it,
you’ll be creating your own from scratch.
SPINMATE Invent a spinning sign for your
fort, or a creature that dances dizzily on
your desk.
BUBBLEBOT Using household objects and a
few of our favorite Bits, you can create big,
beautiful bubbles as if by magic.
BUMPERBALL Invent a game that puts a new
spin on an old arcade favorite: the pinball
machine.
BITBOT Invent a rover that roams your
world wirelessly.
CHALLENGE
Challenges get you to flex your creative
muscles. They start with an open-ended
problem. Your mission is to explore how you
could use your Bits™to create an invention
that solves that problem.
ANIMATRONICS CHALLENGE Animatronics
is a type of special eect that uses electronics
to create lifelike animals, creatures, humans,
aliens – you name it. In this challenge, you'll
create your own unique animatronic creature.
02
03
04–20
05
06
08
12
17
21
22
56–57
58
59
24–53
24
32
42
52
54–55
54
GIZMOS &
GADGETS KIT
QUICK
START
PG 24 PG 32 PG 42
INVENTION GUIDE
1. Download the littleBits
Invent app.
Is your smart device compatible?
Find out at littleBits.com/app
2. Add this kit to
your profile.
3. Use your device to
control your inventions!
PG 52

2
CAUTION: Parental supervision and assistance may be required for safe use of components.
BUILD & PLAY WITH
THIS CIRCUIT FIRST.
1TURN POWER ON 2 SLIDE THE DIMMER BACK AND FORTH 3EXTEND YOUR CIRCUIT
WITH A WIRE
4WATCH THE BARGRAPH
LIGHT UP
5MAKE SOME NOISE
WITH A BUZZER

3
ANATOMY OF A BITTM
Learn how you can tell top from bottom.
1COLOR-CODED BY FUNCTION
BitsTM are grouped into four dierent categories,
which are color-coded.
Learn more about your Bits in the BIT INDEX ON PG 04
2
POWER (BLUE)
Power Bits, plus a power
supply, run power through
your circuit.
INPUT (PINK)
Input Bits accept input from
you or the environment and
send signals that aect the
Bits that follow.
OUTPUT (GREEN)
Output Bits do something –
light up, buzz, move…
WIRE (ORANGE)
Wire Bits connect to other
systems and let you build
circuits in new directions.
BUILD DIRECTION
BIT FEET
BOTTOM
BIT NAME
TOP
BITSNAPS
(“X” ICONS)
OPEN HARDWARE SYMBOL
& LITTLEBITS LOGO
MAGNET MAGIC!
Bits snap together with magnets. The magnets are
always right – you can’t snap them together the
wrong way.
3
ARROWS SHOULD POINT IN THE SAME DIRECTION
IF THE BITS WON’T SNAP TOGETHER, TRY SPINNING
ONE AROUND AND MAKE SURE THE ARROWS POINT
IN THE SAME DIRECTION
ORDER IS IMPORTANT
POWER BITS always come rst and INPUT BITS
only aect the OUTPUT BITS that come after them.
4
WITH NO OUTPUT BIT AFTER IT, THE INPUT BIT HAS NOWHERE
TO SEND ITS SIGNAL
THE INPUT BIT AFFECTS THE OUTPUT BITS THAT FOLLOW
SOME BITS ARE ADJUSTABLE
Switches, buttons, and dials on the Bit allow
you to change how the Bit functions.
5
FLIP THE SWITCH TO CHANGE MODES
ADJUST SENSITIVITY WITH
PURPLE SCREWDRIVER
BASICS
3EXTEND YOUR CIRCUIT
WITH A WIRE

4
BITTM INDEX
p1 power i5 slide dimmer
i13 light sensor
w1 wire
w19 split
w30 Bluetooth®
Low Energy Bit
o6 buzzer
o9 bargraph
o11 servo
o13 fan
o25 DC motor
a7 adhesive shoes
a10 motorMate
a19 servo hub
a22 ball caster
a23 mechanical arm
a24 servo mount
a25 wheel
a26 mounting board
05
POWER INPUT WIRE OUTPUT ACCESSORIES
06
07
08
09
10
12
13
14
15
16
17
18
19
20
Occasionally BitsTM and accessories get updated, so the features or
appearance of your Bits may dier from those used in this guide.

5
MEET THE BIT
HOW IT WORKS
p1 POWER
Every circuit starts with power. It provides the electricity that
makes your Bits spin, buzz, blink, and shine.
The power Bit converts the
9 volts of electricity in the
battery to the 5 volts that
littleBits circuits run on.
The power Bit also sends a
signal through your circuit.
Controlling this signal with
inputs is how you control
your circuit.
REAL WORLD ANALOGIES
PHONE CHARGER
o9 BARGRAPH
p1 POWER
MODE: on/o
On light
SAMPLE CIRCUIT

6
MEET THE BIT
MINI-CHALLENGE
i5 SLIDE DIMMER
Slide this dimmer back and forth to control your circuit.
As you slide it up, more signal goes to the Bits that follow,
brightening lights, speeding up motors, and raising the
volume on your buzzer.
Can you invent something with the slide dimmer that waves
a flag back and forth? How could you change the speed
it waves?
When the slider is all the
way to the left, it’s sending
an o or 0 volt signal.
When the slider is all the
way to the right, it’s sending
a 5 volt signal. The slider
can be positioned to send
any signal between 0 and
5 volts.
HOUSEHOLD
DIMMER SWITCH STEREO VOLUME CONTROL CAR PEDAL
p1 POWER
i5 SLIDE DIMMER
o9 BARGRAPH
REAL WORLD ANALOGIES
SAMPLE CIRCUIT HOW IT WORKS

7
MEET THE BIT
MINI-CHALLENGE
i13 LIGHT SENSOR
Use this Bit to control your circuits with light! The amount
of light shining on the sensor will change how your circuit
behaves. It's a great way to activate your circuit without
hands and is perfect for alarms!
Can you invent something that moves when the lights go out?
The light sensor measures
how much light is shining
on it. It has two modes.
In LIGHT mode, as the
light shining on the sensor
gets brighter, more signal
passes through it (making
lights brighter or motors
turn faster). In DARK mode,
the signal increases as it
gets darker.
Use the purple screwdriver to
turn the dial and adjust how
much light it takes to change
the signal. Clockwise
increases sensitivity, counter-
clockwise decreases it.
NIGHT LIGHT SENSOR PHOTOGRAPHER'S
LIGHT METER FINGER PULSE METER
p1 POWER
o9 BARGRAPH
A
p
u
l
s
e
m
e
r
s
n
e
s
a
b
r
i
g
h
t
l
i
g
h
t
i
n
t
o
y
o
u
r
fi
e
r
d
u
s
e
s
a
l
i
g
h
t
s
s
o
r
t
o
m
e
a
s
u
r
e
b
l
o
o
d
f
l
o
w
.
MODE: light or dark
SENSITIVITY: "–" decrease,
"+" increase
This is the component that
measures light.
i13 LIGHT SENSOR
REAL WORLD ANALOGIES
SAMPLE CIRCUIT HOW IT WORKS

8
MEET THE BIT
w1 WIRE
The wire Bit has a flexible wire running between its two
bitSnapsTM
. This allows you to place your Bits farther apart,
turn corners, and make connections that can twist, turn,
and spin.
The wire doesn’t change the
signal in any way – it just
carries it over from one Bit
to another.
EXTENSION CORD POWER LINES STRING OF LIGHTS
p1 POWER
w1 WIRE
o6 BUZZER
MINI-CHALLENGE
Can you invent a circuit that uses the wire to shine the
bargraph on the light sensor?
REAL WORLD ANALOGIES
SAMPLE CIRCUIT HOW IT WORKS

9
MEET THE BIT
w19 SPLIT
The split lets you connect a single Bit to two others. If you
place an input before the split, it will control the two outputs
at once, like a single light sensor controlling two motors. The
flexible wires on the split also allow you to place your Bits
farther apart and position them how you like.
The split divides the incoming
signal and sends it to the two
output bitSnaps.
POWER STRIP HEADPHONES
p1 POWER
w7 FORK
o6 BUZZER
o9 BARGRAPH
MINI-CHALLENGE
Can you invent a circuit with two parts that move at the
same time?
REAL WORLD ANALOGIES
SAMPLE CIRCUIT HOW IT WORKS

10
MEET THE BIT
w30 LITTLEBITS BLUETOOTH
LOW ENERGY BIT
The littleBits Bluetooth Low Energy Bit (marked "BLE" on your
Bit) is the easiest way to control your inventions wirelessly,
from any smart device (like a phone or tablet). All you need is
the littleBits Invent app and this Bit to move motors on wireless
vehicles, or trigger buzzers for pranks. You can also use your
circuit to control functions on your device, like triggering the
camera to take a picture.
The Bluetooth Low Energy
Bit can send and receive
a signal from your smart
device using Bluetooth Low
Energy wireless technology,
up to a distance of about
80ft (25m) indoors. To use
the Bluetooth Low Energy
Bit, you rst need to connect
it to your smart device
(smartphone, tablet) through
the littleBits Invent app.
Check your device's compat-
ibility at littleBits.com/app.
FITNESS TRACKERS
MINI-CHALLENGE
Can you invent a prank using the Bluetooth Low Energy
Bit in your circuit?
REAL WORLD ANALOGIES
SAMPLE CIRCUIT HOW IT WORKS
®
WIRELESS MOUSE &
KEYBOARD
CONTROL YOUR
BLUETOOTH LOW
ENERGY BIT USING
THE LITTLEBITS
INVENT APP
Solid Green = Connected
Blinking White = Not Connected
p1 POWER
o9 BARGRAPH
i5 SLIDE DIMMER
LED COLORS
W30 BLUETOOTH LOW ENERGY BIT

11
__
30
USING THE BLUETOOTH LOW ENERGY BIT WITH YOUR DEVICE
TO GET STARTED WITH THE BLUETOOTH
LOW ENERGY BIT, download the
littleBits Invent app and add your
Gizmos & Gadgets Kit, 2nd Edition to
your prole.
DISPLAY SCREEN: You can take
remote readings of the signals
going into your Bluetooth Low
Energy Bit with on-screen readouts.
PHOTOS & VIDEO: Signals from the
Bluetooth Low Energy Bit can control
the camera on your phone, letting you
take photos and video remotely.
USING THE BLUETOOTH LOW ENERGY BIT
TO CONTROL YOUR DEVICE
WIRELESS: The antenna sends
and receives signals between your
device and the Bluetooth Low
Energy Bit.
__
30
TOUCH SCREEN: Send signals to
your Bluetooth Low Energy Bit with
on-screen buttons, sliders, and other
controls.
MOVEMENT: The accelerometer
and gyroscope in your device sense
movement. The signals from these
sensors can be sent to your Bluetooth
Low Energy Bit to control your circuits.
USING YOUR DEVICE TO CONTROL YOUR
BLUETOOTH LOW ENERGY BIT
*App may dier from screenshots shown.
Once connected, you can use the app’s controls to send
signal information from your device to your circuit and vice
versa. You can also create custom control dashboards for
your inventions. Controls range from simple buttons and
dimmers to accelerometers. You can communicate with up to
two Bluetooth Low Energy Bits at the same time.

12
MEET THE BIT
o6 BUZZER
The buzzer makes a sound no one can ignore. It's great at
sounding the alarm or annoying those nearby.
The buzzer converts the
electrical signal it receives
into a vibration, which
creates a buzzing sound.
The higher the signal it
receives, the more intense
the vibration, and the
louder the sound is.
DOORBELL CAR ALARM WASHING MACHINE
p1 POWER
i5 SLIDE DIMMER
o6 BUZZER
MINI-CHALLENGE
Can you invent a way to communicate with your friends
using the buzzer?
REAL WORLD ANALOGIES
SAMPLE CIRCUIT HOW IT WORKS
di dg!
de!

13
MEET THE BIT
o9 BARGRAPH
The bargraph uses ve LEDs
to turn electricity into light.
Each LED on the board
needs a certain amount of
signal in order to light up. As
you increase the signal sent
to the bargraph, more LEDs
will shine.
MINI-CHALLENGE
Can you invent a way to measure your mood?
REAL WORLD ANALOGIES
SAMPLE CIRCUIT HOW IT WORKS
The bargraph shows you how much signal the Bit is
receiving with a display of ve light-emitting diodes (LEDs)
in dierent colors. Try it with a dimmer to make your own
adjustable lamp.
MUSIC VISUALIZER TV VOLUME
o9 BARGRAPH
p1 POWER
i5 SLIDE DIMMER

14
MEET THE BIT
o11 SERVO
The servo is a motor that can swing back and forth or be
turned to a specic position.
There are a few accessories you can use with the servo (like
the mechanical arm). You can nd out how to use those on
pages 18 and 19.
The servo has two modes. In
TURN mode, the input from
other Bits determines the
position of the hub–try
using a slide dimmer to
set the angle you want. In
SWING mode, the servo
will move back and forth
on its own like a pair of
windshield wipers–the input
signal controls the speed of
the swing.
The servo's range of motion
is about 110 degrees.
TRUCK CRANE ROBOT
p1 POWER
i5 SLIDE DIMMER
MINI-CHALLENGE
Can you invent something that uses the servo to clean up
your desk?
WINDSHIELD WIPERS
o11 SERVO
MODE: turn or swing
REAL WORLD ANALOGIES
SAMPLE CIRCUIT HOW IT WORKS
b
l
e
e
p
b
l
o
r
p
Attach the servo
hub. See pg 18.

15
MEET THE BIT
o13 FAN
Use the fan to create a gentle breeze, perfect for cooling
things o. You can also try taping small things (like stickers
or pieces of paper) to the center of the fan for some
spinning visuals.
Inside the fan is a tiny motor.
When it receives a signal,
it spins. The more signal it
receives, the faster it spins.
LEAF BLOW
E
R
PERSONAL FAN AIRPLANE PROPELLER
p1 POWER
i5 SLIDE DIMMER
o13 FAN
Feet for attaching to mounting
boards and shoes
MINI-CHALLENGE
Can you invent something that uses the fan to move an
object across the table?
REAL WORLD ANALOGIES
SAMPLE CIRCUIT HOW IT WORKS

16
MEET THE BIT
o25 DC MOTOR
Use the motor to spin, turn, twist, and roll.
There are a few accessories you can use with the DC motor
(like wheels). You can nd out how to use those on pages
17, 19 and 20.
The DC (or “direct current”)
motor rotates a shaft when it
receives a signal. The more
signal it receives, the faster
the motor will spin.
A switch on the board lets
you choose which direction
the motor spins. CW spins
clockwise and CCW spins
counterclockwise. When the
switch is in VAR (variable)
mode, the amount of signal
the motor receives from
previous Bits allows you
to control the speed and
direction (clockwise or
counterclockwise) of its
motion. In this mode, using
an input like a slide dimmer
makes steering easy!
CAR ENGINE DRILL FERRIS WHEEL
p1 POWER
i5 SLIDE DIMMER
o25 DC MOTOR
MODE: CW (clockwise),
VAR (variable mode), and
CCW (counterclockwise)
Can be mounted to other
materials with included #6 screws.
Feet for attaching to mounting
boards or shoes
MINI-CHALLENGE
Can you invent something using the DC motor that travels
across the table?
REAL WORLD ANALOGIES
SAMPLE CIRCUIT HOW IT WORKS

17
MEET THE ACCESSORY
a7 ADHESIVE SHOES
Shoes slip onto your Bit feet
and hold your circuit together.
On the bottom of your shoes
you'll nd adhesive, which
is great for securing your
circuits to dierent surfaces.
HOW IT WORKS
First, snap together your
littleBits circuit. Then press
the feet of your Bits into the
holes of the shoes and place
it on your chosen surface.
Adhesive shoes can be
secured onto any surface –
paper, cardboard, plastic
– you name it! Just peel the
adhesive backing o, and
stick it on.
Bit feet go in the shoes
NOTE: The shoe adhesive
is for one-time use only.
MEET THE ACCESSORY
HOW IT WORKS
a10 MOTORMATE
The motorMate makes
it easy to attach paper,
cardboard, LEGO®axles,
and lots of other materials
to the DC motor.
To mount, slide the motorMate
onto the shaft of the DC
motor by aligning the flat
edges. The motorMate has
two dierent sized slots: one
ts most standard craft sticks
and the other fits thicker
papers like cardstock. LEGO
axles fit right into the center.
Flat edge

18
MEET THE ACCESSORY
HOW IT WORKS
a19 SERVO HUB
The servo hub lets you eas-
ily attach materials to your
servo motor and add more
complex movements to your
littleBits inventions.
The servo hub can be
attached and removed by
gently pushing or pulling it
on or o the servo motor.
This is helpful if you need to
reorient how the holes are
positioned for a project.
The servo hub can be
permanently attached by
using a small screw in the
center hole.
Use the included #6 screws
with any of these eight
outer holes.
USE A PHILLIPS-HEAD
SCREWDRIVER
BE SURE TO ALIGN THE
TEETH ON THE SHAFT
WITH THE TEETH IN THE
HUB HOLE
MEET THE ACCESSORY
HOW IT WORKS
a22 BALL CASTER
The ball caster works as a
wheel, adding rolling support
to your inventions. The ball
can also be removed from
the socket, so you can use it
in games and contraptions.
You can even use the socket
as a ball stand!
Attach the ball caster to a
surface using small screws
(not included) or Glue Dots® .
Single screw hole
This manual suits for next models
21
Table of contents
Other Littlebits Toy manuals