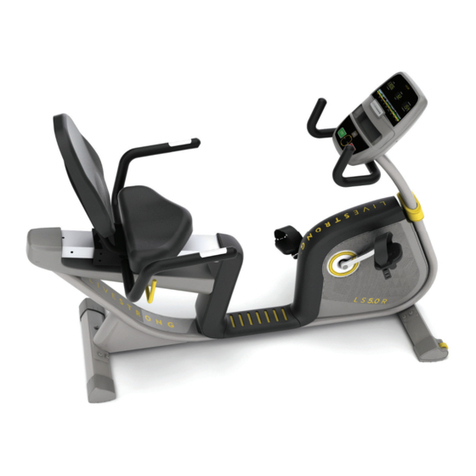
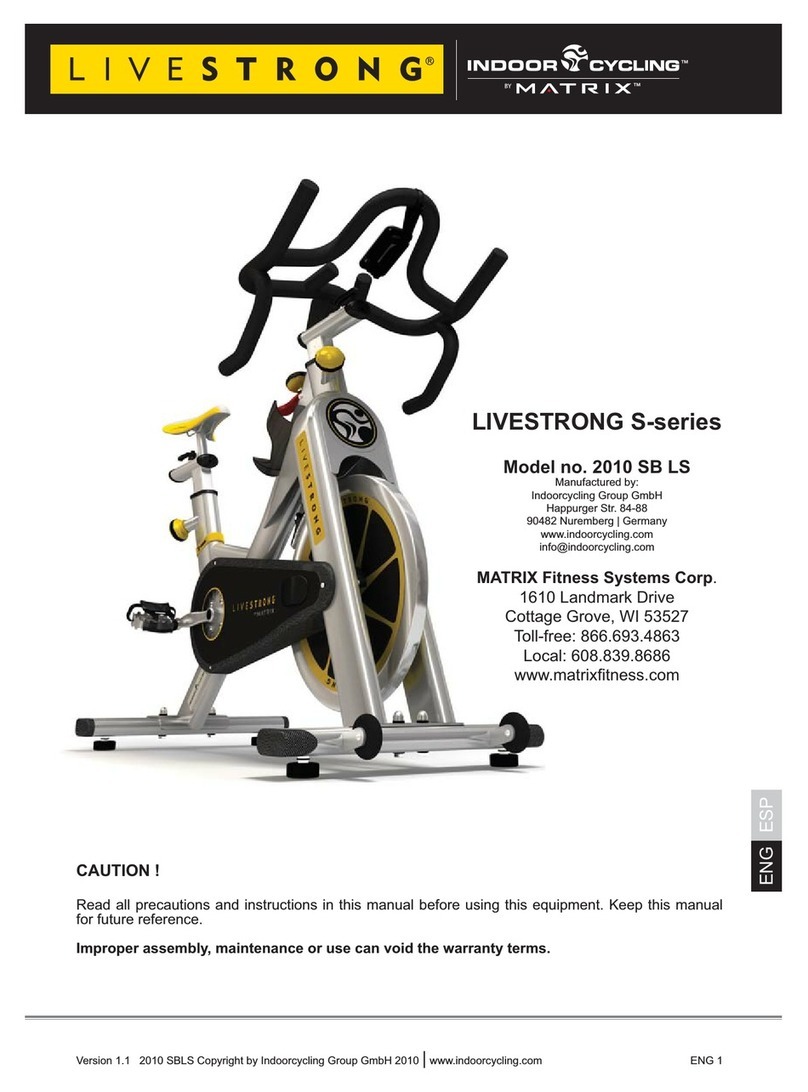
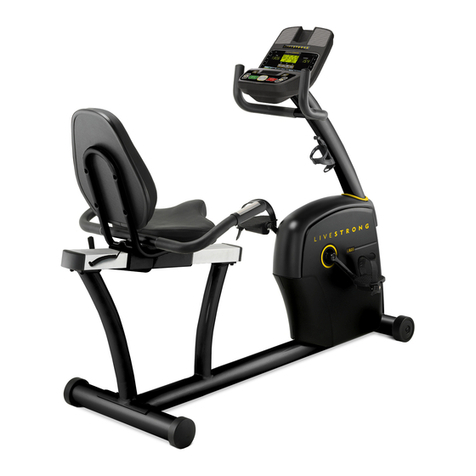
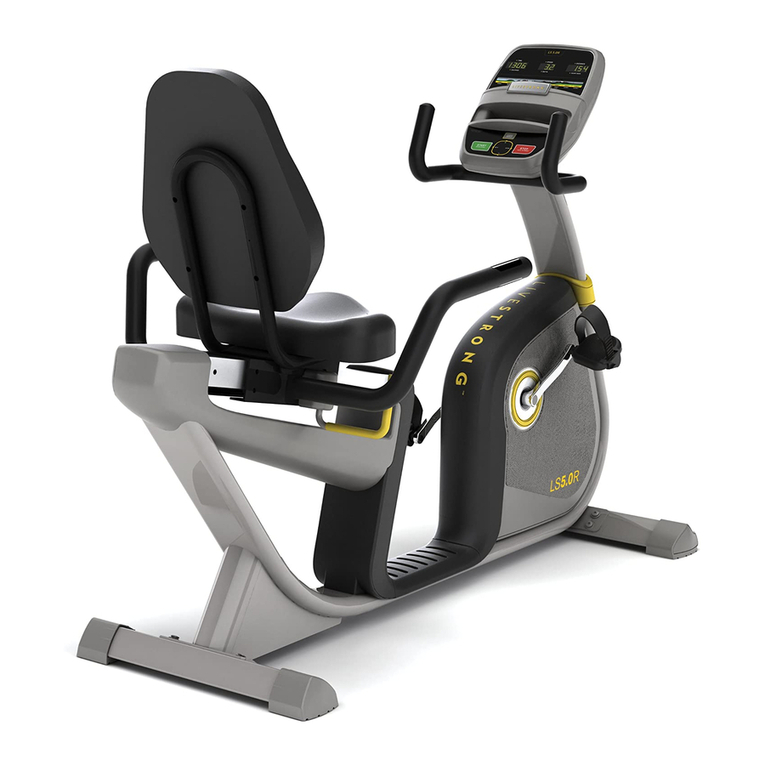
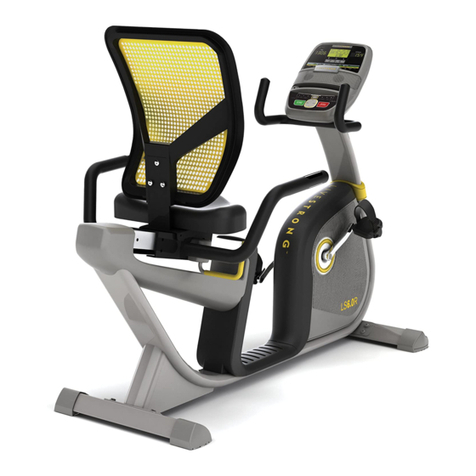
Livestrong LS5.0R User manual

LS5.0R
LS6.0R
LS5.0U
EXERCISE BIKE OWNER’S MANUAL
MANUEL DU PROPRIÉTAIRE DU VÉLO D’EXERCICE
MANUAL DEL PROPIETARIO DE LA BICICLETA ESTACIONARIA
Read the BIKE GUIDE before using this OWNER’S MANUAL.
Lire le GUIDE D’UTILISATION DU VÉLO D’EXERCICE avant de se servir du présent MANUEL DU PROPRIÉTAIRE.
Lea la GUÍA DEL USUARIO DE LA BICICLETA ESTACIONARIA antes de usar este MANUAL DEL PROPIETARIO.

2
LIVESTRONG® is a registered trademark of the Lance Armstrong Foundation.
The Lance Armstrong Foundation fights for the more than 25 million people around the world living with cancer today. There can be – and should be – life after cancer for more people. The
Foundation’s support kicks in at the moment of diagnosis, giving people the resources and support they need to fight cancer head-on. They find innovative ways to raise awareness, fund research
and end the stigma about cancer that many survivors face. They connect people and communities to drive social change, and call for state, national and world leaders to help fight this disease.
Anyone, anywhere can join the fight against cancer. Join them at LIVESTRONG.org.
INTRODUCTION
Congratulations and thank you for your purchase of this LIVESTRONG® exercise bike!
Purchases of this product ensure that a minimum of $4M will go to the Lance Armstrong Foundation and the fight against cancer.
Whether your goal is to win races or simply enjoy a fuller, healthier lifestyle, a LIVESTRONG® exercise bike can help
you attain it – adding club-quality performance to your at-home workouts, with the ergonomics and innovative features
you need to get stronger and healthier, faster. Because we’re committed to designing fitness equipment from the inside
out, we use only the highest quality components. It’s a commitment we back with one of the strongest frame-to-brake
warranty packages in the industry.
You want exercise equipment that offers the most comfort, the best reliability and the highest quality in its class.
LIVESTRONG® exercise bikes deliver.
2 ENGLISH
40 FRANÇAIS
78 ESPAÑOL

3
IMPORTANT PRECAUTIONS
SAVE THESE INSTRUCTIONS
When using an exercise product, basic precautions should always be followed, including the following: Read all instructions
before using this exercise bike. It is the responsibility of the owner to ensure that all users of this exercise bike are adequately
informed of all warnings and precautions. If you have any questions after reading this owner’s manual, contact Customer Tech
Support at the number listed on the back panel.

4
READ AND SAVE ALL INSTRUCTIONS BEFORE ASSEMBLING OR USING THIS
EXERCISE BIKE. IT IS STRONGLY RECOMMENDED TO TAKE THE FOLLOWING SAFETY
INSTRUCTIONS.
• CAUTION: If you experience chest pains, nausea, dizziness or shortness of breath, stop exercising immediately and consult your
physician before continuing.
• Use this exercise bike for its intended purpose as described in this manual. Do not use attachments that have not been
recommended by the manufacturer.
• Never operate the exercise bike if it is not working properly, or if it has been damaged. Contact Customer Tech Support or the
authorized dealers for examination and repair.
• Do not use the exercise bike without proper footwear. NEVER operate the exercise bike with bare feet.
• Do not wear any clothing that might catch on any moving parts of this exercise bike.
• Keep hands and feet clear at all times from moving parts to avoid injury. Never turn the pedal cranks by hand.
• Do not dismount the exercise bike until the pedals are at a complete STOP.
• Do not attempt to ride the exercise bike in a standing position at high RPMs until you have practiced at slower speeds.
• Do not insert any object, hands or feet into any openings, or expose hands, arms or feet to the drive mechanism or other potentially
moving part of the exercise bike.
• Do not use any equipment that is damaged or has worn or broken parts. Use only replacement parts supplied by Customer Tech
Support or the authorized dealers.
• Do not operate where aerosol (spray) products are being used or when oxygen is being administered.
• Close supervision is necessary when used near children, invalids or disabled people.
• When the exercise bike is in use, young children and pets should be kept at least 3 meters / 10 feet away.
• Ensure that adjustment levers (seat and handlebar fore-and-aft) are properly secured and do not interfere with range of motion
during exercise.
WARNING
5
ASSEMBLY
There are several areas during the assembly process that special attention must be paid. It is very important to follow the assembly
instructions correctly and to make sure all parts are firmly tightened. If the assembly instructions are not followed correctly, the
exercise bike could have parts that are not tightened and will seem loose and may cause irritating noises. To prevent damage to
the exercise bike, the assembly instructions must be reviewed and corrective actions should be taken.
Before proceeding, find your exercise bike’s serial number located on
the front stabilizer tube and enter it in the space provided below.
ENTER YOUR SERIAL NUMBER AND MODEL NAME IN THE BOX BELOW:
» Refer to the SERIAL NUMBER and MODEL NAME when calling for service.
» Be sure to enter both the SERIAL NUMBER and MODEL NAME on your warranty card.
MODEL NAME: LIVESTRONG EXERCISE BIKE
WARNING
SERIAL NUMBER:
BK
SERIAL NUMBER LOCATION

6
CRANK
WATER BOTTLE HOLDER
PULSE GRIP HANDLEBARS
REAR STABILIZER TUBE POWER CORD SOCKET
CONSOLE
SEAT POSITION ADJUSTMENT KNOB
SEAT POST TUBE
SEAT HEIGHT ADJUSTMENT KNOB
FRONT STABILIZER TUBE
SEAT
PEDALS SHROUD
WARNING
CONSULT A PHYSICIAN PRIOR TO USING ANY
EXERCISE EQUIPMENT. POSSIBILITY OF
SERIOUS INJURY IF EQUIPMENT IS USED
IMPROPERLY. READ INSTRUCTION MANUAL
BEFORE USING. KEEP CHILDREN OFF AND
AWAY FROM THIS EQUIPMENT. FOR
CONSUMER USE ONLY.
AVERTISSEMENT
CONSULTER UN MÉDECIN AVANT D’UTILISER
CET ÉQUIPEMENT. POSSIBILITÉ DE BLESSURES
SÉRIEUSES SI L’ÉQUIPEMENT EST UTILISE DE
MANIÈRE INCORRECTE. AVANT USAGE, LIRE LE
GUIDE D’UTILISATEUR. NE PAS LAISSER CET
ÉQUIPEMENT À LA PORTÉE DES ENFANTS.
POUR USAGE DOMESTIQUE UNIQUEMENT.
PRECAUCIÓN
CONSULTAR CON UN MEDICO ANTES DE USAR ESTE
EQUIPO. POSIBILIDAD DE RESULTAR EN HERIDAS
GRAVES SI EL EQUIPO ESTÁ UTILIZADO
IMPROPIAMENTE. LEER LA GUÍA DE
INSTRUCCIONES ANTES DE USAR.MANTENER
NIÑOS PEQUEÑOS ALEJADOS DE LA MÁQUINA.ESTE
EQUIPO ES SÓLO PARA EL USO DEL CONSUMIDOR.
CONSOLE MAST
CONSOLE MAST GROMMET
LS5.0U

7
LS5.0R
LS6.0R
CRANK
WATER BOTTLE HOLDER
PULSE GRIP
HANDLEBARS
REAR STABILIZER TUBE
CONSOLE MAST HANDLEBARS
POWER CORD SOCKET
CONSOLE
SEAT SLIDE
SEAT POSITION ADJUSTMENT LEVER
FRONT STABILIZER TUBE
MESH SEAT BACK
(LS6.0R ONLY)
SEAT BASE
PEDALS
FRONT SHROUD
WARNING
CONSULT A PHYSICIAN PRIOR TO USING ANY
EXERCISE EQUIPMENT. POSSIBILITY OF
SERIOUS INJURY IF EQUIPMENT IS USED
IMPROPERLY. READ INSTRUCTION MANUAL
BEFORE USING. KEEP CHILDREN OFF AND
AWAY FROM THIS EQUIPMENT. FOR
CONSUMER USE ONLY.
AVERTISSEMENT
CONSULTER UN MÉDECIN AVANT D’UTILISER
CET ÉQUIPEMENT. POSSIBILITÉ DE BLESSURES
SÉRIEUSES SI L’ÉQUIPEMENT EST UTILISE DE
MANIÈRE INCORRECTE. AVANT USAGE, LIRE LE
GUIDE D’UTILISATEUR. NE PAS LAISSER CET
ÉQUIPEMENT À LA PORTÉE DES ENFANTS.
POUR USAGE DOMESTIQUE UNIQUEMENT.
PRECAUCIÓN
CONSULTAR CON UN MEDICO ANTES DE USAR ESTE
EQUIPO. POSIBILIDAD DE RESULTAR EN HERIDAS
GRAVES SI EL EQUIPO ESTÁ UTILIZADO
IMPROPIAMENTE. LEER LA GUÍA DE
INSTRUCCIONES ANTES DE USAR.MANTENER
NIÑOS PEQUEÑOS ALEJADOS DE LA MÁQUINA.ESTE
EQUIPO ES SÓLO PARA EL USO DEL CONSUMIDOR.
CAUTION AVERTISSEMENT PRECAUCIÓN
KEEP HANDS AND FEET
AWAY FROM THIS AREA.
GARDER LES MAINS ET LES
PIEDS LOIN DE CETTE REGION.
MANTENGA LAS MANOS Y LOS
PIES LEJOS DE ESTA AREA.
CONSOLE MAST
CONSOLE MAST GROMMET

8
TOOLS INCLUDED:
F13/15mm Flat Wrench
FPhillips Screwdriver/Allen Wrench
PARTS INCLUDED:
F1 Bike Frame
F1 Console
F1 Console Mast
F1 Console Mast Grommet
F1 Front Stabilizer Tube
F1 Rear Stabilizer Tube
F1 Seat
F1 Padded Seat Back (LS5.0R only)
F1 Mesh Seat Back (LS6.0R only)
F1 Seat Back Bracket (LS6.0R only)
F1 Seat Back Bracket Plate (LS6.0R only)
F1 Seat Post Tube (LS5.0U only)
F1 Seat Post Bracket (LS5.0U only)
F1 Handlebar Bracket Cover (LS5.0U only)
F1 Pulse Grip Handlebars
F2 Pedals with Straps
F1 Water Bottle Holder
F1 Audio Adapter Cable
F1 Power Cord
F1 Hardware Kit
UNPACKING
Unpack the product where you will be using it. Place the exercise bike carton on a
level flat surface. It is recommended that you place a protective covering on your
floor. Never open box when it is on its side.
NOTE: During each assembly step, ensure that ALL nuts and bolts are in place
and partially threaded in before completely tightening any ONE bolt.
NOTE: A light application of grease may aid in the installation of hardware. Any
grease, such as lithium bike grease is recommended.
If you have questions or if
there are any missing parts,
contact Customer Tech
Support. Contact information
is located on the back panel
of this manual.
NEED HELP?
PRE ASSEMBLY
NOTE: User must provide their own USB flash
drive for the LIVETRACK Interactive Technology.

9
ASSEMBLY
LS5.0R
page 10
LS6.0R
page 10
LS5.0R
page 10

10
LS5.0R, LS6.0R ASSEMBLY STEP 1
A Open HARDWARE FOR STEP 1.
B Attach the REAR STABILIZER TUBE to the BIKE
FRAME using 4 BOLTS (A), 4 SPRING WASHERS
(B) and 4 FLAT WASHERS (C).
C Attach the FRONT STABILIZER TUBE to the BIKE
FRAME using 4 BOLTS (A), 4 SPRING WASHERS
(B) and 4 FLAT WASHERS (C).
BOLT (A)
20 mm
Qty: 8
SPRING WASHER (B)
15.4 mm
Qty: 8
FLAT WASHER (C)
16 mm
Qty: 8
HARDWARE FOR STEP 1 :
BOLTS (A)
SPRING WASHERS (B)
FLAT WASHERS (C)
FRONT STABILIZER TUBE
BIKE
FRAME
REAR STABILIZER TUBE
LS5.0R
LS6.0R
LS6.0R SHOWN

11
LS5.0R, LS6.0R ASSEMBLY STEP 2
A Open HARDWARE FOR STEP 2.
B Slide CONSOLE MAST GROMMET from the bottom
up the CONSOLE MAST.
C Attach CONSOLE CABLES and carefully tuck all
cables into BIKE FRAME. Slide CONSOLE MAST
into BIKE FRAME.
D Attach the CONSOLE MAST to the BIKE FRAME
using 4 BOLTS (F), 4 SPRING WASHERS (B) and
4 FLAT WASHERS (C) from the rear.
E Slide CONSOLE MAST GROMMET down over
BIKE FRAME.
SPRING WASHER (B)
15.4 mm
Qty: 4
FLAT WASHER (C)
16 mm
Qty: 4
BOLT (F)
50 mm
Qty: 4
HARDWARE FOR STEP 2 :
BOLTS (A)
CONSOLE CABLES
CONSOLE MAST
CONSOLE MAST GROMMET
SPRING WASHERS (B)
FLAT WASHER (C)
BIKE FRAME
LS6.0R SHOWN
LS5.0R
LS6.0R
NOTE: Be careful not to pinch any wires while attaching the console mast.

12
LS5.0R, LS6.0R ASSEMBLY STEP 3
* NOTE: There is no hardware for this step.
A Attach PEDAL STRAPS to PEDALS.
B Attach the RIGHT PEDAL to the RIGHT CRANK
ARM, tightening it CLOCKWISE with the provided
13mm/15mm flat wrench.
C Attach the LEFT PEDAL onto the LEFT CRANK
ARM, tightening it COUNTER-CLOCKWISE with the
provided 13mm/15mm flat wrench. (NOTE: The left
crank arm is reversed threaded so it is very important
that it is tightened counter-clockwise. Tightening it
the opposite way can damage the pedal or the crank
arm or both.)
D Connect the CONSOLE CABLES and carefully tuck
the CONSOLE CABLES into the CONSOLE MAST.
E Attach the CONSOLE to the CONSOLE MAST using
the 4 PRE-ATTACHED SCREWS (The screws will
have to be removed from the console first).
PRE-INSTALLED SCREWS
CONSOLE MAST
PEDALS
LEFT CRANK ARM
CONSOLE CABLES
CONSOLE PEDAL STRAP
PEDAL
LS5.0R
LS6.0R
LS6.0R SHOWN
NOTE: Be careful not to pinch any wires while attaching the console.

13
LS5.0R ASSEMBLY STEP 4
* NOTE: This step is for LS5.0R models only.
A Open HARDWARE FOR STEP 4.
B Attach the SEAT to the SEAT FRAME using 4
BOLTS (E) and 4 FLAT WASHERS (C).
C Attach the WATER BOTTLE HOLDER to the
CONSOLE MAST using 2 SCREWS (F).
BOLT (E)
35 mm
Qty: 4
SCREW (F)
15 mm
Qty: 2
FLAT WASHER (C)
16 mm
Qty: 4
HARDWARE FOR STEP 4 :
SEAT
SEAT FRAME
WATER BOTTLE
HOLDER
FLAT WASHERS (C)
BOLTS (E)
SCREWS (F)
CONSOLE MAST
LS5.0R SHOWN
LS5.0R

14
LS6.0R ASSEMBLY STEP 4
LS6.0R
LS6.0R SHOWN
BOLTS (E)
ARC WASHERS (D)
SEAT FRAME
NUTS (F)
FLAT WASHERS (C)
LEFT PULSE GRIP HANDLEBAR
WATER BOTTLE HOLDER
SCREWS (G)
* NOTE: This step is for LS6.0R models only.
A Open HARDWARE FOR STEP 4
B Attach the LEFT PULSE GRIP HANDLEBAR
to the SEAT FRAME using 2 BOLTS (E), 2 ARC
WASHERS (D), 2 FLAT WASHERS (C) and 2 NUTS
(F).
C Repeat on right side.
D Attach the WATER BOTTLE HOLDER to the
CONSOLE MAST using 2 SCREWS (G).
BOLT (E)
70 mm
Qty: 4
NUT (F)
Qty: 4
FLAT WASHER (C)
16 mm
Qty: 4
ARC WASHER (D)
22 mm
Qty: 4
SCREW (G)
15 mm
Qty: 2
HARDWARE FOR STEP 4 :

15
LS5.0R ASSEMBLY STEP 5
* NOTE: This step is for LS5.0R models only.
A Open HARDWARE FOR STEP 5.
B Silde the SEAT BACK BRACKET into the SEAT
FRAME.
C Align PULSE GRIP HANDLEBARS with SEAT
FRAME and attach using 4 BOLTS (A), 4 SPRING
WASHERS (B) and 4 FLAT WASHERS (C).
D Attach SEAT CABLE as shown. Plug in POWER
ADAPTER as shown.
FLAT WASHER (C)
16 mm
Qty: 4
BOLT (A)
20 mm
Qty: 4
SPRING WASHER (B)
15.4 mm
Qty: 4
HARDWARE FOR STEP 5 :
BOLTS (A)
SPRING WASHERS (B)
SEAT CABLE
FLAT WASHERS (C)
PULSE GRIP
HANDLEBARS
SEAT FRAME
POWER
ADAPTER
SEAT BACK BRACKET
PADDED SEAT BACK
LS5.0R SHOWN
LS5.0R
LS5.0R ASSEMBLY COMPLETE!

16
BOLTS (H)
SEAT
SEAT
FRAME
SPRING WASHERS (B)
BOLTS (I)
FLAT WASHERS (C)
FLAT WASHERS (C)
SEAT BACK BRACKET
LS6.0R ASSEMBLY STEP 5
LS6.0R
LS6.0R SHOWN
* NOTE: This step is for LS6.0R models only.
A Open HARDWARE FOR STEP 5
B Attach the SEAT BACK BRACKET to the SEAT
FRAME using 4 BOLTS (H), 4 SPRING WASHERS
(B) and 4 FLAT WASHERS (C).
C Attach the SEAT to the SEAT FRAME using 4
BOLTS (I) and 4 FLAT WASHERS (C).
BOLT (H)
15 mm
Qty: 4
FLAT WASHER (C)
16 mm
Qty: 8
SPRING WASHER (B)
15.4 mm
Qty: 4
BOLT (I)
35 mm
Qty: 4
HARDWARE FOR STEP 5 :

17
LS6.0R ASSEMBLY STEP 6
* NOTE: This step is for LS6.0R models only.
A Open HARDWARE FOR STEP 6.
B Place SEAT BACK BRACKET PLATE on the inside
of the mesh seat back mount. Align mesh SEAT
BACK to seat back bracket.
C Attach mesh seat back to seat back bracket using 3
BOLTS (I) and 3 FLAT WASHERS (C) from the rear
and 3 FLAT WASHERS (C) and 3 NUTS (F) on the
other side of the seat back bracket plate.
D Connect HEART RATE WIRES to SEAT CABLE.
Attach SEAT CABLE as shown. Plug in POWER
ADAPTER as shown.
FLAT WASHER (C)
16 mm
Qty: 6
BOLT (I)
35 mm
Qty: 3
NUT (F)
Qty: 3
HARDWARE FOR STEP 6 :
BOLTS (I)
FLAT WASHERS (C)
NUTS (F)
SEAT CABLE
POWER
ADAPTER
HEART RATE WIRES
SEAT BACK BRACKET
SEAT BACK BRACKET PLATE
MESH SEAT BACK
LS6.0R SHOWN
LS6.0R
LS6.0R ASSEMBLY COMPLETE!

18
LS5.0U ASSEMBLY STEP 1
A Open HARDWARE FOR STEP 1.
B Attach the REAR STABILIZER TUBE to the BIKE
FRAME using 4 BOLTS (A), 4 SPRING WASHERS
(B) and 4 FLAT WASHERS (C).
C Attach the FRONT STABILIZER TUBE to the BIKE
FRAME using 4 BOLTS (A), 4 SPRING WASHERS
(B) and 4 FLAT WASHERS (C).
BOLT (A)
20 mm
Qty: 8
SPRING WASHER (B)
15.4 mm
Qty: 8
FLAT WASHER (C)
16 mm
Qty: 8
HARDWARE FOR STEP 1 :
BOLTS (A)
SPRING WASHERS (B)
FLAT WASHERS (C)
FRONT STABIILIZER TUBE
BIKE
FRAME
REAR STABIILIZER TUBE
LS5.0U

19
LS5.0U ASSEMBLY STEP 2
A Open HARDWARE FOR STEP 2.
B Attach SEAT to SEAT BASE using 3 FLAT
WASHERS (C) and 3 NUTS (D).
C Attach SEAT BASE to SEAT POST TUBE using 1
FLAT WASHER (E) and the SEAT ADJUSTMENT
KNOB.
D Pull the SEAT HEIGHT ADJUSTMENT KNOB
outward while sliding the SEAT POST TUBE into the
BIKE FRAME.
FLAT WASHER (C)
16 mm
Qty: 3
NUT (D)
Qty: 3
FLAT WASHER (E)
25 mm
Qty: 1
HARDWARE FOR STEP 2 :
BIKE
FRAME
NUTS (D)
SEATSEAT BASE
SEAT ADJUSTMENT KNOB
SEAT HEIGHT
ADJUSTMENT KNOB
FLAT WASHER (E)
SEAT BASE
SEAT POST TUBE
FLAT WASHERS (C)
LS5.0U

20
LS5.0U ASSEMBLY STEP 3
LS5.0U
NOTE: Be careful not to pinch any wires
while attaching the console mast.
A Open HARDWARE FOR STEP 3.
B Slide CONSOLE MAST GROMMET from the bottom
up the CONSOLE MAST.
C Attach CONSOLE CABLES and carefully tuck all
cables into BIKE FRAME. Slide CONSOLE MAST
into BIKE FRAME.
D Attach the CONSOLE MAST to the BIKE FRAME
using 4 BOLT (F), 4 SPRING WASHERS (B) and 4
FLAT WASHERS (C) from the rear.
E Slide CONSOLE MAST GROMMET down over
BIKE FRAME.
SPRING WASHER (B)
15.4 mm
Qty: 4
FLAT WASHER (C)
16 mm
Qty: 4
BOLT (F)
50 mm
Qty: 4
HARDWARE FOR STEP 3 :
BOLTS (F)
FLAT WASHERS (C)
CONSOLE MAST GROMMET
CONSOLE MAST
SPRING WASHERS (B)
BIKE FRAME
CONSOLE
CABLES
Other manuals for LS5.0R
2
Table of contents
Languages:
Other Livestrong Exercise Bike manuals

Livestrong
Livestrong LS9.9IC User manual

Livestrong
Livestrong 2010 SB LS User manual

Livestrong
Livestrong LS5.9IC User manual

Livestrong
Livestrong LS5.0R User manual

Livestrong
Livestrong LS9.9IC User manual

Livestrong
Livestrong LS5.0R User manual

Livestrong
Livestrong LS7.0B User manual

Livestrong
Livestrong LS9.9IC User manual

Livestrong
Livestrong 2010 EB LS User manual

Livestrong
Livestrong LS6.0R User manual