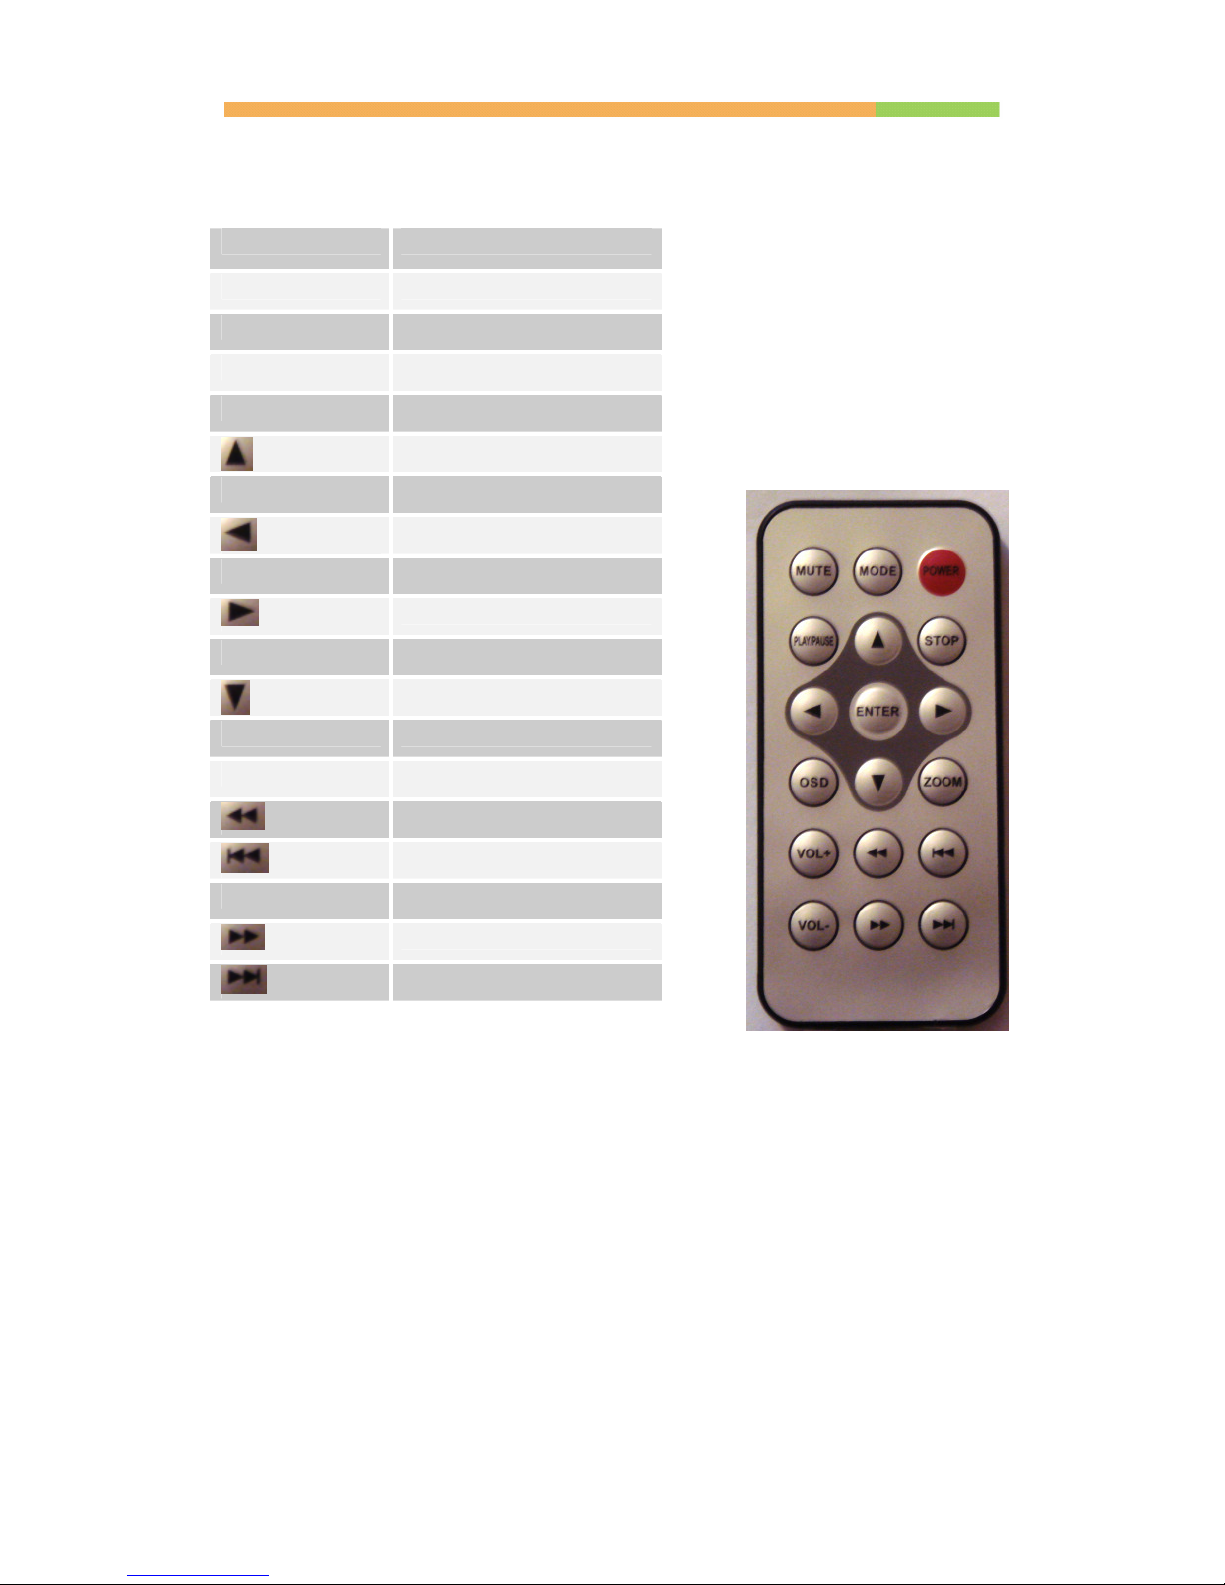
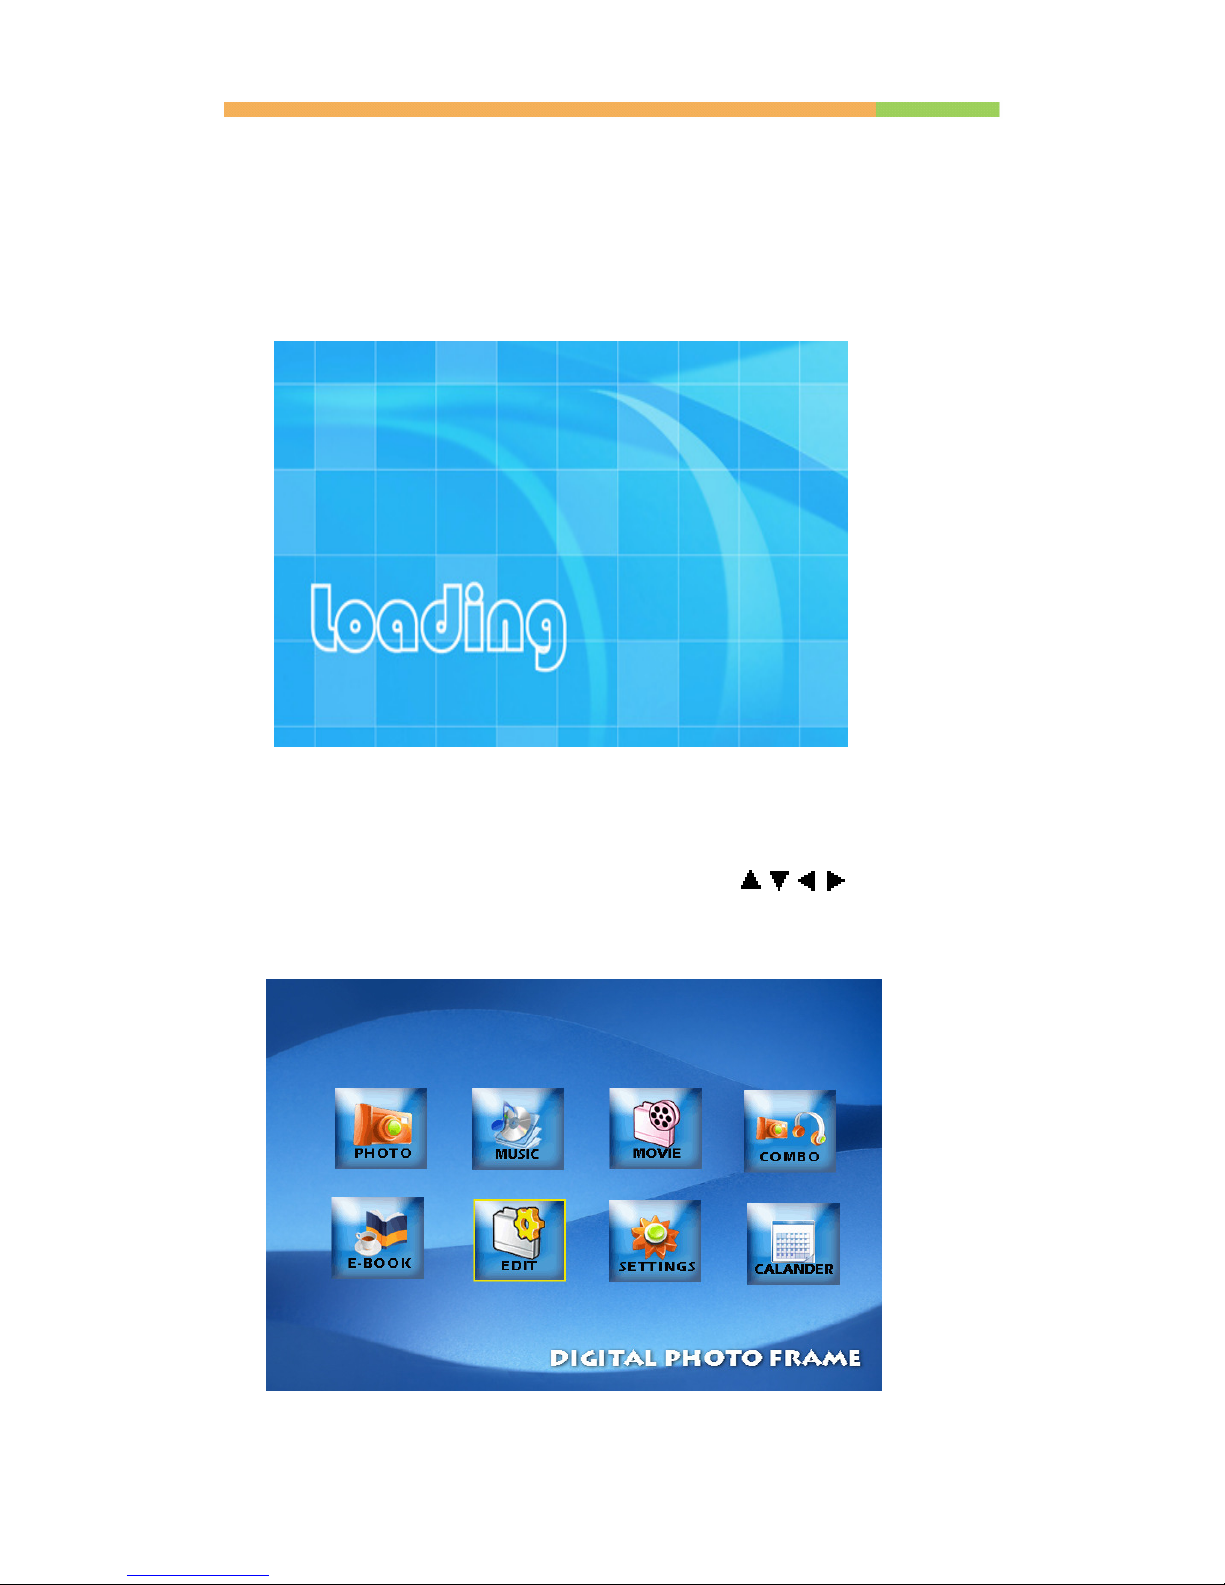
Living Images LI-800-MV User manual

8 INCH MEMORY VIEW
MEMORY VIEW
8” DIGITAL PHOTO FRAME
LI-800-MV
User Operation Guide

8 INCH MEMORY VIEW
2
CONTENTS :
FEATURES:..............................................................................................3
MACHINE BUTTONS: ...........................................................................4
USING YOUR REMOTE CONTROL...................................................5
USER OPERATION GUIDE: .................................................................6
1.
F
UNCTION SELECT
............................................................................................................................6
2.
C
ARD SELECT MENU
.........................................................................................................................7
3.
F
ILE
L
IST
S
CREEN
.............................................................................................................................7
4.
P
LAYBACK SCREENS
.......................................................................................................................10
4.1 Movie playback screen............................................................................................................11
4.2 Picture display screen...........................................................................................................122
*For interchange 16:9 to 4:3 display, please press “mode” on remote control. .........................12
4.3 Music playback screen............................................................................................................13
5.
C
ALENDAR
.....................................................................................................................................14
6.
A
LARM SCREEN
..............................................................................................................................15
7.
S
ETUP
M
ENU
..................................................................................................................................16
8.
S
YSTEM UPGRADE
= ......................................................................................................................177
REPLACING THE REMOTE CONTROL BATTERY…….….…..18
FREQUENT ASK QUESTOINS…………………..…………………19
SPECIFICATIONS………………………………………………...….20

8 INCH MEMORY VIEW
3
Features:
•Playback of photo, music, or video files stored in data storage
devices through dual High-Speed USB 2. port or various
card-reader port, or internal memory.
•Supported data storage devices include USB disk, memory card,
MP3 player, hard disk, etc.
•Dual High-Speed USB 2. can be configured as OTG, Host, or
Device
•Supports up to 8 x8 mega pixel image files (JPEG
format)
•Compatible with most digital cameras stored JPEG images
including Motion JPEG files
•Automatic slideshow with multiple transition effects and
adjustable display time
•Dedicated hardware JPEG decoder for super fast JPEG display
•Plays slideshow with MP3 music on in the background
•Plays MP3 music through the integrated speakers
•Plays MPEG-I, II, or IV video files (including DIVX) stored on
supported memory cards or external USB devices.
•Supports SD, SM, MS, CF, MMC memory cards
•User friendly on-screen display
•Build in alarm clock and calendar
•Supports default alarm sound or user-selected alarm music.
•Supports firmware upgrade via USB device or memory cards.
* Although the on-screen menu mentions XD card as an option, this
feature is not currently installed and XD cards cannot currently be
used in this frame

8 INCH MEMORY VIEW
4
Machine buttons:
Up Joystick button:
a) Move up the cursor at the menu
b) Open brightness adjustment menu at playing
interface
c) Switch picture control bar and music control bar
(After ENTER button open control bar).
d) Shift up when zoom in picture
Down Joystick button:
a) Move down the cursor at the menu
b) Open volume adjustment menu at playing interface
c) Switch picture control bar and music control bar
(After ENTER button open control bar).
d) Shift down when zoom in picture
Left Joystick button:
a) Move left the cursor at the menu
b) Back to up-level folder(in file list);
c) Switch the last file at playing interface
d) Shift left when zoom in picture
Right Joystick button:
a) Move right the cursor at the menu
b) Back to sub-level folder(in file list)
c) Operate copy/delete selected files
d) Switch the next file at playing interface
e) Shift right when zoom in picture
ENTER button:
a) Confirm perform selected item
b) Open control bar at the file playing interface
O D button:
::
:
a) Turn on/off menu or function bar
(After Right button in file list)
b) Exit
Power switch:
Turn on or cut off the power supply. When it is on OFF, the power is
off; when it is pushed upwards to ON, the power is on; when it is
further pushed upwards to LED, the decorative indicators are turned
on (such indicators are optional; you need to refer to the instructions
on the external package; this operation is available only when you
select the decorative LED).

8 INCH MEMORY VIEW
5
Using your Remote Control
The following table briefly describes the remote control functions
Button Description
Mute Mute mode
Mode Main menu
Power On/Off button
Play/Pause Play/Pause
Up
Up
Stop Stop
Left
Left / Previous Menu
Enter Enter
Right Right / Next Menu
OSD Picture Menu
Down
Down
Zoom Zoom
Vol+ Increase volume
Rewind Fast Rewind
Previous Previous
Vol - Decrease volume
Forward Fast Forward
Next Next

8 INCH MEMORY VIEW
6
User Operation Guide:
Assemble the Multimedia Digital Photo Frame bracket to prop the
unit up, insert the adaptor DC plug into the DPF player first, then plug
the power cord to a standard wall outlet.
Then the screen will display“LOADING…”interface(Exhibit 1).
Exhibit 1.Loading
1. Function select
In the function select menu, you can Press / / / to select to
play picture, music, movie, combo or text, and then Press enter to
card select menu .And you can also select to edit the files, setup the
system or display the calendar. (Exhibit 2.)
Exhibit 2. function select menu

8 INCH MEMORY VIEW
7
2. Card select menu
In the function select menu, you can press / to select to the
highlight icon which shows the card is inserted or not. (Exhibit 3.)
Press enter to display file list in the card . Press OSD to return to
function select menu.
Exhibit 3. Card select menu
3. File List Screen
With USB device/Memory cards rightly inserted into the Digital Picture
Frame: volume label list screen displays. (Exhibit 4)
Actions:
a) Press / to select a volume label, then press ENTER to
enter the file list.
b) Press / to select a file/folder, then press to enter the
folder or press ENTER to play the file. (Exhibit 5)
c) Press to return to previous directory.
d) Press OSD to return to card select menu.

8 INCH MEMORY VIEW
8
Exhibit 4. Volume Label List
Exhibit 5. File Play List
File management screen Action: (Copying files to the Memory
View Digital Frame - Calendar version)
Your new digital photo frame features a built-in memory that allows
you to copy images and files from your PC or memory card/stick and
store them on the frame.
Follow these instructions to try this out!

8 INCH MEMORY VIEW
9
From PC:
-Connect supplied USB cable with small socket in frame and
large standard socket in PC
-Switch on frame. PC will recognise new hardware and start to
communicate with it. A drive letter will be allocated to the
frame.
-Now you can view/delete files stored on the frame or copy and
paste files to the frame – simply by using Windows Explorer.
-When completed, disconnect USB connector. Frame will tell you
to switch power on & off to complete the edit process.
From Memory Card/stick:
-Insert memory card(s)
-Go on menu to “edit”
-Enter on the memory source that you want to copy from (eg
SD/MMC) and view files stored
-Use up/down arrow to move between the files. Each one that
you want to copy – stop on it and press right arrow once. A
symbol will appear beside the file
-When you have finished, press left arrow to return to list of
sources
-Highlight internal memory (MEMORY) and Enter. You will list
stored files.
-Press OSD and select paste (2
nd
arrow down)
-Files will transfer to the internal memory
-Deleting files is done in a similar way
Please refer to the instruction manual for any further information, or
contact [email protected]

8 INCH MEMORY VIEW
10
Exhibit 6. File Operation
Exhibit 7. File Copy
4. Playback screens
Actions:
During Playback, press ENTER and info bar displays on the screen.
Then select a function item by pressing / , and press ENTER to
perform the corresponding function. (Exhibit 8)
Press OSD to return to file list display screen .

8 INCH MEMORY VIEW
11
4.1 Movie playback screen
Exhibit 8. Video Playback with Info Bar
Info bar layout and functions:
•Status indicator (Status)
•Playback time (TIME)
•Play/Pause
•Stop
•Previous movie clip
•Fast backward (FB)
•Fast forward (FF)
•Next movie clip (Next)
•Show file info
•Zoom
•Sub-title switch
Status
Play/Pause
Stop Previous
FB
FF
Next
File Info
Zoom Sub Title
Time

8 INCH MEMORY VIEW
12
4.2 Picture display screen
Exhibit 9. Picture Playback with Info Bar
Info bar layout and functions:
•Status indicator
•Play/Pause
•Stop
•Picture rotate
•Zoom
•Previous picture
•Next picture
•Show file info
•Picture thumbnail display
•Picture resolution display
*For interchange 16:9 to 4:3 displays, please press “Mode” on remote control
for few seconds. (This function cannot apply on 8” Digital Photo Frame as it
already is a 4:3 LCD display)
Status
Play/Pause
Stop
Rotate
Zoom
Previous
Next
Info
Preview
Resolution

8 INCH MEMORY VIEW
13
4.3 Music playback screen
Exhibit 1 . Music Playback with Info Bar
Info bar layout and functions:
•Status indicator
•Play/Pause
•Stop
•Previous song
•Fast backward
•Fast forward (FF)
•Next song
•Show file info
•ID3 tag display
•Play mode (Standard, Repeat, Directory repeat)
Status
Play/Pause
Stop Previous
FB
FF
Next
File Info
Tag Play Mode
Time

8 INCH MEMORY VIEW
14
5. Calendar
Exhibit 11. Calendar Screen
Actions:
Press OSD to return to function select menu. Press / to
move to the previous or next month.
Display Information:
•Monthly calendar display
•Picture display
•Time display
•Alarm display

8 INCH MEMORY VIEW
15
6. Alarm screen
Exhibit 12. Alarm Screen
When alarm goes off, the screen displays current date and time.
(Exhibit 12) Press any button to return to the previous mode.

8 INCH MEMORY VIEW
16
7. Setup Menu
Press OSD to return to function select menu. (Exhibit 13)
Exhibit 13. Setup Screen
The setup items are shown as below:
:Menu language setup,it includes Simplified Chinese, English
two items.
:Picture setup, it includes the speed of automatic slide show,
picture play mode two items.
:Clock setup
:Alarm setup
:Video setup, Screen brightness, contrast and color setups.
:Default setup, recover the factory default setup.
:Check out the information of current software edition
The buttons’ operation method is shown as below:
button:shift items or choose parameters.
or ENTER button:enter the selected item, confirm the setup
result.
or OSD button: Back to the up-level item/the last picture or
forward to the next picture.

8 INCH MEMORY VIEW
17
8. System upgrade
Actions:
a) Get an upgrade file named *.img from Amlogic Company
and copy it to the root directory of a USB device.
b) Select the upgrade file from the Play List Screen, then press
the ENTER to do system upgrade. During firmware upgrade,
the screen will show the status information. Please do not
power off the unit until the upgrade is done.
c) Power off the unit.
d) Power on the unit, and the upgraded file is operational.
audio

8 INCH MEMORY VIEW
18
Replacing the Remote Control Battery

8 INCH MEMORY VIEW
19
Technical upport
Frequently asked questions
1) Q: Can I use touch-enabled technology for my Digital Picture Frame?
A: The LCD screen does not support touch-enabled technology. Please use the
buttons to control the Digital Picture Frame.
2) Q: If I keep showing the same photo for a long time, will it damage the LCD
screen?
A: No. The Digital Picture Frame can display the same photo continuously for a long
time. But it is recommended not to show the same picture continuously for more than
1 month.
3) Q: How do I store music files?
A: First, use a personal computer and popular audio editing software to convert your
music to MP3 format. The Digital Picture Frame will only play MP3 files so all
Windows Media Player™ and/or iTunes™ files will have to be converted first. You
can use a card reader or your digital camera to transfer those files to your memory
card.
4) Q: Does the Digital Picture Frame have built-in memory?
A: Yes, we offer 8” digital photo frame with built-in memory and please check our
model on website for details.
5) Q: What is the maximum picture size?
A: The Digital Picture Frame is able to display pictures up to 10 Mega Pixels.
6) Q: What is the best picture resolution displayed on the screen?
A: The frame’s best resolution is 800 x 600.
7) Q: Does it play every type of AVI and or MPEG4 videos?
A: No. The device only works with the avi/mpeg4 files taken by most digital cameras.
8) Q: How come the Digital Picture Frame does not show some of my photos?
A: The Digital Picture Frame is designed to show photos following the same camera
industry standards format as digital cameras. This format is a JPEG format.
Images, such as web images, scanned images, or photos in RAW format, are not
stored according to camera industry standards and therefore cannot be displayed
correctly on the Digital Picture Frame. Please use your PC applications to convert
such images into standard JPEG format before viewing them on the Digital Picture
Frame.

8 INCH MEMORY VIEW
20
Specifications
Type 8 inch Digital Picture Frame
Resolution 800 (RGB) x 600
Alimentation 12 V, 1.5A
Working Temperature -20 to +65 degrees
Luminosity 250cd/m
2
max.
Contrast 500:1
Viewing Angle
(U/D/L/R)
50/70/70/70 (CR>10)
Response Time 15ms
Display Mode 4 : 3
Photo Changing Interval Fast, Slow, Normal
File Format JPEG, MPEG1, MPEG2, MP3, MPEG4
Photo Size 10 Mega Pixels
Current AC110—240V (50HZ—60HZ)
Cards SD/MMC/MS/CF/ USB
Start-up Mode Select, Calendar, Picture, Music,
Movie, Edit (optional)
Package Contents Digital Picture Frame
AC/DC Adapter
User Guide
Remote control
USB Cable
AV cable
Table of contents
Other Living Images Digital Photo Frame manuals