Livington FITMIX SMART User manual

Bedienungsanleitung . . . . . 3
User manual . . . . . . . . . . 7
Mode d‘emploi . . . . . . . . 11
Istruzioni per l’uso . . . . . . 15
Gebruiksaanwijzing . . . . . 20
Návod k obsluze . . . . . . . 23
Návod na použitie . . . . . . 27
Instrucţiuni de utilizare . . . 30
Használati utasítás . . . . . . 33
Kullanma Kılavuzu . . . . . . 37
Instrukcja obsługi . . . . . . 40
Instrucciones de uso. . . . . 44
Gesunder Genuss dank intelligenter Technik
FITMIX SMART
Manual FitMix Smart_20170309_BA.indd 1 09.03.17 11:48

2
3
Bezeichnungen der Teile
1. To-Go-Becher
2. Messereinheit
3. Motoreinheit
4. Programmtasten
5. To-Go-Deckel
6. PULSE-Taste
7. Mahlbehälter
8. Streudeckel
9. Anti-Rutsch-Pads
Description of parts
1. To-Go pitcher
2. Blade attachment
3. Motor unit
4. Programme buttons
5. To-Go lid
6. PULSE button
7. Mini mixer
8. Sprinkle lid
9. Anti-slip pads
Désignation des pièces
1. Bocal de mixage
2. Couteaux
3. Bloc moteur
4. Touches de programmation
5. Couvercle de mixage
6. Touche PULSE
7. Mini mixer
8. Couvercle à saupoudrer
9. Patins antidérapants
Descrizione dei componenti:
1. Bicchiere To-Go
2. Lama
3. Motore
4. Tasti dei programmi
5. Coperchio To-Go
6. Tasto PULSE
7. Contenitore per macinatura
8. Coperchio dosatore
9. Piedini antiscivolo
Namen van de onderdelen
1. To-Go-beker
2. Meseenheid
3. Motoreenheid
4. Programmaknoppen
5. To-Go-deksel
6. PULSE-knop
7. Maalbeker
8. Strooideksel
9. Antislip-pads
Označení dílů
1. Nádoba k odnesení s sebou
2. Nože s příslušenstvím
3. Jednotka motoru
4. Programová tlačítka
5. Víko nádoby k odnesení s
sebou
6. Tlačítko PULSE
7. Nádoba K mletí
8. Posypávací víko
9. Protiskluzové podložky
Popis častí
1. Nádoba To-Go
2. Jednotka s nožom
3. Motorová jednotka
4. Programovacie tlačidlá
5. Kryt To-Go
6. Tlačidlo PULSE
7. Mlecia nádoba
8. Posýpací uzáver
9. Protišmykové prísavky
Denumirile pieselor
1. Bol To-Go
2. Cuţit
3. Motor
4. Taste programe
5. Capac To-Go
6. Tastă PULSE
7. Bol de măcinare
8. Capac de presărare
9. Pad-uri antiderapante
A részegységek leírása
1. To-Go tartály
2. Aprító egység
3. Motor egység
4. Programgombok
5. To-Go tartály teteje
6. PULSE gomb
7. Daráló tartály
8. Szórófedő
9. Csúszásgátló tappancsok
Parçaların tanımları
1. Seyahat bardağı
2. Bıçak ünitesi
3. Motor ünitesi
4. Program tuşları
5. Seyahat kapağı
6. PULSE tuşu
7. Öğütme haznesi
8. Serpme kapağı
9. Kaydırmaz pedler
Nazwy części
1. Pojemnik To-Go
2. Jednostka tnąca
3. Silnik
4. Przyciski programów
5. Pokrywka To-Go
6. PULSE - Przycisk pulsacyjny
7. Pojemnik do mielenia
8. Pokrywka dyspensera
9. Podkładki antypoślizgowe
Denominación de los
componentes
1. Vaso para llevar
2. Unidad cuchillo
3. Motor
4. Teclas programas
5. Tapa vaso para llevar
6. Tecla PULSE
7. Recipiente para triturar
8. Tapa espolvoreadora
9. Almohadillas antideslizantes
DE
HU
NL
EN
TR
CZ
FR
PL
SK
IT
ES
RO
1
7
8
2
6
9
3
45
Manual FitMix Smart_20170309_BA.indd 2 09.03.17 11:48

2
3
GEBRAUCHSANLEITUNG
Sehr geehrter Kunde! Sehr geehrte Kundin!
Vielen Dank, dass Sie sich für Fitmix Smart entschieden haben. Mit Fitmix Smart haben Sie den ultimativen Helfer für den
gesunden Trinkgenuss für unterwegs!
Weiteres praktisches Zubehör finden Sie unter: www.mediashop.tv
Haftungsbeschränkung: Die in dieser Bedienungsanleitung enthaltenen technischen Informationen, Daten und Hinweise für
die Installation, für den Betrieb und für die Pflege entsprechen dem letzten Stand bei Drucklegung. Es können aus den Angaben,
Abbildungen und Beschreibungen in dieser Anleitung keine Ansprüche hergeleitet werden. Es wird keine Haftung vom Hersteller
übernommen für Schäden, die aufgrund von Nichtbeachtung der Anleitung, nicht bestimmungsgemäßer Verwendung, unsachge-
mäßen Reparaturen, unerlaubt vorgenommener Veränderungen oder Verwendung nicht zugelassener Ersatzteile entstehen.
Bestimmungsgemäße Verwendung
WICHTIGE SICHERHEITSHINWEISE UND ALLGEMEINE HINWEISE
Das Gerät ist nur für den privaten Gebrauch bestimmt. Das Gerät ist nur zur Nahrungsmittel-
zubereitung geeignet. Benutzen Sie das Gerät nicht für Zwecke, für die es nicht bestimmt ist.
Ansprüche jeglicher Art wegen Schäden aus nicht bestimmungsgemäßer Verwendung sind
ausgeschlossen. Der Betreiber trägt allein das Risiko.
SICHERHEIT & AUFSTELLEN
Lesen Sie diese Bedienungsanleitung sorgfältig, bevor Sie den Mixer benutzen! Beachten Sie
die Sicherheitshinweise bei der Inbetriebnahme des Mixers, denn es können Sach- oder Per-
sonenschäden entstehen. Befolgen Sie alle Sicherheitshinweise, um Schäden wegen falscher
Benutzung zu vermeiden! Bewahren Sie die Bedienungsanleitung zum späteren Nachschlagen
auf. Sollte der Mixer an Dritte weitergegeben werden, so muss diese Bedienungsanleitung
ebenfalls mit ausgehändigt werden.
Hinweise:
• Vor der Verwendung ist der Mixer auf äußere sichtbare Schäden zu kontrollieren.
Ein beschädigter Mixer darf nicht verwendet werden.
• Das Typenschild darf nicht entfernt werden.
• Dieses Gerät kann von Kindern ab 8 Jahren und darüber sowie von Personen mit verringerten
physischen, sensorischen oder mentalen Fähigkeiten oder Mangel an Erfahrung und Wissen
benutzt werden, wenn sie beaufsichtigt oder bezüglich des sicheren Gebrauchs des Gerätes
unterwiesen wurden und die daraus resultierenden Gefahren verstehen. Kinder dürfen
nicht mit dem Gerät spielen. Reinigung und Benutzer-Wartung dürfen nicht von Kindern
ohne Beaufsichtigung durchgeführt werden.
• Lassen Sie den Mixer niemals unbeaufsichtigt eingeschaltet.
• Ziehen Sie den Netzstecker vor dem Anbringen und Abnehmen von Teilen am Gerät, nach
der Benutzung des Gerätes, vor der Reinigung des Gerätes, bevor Sie den Raum verlassen
oder wenn ein Fehler auftritt aus der Steckdose. Ziehen Sie den Netzstecker nicht am Kabel
aus der Steckdose.
DE
Denominación de los
componentes
1. Vaso para llevar
2. Unidad cuchillo
3. Motor
4. Teclas programas
5. Tapa vaso para llevar
6. Tecla PULSE
7. Recipiente para triturar
8. Tapa espolvoreadora
9. Almohadillas antideslizantes
Manual FitMix Smart_20170309_BA.indd 3 09.03.17 11:48

4
5
• Lassen Sie die Motoreinheit, das Netzkabel oder den Netzstecker niemals nass werden.
Tauchen Sie die Motoreinheit, Netzkabel oder Netzstecker nicht in Wasser oder andere
Flüssigkeiten; halten Sie es nicht unter fließendes Wasser.
• Reinigen Sie den Mixer und die Zubehörteile vor dem ersten Gebrauch des Gerätes.
Beachten Sie weitere Informationen im Abschnitt Reinigung.
• Trocknen Sie den Mixer und alle Zubehörteile, bevor Sie die Teile anbringen und bevor Sie
das Gerät mit der Stromversorgung verbinden.
• Benutzen Sie das Gerät immer auf einer stabilen, ebenen, sauberen und trockenen Oberfläche
.
• Kleben Sie keine Fremdkörper an das Gerät.
• Halten Sie die Hände und Utensilien außerhalb des To-Go-Bechers, wenn er sich auf der
Motoreinheit befindet.
• Verwenden Sie niemals Zubehörteile, die nicht für den Mixer vorgesehen sind.
• Das Gerät kann nur eingeschaltet werden, wenn der Stecker mit einer Steckdose
verbunden ist.
• Überprüfen Sie, ob die Netzspannung auf dem Typenschild mit Ihrer lokalen Versorgungs-
spannung übereinstimmt. Die einzige Art, das Gerät von der Stromversorgung zu trennen,
ist den Netzstecker zu ziehen.
• Stellen Sie das Gerät so auf, dass der Netzstecker immer zugänglich ist.
• Warten Sie bis der Messerkopf vollständig zum Stillstand gekommen ist bevor Sie den
To-Go-Becher oder den Mahlbehälter von der Motoreinheit abnehmen.
• Stellen Sie vor Inbetriebnahme des Mixers sicher, dass der Behälter fest verschlossen ist.
• Verpackungsmaterialien dürfen nicht zum Spielen verwendet werden, da Erstickungsgefahr
besteht.
• Beim Reinigen der Messereinheit müssen Sie besonders vorsichtig vorgehen um
Verletzungen zu vermeiden, da die Klingen extrem scharf sind.
• Stehen Leitungen oder Bauteile unter Spannung, besteht Lebensgefahr durch elektrischen
Strom!
• Vermeiden Sie Schäden am Netzkabel, indem Sie es nicht quetschen, knicken oder über
scharfe Kanten ziehen. Halten Sie das Netzkabel von heißen Oberflächen und offenen
Flammen fern.
• Wenn die Netzanschlussleitung dieses Gerätes beschädigt wird, muss sie durch den
Hersteller oder seinen Kundendienst oder eine ähnlich qualifizierte Person ersetzt werden,
um Gefährdungen zu vermeiden.
• Verwenden Sie keine Werkzeuge oder Gegenstände im Gerät. Metallgegenstände können
einen Kurzschluss verursachen oder zu einem Stromschlag führen.
• Versuchen Sie niemals, die Messereinheit alleine ohne To-Go-Becher in das Gerät zu geben
und einzuschalten. Das offene Messer kann zu schweren Verletzungen und zu
Beschädigungen am Gerät führen!
Manual FitMix Smart_20170309_BA.indd 4 09.03.17 11:48

4
5
BEDIENUNG
1. Entfernen Sie sämtliches Verpackungsmaterial und entsorgen Sie es entsprechend den geltenden gesetzlichen Bestimmungen.
2. Reinigen Sie den Mixer und alle Zubehörteile bevor Sie sie zum ersten Mal benutzen. (Siehe Reinigung)
3. Schneiden Sie die Zutaten, z. B. Obst oder Gemüse, klein. Füllen Sie die kleingeschnittenen Zutaten in den To-Go-Becher (1).
Befüllen Sie den Behälter höchstens bis 2/3 des Fassungsvermögens. Bitte geben Sie immer zu dem Obst oder Gemüse
Flüssigkeit mit bei, da anderenfalls manche Sorten nicht richtig zerkleinert werden können.
4. Schrauben Sie nun die Messereinheit (2) im Uhrzeigersinn auf den To-Go-Becher (1).
5. Setzen Sie den To-Go-Becher (1) auf die Motoreinheit (3). Passen Sie darauf auf, dass die Pfeilmarkierungen an der Messer
einheit (2) und die Markierung auf der Motoreinheit (3) auf einander stehen. Drehen Sie den To-Go-Becher (1) im
Uhrzeigersinn, bis dieser fest einrastet.
Achtung: Das Gerät lässt sich nur mit richtig aufgesetztem To-Go-Becher einschalten. Durch die Sicherheits-
abschaltung wird der Betrieb ohne To-Go-Becher (1) verhindert.
6. Stecken Sie den Netzstecker in die Steckdose.
7. Wählen Sie nun Ihr gewünschtes Programm per Programmtaste (4) um den Mixvorgang zu starten. Es wurden zwei
Programme für Sie mit den perfekten Geschwindigkeiten vorprogrammiert, sodass Sie für immer perfekte Ergebnisse aus nur
zwei Programmen bzw. der PULSE-Taste wählen können:
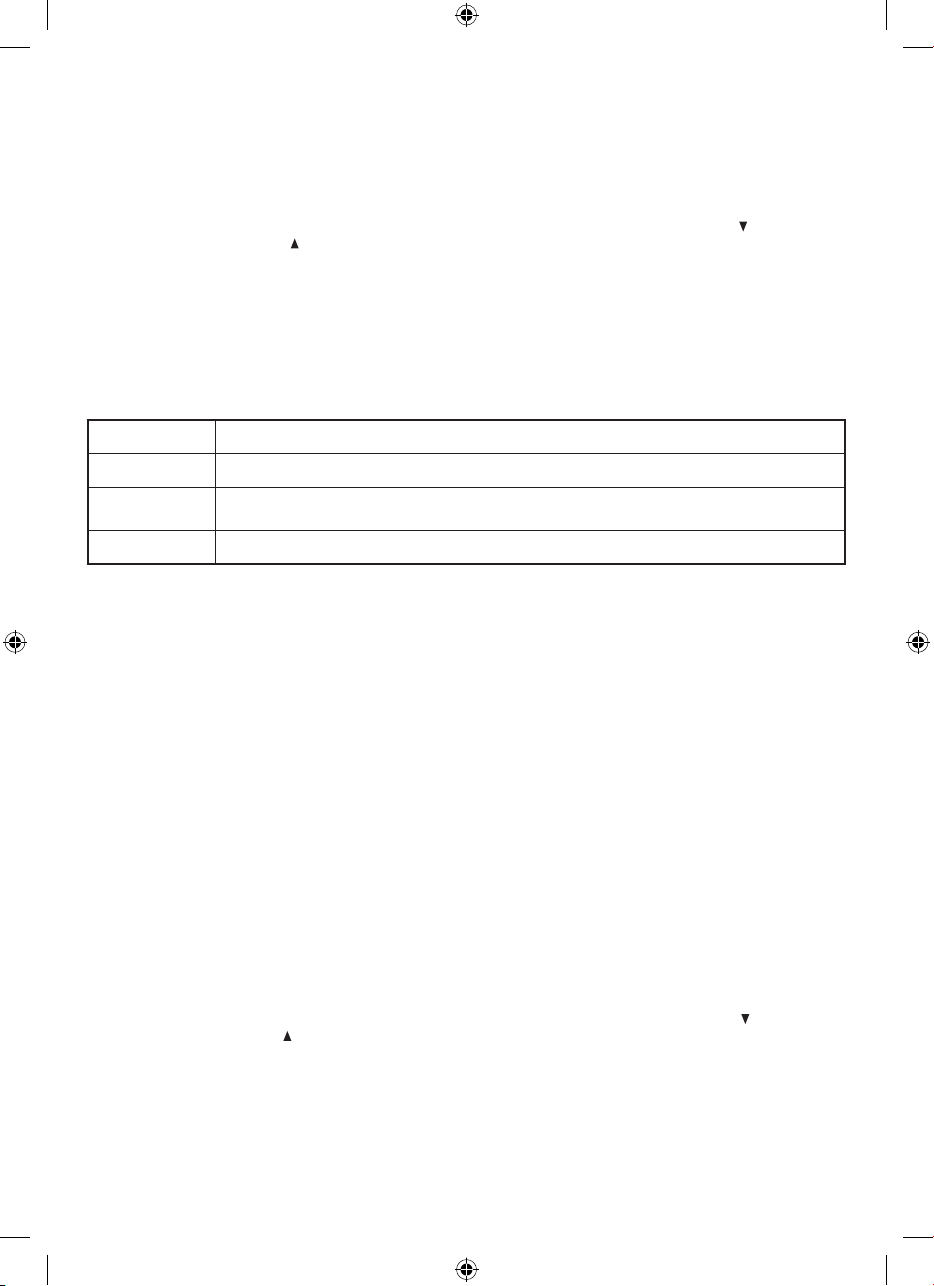
Programm: Empfohlen für:
P1* Zubereitung von Smoothies aus weichen Obst und Gemüse, Getränken, Suppen und Eiweisshakes
P2* Herstellung von Smoothies, Slushies und Getränken, welche Eiswürfel, gefrorene Früchte, hartes Obst
und Gemüse enthalten. Pesto
PULSE Hacken/Zerkleinern von Nüssen, trockenen Kräutern, Eiswürfeln, Kaffee, Hartkäse
* Bitte beachten Sie, dass das Gerät während eines Programmes in Intervallen arbeitet, um das Obst oder Gemüse noch effektiver
zu verarbeiten. Das Programm ist erst beendet, wenn die kreisförmige LED Anzeige geschlossen voll aufleuchtet.
Bitte entfernen Sie keinesfalls den To-Go-Becher (1) mit der Messereinheit (2) bevor die Anzeige zur Gänze aufleuchtet. Dies
kann zu Schäden am Gerät führen, für welche keine Haftung übernommen wird.
8. Wenn das Programm beendet ist, ziehen Sie bitte den Netzstecker.
9. Drehen Sie den To-Go-Becher (1) mit der Messereinheit (2), von der Motoreinheit (3) ab. Drehen Sie hierzu den
To-Go-Becher (1) leicht gegen den Uhrzeigersinn und nehmen Sie diesen dann nach oben ab. Nehmen Sie den
To-Go-Becher so in die Hand, dass die Messereinheit (2) nach oben zeigt.
10. Schrauben Sie die Messereinheit (2) gegen den Uhrzeigersinn vom To-Go-Becher (1) ab. Sie können nun Ihr Getränk
ausgießen. Der To-Go-Becher (1) kann durch Anbringen des To-Go-Deckels (5) als Trinkflasche verwendet werden.
EISWÜRFEL
Befüllen Sie den To-Go-Becher (1) mit maximal 6 Eiswürfeln (bzw. 12 kleinen Eiswürfeln) und etwas Flüssigkeit. Bitte fügen Sie
immer etwas Flüssigkeit hinzu, wenn Sie Eiswürfeln zerkleinern wollen, um perfekte Ergebnisse zu erreichen. Verschließen Sie
den To-Go-Becher (1) durch Anbringung der Messereinheit (2). Schrauben sie den Behälter auf das Gerät. Betätigen Sie nun die
PULSE-Taste (6) für wenige Sekunden. Wenn die Eiswürfel wieder unten im To-Go-Becher (1) liegen, können Sie wiederholt die
PULSE-Taste (6) betätigen. Wiederholen Sie den Vorgang bis die gewünschte Konsistenz erreicht ist.
MAHLBEHÄLTER
Mit dem Mahlbehälter können Sie Gewürze, Nüsse, getrocknete Kräuter, Hartkäse, Kaffee uvm. mahlen bzw. zerkleinern.
Achtung: Mixen Sie trockene Zutaten (z. B. Gewürze, Nüsse) immer nur im Mahlbehälter und nicht im To-Go-Becher.
Bitte füllen Sie unter keinen Umständen Flüssigkeiten in den Mahlbehälter!
1. Befüllen Sie den Mahlbehälter (7) mit den Zutaten (max. 50 g).
2. Schrauben Sie nun die Messereinheit (2) auf den Mahlbehälter (7). Achten Sie darauf, dass der Mahlbehälter fest verschlossen ist.
3. Setzen Sie den Mahlbehälter (7) auf die Motoreinheit (3). Passen Sie darauf auf, dass die Pfeilmarkierungen
an der Messer-
einheit (2) und die Markierung auf der Motoreinheit (3) auf einander stehen. Drehen Sie den Mahlbehälter (7) im Uhrzeigersinn,
bis dieser fest einrastet.
Achtung: Das Gerät lässt sich nur mit richtig aufgesetztem Mahlbehälter (7) einschalten. Durch die Sicherheits-
abschaltung wird der Betrieb ohne Mahlbehälter (7) verhindert.
4. Stecken Sie den Netzstecker in die Steckdose.
5. Drücken Sie die PULSE-Taste (6) kurz, um den Mahlvorgang zu beginnen. Drücken Sie PULSE-Taste (6) solange, bis die
Zutaten den gewünschten Feinheitsgrad erreicht haben.
6. Heben Sie mit einer Drehbewegung gegen den Uhrzeigersinn den Mahlwerkbehälter gemeinsam mit der Messereinheit (2)
von der Motoreinheit (3) ab. Nehmen Sie die Messereinheit von dem Mahlbehälter ab. Nun können Sie die gemahlenen
Zutaten ausleeren oder durch Anbringung des praktischen Streudeckels (8) aufbewahren und verwenden.
Manual FitMix Smart_20170309_BA.indd 5 09.03.17 11:48

6
7
SCHUTZSCHALTUNG! Der Motor verfügt über eine Schutzvorrichtung, d.h. er schaltet sich bei Überlast automatisch ab und
setzt sich erst nach Abkühlen wieder in Gang.
HINWEISE
• Mixen Sie trockene Zutaten (z. B. Gewürze, Nüsse) immer nur im Mahlbehälter und nicht im To-Go-Becher.
• Lassen Sie den Mixer nie laufen, wenn er leer ist.
• Verwenden Sie den Mixer niemals kontinuierlich länger als 60 Sekunden.
• Bei manchen Flüssigkeiten, z.B. bei Milch, erhöht sich das Volumen während des Mixens und es kann Schaum entstehen.
Füllen Sie den To-Go-Becher daher nicht allzu voll (max. bis 2/3 des Fassungsvermögens) und stellen Sie sicher, dass der
Deckel korrekt aufgesetzt ist.
• Mixen Sie niemals Lebensmittel, die bei dem Einfrieren zu einer soliden Masse gefroren sind. Brechen Sie sie vor der Zugabe
in den To-Go-Becher auseinander.
ANWENDUNGSTIPPS
• Verwenden Sie die PULSE-Taste (Impulsbetrieb), um die Motoreinheit im Start-Stop-Betrieb zu verwenden, um die gewünschte
Konsistenz zu erzielen. Seien Sie vorsichtig, da dabei automatisch die höhere Geschwindigkeit ausgewählt wird.
• Manche Flüssigkeiten können sich bei längerem Stehenlassen möglicherweise absetzen. Daher ist es am besten, wenn Sie
diese sofort trinken. Wenn Sie eine Flüssigkeit länger stehen lassen, sollten Sie diese nochmal schütteln, bevor Sie diese trinken.
• Um einen dünnflüssigeren Smoothie zu mixen, fügen Sie mehr Flüssigkeit hinzu. Um einen dickflüssigeren Smoothie-Drink
zu mixen, fügen Sie mehr tiefgekühlte Zutaten hinzu. Um den letzten Rest eines dickflüssigen Smoothie-Drinks auszugießen,
geben Sie ein paar Esslöffel Flüssigkeit hinzu, um das Ausgießen zu erleichtern.
REINIGUNG
Behälter und Deckel
Nach der Verwendung können Sie den To-Go-Becher (1), den To-Go-Deckel (5), Mahlbehälter (7) sowie den Streudeckel (8) in
der Spülmaschine reinigen.
Motoreinheit
Wischen Sie sie mit einem feuchten Tuch ab und trocknen Sie sie danach ab.
Messereinheit
Wir empfehlen eine Reinigung per Hand mit warmen Wasser und milden Spülmittel.
HINWEISE
• Lassen Sie die Motoreinheit, das Kabel oder den Stecker niemals nass werden.
• Nach der Verwendung immer sofort reinigen.
• Lassen Sie Lebensmittel nicht auf dem To-Go-Becher trocknen, da dies die Reinigung erschwert.
• Bitte versuchen Sie niemals das Messer zu entfernen oder zu schärfen. Dies könnte die Funktion beeinträchtigen.
WARNHINWEIS
Schalten Sie das Gerät immer aus und stecken Sie es aus bevor Sie es reinigen.
Fehlerbehebung
Problem Mögliche Ursache Maßnahmen
Motor läuft nicht Messereinheit nicht korrekt aufgesetzt Gefäß neu zusammensetzen und
korrekt an der Basis anschließen.
Motor überhitzt oder übelriechend Zu viel Nahrungsmittel oder zu lange
Betriebsdauer
Menge reduzieren und nach Abkühlen
wieder einschalten.
Die Früchte oder Eiswürfel werden nicht
richtig zerkleinert
Zu wenig Flüssigkeit enthalten Geben Sie mehr Flüssigkeit dazu
WARTUNG
1. Jedes Rütteln am Gerät vermeiden, es könnte sich verformen oder zu Bruch gehen.
2. Das Gerät nach Gebrauch reinigen, die Teile mit einem trockenen Tuch abwischen und für trockene und luftige Lagerung sorgen.
GEWÄHRLEISTUNGSBESTIMMUNG
Von der Gewährleistung ausgenommen sind alle Mängel, die durch unsachgemäße Behandlung entstehen, z.B. Überhitzung,
Verfärbung, Kratzer, Beschädigung durch Fall auf den Boden,Reparaturversuche und unsachgemäße Reinigung. Ausgenommen
sind ebenso rein optische Gebrauchsspuren. Dies gilt auch für den normalen Verschleiß.
Manual FitMix Smart_20170309_BA.indd 6 09.03.17 11:48

6
7
TECHNISCHE DATEN & ENTSORGUNG
TECHNISCHE DATEN
Dieses Produkt entspricht den Europäischen Richtlinien.
Maße Fitmix Smart Motoreinheit: Ø 74 mm x 55 mm
Maße Fitmix Smart Motoreinheit mit aufgesteckten To-Go-Becher: Ø 74 mm x 230 mm
Maße Fitmix Smart Motoreinheit mit aufgesteckten Mahlbehälter: Ø 74 mm x 103 mm
Fassungsvermögen To-Go-Becher: 600 ml
Fassungsvermögen Mahlaufsatz: 50g
Kabellänge: 1,20 m
Motorleistung: 300 W
Netzspannung: AC 220-240V, 50/60Hz
Umdrehungen: bis zu 20.000 / Minute
Technische und optische Änderungen vorbehalten.
UMWELTHINWEIS
Entsorgen Sie das Produkt am Ende seiner Lebensdauer deshalb nicht mit dem normalen Hausmüll. Bringen Sie es zu
einer Sammelstelle zum Recycling von elektrischen und elektronischen Geräten. Dies wird durch dieses Symbol auf
dem Produkt, in der Bedienungsanleitung und auf der Verpackung angegeben. Informieren Sie sich über Sammelstel-
len, die von Ihrem Händler oder der lokalen Behörde betrieben werden. Die Wiederverwertung und das Recycling von
Altgeräten ist ein wichtiger Beitrag zum Schutz unserer Umwelt.
USER INSTRUCTIONS
Dear Customer,
Thank you for choosing Fitmix Smart. Fitmix Smart is the ultimate kitchen tool for preparing healthy drink creations for on the go!
You can find additional handy accessories by visiting www.mediashop.tv
Limitation of liability: all technical information, data and instructions on installation, operation and care included in this instruc-
tion manual accord with the latest state at the time of printing. No claims can be derived from the information, illustrations and
descriptions in these instructions. The manufacturer does not assume any liability for damages due to non-compliance with the
instructions, non-intended use, improper repairs, unauthorised technical modifications, or use of non-approved spare parts.
Intended use
IMPORTANT SAFETY ADVICE AND GENERAL INFORMATION
This appliance is intended for domestic use only. The appliance has been designed for food
preparation only. Do not use this appliance for anything than its intended purpose. All claims
of any type due to improper usage are excluded. The risk is borne solely by the operator.
SAFETY & INSTALLATION
Please read the instruction manual carefully before using the blender! Observe the safety
guidelines when operating the blender because personal harm or damage to property could
possibly occur. Follow the safety instructions to avoid damages due to improper use. Save the
instruction manual for future reference. When you hand over the blender to the next owner,
the manual must be passed on as well.
Note
• Check the blender for visible damage before use. Do not put a damaged blender into operation.
EN
Manual FitMix Smart_20170309_BA.indd 7 09.03.17 11:48

8
9
• Do not remove the rating plate.
• This appliance may be used by children aged 8 years and over and persons with reduced
physical, sensory or mental capabilities or lack of experience and knowledge provided that
they are under close supervision or have been given instruction regarding the use of the
appliance in a safe way and understand the hazards involved. Children must not play with
the appliance. Cleaning and user maintenance must not be carried out by children without
supervision.
• Never leave the blender unattended.
• Unplug before fitting or removing parts, after use, before cleaning, before leaving the room,
or when the blender malfunctions. Do not pull on the power cord to unplug.
• Never let the motor unit, cord or plug get wet. Do not immerse the motor unit, cord or plug
in water or other liquids; do not rinse under running water.
• Clean the blender and its components before using it for the first time. Observe the information
in the section entitled “cleaning”.
• Dry off the blender and all of its parts before fitting components and before connecting the
unit to the power supply.
• Always operate the appliance on a stable, flat, clean and dry surface.
• Do not glue foreign objects onto the appliance.
• Keep hands and utensils, out of the pitcher when it is on the motor unit.
• Never use attachments that are not intended for this blender.
• It is only possible to turn on the appliance when the plug is connected to an electric socket.
• Compare the connection information (voltage and frequency) on the rating plate with that
of your electrical network. The only way to disconnect the appliance from the power supply
is by pulling the plug from the socket.
• Set up the appliance so that the power plug is always accessible.
• Before removing the pitcher or mini-mixer from the motor unit, wait until the blades have
completely stopped.
• Ensure the blender’s lid is in place before putting it into operation.
• The packing material should not be used as a toy, it is a suffocation hazard!
• When cleaning the blade assembly, you must be especially careful to avoid injury because
the blades are extremely sharp.
• Touching live lines and parts under voltage poses a lethal risk of electrocution.
• Avoid damaging the power cord. Do not crush it, twist it, or pull it over sharp edges. Keep it
away from hot surfaces or open fire.
• If the supply cord is damaged, it must be replaced by the manufacturer, its service agent or
similarly qualified persons in order to avoid a hazard.
• Do not use any tools or objects inside the appliance. Metal objects can generate an electrical
short or cause an electric shock.
• Never try to put the blade attachment into the appliance and turn it on without the pitcher
being present. An open blade can result in serious injury or cause damage to the appliance!
Manual FitMix Smart_20170309_BA.indd 8 09.03.17 11:48

8
9
OPERATION
1. Remove all packaging material and discard it in accordance with local laws and regulations.
2. Clean the blender and all components before using it for the first time. (See Cleaning)
3. Chop the ingredients e.g. fruit and vegetables into small pieces. Empty the chopped ingredients into the To-Go container (1).
Fill the container up to a maximum of 2/3 of its capacity. Always add a little liquid to fruit or vegetables, otherwise some types
cannot be chopped up into small pieces.
4. Screw down the blade attachment on the (2) in a clock-wise motion auf den To-go container (1).
5. Place the To-Go (1) container onto the motor unit. (3). Take care to line up arrow indicators
on the blade attachment (2) with
the mark on the motor unit (3). Turn the To-Go container (1) in a clockwise motion until it sits tightly in place.
Caution: this appliance can only be switched on using the correct To-Go container. The safety switch off prevents
operation without the To-go container. (1)
6. Plug in the appliance.
7. Select your required programme using the programme button (4) to start blending. Two pre-set programme options have
already been pre-programmed for you and set at the perfect speeds, so you can always choose between these or use the
PULSE button to ensure you always achieve perfect results.
Programme: recommended for:
P1* The preparation of soft fruit and vegetables,drinks & soups and egg white shakes.
P2*
Creating smoothies, slushes and drinks, containing ice cubes, frozen fruit and hard fruit & vegetables.Pesto
PULSE Pulse mode: for chopping and crushing nuts, dried herbs, ice cubes & hard cheese.
* Please ensure that the appliance runs at intervals during a programme, so fruit and vegetables are blended together more
effectively. The programme has finished when the triangular LED display is fully illuminated. Never remove the
To-Go container (1) with the blade attachment (2) until the display is fully illuminated. This may cause damage to the appliance
for which no liability can be accepted.
8. When the programme has ended, unplug the appliance.
9. Twist the To-Go container (1) off the motor unit (3). Then, turn the To-Go container (1) anti-clockwise and remove
by pulling upwards. Hold the To-Go container in your hand so the blade attachment (2) is pointing upwards.
10. Unscrew the blade attachment (2) in an anti-clockwise motion to remove it from the To-Go container (1).
You can now pour out your drink. The To-Go container (1) can be used as a drink bottle by adding a To-Go lid (5).
ICE CUBES
Fill the To-Go container (1) with a maximum of 6 ice cubes (or 12 small ice cubes) and some liquid. Always add liquid when you want
to crush ice cubes to achieve perfect results. Close the To-Go container by (1) by fitting the blade attachment (2). Screw down the
container onto the appliance. Now press the PULSE button (6) for a few seconds. If the ice cubes are still sitting at the bottom of the
To-Go container (1), you can press the PULSE button again (6). Repeat the process until you have achieved your preferred consistency.
MINI MIXER
The Mini Mixer enables you to grind spices, nuts, herbs, hard cheese, coffee and much more. Please note: only grind dry
ingredients (e.g., spices, nuts) in the mini mixer, never in the To-Go container. Never fill the mini mixer with liquid!
1. Add ingredients to the mini mixer (7) (max. 50g)
2. Screw the blade attachment (2) onto the mini mixer (7). Ensure that the mini-mixer is closed securely.
3. Put the mini mixer (7) onto the motor unit (3). Take care to line up arrow indicators
on the blade attachment (2) with the
mark on the motor unit (3). Turn the mini mixer (7) in a clockwise motion until it sits tightly in place.
Warning: the appliance will only operate if the mini mixer (7) has been fitted correctly. The safety shut off function
prevents the appliance from operating without the mini-mixer (7).
4. Connect the unit to the power supply.
5. Press the PULSE button (6) to start the grinding process. Then, press the 0/Pulse button (6) and continue until the ingredients
are ground to the desired fineness.
6. Twist the mini mixer attachment and blade unit in an anti-clockwise motion and lift them off the motor unit. Remove the
blade attachment (2) from the mini-mixer and pour the ground ingredients into a container. They can also be stored for later
use by adding the sprinkle lid (8).
Safety shutoff! The motor has a safety feature, and it switches itself off automatically in the event of an overload and will only
function again after cooling down.
Manual FitMix Smart_20170309_BA.indd 9 09.03.17 11:48

10
11
Note
• Always blend dry ingredients (e.g., spices, nuts) in the grinding container and never in the To-Go container.
• Never run the blender when it is empty.
• Never run the blender continuously for longer than 60 seconds.
• With some liquids e.g. milk, the volume increases when blending and foam may be produced. Therefore, you should take care
not to overfill the To-go container (up to a max. 2/3 of the capacity) and ensure that the lid has been attached correctly.
• Never blend food that has formed a solid mass during freezing. Break it up before adding it to the pitcher.
Practical tips
• Use the 0/PULSE button (pulse mode) to operate the motor unit in a start stop action to control the texture of your drink.
Take care as this automatically selects the higher speed.
• Some liquids may separate on standing; therefore, it is best to drink them right away. Separated drinks should be stirred
before drinking. If a drink has been left standing for some time, it should be shaken before drinking.
• To make a thinner smoothie drink, add more liquid. To make a thicker smoothie drink, add more frozen ingredients. To help
dispense the last amount of a thick smoothie drink, add a few tablespoons of liquid to increase the flow.
CLEANING
Container and lid
The To-Go container (1), the To-Go-lid (5), mini mixer (7) and the sprinkle lid (8) can be washed in the dishwasher.
Motor unit
Wipe with a damp cloth and then dry.
Blade attachment
We recommend washing by hand using warm water and a mild detergent.
Note
• Never let the motor unit, cord or plug get wet.
• Always clean immediately after use.
• Do not let food dry onto the pitcher as this will make cleaning difficult.
• Please do not attempt to remove or sharpen the blade. This may degrade its performance.
WARNING
Before cleaning, always switch off and unplug the appliance.
Troubleshooting
Problem Possible cause Actions
Motor does not operate The blade attachment has not been
properly fitted.
Reassemble the pitcher and reconnect
to the base.
Motor is overheating or is foul smelling Too many ingredients have been added
or the operating time is too long.
Reduce the amount and switch on
again once it has cooled down.
The fruit or ice cubes are not being
crushed properly
There is too little liquid. Add more liquid.
Maintenance
1. Refrain from shaking the appliance as it may result in a defect or break.
2. Clean the appliance after use, wipe the parts with a dry cloth and ensure it is stored in a dry and well-ventilated place.
WARRANTY
Not included in the warranty are damages that have arisen due to improper handling, e.g., overheating, discoloration, scratching,
damages caused by dropping it on the floor, unauthorised repairs and improper cleaning. Excluded are also purely visual signs of
wear and tear or wear and tear in general.
TECHNICAL DATA & DISPOSAL
TECHNICAL DATA
This product complies with the European directives
Manual FitMix Smart_20170309_BA.indd 10 09.03.17 11:48

10
11
MODE D’EMPLOI
Chère cliente, cher client!
Merci d’avoir choisi Fitmix Smart. Avec Fitmix Smart, vous possédez le meilleur assistant pour des boissons saines en déplace-
ment ! Vous trouvez d’autres accessoires pratiques à : www.mediashop.tv
Limitation de responsabilité: Les informations techniques, données et instructions contenues dans ce mode d’emploi pour
l’installation, l’utilisation et l’entretien répondent à l’état de connaissance le plus récent au moment de l’impression de ce manuel.
Les mentions, illustrations et spécifications figurant dans ces instructions ne peuvent donner lieu à aucun recours juridique. Le
fabricant n’assume aucune responsabilité quant aux dommages qui découleraient d’un non-respect de ces instructions, d’une
utilisation non conforme, de réparations inappropriées, de modifications non autorisées ou de l’utilisation de pièces de rechange
non conformes.
Utilisation conforme
CONSIGNES DE SÉCURITÉ IMPORTANTES ET CONSIGNES GÉNÉRALES
L’appareil est uniquement destiné à un usage privé. L’appareil convient uniquement à la
préparation de denrées alimentaires. N’utilisez pas l’appareil à des fins auxquelles il n’est pas
destiné. Toute réclamation, quelle qu’elle soit, pour des dommages résultant d’une mauvaise
utilisation, est exclue. L’exploitant seul répond des risques encourus.
SECURITÉ & MISE EN SERVICE
Lisez attentivement ce mode d’emploi avant d’utiliser le mixer ! Observez les consignes de sécurité
lors de la mise en service du mixer, car des dommages matériels ou corporels peuvent se
produire en cas d’utilisation non conforme. Suivez toutes les consignes de sécurité pour éviter
les dommages dus à une mauvaise utilisation ! Conservez le mode d’emploi pour le consulter
à nouveau ultérieurement. Si vous cédez le mixer à un tiers, vous devez lui remettre également
ce mode d’emploi.
Instructions:
• Avant d’utiliser le mixer, vérifiez qu’il ne présente pas de dommages externes visibles. Il ne
faut pas utiliser un mixer endommagé.
FR
Fitmix Smart motor unit dimensions: Ø 74 mm x 55 mm
Fitmix Smart motor unit dimensions with attached To-Go cup: Ø 74 mm x 230 mm
Fitmix Smart motor unit dimensions with attached mini mixer: Ø 74 mm x 103 mm
Capacity To-Go pitcher: 600 ml
Capacity grinding attachment: 50g
Cable length: 1.20 m
Motor output: 300 W
Mains voltage: AC 220-240V, 50/60Hz
Rotations: max. 20,000 / Minute
Technical and design features may be subject to change
Environmental instructions
Do not dispose this product at the end of its service life with normal domestic waste. It must be disposed through a
collection agency that recycles electrical and electronic devices. This is indicated by the symbol on the product, in the
instruction manual, and on the packaging. Please enquire about local collection agencies that may be operated by
your distributor or your local council. By recycling and reusing old appliances, you are making an important
contribution to protecting our environment
Manual FitMix Smart_20170309_BA.indd 11 09.03.17 11:48

12
13
• La plaque signalétique ne doit pas être enlevée.
• Cet appareil peut être utilisé par des enfants de 8 ans et plus et des personnes dont les
capacités physiques, sensorielles ou mentales sont réduites ou qui manquent d’expérience/
de connaissances, si elles sont surveillées ou ont été informées de l’utilisation sûre de
l’appareil et comprennent les dangers qui peuvent en résulter. Les enfants ne doivent pas
jouer avec le mixer. Le nettoyage et l’entretien effectués par l’utilisateur ne doivent pas être
effectués par des enfants sans surveillance.
• Ne laissez jamais le mixer branché sans surveillance.
• Débranchez l’appareil avant de monter ou d’enlever des pièces, après utilisation, avant son
nettoyage, avant de quitter la pièce ou si la prise électrique est défectueuse. Ne retirez pas
la fiche de la prise électrique en tirant sur le cordon d’alimentation.
• Le bloc moteur, le cordon électrique ou la fiche ne doivent jamais être mouillés. Ne plongez
jamais le bloc moteur, le cordon électrique ou la fiche dans l’eau ou dans tout autre liquide;
ne les placez pas sous l’eau courante.
• Nettoyez le mixer et ses accessoires avant la première utilisation de l’appareil. Veuillez
consulter la rubrique « Nettoyage » pour plus de détails.
• Séchez soigneusement le mixer et tous les accessoires avant de monter les divers éléments
et avant de brancher l’appareil.
• N’utilisez l’appareil que sur une surface stable, plane, propre et sèche.
• Ne collez pas de corps étrangers sur l’appareil.
• Ne laissez pas vos mains, ni d’ustensiles dans le bocal du mixer lorsqu’il est sur le moteur.
• N’utilisez jamais d’accessoires qui ne sont pas prévus pour le mixer.
• L’appareil ne peut être mis en route que lorsqu’il est connecté à la prise de courant par une fiche.
• Vérifiez si la tension d’alimentation indiquée sur la plaque signalétique correspond à votre
tension locale. La seule manière de débrancher l’appareil est de retirer la prise.
• Placez l’appareil de sorte que la prise soit toujours accessible.
• Attendez que la tête du couteau soit complètement arrêtée pour enlever le bocal du mixer
ou le mini-mixer du bloc moteur.
• Assurez-vous que le bocal est correctement fermé avant d’utiliser le mixer.
• Il ne faut pas jouer avec les matériaux d’emballage: risque de suffocation.
• Lors du nettoyage des couteaux, il s’agit d’être particulièrement prudent afin d’éviter toute
blessure: les lames sont extrêmement tranchantes.
• Tout cordon ou composant sous tension électrique représente un danger de mort potentiel
par électrocution!
• Evitez d’endommager le cordon électrique: il ne faut ni l’écraser, ni le plier, ni le faire glisser
sur des bords saillants. Tenez le câble éloigné des surfaces chaudes et des flammes nues.
• Si le cordon d’alimentation de cet appareil est endommagé ou l’appareil lui-même est
endommagé, il doit alors être remplacé par le fabricant ou son SAV ou une personne de
qualification similaire pour éviter tout risque.
• Ne mettez pas d’outils ou d’objets quelconques dans l’appareil. Tout objet métallique risque
Manual FitMix Smart_20170309_BA.indd 12 09.03.17 11:48

12
13
de provoquer un court-circuit et une électrocution.
• N’essayez jamais de mettre les couteaux seuls dans l’appareil sans le bocal du mixer et de
mettre en marche. Le couteau non protégé peut provoquer de graves blessures et
endommager l’appareil !
UTILISATION
1. Ôtez soigneusement l’emballage et jetez-le conformément aux réglementations locales en vigueur.
2. Nettoyez le mixer et toutes les pièces avant de les utiliser pour la première fois (voir la rubrique Nettoyage).
3. Découpez les ingrédients, par exemple des fruits ou des légumes, en petits morceaux. Remplissez le bocal de mixage (1) des
ingrédients coupés en petits morceaux au maximum aux 2/3 de sa contenance. Mélangez toujours du liquide aux fruits ou
aux légumes, car certaines sortes pourraient sinon ne pas être broyées comme il faut.
4. Vissez maintenant les couteaux (2) dans le sens horaire sur le bocal de mixage (1).
5. Placez le bocal de mixage (1) sur le bloc moteur (3). Veillez à ce que les repères fléchés
sur les couteaux (2) et le repère
sur le bloc moteur (3) coïncident. Tournez le bocal de mixage (1) dans le sens horaire jusqu’à ce qu’il prenne encoche.
Attention : L’appareil ne peut être mis en marche que si le bocal de mixage est correctement posé. L’arrêt de sécurité
empêche le fonctionnement du bocal de mixage (1).
6. Fichez la fiche dans la prise.
7. Sélectionnez le programme souhaité avec la touche de programmation (4) pour démarrer le mixage. Deux programmes aux
vitesses parfaites ont été préprogrammés pour vous de sorte qu’il vous suffit de sélectionner seulement ces deux programmes
ou la touche PULSE pour des résultats toujours parfaits :
Programme : Recommandé pour :
P1* Préparation de fruits et de légumes mous, de boissons, de soupes et de boissons protéinées
P2* Préparation de smoothies, slushies et boissons contenant des glaçons, des fruits surgelés, des fruits et
légumes durs. Pesto
PULSE
Mode impulsion pour hacher/broyer des noix, des herbes séchées, des glaçons, le café, le fromage à pâte dure
* Notez que l’appareil fonctionne à intervalles pendant un programme pour transformer plus efficacement les fruits ou les légumes.
Le programme n’est terminé que lorsque la LED en forme de cercle est entièrement allumée. N’enlevez en aucun
cas le bocal de mixage (1) avec les couteaux (2) avant que l’affichage soit entièrement allumé. Cela peut causer des dommages
à l’appareil pour lesquels nous n’assumons aucune garantie.
8. Veuillez débrancher la fiche à la fin du programme.
9. Dévissez le bocal de mixage (1) du bloc moteur (3). Pour cela, tournez légèrement le bocal de mixage (1) dans le sens
antihoraire, puis retirez-le par le haut. Prenez le bocal de mixage en main de sorte que les couteaux (2) soient tournés vers
le haut.
10. Dévissez les couteaux (2) du bocal de mixage (1) dans le sens antihoraire. Vous pouvez maintenant verser votre boisson. Le
bocal de mixage (1) peut être utilisé comme bidon en mettant le couvercle de mixage (5).
GLAÇONS
Remplissez le bocal de mixage (1) de 6 glaçons maximum (ou 12 petits glaçons) et d’un peu de liquide. Ajoutez toujours un peu
de liquide si vous souhaitez broyer des glaçons pour obtenir de parfaits résultats. Fermez le bocal de mixage (1) en mettant les
couteaux en place (2). Vissez le bocal sur l’appareil. Actionnez maintenant la touche PULSE (6) pendant quelques secondes. Vous
pouvez de nouveau actionner la touche PULSE (6) quand les glaçons reposent de nouveau dans le bocal de mixage (1). Répétez
l’opération jusqu’à obtenir la consistance souhaitée.
MINIMIXER
Avec le Mini Mixer, vous pouvez moudre ou broyer finement des épices, des noix, des herbes séchées, du fromage à pâte dure,
du café etc. Attention : mixez toujours les ingrédients secs (tels que les épices, noix) dans le mini-mixer uniquement et non dans
le bocal de mixage. Ne versez en aucun cas de liquides dans le mini-mixer !
1. Remplissez le min-mixer (7) des ingrédients (max. 50 g).
2. Vissez maintenant les couteaux (2) sur le mini-mixer (7). Veillez à ce que le mini-mixer soit solidement fermé.
3. Placez le mini-mixer (7) sur le bloc moteur (3). Veillez à ce que les repères fléchés
sur les couteaux (2) et le repère sur
le bloc moteur (3) coïncident. Tournez le mini-mixer (7) dans le sens horaire jusqu’à ce qu’il prenne encoche.
Attention : L’appareil ne peut être mis en marche que si le mini-mixer (7) est correctement posé. L’arrêt de sécurité
empêche le fonctionnement du mini-mixer (7).
4. Fichez la fiche dans la prise.
Manual FitMix Smart_20170309_BA.indd 13 09.03.17 11:48

14
15
5. Appuyez brièvement sur la touche PULSE (6) pour lancer la procédure de mixage. Appuyez sur la touche PULSE (6) jusqu’à
ce que les ingrédients soient moulus à la finesse souhaitée.
6. Soulevez le mini-mixer avec les couteaux (2) du bloc-moteur (3) en le faisant pivoter dans le sens antihoraire. Retirez les
couteaux du mini-mixer. Vous pouvez maintenant vider les ingrédients moulus ou les conserver et les utiliser en mettant le
couvercle à saupoudrer (8).
CIRCUIT DE PROTECTION ! Le moteur possède un dispositif de protection; il s’arrête ainsi automatiquement en cas de
surcharge et se remet en marche seulement après refroidissement.
REMARQUES
• Mélangez toujours les ingrédients secs (par exemple les épices, les noix) uniquement dans le mini-mixer et non dans le bocal
de mixage.
• Ne laissez jamais le mixer en état de marche quand il est vide.
• N’utilisez jamais le mixer sans interruption pendant plus de 60 secondes
• Avec quelques liquides comme par exemple le lait, le volume augmente pendant le mixage et de la mousse peut se former.
Ne remplissez pas trop le bocal de mixage (max. jusqu’aux 2/3 de sa contenance) et assurez-vous que le couvercle est
correctement en place.
• Ne mélangez jamais des aliments surgelés en bloc. Séparez-les en petits morceaux avant de les mettre dans le bocal de
mixage
CONSEILS D’UTILISATION
• Utilisez la touche PULSE (mode impulsions) pour le fonctionnement du moteur en mode Marche-Arrêt et obtenir la consistance
souhaitée pour votre boisson. Soyez prudent, car la vitesse la plus élevée est automatiquement sélectionnée.
• Au repos, certains liquides peuvent former un dépôt. Il est de ce fait conseillé de les consommer immédiatement. Si le liquide
devait reposer plus longtemps, mélangez-le avant de le boire.
• Pour obtenir un smoothie plus liquide, ajoutez-y plus de liquide. En revanche, pour un smoothie plus épais, ajoutez plus
d’ingrédients surgelés. Pour verser le dernier reste d’un smoothie plus consistant, ajoutez quelques cuillères à soupe de
liquide pour vider plus facilement le bocal.
NETTOYAGE
Bocaux et couvercle
Après utilisation, vous pouvez laver le bocal de mixage (1), le couvercle de mixage (5), le mini mixer (7) et le couvercle à
saupoudrer (8) au lave-vaisselle.
Bloc moteur
Passez un chiffon humide sur le bloc moteur et ensuite essuyez-le.
Couteaux
Nous vous conseillons le nettoyage à la main à l’eau chaude et un nettoyant doux.
REMARQUES
• Le bloc moteur, le câble ou la prise ne doivent jamais être mouillés.
• Nettoyer immédiatement l’appareil après chaque utilisation.
• Pour un nettoyage plus aisé, ne laissez pas sécher d’aliments dans le mini mixer.
• N’essayer jamais d’enlever la lame ou de l’aiguiser. Cela pourrait porter préjudice à la fonction.
MISE EN GARDE
Arrêtez toujours l’appareil et débranchez-le avant chaque nettoyage.
Élimination des pannes
Problème Cause possible Mesures
Moteur ne tourne pas Couteaux non placés correctement Assembler de nouveau le récipient et le
raccorder correctement à la base.
Moteur surchauffé ou mauvaise odeur Trop d’ingrédients ou durée de service
trop longue
Réduire la quantité et remettre en
marche après refroidissement.
Les fruits ou les glaçons ne sont pas
correctement broyés
Trop peu de liquide contenu Ajoutez plus de liquide
Manual FitMix Smart_20170309_BA.indd 14 09.03.17 11:48

14
15
ENTRETIEN
1. Éviter toute secousse à l’appareil; il pourrait se déformer ou casser.
2. Nettoyer l’appareil après utilisation, essuyer les pièces avec un chiffon sec et conserver dans un endroit sec et aéré.
GARANTIE
Sont exclus de la garantie tous les dommages dus à un traitement inadéquat, tel que : surchauffe, décoloration, rayures,
dommages suite à une chute, tentatives de réparation et entretien non approprié. De même sont exclues toutes les marques
visibles dues à l’utilisation. Ceci vaut également pour l’usure normale de l’appareil.
MISE AU REBUT & DONNÉES TECHNIQUES
DONNÉES TECHNIQUES
produit est conforme aux directives européennes.
Dimensions bloc moteur Fitmix Smart : Ø 74 mm x 55 mm
Dimensions bloc moteur Fitmix Smart avec bocal de mixage monté : Ø 74 mm x 230 mm
Dimension bloc moteur Fitmix Smart avec mini mixer monté : Ø 74 mm x 103 mm
Contenance du bocal de mixage : 600 ml
Contenance du mini-mixer : 50 g
Longueur de câble: 1,20 m
Puissance du moteur : 300 W
Tension secteur : CA 220-240V, 50/60 Hz
Tours : max. 20.000 / minute
Sous réserve de modifications techniques ou optiques.
CONSIGNES EN MATIÈRE D’ENVIRONNEMENT
A la fin de vie de votre appareil, veuillez ne pas le jeter avec vos déchets ménagers. Déposez-le dans un site de
récupération spécifique pour appareils électriques et électroniques. Ce symbole apparaît sur l’appareil, dans le mode
d’emploi ainsi que sur l’emballage. Informez-vous quant aux sites de récupération tenus par votre revendeur ou par
les autorités locales. La récupération et le recyclage des appareils usagés sont une contribution importante à la
protection de notre environnement.
ISTRUZIONI PER L’USO
Egregio/a Cliente,
La ringraziamo per aver scelto di acquistare il Fitmix Smart. Con il Fitmix Smart potrà avvalersi di un aiutante eccezionale per
preparare le sue bevande salutari da portare sempre con sé!
Troverà altri pratici accessori sul sito: www.mediashop.tv
Limitazioni della responsabilità: le informazioni tecniche contenute in queste istruzioni per l’uso, nonché i dati e le indicazioni
d’installazione e di manutenzione dell’apparecchio, corrispondono all’ultimo stato della tecnica al momento della stampa. Dalle
indicazioni, illustrazioni e descrizioni delle presenti istruzioni per l’uso non può derivare alcun tipo di pretesa. Il produttore non
si assume alcuna responsabilità per gli eventuali danni scaturenti dall’inosservanza delle istruzioni, dall’uso non conforme, da
riparazioni inappropriate, da modifiche effettuate senza autorizzazione oppure dall’uso di pezzi di ricambio non omologati.
Uso conforme
IMPORTANTI AVVISI DI SICUREZZA E AVVERTENZE GENERALI
L’apparecchio è concepito per il solo uso privato ed è adatto unicamente per la lavorazione di
generi alimentari. Non utilizzare l’apparecchio per scopi per i quali non è stato concepito. È
esclusa qualsiasi tipo di pretesa per danni derivanti dall’uso non conforme. L’utente si assume
tutti i rischi.
IT
Manual FitMix Smart_20170309_BA.indd 15 09.03.17 11:48

16
17
SICUREZZA & MONTAGGIO
Leggere attentamente le presenti istruzioni per l’uso prima di utilizzare il mixer! Osservare tutti
gli avvisi di sicurezza contenuti nelle presenti istruzioni, poiché l’uso non conforme può essere
causa di danni a persone o alle cose. Osservare tutti gli avvisi di sicurezza onde evitare danni
derivanti da un uso errato! Conservare le istruzioni per l’uso onde poterle consultare anche
in un secondo momento. In caso di cessione del Mixer a terzi, consegnare anche le presenti
istruzioni per l’uso.
Avvisi:
• Prima dell’uso, verificare che il mixer non presenti danni esterni visibili a occhio nudo. Se
presenta danni di qualsiasi genere, non utilizzare il mixer.
• Non rimuovere la targhetta con l’indicazione del modello.
• Questo mixer può essere utilizzato da bambini maggiori di 8 anni o da persone con ridotte
facoltà psichiche, sensoriali o mentali soltanto se monitorate da un adulto o se sono stati
opportunamente addestrati sull’uso in sicurezza del mixer e dei pericoli ad esso connessi. I
bambini non devono giocare con il mixer. La pulizia e la manutenzione non devono essere
eseguite da bambini non sorvegliati.
• Non lasciare mai il mixer acceso senza sorveglianza.
• Estrarre la spina dalla presa prima di montare o smontare pezzi dell’apparecchio, dopo il
suo utilizzo, prima della sua pulizia, prima di lasciare la stanza o se si verifica un’avaria. Non
estrarre la spina dalla presa tirandola per il cavo elettrico.
• Tenere l’unità motore, il cavo elettrico o la spina lontani dall’acqua o da altri liquidi. Non
immergere mai l’unità motore, il cavo elettrico o la spina in acqua o in altri liquidi e non
tenerli mai sotto l’acqua corrente.
• Pulire il mixer e gli accessori prima del loro primo utilizzo. Osservare le altre informazioni
contenute nella sezione “Pulizia”.
• Asciugare il mixer e gli accessori prima di montarli e prima di collegare l’apparecchio alla
rete elettrica.
• Utilizzare sempre l’apparecchio su una superficie stabile, omogenea, pulita e asciutta.
• Non incollare alcun corpo estraneo sull’apparecchio.
• Tenere sempre le mani e gli utensili all’esterno del contenitore del Mixer quando è montato
sull’unità motore.
• Non utilizzare mai parti o accessori che non siano specificamente omologati per il mixer.
• L’apparecchio può essere acceso solo quando la spina è inserita nella presa.
• Verificare se la tensione di rete locale corrisponde a quella indicata sulla targhetta con
l’indicazione del modello. Scollegare l’apparecchio dall’alimentazione elettrica esclusiva-
mente rimuovendo la spina dalla presa di corrente.
• Posizionare l’apparecchio in modo tale che la presa elettrica sia sempre accessibile.
• Attendere che le lame siano completamente ferme prima di rimuovere il contenitore del
mixer o il contenitore della macinatura dall’unità motore.
Manual FitMix Smart_20170309_BA.indd 16 09.03.17 11:48

16
17
• Prima di accendere il mixer, assicurarsi che il bicchiere sia ben avvitato.
• Non utilizzare l’imballaggio come giocattolo, perché sussiste il pericolo di soffocamento.
• Durante la pulizia delle lame, si raccomanda di procedere con particolare cautela onde
vitare ferimenti, poiché le lame sono estremamente affilate.
• Quando i cavi o i componenti sono collegati alla rete elettrica sussiste il pericolo di
folgorazione!
• Evitare di danneggiare il cavo elettrico, ad es. schiacciandolo, piegandolo, tranciandolo
oppure tagliandolo se lo si fa scorrere su bordi affilati. Tenere il cavo elettrico lontano da
superfici calde e da fiamme libere.
• Se il cavo di rete di quest’apparecchio è danneggiato, deve essere sostituito dal produttore,
dal suo servizio di assistenza al cliente o da personale qualificato onde evitare pericoli.
• Non utilizzare utensili o altri oggetti all’interno dell’apparecchio. Gli oggetti metallici
possono essere causa di corto circuito o folgorazione.
• Non provare mai ad accendere l’apparecchio con la sola unità lama montata senza il
bicchiere. La lama scoperta può essere causa di ferite gravi e danni all’apparecchio!
USO
1. Rimuovere tutto il materiale d’imballaggio smaltirlo secondo le norme vigenti.
2. Pulire il mixer e tutti gli accessori prima del primo utilizzo (vedi sezione “Pulizia”).
3. Tagliare gli ingredienti, ad es. la frutta e la verdura, in pezzi piccoli. Versare gli ingredienti sminuzzati nel bicchiere To-go (1).
Riempire il bicchiere per i 2/3 della sua capacità. Ricordare di aggiungere sempre del liquido con la frutta e la verdura, poiché
in caso contrario alcune tipologie di frutta e verdura non possono essere sminuzzate.
4. Avvitare l’unità lama (2) in senso orario sul bicchiere To-go (1).
5. Montate il bicchiere To-go (1) sull’unità motore (3). Assicurarsi che il simbolo della freccia
presente sull’unità lama (2) si
trovi in corrispondenza del simbolo collocato sull’unità motore (3). Avvitare il bicchiere to-go (1) in senso orario finché non
scatta in posizione.
Attenzione: è possibile accendere l’apparecchio solo se il bicchiere è avvitato correttamente. L’interruttore di
sicurezza impedisce che l’apparecchio possa essere accesso senza il bicchiere to-go (1).
6. Inserire la spina nella presa di corrente.
7. Selezionare il programma desiderato mediante l’apposito tasto programma (4) per avviare il frullatore. L’apparecchio dispone
di due programmi con velocità preimpostata, in modo tale da garantire risultati perfetti selezionando solo due programmi o
premendo il tasto PULSE:
Programma: Consigliato per:
P1* Preparazione di frutta e verdura morbide, bevande, zuppe e frullato di albumi
P2* Preparazione di smoothie, granite e bevande contenenti cubetti di ghiaccio, frutta congelata, frutta e
verdura dure. Pesto
PULSE* Funzionamento a impulsi, macinatura/sminuzzatura di noci, erbe essiccate, cubetti di ghiaccio, caffè,
formaggio duro
* Assicurarsi che l’apparecchio funzioni ad intervalli durante un programma, onde poter elaborare la frutta o la verdura in modo
ancora più efficace. l programma termina unicamente quando la spia a LED circolare si illumina completamente. Si
rega di non rimuovere in nessun caso il bicchiere to-go (1) con l’unità lama (2) prima che la spia si illumini. In caso di contrario,
l’apparecchio potrebbe esserne danneggiato, e il produttore non si assume alcuna responsabilità per questo genere di danni.
8. Una volta terminato il programma, rimuovere la spina dalla presa di corrente.
9. Rimuovere il bicchiere to-go (1) dall’unità motore (3), svitando delicatamente il bicchiere to-go (1) in senso antiorario, e poi
sollevandolo. Impugnare il bicchiere to-go in modo tale che l’unità lama (2) punti verso l’alto.
10. Svitare l’unità lama (2) dal bicchiere to-go (1) in senso antiorario. Adesso potete godervi la vostra bevanda. Il bicchiere to-go (1)
è utilizzabile anche come bottiglia grazie al pratico coperchio to-go (5).
Manual FitMix Smart_20170309_BA.indd 17 09.03.17 11:48

18
19
CUBETTI DI GHIACCIO
Riempire il bicchiere to-go (1) con massimo 6 cubetti di ghiaccio (oppure 12 cubetti piccoli) e una piccola quantità di liquido. Si
raccomanda di aggiungere sempre del liquido se si desidera sminuzzare i cubetti di ghiaccio per un risultato ottimale. Chiudere
il bicchiere to-go (1) montando l’unità lama (2). Avvitare il bicchiere sull’apparecchio. Azionare il tasto PULSE (6) per alcuni
secondi. Una volta che i cubetti di ghiaccio si saranno nuovamente depositati sul fondo del bicchiere to-go (1), azionare di nuovo
il tasto PULSE (6). Ripetere il procedimento fino a ottenere la consistenza desiderata.
CONTENITORE PER MACINATURA
Con il contenitore per macinatura è possibile macinare o sminuzzare spezie, noci, erbe essiccate, formaggio duro, caffè e tanto
altro. Attenzione: miscelare sempre gli ingredienti essiccati (es. spezie, noci) unicamente nel contenitore per macinatura e non
nel bicchiere to-go. Non versare mai liquidi nel contenitore per macinatura!
1. Riempire il contenitore per macinatura (7) con gli ingredienti (max. 50 g).
2. Avvitare l’unità lama (2) sul contenitore per macinatura (7) e assicurarsi che sia ben chiuso.
3. Montare il contenitore per macinatura (7) sull’unità motore (3). Assicurarsi che il simbolo della freccia
presente sull’unità
lama si trovi in corrispondenza del simbolo presente sull’unità motore (3). Avvitate il contenitore per macinatura (7) in senso
orario finché non scatta in posizione.
Attenzione: l’apparecchio si accende unicamente se il contenitore per macinatura (7) è montato correttamente.
L’interruttore di sicurezza impedisce l’accensione dell’apparecchio senza il contenitore per macinatura (7).
4. Inserire la spina nella presa di corrente.
5. Premere il tasto PULSE (6) per avviare la macinatura. Premere il tasto PULSE (6) fino ad ottenere il grado di finezza desiderato.
6. Svitare il contenitore per macinatura in senso antiorario e sollevarlo insieme all’unità lama (2) dall’unità motore (3). Smontare
l’unità lama dal contenitore. Adesso potete estrarre gli ingredienti macinati oppure conservarli per un uso successivo grazie al
pratico coperchio dosatore (8).
INTERRUTTORE DI SICUREZZA! Il motore dispone di un dispositivo di sicurezza che spegne l’apparecchio automaticamente in
caso di sovraccarico e lo riavvia solo dopo che si è raffreddato.
AVVISI
• Miscelate gli ingredienti secchi (ad es. spezie, noci) esclusivamente con il contenitore per macinatura e non con il bicchiere to-go.
• Non accendere mai il mixer se il contenitore è vuoto.
• Non utilizzare mai il mixer in modo continuativo per oltre 60 secondi.
• Durante la miscelazione, il volume di alcuni fluidi, come ad es. il latte, aumenta e può formarsi della schiuma. Pertanto, non
riempire troppo il bicchiere to-go (max. 2/3 della sua capacità) e assicurarsi che il coperchio sia chiuso correttamente.
• Non frullare mai generi alimentari che siano congelati in una massa solida. Si raccomanda di spezzettarli prima di versarli nel
bicchiere del Mixer.
CONSIGLI PER L’USO
• Utilizzare il tasto 0/PULSE-Taste (funzionamento ad impulsi), in modo da far funzionare l’unità motore in modalità Start-Stop,
al fine di ottenere la consistenza desiderata per la propria bevanda. Procedere con cautela poiché in questo caso si seleziona
automaticamente la velocità più alta.
• Alcuni liquidi possono formare degli strati di posa in caso di lunga conservazione. Pertanto, è consigliabile consumarli subito.
Se si conserva a lungo una bevanda, si consiglia di rimescolarla di nuovo prima di berla.
• Per ottenere uno smoothie meno denso, aggiungere una maggiore quantità di liquido. Per ottenere uno smoothie più denso,
aggiungere una maggiore quantità di ingredienti. Per versare l’ultima quantità residua di uno smoothie denso, aggiungere un
paio di cucchiai di liquido al fine di facilitare lo svuotamento.
PULIZIA
Bicchiere e coperchio
Dopo l’uso, lavare il bicchiere to-go (1), il coperchio to-go (5), contenitore per macinatura (7) e il coperchio dosatore (8) in
lavastoviglie.
Unità motore
Si consiglia di pulire il motore manualmente con dell’acqua calda e un detergente non aggressivo.
Unità lama
Si consiglia di pulire la lama manualmente con dell’acqua calda e un detergente non aggressivo.
AVVISI
• Tenere il cavo elettrico o la spina lontani dall’acqua o altri liquidi.
• Pulire l’apparecchio e i suoi componenti dopo ogni utilizzo.
• Non fare mai seccare gli alimenti all’interno del contenitore del mixer, perché questo ne complica la successiva pulizia.
• Non provare mai a rimuovere o ad affilare le lame, perché questo potrebbe alternare il funzionamento dell’apparecchio.
Manual FitMix Smart_20170309_BA.indd 18 09.03.17 11:48

18
19
AVVERTENZA
Spegnere sempre l’apparecchio e staccarlo dalla rete elettrica prima di pulirlo.
Risoluzione dei problemi
Problema Possibili cause Misure
Il motore non si accende L’unità lama non è stata montata
correttamente
Ricollocare il bicchiere sull’apparecchio
e serrarlo correttamente sulla base
Il motore si surriscalda o emana cattivi
odori
Il bicchiere è troppo pieno o
l’apparecchio è in funzione da
troppo tempo
Ridurre le quantità e riaccendere il
mixer dopo averlo fatto completamente
raffreddare
La frutta o i cubetti di ghiaccio non
vengono sminuzzati bene
Non è stata aggiunta una quantità di
liquido sufficiente
Versare una maggiore quantità di
liquido nel bicchiere
MANUTENZIONE
1. Evitare che l’apparecchio sobbalzi, perché potrebbe deformarsi o rompersi.
2. Pulire sempre tutti i componenti dell’apparecchio con un panno asciutto dopo l’uso, e conservarlo in un luogo fresco e asciutto.
CLAUSOLA DI GARANZIA
Sono esclusi dalla garanzia tutti i difetti causati da un uso improprio, come ad es. surriscaldamento, scolorimenti, graffi, danni
da caduta, tentativi di riparazione e pulizia non appropriati. Sono altresì escluse dalla garanzia i segni dell’uso puramente ottici.
Questo vale anche per la normale usura dell’apparecchio.
DATI TECNICI & SMALTIMENTO
DATI TECNICI
Questo prodotto rispetta le linee direttive dalla UE.
Dimensioni dell’unità motore del Fitmix Smart: (Lu×La×H) 12,5 × 12,5 × 15,3 cm
Dimensioni dell’unità motore del Fitmix Smart con bicchiere to-go inserito: ((Lu×La×H) 12,5 x 12,5 x 35,5 cm
Dimensioni dell’unità motore del Fitmix Smart con contenitore per macinatura inserito: (Lu×La×H) 12,5 x 12,5 x XX cm
Capacità del bicchiere to-go: 600 ml
Capacità del contenitore per macinatura: 50g
Lunghezza del cavo: 1,5m
Prestazioni del motore: 300 W
Tensione della rete elettrica: AC 220-240V, 50/60Hz
Giri: max. 16.000 / minuto
Il produttore si riserva di effettuare modifiche tecniche o estetiche.
SMALTIMENTO IMBALLAGGI E PRODOTTO
Al termine del suo ciclo di vita, il prodotto non può essere smaltito insieme ai rifiuti domestici. Si raccomanda di
consegnarlo ad un punto di raccolta per il riciclaggio degli apparecchi elettrici ed elettronici, come indicato sul
prodotto da questo simbolo, nonché nel manuale d’uso e sull’imballaggio. Si prega di informarsi sui punti di raccolta
gestiti dal proprio rivenditore o dalle autorità locali. La rivalorizzazione ed il riciclo di vecchi apparecchi costituisce un
importante contributo per la tutela dell’ambiente.
Manual FitMix Smart_20170309_BA.indd 19 09.03.17 11:48

20
21
GEBRUIKSAANWIJZING
Beste klant!
Hartelijk dank dat u gekozen hebt voor de Fitmix Smart. Met de Fitmix Smart hebt u de ultieme helper voor lekkere en gezonde
drankjes voor onderweg!
Meer praktische hulpstukken en accessoires op www.mediashop.tv
Beperking van aansprakelijkheid: Bij het in druk gaan, stemt de technische informatie, gegevens en instructies voor de
installatie, voor het bedrijf en voor het onderhouden, overeen met de laatste stand van zaken. Er kunnen geen claims ontleend
worden aan de informatie, afbeeldingen en beschrijvingen in deze handleiding. Er wordt door de fabrikant geen aansprakelijkheid
aanvaard voor schade ten gevolge van niet-naleving van de instructies, oneigenlijk gebruik, onbevoegde reparatie,
ongeoorloofde wijzigingen of het gebruik van niet-goedgekeurde reserveonderdelen.
Beoogd gebruik
BELANGRIJKE VEILIGHEIDSINSTRUCTIES EN ALGEMENE AANWIJZINGEN
Het apparaat is enkel voor particulier gebruik bedoeld. Het apparaat is enkel geschikt voor de bereiding van voedingsmiddelen.
Gebruik het apparaat niet voor doelen waarvoor het niet bestemd is. Claims van welke aard dan ook voor schade ten gevolge van
onjuist gebruik zijn uitgesloten. Alleen de gebruiker draagt het risico.
VEILIGHEID & OPSTELLEN
Lees zorgvuldig deze gebruiksaanwijzing, vóórdat u de mixer gaat gebruiken! Neem de veiligheidsinstructies in acht bij gebruik
van de mixer, want bij onjuist gebruik kan er schade aan voorwerpen en letsel aan personen optreden. Volg de veiligheidsinstruc-
ties om schade wegens verkeerd gebruik te vermijden! Bewaar de gebruikswaanwijzing voor raadpleging op een later moment.
Indien deze mixer aan derden wordt gegeven, dan moet ook deze gebruiksaanwijzing mee overhandigd worden.
Instructies
• Vóór gebruik moet de mixer gecontroleerd worden op zichtbare schade. Een beschadigde mixer mag niet gebruikt worden.
• Het typeplaatje mag niet verwijderd worden.
• Deze mixer kan gebruikt worden door kinderen vanaf 8 jaar en door personen met verminderde lichamelijke, zintuiglijke of
verstandelijke vermogens of gebrek aan ervaring en kennis als ze onder toezicht staan of worden geïnstrueerd over het veilig
gebruik van de mixer en ze de daaruit voortvloeiende risico’s begrijpen. Kinderen mogen niet met de mixer spelen. Reiniging
en gebruiksonderhoud mogen niet uitgevoerd worden door kinderen zonder toezicht.
• Laat de mixer nooit ingeschakeld zonder toezicht.
• Trek het netsnoer uit het stopcontact, vóór u delen aan het apparaat toevoegt of verwijdert, na gebruik van het apparaat, vóór
de reiniging ervan, en vóór u de ruimte verlaat of wanneer er een storing optreedt. Trek het netsnoer niet aan de kabel uit het
stopcontact.
• Laat de motoreenheid, de netkabel of de netstekker nooit nat worden. Dompel de motoreenheid, netkabel of netstekker niet
in water of andere vloeistoffen; hou ze niet onder stromend water.
• Reinig de mixer en de bijhorende delen vóór het eerste gebruik van het apparaat. Neem verdere informatie in de sectie
Reiniging in acht.
• Droog de mixer en alle bijhorende delen, vóór u de delen aanbrengt en vóór u het apparaat met de elektrische voeding verbindt.
• Gebruik het apparaat steeds op een stabiel, effen, zuiver en droog oppervlak.
• Kleef geen vreemde voorwerpen aan het apparaat.
• Hou handen en gebruiksvoorwerpen, uit de mengbeker, wanneer deze zich op de motoreenheid bevindt.
• Gebruik nooit accessoires die niet voor de mixer bedoeld zijn.
• Het apparaat kan slechts ingeschakeld worden, wanneer de stekker met een stopcontact verbonden is.
• Controleer of de netspanning op het typeplaatje met uw lokale netspanning overeenstemt. De enige manier om het apparaat
te scheiden van de netspanning, is het uittrekken van de stekker.
• Stel het apparaat zo op, dat de stekker steeds toegankelijk is.
• Wacht tot de meskop volledig tot stilstand is gekomen, vóór u de go-to-beker of de maalbeker van de motoreenheid afneemt.
• Controleer vóór gebruik van de mixer, dat de beker goed dicht is.
• Verpakkingsmaterialen mogen niet gebruikt worden om te spelen, daar verstikkingsgevaar bestaat.
• Bij het reinigen van de messeneenheid moet u bijzonder voorzichtig zijn om letsels te vermijden, omdat de snijbladen extreem
scherp zijn.
• Staan kabels of onderdelen onder spanning, dan bestaat risico op overlijden door elektrische schok!
• Vermijd schade aan het netsnoer, door het niet te knijpen, niet te buigen of niet over scherpe randen te trekken. Hou het
netsnoer ver verwijderd van hete oppervlakken en open vlammen.
• Gebruik het apparaat nooit als het netsnoer of het apparaat beschadigd is. Als het netsnoer of de netaansluiting van het
apparaat beschadigd is, dan moeten deze door de fabrikant of zijn klantendienst of door een vergelijkbaar gekwalificeerde
persoon vervangen worden, om gevaar te vermijden.
NL
Manual FitMix Smart_20170309_BA.indd 20 09.03.17 11:48
Table of contents
Languages:
Other Livington Blender manuals