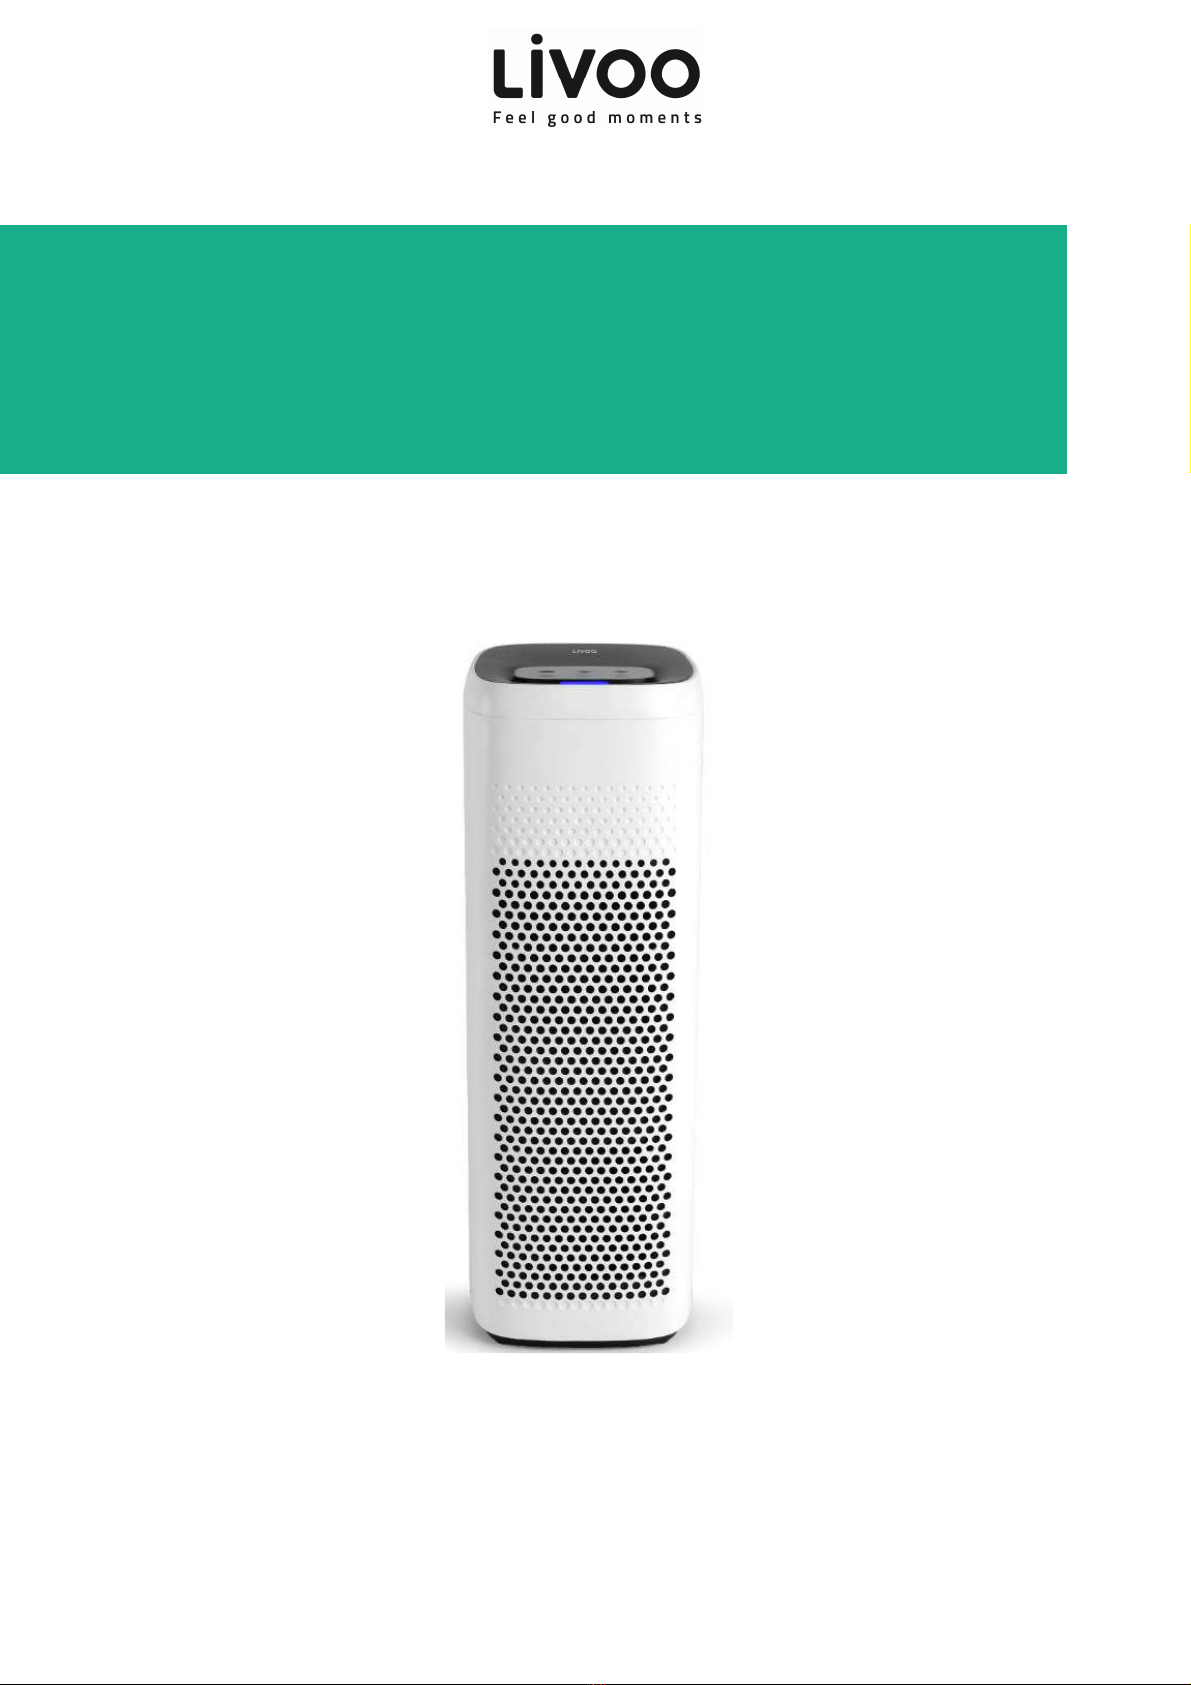
Livoo DOM407 User manual

Instruction Manual
WWW.LIVOO.FR
Reference: DOM407
Version: 1.4
Language: English
ir purifier

Instruction Manual
1
You have purchased a LIVOO brand product and we thank you for it. We give great attention to the design,
ergonomics and ease of use of our products. We hope that this product will give you complete satisfaction.
This instruction manual is available too on our website www.livoo.fr
S FETY INSTRUCTIONS
PLE SE, T KE TIME TO RE D WELL THE INSTRUCTIONS FOR USE
P RTICUL RLY BEFORE THE FIRST USE.
misuse of the appliance can damage it or hurt the user. ssure
that you use the appliance for the use for which it is designed, we
refuse any responsibilities as for the damages by an incorrect use
or a bad manipulation.
1. Before connecting your appliance, verify that the supply
voltage indicated on the indicator plate of the appliance
corresponds properly to that of your electrical
installation.
2. No responsibility may be assumed in case of damages
caused by non-compliance of this manual by the user or
by faulty use or handling.
3. This appliance is meant for ONLY DOMESTIC USE and
FOR INTERN L USE.
4. Use this appliance only as indicated in the instruction
manual.
5. Before each use, ensue that the supply cord is in good
condition.
6. If the supply cord is damaged, it must be replaced by
the manufacturer, its service agent or similarly qualified
persons (*) in order to avoid a hazard.
7. Never plunge the appliance, its supply cord or the plug

Instruction Manual
2
in water or any other liquid.
8. Do not handle the plug on the appliance with wet
hands.
9. This appliance can be used by children aged from 8
years and above and persons with reduced physical,
sensory or mental capabilities, or lack of experience and
knowledge if they have been given supervision or
instruction concerning use of the appliance in a safe
way and understand the hazards involved. Children
shall not play with the appliance. Cleaning and user
maintenance shall not be made by children without
supervision.
10. When you disconnect the supply cord, always remove it
from the plug. Do not pull on the cord itself.
11. Unplug the appliance during filling, cleaning and other
maintenance.
12. Ensure that the appliance is always placed on a flat
surface, dry and stable.
13. Do not use chemical products or abrasive detergents for
cleaning, which may easily damage or deform your
appliance.
14. For reducing the risk of electric shock, never use this
product with wet hands, never spill a liquid on the
product or submerge it in water.
15. Do not use outside (For internal use only). This
appliance is not suitable for industrial or open-air use.
16. This appliance is not designed to be used with an
external timer or a separate remote-control system.
17. Do not operate this appliance in any greasy

Instruction Manual
3
environments, such as kitchen. This product is not
intended to filter oil or grease from the air.
18.
Do not use the air purifier in bathrooms or other humid
environments. Do not use near fireplaces or in areas
where flammable or combustible vapors or products may
exist.
19.
lways unplug the power cord from the electrical outlet
when the purifier is not in use, before cleaning, inserting
or removing parts or before moving to another location.
20.
Never run the air purifier unless it is fully assembled.
21. lways turn off all controls before unplugging the air
purifier from the outlet.
22. In case of the replacement of the UV-C emitter, please
read carefully the safety points 24,25,26,27 and 28.
23. This appliance contains a UV-C emitter
24. Unintended use of the appliance or damage to the housing
may result in the escape of dangerous UV-C radiation. UV-
C radiation may, even in little doses, cause harm to the
eyes and skin.
25. ppliance that are obviously damaged must not be
operated.
26. Read the maintenance instructions before opening the
appliance.
27. The appliance must be disconnected from supply before
replacing the UV-C emitter.
28. This appliance is intended to be used in household and
similar applications such as:
•staff kitchen areas in shops, offices and other
working environments
•farm houses

Instruction Manual
4
•by clients in hotels, motels and other
residential type environments
•bed and breakfast type environments
(*)
Authorised qualified electrician: after-sales department of the manufacturer or the importer or any
other qualified person, approved and authorised for carrying out this kind of repair for avoiding any
danger. In any case, you must send the appliance to this electrician.
SPECI L S FETY INSTRUCTIONS
Warning:
- UV lamp notice:
UV light is harmful to bare skin and eyes and can cause temporary
or cleanable loss of vision. Never look directly at the UV lamp while it is illuminated; doing
so could cause loss of vision! Only view illumination through the window at the front of the
unit. To prevent exposure to ultraviolet light, disconnect the power to the unit before
servicing any part of this appliance.
-UV lamp disposal:
If UV lamp breaks, turn off the unit. Do not operate the unit
with a broken lamp. Do not use a vacuum to clean up breakage. Sweep debris into a plastic
bag and disposal properly. Contact your local waste management authority for instructions
regarding recycling and the proper disposal of old lamp(s).
-
Mercury Notice:
because this appliance contains a light bulb which contains
mercury, please pay attention to following points:
. Dot not place your used lamp(s) in the trash. Disposal of any item containing
mercury must be in accordance with any hazardous waste disposal or recycling laws and
regulations of your state.
.
This product complies with the maximum allowable concentration of ozone od 0.05
part per million by volume(ppmv) in a 24-jour period.
TECHNIC L SPECIFIC TIONS
Voltage : 220-240V~50Hz
Puissance : 70W

Instruction Manual
5
DESCRIPTION
USE
Before first use
1. Remove all packaging materials from the air purifier, including the packing material around the air
filter inside of the appliance.
2. Please keep the product away from fan to avoid affecting the normal operation of the product.
3. Do not place the product near the curtains to prevent the curtain being sucked in and therefore
damaged the product.
4. when using and ensure that the appliance is at least 30cm away from the wall to ensure normal
running.
5. Please put the product in the polluted air area to effectively improve the indoor air quality
Notice: Check the filter before using. o not use this product if the filter is damaged. Please replace a new
filter if there are cracks or holes in the filters.

Instruction Manual
6
On/Off Button
:
Press the power button to switch on the appliance
Fan Speed Adjustment: In the power-on state, press the “SPEED” button to adjust the fan
speed. Press the wind speed button continuously (delay 0.5 seconds between each gear
position), the wind speed of the machine will be switched from 1 to 3.
Sleep Mode: In the power-on state, press the “ +” button and the machine will enter
in sleep mode: the machine will run at Speed 1, and other indicator will be turned off except
the speed light; press it again and the machine will exit from the Sleep Mode.
Air sensor: The air purifier is equipped with an air sensor to monitor the quality of your air.
Simply press the on/off button and air sensor button to activate the air monitoring system.
The monitor will test the air quality and automatically adjust the fan speed to remove the air
contaminants. The front of the display is equipped with LED lights to notify you of the air
quality. RED color is for poor, OR NGE for fair and BLUE for good quality air.
Ioniser button: Press the Ioniser button to turn on the IONs. Press it again to turn the IONs
off.
UV control button: Press the UV control button “UV” to turn on the UV lamp and the
photocatalyst filter.

Instruction Manual
7
Timer control : ir purifier can be programmed to turn off after a preset amount of time.
Press the “TIMER” button to program the timer 2-4-8H.
Filter Replacement Indicator : When the cumulative working time of the machine reaches
1500 hour, the pre-filter indicator light will be lit up(red) to remind you to replace the filter;
when the cumulative working time of the machine reaches 3000 hours, HEP filter indicator
light will be lit up(red) to remind you to replace the filter.
When only PRE filter indicator light is on, press Timer+ UTO button for 3 seconds to turn off
PRE indicator light and clear PRE filter screen timing; when only HEP filter indicator light is
on, press Timer+ UTO button for 3 seconds to turn off HEP indicator light and clear HEP
filter timing; when both filter indicator lights are on, press Timer+ UTO button for long. In 3
seconds, two filter indicators can be switched off, and two filters timing will be cleared.
CLE NING ND M INTEN NCE
Warning: Before cleaning and maintaining this product, be sure to turn off the power and unplug
it to the power source to avoid electric shock.
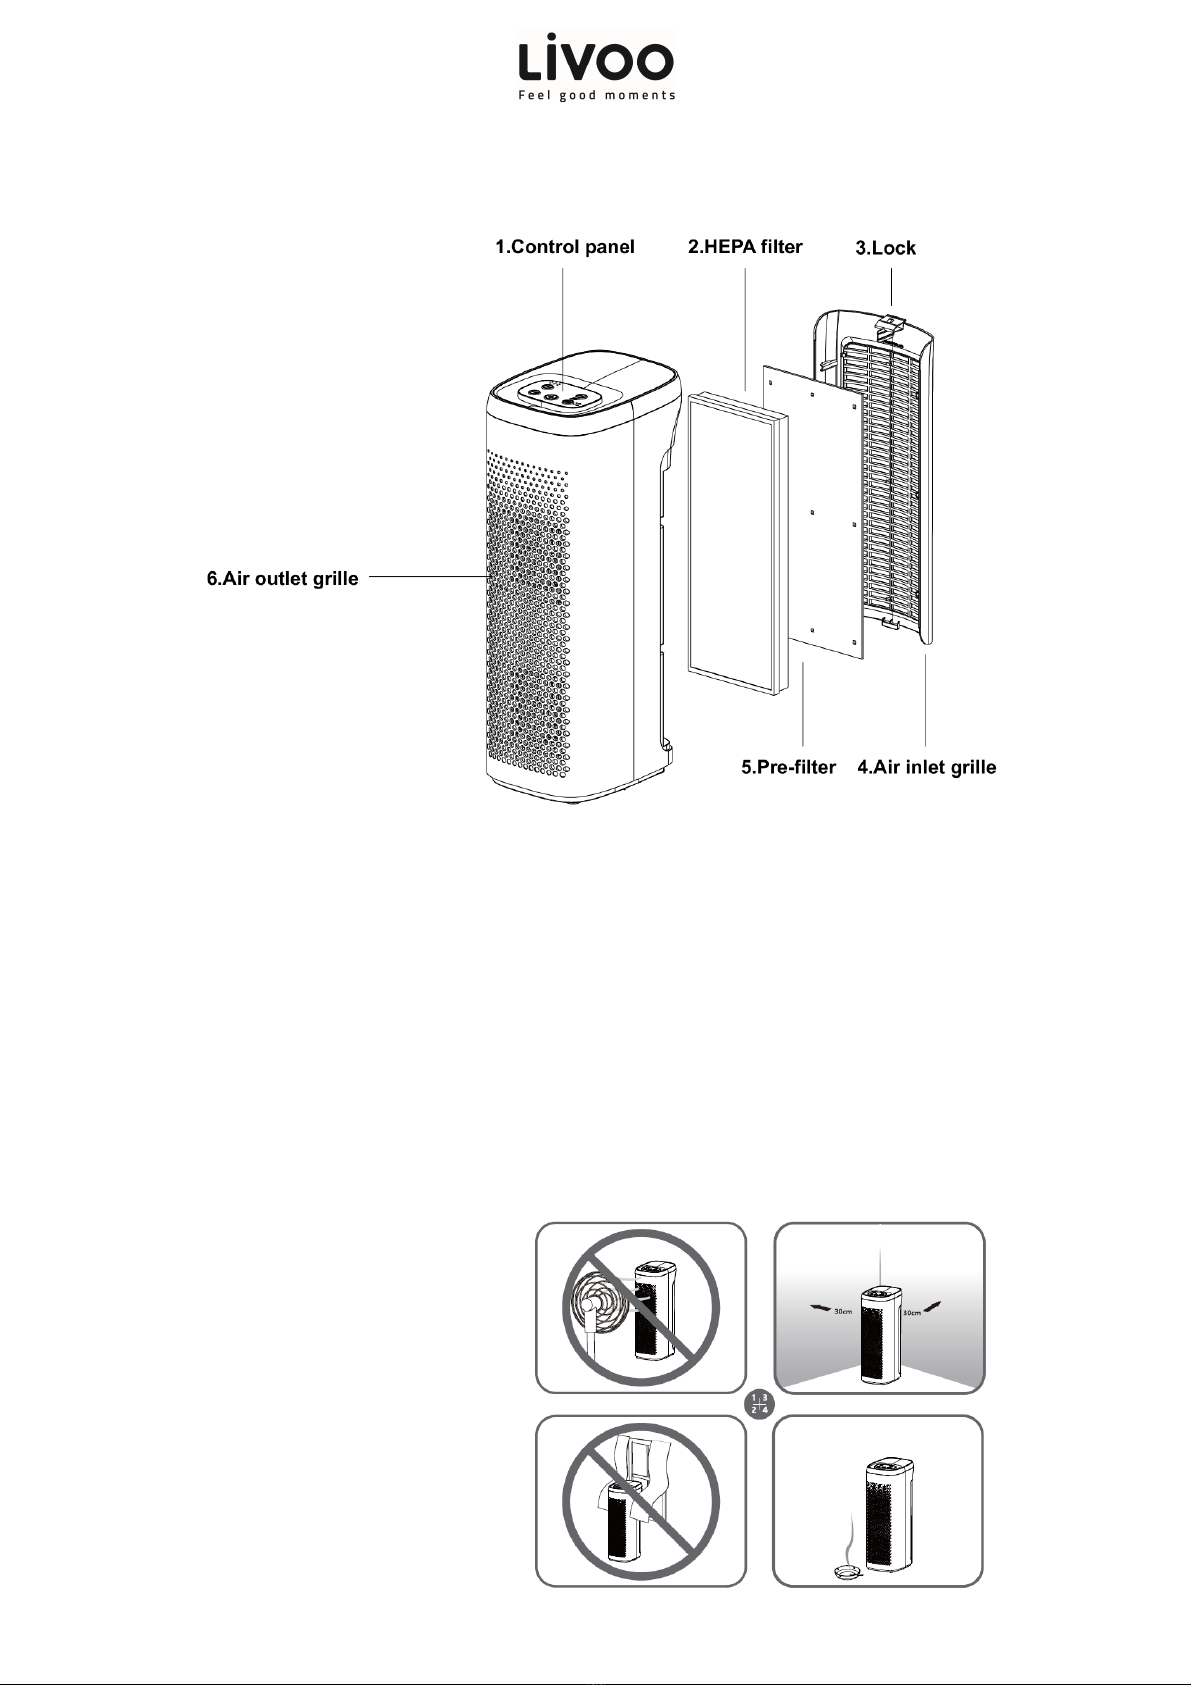
Replace the HEPA filter
1. Pull the air inlet grille out (see the picture).
2. s shown in the figure, the air inlet grille has been opened.
3. Grab the frame on both sides of the HEP filter and remove the filter from the product.
4. Replace the unused HEP filter with the reverse operation as shown below.
Pre-filter Maintenance
The preliminary filter can be cleaned with water. It is not recommended to use the air purifier in
places which full of candles, soot, fireplace soot, or smoke. If used in such an environment, the
filter should be cleaned frequently.
Attention:
Please carefully identify the front and rear direction of the filter assembly to avoid wrong

Instruction Manual
8
installation.
It is recommended to wear gloves when replacing the filter. nd in order to prevent the
secondary pollution in the old filter components, please put the old filter components in plastic
bags before discarding them to prevent the secondary pollution to the environment.
Outer Surface Cleaning
1. Turn off the power and unplug
2. Clean the surface of the machine casing with a soft cloth and a little soapy water.
3. Do not allow water to flow into the machine, as this may damage your machine and cause
electric shock and damage to you.
4. fter cleaning, please put the product in a ventilated place (not exposed), until the machine is
completely dry before turning it on.
Troubleshooting
Common problem
Possible cause
Solutions
The machine doesn’t
work
1 The power switch is not
turned on
2 Unplugged
1 Press the power on button to turn it on
2 Check whether the power has been
turned on
irflow reduced or
purification effect is
unsatisfactory
1 ir inlet or air outlet is blocked
2 Pre-filter may be blocked
3 Filter life expires
1 Check and make sure the air inlet and
outlet are not blocked
2 Check and clean the filter if necessary
3 Replace the filter
The filter indicator
blinks all the time
1 Filter life expires
2 Filter is not reset after replacing the
filter
1 Replace the filter
2 Reset filter setting

Instruction Manual
9
Correct disposal of the unit
(Electrical and Electronic Equipment)
( pplicable in the European Union and the rest of Europe that have adopted separate collection systems
countries)
The European Directive 2012/19/EU on Waste Electrical and Electronic Equipment (WEEE), requires that old
household electrical appliances must not be disposed of in the normal household waste stream.
Old appliances must be collected separately in order to optimize the recovery and recycling of the materials they contain and
reduce the impact on human health and the environment.
The symbol of the crossed out dustbin is marked on all products to remind the obligations of separate collection.
Consumers should contact their local authority or retailer for information concerning the correct disposal of their product.
•Photo no contractual
• Worried about the quality of his products the manufacturer reserves the right to make modifications without advance
Table of contents
Other Livoo Air Cleaner manuals
Popular Air Cleaner manuals by other brands

AllerAir
AllerAir AirTube series brochure

GLOBAL PLASMA SOLUTIONS
GLOBAL PLASMA SOLUTIONS GPS-DM48-AC Installation, operation & maintenance manual

Fellowes
Fellowes AeraMax 290 Operator's manual

Honeywell
Honeywell F116 Product data

Field Controls
Field Controls MC2025-11 installation manual

Goodman
Goodman G1EAC Series Product specifications