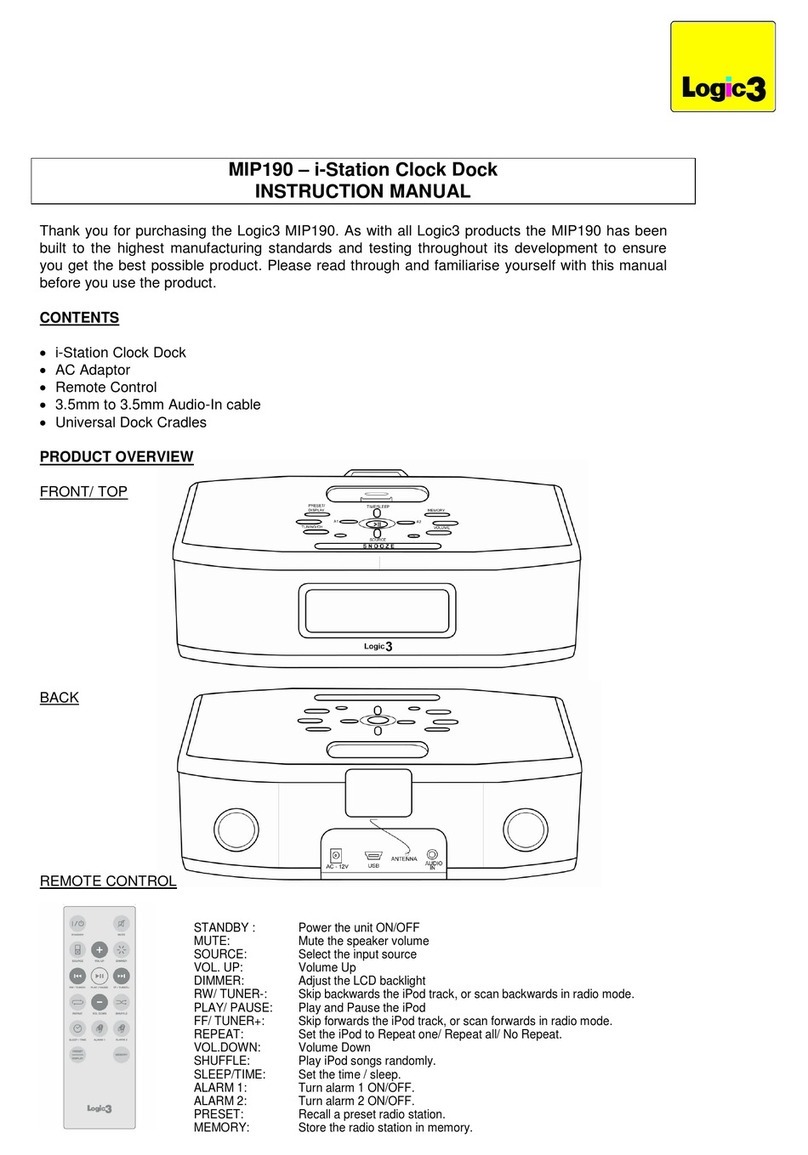
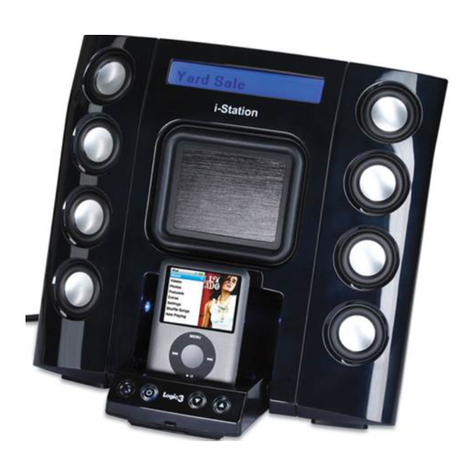
Logic3 WIP027 i-Station Rotate User manual

INSTRUCTION MANUAL
WIP027

2
Logic3WIP027
i-Station Rotation
(Vertical Position) (Horizontal Position)
AC Adapter with
Interchangeable Plugs
(Euro 2pin and BS 3pin)
Contents
Set up of i-Station
Cradles x 7
(iPhone/iPhone 3G,
touch/touch 2G,
classic 80GB/160GB,
nano 3G/4G)
Line-in cable
(3.5mm)
Remote Control
1
3B
2
4
6
3A
5
Logic
3
Logic3
i-Station
Logic3
i-Station
Logic3
Logic3
DC 5V 2A
Logic3WIP027
Logic3Logic3Logic3
Battery
Power
On
Off
Docking Cover
Power
Switch
Volume
Up/Down

3
Video In
Power
ON/OFF
Scroll Up
Menu
RW/Previous
Play/Pause Battery Compartment
Front Back
FW/Next
Scroll Down
Select
Mute
Volume Down
Video Out
Volume Up
Use of Remote Control
Set up of Line In
Set up of Video Out
Line In
Battery
Power
On
Off
DC In
Logic3WIP027
Composite
Video
Line In
Battery
Power
On
Off
DC In
Logic3WIP027
Composite
Video
MD
MiniDisc
CD
MP3
LINE IN
Composite
Video

4
ENGLISH
i-Station Rotate (WIP027) - User Manual
Thank you for purchasing the Logic3 i-Station Rotate. As with all Logic3 products it has been built to the highest manufac-
turing standards and tested throughout its development, to ensure you get the best possible product. Please read through
and familiarize yourself with this manual before you use the i-Station Rotate.
Set up of i-Station
Remove the docking cover from the unit. (see g.1)1.
Insert the appropriate cradle for your iPod/iPhone into the docking area. (see g.2)2.
Choose your source of power :-3.
Mains Power (see g.3A) - Plug in the DC jack to the rear of the i-Station (DC 5V)
- Select and t the correct plug adapter to suit your power supply
- Plug the power supply into your mains socket and turn the mains socket ON
- Make sure the Battery Power Switch is in the OFF position
Battery Power (see g.3B) - Remove the Battery compartment cover
- Insert 4 x AA batteries observing the Polarity Markings
- Replace the Battery compartment cover
- Switch the Battery Power Switch to the ON position
WARNING: Please ensure that the batteries are inserted correctly. If the batteries are inserted incorrectly
(reversed polarity), this may cause personal injury as well as damage to your i-Station
Open the feet on rear of the i-Station (located on the bottom of the i-Station) - (see g.4)4.
Insert the Battery into the remote control5.
Inserting your iPod/iPhone Vertically (Portrait Position)6.
a. Insert the appropriate cradle for your iPod into the docking area.
b. Move the iPod/iPhone docking tray into the middle of the docking bay.
c. Insert your iPod/iPhone rmly into the docking cradle (see g.5)
Viewing your iPod Horizontally for use with itouch and iPhone (Landscape Position)7.
a. Insert the appropriate cradle for your iPod/iPhone into the docking area.
b. Move the iPod/iPhone docking tray into the right side of the docking bay.
c. Insert your iPod/iPhone rmly into the docking cradle (see g.6)
d. The iPod/iPhone can now be rotated freely into a Horizontal position (see g.6)
After use remember to move the docking cradle to the right of the i-Station Rotate, this will allow the Docking Cover to
t correctly.
NOTE:
After the iPhone has been docked to the speaker, the iPhone may stop responding for up to 5seconds, whilst it com-1.
municates with the speaker.
Do not remove the iPod/iPhone from the speakers immediately after docking. It is recommended that the iPod/iPhone2.
should be removed after 10seconds after being docked.
If a warning message is displayed on the iPhone after it has been docked, remove the iPhone and dock again.3.
Using the i-Station
Power is turned ON/OFF via the Power Button located on the front left of the i-Station (LED will illuminate Blue when1.
switched ON).
The speaker system is preset to a 30% volume level; the volume level will be displayed on your iPod screen. This can2.
be adjusted by using the Up and Down keys located on front right side of the i-Station, the volume bar on the iPod/
iPhone will also move according to the volume adjustment.
iPod/iPhone navigation mode (for all iPods/iPhone in vertical position; these functions do not work for iPod
touch and iPhone in Horizontal position):
Menu button: bring back to the upper level of menu•
Select button: entry into next level of menu•
UP / DOWN button: menu courser moving up and down•

5
ENGLISH
Play / Pause button: Play or Pause the music from iPod•
Next / Previous button: Jump to Next or Previous Track•
The i-Station is tted with a power saving mode, if the unit is left on for a certain amount of time without playing any
music, it will switch into the power saving modes.
Sleep Mode – 5 minutes.
Standby Mode – 30 minutes.
POWER LED Status
LED OFF – Standby Mode
LED ON – Power ON
LED Dim – Sleep Mode
LED Flashing – Battery Power is Low; Speaker will shut off in 5 mins
Watching Video from your iPhone/iPod
Once your iPhone/iPod is docked onto the speaker, the iPhone/iPod ‘s Video Out function is enabled.
For users preference, you can select to view video’s on your iPhone/iPod or output to a TV
Watching Video on your TV
Attach the RCA Cable (Not supplied) to the back of the i-Station Rotate (Composite Video-Out).1.
Attach the other end of the RCA cable to your TV (Video-In).2.
Dock your iPhone/iPod onto the speaker.3.
Select the Video you wish to play and the Video will be displayed on your TV4.
The iPhone/iPod video out setting is normally defaulted to display video via the Composite Video Out.
If the Video does not display on the TV please follow the instructions:-
A. Press the Video Output button on the remote control, this will bring you back to the video menu.
B. Select the video you wish to watch.
C. The video will now be displayed on your TV.
To switch back to watch a Video on your iPhone/iPod Repeat steps A-B.
Watching Video on your iPhone/iPod
Dock your iPhone/iPod onto the speaker1.
Select the Video you wish to play and the Video will be displayed on your TV.2.
Press the Video Output button on the remote control, this will bring you to the video menu.3.
Select the video you wish to play.4.
If the Video does not display on your iPhone/iPod, please follow the instructions:-
A. Press the Video Output button on the remote control, this will bring you back to the video menu.
B. Select the video you wish to watch.
C. The video will now be displayed on your iPhone/iPod.
To switch back to watch Video on your TV Repeat steps A-B.
Recharging the iPod
Connect the AC adaptor to the i-Station and turn on the mains socket.1.
Dock your iPod/iPhone into the cradle and the iPod/iPhone will begin to recharge (The i-Station Power button does not2.
have to be turned ON in order to recharge the iPod/iPhone).
iPod/iPhone can recharge and play music at the same time when using the AC adapter.3.
NOTE: Your iPod will not charge when using Batteries as the Power Source.

6
ENGLISH
Line in Mode
The i-Station also offers the ability to allow other portable audio devices such as iPod shufe, MP3, MiniDisc and Portable
CD Players to be connected for use as a speaker system.
Put the docking cover back on the unit, this will protect the 30 pin connector from accidental damage and dust.1.
Plug in the line in cable (3.5mm right angle jack - supplied) into the rear of the i-Station Line in Socket.2.
Connect the other end of the line in cable (3.5mm straight jack) to your device.3.
Set your device volume to Maximum.4.
Turn on your i-Station.5.
Note: Remember to remove the line in cable when using the docking station as the line in cable will override
any sound coming from the docking station.
System Specications
Total 10W Output (5W / Channel)
Tweeter (22mm) per satellite
Mid range (50mm) per satellite
Distortion <=1%
S/N ratio: 60dB
Frequency Response: 200Hz – 20 kHz
Provided Power Adaptor:5VDC@2A
Video Output is only Compatible with the following:
iPhone / iPhone3G :640 x 480 pixels (Max)
iPod touch / touch 2G: 640 x 480 pixels (Max)
iPod classic: 640 x 480 pixels (Max)
iPod nano 3G / 4G: 640 x 480 pixels (Max)
iPod 5G: 480 x 480 pixels (Max)
Trouble Shooting
Problem What Should I do?
i-Station does not turn ON when powered via
AC Mains
Check the AC power cable is connected rmly into the AC wall outlet and the
i-Station.
Test the i-Station by powering the unit with 4 x AA batteries.
Ensure Battery Switch on the back of the speaker is switched to OFF position
i-Station does not turn ON when powered via
Batteries
Test the i-Station by powering the unit via AC Mains, if this works replace the batteries
with new ones.
Ensure Battery Switch on the back of the speaker is switched to ON position
No sound
Ensure the correct cradle is used with your iPod/iPhone.
Ensure the line in cable is not plugged into the i-Station
Check Play status on the iPod/iPhone.
Please try updating the rmware for your iPod/iPhone using the latest iTunes which
is available from www.apple.com/ipod/download
Check i-Station is not in power save mode. Press any button to exit this mode
Check the MUTE function is not ON by pressing the MUTE on the remote control
Sound Quality is poor
If you are using AA Batteries, replace them with new ones.
Ensure the correct cradle is used with your iPod/iPhone.

7
ENGLISH
iPod/iPhone is not recharging
Ensure the correct cradle is used with your iPod/iPhone.
Ensure the Battery Switch is in the OFF Position.
Ensure your i-Station is connected to the AC Mains
Cradle will not x into the i-Station Remove any previously inserted universal dock cradles
I have lost a part for the i-Station Please refer to the spare parts section in this manual
i-Station goes into standby mode when the
music is playing on the iPod/iPhone
Go into your iTunes library
1. Highlight all the tracks and click EDIT.
2. Select Preferences and select Playback.
3. Turn the Sound Check ON
4. Goto your iPod/iPhone Menu and Turn ON Sound Check.
5. Now re-sync your iPod/iPhone
Now all your songs will be at the same level.
i-Station goes into standby mode when music
is playing on a audio device connected to the
‘line-in’
Turn the volume level on the audio device to the maximum level, then use the
i-Station to control your volume levels
Remote Control is not working Replace Battery.
Check the Battery is inserted correctly (Polarity)
No Picture
Check your Video cable (Yellow RCA) is connected correclty.
Check your iPod/iPhone is set to TV out (refer to your iPod/iPhone manual for
settings)
iPod/iPhone not responding Reset the iPod/iPhone (Goto http://www.apple.com/support/)
Spare Part List
Part No. Item code Item Name Price
1 YAD011 AC ADAPTOR (INTERCHANGEABLE POWER PLUGS)
For prices visit our website at
www.logic3.com
2 YCB000K LINE IN CABLE (BLACK)
3 YRM027 REMOTE CONTROL
4 YCR027 Cradles for iPhone/iPhone 3G, touch/touch 2G, classic 80GB/160GB,
nano 3G/4G
Should you have any setup problems with the i-Station (WIP027) please contact our Technical Support Hotline on
+44 (01923) 471 000 – National/International call rates apply or Email [email protected] - Spare parts are avail-
able for some models at our website www.logic3.com

8
FRENCH
i-Station Rotate (WIP027) – Manuel de l’utilisateur
Merci d’avoir acheté l’i-Station Rotate. Comme tous les produits Logic 3, il a été créé selon les normes de fabrication les
plus exigeantes et testé tout au long de son développement, de façon à ce que vous obteniez le meilleur produit possible.
Veuillez lire et vous familiariser avec ce manuel avant d’utiliser l’i-Station Rotate.
Installation de l’i-Station
Enlevez le couvercle d’accueil. (voir g.1)1.
Insérez le support approprié à votre iPod/iPhone dans la zone d’accueil (voir g.2)2.
Choisissez votre source d’alimentation :3.
Alimentation par le secteur (voir g.3A) - Branchez le jack DC à l’arrière du système de haut-parleurs (DC 5V)
- Sélectionnez et branchez l’adaptateur approprié à votre alimentation élec-
trique
- Branchez le câble d’alimentation à la prise du secteur
- Assurez-vous que le bouton marche/arrêt des piles est en position Arrêt (OFF)
Alimentation par piles (voir g.3B) - Enlevez les couvercles des compartiments à piles
- Insérez 4 piles AA en respectant les signes + et -
- Replacez les couvercles sur les compartiments à piles
- Allumez le bouton marche/arrêt des piles (ON)
ATTENTION : Veuillez vous assurer que les piles sont insérées correctement. Une mauvaise insertion (polarité
inversée) pourrait causer des dommages corporels et endommager votre i-Station.
Ouvrez les pieds à l'arrière de l'i-Station (au dessous de l'i-Station) - (voir g.4)4.
Insérez les piles dans la télécommande5.
Insertion de votre iPod/iPhone en position verticale (position portrait)6.
a. Insérez le support approprié à votre iPod dans la zone d’accueil.
b. Placez le plateau d’accueil de l’iPod/iPhone au milieu de la zone d’accueil.
c. Insérez votre iPod/iPhone fermement dans le support d’accueil.
Positionner votre iPod horizontalement pour l’utiliser avec itouch/iPhone (Position paysage)7.
a. Insérez le support approprié à votre iPod/iPhone dans la zone d’accueil.
b. Placez le plateau d’accueil du iPod/iPhone dans la partie droite de la zone d’accueil.
c. Insérez fermement votre iPod/iPhone dans le support d’accueil (voir g.6)
d. Vous pouvez maintenant faire tourner votre iPod/iPhone librement en position horizontale (voir g.6)
Après usage, veuillez vous assurer de placer le support d’accueil à droite de l’i-Station rotate; cela permettra au cou-
vercle d’accueil de s’ajuster correctement.
Remarques :
Une fois l’iPhone connecté à l’enceinte, il se peut qu’il ne réponde plus pendant 5 secondes - le temps de la communi-1.
cation entre les deux appareils.
Ne retirez pas l’iPod/iPhone des enceintes immédiatement après les avoir enclenchés. Nous vous conseillons 2.
d’attendre au moins 10 secondes.
Si un message d’avertissement s’afche sur l’iPhone après que vous l’avez connecté, retirez-3.
le et rebranchez-le.
Utilisation de l’i-Station
Allumez ou éteignez votre appareil avec le bouton marche/arrêt (ON/OFF) situé sur le devant gauche de l’i-Station (la1.
LED s’illuminera en Bleu lorsqu’en mode Marche).
Le système de haut-parleurs est réglé à un niveau de volume de 30%; le niveau de volume est afché sur l’écran de 2.
votre iPod. Le volume peut être réglé en utilisant les touches de réglage de volume situées sur le devant de l’i-Station;
la barre de volume sur l’iPod bougera aussi selon le réglage du volume.
Mode navigation iPod/iPhone (pour tous les iPods/iPhone en position verticale) : ces fonctions ne sont pas
disponibles pour l’iPod touch et l’iPhone en position horizontale :
Touche Menu : vous renvoie au niveau précédent du menu•
Touche Sélectionner : aller au niveau suivant du menu•
9
FRENCH
Touche HAUT/BAS : fait déler le menu vers le haut ou vers le bas•
Touche Lecture/Pause : lire ou mettre en Pause la musique de votre iPod•
Touche Précedent/Suivant : Aller au morceau précédent ou suivant•
L’i-Station dispose d’un mode à économie d’énergie : si l’unité reste allumée pendant un certain temps sans émettre de
musique, elle passera en mode économie.
Mode Veille – 5 minutes.
Mode Standby – 30 minutes.
Statut d’énergie LED
LED en position OFF – Mode Standby
LED en position ON – Mode Marche (ON)
LED Faible – Mode Veille
LED Clignotante – Les piles sont faibles; Le haut-parleur s’éteindra dans 5 minutes
Regarder des vidéos de votre iPhone/iPod
Une fois votre iPhone/iPod placé sur le haut-parleur, la fonction de sortie vidéo de l’iPhone/iPod est activée.
Vous pouvez choisir de voir les vidéos sur votre iPhone/iPod ou sur une TV
Regarder des vidéos sur une TV
Branchez le câble RCA (non fourni) à l’arrière de l’i-Station Rotate (sortie vidéo composite).1.
Branchez l’autre extrémité du câble RCA à votre TV (entrée vidéo).2.
Placez votre iPhone/iPod sur le haut-parleur.3.
Sélectionnez la vidéo que vous voulez lire ; celle-ci s’afche sur votre TV4.
Par défaut, l’iPhone/iPod afche les vidéos via la sortie vidéo composite.
Si les vidéos ne s’afchent pas sur la TV, suivez les instructions ci-dessous :-
A. Appuyez sur le bouton de sortie vidéo de la télécommande pour revenir au menu vidéo.
B. Sélectionnez la vidéo que vous voulez regarder.
C. La vidéo s’afche sur votre TV.
Pour revenir à votre iPhone/iPod pour regarder une vidéo, répétez les étapes A-B.
Regarder des vidéos sur votre iPhone/iPod
Placez votre iPhone/iPod sur le haut-parleur1.
Sélectionnez la vidéo que vous voulez regarder ; elle s’afche alors sur votre iPhone/iPod.2.
Appuyez sur le bouton de sortie vidéo de la télécommande pour ouvrir le menu vidéo.3.
Sélectionnez la vidéo que vous voulez lire.4.
Si la vidéo ne s’afche pas sur votre iPhone/iPod, suivez les instructions ci-dessous :-
A. Appuyez sur le bouton de sortie vidéo de la télécommande pour revenir au menu vidéo.
B. Sélectionnez la vidéo que vous voulez regarder.
C. La vidéo s’afche sur votre iPhone/iPod.
Pour revenir à votre TV pour regarder une vidéo, répétez les étapes A-B.
Recharger votre iPod
Connectez l’adaptateur AC à l’i-Station et assurez-vous que la prise du secteur est en marche.1.
Placez votre iPod/iPhone sur le haut-parleur et l’iPod/iPhone commencera à se recharger (Il n’est pas nécessaire que2.
le bouton marche/arrêt soit en position Marche (ON) pour que l’iPod/iPhone se recharge).
Vous pouvez recharger votre iPod/iPhone tout en écoutant de la musique en utilisant l’adaptateur AC.3.
REMARQUE : Vous ne pouvez pas recharger votre iPod en utilisant les piles comme source d’alimentation

10
FRENCH
Mode entrée Line-in
L’i-Station vous offre également la possibilité de connecter d’autres périphériques portables tels que l’iPod Shufe, MP3,
MiniDisc et lecteurs de CD portables, an de les utiliser comme systèmes de haut-parleurs.
Replacez le couvercle d’accueil sur l’appareil; ceci protègera le connecteur à 30 broches des dégâts et de la poussière. 1.
Branchez l’entrée line-in (jack à angle droit de 3,5mm – fourni -) à l’arrière du port line-in de l’i-Station…2.
Connectez l’autre bout du câble line-in (jack raide 3,5mm) à votre appareil.3.
Réglez le volume de votre appareil au maximum.4.
Allumez votre i-Station.5.
Remarque : Assurez-vous d’enlever l’entrée line-in lorsque vous utilisez la station d’accueil, car l’entrée line-in
neutralisera tout son venant de la station d’accueil.
Spécications du système
Sortie 10W (5W / Channel)
Tweeter (22mm) par satellite
Mid range (50mm) par satellite
Distortion <=1%
Rapport Signal/Bruit : 60dB
Réponse en fréquence : 200Hz – 20 kHz
Adaptateur fourni :5VDC@2A
La sortie Vidéo n’est compatible qu’avec :
iPhone / iPhone3G :640 x 480 pixels (Max)
iPod touch / touch 2G: 640 x 480 pixels (Max)
iPod classic: 640 x 480 pixels (Max)
iPod nano 3G / 4G: 640 x 480 pixels (Max)
iPod 5G: 480 x 480 pixels (Max)
Aide
Problème Que dois-je faire ?
L’i-Station ne s’allume pas lorsqu’il est alimenté
par le secteur
Vériez que le câble d’alimentation AC est fermement connecté à la prise de courant
au mur et à l’i-Station.
Testez l’i-Station en l’alimentant avec 4 piles AA.
Assurez-vous que le bouton marche-arrêt des piles à l’arrière du haut-parleur est en
position arrêt (OFF)
L’i-Station ne s’allume pas lorsqu’il est alimenté
par des piles
Testez l’i-Station en l’alimentant avec le secteur AC; si cela fonctionne, remplacez les
piles par des piles neuves
Assurez-vous que le bouton marche-arrêt des piles à l’arrière du haut-parleur est en
position marche (ON)

11
FRENCH
Pas de son
Assurez-vous que vous utilisez le support approprié à votre iPod.
Assurez-vous que l’entrée line-in n’est pas branchée à l’i-Station.
Vériez le statut «Lecture» sur votre iPod/iPhone
Veuillez essayer de mettre à jour le microprogramme de votre iPod/iPhone en utilisant
les derniers iTunes, que vous pouvez télécharger à partir de www.apple.com/ipod/
download
Vériez que l’i-Station n’est pas en mode économie. Appuyez sur n’importe quel
bouton pour quitter ce mode.
Vériez que la fonction MUET n’est pas en position Marche (ON) en appuyant sur
MUET sur la télécommande.
Mauvaise qualité du son
Si vous utilisez des piles AA, remplacez-les par des piles neuves
Assurez-vous que vous utilisez le support approprié à votre iPod/iPhone
L’iPod ne se recharge pas
Assurez-vous que vous utilisez le support approprié à votre iPod/iPhone
Assurez-vous que le bouton marche/arrêt des piles est en position Arrêt (OFF).
Assurez-vous que votre i-Station est branché au secteur AC.
Impossible de xer le support dans l’i-Station Enlevez tout support dock universel précédemment inséré
J’ai perdu une pièce pour l’i-Station Veuillez consulter la rubrique Pièces de rechange de ce manuel
L’i-Station se met en mode stand-by lorsque
l’iPod émet de la musique.
Allez à votre bibliothèque Itunes
1. Sélectionnez tous les titres et cliquez sur ÉDITER
2. Sélectionnez Préférences and sélectionnez Playback.
3. Allumez le Sound Check
4. Allez au menu de votre iPod/iPhone et allumez le Sound Check.
5. Maintenant resynchronisez votre iPod/iPhone
Tous vos titres seront alors au même niveau
L’i-Station se met en mode stand-by lorsqu’un
appareil connecté à l’entrée line-in émet de
la musique
Réglez le volume de votre appareil au maximum, puis utilisez le i-Station pour régler
vos niveaux de volume
La télécommande ne fonctionne pas Remplacez les piles
Vériez que les piles sont insérées correctement (+/-)
Pas d’image
Vériez que votre cable Vidéo (RCA jaune) est correctement branché.
Vériez que votre iPod/iPhone est réglé en mode sortie TV (référez-vous à votre
manuel iPod/iPhone à la section paramètres)
iPod/iPhone ne répond pas Réinitialisez l’iPod/iPhone (Visitez http://www.apple.com/support/)
Liste des pièces de rechange
Pièce No. Code produit Nom produit Tarif
1 YAD011 ADAPTATEUR AC (FICHES D’ALIMENTATION ÉLECTRIQUE
INTERCHANGEABLES)
Pour en savoir plus sur les tarifs,
veuillez consulter notre site Web :
www.logic3.com
2 YCB000K ENTRÉE LINE-IN (NOIRE)
3 YRM027 TÉLÉCOMMANDE
4 YCR027 Supports iPhone/iPhone 3G, touch/touch 2G, classic
80GB/160GB nano 3G/4G
Si vous rencontrez des difcultés lors de l’installation de l’i-Station (WIP027), veuillez contacter notre service
d’assistance téléphonique en appelant le +44 (01923) 471 000 Des tarifs d’appels nationaux ou internationaux
devront être appliqués - ou contactez-nous par courrier électronique : [email protected] - Pièces de rechange
disponibles pour certains modèles sur notre site Web : www.logic3.com

12
GERMAN
i-Station Rotate (WIP027) - Benutzerhandbuch
Vielen Dank, dass Sie sich für die i-Station Rotate von Logic3 entschieden haben. Wie alle Produkte von Logic3 wurde
sie mit den höchsten Produktionsstandards hergestellt und während der gesamten Entwicklung gründlich getestet, um
sicherzustellen, dass wir Ihnen das bestmögliche Produkt bieten können. Lesen Sie dieses Handbuch gründlich durch
und machen Sie sich mit seinem Inhalt vertraut, bevor Sie die i-Station Rotate verwenden.
Einrichten der i-Station
Entfernen Sie die Dock-Abdeckung vom Gerät. (Siehe Abb. 1)1.
Setzen Sie die korrekte Basis für Ihren iPod oder Ihr iPhone in den Andockbereich ein. (Siehe Abb. 1)2.
Wählen Sie die gewünschte Stromquelle:3.
Netzstrom (siehe Abb. 3A) - Schließen Sie den DC-Stecker an der Rückseite der i-Station an (DC 5V).
- Wählen sie den für Ihre Stromversorgung korrekten Adapterstecker, und schließen sie
diesen an.
- Stecken Sie den Stecker in die Steckdose und schalten Sie die Stromversorgung EIN.
- Stellen Sie sicher, dass sich der Batteriebetriebsschalter in der Position OFF bendet.
Batteriebetrieb (siehe Abb. 3B) - Entfernen Sie die Batteriefachabdeckung.
- Legen Sie 4 Batterien des Typs AA ein, und achten Sie auf die Polarität.
- Setzen Sie die Batteriefachabdeckung wieder ein.
- Stellen Sie den Batteriebetriebsschalter in die Position ON (EIN).
WARNUNG: Bitte stellen Sie sicher, dass die Batterien richtig eingelegt sind. Wenn die Batterien falsch eingelegt
werden (mit umgekehrter Polarität), kann dies zu Verletzungen führen sowie auch Ihre i-Station beschädigen.
Klappen Sie die Standfüße an der Rückseite der i-Station nach außen (sie benden sich an der Kante der Unterseite 4.
der i-Station) - (siehe Abb. 4)
Legen Sie die Batterie in die Fernbedienung ein.5.
So setzen Sie Ihren iPod oder Ihr iPhone vertikal ein (hoch)6.
a. Setzen Sie die korrekte Basis für Ihren iPod in den Andockbereich ein.
b. Bringen Sie den Dock-Anschluss des iPods/iPhones in die Mitte der Andockvorrichtung.
c. Setzen Sie Ihren iPod oder Ihr iPhone fest in die Andockbasis ein (siehe Abb. 5).
So nutzen Sie Ihren iPod in horizontaler Position zur Verwendung mit itouch und iPhone (Querposition)7.
a. Setzen Sie die korrekte Basis für Ihren iPod oder Ihr iPhone in den Andockbereich ein.
b. Bewegen Sie die Andockstelle des iPods/iPhones an die rechte Seite der Andockvorrichtung.
c. Setzen Sie Ihren iPod oder Ihr iPhone fest in die Andockbasis ein (siehe Abb. 6).
d. Der iPod oder das iPhone kann nun problemlos in die horizontale Position gebracht werden (siehe Abb. 6).
Bewegen Sie nach der Verwendung die Andockbasis auf die rechte Seite der i-Station Rotate. So kann die Andockab-
deckung korrekt eingesetzt werden.
Anmerkung:
Nachdem das iPhone am Lautsprecher angedockt wurde, reagiert es möglicherweise während der Kommunikation mit1.
dem Lautsprecher maximal fünf Sekunden lang nicht.
Entfernen Sie den iPod/das iPhone nicht unmittelbar nach dem Andocken am Lautsprecher. Es wird empfohlen, nach2.
dem Andocken 10 Sekunden zu warten, bevor Sie den iPod/das iPhone vom Lautsprecher entfernen.
Wird nach dem Andocken auf dem iPhone ein Warnhinweis angezeigt, entfernen Sie das3.
iPhone und docken Sie es erneut an.
Verwenden der i-Station
Schalten Sie das Gerät mit der An-/Aus-Taste an der vorderen linken Seite der i-Station EIN/AUS (ist das Gerät einge-1.
schaltet, leuchtet die LED blau auf).
Das Lautsprechersystem ist standardmäßig auf einen Pegel von 30 % eingestellt. Der Lautstärkepegel wird auf dem2.
Display Ihres iPods angezeigt. Mithilfe der Oben- und Unten-Tasten an der Vorderseite der i-Station können Sie die
Lautstärke einstellen. Die Lautstärkeanzeige des iPods verändert sich entsprechend der Anpassung der Lautstärke.
iPod-/iPhone-Navigationsmodus (für alle iPods/iPhones in vertikaler Position. Diese Funktionen stehen für
iPod touch und iPhone in horizontaler Position nicht zur Verfügung):

13
GERMAN
Menütaste: Oberste Ebene des Menüs aufrufen•
Auswahltaste Nächste Ebene des Menüs aufrufen•
OBEN-/UNTEN-Tasten Menü-Cursor nach oben/unten bewegen•
Wiedergabe-/Pause-Taste: Musik vom iPod wiedergeben/anhalten•
Vor-/Zurück-Tasten: Nächsten bzw. vorherigen Track wählen•
Die i-Station ist mit einem Energiesparmodus ausgestattet. Wenn Sie das Gerät eine bestimmte Zeit eingeschaltet las-
sen, jedoch keine Musik hören, wird der Energiesparmodus aktiviert.
Schlaf-Modus - 5 Minuten.
Standby-Modus - 30 Minuten.
BETRIEBS-LED-Status
LED AUS – Standby-Modus
LED AN – Gerät AN
LED leuchtet schwach – Schlaf-Modus
LED blinkt – Batterie ist schwach. Der Lautsprecher wird in fünf Minuten ausgeschaltet.
Videos auf einem iPhone/iPod anschauen
Beim Andocken Ihres iPhone/iPod am Lautsprechersystem wird die Videoausgabefunktion des iPhone/iPod aktiviert.
Videos können auch auf einem iPhone/iPod oder Fernseher wiedergegeben werden.
Videos auf einem Fernseher anschauen
Schließen Sie das RCA-Kabel (nicht mitgeliefert) an der Rückseite der i-Station Rotate an (Composite-Video-Ausgang).1.
Stecken Sie das andere Ende des RCA-Kabels in die Video-Eingangsbuchse Ihres Fernsehers.2.
Docken Sie Ihr iPhone/Ihren iPod am Lautsprechersystem an.3.
Wählen Sie das Video aus, das wiedergegeben werden soll. Das Video wird auf Ihrem Fernseher wiedergegeben.4.
Der Videoausgang des iPhones/iPods ist standardmäßig so eingestellt, dass Videobilder über den Composite-Video-
Ausgang ausgegeben werden.
Falls das Video nicht auf dem Fernseher wiedergegeben wird, führen Sie bitte die folgenden Schritte aus:
A. Drücken Sie die “Video Output”-Taste auf der Fernbedienung, um das Video-Menü aufzurufen.
B. Wählen Sie das Video aus, das Sie sehen möchten.
C. Das Video wird nun auf Ihrem Fernseher wiedergegeben.
Wiederholen Sie Schritte A-B, um Videos wieder auf Ihrem iPhone/iPod zu schauen.
Videos auf dem iPhone/iPod anschauen
Docken Sie Ihr iPhone/Ihren iPod am Lautsprechersystem an.1.
Wählen Sie das Video aus, das wiedergegeben werden soll. Das Video wird auf Ihrem Fernseher wiedergegeben.2.
Drücken Sie die “Video Output”-Taste auf der Fernbedienung, um das Video-Menü aufzurufen.3.
Wählen Sie das Video aus, das Sie sehen möchten.4.
Falls das Video nicht auf Ihrem iPhone/iPod wiedergegeben wird, führen Sie bitte die folgenden Schritte aus:
A. Drücken Sie die “Video Output”-Taste auf der Fernbedienung, um das Video-Menü aufzurufen.
B. Wählen Sie das Video aus, das Sie sehen möchten.
C. Das Video wird auf Ihrem iPhone/iPod wiedergegeben.
Wiederholen Sie Schritte A-B, um Videos wieder auf Ihrem Fernseher zu schauen.
Wiederauaden des iPods
Schließen Sie den Wechselstromadapter an die i-Station an und schalten Sie die Stromversorgung ein.1.
Sobald Sie Ihren iPod oder Ihr iPhone in der Basis andocken, wird das Gerät aufgeladen. (Die An-/Aus-Taste der2.
i-Station muss zum Auaden des iPods oder iPhones nicht eingeschaltet werden).

14
GERMAN
Wenn Sie den Wechselstromadapter verwenden, können Sie den iPod/das iPhone auaden und gleichzeitig Musik 3.
hören.
HINWEIS: Bei Verwendung von Batterien als Stromversorgung wird der iPod nicht aufgeladen.
Line-in-Modus
Sie können auch andere tragbare Audiogeräte, wie z. B. iPod Shufe, MP3-, MiniDisc- und tragbare CD-Player an die
i-Station anschließen und sie als Lautsprechersystem für diese Geräte verwenden.
Setzen Sie die Andockabdeckung wieder am Gerät ein. Auf diese Weise schützen Sie den 30-Pin-Anschluss vor unbe-1.
absichtigter Beschädigung und Staubeinwirkung.
Stecken Sie das Line-In-Kabel (mitgelieferter rechtwinkliger 3,5-mm-Stecker) in die Line-In-Buchse an der Rückseite2.
der i-Station ein.
Schließen Sie das andere Ende des Line-In-Kabels (gerader 3,5-mm-Stecker) an Ihr Gerät an.3.
Stellen Sie die Ausgangslautstärke Ihres Geräts auf Maximum.4.
Schalten Sie die i-Station ein.5.
Hinweis: Entfernen Sie das Line-In-Kabel, wenn sie die Andockstation verwenden, da durch Anschließen des
Line-In-Kabels der Ton von der Andockstation deaktiviert wird.
Systemspezikationen
Gesamtleistung 10 W (5 W/Kanal)
Hochtöner (22 mm) pro Satellit
Mitteltöner (50 mm) pro Satellit
Verzerrung < = 1 %
Rauschabstand: 60 dB
Frequenzbereich: 100 Hz – 20 kHz
Mitgeliefertes Netzteil: 5 V DC; 2 A
Videoausgangsauösung
iPhone / iPhone3G :640 x 480 pixels (Max)
iPod touch / touch 2G: 640 x 480 pixels (Max)
iPod classic: 640 x 480 pixels (Max)
iPod nano 3G / 4G: 640 x 480 pixels (Max)
iPod 5G: 480 x 480 pixels (Max)
Fehlerbehebung
Problem Lösung
Die i-Station wird bei Wechselstrombe-
trieb nicht eingeschaltet
Stellen Sie sicher, dass das Wechselstromkabel fest an der Steckdose und an der i-Station
angeschlossen ist.
Überprüfen Sie, ob die i-Station funktioniert, indem Sie vier Batterien des Typs AA einlegen
und das Gerät einschalten.
Stellen Sie sicher, dass der Batterieschalter an der Rückseite des Lautsprechersystems
sich in der Position OFF (AUS) bendet.
Die i-Station wird bei Batteriebetrieb nicht
eingeschaltet
Überprüfen Sie, ob die i-Station funktioniert, indem Sie das Gerät über den Wechselstrom-
adapter aktivieren. Funktioniert es, müssen Sie evtl. neue Batterien einlegen.
Stellen Sie sicher, dass der Batterieschalter an der Rückseite des Lautsprechersystems
sich in der Position ON (AN) bendet.

15
GERMAN
Es ist kein Ton zu hören
Stellen Sie sicher, dass Sie die korrekte Basis für Ihren iPod oder Ihr iPhone verwenden.
Stellen Sie sicher, dass das Line-in-Kabel nicht an die i-Station angeschlossen ist.
Überprüfen Sie den Wiedergabestatus des iPods/iPhones.
Aktualisieren Sie die Firmware Ihres iPods/iPhones mithilfe der aktuellen Version von
iTunes, die Sie hier erhalten: www.apple.com/ipod/download
Stellen Sie sicher, dass sich die i-Station nicht im Energiesparmodus bendet. Drücken Sie
eine beliebige Taste, um diesen Modus zu verlassen.
Stellen Sie sicher, dass das Gerät nicht stumm geschaltet wurde, indem Sie die
Stummschalttaste auf der Fernbedienung betätigen.
Die Klangqualität ist schlecht
Legen Sie neue Batterien des Typs AA, sofern Sie das Gerät mit Batterien betreiben.
Stellen Sie sicher, dass Sie die korrekte Basis für Ihren iPod oder Ihr iPhone verwenden.
Der iPod/das iPhone wird nicht aufge-
laden
Stellen Sie sicher, dass Sie die korrekte Basis für Ihren iPod oder Ihr iPhone verwenden.
Stellen Sie sicher, dass sich der Batterieschalter in der Position OFF (AUS) bendet.
Stellen Sie sicher, dass Ihre i-Station an die Stromversorgung angeschlossen ist.
Die Basis rastet nicht in der i-Station ein Entfernen Sie zuvor eingelegte Andockbasen.
Ich habe ein Teil der i-Station verloren Lesen Sie bitte den Abschnitt zu Ersatzteilen in diesem Handbuch.
Die i-Station wechselt in den Standby-
Modus, wenn auf dem iPod/iPhone Musik
wiedergegeben wird
Rufen Sie Ihre iTunes-Bibliothek auf
1. Markieren Sie alle Dateien und klicken Sie auf BEARBEITEN .
2. Wählen Sie Einstellungen und anschließend Wiedergabe.
3. Aktivieren Sie die Option Lautst. anpassen.
4. Rufen Sie das iPod-/iPhone-Menü auf und aktivieren Sie die Option Lautst. anpassen.
5. Synchronisieren Sie Ihren iPod/Ihr iPhone.
Jetzt benden sich alle Ihre Lieder auf einer Ebene.
Die i-Station wechselt in den Standby-
Modus, wenn auf einem über Line-in
angeschlossenen Audiogerät Musik
wiedergegeben wird
Stellen Sie den Lautstärkepegel des Audiogeräts auf Maximum und steuern Sie den
Lautstärkepegel mit der i-Station.
Die Fernbedienung funktioniert nicht Ersetzen Sie die Batterie.
Stellen Sie sicher, dass die Batterie richtig (mit korrekter Polarität) eingelegt ist.
Es wird kein Bild angezeigt
Stellen Sie sicher, dass das Videokabel (das gelbe RCA-Kabel) korrekt angeschlossen ist.
Stellen Sie sicher, dass bei Ihrem iPod/iPhone die TV-Ausgangskonguration korrekt
eingestellt ist (weitere Infos zu Einstellungen nden Sie im Handbuch Ihres iPods/iPhones).
Der iPod/das iPhone reagiert nicht Setzen Sie den iPod/das iPhone zurück. (Weitere Infos auf http://www.apple.com/support/.)
Ersatzteilliste
Teil Nr. Artikelcode Artikelname Preis
1 YAD011 WECHSELSTROMADAPTER (AUSWECHSELBARE STECKER)
Preise erfahren Sie auf www.
logic3.com
2 YCB000K LINE-IN-KABEL (SCHWARZ)
3 YRM027 FERNBEDIENUNG
4 YCR027 BASEN FÜR iPhone/iPhone 2G, touch/touch 2G, classic 80GB/160GB,
nano 3G/4G
Bei Problemen bei der Einrichtung der i-Station (WIP027) setzen Sie sich bitte mit unserer technischen Kundendi-
enst-Hotline unter +44 (01923) 471 000 in Verbindung - Nationale/internationale Gebühren fallen an -
oder schicken Sie eine E-Mail an [email protected] - Ersatzteile für manche unserer Modelle sind erhältlich unter
www.logic3.com

16
ITALIAN
i-Station Rotate (WIP027) - Manuale di istruzioni
Grazie per aver acquistato il prodotto i-Station Rotate della Logic3. Tutti i prodotti Logic3 sono stati realizzati seguendo
i migliori standard di produzione e testati durante la costruzione per poterti garantire un prodotto di ottima qualità. Leggi
con attenzione questo manuale prima di utilizzare la i-Station Rotate.
Installare una i-Station
Togli il coperchio della stazione. (vedi g.1)1.
Inserisci l’adattatore dock adeguato per il tuo iPod/iPhone nella stazione dock. (vedi g.2)2.
Scegli la fonte di alimentazione:3.
Alimentazione a corrente (vedi g. 3A) - Inserisci la spina CC nella parte posteriore della i Station (CC 5V)
- Seleziona e sistema l’adattatore di presa corretto a seconda
dell’alimentazione di corrente a disposizione
- Inserisci la spina nella presa di corrente e accendi il dispositivo
- Assicurati che l’interruttore delle batterie sia in posizione spenta (OFF)
Alimentazione a batteria (vedi g. 3B) - Togli il coperchio dell’alloggiamento batterie
- Inserisci 4 batterie stilo (AA) rispettando le indicazioni di polarità
- Riposiziona il coperchio dell’alloggiamento batterie
- Accendi l’interruttore delle batterie (ON)
ATTENZIONE: Assicurati che le batterie siano inserite correttamente. Inserire le batterie non correttamente
(polarità invertita) può provocare danni alle persone e alla iStation
Estrai il piedino sulla parte posteriore della i Station (posizionato nella parte inferiore della i Station) - (vedi g.4)4.
Inserisci le batterie nel telecomando5.
Inserisci il tuo iPod/iPhone in verticale (posizione ritratto)6.
a. Inserisci l’adattatore dock adeguato per il tuo iPod/iPhone nella base.
b. Sposta il supporto dock dell’iPod/iPhone nel centro della base dock.
c. Inserisci saldamente il tuo iPod/iPhone nell’adattatore dock (vedi g.5)
Inserisci l’iPod in orizzontale per utilizzarlo con iPod Touch e iPhone (posizione panoramica)7.
a. Inserisci l’adattatore dock adeguato per il tuo iPod/iPhone nella base.
b. Sposta il supporto dock dell’iPod/iPhone a destra della base dock.
c. Inserisci saldamente il tuo iPod/iPhone nell’adattatore dock (vedi g.6)
d. Ora l’iPod/iPhone può essere ruotato liberamente in posizione orizzontale (vedi g.6)
Dopo l’uso, ricordati di spostare l’adattatore dock a destra della iStation Rotate. In questo modo, il coperchio della base
si posizionerà correttamente.
Note:
Dopo che l’iPhone è stato inserito nell’adattatore dock dell’’altoparlante, potrebbe non essere in grado di eseguire 1.
alcuna operazione per un tempo di 5 secondi durante i quali comunica con l’altoparlante.
Non rimuovere l’iPod/iPhone dagli altoparlanti subito dopo averlo inserito nell’adattatore dock. Si raccomanda di rimuo-2.
vere l’iPod/iPhone solo dopo che sono trascorsi 10 secondi dal collegamento.
Se dopo aver inserito l’iPhone nell’adattatore dock compare un messaggio d’avviso, rimuo-3.
vere l’iPhone e ripetere l’operazione.
Utilizzare la iStation
La stazione viene accesa/spenta tramite il pulsante posizionato nella parte anteriore sinistra della i Station (quando è 1.
accesa il LED si illuminerà di blu).
Il livello del volume degli altoparlanti è impostato al 30%; il livello del volume verrà visualizzato sullo schermo dell’iPod. 2.
Per regolare il volume, utilizza i tasti freccia situati nella parte anteriore destra della iStation. Anche la barra volume
sull’iPod/iPhone si regolerà di conseguenza.
Modalità di navigazione per iPod/iPhone(per iPod/iPhone in posizione verticale; queste funzioni non valgono
per iPod Touch e iPhone in posizione orizzontale):
Pulsante menu: torna al livello superiore del menu•
Pulsante seleziona: passa al livello successivo del menu•

17
ITALIAN
Pulsante su/giù: sposta il cursore del menu in alto e in basso•
Pulsante play/pausa: riproduci o metti in pausa la musica dell’iPod•
Pulsante successivo/precedente: passa al brano successivo o precedente•
La i Station è dotata di una modalità di risparmio energetico. Se l’unità viene lasciata inattiva per un certo periodo di
tempo, si attiverà la modalità di risparmio energetico.
Modalità sleep – 5 minuti.
Modalità standby – 30 minuti.
Stato dei LED
LED SPENTO – modalità standby
LED ACCESO – Accensione
LED BASSO – modalità sleep
LED LAMPEGGIANTE – Il livello della batteria è basso; gli altoparlanti si spegneranno (OFF) entro 5 minuti
Guardare video dal tuo iPhone/iPod
La funzione di trasmissione video dell’iPhone/iPod è abilitata non appena l’iPhone/iPod è collegato agli altoparlanti.
A seconda delle preferenze, puoi scegliere se visualizzare i video sull’iPhone/iPod o sulla tua TV.
Guardare video sulla tua TV
Collega il cavo RCA (non fornito) al retro dell’i-Station Rotate (Video-Output: Composite).1.
Collega l’altro capo della presa RCA alla tua TV (Video-Input).2.
Alloggia il tuo iPhone/iPod nello chassis dell’altoparlante.3.
Seleziona il video che desideri eseguire e questo sarà visualizzato sulla TV4.
L’impostazione di riproduzione esterna di video dell’iPhone/iPod è normalmente quella di trasmettere il video attraverso
un collegamento composito Video Out.
Se il video non viene riprodotto sulla TV, attieniti alla procedura illustrata di seguito:
A. Premi il pulsante Video Output sul telecomando: tornerai al menu video.
B. Seleziona il video che desideri riprodurre.
C. Il video sarà ora trasmesso sulla tua TV.
Per tornare indietro e guardare un video sul tuo iPhone/iPod ripeti i passi A-B.
Guardare video sul tuo iPhone/iPod
Alloggia il tuo iPhone/iPod nello chassis dell’altoparlante1.
Seleziona il video che desideri eseguire e questo sarà visualizzato sulla TV2.
Premi il pulsante Video Output sul telecomando: verrà visualizzato il menu video.3.
Seleziona il video che desideri riprodurre.4.
Se il video non viene riprodotto sul tuo iPhone/iPod, attieniti alla procedura illustrata di seguito
A. Premi il pulsante Video Output sul telecomando: tornerai al menu video.
B. Seleziona il video che desideri riprodurre.
C. Il video sarà ora visualizzato sul tuo iPhone/iPod.
Per tornare indietro e guardare un video sulla tua TV ripeti i passi A-B.
Ricaricare l’iPod
Collega l’adattatore CA alla iStation e alla presa di corrente.1.
Posiziona l’iPod/iPhone nell’adattatore dock e l’iPod/iPhone inizierà a ricaricarsi (il pulsante di accensione/spegnimento2.
della iStation non deve essere acceso per ricaricare l’iPod/iPhone).
Utilizzando l’adattatore CA, l’iPod/iPhone può ricaricarsi e riprodurre musica allo stesso tempo.3.
NOTA: Il tuo iPod non si caricherà utilizzando le batterie come fonte di alimentazione.

18
ITALIAN
Modalità di linea
La i Station permette di collegare altri dispositivi audio portatili, come iPod shufe, MP3, MiniDisc e lettori CD portatili, per
sfruttare il sistema di altoparlanti.
Rimetti il coperchio sull’unità dock: in questo modo, il connettore 30 pin verrà protetto da danni accidentali e dalla1.
polvere.
Inserisci il cavo di linea (spinotto ad angolo retto 3,5 mm - in dotazione) nell’ingresso di linea sulla parte posteriore2.
della iStation.
Collega l’altra estremità del cavo di linea (spinotto diritto 3,5 mm) al tuo dispositivo.3.
Imposta il volume del dispositivo al massimo.4.
Accendi la tua iStation.5.
Nota: Ricordati di rimuovere il cavo di linea quando utilizzi la base perché il cavo di linea disattiverebbe l’audio
proveniente dalla stazione.
Speciche tecniche
Potenza di uscita totale 10W (5W / canale)
Altoparlante per alte frequenze (22mm) per satellite
Medio raggio (50mm) per satellite
Alterazione <=1%
SNR: 60dB
Risposta in frequenza: 200Hz – 20 kHz
Adattatore di alimentazione in dotazione:5VCC@2A
Il collegamento video esterno è compatibile solo con:
iPhone / iPhone3G :640 x 480 pixels (Max)
iPod touch / touch 2G: 640 x 480 pixels (Max)
iPod classic: 640 x 480 pixels (Max)
iPod nano 3G / 4G: 640 x 480 pixels (Max)
iPod 5G: 480 x 480 pixels (Max)
Risoluzione dei problemi
Problema Cosa devo fare?
La i-Station non si accende quando utilizzo
l’alimentazione di corrente
Controlla che il cavo di alimentazione CA sia inserito correttamente nella presa a muro
e nella iStation.
Prova la iStation con l’alimentazione a 4 batterie AA.
Assicurarsi che l’interruttore batteria sul retro degli altoparlanti sia spento (OFF)
La i-Station non si accende quando utilizzo
l’alimentazione a batterie
Prova la iStation accendendola tramite corrente alternata. Se in questo modo funziona,
sostituisci le batterie con batterie nuove.
Assicurarsi che l’interruttore batteria sul retro degli altoparlanti sia acceso (ON)
Non c’è audio
Assicurati che per il tuo iPod/iPhone venga utilizzato l’adattatore dock adeguato.
Assicurati che il cavo di linea non sia collegato alla iStation.
Controlla lo stato di riproduzione (Play) sull’iPod/iPhone.
Prova ad aggiornare il rmware per il tuo iPod/iPhone usando la versione più recente
di iTunes disponibile sul sito www.apple.com/ipod/download
Controlla che la iStation non abbia attivato la modalità di risparmio energetico. Premi
qualsiasi pulsante per uscire da questa modalità.
Controlla che la funzione MUTE sia attivata (ON) premendo il pulsante di assenza
audio sul telecomando.

19
ITALIAN
La qualità dell’audio è scarsa
Se utilizzi batterie AA, sostituiscile con batterie nuove.
Assicurati che per il tuo iPod/iPhone venga utilizzato l’adattatore dock adeguato.
L’iPod/iPhone non si ricarica
Assicurati che per il tuo iPod/iPhone venga utilizzato l’adattatore dock adeguato.
Assicurati che l’interruttore della batteria sia spento (OFF).
Assicurati che la tua iStation sia collegata alla presa di corrente.
L’adattatore dock non si ssa nella i-Station Togli eventuali adattatori dock universali inseriti precedentemente nella stazione.
Ho perso un pezzo della i-Station Consulta la sezione sui pezzi di ricambio di questo manuale.
La i-Station va in standby mentre l’iPod/iPhone
sta riproducendo musica
Accedi alla libreria di iTunes
1. Seleziona tutti i brani e clicca su MODIFICA.
2. Seleziona Preferenze e poi Riproduci.
3. Attiva l’opzione Verica livello sonoro
4. Accedi al menu del tuo iPod/iPhone e attiva l’opzione Verica livello sonoro.
5. Ora puoi ripetere la sincronizzazione del tuo iPod/iPhone
Ora tutte le canzoni saranno allo stesso livello.
La i-Station va in standby mentre un dispositivo
audio collegato all’ingresso di linea sta riprod-
ucendo musica
Imposta il volume del dispositivo audio al massimo, poi usa la iStation per controllare
il livello del volume.
Il telecomando non funziona Sostituisci le batterie.
Controlla che le batterie siano inserite correttamente (polarità)
Assenza di immagini
Controlla che il cavo video (cavo AV giallo) sia collegato correttamente.
Controlla che il tuo iPod/iPhone sia impostato su Uscita TV (consulta il manuale del
tuo iPod/iPhone).
L’iPod/iPhone non risponde ai comandi Azzera l’iPod/iPhone (Vai su http://www.apple.com/support/)
Lista dei pezzi di ricambio
Nr. pezzo Codice articolo Nome articolo Prezzo
1 YAD011 ADATTATORE CA (SPINE DI ALIMENTAZIONE
INTERCAMBIABILI)
Per maggiori informazioni sui prezzi,
visita il sito www.logic3.com
2 YCB000K CAVO DI LINEA (NERO)
3 YRM027 TELECOMANDO
4 YCR027 Adattatori Dock per iPhone/iPhone 3G, touch/touch 2G, clas-
sic 80GB/120GB, nano 3G/4G
In caso di problemi di installazione della iStation (WIP027) contatta il nostro Centro di assistenza tecnica al numero
+44 (01923) 471 000 – La tariffa applicata è per telefonate nazionali/internazionali oppure scrivi un’email all’indirizzo
[email protected] - Per alcuni modelli, i pezzi di ricambio sono disponibili sul sito www.logic3.com

20
SPANISH
i-Station Rotate (WIP027) - Manual del usuario
Gracias por adquirir Logic3 i-Station Rotate. Como todos los productos de Logic3, se ha fabricado de acuerdo con los
estándares más exigentes y se ha sometido a diversas pruebas durante todo su desarrollo, para garantizar que tengas el
mejor producto posible. Lee atentamente este manual antes de usar i-Station Rotate.
Conguración del i-Station
Retira la cubierta de la base de la unidad. (ver g.1)1.
Introduce el soporte adecuado para tu iPod o iPhone en la zona de la base Dock. (ver g.2)2.
Elige la fuente de alimentación :3.
Corriente eléctrica (ver g.3A) - Conecta el conector para CC a la parte trasera del i-Station (CC 5 V).
- Selecciona y acopla el adaptador de enchufe correcto a la fuente de alimentación.
- Conecta la fuente de alimentación a un enchufe de pared y enciende el interruptor
principal.
- Asegúrate de que el interruptor de alimentación por pilas esté en la posición de
apagado (OFF).
Alimentación por pilas (ver g.3B) - Retira la tapa del compartimento para las pilas.
- Introduce 4 pilas de tipo AA de acuerdo con las marcas de polaridad.
- Vuelve a colocar la tapa del compartimento para las pilas.
- Coloca el interruptor de alimentación por pilas en la posición de encendido (ON).
ADVERTENCIA: es muy importante asegurarse de que las pilas están colocadas correctamente. En caso con-
trario (polaridad inversa), podrían causar lesiones personales y daños en tu i-Station.
Abre las patillas de la parte trasera de i-Station (situadas en la parte inferior) - (ver g. 4).4.
Introduce las pilas en el mando a distancia.5.
Introducción de iPod o el iPhone en posición vertical:6.
a. Introduce el soporte adecuado para tu iPod en la zona de la base.
b. Mueve la bandeja de la base para iPod/iPhone al centro de la base.
c. Introduce el iPod o el iPhone con rmeza en el soporte de la base (ver g. 5).
Visualización del iPod en posición horizontal con iTouch e iPhone:7.
a. Introduce el soporte adecuado para tu iPod o iPhone en la zona de la base Dock.
b. Mueve la bandeja de la base para iPod o iPhone al lado derecho de la base Dock.
c. Introduce el iPod o el iPhone con rmeza en el soporte de la base Dock (ver g. 6).
d. Ahora ya puedes girar libremente el iPod o el iPhone en posición horizontal (ver g. 6)
Cuando termines de usarlo, acuérdate de volver a colocar el soporte de la base Dock a la derecha del i-Station Rotate
para que la cubierta encaje correctamente.
Nota:
Después de haber acoplado el iPhone al altavoz, es posible que el iPhone deje de responder durante unos 5 segun-1.
dos, mientras se está comunicando con el altavoz.
No desconectes el iPod o el iPhone de los altavoces justo después de haberlos acoplado. Se recomienda desconectar 2.
el iPod o el iPhone una vez hayan transcurrido 10 segundos después de haberlos acoplado.
Si aparece un mensaje de advertencia en el iPhone después de haberlo acoplado, desconéc-3.
talo y acóplalo de nuevo.
Uso del i-Station
El dispositivo se enciende y se apaga mediante el botón de encendido situado en la parte delantera (el LED se ilumi-1.
nará en azul cuando esté encendido).
El sistema de altavoces viene congurado de fábrica al 30% de volumen. El volumen se muestra en la pantalla del 2.
iPod. Ajusta el volumen con las teclas de control de volumen (Arriba y Abajo) situadas en el lado derecho del i-Station.
La barra de volumen del iPod o el iPhone también se moverá en consonancia.
Modo de navegación para iPod/iPhone (para todos los iPods e iPhones en posición vertical; estas funciones
no funcionan con el iPod touch ni el iPhone en posición horizontal):
Table of contents
Languages:
Other Logic3 Docking Station manuals

Logic3
Logic3 Scuderia Fs1 Air User manual

Logic3
Logic3 MIP108 User manual

Logic3
Logic3 MIP011 User manual

Logic3
Logic3 Valve80 User manual

Logic3
Logic3 WIP043 User manual

Logic3
Logic3 i-Station TimeCurve User manual

Logic3
Logic3 ProDock WIP040 User manual

Logic3
Logic3 i-Station TimeCube WIS191 User manual

Logic3
Logic3 MIP103 User manual

Logic3
Logic3 i-Station Studio MIP199 User manual
Popular Docking Station manuals by other brands

BML
BML USB-C Multiport docking station L Instructions for use

HighPoint
HighPoint RocketStor 3112D Quick installation guide

StarTech.com
StarTech.com USBVGADOCK Specifications

Roadstar
Roadstar HRA-500IP instruction manual

RAM
RAM QUICK DRAW Assembly instructions

Basalte
Basalte EVE Plus 0131-CC installation manual