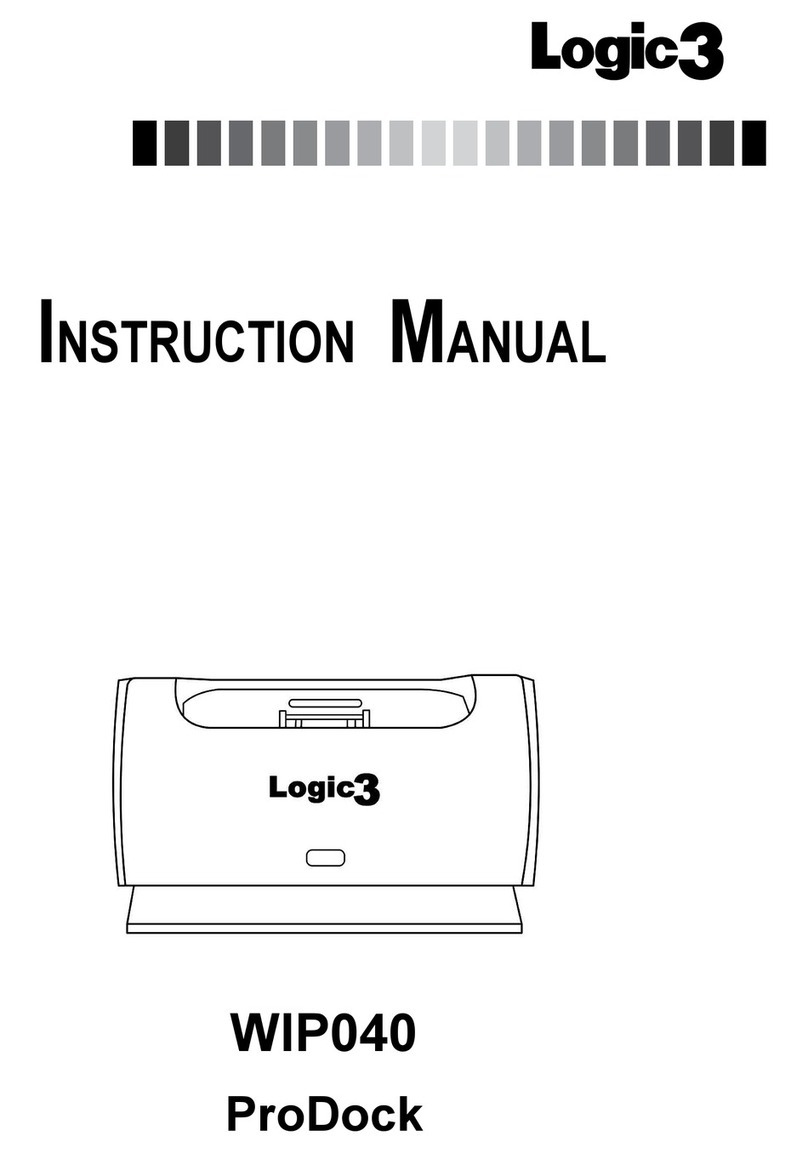
Logic3 WIP043 User manual


1
4
2
5
3
6
6 6
ProDock LCD
Remote
Control
Batteries
AAA x 2 iPhone 3Gs
Cradle A/V Cable Component
Cable
AC Adapter with
Interchangeable Plugs
(Euro 2pin and BS 3pin)
DC 5V 2A
Loading...
No Signal
LED Flashing
Pairing Mode
Connecting with
ProDock…..
Connection
Successful!
Please turn ON the
ProDock
Press and Hold
‘Select’ to start the
connection
1.Press & Hold
‘Connect’ button
for 3 secs (bottom
of the ProDock)
2.Press ‘Select’ to
continue
4 secs
3 secs
2 3
Thank you for purchasing the Logic3 LCD ProDock. As with all Logic3 products it has been built to the highest manufac-
turing standards and tested throughout its development, to ensure you get the best possible product. Please read through
and familiarize yourself with this manual before you use the LCD ProDock.
ENGLISH
ENGLISH
1. Plug in the DC jack to the rear of the ProDock (DC 5V) Select and t the correct plug adapter to suit your power supply.
Plug the power supply into your mains socket and turn the mains socket ON.
2. Press to switch ON the LCD remote control.
3. Press and hold ‘Select’ button (Enables connecting mode on the remote control), if “No Signal” Message is displayed
on the screen.
4. Press and hold ‘Connect’ button (located on the bottom of the ProDock) until the blue LED ashes quickly on front of
the dock (Enables connecting mode on the Pro Dock)
5. Press ‘Select’ button until LCD remote screen shows ‘Connecting with ProDock’.
6. LCD will show ‘Pairing in Progress’
7. Once pairing is established the LCD remote control screen will show ‘Connection Successfully’.
8. Blue LED on the ProDock will now stop ashing and stay on constantly.
Note: Once your dock is already connected it is not necessary to perfom the connecting process again. To
connect the ProDock to the LCD remote just connect power to the ProDock, dock your iPhone/ iPod on to the
ProDock and press any key on the LCD remote. (LCD remote control and ProDock will automatically connect)
- Solid – Remote and ProDock Conencted
- Flashing (Slowly): LCD Remote and ProDock Not Connected
- Flashing (Quickly): ProDock in Connecting mode

Menu button
Prev/Rw Search
Volume Down
Play/Pause
On/OFF
Scroll Down
Remote screen
(display iPod
navigation menu)
Select button
Skip/ Fwd Search
Scroll Up
Volume Up
CONNECTING C/V
(COMPOSITE VIDEO) CONNECTING TO Y/Pr/Pb
(COMPONENT VIDEO)
COMPONENT INAV IN AUDIO IN
CONNECTING TO
STEREO AMPLIFIER
VIDEO Y/G Pb/B Pr/R
AUDIO AUDIO AUDIO
12 3
C/V – Composite Video Y/Pr/
Pb - Component Video
Name of iPod Settings Settings
Music
Videos
Photos
Settings
Now Playing
Shufe Songs
Repeat Off
Video Setting
Enter Pairing mode
Video Out: C/V
TV Signal: PAL
Screen: Wide
Fit to Screen: Off
Alt Audio: On
Captions: Off
Subtitles: On
4 5
NOTE: It is important that after connecting your ProDock to your TV, the settings on the ProDock are set correctly
corresponding to your Video connection.
Some TV’s may not allow you to play music without the video; if this is the case, please connect the Audio output from the
LCD ProDock to the Stereo System; such as Hi-Fi or Stereo Amplier.
ENGLISH
ENGLISH
NOTE : As the ProDock can display both Composite and Component Video, the correct output setting must be
selected as shown below.
Problem What Should I do?
No Sound/Picture
Ensure the correct cradle is used with your iPhone/iPod.
Check play status on the iPhone/iPod
Ensure you have selected the correct video settings (refer to Selecting your Video
connection on your ProDock in this manual)
Check your iPod is set to TV out (refer to your iPhone/iPod manual for settings)
Check your format settings (PAL, NTSC refer to your iPhone/iPod manual for settings)
iPhone/Pod is not recharging Ensure the correct cradle is used with your iPhone/iPod.
Ensure your LCD ProDock is connected to the AC Mains
Cradle will not x into the Dock Remove any inserted cradles
Remote Control is not working
Replace Batteries
Check the Battery is inserted correctly (Polarity)
Ensure the LCD Remote is paired with the ProDock (refer to Pairing of LCD Remote and
ProDock in this manual)
Part No. Item code Item Name Price
1 YAD191K AC Power Adaptor (UK 3PIN PLUG)
For prices visit our website at
www.logic3.com
2 YCB012 Component RGB Cable
3 YCB011 Audio/Video Cable
Please use Item Codes above, when searching for Spare Parts on our Website www.logic3.com
Should you have any setup problems with the LCD ProDock (WIP043) please contact our Technical Support Hotline on +44
(01923)471000 – National/International call rates apply or Email [email protected] - Spare parts are available for some
models at our website www.logic3.com

1
4
2
5
3
6
ProDock Télécom-
mande
LCD
Piles AAA
x 2 Socle
iPhone
3Gs
Câble A/V Câble com-
posante
Adaptateur Secteur avec
prises interchangeables
(Euro à 2 broches et BS
à 3 broches)
DC 5V 2A
Charge-
ment en
cours…
No Signal
DEL clignotante
Pairing Mode
Connexion du
ProDock en
cours…
6 6
Connexion
Veuillez allumer le
ProDock.
Maintenez enfoncé
le bouton Select
pour lancer la
connexion.
1.Maintenez enfoncé
le bouton Connect
pendant 3 secondes
(en bas du ProDock).
2.Appuyez sur Select
pour continuer.
4 sek
3 sek
6 7
Merci d’avoir choisi le LCD ProDock de Logic3. À l’instar des autres produits Logic3, il répond aux standards de fabrica-
tion les plus élevés. Les tests qu’il a subits tout au long de son développement vous garantissent en outre le meilleur
produit possible. Veuillez vous familiariser avec ce guide avant d’utiliser le LCD ProDock.
FRENCH
FRENCH
1. Branchez la che de courant continu à l’arrière du ProDock (courant continu de 5V) ; Sélectionnez et branchez un adap-
tateur adapté à votre prise électrique ; Branchez votre prise électrique dans votre socle principal et allumez le socle
2. Appuyez sur pour allumer la télécommande LCD ;
3. Maintenez enfoncé le bouton Select pour lancer la connexion de la télécommande si le message Pas de signal
s’afche sur l’écran ;
4. Pour lancer la connexion du ProDock, maintenez enfoncé le bouton Connect, situé au bas du ProDock, jusqu’à ce
que la DEL bleue clignote rapidement sur le dock ;
5. Appuyez sur le bouton Select jusqu’à ce que le message Connexion du ProDock en cours s’afche sur l’écran de la
télécommande LCD ;
6. Le message Connexion en cours s’afche sur la télécommande LCD ;
7. Une fois la connexion établie, le message Connexion réussie s’afche sur l’écran de la télécommande LCD ;
8. La DEL bleue du ProDock s’arrête de clignoter pour émettre une lumière continue.
Remarque : Une fois que votre dock est connecté, vous n’avez plus à suivre la procédure de connexion.Pour
connecter le ProDock à la télécommande LCD, il vous suft d’allumer le ProDock, de brancher votre iPhone/iPod
au ProDock puis d’appuyer sur n’importe quelle touche de la télécommande LCD (la télécommande LCD et le
ProDock se connectent automatiquement).
- Lumière continue : La télécommande et le ProDock sont connectés ;
- Clignotement lent : La télécommande et le ProDock ne sont pas connectés ;
- Clignotement lent : Le ProDock est en cours de connexion.

Bouton Menu
Precédent/Retour
Baisse de Volume
Play/ Pause
On/OFF
Délement vers le bas
Écran d’afchage
Bouton Select
Passer/Avancer
Délement vers
le haut
Augmentation
de Volume
CONNEXION V/C
(VIDÉO COMPOSITE) CONNEXION Y/Pr/Pb
(VIDÉO COMPOSANTE)
COMPOSANTEAV IN AUDIO IN
CONNEXION DE
L’AMPLIFICATEUR
STÉRÉO
VIDEO Y/G Pb/B Pr/R
AUDIO AUDIO AUDIO
12 3
V/C : Vidéo composite
Y/Pr/Pb : Vidéo composante
Nom de l’iPod/iPhone Nom de l’iPod/iPhone Nom de l’iPod/iPhone
Musique
Vidéos
Photos
Paramètres
Lecture en cours
Aléatoire
Chansons
Répéter
Off
Paramètre vidéo
Entrez le mode de
connexion
Sortie vidéo : V/C
Signal télé : PAL
Largeur d’écran
Ajuster à l’écran : Off
Alt audio : On
Titres : Off
Sous-titres : On
8 9
REMARQUE : Une fois que le ProDock est connecté à votre téléviseur, vous devrez vous assurer que les
paramètres du ProDock sont adaptés à votre connexion vidéo.
Certains téléviseurs ne permettent pas de jouer de la musique sans la vidéo. Le cas échéant, veuillez connecter le
système stéréo à la sortie audio du ProDock LCD (Hi-Fi ou amplicateur stéréo)..
FRENCH
FRENCH
REMARQUE : Le ProDock vous propose de choisir entre la vidéo composante et la vidéo composite. Pour ce
faire, vous devez sélectionner une sortie vidéo comme suit :
Problème Que dois-je faire ?
Absence de son/image
Assurez-vous que vous utilisez le support universel approprié à votre iPod/iPhone.
Vériez le statut «Lecture» sur l'iPod/iPhone
Vériez que vous avez sélectionné les bons paramètres vidéo (voir la partie Sélection de
la connexion vidéo de votre ProDock du guide)
Vériez que votre iPhone/Pod est réglé sur TV out (pour les réglages, voir votre manuel
iPod)
Vériez les réglages du format (PAL, NTSC, pour les réglages, voir le manuel de votre
iPhone/iPod
L'iPod/iPhone ne se recharge
pas
Assurez-vous que vous utilisez le support approprié à votre iPod/iPhone.
Assurez-vous que votre ProDock est branché au secteur AC
Impossible de xer le support
dans l'ProDock
Enlevez tout support dock universel précédemment inséré
La télécommande ne fonctionne
pas
Remplacez les piles
Vériez que les piles sont insérées correctement (+/-)
Vériez que la télécommande est connectée au ProDock LCD (voir la partie Connexion de
la télécommande LCD au ProDock du guide)
Pièce No. Code produit Nom produit Tarif
1 YAD191K ADAPTATEUR AC (UK 3PIN PLUG) Pour en savoir plus sur les tarifs,
veuillez consulter notre site Web
: www.logic3.com
2 YCB012 Câble composante RVB
3 YCB011 Câble Audio/Vidéo
Pour les Liste des pièces de rechange/Prix, consultez notre site Web www.logic3.com
Si vous avez le moindre problème d’installation avec le LCD ProDock (WIP043), veuillez contacter notre Service d’assistance
technique au :+441923 471 000 – tarifs d’appels nationaux/internationaux en vigueur ou envoyez un e-mail à support@logic3.
com. Des pièces de rechange sont disponibles pour certains modèles sur notre site Web www.logic3.com

1
4
2
5
3
6
ProDock LCD- Fer-
mbedienung Batterien
AAA x2 iPhone 3Gs
Halter AV-Kabel Zusatzgeräte-
Kabel
Netzteil mit austusch-
baren Steckern (Euro
2-Pin und UK 3-Pin)
DC 5V 2A
Lade …
No Signal
LED blinkt
Pairing Mode
Verbinde mit der
ProDock…..
Bitte schalten Sie
die ProDock EIN
Drücken und halten
die ‘Select’-Taste
gedrückt, um das
Verbinden zu starten
1. Drücken & halten Sie
die ‘Connect’-Taste für 3
Sekunden gedrückt (am
Fuß der ProDock)
2. Drücken Sie die
‘Select’-Taste, um
fortzufahren
6 6
Verbindung
erfolgreich!
4 secs
3 secs
10 11
Vielen Dank, dass Sie sich für das LCD ProDock von Logic3 entschieden haben. Wie alle Produkte von Logic3 wurde
es mit den höchsten Produktionsstandards hergestellt und während der gesamten Entwicklung gründlich getestet, um
sicherzustellen, dass wir Ihnen das bestmögliche Produkt bieten können. Lesen Sie dieses Handbuch gründlich durch
und machen Sie sich mit dem Inhalt vertraut, bevor Sie das LCD ProDock verwenden.
GERMAN
GERMAN
1. Den DC-Stecker an der Rückseite der ProDock (DC 5V) einstecken. Wählen Sie den korrekten Adapter für die Stromver-
sorgung. Stecken Sie den Netzstecker der Stromversorgung in die Steckdose.
2. Drücken Sie , um die LCD-Fernbedienung einzuschalten.
3. Drücken und halten Sie die ‘Select‘-Taste gedrückt (das aktiviert den Verbinden-Modus der Fernbedienung), falls die
Meldung “No Signal” auf dem Display erscheint.
4. Drücken und halten Sie die ‘Connect‘-Taste gedrückt (diese bendet sich am Fuß der ProDock), bis die blaue LED an
der Vorderseite der Pro Dock schnell blinkt (das aktiviert den Verbinden-Modus der Pro Dock).
5. Drücken Sie die ‘Select’-Taste bis der Bildschirm der LCD-Fernbedienung die Meldung ‘Connecting with ProDock’
anzeigt.
6. LCD-Fernbedienung wird ‘Pairing in Progress’ anzeigen.
7. Wenn die Verbindung hergestellt wurde, wird der Bildschirm der LCD-Fernbedienung ‘Connection Successfully’
anzeigen.
8. Die blaue LED der ProDock wird dann aufhören zu blinken und dauerhaft leuchten.
Hinweis: Wenn die ProDock einmal verbunden wurde, ist es nicht notwendig den Verbindungsprozess ein weit-
eres Mal durchzuführen.
Um die ProDock mit der LCD-Fernbedienung zu verbinden, einfach das iPhone/iPod in die ProDock stecken und
eine beliebige Taste der LCD-Fernbedienung drücken. ( LCD-Fernbedienung und ProDock werden sich automa-
tisch verbinden).
- Dauerhaft – Fernbedienung und ProDock sind verbunden.
- Blinken (langsam): LCD-Fernbedienung und ProDock sind nicht verbunden.
- Blinken (schnell): ProDock bendet sich gerade im Verbindungs-Modus.

‘Menu‘-Taste
Vorh./Rückw. Suchen
Leiser
Spielen/ Pause
Ein/AUS
Nach unten scrollen
Bildschirm
‘Select‘-Taste
Überspr./Vorw. Suchen
Nach oben
scrollen
Lauter
VERBINDEN MIT C/V
(COMPOSITE-VIDEO) VERBINDEN MIT Y/Pr/Pb
(COMPONENT-VIDEO)
ZUSATZGERÄTE INAV IN AUDIO IN
VERBINDEN MIT STE-
REOANLAGE
VIDEO Y/G Pb/B Pr/R
AUDIO AUDIO AUDIO
12 3
C/V – Composite-Video
Y/Pr/Pb – Component-Video
Name des iPod/iPhone Name des iPod/iPhone Name des iPod/iPhone
Musik
Videos
Photos
Einstellungen
Aktue
Mischen
Lieder
Wiederholen
Aus
Video Eistellungen
Verbindungs-Modus
Video Out: C/V
TV-Signal: PAL
Bild: Weit
Bild anpassen: Aus
Alt. Audio: Ein
Titel: Aus
Untertitel: Ein
12 13
HINWEIS: Es ist wichtig, dass die ProDock korrekt auf die Einstellungen der Video-Verbindung angepasst wird,
nachdem die ProDock mit dem Fernseher verbunden wurde.
Einige Fernseher lassen eine Wiedergabe von Musik ohne Bildwiedergabe nicht zu. Sollte das der Fall sein, bitte den
Audio-Ausgang der LCD-ProDock mit der Stereo-Anlage verbinden (HiFi- oder Stereo-Verstärker)...
GERMAN
GERMAN
HINWEIS: Da die ProDock die beiden Formate Composite- und Component-Video darstellen kann, muss die kor-
rekte Einstellung (siehe unten) ausgewählt werden.
Problem Abhilfe
Kein Ton/Bild
Stellen Sie sicher, dass Sie die korrekte Universalbasis für Ihren iPod/iPhone verwenden
Überprüfen Sie den Wiedergabestatus des iPods/iPhone
Stellen Sie sicher, dass die korrekte Video-Einstellung gewählt wurde (Siehe: „Auswahl der
Video-Verbindung an der ProDock“ im Handbuch)
Prüfen, dass Ihr iPhone/iPod auf den TV-Ausgang gestellt ist (Einstellungen siehe iPod-
Handbuch)
Formateinstellungen überprüfen (PAL-, NTSC-Einstellungen siehe iPhone/iPod-Handbuch
Der iPod/iPhone wird nicht
aufgeladen
Stellen Sie sicher, dass Sie die korrekte Basis für Ihren iPod/iPhone verwenden
Stellen Sie sicher, dass Ihre ProDock an die Stromversorgung angeschlossen ist.
Die Basis rastet nicht in der
ProDock ein Entfernen Sie zuvor eingelegte Andockbasen.
Die Fernbedienung funktioniert
nicht
Ersetzen Sie die Batterie
Stellen Sie sicher, dass die Batterie richtig (mit korrekter Polarität) eingelegt ist.
Stellen Sie sicher, dass die Fernbedienung mit der LCD-ProDock verbunden ist
(Siehe: „Verbinden der LCD-Fernbedienung mit der ProDock“ im Handbuch)
Teil Nr. Artikelcode Artikelname Preis
1 YAD191K WECHSELSTROMADAPTER (UK 3 PIN
PLUG) Preise erfahren Sie auf www.
logic3.com2 YCB012 Zusatzgeräte-RGB-Kabel
3 YCB011 Audio/Video-Kabel
Die aktuellen Ersatzteilistliste/Preise nden Sie auf unserer Website www.logic3.com
Sollten Sie irgendwelche Probleme mit der Inbetriebnahme Ihres LCD ProDock (WIP043) haben, wenden Sie sich bitte an
unsere Technische Support-Hotline, Tel. +44 (01923) 471 000 – Es gelten die Gebühren für Inlands-/Auslandsgespräche –
oder senden Sie uns eine E-Mail an [email protected]. Für einige Modelle können Ersatzteile über unsere Website www.
logic3.com bestellt werden.
1
4
2
5
3
6
ProDock Telecomando
LCD 2x Batterie
AAA Supporto
per iPhone
3Gs
A/V Cable Cavo compo-
nenti
Adattatore CA con spine
intercambiabili (Euro
due poli e Britannica a
3 poli)
DC 5V 2A
Carica-
mento…
No Signal
LED lampeggiante
Pairing Mode
In connessione
a ProDock…..
Accendere il
ProDock
Premere e tenere
premuto il pulsante
"Select" per iniziare
la connessione
1.Premere e tenere
premuto il pulsante
"Connect" per 3 secondi
(parte inferiore del
ProDock)
2.Premere "Select" per
continuare
6 6
Connessione
riuscita!
4 sec.
3 sec.
14 15
Grazie per aver acquistato il LCD ProDock prodotto da Logic3. Come tutti i prodotti Logic3, è stato realizzato seguendo
i più alti standard di produzione e testato durante tutta la sua realizzazione per assicurare un prodotto di elevata qualità.
Consigliamo di leggere attentamente questo manuale prima di utilizzare il LCD ProDock.
ITALIAN
ITALIAN
1. Inserire il jack CC sul retro del ProDock (DC 5V) Selezionare e installare l’adattatore adeguato al proprio tipo di alimen-
tazione. Inserire il cavo di corrente nella presa e accendere la presa (dove questo è possibile).
2. Premere per accendere il telecomando LCD.
3. Se sullo schermo compare il messaggio “Nessun segnale”, premere e tenere premuto il pulsante “Select” per attivare
la modalità di connessione sul telecomando.
4. Premere e tenere premuto il pulsante “Connect” (situato nella parte inferiore del ProDock) no a quando l‘indicatore
LED blu sulla parte frontale del dock lampeggerà rapidamente per attivare la modalità di connessione sul Pro Dock
5. Tenere premuto il pulsante “Select” no a quando sullo schermo del telecomando LCD non compare la scritta “Con-
necting with ProDock”.
6. Sullo schermo LCD comparirà la scritta “Collegamento in corso”
7. Una volta che il collegamento sarà stato stabilito, sullo schermo del telecomando LCD comparirà il messaggio “Con-
nessione avvenuta con successo”.
8. L’indicatore LED del ProDock smetterà di lampeggiare e resterà costantemente acceso.
NOTA: Una volta che il dock è connesso, non sarà più necessario eseguire il processo di connessione.
Per connettere il ProDock al telecomando LCD sarà sufciente collegare il ProDock alla presa di corrente, in-
serire il proprio iPhone/iPod sul ProDock e premere un pulsante qualsiasi del telecomando LCD. (Il telecomando
LCD e il ProDock si connetteranno automaticamente)
- La luce è ssa: il telecomando e il ProDock sono connessi
- La luce lampeggia (lentamente): il telecomando LCD e il ProDock non sono connessi.
- La luce lampeggia (rapidamente): il ProDock è in modalità connessione

Pulsante menu
Prec./Indietro
Volume -
Play/Pausa On/
OFF
Giù
Schermo
Pulsante Select
Salta/Avanti
Su
Volume +
CONNESSIONE A C/V
(VIDEO COMPOSITO) CONNESSIONE A Y/Pr/Pb
(VIDEO A COMPONENTI)
INGRESSO COMPONENTIINGRESSO AV INGRESSO
AUDIO
CONNESSIONE AD
AMPLIFICATORE
STEREO
VIDEO Y/G Pb/B Pr/R
AUDIO AUDIO AUDIO
12 3
C/V: Video composito
Y/Pr/Pb: Video a componenti
Nome iPod/iPhone Nome iPod/iPhone Nome iPod/iPhone
Musica
Video
Foto
Impostazioni
In riproduzione
Shufe
Brani
Ripetizione
Off
Impostazioni video
Modalità di
connessione
Uscita video: C/V
Segnale TV: PAL
Schermo: panoramico
Adatta allo schermo: Off
Alt audio: On
Messaggi: Off
Sottotitoli: On
16 17
NOTA: dopo avere collegato il ProDock alla TV, è importante controllare che le impostazioni del ProDock cor-
rispondano esattamente a quelle della propria connessione video.
Alcune TV potrebbero non essere compatibili con la riproduzione di musica senza immagini. In questo caso sarà neces-
sario connettere l’uscita audio di LCD ProDock a un impianto Stereo hi- o a un amplicatore....
ITALIAN
ITALIAN
NOTA : ProDock è compatibile sia con video composito che con video a componenti, per questo motivo sarà
necessario selezionare le impostazioni in uscita adeguate come mostrato di seguito.
Problema Che cosa dovrei fare?
Il dispositivo non riproduce suoni/
immagini
Assicurati di avere utilizzato il supporto adeguato per iPhone/iPod.
Controlla lo stato della riproduzione di iPhone/iPod
Assicurati di avere selezionato le impostazioni video corrette (fai riferimento alla sezione
"Selezionare la connessione video su ProDock" del manuale)
Controlla che iPod sia impostato su TV out (fai riferimento al manuale di iPhone/iPod per la
congurazione)
Controlla la congurazione del formato video (PAL, NTSC fai riferimento al manuale di
iPhone/iPod per impostare la congurazione)
iPhone/Pod non si carica Assicurati di avere utilizzato il supporto adeguato per iPhone/iPod.
Assicurati che il tuo ProDock sia collegato alla rete elettrica
Il supporto non si aggancia al
Dock Rimuovi eventuali supporti già inseriti
Il telecomando non funziona
Sostituisci le batterie
Controlla che le batterie siano inserite correttamente
Assicurati che il telecomando sia collegato al tuo LCD ProDock (fai riferimento alla sezione
"Connettere il telecomando LCD al ProDock" del manuale)
Parte Nº Codice art. Nome articolo Prezzo
1 YAD191K Adattatore di corrente CA (Spina a tre poli UK)
Per informazioni sui prezzi, visita
il sito www.logic3.com
2 YCB012 Cavo componenti RGB
3 YCB011 Cavo Audio/Video
Quando cerchi pezzi di ricambio sul nostro sito www.logic3.com, assicurati di utilizzare i codici articolo elencati
qui sopra.
Per qualunque problema di congurazione relativo a LCD ProDock (WIP043), contatta la nostra assistenza clienti al numero
+44 (01923)471000 - Si applicano tariffe nazionali/internazionali o scrivi all'indirizzo [email protected]. I pezzi di ricambio
per alcuni modelli sono disponibili sul sito www.logic3.com

1
4
2
5
3
6
ProDock Mando a
distancia LCD 2 pilas AAA Soporte
de iPhone
3Gs
Cable A/V Cable compo-
nentes
Adaptador de corriente
con machos intercam-
biables (europeo de 2
polos y BS de 3 polos)
DC 5V 2A
Cargan-
do…
No Signal
Pairing Mode
Conectando con
ProDock…..
LED parpadea
Encienda ProDock
Mantenga pulsado
SELECT para
iniciar la conexión
1. Mantenga pulsado
en botón Connect
durante 3 segundos
(parte inferior de
ProDock)
2. Pulse SELECT para
continuar
6 6
Conexión
establecida
4 seg
3 seg
18 19
Gracias por adquirir el LCD ProDock de Logic3. Como todos nuestros productos, se ha sometido a pruebas exhaustivas
que garantizan su calidad. Antes de usarlo, te recomendamos que leas con detenimiento este manual.
SPANISH
SPANISH
1. Enchufe el conector de corriente continua a la parte trasera de ProDock (DC 5V). Seleccione el adaptador del enchufe
adecuado para su fuente de alimentación. Conecte la fuente de alimentación al enchufe y enciéndalo.
2. Pulse para encender el mando a distancia LCD.
3. Si aparece en pantalla el mensaje “Sin señal”, mantenga pulsado el botón SELECT para activar el modo conexión del
mando a distancia.
4. Mantenga pulsado el botón Connect (situado en la parte inferior de ProDock) hasta que el indicador LED azul de la
parte delantera parpadee rápidamente para activar el modo conexión de ProDock)
5. Pulse el botón SELECT hasta que “Conectando con ProDock” aparezca en la pantalla del mando LCD.
6. En la pantalla aparecerá “Asociación en progreso”.
7. Una vez producida la asociación, en la pantalla del mando a distancia aparecerá “Conexión establecida”.
8. El indicador LED azul del ProDock dejará de parpadear y permanecerá encendido de manera constante.
Aviso: Una vez conectado ProDock, no es necesario repetir el proceso de conexión.
Para conectar el ProDock al mando LCD, encienda ProDock, coloque su iPhone/iPod en el ProDock y pulse
cualquier botón del mando LCD (el mando a distancia LCD y ProDock se conectarán automáticamente).
- Luz ja - Mando y ProDock conectados
- Parpadeo lento – Mando LCD y ProDock no conectados
- Parpadeo rápido - ProDock en modo conexión

Botón Menu
Ant./Rebobinar
Bajar
volumen
Reproducción/Pausa
Encender/Apagar
Bajar
Pantalla
Botón Select
Salta/Avanti
Subir
Subir volumen
CONEXIÓN A C/V
(VÍDEO COMPUESTO) CONEXIÓN A Y/Pr/Pb
(VÍDEO COMPONENTES)
ENTRADA COMPONENTESENTRADA AV ENTRADA
AUDIO
CONEXIÓN A AMPLIFI-
CADOR ESTÉREO
VIDEO Y/G Pb/B Pr/R
AUDIO AUDIO AUDIO
12 3
C/V – Vídeo compuesto
Y/Pr/Pb – Vídeo componentes
Nombre iPod/iPhone Nombre iPod/iPhone Nombre iPod/iPhone
Música
Vídeos
Fotos
Ajustes
Reproduciendo
Aleatorio canciones
Canciones
Repetir
Apagar
Ajustes de vídeo
Modo asociación
Uscita video: C/V
Segnale TV: PAL
Schermo: panoramico
Adatta allo schermo: Off
Alt audio: On
Messaggi: Off
Sottotitoli: On
20 21
AVISO: después de conectar ProDock a la televisión, es muy importante que los ajustes de ProDock coincidan
con los de su conexión de vídeo.
Puede que algunos televisores no sean compatibles con la reproducción de música sin video. Si esto sucede, conecte la
salida de audio del LCD ProDock a un equipo estéreo de alta delidad o a un amplicador, por ejemplo.
SPANISH
SPANISH
AVISO: ProDock es compatible con video compuesto y con video componentes, es necesario seleccionar los
ajustes de salida adecuados como se muestra a continuación.
Problema ¿Qué debo hacer?
Sin sonido/imagen
Asegúrate de que estás utilizando el soporte de base Dock universal correcto para tu iPod/
iPhone
Comprueba el estado de reproducción del iPod/iPhone
Asegúrese de que ha seleccionado los ajustes de vídeo adecuados (consulte la sección del
manual “Seleccionar la conexión de vídeo en su ProDock”)
Compruebe que su iPhone/Pod está en la salida de TV (véase ajustes en el manual del
iPod)
Comprobar sus ajustes de formato (PAL, NTSC véase ajustes en el manual del iPhoneiPod)
El iPod/iPhone no se recarga Comprueba que estás usando el soporte correcto para el iPod/iPhone.
Comprueba que el ProDock está conectado a la corriente
El soporte no se sujeta en el
ProDock Extrae cualquier soporte universal que hayas introducido anteriormente
El mando a distancia no funciona
Cambia las pilas
Comprueba que las pilas están colocadas correctamente (polaridad)
Asegúrese de que el mando a distancia está asociado al LCD ProDock (consulte la sección
del manual “Asociar el mando LCD a ProDock”)
Referencia Código de artículo Nombre de artículo Precio
1 YAD191K ADAPTADOR CA (UK 3PIN PLUG) Para ver la lista de precios,
visita nuestro sitio web en www.
logic3.com
2 YCB012 Cable componentes RGB
3 YCB011 Cable Audio/Vídeo
Para Lista de piezas de recambio / precios visite nuestro sitio web en www.logic3.com
Si experimenta problemas de conguración con el LCD ProDock (WIP043), por favor, póngase en contacto con nuestra
Hotline de Apoyo Técnico al +44 (01923) 471 000 – Se aplicarán las tarifas telefónicas nacionales/internacionales, o envíe
un e-mail a [email protected] - En nuestro sitio web www.logic3.com encontrará recambios disponibles para algunos
modelos.

1
4
2
5
3
ProDock Comando à
distância LCD 2 pilhas
AAA Base de
ligação para
iPhone 3Gs
Cabo A/V Cabo de vídeo
componente
Transformador AC
com chas amovíveis
(europeia de 2 pinos e
britânica de 3 pinos)
DC 5V 2A
A car-
regar…
No Signal
Pairing Mode
A ligar ao
ProDock…
LED intermitente
Ligue o ProDock.
Mantenha premido
“Select” para iniciar
a ligação.
1.Mantenha premido
o botão “Connect”
durante 3 segundos
(ProDock, em baixo).
2.Carregue em
“Select’” para
continuar.
6 6
Ligação bem
sucedida!
4 seg
3 seg
6
22 23
Obrigado por adquirir o Logic3 LCD ProDock. Como todos os produtos Logic3, foi construído segundo os mais altos
padrões de fabrico e testado durante o seu desenvolvimento, para assegurar que é o melhor produto possível. Por favor
leia este manual e familiarize-se com ele, antes de utilizar o LCD ProDock.
PORTUGUESE
PORTUGUESE
1. Ligue a cha de alimentação DC na parte de trás do ProDock (DC 5 V). Seleccione e encaixe o adaptador correspon-
dente à sua rede eléctrica. Ligue a cha de alimentação à tomada e active a tomada.
2. Carregue em para ligar o comando à distância LCD.
3. Mantenha premido o botão “Select” (seleccionar) (activa o modo de ligação no comando à distância) se aparecer a
mensagem “Sem sinal” no ecrã.
4. Mantenha premido o botão “Connect” (ligar) (localizado na parte de baixo do ProDock) até o LED azul piscar rapida-
mente na parte frontal da base de ligação (activa o modo de ligação no ProDock).Pulse el botón SELECT hasta que
“Conectando con ProDock” aparezca en la pantalla del mando LCD.
5. Carregue no botão “Select” (seleccionar) até o ecrã do comando LCD indicar “A ligar ao ProDock”.
6. O LCD mostra “Emparelhamento em curso”.
7. Uma vez estabelecido o emparelhamento, o ecrã do comando à distância LCD indica “Ligação bem sucedida!”.
8. O LED azul no ProDock deixa de estar intermitente e ca ligado permanentemente.
Nota: Depois de ligar a base, não é necessário efectuar novamente o processo de ligação.
Para ligar o ProDock ao comando LCD, basta ligar a alimentação do ProDock, encaixar o iPhone/iPod no
ProDock e carregar em qualquer tecla no comando LCD (o comando à distância LCD e o ProDock ligam-se
automaticamente).
- Constante – comando e ProDock ligados.
- Intermitente (lento): comando LCD e ProDock não ligados.
- Intermitente (rápido): ProDock em modo de ligação.

Botão de menu
Anterior/Retrocesso
Diminuir
volume
Reproduzir/pausa
Ligar/desligar
Deslocar para baixo
Ecrã de visualização
Botão de selecção
Seguinte/Avanço rápido
Deslocar para
cima
Aumentar
volume
LIGAÇÃO C/V
(VÍDEO COMPOSTO) LIGAÇÃO Y/Pr/Pb
(VÍDEO COMPONENTE)
ENTRADA DE COMPONENTEENTRADA AV ENTRADA
ÁUDIO
LIGAÇÃO A AMPLIFICA-
DOR ESTÉREO
VIDEO Y/G Pb/B Pr/R
AUDIO AUDIO AUDIO
12 3
C/V – Vídeo composto
Y/Pr/Pb – Vídeo componente
Nombre iPod/iPhone Nombre iPod/iPhone Nombre iPod/iPhone
Música
Vídeos
Fotograa
Denições
Em reprodução
Aleatório
Títulos
Repetir
Desligado
Denição vídeo
Modo
emparelhamento
Saída vídeo: C/V
Sinal de TV: PAL
Ecrã: panorâmico
Ajustar ao ecrã: não
Áudio Alt: sim
Descrições: não
Legendas: sim
24 25
ANOTA: É importante que, depois de ligar o ProDock ao televisor, as denições no ProDock estejam conguradas
correctamente de acordo com a ligação de vídeo utilizada.
Alguns televisores podem não permitir a reprodução de música sem vídeo; nesse caso, ligue a saída áudio do LCD
ProDock ao sistema estéreo, como uma aparelhagem de alta-delidade ou um amplicador estéreo..
PORTUGUESE
PORTUGUESE
NOTA: Uma vez que o ProDock pode apresentar vídeo composto e vídeo componente, é necessário seleccionar
a denição de saída correcta, como indicado em baixo.
Problema O que devo fazer?
Sem Som/Imagem
Assegure-se de que está a utilizar o suporte de encaixe universal correcto para o seu iPod/
iPhone
Verique o estado da reprodução no iPod/iPhone
Certique-se de que seleccionou as denições de vídeo correctas (consulte a secção
“Seleccionar a ligação de vídeo no LCD ProDock” do manual).
Verique se o seu iPhone/Pod está denido para saída de TV (consulte o manual do seu
iPod para obter mais informações sobre denições)
Verique as suas denições de formato (PAL, NTSC, consulte o manual do seu iPod para
obter mais informações sobre denições)
O iPod/iPhone não está a
recarregar
Assegure-se de que está a utilizar o suporte correcto para o seu iPod/iPhone
Assegure-se de que a sua ProDock está ligada à cha eléctrica
O suporte não encaixa na
ProDock Remova quaisquer suportes de encaixe universal anteriormente inseridos
O Controlo Remoto não está a
funcionar
Substitua a Pilha
Assegure-se de que a Pilha está inserida correctamente (Polaridade)
Certique-se de que o comando está emparelhado com o LCD ProDock (consulte a secção
“Emparelhar o comando com o ProDock” do manual).
Parte Nº. Código Nome do objecto Preço
1 YAD191K ADAPTADOR AC (UK 3PIN PLUG) Para informações sobre os
preços, visite o nosso website
em www.logic3.com
2 YCB012 Cabo de sinal componente RGB
3 YCB011 Cabo de áudio/vídeo
Para informações sobre os Lista de Peças/Preços, visite o nosso website www.logic3.com
Se tiver algum problema de conguração com o LCD ProDock (WIP043), contacte a nossa Linha de Suporte Técnico +44
(01923) 471 000 – Vigoram as tarifas de ligação nacionais e internacionais. Ou contacte-nos por e-mail para support@logic3.
com Para alguns modelos, as peças para substituição podem ser obtidas a partir do nosso website www.logic3.com

1
4
2
5
3
6
ProDock LCD Afstands-
be-diening Batterijen
AAA x2 Telefoon
3Gs Laad-
basis
A/V-kabel Component-
kabel
AC-adapter met
onderling verwisselbare
stekkers (Euro 2pennen
en UK 3pennen)
DC 5V 2A
Bezig met
laden …
No Signal
LED knippert
Pairing Mode
Verbinding met
ProDock wordt
gemaakt…
Schakel de
ProDock uit aub
Druk op “Select”
en houd de toets
ingedrukt om de
verbinding te starten
De toets “Connect 1
indrukken in ingedrukt
houden gedurende 3
sec (onderkant van de
ProDock)
2. Druk op ‘Select’ om
verder te gaan
6 6
Verbinding
succesvol!
4 secs
3 secs
26 27
Hartelijk dank voor de aankoop van Logic3 LCD ProDock. Zoals bij alle Logic3 producten is deze volgens de hoogste
kwaliteits- en fabrieksnormen ontworpen en getest om het best mogelijke product te kunnen bieden. Lees deze handlei-
ding aandachtig door voordat je de LCD ProDock in gebruik neemt
DUTCH
DUTCH
1. Sluit de DC-stekker aan op de achterkant van de ProDock (DC 5V) Kies de juiste stekkeradapter voor uw stroomvoorz-
iening. Steek de stroomstekker in het stopcontact en zet de stroom op ON (aan).
2. Druk op om de LCD-afstandsbediening IN te schakelen.
3. Druk op de toets ‘Select’ en houd de toets ingedrukt (Dit activeert de verbindingsmodus met de afstandsbediening),
als het bericht “No Signal” (geen signaal) op het scherm verschijnt.
4. Druk op de toets ‘Connect’ en houd de toets ingedrukt (deze toets bevindt zich aan de onderkant van de ProDock) tot
de blauwe LED aan de voorkant van het dock snel knippert (Activeert de verbindingsmodus op de Pro Dock)
5. Druk op de toets ‘tot op het LCD-scherm van de afstandsbediening ‘Connecting with ProDock’ (verbinding met
Prodock wordt gemaakt) verschijnt.
6. Op het LCD-scherm zal verschijnen ‘Pairing in Progress’ (Paring is bezig)
7. Zodra de paring voltooid is, zal het LCD-scherm van de afstandsbediening het bericht ‘Connection Successfully’
(verbinding succesvol) tonen.
8. De blauwe LED op de ProDock zal nu stoppen met knipperen en zal constant branden.
Opmerking: Als uw dock eenmaal verbonden is, is het niet nodig om het verbindingsproces opnieuw uit te
voeren.
Om de ProDock met de LCD-afstandsbediening te verbinden, moet u de ProDock gewoon aansluiten op het
stroomnet, uw iPhone/iPod op de ProDock docken en op gelijk welke toets van de LCD-afstandsbediening druk-
ken. (LCD-afstandsbediening en ProDock zullen automatisch verbinden)
- Vast – Afstandsbediening en ProDock zijn verbonden
- (Traag) knipperend: LCD-afstandsbediening en ProDock zijn niet verbonden
- (Snel) kniperend: ProDock in verbindingsmodus

Menutoets
Vorige/ Achterwaarts
Volume
verlagen
Weergave/pauze Aan/UIT
Pijl omlaag
Display
Toets selecteren
Verspringen/Voorwaarts
zoeken
Pijl naar boven
Volume
verhogen
VERBINDING C/V
(COMPOSIETE VIDEO) VERBINDING C/V
(COMPOSIETE VIDEO)
COMPONENT INAV IN AUDIO IN
VERBINDING MET
STEREOVERSTERKER
VIDEO Y/G Pb/B Pr/R
AUDIO AUDIO AUDIO
12 3
C/V – Composiete video
Video Y/Pr/Pb - Componente
video
Naam van iPod/iPhone Naam van iPod/iPhone Naam van iPod/iPhone
Muziek
Video’s
Foto’s
Instellingen
Wordt nu
weergegeven
Shufe (mengen)
Songs
Herhalen
Uit
Video-instelling
Geef paringmodus in
Video uit: C/V
TV-signaal: PAL
Scherm: breed
Aanpassen aan
scherm: Uit
Alt audio: aan
Titels: Uit
28 29
OPMERKING: Het is belangrijk dat de instellingen op de ProDock na het tot stand brengen van de verbinding tus-
sen uw ProDock correct overeenstemmen met uw videoverbinding.
Bij sommige TV’s kunt u geen muziek met de video weergeven; als dat het geval is, sluit de Audio-uitgang van de LCD
ProDock dan aan op het stereosysteem, zoals Hi-Fi of Stereoversterker.
DUTCH
DUTCH
OPMERKING: Aangezien de ProDock zowel Composiete als Componente video kan weergeven, moet de juiste
uitgaande instelling ingesteld worden zoals hieronder getoond wordt.
Probleem Wat moet ik doen?
Geen beeld/geluid
Controleer of de juiste universele dockhouder voor uw iPod/iPhone wordt gebruikt
Controleer de afspeelstatus op de iPod/iPhone
Controleer of u de juiste videoinstellingen gecontroleerd heeft (zie Selectie van uw
videoverbinding op de LCD-ProDock in de gebruiksaanwijzing)
Controleer of uw iPhone/iPod is ingesteld op TV uit (zie de handleiding bij uw iPod voor
instellingen)
Controleer uw formaatinstellingen (PAL, NTSC. Zie de handleiding bij uw iPhone/iPod voor
instellingen).
iPod/iPhone laadt zich niet op Controleer of u de juiste houder voor uw iPod/iPhone gebruikt
Controleer of uw ProDock aangesloten is op het elektriciteitsnet
Houder past niet in het ProDock Verwijder eerder geplaatste universele dockhouders
De afstandsbediening werkt niet
Batterij vervangen
Controleer of de batterij juist is geplaatst (met de polen in de juiste positie)
Controleer of de Afstandsbediening gepaard is met het LCD ProDock (zie Paren van de
afstandsbediening de ProDock in de gebruiksaanwijzing)
Onderdeelnr.: Voorwerpcode Voorwerpnaam Prijs
1 YAD191K AC-ADAPTER (UK 3PIN PLUG)
Bezoek onze website www.
logic3.com om prijzen te bekijken
2 YCB012 Componente RGB-kabel
3 YCB011 Audio-/videokabel
Kijk voor Lijst reserveonderdelen/Prijzen op onze website, www.logic3.com
Mocht u problemen hebben bij het instellen van de LCD ProDock (WIP043), raadpleeg dan onze technische hulplijn via +44
(0)19 23 47 10 00 (internationaal beltarief) of via e-mail [email protected]. Voor sommige modellen zijn reserveonderdelen
verkrijgbaar op onze website, www.logic3.com

K09-00620-01
WARNING
Follow all operating and usage instructions
Do not submerge or use the i-Station in or near water
Do not disassemble any part of the i-Station
Do not place heavy objects on top of the i-Station
Do not allow small children to play with the i-Station unsupervised
Keep i-Station away from extreme temperatures and store away from dust and humidity
Unplug this product from the power source before cleaning
Do not use liquid or aerosol cleaner, use only a damp cloth for cleaning
Logic3 International Ltd. of Watford, UK is the owner of the Logic3 and i-Station registered trademark as well as registered and unregistered design
rights and copyright subsisting in various products within its range. “Made for iPod” means that an electronic accessory has been designed to connect
specically to iPod and has been certied by the developer to meet Apple performance standards. “Works with iPhone” means that an electronic
accessory has been designed to connect specically to iPhone and has been certied by the developer to meet Apple performance standards.
Apple is not responsible for the operation of this device or its compliance with safety and regulatory standards. iPod is a trademark of Apple Inc.,
registered in the U.S. and other countries. All other trademarks, copyrights and trade names are registered properties of their respective owners.
Logic3 are continually updating their products in the interest of improving the quality and design. As a result, some features and the appearance of
the product may vary from those shown on this packaging. Copyright in this manual is owned by Logic3 International Ltd.
Rhodes Way, Watford
WD24 4YW UK
Tel: +44 (0) 1923 471 000
Email: [email protected]
www.logic3.com
For Spares/ Prices visit our website at www.logic3.com
Other manuals for WIP043
1
Table of contents
Languages:
Other Logic3 Docking Station manuals

Logic3
Logic3 Scuderia Fs1 Air User manual

Logic3
Logic3 MIP103 User manual

Logic3
Logic3 WIP027 i-Station Rotate User manual

Logic3
Logic3 Valve80 User manual

Logic3
Logic3 MIP100 JiveBox User manual

Logic3
Logic3 i-Station TimeCurve User manual

Logic3
Logic3 MIP190 User manual

Logic3
Logic3 ProDock WIP040 User manual

Logic3
Logic3 MIP108 User manual

Logic3
Logic3 i-Station TimeCube WIS191 User manual