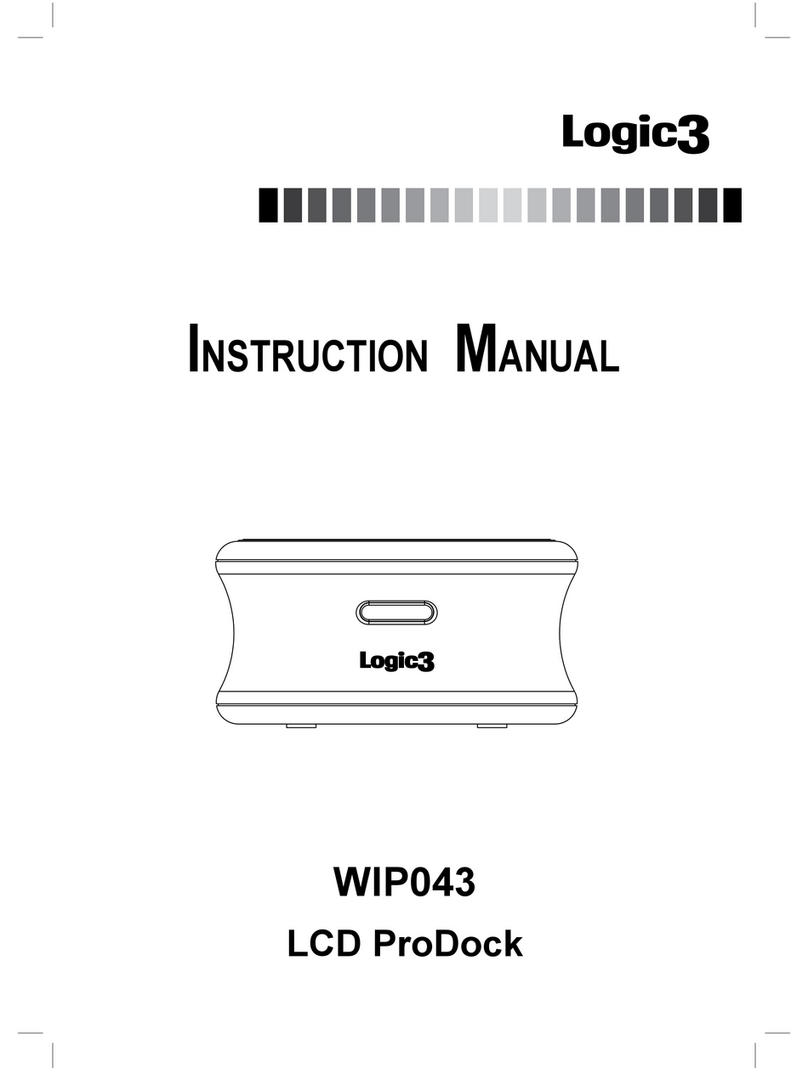
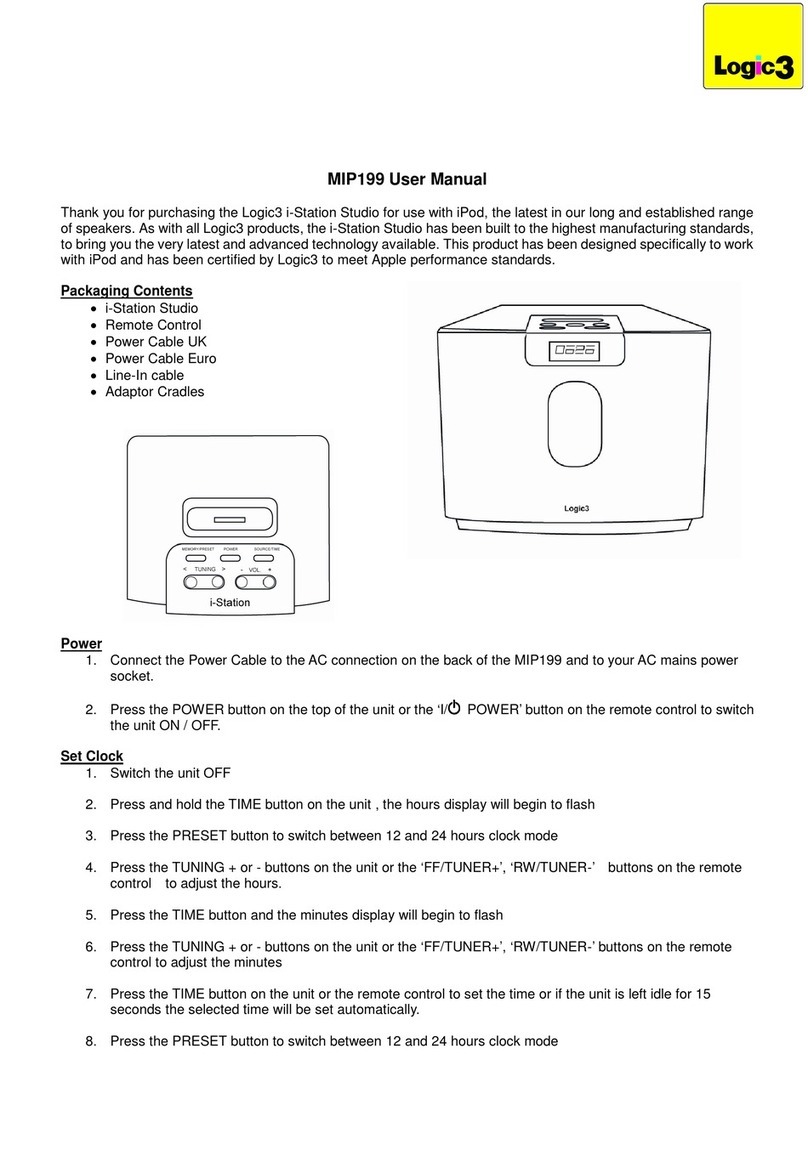
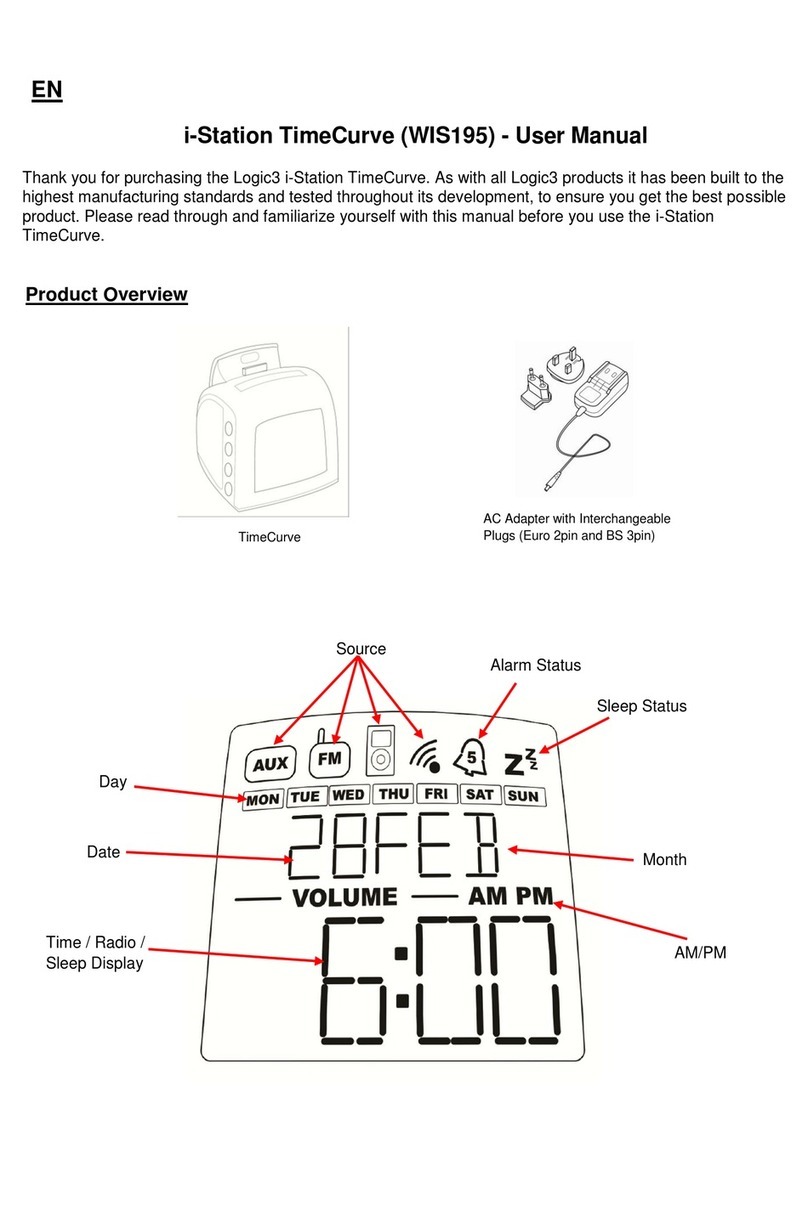
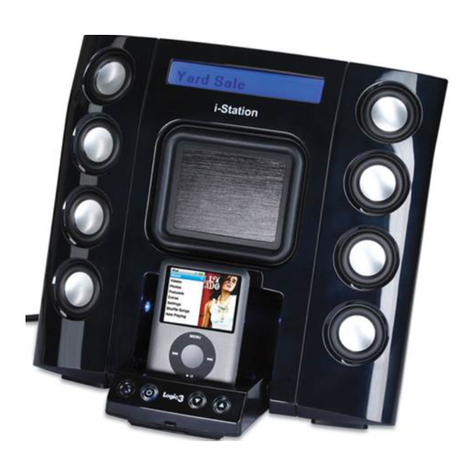
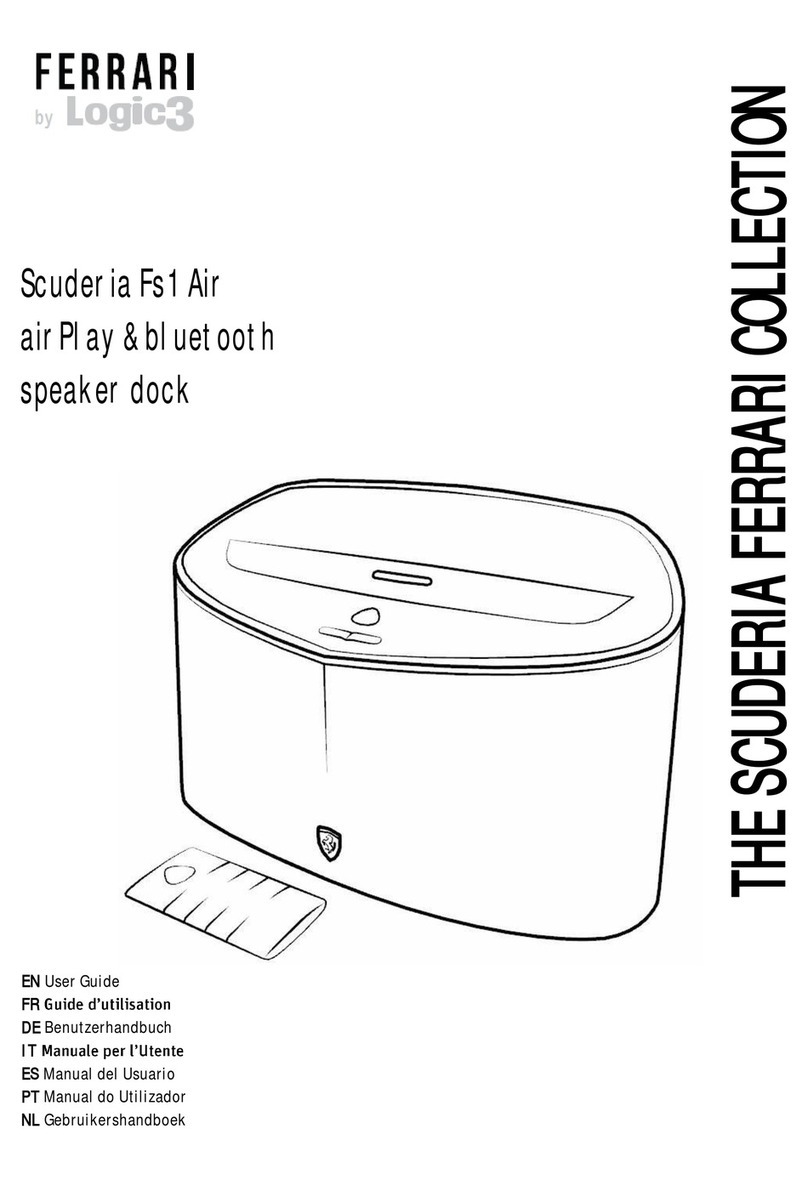
Logic3 MIP011 User manual

MIP011
INSTRUCTION MANUAL

2
MIP011
3
Logic
i-Station 11
i-Station
Logic
3
i-Station
Logic
3
i-Station
Logic
3
i-Station11
Insert correct cradle
Power Switch Volume Up/Down
AC Adapter with Interchangeable
Plugs (Euro 2pin and BS 3pin)
Logic
3
Contents
Set up of i-Station
MIP011
3
Logic
i-Station 11
Universal Cradle Line-in cable (3.5mm)
1
3a
or
4
2
3b
DC 5V 1.2A
ENGLISH

3
Logic
3
MIP011
3
Logic
i-Station 11
MD
MiniDisc
CD
MP3
Set up of Line In
LINE IN
i-Station11 (MIP011) - User Manual
Thank you for purchasing the Logic3 i-Station11. As with all Logic3 products it has been built to the
highest manufacturing standards and tested throughout its development, to ensure you get the best
possible product. Please read through and familiarize yourself with this manual before you use the
i-Station11.
Set up of i-Station
1. Press the release button to unlock the docking base for the iPod, open it until it locks into position.
2. Insert the appropriate cradle (supplied with your iPod) into the universal dock on the speaker base;
if you are using a line in device a blank cradle is supplied.
3. Choose your source of power :-
Mains Power (3a) - Plug in the DC jack to the rear of the i-Station (DC 5V)
-Selectandtthecorrectplugadaptertosuityourpowersupply
- Plug the power supply into your mains socket and turn the mains socket ON
Battery Power (3b) - Remove the Battery compartment covers
- Insert 4 x AA batteries observing the Polarity Markings
- Replace the Battery compartment covers
WARNING: Please ensure that the batteries are inserted correctly. If the batteries are in-
serted incorrectly (reversed polarity), this may cause personal injury as well as damage to
your i-Station
4. Dock your iPod into the docking base of the speaker.
ENGLISH

4
ENGLISH
Using the i-Station
1. Power is turned ON/OFF via the Power Button located on the front of the Docking Base (Button will
illuminate Blue when switched ON).
2. The speaker system is preset to a 30% volume level. The volume can be adjusted by using the Up
and Down keys located on front of the docking base.
3. The docking base can be folded up by pressing in the two catches on either side of the dock, fold-
ingitupwardsuntilitlocksushintoposition
Recharging the iPod
1. Connect the AC adaptor to the i-Station and turn ON at the mains socket.
2. Dock your iPod onto the speaker and the iPod will begin to recharge (The i-Station Power button
does not have to be turned ON in order to recharge the iPod).
3. iPod can recharge and play music at the same time when using the AC adapter.
NOTE: Your iPod will not charge when using Batteries as the Power Source.
Line in Mode
Thei-StationalsoofferstheabilitytoallowotherportableaudiodevicessuchasiPodshufe,MP3,
MiniDisc and Portable CD Players to be connected for use as a speaker system.
1. Insert the universal cradle into the docking base, this will allow you to rest your device on the dock-
ing base without damaging the 30 pin connector.
2. Plug in the line in cable (3.5mm right angle jack) into the rear of the i-Station Line in Socket.
3. Connect the other end of the line in cable (3.5mm straight jack) to your device (headphone/line out
socket).
4. Set your device volume to Maximum.
5. Turn on your i-Station.
Note: Remember to remove the line in cable when using the docking station as the line in cable will
override any sound coming from the docking station.
System Specications
Total Continuous Power: 6W RMS (3W x 2)
Satellite Speakers: 3Watts/Channel
Speaker Drivers: Two 40mm Full Range Speaker Cone Drivers
Signal to Noise Ratio: 60dB@1W
Frequency Response: 200Hz – 20 kHz

5
ENGLISH
Trouble Shooting
Problem What Should I do?
i-Station does not turn ON when pow-
ered via AC Mains
ChecktheACpowercableisconnectedrmlyintotheACwall
outlet and the i-Station.
Test the i-Station by powering the unit with 4 x AA batteries.
i-Station does not turn ON when pow-
ered via Batteries
Test the i-Station by powering the unit via AC Mains, if this works
replace the batteries with new ones.
No sound
Ensure the correct universal dock cradle has been used for your
iPod.
Ensure the line in cable is not plugged into the i-Station
Check Play status on the iPod
PleasetryupdatingthermwareforyouriPodusingthelatest
iTunes which is available from www.apple.com/ipod/download
Sound Quality is poor
If you are using AA Batteries, replace them with new ones.
Ensure the correct cradle is used with your iPod.
iPod is not recharging
Ensure the correct cradle is used with your iPod.
Ensure sure your i-Station is connected to the AC Mains
Cradlewillnotxintothei-Station Remove any previously inserted universal dock cradles
I have lost a part for the i-Station Please refer to the spare parts section in this manual
Spare Part List
Part No. Item code Item Name Price
1 YAD011 AC ADAPTOR (INTERCHANGEABLE POWER PLUGS) For prices visit
our website at
www.logic3.com
2 YCB000K LINE IN CABLE (BLACK)
Should you have any setup problems with the i-Station11 (MIP011) please contact our Technical Support
Hotline on +44 (01923) 471 000 – National/International call rates apply or Email [email protected] -
Spare parts are available for some models at our website www.logic3.com

6
FRENCH
MIP011
3
Logic
i-Station 11
i-Station
Logic
3
i-Station
Logic
3
i-Station
Logic
3
i-Station11
Insérez le support
approprié
Bouton marche-arrêt Volume Up/Down
AdaptateurACavecches
d’alimentation interchangeables
(Euro 2-pin et BS 3-pin)
Logic
3
Contenu
Installation d’i-Station
MIP011
3
Logic
i-Station 11
Support universel Cable Line-in (3,5mm)
1
3a
ou
4
2
3b
DC 5V 1.2A

7
FRENCH
Logic
3
MIP011
3
Logic
i-Station 11
MD
MiniDisc
CD
MP3
Installation du câble Line-in
LINE IN
i-Station11 (MIP011) – manuel de l’utilisateur
Merci d’avoir acheté l’i-Station11 de Logic 3. Comme tous les produits Logic 3, il a été créé selon les
normes de fabrication les plus exigeantes et testé tout au long de son développement, de façon à ce
que vous obteniez le meilleur produit possible. Veuillez lire et vous familiariser avec ce manuel avant
d’utiliser l’i-Station11.
Installation d’i-Station
1. Appuyez sur le bouton pour déverrouiller la base d’accueil du iPod, puis ouvrez-la jusqu’à ce qu’elle
se bloque dans la bonne position.
2. Insérez le support approprié (fourni avec votre iPod) dans le Dock universel sur la base du haut-
parleur; si vous utilisez un périphérique line-in, un support vide est fourni.
3. Choisissez votre source d’alimentation :
Alimentation par le Secteur (3a) - Branchez le jack DC à l’arrière d’i-Station (DC 5V)
- Sélectionnez et branchez l’adaptateur approprié à votre alimenta-
tion électrique
- Branchez l’alimentation électrique dans la prise de courant du
secteur et appuyez sur ON si vous disposez d’une prise à inter-
rupteur.
Alimentation par piles (3b) - Enlevez les couvercles des compartiments à piles
- Insérez 4 piles AA en respectant les signes + et -
- Replacez les couvercles sur les compartiments à piles
ATTENTION : Veuillez vous assurer que les piles sont insérées correctement. Une mauvaise
insertion (polarité inversée) pourrait causer des dommages corporels et endommager votre
i-Station.
4. Placez votre iPod dans la station d’accueil du haut-parleur.

8
FRENCH
Utilisation d’i-Station
1. Vous pouvez allumer ou éteindre le i-Station à l’aide du bouton marche-arrêt (ON/OFF) situé sur le
devant de la station d’accueil (le bouton s’allume en bleu quand il est sur ON).
2. Lesystèmedehaut-parleursestrégléàunniveaudevolumede30%.Levolumepeutêtremodié
en utilisant les touches de réglage du volume situées sur le devant de la station d’accueil.
3. La station d’accueil peut être pliée en appuyant sur les deux fermetures de chaque côté du Dock,
l’amenant à se plier vers le haut jusqu’à ce qu’elle se bloque dans la bonne position.
Recharger votre iPod
1. Connectez l’adaptateur AC à l’i-Station et assurez-vous que la prise du secteur est en marche.
2. Placez votre iPod sur le haut-parleur et le iPod commencera à se recharger (Il n’est pas nécessaire
que le bouton marche/arrêt soit sur ON pour que le iPod se recharge).
3. Vous pouvez recharger votre iPod tout en écoutant de la musique en utilisant l’adaptateur AC.
REMARQUE : Vous ne pouvez pas recharger votre iPod en utilisant les piles comme source
d’alimentation
Mode Line-in
L’i-Station vous offre également la possibilité de connecter d’autres périphériques portables tels que le
iPodShufe(modealéatoire),MP3,MiniDiscetlecteursdeCDportables,andelesutilisercomme
systèmes de haut-parleurs.
1. Insérez le support universel dans la station d’accueil; ceci vous permettra de placer votre appareil
sur la station d’accueil sans abîmer le connecteur à 30 broches.
2. Branchez le câble line-in (jack à angle droit 3,5mm) à l’arrière de la prise line-in d’i-Station.
3. Connectez l’autre bout du câble line-in (jack raide 3,5mm) à votre appareil (casque/prise de sortie
line-out).
4. Réglez le volume de votre appareil au maximum.
5. Allumez votre i-Station.
Remarque : Assurez-vous d’enlever le cable line-in lorsque vous utilisez la station d’accueil, car le
cable line-in neutralisera tout son venant de la station d’accueil.
Spécications du système
Alimentation Continue : 6W RMS (3W x 2)
Haut-parleurs satellites : 3Watts/Channel
Pilotes Haut-parleurs : Two 40mm Full Range Speaker Cone Drivers
Rapport Signal-Bruit : 60dB@1W
Réponse en fréquence : 200Hz – 20 kHz

9
FRENCH
Aide
Problème Que dois-je faire?
L’i-Station ne s’allume pas lorsqu’il
est alimenté par le secteur
Vériezquelecabled’alimentationACestfermementconnectéàla
prise de courant au mur et à l’i-Station.
Testez l’i-Station en l’alimentant avec 4 piles AA.
L’i-Station ne s’allume pas lorsqu’il
est alimenté par des piles
Testez l’i-Station en l’alimentant avec le secteur AC; si cela fonctionne,
remplacez les piles par des piles neuves
Pas de son
Assurez-vous que vous utilisez le support universel approprié à votre
iPod.
Assurez-vous que le cable line-in n’est pas branché à l’i-Station.
Vériezlestatut«Play»surl’iPod
Veuillez essayer de mettre à jour le microprogramme de votre iPod en
utilisant les derniers iTunes, que vous pouvez télécharger à partir de
www.apple.com/ipod/download
Mauvaise qualité du son
Si vous utilisez des piles AA, remplacez-les par des piles neuves
Assurez-vous que vous utilisez le support approprié à votre iPod.
L’iPod ne se recharge pas
Assurez-vous que vous utilisez le support approprié à votre iPod.
Assurez-vous que votre i-Station est branché au secteur AC.
Impossibledexerlesupportdans
l’i-Station Enlevez tout support universel précédemment inséré
J’ai perdu une pièce pour l’i-Station Veuillez consulter la rubrique Pièces de rechange de ce manuel
Liste des pièces de rechange
Pièce No. Code produit Nom produit Tarif
1 YAD011 ADAPTATEUR (FICHES D’ALIMENTATION
ÉLECTRIQUE INTERCHANGEABLES) Pour en savoir plus sur les
tarifs, veuillez consulter notre
site Web: www.logic3.com
2 YCB000K CABLE LINE-IN (NOIR)
Sivousrencontrezdesdifcultéslorsdel’installationd’i-Station(MIP011),veuillezcontacternotreservice
d’assistance téléphonique en appelant le +44 (01923) 471 000 – Des tarifs d’appels nationaux ou interna-
tionaux devront s’appliquer - ou contactez-nous par courrier électronique : [email protected] - Pièces de
rechange disponibles pour certains modèles sur notre site Web: www.logic3.com
10
GERMAN
MIP011
3
Logic
i-Station 11
i-Station
Logic
3
i-Station
Logic
3
i-Station
Logic
3
i-Station11
Korrekte Basis
einsetzen
An-/Aus-Taste Lauter/leiser
Stromanschluss mit austausch-
baren Steckern (Euro-2-Pin und
BS-3-Pin)
Logic
3
Inhalt
Einrichten der i-Station
MIP011
3
Logic
i-Station 11
Universalbasis Line-in-Kabel (3,5 mm)
1
3a
ODER
4
2
3b
DC 5V 1.2A

11
GERMAN
Logic
3
MIP011
3
Logic
i-Station 11
MD
MiniDisc
CD
MP3
Line-in-Eingänge anschließen
LINE IN
i-Station11 (MIP011) - Benutzerhandbuch
Vielen Dank, dass Sie sich für die Logic3 i-Station11 entschieden haben. Wie alle Produkte von Logic3
wurde sie mit den höchsten Produktionsstandards hergestellt und während der gesamten Entwicklung
gründlich getestet, um sicherzustellen, dass wir Ihnen das bestmögliche Produkt bieten können. Lesen
Sie dieses Handbuch gründlich durch und machen Sie sich mit seinem Inhalt vertraut, bevor Sie die
i-Station11 verwenden.
Einrichten der i-Station
1. Drücken Sie die Loslösetaste, um den Dock-Anschluss des iPods zu entsperren und öffnen Sie ihn,
bis er in der korrekten Position einrastet.
2. Legen sie die korrekte Basis (im Lieferumfang Ihres iPods) in die Universal-Dockbasis der
Lautsprecherstation ein. Verwenden Sie ein Line-in-Gerät, können sie die mitgelieferte Abdeck-
ungsbasis einsetzen.
3. Wählen Sie die gewünschte Stromquelle:
Netzstrom (3a) - Schließen Sie den DC-Stecker an der Rückseite der i-Station an (DC 5V).
- Wählen sie den für Ihre Stromversorgung korrekten Adapterstecker, und
schließen sie diesen an.
- Stecken Sie den Stecker in die Steckdose und schalten Sie die Stromver-
sorgung EIN.
Batteriebetrieb (3b) - Entfernen Sie die Batteriefachabdeckungen.
- Legen Sie 4 Batterien des Typs AA ein, und achten Sie auf die Polarität.
- Setzen Sie die Batteriefachabdeckungen wieder ein.
WARNUNG: Bitte stellen Sie sicher, dass die Batterien richtig eingelegt sind. Wenn die Bat-
terien falsch eingelegt werden (mit umgekehrter Polarität), kann dies zu Verletzungen führen
sowie auch Ihre i-Station beschädigen.
4. Setzen Sie Ihren iPod in die Andockbasis des Lautsprechersystems ein.

12
GERMAN
Verwenden der i-Station
1. Schalten Sie das Gerät mit der An-/Aus-Taste an der Vorderseite der Andockstation EIN (ON) oder
AUS (OFF) (ist das Gerät eingeschaltet, leuchtet die Taste blau auf).
2. Standardmäßig ist die Lautstärke des Lautsprechersystems auf 30 % voreingestellt. Mit den Oben-
und Unten-Tasten an der Vorderseite der Andockstation können Sie die Lautstärke einstellen.
3. Die Andockstation kann nach oben geklappt werden. Drücken Sie die beiden Verriegelungen an
den Seiten der Andockstation ein und klappen sie sie nach oben, bis sie vollständig einrastet.
Wiederauaden des iPods
1. Schließen Sie den Wechselstromadapter an die i-Station an und schalten Sie die Stromversorgung
EIN.
2. Sobald Sie Ihren iPod am Lautsprechersystem andocken, wird er aufgeladen. (Die An-/Aus-Taste
deri-StationmusszumAuadendesiPodnichteingeschaltetwerden).
3. WennSiedenWechselstromadapterverwenden,könnenSiedeniPodauadenundgleichzeitig
Musik hören.
HINWEIS: Bei Verwendung von Batterien als Stromversorgung wird der iPod nicht aufgeladen.
Line-in-Modus
SiekönnenauchanderetragbareAudiogeräte,wiez.B.iPodShufe,MP3-,MiniDisc-undtragbare
CD-Player an die i-Station anschließen und sie als Lautsprechersystem für diese Geräte verwenden.
1. Setzen Sie die Universalbasis in die Andockstation ein. Auf diese Weise können Sie Ihr Gerät auf
die Andockbasis stellen, ohne den 30-Pin-Anschluss zu beschädigen.
2. Stecken Sie das Line-in-Kabel (rechtwinkliger 3,5-mm-Stecker) in die Line-in-Buchse an der Rück-
seite der i-Station ein.
3. Stecken Sie das andere Ende des Line-in-Kabels (gerader 3,5-mm-Stecker) in die Ausgangsbuchse
Ihres Geräts ein (Kopfhörer-/Line-Out-Buchse).
4. Stellen Sie die Ausgangslautstärke Ihres Geräts auf Maximum.
5. Schalten Sie die i-Station ein.
Hinweis: Entfernen Sie das Line-in-Kabel, wenn sie die Andockstation verwenden, da durch An-
schließen des Line-in-Kabels der Ton von der Andockstation deaktiviert wird.
Systemspezikationen
Gesamtdauerleistung: 6W Effektivleistung (3W x 2)
Satellitenlautsprecher: 3Watt/Kanal
Lautsprechertreiber: Zwei 40-mm-Lautsprecher-Cone-Treiber mit vollem Frequenzumfang
Rauschabstand: 60 dB; 1 W
Frequenzbereich: 200 Hz - 20 kHz
Mitgeliefertes Netzteil: 5 V DC; 1,2 A

13
GERMAN
Fehlerbehebung
Problem Lösung
Die i-Station wird bei Wechsel-
strombetrieb nicht eingeschaltet
Stellen Sie sicher, dass das Wechselstromkabel fest an der Steckdose
und an der i-Station angeschlossen ist.
Überprüfen Sie, ob die i-Station funktioniert, indem Sie vier Batterien
des Typs AA einlegen und das Gerät einschalten.
Die i-Station wird bei Batteriebe-
trieb nicht eingeschaltet
Überprüfen Sie, ob die i-Station funktioniert, indem Sie das Gerät über
den Wechselstromadapter einschalten. Funktioniert es, müssen Sie evtl.
neue Batterien einlegen.
Es ist kein Ton zu hören
Stellen Sie sicher, dass Sie die korrekte Universalbasis für Ihren iPod
verwenden.
Stellen Sie sicher, dass das Line-in-Kabel nicht an die i-Station ange-
schlossen ist.
Überprüfen Sie den Wiedergabestatus des iPods.
Aktualisieren Sie die Firmware Ihres iPods mithilfe der aktuellen Version
von iTunes, die Sie hier erhalten: www.apple.com/ipod/download
Die Klangqualität ist schlecht
Legen Sie neue Batterien des Typs AA, sofern Sie das Gerät mit Bat-
terien betreiben.
Stellen Sie sicher, dass Sie die korrekte Basis für Ihren iPod verwenden.
Der iPod wird nicht aufgeladen
Stellen Sie sicher, dass Sie die korrekte Basis für Ihren iPod verwenden.
Stellen Sie sicher, dass Ihre i-Station an die Stromversorgung ange-
schlossen ist.
Die Basis rastet nicht in der
i-Station ein Entfernen Sie zuvor eingelegte Andockbasen.
Ich habe ein Teil der i-Station
verloren Lesen Sie bitte den Abschnitt zu Ersatzteilen in diesem Handbuch.
Ersatzteilliste
Teil Nr. Artikelcode Artikelname Preis
1 YAD011 WECHSELSTROMADAPTER (AUSWECHSELBARE
STECKER) Preise erfahren Sie auf
www.logic3.com
2 YCB000K LINE-IN-KABEL (SCHWARZ)
Bei Problemen bei der Einrichtung der i-Station11 (MIP011) setzen Sie sich bitte mit unserer technischen
Kundendienst-Hotline unter +44 (01923) 471 000 in Verbindung - Nationale/internationale Gebühren fallen
an - oder schicken Sie eine E-Mail an [email protected] - Ersatzteile für manche unserer Modelle sind
erhältlich unter www.logic3.com

14
ITALIAN
MIP011
3
Logic
i-Station 11
i-Station
Logic
3
i-Station
Logic
3
i-Station
Logic
3
i-Station11
Inserire l’adattatore
corretto
Pulsante ON/OFF Volume +/-
Adattatore CA con spine intercam-
biabili (Euro 2pin e BS 3pin)
Logic
3
Indice
Installare una i-Station
MIP011
3
Logic
i-Station 11
Adattatore dock
universale
Cavo di linea (3,5mm)
1
3a
OPPURE
4
2
3b
DC 5V 1.2A

15
ITALIAN
Logic
3
MIP011
3
Logic
i-Station 11
MD
MiniDisc
CD
MP3
Collegare il cavo di linea
LINE IN
i-Station11 (MIP011) - Manuale di istruzioni
Grazie per aver acquistato il prodotto iStation11 della Logic3. Tutti i prodotti Logic3 sono stati realiz-
zati seguendo i massimi standard di produzione e sono stati testati per poter garantire un prodotto di
ottima qualità. Leggi con attenzione questo manuale prima di utilizzare la iStation11.
Installare una i-Station
1. Premiilpulsantedirilasciopersbloccarelabasedell’iPod,aprilanchénonsibloccainposizione.
2. Inserisci l’adattatore dock adeguato (in dotazione con il tuo iPod) nell’alloggiamento sulla base degli
altoparlanti; se stai utilizzando un dispositivo di linea, l’adattatore dock viene fornito in dotazione.
3. Scegli la fonte di alimentazione:
Alimentazione a corrente (3a) - Inserisci la spina CC nella parte posteriore della i-Station (CC
5V)- Seleziona e sistema l’adattatore di presa corretto a seconda
dell’alimentazione di corrente a disposizione
- Inserisci la spina nella presa di corrente e accendi il dispositivo
Alimentazione a batteria (3b) - Togli i coperchi degli alloggiamenti delle batterie
- Inserisci 4 batterie stilo (AA) rispettando le indicazioni di polarità
- Riposiziona i coperchi degli alloggiamenti delle batterie
ATTENZIONE: Assicurati che le batterie siano inserite correttamente. Inserire le batterie non
correttamente (polarità invertita) può provocare danni alle persone e alla i-Station
4. Posiziona il tuo iPod nella base dock degli altoparlanti.

16
ITALIAN
Utilizzare la i-Station
1. La stazione viene accesa/spenta tramite il pulsante posizionato nella parte anteriore della base
(quando è accesa il pulsante si illuminerà di blu).
2. Il sistema di altoparlanti è preimpostato ad un livello di volume del 30%. Per regolare il volume
utilizza i tasti freccia sulla parte anteriore della base.
3. La base può essere chiusa premendo in corrispondenza dei due ganci ai lati, piegandoli verso l’alto
nchénonsibloccano.
Ricaricare l’iPod
1. Collega l’adattatore CA alla i-Station e alla presa di corrente.
2. Posiziona l’iPod sugli altoparlanti e l’iPod inizierà a ricaricarsi (il pulsante di accensione/spegni-
mento della i-Station non deve essere acceso per ricaricare l’iPod).
3. Utilizzando l’adattatore CA, l’iPod può ricaricarsi e riprodurre musica contemporaneamente.
NOTA: Il tuo iPod non si caricherà se utilizzi l’alimentazione e batteria.
Modalità di linea
Lai-Stationpermettedicollegarealtridispositiviaudioportatili,comeiPodshufe,MP3,MiniDisceCD
player portatili, per sfruttare il sistema di altoparlanti.
1. Inserisci l’adattatore dock universale nella base per riporre il dispositivo senza danneggiare il con-
nettore 30 pin.
2. Inserisci il cavo di linea (spinotto ad angolo retto 3,5 mm) nell’ingresso di linea sulla parte posteriore
della i-Station.
3. Collegal’altraestremitàdelcavodilinea(spinottodiritto3,5mm)altuodispositivo(presacufe/
uscita audio).
4. Imposta il volume del dispositivo al massimo.
5. Accendi la tua i-Station.
Nota: Ricordati di rimuovere il cavo di linea quando utilizzi la base perché il cavo di linea disattiverebbe
l’audio proveniente dalla stazione.
Speciche tecniche
Potenza continua totale: 6W RMS (3W x 2)
Altoparlanti satellitari: 3W/canale
Driver altoparlanti: 2 driver di tipo full range cono altoparlante da 40mm
Rapporto segnale/rumore (SNR): 60dB@1W
Risposta in frequenza: 200Hz – 20 kHz

17
ITALIAN
Risoluzione dei problemi
Problema Cosa devo fare?
La i-Station non si accende quando
utilizzo l’alimentazione di corrente
Controlla che il cavo di alimentazione CA sia inserito correttamente
nella presa a muro e nella i-Station.
Prova la i-Station con l’alimentazione a 4 batterie AA.
La i-Station non si accende quando
utilizzo l’alimentazione a batterie
Prova la i-Station accendendola tramite corrente alternata. Se in
questo modo funziona, sostituisci le batterie con batterie nuove.
Non c’è audio
Assicurati che per il tuo iPod sia stato utilizzato l’adattatore dock
universale adeguato.
Assicurati che il cavo di linea non sia collegato alla i-Station
Controlla lo stato di riproduzione (Play) sull’iPod
ProvaadaggiornareilrmwareperiltuoiPodusandolaversionepiù
recente di iTunes disponibile sul sito www.apple.com/ipod/download
La qualità dell’audio è scarsa
Se utilizzi batterie AA, sostituiscile con batterie nuove.
Assicurati che per il tuo iPod venga utilizzato l’adattatore dock
adeguato.
L’iPod non si ricarica
Assicurati che per il tuo iPod venga utilizzato l’adattatore dock
adeguato.
Assicurati che la tua i-Station sia collegata alla presa di corrente.
L’adattatoredocknonsissanella
i-Station
Togli eventuali adattatori dock universali inseriti precedentemente
nella stazione.
Ho perso un pezzo della i-Station Consulta la sezione sui pezzi di ricambio di questo manuale.
Lista dei pezzi di ricambio
N° pezzo Codice articolo Nome articolo Prezzo
1 YAD011 ADATTATORE CA (SPINE DI ALIMENTAZIONE
INTERCAMBIABILI) Per maggiori informazi-
oni sui prezzi, visita il
sito www.logic3.com
2 YCB000K CAVO DI LINEA (NERO)
In caso di problemi di installazione della iStation11 (MIP011) contatta il nostro Centro di assistenza tecnica
al numero +44 (01923) 471 000 – La tariffa applicata è per telefonate nazionali/internazionali oppure scrivi
un’email all’indirizzo [email protected] - Per alcuni modelli, i pezzi di ricambio sono disponibili sul sito
www.logic3.com

18
PORTUGUESE
MIP011
3
Logic
i-Station 11
i-Station
Logic
3
i-Station
Logic
3
i-Station
Logic
3
i-Station11
Inserir suporte
correcto
Interruptor Aumentar / Diminuir o Volume
Adaptador AC com Tomadas
Intercambiáveis (Euro 2pinos
e BS 3pinos)
Logic
3
Conteúdos
Congurar a i-Station
MIP011
3
Logic
i-Station 11
Suporte Universal Cabo line-in (3,5mm)
1
3a
ou
4
2
3b
DC 5V 1.2A

19
PORTUGUESE
Logic
3
MIP011
3
Logic
i-Station 11
MD
MiniDisc
CD
MP3
Conguração da Entrada
LINE IN
i-Station11 (MIP011) - Manual do Utilizador
Obrigado por adquirir a Logic3 i-Station11. Como todos os produtos Logic3, foi criada segundo os
mais altos padrões de fabrico e testada ao longo do seu desenvolvimento, para assegurar que o
cliente recebe o melhor produto possível. Por favor leia este manual e familiarize-se com ele antes de
usar a i-Station11.
Congurar a i-Station
1. CarreguenobotãolibertarparadesbloquearabasedeencaixedoiPod,abra-aatécarem
posição.
2. Insira o suporte apropriado (fornecido com o seu iPod) no encaixe universal na base das colunas;
se estiver a usar um aparelho de line in, é fornecido um suporte.
3. Escolha a sua fonte de energia:-
Ficha Eléctrica (3a) -Insira o conector de Corrente Contínua na parte traseira da i-Station (DC 5V)
-Seleccioneeajusteoadaptadordechacorrectoparaasuafontedeenergia
-LIGUEachaeléctrica.
Pilhas (3b) -Remova a tampa do compartimento das Pilhas
- Insira 4 x AA pilhas, tendo em conta as Marcas de Polaridade
- Volte a colocar a tampa do compartimento das Pilhas
AVISO: Por favor assegure-se de que as pilhas estão inseridas correctamente. Se as pilhas
estiverem inseridas de modo incorrecto (polaridade invertida), tal poderá causar danos pes-
soais, bem como danos à sua i-Station
4. ColoqueoseuiPodnabasedascolunas(verg.4)

20
PORTUGUESE
Utilizar a i-Station
1. A i-Station é LIGADA/DESLIGADA através do Botão LIGAR/DESLIGAR situado na parte da frente
daBasedeEncaixe(QuandooaparelhoestiverLIGADO,oLEDcaráAzul).
2. Osistemadecolunasestápredenidoparaumníveldevolumede30%.Ovolumepodeser
ajustado utilizando as teclas Cima e Baixo, localizadas na parte da frente da base de encaixe.
3. A base de encaixe pode ser dobrada para cima, carregando nas duas pegas dos lados, dobrando-a
paracima,atéquequeemposição.
Recarregar o iPod
1. LigueoadaptadordeCAài-StationeLIGUEachaeléctrica.
2. Encaixe o seu iPod nas colunas e o iPod começará a recarregar (o botão LIGAR/DESLIGAR da
i-Station não tem de estar LIGADO para recarregar o iPod).
3. O iPod pode recarregar e reproduzir música ao mesmo tempo que está a usar o adaptador AC.
NOTA: O seu iPod não vai carregar se utilizar Pilhas como Fonte de Energia.
Modo Line in
Ai-Stationoferecetambémacapacidadedepermitirqueoutrosaparelhosáudio,comooiPodshufe,
MP3, MiniDisc e Leitores de CD Portáteis sejam ligados à unidade, para a utilizar como sistema de
colunas.
1. Insira o suporte universal na base de encaixe. Isto vai permitir que coloque o seu aparelho na base
deencaixesemdanicaroconectorde30pinos.
2. Ligue o cabo line in (conector de ângulo recto de 3,5mm) à parte de trás da Entrada Line in da
i-Station.
3. Ligue o outro extremo do cabo line in (conector de ângulo recto de 3,5mm) ao seu aparelho (head-
phones/line out).
4. Ponha o volume do seu aparelho no Máximo.
5. Ligue a sua i-Station.
Nota: Lembre-se de remover o cabo line in ao usar a base de encaixe, pois o cabo irá anular qualquer
som vindo da base de encaixe.
Especicações de Sistema
Energia Total Contínua: 6W RMS (3W x 2)
Colunas: 3Watts/Canal
Drivers: Dois Drivers de Colunas de Alcance Total de 40mm
Relação Sinal/Ruído: 60dB@1W
Resposta de Frequência: 200Hz – 20 kHz
This manual suits for next models
1
Table of contents
Languages:
Other Logic3 Docking Station manuals

Logic3
Logic3 MIP108 User manual

Logic3
Logic3 MIP100 JiveBox User manual

Logic3
Logic3 ProDock WIP040 User manual

Logic3
Logic3 i-Station TimeCube WIS191 User manual

Logic3
Logic3 i-Station Studio MIP199 User manual

Logic3
Logic3 Scuderia Fs1 Air User manual

Logic3
Logic3 i-Station TimeCurve User manual

Logic3
Logic3 MIP190 User manual

Logic3
Logic3 WIP043 User manual

Logic3
Logic3 MIP103 User manual