Roadstar HRA-500IP User manual

34
R
AUDIO VIDEO
iPod / iPad / iPhone DOCKING STATION
WITH FM-BAND TUNER, ALARM CLOCK
AND FULL FUNCTION REMOTE CONTROL.
Instruction manual
Bedienungsanleitung
Manuel d’instructions
Manuale d’istruzioni
Manual de instrucciones
Manual de instruções
HRA-500IP
R
AUDIO VIDEO
is a registered Trademark of Roadstar S.A. - Switzerland All rights reserved

English Page 1
Deutsch Seite 13
Français Page 25
Italiano Pagina 37
Español Página 49
Portuguès Pagina 61
Fig.
Fig.
HRA-500IP
INDEX
• Your new unit was manufactured and assembled
under strict ROADSTAR quality control.
Thank you for purchasing our product.
Before operating the unit, please read this instruc-
tion manual carefully. Keep it also handy for further
future references.
• Votre nouvel appareil a été fabriqué et monté en
étant soumis aux nombreaux tests ROADSTAR. Nous
espérons que cet appareil vous donnera entière sat-
isfaction.
Avant de vous adonner à ces activités, veuillez lire
attentivement ce manuel d’instructions. Conservezle
à portée de main à fin de référence ultérieure.
• Vuestro nuevo sistema ha sido construido según las
normas estrictas de control de calidad ROADSTAR.
Le felicitamos y le damos las gracias por su elección
de este aparado. Por favor leer el manual antes de
poner en funcionamiento el equipo y guardar esta
documentación en case de que se necesite
nuevamente.
• Ihr neues Gerät wurde unter Beachtung der strengen
ROADSTAR-Qualitätsvorschriften gefertigt.
Wir danken Ihnen für den Kauf unseres Produktes.
Bitte lesen Sie diese Bedienungsanleitung durch,
und heben Sie sie auf, um jederzeit darin
nachschlagen zu können.
• Il vostro nuovo apparecchio è stato prodotto ed
assemblato sotto lo stretto controllo di qualitá
ROADSTAR.
Vi ringraziamo di aver acquistato un nostro prodotto.
Prima di procedere all'utilizzo dell'apparecchio,
leggete attentamente il manuale d’istruzioni e
tenetelo sempre a portata di mano per futuri
riferimenti.
• Seu novo aparelho foi construido e montado sob o
estrito controle de qualidade da ROADSTAR.
Agradecemos por ter comprado nosso produto para
a sua diversão.
Antes de usar esta unidade é necessário ler com
atençâo este manual de instruções pare que possa
ser usada apropriadamente; mantenha o manual
ao seu alcance para outras informações.
Front view
Rear view
Top view
Bottom view
814 16 3915
10 4213 20 19
6

EnglishEnglish 12
WARNINGS
CAUTION
RISK OF ELECTRIC
SHOCK
DO NOT OPEN
The exclamation point within the triangle is a warning sign alert-
ing the user of important instructions accompanying the
product.
The lightening flash with arrowhead symbol within the triangle
is a warning sign alerting the user of “dangerous voltage” inside
the unit.
To reduce the risk of electric shock, do not remove the cover. No
user serviceable parts inside the unit. Refer all servicing to
qualified personnel.
This unit operates on 230V ~ 50Hz. If the unit is not used for a
long period of time, remove the plug from the AC mains.
This unit must not be exposed to moisture or rain.
The power switch in this unit is mounted on the secondary
circuit and does not disconnect the whole unit from the mains in
OFF position.
Ensure all connections are properly made before operating the
unit.
This unit should be positioned so that it is properly ventilated.
Avoid placing it, for example, close to curtains, on the carpet or in
a built-in installation such as a bookcase.
Do not expose this unit to direct sunlight or heat radiating sources.
Make sure all batteries are inserted according to the proper
polarity.
If the unit is not used for a long period of time (more than 1
month), remove all batteries from their compartment to avoid
possible leaking.
230v~
HRA-500IP
iPod iPad iPhone DOCKING STATION WITH FM-BAND TUNER AND FULL
FUNCTION REMOTE CONTROL.
INSTRUCTION MANUAL
Please read this instruction manual carefully and familiarize yourself with your new HiFi
System before using it for the first time. Please retain this manual for future reference.
LOCATION OF CONTROLS
1. SPEAKER
2. SNOOZE BUTTON
3. iPod iPad iPhone CONNECTOR
4. FUNCTION BUTTON ( iPod, AUX or TUNER)
5. EADPHONE JACK
6. BATTERY BACK-UP MEMORY COMPARTMENT
7. LCD DISPLAY
8. STANDBY INDICATOR
9. PLAY/PAUSE BUTTON (iPod only)
10. STANDBY/ON BUTTON
11. AC CORD
12. AUX LINE-IN JACK
13. iPod/MEMORY/CLOCK-ADJ. BUTTON
14. SKIP/SEARCH/TUNING DOWN BUTTON
15. VOLUME KNOB
16. SKIP/SEARCH/TUNING UP BUTTON
17. FM ANTENNA
18. IR SENSOR
19. JOG CONTROL KNOB
20. ALARM BUTTON
CONNECTING TO POWER
Before switching on make sure that the voltage of your electricity supply is the same as
that indicated on the rating plate.
For your own safety read the following instructions carefully before attempting to connect
this unit to the mains.
MAINS (AC) OPERATION
This unit is designed to operate on AC 230V 50Hz current only. Connecting it to other
power sources may damage the unit.
- +
- +

EnglishEnglish
on the main unit.
When there is a strong ambient light source, the performance of the infrared Remote Sensor
may be degraded, causing unreliable operation.
The maximum effective distance for remote control operation is about 5 metres (16.5 feet).
REMOTECONTROL
1. STANDBY BUTTON
2. MUTE BUTTON
3. PRESET Radio UP BUTTON
4. PRESET Radio DOWN BUTTON
5. BACKLIGHT BUTTON
6. SKIP/TUNING/SEARCH DOWN BUTTON
7. DISPLAY BUTTON
8. VOLUME DOWN BUTTON
9. FUNCTION BUTTON
10. SNOOZE / iPOD ENTER BUTTON
11. PRESET / MENU BUTTON
12. ALARM BUTTON
13. PLAY/PAUSE (only iPod) BUTTON
14. EQ BUTTON
15. SKIP/TUNING/SEARCH UP BUTTON
16. BASS BOOST BUTTON
17. VOLUME UP BUTTON (21)
18. SLEEP BUTTON
CLOCK SETTING
In the STANDBY mode:
1. Press and hold the CLOCK/DISPLAY button (13) until the time display changes to 12-hour
digit and will flash.
2. Press theTUNE/CLK+ or TUNE/CLK- button (16,14) to adjust 12-hour or 24-hour digit.
3. Press the PLAY/PAUSE/FM button (9), the HOUR digit will flash on the display,
press the TUNE/CLK+ or TUNE/CLK- button (16,14) button to adjust HOUR digit.
4. Press the PLAY/PAUSE/FM button once more, the MINUTE digit will flash on the display,
press the TUNE/CLK+ or TUNE/CLK- button (16,14) button to adjust MINUTE digit.
34
Caution
To prevent electric shock disconnect from the mains before removing cover. No user
serviceable parts inside. Refer servicing to qualified service personnel.
Safety Precaution
Do not allow this unit to be exposed to rain or moisture.
Mains Supply: AC230Volts / 50Hz - AC only
This symbol means that this unit is double insulated. An earth connection is not
required.
POWER SUPPLY
Remove the stereo carefully from the box, retaining the packaging for future use.
Read these instructions carefully before use.
Connections
Connect the Mains Lead to an AC outlet. Check that your mains supply is 230V, 50Hz.
Extend the FM antena on the rear of the unit (11).
Disconnect the power cord from the mains if the unit is not going to be used for some time.
BATTERYINSTALLATION
Insert one CR-2032 battery into the battery compartment of the remote controller and replace
the cover.
BATTERYREPLACEMENT
When the batteries become too weak, the
operating distance of the remote controller
is greatly reduced and you will need to replace
the batteries.
Notes: To maintain the accuracy and long life
of the transmitter, do not press two or more
Buttons simultaneously.
If the remote control is not to be used for a long time, remove the batteries to prevent possible
damage through leaking batteries.
USINGTHEREMOTECONTROLLERCORRECTLY
Point the remote controller at the Remote Sensor (10).
The functions of the buttons on the remote control are the same as the corresponding controls
1
5
6
7
4
2
18
9
15
10
3
12
16
17
13
11
14
8

EnglishEnglish 56
5. Press the PLAY/PAUSE/FM button again to confirm the time.
6. Each state as shown above will be cleared if the key is not pushed in10 seconds.
ALARM SETTING
During in the STANDBY OFF/ON mode.
1. After adjusting clock, press the ALARM button on the unit (20) for a few seconds, " and
"07:00” appears on the display and the HOUR digit flashes.
2. Press the TUNE/CLK+ or TUNE/CLK- button (16,14) to adjust it.
3. Press the PLAY/PAUSE/FM button again, the MINUTE digit will start flashing, adjust it by
pressing the TUNE/CLK+ or TUNE/CLK- button.
4. Press the PLAY/PAUSE/FM button once more to confirm and order ALARM time.
5. After adjusting "TIMER -ON", the ALARM VOLUME LEVEL appears on the display. Adjust
it by pressing the TUNE/CLK+ or TUNE/CLK- button.
7. Now the "FM Memory Station" appears on the display with flashing , adjust by pressing
the TUNE/CLK+ or TUNE/CLK- button.
8. Press the PLAY/PAUSE/FM button again, the timer "Buzzer Level" indicator appears on the
display and flashes, adjust the timer volume high or low by pressing the TUNE/CLK+ or
TUNE/CLK- button.
9. Each enable state as shown above will be cleared if the button is not pushed in 7 seconds.
10. The unit will be switched on automatically at "ALARM ON" order and start playing , the unit
will be switched off automatically at "ALARM OFF" order.
ACTIVATING THE ALARM WAKE UP MODE
1. Press repeatedly the ALARM button to activate the alarm function and select the wake-up
mode.
2. The alarm mode and corresponding icon TUNER / iPod / BUZZER / ALARM OFF appear
in sequence to the display.
NOTE: If Alarm wake-up to iPod mode is selected and no iPod /iPhone/iPad is fitten in the
docking or recognized, when the alarm arrive the buzzer wis activated automatically.
To switch OFF the Alarm, press repeadtly the ALARM button until the Alarm icon disappear
from the display.
SNOOZEFUNCTION
During the alarm, press the SNOOZE button will temporary switch OFF the alarm for 5 minutes
and the snooze icon will be displayed. This is repeatable in the hour alarm duration.
EQ CONTROL (FROM REMOTE CONTROL)
EQ shows the BASS and TREBLE sound tone.
When you press the EQ button, the sound tone BASS or TREBLE can be changed by pressing
the TUNE/CLK+ or TUNE/CLK- bottons.

EnglishEnglish
• The tuner will stop scanning when it finds a strong signal.
• Repeat this process until the desired station is found.
Notes: As automatic tuning depends on the signal strength of the transmitters, weak
transmitters are sometimes skipped. In such a case, tune manually to find the
weaker transmitters.
On the other hand, with a very strong signal, the tuner may stop before it reaches
the optimum setting. Tune manually for the best reception.
Storing Stations (from Remote Control only)
This unit allows you to store the frequencies of up to 20 radio stations in the memory;
• First tune into the station you want to store using one of the methods above.
• Then press the Preset Menu button (11) on the remote control (17).
• Press PRESET-UP or PRESET-DN Buttons the remote control (3,4) to select the desired
channel memory and press the Preset Menu button (11) within 5 seconds to store it.
To reprogram a preset station repeat the procedure above.
Selecting a preset station
To select a preset station, press the Jog/Mode button and turn the Volume/Tune knob on main
unit or press the PRESET-UP or PRESET-DN Buttons on the remote control (3,4) until the
desired preset program is displayed.
FM Stereo Reception
When an FM signal is tuned in, the ((( ST. ))) indicator will appear in the display.
In case of noisy reception, if you push the PLAY/PAUSE MONO-STEREO button (9) to FM
MONO position, the FM STEREO indicator will turn off & switch to MONO FM status.
Antenna
For FM reception there is a wire antenna (17) at the rear of the unit. Extend it for best reception.
78
SLEEP FUNCTION (by remote control)
1. If you want to fall asleep to music, press the SLEEP button .
2. You may select the TUNER, iPod orAUX mode in sleep function to play from 90, 80, 70 up
to 10 minutes of music before shutting itself off automatically.
FUNCTION SELECT
1. Press repeatedly the FUNCTION button (12) on the unit or on the remote control (9) to
select the desired. Display changes as: iPod - TUNER - AUX-IN.
FM RADIO OPERATION
Operation
• Press the STANDBY Button on the unit (23) or the remote control (1) to turn the unit on.
• Select the TUNER function with the Function Button on the unit (4) or on the remote control (9).
• There are a number of ways that you can tune to radio stations. Follow the instructions
in the sections below.
• Adjust the VOLUME to the desired level using the VOLUME -/+ Knob (15) or the VOLUME
-/+ Buttons (8,21) on the remote control .
• To turn off the radio, press the STANDBY Button again.
Manual Tuning
Manual tuning is useful when you already know the frequency of the desired transmitter.
• To change the frequency, repeatedly press the TUNE/CLK+ or TUNE/CLK- from Remote
Control until the precise frequency is reached.
• From the main unit press the Jog Mode button (19) and rotate the Volume/Tune knob until
the precise frequency is reached.
Automatic Tuning
• Press and hold the TUNE/CLK+ or TUNE/CLK- Buttons for about a second. The radio
will start automatically scanning for strong radio signals. The TUNER Display shows the
frequency in MHz for Fm.

EnglishEnglish 9 10
iPod iPad iPhone OPERATION
With unit in STANDBY mode:
1. Insert the iPod player in the iPod deck bracket on the top of the main unit fixedly.
2. Power on the main unit, and then press the FUNCTION button to the iPod mode, the
iPod indicator will appear on the display of the main unit.
With unit in iPod mode:
1. Press the PLAY/PAUSE button once to start the iPod playing.
Adjust the volume control by turning theVOLUME knob. To stop the current
playing, press the PLAY/PAUSE button once.
2. Press the PLAY/PAUSE button once to pause the current track. To resume the
playback, press the PLAY/PAUSE button once again.
3. To skip forwards or backwards, press the TUNE/CLK+ or TUNE/CLK- button to
select the desired track.
With unit in iPod MENU mode (from Remote Control only)
1. When the unit is in iPod mode, press the PRESET/MENU button once, the unit will
enter to the iPod MENU mode.
2. Press the PRESET/MENU UP or PRESET/MENU DOWN button (3,4) to enter to the
desired menu folder.
3. To resume playback, press the Play/Pause button once again, the unit will return to
iPod mode.
Charging the iPod Player battery through the main unit:
1. The iPod Player has a internal non removable battery, the battery may need to be
charged when it is not used for a while.
2. You can charge the iPod Player through the main unit automatically under the
STANDBY or POWER ON mode.
Note :
1. The iPod Player's battery is 80% charged in about an hour, and fully charged in
about a few hours. If you charge it while playing music, it may take longer.
2. It is not better to charge under the TUNER mode. It may interfere the reception.
Note:
1. In any time, you can control the iPod player on the main unit, remote control or iPod
player itself while the unit in the "iPod" or "iPod MENU" mode.
2. In any time, the iPod player must be fixed well under in the STANDBY mode to avoid
the unit and iPod player were damaged.
AUX IN PLAY
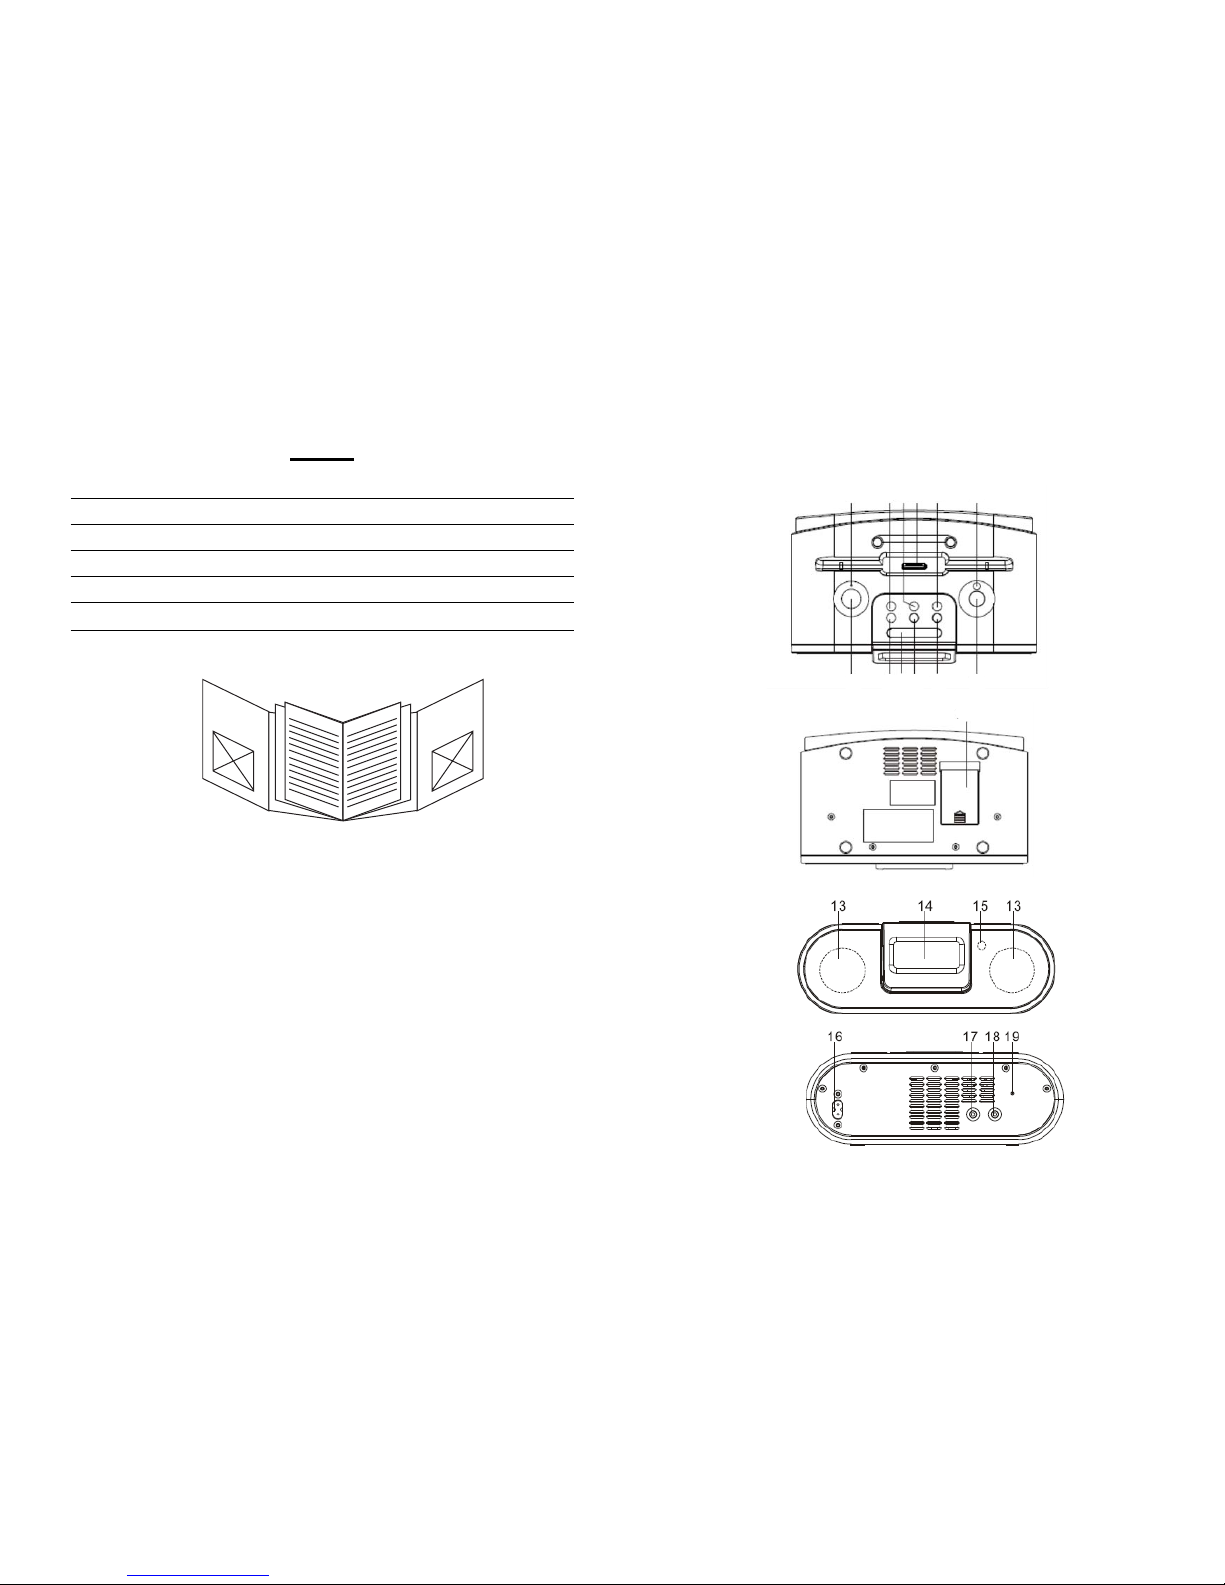
The AUX input is located at the rear of the unit (12). Use a 3.5mm stereo jack cable to connect
audio equipment through the LINE IN jack.
1. To select the AUX input function, repeatedly press the FUNCTION button on the unit (or
remote control) until AUX is indicated on the display.
2. Press the VOLUME (UP or DOWN) button to adjust the sound output level.
Note: LINE in cable not included.
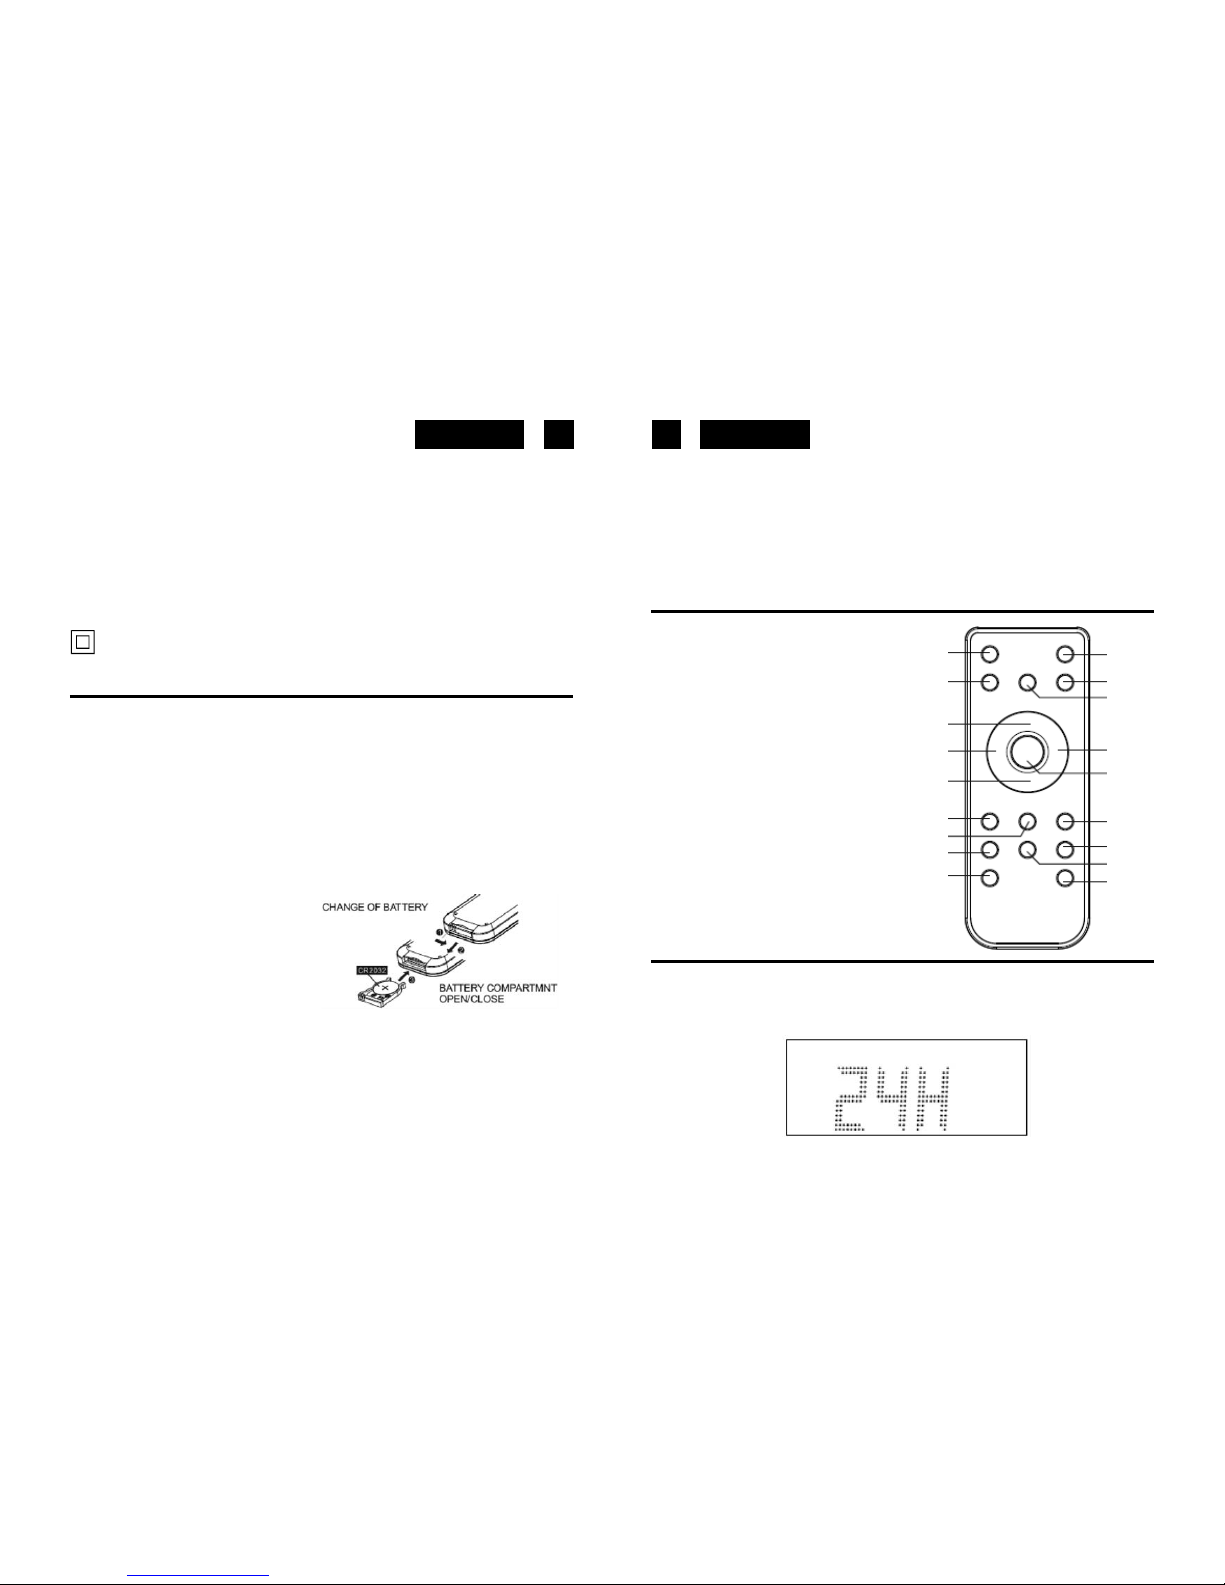
MUTE SETTING (ON THE REMOTE CONTROL)
1. When you press the MUTE button (2) once on the remote control, the volume level will flash
and the audio output will be temporarily terminated.
2. Press the MUTE button again, the volume level and the audio output will return to normal.
HEADPHONESJACK
Headphones should have a 3.5mm diameter stereo plug and an impedance of 8-32 ohms.
When headphones are connected (18), the speakers are automatically disconnected.
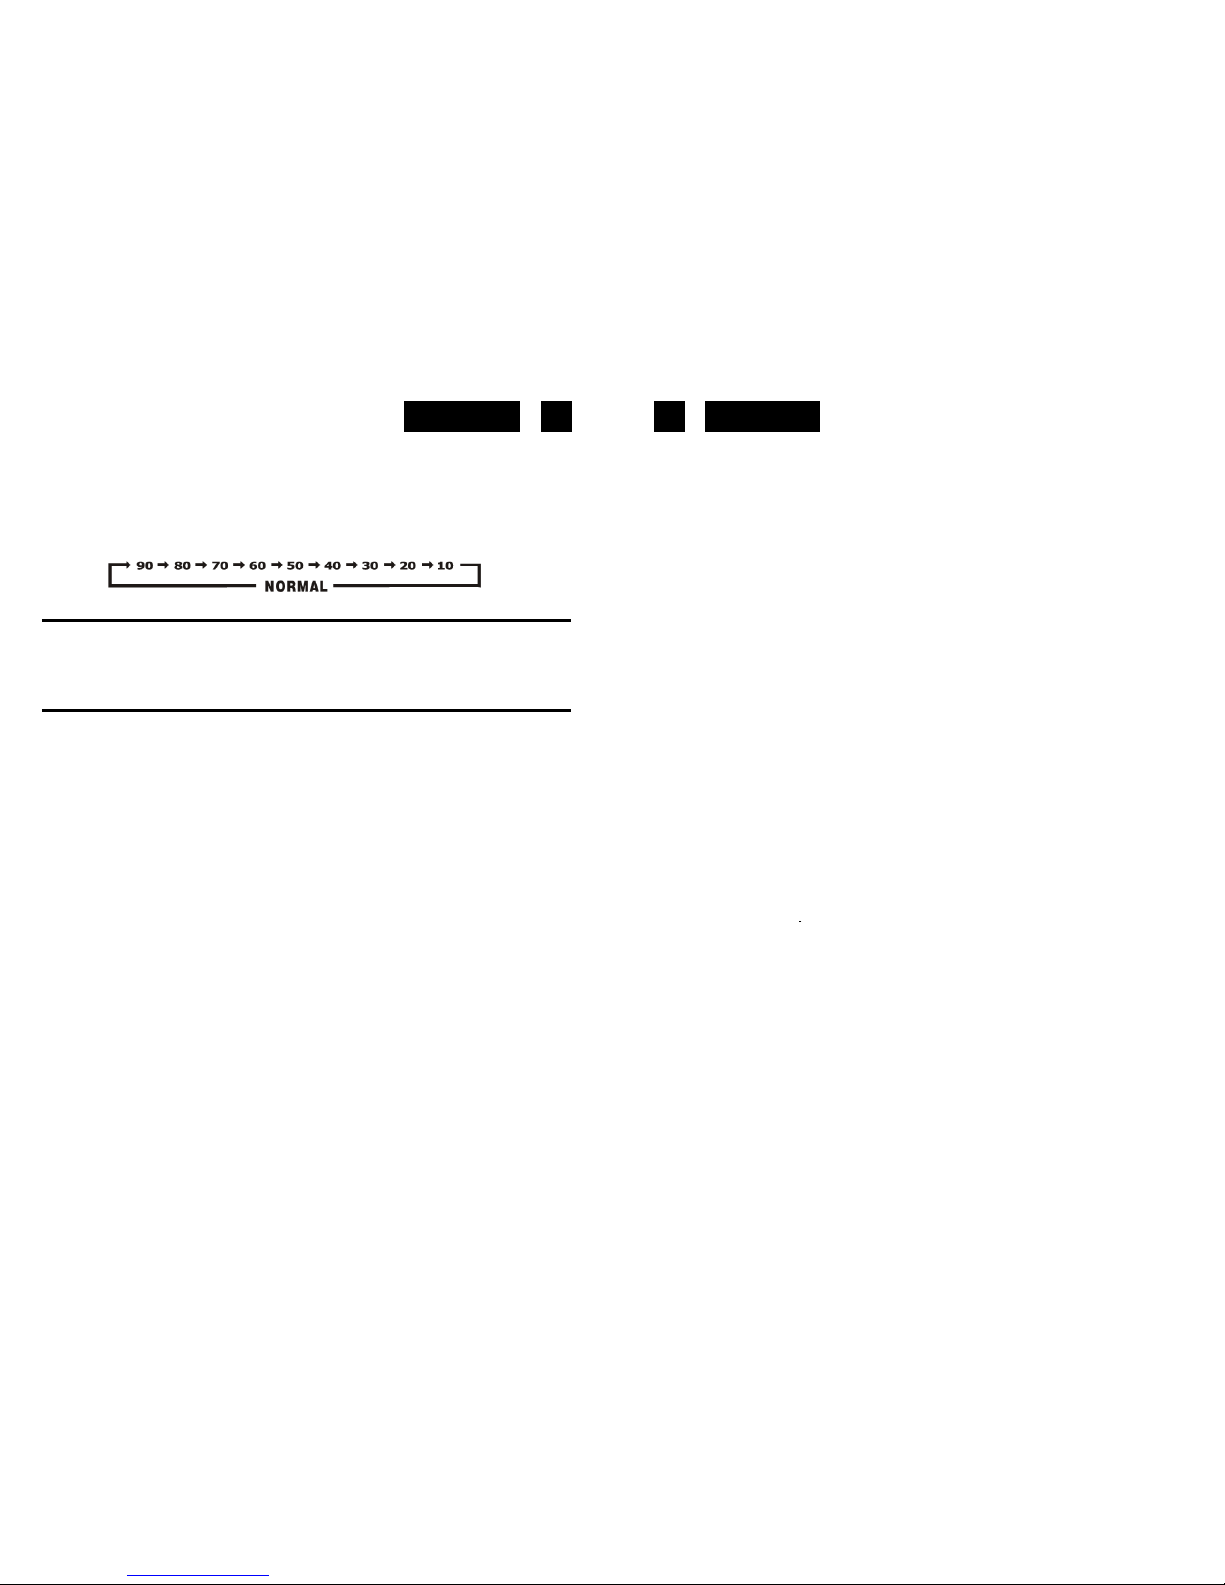
DISPLAY BACKLIGHT
This unit has 4 different levels of Display illumination.
Press in sequence the button BACKLIGHT from Remote Control to select the desired
intensity.
X-BASS FUNCTION
Press the button X-BASS on Remote Control to obtain a bass effect and better Audio
response.

EnglishEnglish 11 12
Correct Disposal of This Product
(Waste Electrical & Electronic Equipment)
This marking shown on the product or its literature, indicates that it should not
be disposed with other household wastes at the end of its working life. To prevent
possible harm to the environment or human health from uncontrolled waste
disposal, please separate this from other types of wastes and recycle it
responsibly to promote the sustainable reuse of material resources.
Household users should contact either the retailer where they purchased this
product, or their local government office, for details of where and how they
can take this item for environmentally safe recycling.
Business users should contact their supplier and check the terms and conditions
of the purchase contract. This product should not be mixed with other commercial
wastes for disposal.
TECHNICAL SPECIFICATIONS
Power Supply
AC: 230V-50Hz
DC: 1 x CR-2032 battery for Remote Control
Frequency Reception
FM: 87.5 - 108 MHZ
General
Eadphones: 3.5 mm plug 8-32 Ohm
Output Power: 2 x 2 Watt
Specifications subject to change without prior notice.
A. STEREO INDICATOR E. ALARM INDICATOR
B. SLEEPINDICATOR F. VOLUME LEVEL INDICATOR
C. MUTE INDICATOR G. TIME / FREQUENCY INDICATOR
D. SNOOZE INDICATOR H. EQUALIZER INDICATOR
LCD DISPLAY WINDOW

DeutschDeutsch 13 14
HIF-500IP
iPod iPad iPhone DOCKING STATION MIT UKW-RADIO, ALARM UND
FERNBEDIENUNG.
BEDIENUNGSANLEITUNG
Bitte lesen Sie diese Bedienungsanleitung aufmerksam durch, um sich mit Ihrem neuen
Hifi-System vertraut zu machen, bevor Sie es zum ersten Mal in Betrieb nehmen. Bitte
bewahren Sie diese Anleitung auf, um später jederzeit nachschlagen zu können.
LAGEDERBEDIENUNGSELEMENTE
1. Lautsprecher
2. Snooze-Taste
3. iPod iPad iPhone-Anschluss
4. FUNKTION-Taste (iPod, AUX oder TUNER)
5. Kopfhörerbuchse
6. Batterie-Speicher Back-up
7. LCD Display
8. Standby-Anzeige
9. WIEDERGABE/PAUSE-Taste
10. Ein-/Standby-Taste
11. Netzkabel
12. AUX LINE-IN Eingang
13. iPod/MEMORY/CLOCK-ADJ.-Taste
14. Radio: Abstimmtaste Abwärts/iPod: Sprungtaste Rückwärts
15. Lautstärkeknopf
16. Radio: Abstimmtaste Aufwärts/iPod: Sprungtaste Vorwärts
17. UKW Antenna
18. Fernbedienungssensor
19. Jog-kontrol
20. Alarm-Taste
NETZANSCHLUSS
Bevor Sie das Gerät einschalten, vergewissern Sie sich, daß Ihre örtliche Netzspannung mit
der auf dem Typenschild angegebenen Spannung übereinstimmt.
Zu Ihrer eigenen Sicherheit lesen Sie die folgende Bedienungsanleitung sorgfältig durch,
bevor Sie das Gerät ans Netz anschließen.
NETZBETRIEB(AC)
Dieses Gerät funktioniert nur mit einer Spannung von AC 230V 50Hz. Wird das Gerät an
SICHERHEITSHINWEISE
CAUTION
RISK OF ELECTRIC
SHOCK
DO NOT OPEN
230v~
Das Ausrufszeichen im Dreieck weist den Benutzer auf wichtige
Bedienungs-und Wartungsanweisungen(Service) indiesemHandbuch
hin,die unbedingt zubefolgensind.
Das Blitzsymbol im Dreieck weist den Benutzer auf “gefährliche
Spannungen” aneinigen freiliegenden BauteilenimInnem des Gerätes
hin.
UmdieGefahrelektrischer Schlägeauszuschliessen,Gehäuseaufkeinen
Fall abnehmen. Im Innem befinden sich keine vom Benutzer selbst
instandsetzbarenTeile.Reparaturen dürfen nurvoneiner autorisierten
Fachwerkstatt durchgeführt werden.
DiesesGerät istfür 230V ~50Hz Netzspannungausgelegt.Bei längerer
Nichtbenutzungdes Geräts ziehenSieden SteckerausderSteckdose.
SetzenSie das Gerät wederFeuchtigkeitnoch Regen aus.
DerEIN-Schalterdieses Geräts ist an den Sekundärschaltkreis ange-
schlossen. SeineAbschaltung unterbricht die Hauptstromzufuhr des
Gerätsnicht.
Schalten Sie das System erst dann ein, wenn Sie alle Verbindungen
genaugeprüft haben.
Stellen Siedas Gerätso auf,dass immereine ungestörteFrischluftzufuhr
sichergestelltist.StellenSie das Gerät keinesfalls aufTeppiche und in
dieNähe von GardinenundbauenSie es nichtin Bücherregale ein.
Setzen Sie das Gerät weder direkter Sonneneinstrahlung noch
Wärmequellenaus.
BeimEinlegen derBatterieachten Sieauf die richtigePolarität.
Beilängerer Nichtbenutzung desGeräts (mehr alseinenMonat) ziehen
SiedieBatterieheraus,umAuslaufen zu vermeiden, die schädlich für
dasGerät sein konnen.
- +
- +

DeutschDeutsch 15 16
andere Stromquellen angeschlossen, könnte es Schaden nehmen.
Vorsicht
Um elektrischen Schlägen vorzubeugen, ziehen Sie den Hauptstecker aus, bevor Sie den
Deckel entfernen. Für die Wartung wenden Sie sich an qualifiziertes Kundendienstpersonal.
Sicherheitsmaßnahmen
Setzen Sie das Gerät weder Regen noch Feuchtigkeit aus.
Stromversorgung: AC 230Volt / 50Hz - nur Wechselstrom (AC)
Dieses Zeichen bedeutet, daß dieses Gerät doppelt isoliert ist. Eine Erdung ist nicht
notwendig.
VORBEREITUNGFÜRDENBETRIEB
Nehmen Sie das Gerät vorsichtig aus der Verpackung und heben Sie diese für eine spätere
Verwendung auf.
Vor der Inbetriebnahme lesen Sie bitte aufmerksam diese Bedienungsanleitung.
ANSCHLÜSSE
Schließen Sie das Netzkabel (11) an eine AC-Steckdose an. Überprüfen Sie, daß Ihre
Stromversorgung 230V, 50Hz beträgt.
Strecken Sie das UKW-Antennenkabel aus (17).
Wählen Sie OFF mit dem Netz-Haupschalter , um das Gerät auszuschalten.
EINSETZENDERBATTERIEN
Setzen Sie eine Batterie CD-2032, in das
Batteriefach der Fernbedienung ein und
schließen Sie den Deckel wieder.
ERSETZENDERBATTERIEN
Wenn die Batterien zu schwach werd, werden
die Reichweite der Fernbedienung bedeutend
verringert und Sie müssen die Batterien ersetzen.
Hinweise: Um die Genauigkeit und eine lange Betriebsdauer des Senders beizubehalten,
drücken Sie niemals zwei oder mehr Tasten gleichzeitig.
Wenn Sie die Fernbedienung längere Zeit nicht benutzen, entfernen Sie die Batterien, um
dem Auslaufen von Säure vorzubeugen.
RICHTIGEVERWENDUNGDERFERNBEDIENUNG
Richten Sie die Fernbedienung auf den Sensor (10).
Die Funktionstasten auf der Fernbedienung sind dieselben wie auf dem Hauptgerät.
Eine starke Lichtquelle im Raum kann die Leistung des Infrarot-Sensor beeinträchtigen und
ein unzuverlässiges Funktionieren hervorrufen.
Die maximale effektive Reichweite der Fernbedienung beträgt ca. 5 Meter.
FERNBEDIENUNG
1. STANDBY-Taste
2. MUTE-Taste
3. Vorwahl (auf)-Taste
4. Vorwahl (ab)-Taste
5. Hintergrundbeleuchtung
6. Radio: Abstimmtaste Abwärts/
iPod: Sprungtaste Rückwärts
7. Display-Taste
8. LAUTSTÄRKE ab Taste
9. FUNKTION-Taste
10. Snooze / iPod enter-Taste
11. Preset-Menu-Taste
12. Alarm-Taste
13. PLAY/PAUSE (nur auf iPod) -Taste
14. EQ-Taste
15. Radio: Abstimmtaste Aufwärts/
iPod: Sprungtaste Vorwärts
16. Extra-Bass-Taste
17. LAUTSTÄRKE auf Taste
18. SLEEP -Taste
UHR-EINSTELLUNG
Im STANDBY-Modus:
1. Drückenundhalten Sie die CLOCK/DISPLAY (13) Tastegedrücktbis die Stunde sich zum
12-Stundenmodus ändert, da blinkt es.
1
5
6
7
4
2
18
9
15
10
3
12
16
17
11
14
8
13

DeutschDeutsch 17 18
5. Nachdem Sie "ALARM ON" geregelt haben, Alarm Lautstärke erscheint. Stellen Sie durch
Drücken der TUNER/CLK+ oder TUNER CLK- (vorwärts oder rückwärts) (16,14)-Taste.
6. Jetzt blinkt "FM-Speicher-Station" auf dem Display. tellen Sie durch Drücken der TUNER/
CLK+ oder TUNER CLK- (vorwärts oder rückwärts) (16,14)-Taste.
8. Nochmals die Taste PLAY/PAUSE/FM (9) drücken, die Anzeige "VOL" des Butter blinkt auf
dem Display. Die Lautstärke des Timer regeln (hoch oder niedrig) mit der Tasten TUNER/
CLK+ oder TUNER CLK- (vorwärts oder rückwärts) (16,14).
9. Jede Stufe oben wird annulliert, wenn keine Taste innerhalb 7 Sekunden gedrückt wird.
10.NachdemSie"ALARMON" und "ALARM OFF" geregelt haben,dieTaste TIMER drücken,
“ ", erscheint er auf dem Display.
2. DrückenSiedieTasteTUNER/CLK+oderTUNERCLK-(vorwärts oder rückwärts) (16,14)
um auf dem 12 oder 24 Stundenmodus zu regeln.
3. Drücken Sie die Taste PLAY/PAUSE/FM (9) erneut. Die Ziffer der Stunde wird auf dem
Display blinken. Drücken Sie TUNER/CLK+ oder TUNER CLK- (vorwärts oder rückwärts)
(16,14), um die Stunden zu regeln.
4. Drücken Sie die Taste PLAY/PAUSE/FM (9) erneut, die Ziffer der Minuten wird auf dem
Display blinken. Drücken Sie TUNER/CLK+ oder TUNER CLK- (vorwärts oder rückwärts)
(16,14), um die Minuten zu regeln.
5. Drücken Sie die Taste PLAY/PAUSE/FM (9) nochmals, um die Zeit zu bestätigen.
6. Jede Stufe oben wird annulliert, wenn keine Taste innerhalb 10 Sekunden gedrückt wird.
ALARM(TIMER)-EINSTELLUNG
Im STANDBY-Modus:
1. Nachdem Sie die Zeit geregelt haben, drücken Sie die Taste ALARM auf dem Gerät (20)
einige Sekunden lang. "07:00" werden auf das Display erscheinen und die Ziffer der
Stunde wird auf dem Display blinken.
2. Drücken Sie TUNER/CLK+ oder TUNER CLK- (vorwärts oder rückwärts) (16,14), um zu
regeln.
3. Nochmals die Taste PLAY/PAUSE/FM (9) drücken, die Ziffer der MINUTEN wird auf dem
Display blinken. Drücken Sie TUNER/CLK+ oder TUNER CLK- (vorwärts oder rückwärts)
(16,14), um zu regeln.
4. Nochmals die Taste PLAY/PAUSE/FM (9) drücken, um die Zeit zu bestätigen und die
Einschalt-Zeit (TIMER ON) einzustellen.

DeutschDeutsch
FUNKTIONWAHL
1. Die Taste FUNKTION auf dem Gerät (12 ) oder auf der Fernbedienung (9) drücken, um
die gewünschte Funktion zu wählen. Anzeige ändert sich wie iPod UKW Radio oder AUX..
RADIOBETRIEB
BETRIEB
• Drücken Sie die STANDBY-Taste (23), um das Gerät einzuschalten. .
• Wählen Sie die TUNER-Funktion mit der Funktion-Taste auf dem Gerät (4) oder auf der
Fernbedienung (9).
• Es gibt mehrere Möglichkeiten, um eine Rundfunkstation einzustellen. Lesen Sie dazu
die unteren Abschnitte.
• Stellen Sie die LAUTSTÄRKE auf den gewünschten Pegel ein, indem Sie den
Lautstärkeknopf (15) oder die Tasten LAUTSTÄRKE Auf/Ab (21,8) verwenden.
• Um das Radio auszuschalten, drücken Sie die Power Ein-/Standby-Taste.
MANUELLESABSTIMMEN
Manuelles Abstimmen ist nützlich, wenn Sie schon die Frequenz des gewünschten Senders
kennen.
• Vergewissern Sie sich, daß die UKW-Antenne (17) ganz ausgestreckt ist.
• Drücken Sie die TUNER/CLK+ oder TUNER CLK- (vorwärts oder rückwärts) (16,14),
Taste aufwärts oder abwärts mehrmals, bis die genaue Frequenz erreicht ist.
• Aus dem Hauptgerät drücken Sie den Jog-Modus-Taste (19) und drehen Sie die
Lautstärke / Tune-Knopf, bis die genaue Frequenz erreicht ist.
AUTOMATISCHESABSTIMMEN
• Vergewissern Sie sich, angeschlossen ist und die UKW-Antenne (25) ganz ausgestreckt
ist.
• Halten Sie die TUNER/CLK+ oder TUNER CLK- (vorwärts oder rückwärts) (16,14)-Taste
aufwärts oder abwärts ungefähr eine Sekunde lang gedrückt. Das Radio beginnt
automatisch das Suchen nach starken Radiosignalen. Das TUNER-Display zeigt die
Frequenzen in MHz für UKW.
• Wenn ein starkes Signal gefunden wird, stoppt der Tuner den Suchlauf.
• Wiederholen Sie diesen Vorgang, bis Sie die gewünschte Station gefunden haben.
Hinweis: Da das Automatische Abstimmen von der Signalstärke der Sender abhängt,
werden schwache Sender manchmal übersprungen. In diesem Fall stimmen Sie
manuell ab, um die schwächeren Sender zu finden.
Andererseits könnte der Tuner bei einem sehr starken Signal stoppen, bevor die
optimale Einstellung erreicht ist. Für den besten Empfang stimmen Sie manuell ab.
19 20
AKTIVIERUNGDESALARMSAUFWACHENMODUS
1.DrückenSiemehrmalsdie Taste ALARM, um die Alarmfunktion zu aktivieren und die Wake
up-Modus.
2. Der Alarm-Modus und das zugehörige Symbol TUNER / iPod / SUMMER / ALARM OFF
erscheinen in der Reihenfolge auf dem Display.
HINWEIS: Wenn Alarm Weckruf für iPod-Modus ausgewählt ist, und kein iPod / iPhone / iPad
ist in der Fitten Docking-oder anerkannt, wenn der Alarm den Summer aktiviert wis kommen
automatisch.
Um den Alarm auszuschalten, drücken Sie die ALARM repeadtly gedrückt, bis der Alarm
Symbol verschwindet aus der Anzeige.
SNOOZE-FUNKTION
Während des Alarms drücken Sie die Taste SNOOZE wird vorübergehend den Alarm
auszuschalten für 5 Minuten und die Snooze-Symbol wird angezeigt. Dies ist wiederholbar
in der Stunde Alarmdauer.
EQUALIZER-EINSTELLUNG(NURVONDERFERNBEDIENUNG)
EQ zeigt die aktuelle Tonalität (BASS und TREBLE).
Wenn Sie die Taste EQ drücken, wird die Tonalität. das Klangbild BASS oder TREBLE kann
durch Drücken verändert werden die TUNER/CLK+ oder TUNER CLK- (vorwärts oder
rückwärts) (16,14), um zu regeln.
SLEEP-FUNKTION (MITTELSFERNBEDIENUNG)
1. Wenn Sie sich mit der Musik einschläfern wollen, die Taste SLEEP drücken.
2. Siekönnenzwischen TUNER, iPod oder AUX, inder Modalität Funktion Sleep wählen, um
die Musik für 90, 80, 70 bis zu 10 Minuten zu hören, bevor das Gerät sich automatisch
ausschaltet.

DeutschDeutsch 21 22
STATIONSSPEICHERUNG (nurvonderFernbedienung)
Dieses Gerät ermöglicht es Ihnen, Frequenzen von bis zu 20 Stationen zu speichern.
• Zuerst stellen Sie mit einer der obigen Methoden die Station ein, die Sie speichern
möchten.
• Dann drücken Sie die PRESETMENU auf dem Fernbedienung (17).
• Wählen Sie den gewünschten Speicherplatz mit die PRESET-UP oder PRESET-DN
Tasten auf dem Fernbedienung (3,4) und drücken Sie diePreset/Menu-Taste (17)
innerhalb 5 Sekunden, um ihn zu speichern.
Um eine gespeicherte Station neu zu programmieren, wiederholen Sie den obigen Vorgang.
ABRUFENEINERGESPEICHERTENSTATION
Um eine gespeicherte Station abzurufen, drücken Sie den Jog / Mode-Taste und drehen Sie
die Lautstärke / Tune-Knopf am Hauptgerät oder drücken Sie die PRESET-UP oder PRESET
-DN Tasten auf der Fernbedienung (3,4), bis der gewünschte Programm wird angezeigt.
UKW-STEREO--EMPFANG
Wenn ein UKW-Stereo-Signal abgestimmt wird und Sie auf UKW-Stereo sind, können Sie
das Programm in Stereo empfangen. Die ((( ST. ))) Anzeige leuchtet in dem Display auf.
Bei schwachen Stereo-Signalen und einem geräuschvollen Empfang ist es oft vorzuziehen,
das Programm in Mono zu empfangen. Stellen Sie den PLAY/PAUSE/MONO/STEREO-taste
(9) auf Mono. Der Empfang erfolgt mit weniger Störgeräuschen.
ANTENNE
FürdenUKW-Empfangbefindetsich auf derRückseitedesGerätes einUKW-Antennenkabel
(25). Für optimer Empfang, strecken Sie es aus.
iPod iPad iPhone FUNKTION
ImSTANDBY-Modus:
1. Der iPod-Leser fest in der iPod-Stand auf das Oberteil des Gerätes einsetzen.
2. Die Taste STANDBY auf das Gerät oder auf die Fernbedienung drücken, um das
Gerät einzuschalten. Die Taste FUNKTION drücken, um den iPodmodus zu wählen,
iPod wird auf dem Display erscheinen.
Mitdem Gerät Im iPod-Modus:
1. Einmal PLAY/PAUSE drücken, um mit der Wiedergabe des iPods anzufangen.
Drehen Sie den Drehknopf VOLUME -/+, um die Lautstärke zu regeln. Um die
aktuelle Wiedergabe anzuhalten, die Taste PLAY/PAUSE einmal drücken.
2. Einmal PLAY/PAUSE drücken, um die Wiedergabe des aktuellen Stückes anzuhalten
Um wieder die Wiedergabe der Disc zu nehmen, wieder die Taste PLAY/PAUSE
drücken.
3. Um vorwärts oder rückwärts die Stücke zu springen, TUNER/CLK+ oder TUNER
CLK- (vorwärts oder rückwärts) (16,14) drücken, um das gewünschte Stück zu
wählen.
MitdemGerätImiPod-MENU-Modus:
1. Wenn das Gerät im iPod-Modus ist, die Taste PRESET/MENU auf die Fernbedie-
nung drücken. Das Gerät tritt im iPod MENÜ Modus ein.
2. Die Taste PRESET UP oder PRESET DOWN (3,4) drücken, um zum iPod Menü
zurückzukehren.
Wie den iPod Leser durch das Gerät zu laden:
1. Der iPod Player hat eine eigene innere Batterie. Das iPod sollte geladen werden,
wenn es für einer Zeit nicht benutzt wird.
2. Sie können den iPod Player automatisch laden, in STANDBY oder POWER ON Modi.
Hinweis:
1. Die Batterie des iPod-Lesers belädt sich um 80% während einer Stunde, und es
belädt sich ganz nach einigen Stunden. Wenn Sie das iPod während der
Wiedergabe laden, mehr Zeit nötig wird.
2. Es ist besser im TUNER-Modus nicht laden. Es könnten Interferenzen mit dem
Empfang eintreten.
Hinweis:
1. Sie können immer den iPod Player vom Hauptgerät, von der Fernbedienung oder
vom gleicher iPod steuern, wenn das Gerät in "iPod" oder "iPod MENU" Modus ist.
2. Der iPod Player muß immer fest befestigt sein, und im STANDBY Modus, um zum
Gerät und dem iPod Schäden zu vermeiden.
AUXINWIEDERGABE
DieAUX IN Eingangbefindet sich auf der Rückseite des Gerätes (12). EinenKabelmitStereo
jack von 3.5mm benutzen, um das externe Audio-Gerät zum AUX IN Eingang zu verbinden.
1. Um die Funktion AUX IN zu wählen, die Taste FUNKTION auf das Gerät oder auf die
Fernbedienung wiederholt drücken, bis AUX auf dem Display erscheint.
2. Die VOL +/- Tasten drücken, um die Lautstärke zu regeln.
Hinweis: Der LINE IN Kabel wird nicht in der Verpackung mitgeliefert.
MUTE(VONDERFERNBEDIENUNG)
1. ZumTonabschalten,drückenSiedieMUTE-Taste(2)aufderFernbedienung.DasNiveau
der Lautstärke wird auf dem Display blinken.
2. Wird die Taste erneut gedrückt, spielt die Anlage mit der bisherigen Lautstärke weiter.

DeutschDeutsch 23 24
KOPFHÖRER
DieKopfhörersollteneinen 3.5mm-Stereo-SteckerundeineImpedanzvon 8-32Ohmhaben.Wenn
die Kopfhörer angeschlossen werden (18), werden die Lautsprecher automatsich abgeschaltet.
DISPLAYBACKLIGHT
Dieses Gerät verfügt über 4 verschiedene Ebenen der Display-Beleuchtung.
Drücken Sie nacheinander die Taste backlight aus der Fernbedienung, um die gewünschte
Intensität auszuwählen.
X-BASSFUNKTION
Drücken Sie die Taste X-BAFF auf der Fernbedienung ein Bass-Effekt und eine bessere
Audio-Antwort zu erhalten.
LCDDISPLAY
Korrekte Entsorgung dieses Produkts (Elektromüll)
Die Kennzeichnung auf dem Produkt bzw. auf der dazugehörigen Literatur gibt
an, dass es nach seiner Lebensdauer nicht zusammen mit dem normalen
HaushaltsmüIl entsorgt werden darf. Entsorgen Sie dieses Gerat bitte getrennt
von anderen Abfallen, um der Umwelt bzw. der menschlichen Gesundheit nicht
durch unkontrollierte Müllbeseitigung zu schaden. Recyceln Sie das Gerät, um
die nachhaltige Wiederverwertung von stofflichen Ressourcen zu fördern.
Private Nutzer sollten den Händler, bei dem das Produkt gekauft wurde, oder
die zuständigen Behörden kontaktieren, um in Erfahrung zu bringen, wie sie das
Gerät auf umweltfreundliche Weise recyceln können.
Gewerbliche Nutzer sollten sich an Ihren Lieferanten wenden und die
Bedingungen des Verkaufsvertrags konsultieren. Dieses Produkt darf nicht
zusammen mit anderem Gewerbemüll entsorgt werden.
TECHNISCHEDATEN
Stromversorgung
AC: 230V – 50Hz
Batterie: 1 x CR-2032 für die Fernbedienung
Radio-Frequenzbereich
UKW: 87.5 – 108 MHz
Allgemeines
Kopfhörer: 3.5mm-Stereo-Stecker, 8-32 Ohm
Ausgang: 2x 2 Watt
Technische Änderungen vorbehalten
A. STEREOANZEIGE E. ALARMANZEIGE
B. SLEEPANZEIGE F.VOLUMEANZEIGE
C. MUTEANZEIGE G.Zeit-Frequenz-ANZEIGE
D. SNOOZEANZEIGE H.EQUALIZERANZEIGE

FrançaisFrançais 25 26
ATTENTION
CAUTION
RISK OF ELECTRIC
SHOCK
DO NOT OPEN
Le symbole “point d’exclamation” à l’intérieur d’un triangle avertit
l’utilisateurque d’importantes instructionsd’utilisation etde maintenance
sont contenues dans le mode d’emploi.
Le symbole “éclair” à l’intérieur d’un triangle sert à avertir l’utilisateur de
la présenceducourant à l’intérieur du l’appareilqui pourrait constituer
un risque.
Afin de minimiser les risques, ne pas ouvrir le boîtier ni ôter le dos de
l’appareil. En case de panne, faites appel aux techniciens qualifiés
pour les réparations. L’appareil ne renferme aucune pièce reparable
par l’utilisateur.
Cet appareil a été conçu pour une tension d’alimentation de 230V ~
50Hz. Débranchez la prise de courant quand on prévoit de ne pas
utiliser l’appareil pendant un certain temps.
L’unité ne doit pas être exposée à l’humidité ou à la pluie.
L’interrupteur d’allumage de cet appareil est monté sur des circuits
secondaireset il ne débranche pasl’appareil tout entierlorsqu’on l’éteint.
Mettez l’appareil sous tension seulement après avoir vérifié que tous
les raccordements soient corrects.
L’appareil doit être gardé dans un endroit suffisamment ventilé. Ne le
gardez jamais par exemple près des rideaux, sur un tapis ou dans des
meubles, tels qu’une bibliothèque.
L’unité ne doit pas être exposée à la lumière directe du soleil ou à des
sources de chaleur.
Installez vos piles en veillant à respecter la correcte polarité.
Quand vous prévoyez de ne pas utiliser l’appareil pendant un mois ou
plus, retirez les piles du logement pour empêcher toute fuite d’acide.
230v~
HRA-500IP
RADIO REVEILAVEC iPod iPad iPhone DOCKING STATION, RADIO DIGITALE
FMET TELECOMMANDE MULTIFUNCTION.
MODED’EMPLOI
Veuillez lire attentivement ce mode d’emploi, afin de familiariser avec votre nouvel appareil
avant de l’utiliser pour la première fois. Veuillez s’il vous plaît garder ce mode d’emploi
comme référence pour le futur.
POSITIONNEMENTDESCOMMANDES
1. Haut-parleur
2. Touche Snooze
3. Connecteur iPod iPad iPhone
4. Touche selecteur fonction iPod iPad iPhone
5. Prise de Casques
6. Compartiment Batterie du Mémoire Radio
7. Afficheur LCD
8. Indicateur de STANDBY
9. Touche de Lecture / Attente / FM Stereo
10. Touche d’Alimentation/STANDBY
11. Câble alimentation CA
12. Entrée AUX IN
13. Touche de CLOCK-ADJ/Display.
14. Radio: Touche d’Accord en Arrière / iPod: Touche de Saut en Arrière
15. Contrôle Volume -/+
16. Radio:Touche d’Accord en Avant / iPod: Touche de Saut en Avant
17. Antenne FM
18. Senseur de la télécommande
19. Touche modalité Jog
20. Touche Alarme
BRANCHEMENTALASOURCED’ALIMENTATION
Avantl’utilisation,vérifierquelatensionélectrique devotresourced’alimentationcorresponde
à celle indiquée sur la plaque des caractéristiques techniques de l’appareil.
Avant de brancher l’appareil au réseau, il faut lire attentivement les instructions suivantes
pour des raisons de sécurité.
UTILISATIONDURESEAU(CC)
L’appareil est conçu pour fonctionner sur une tension de CA 230V, 50Hz seulement. S’il est
- +
- +

FrançaisFrançais
branché à d’autres sources d’alimentation cela peut causer des dommages.
Danger
Pour éviter tout risque de décharge électrique, débrancher l’appareil avant d’enlever la
protection. A l’intérieur il n’y a pas de parties utilisables. S’adresser au personnel qualifié
pour toute opération d’entretien.
Consignes de Sécurité
N’exposer cet appareil ni à la pluie ni à l’humidité.
Alimentation du réseau: CA 230Volt 50Hz - CC seulement
Ce symbole signifie que l’appareil a été doublement isolé. La connexion de terre n’est
pas nécessaire.
PREPARATIONPOURL’UTILISATION
Enleverle stéréo de son emballageavecattention et garder la boîteen cas d’utilisation future.
Avant la mise en service de l’appareil, lire attentivement le mode d’emploi présent.
BRANCHEMENTS
Brancher le Cordon d’Alimentation à une prise murale CA. Vérifier que la tension électrique
du réseau soit de 230 V, 50 Hz.
Dérouler l’antenne FM sur le dos de l’appareil (17).
FONCTIONNEMENTSURRESEAUCA
Débrancher le cordon d’alimentation de la prise murale en cas d’inutilisation prolongée.
INSTALLATIONDESPILES
Introduire dans le compartiment prévu à
cet effet une pile du type CD-2032 et
repositionner le couvercle.
REMPLACEMENTDESPILES
Quand la pile devient trop faible, la portée de la télécom-
mande diminue considérablement et il faut remplacer la pile.
Remarques: Pour bien garder la télécommande, et en prolonger sa durée, ne pas appuyer
sur deux ou plus de deux Touches en même temps.
En cas d’inutilisation prolongée de la télécommande, retirer la pile afin d’éviter qu’elle coule
et par conséquent qu’elle cause des dommages éventuels.
27 28
UTILISATIONCORRECTEDELATELECOMMANDE
Diriger la télécommande vers le capteur à Distance (18).
Les fonctions des touches sur la télécommande sont les mêmes que celles des touches
correspondantes se trouvant sur l’appareil.
Si la lumière de l’ambiance est trop forte, le rendement des radiations infrarouges du Capteur
à Distance peut être altéré, en compromettant le bon fonctionnement de la télécommande.
La télécommande fonctionne sur une distance effective maximale de 5 m. environ.
TELECOMMANDE
1. Touche de STANDBY
2. Touche de MUTE
3. Touche de PRESET Radio haut
4. Touche de PRESET Radio bas
5. Touche de rétroéclairage
6. Radio: Touche d’Accord en Arrière /
iPod: Touche de Saut en Arrière
7. Touche Display
8. Touche de VOLUME bas
9. Touche de FONCTION
10. Touche Snooze / iPod conf.
11. Touche présélection / Menu
12. Touche Alarme
13. Touche de PLAY/PAUSE (seul. iPod)
14. Touche de EGALISATEUR
15. Radio: Accord en Avant / iPod: Saut en Avant
16. Touche de Basse
17. Touche Volume sur
18. Touche Sleep
POUR AJUSTERL’HORLOGE
En mode ATTENTE (STAND-BY):
1. Presser et tenir la touche Clock/Display. (13) tant que l'heure change à la modalité de 12-
heures en clignotant.
1
5
6
7
4
2
18
9
15
10
3
12
16
17
8
14
11
13

FrançaisFrançais
2. Presser la touche Tune/Clk+ ou Tune/Clk- (16,14), pour régler à la modalité 12 ou 24
heures.
3. Presserlatouche Play/Pause(9)denouveau,lechiffrede l'heureclignoterasurl’afficheur,
presser Tune/Clk+ ou Tune/Clk- (16,14), haut ou bas pour régler les heures.
4. PresserlatouchePlay/Pause (9).encoreunefois,le chiffre delaMINUTEclignotera sur l’afficheur,
presser Tune/Clk+ ou Tune/Clk- (16,14), haut ou bas pour régler les minutes.
5. Presser la touche Play/Pause (9) encore une fois pour confirmer l'horaire.
6. Chaque état en haut sera annulé si aucune touche n'est pressée pendant 10 secondes.
REGLAGEALARME
EnmodeATTENTE (STAND-BY) OFF/ON:
1. Après avoir réglé l'heure, presser la toucheAlarme sur l’appareil (20) pour quelques
secondes "00:70" apparaîtront sur le display, et le chiffre de l'heure clignotera sur
l’afficheur.
2. Presser Tune/Clk, haut ou bas (16,14), pour régler.
3. Presser la touche Play/Pause (9) de nouveau, le chiffre de la MINUTE clignotera sur
l’afficheur, presser Tune/Clk+ ou Tune/Clk-, haut ou bas (16,14), pour régler.
4. Presser la touche Play/Pause (9) ancore une fois pour confirmer l'horaire et régler l'horaire
d'allumage (ALARM ON).
5. Après avoir réglé "TIMER ON", "Niveau de Alarme " apparaît sur l’afficheur en clignotant.
29 30
6. Maintenant"MemoireduRadio"apparaîtsurl’afficheurenclignotant,réglerTune/Clk,haut
ou bas (16,14) haut ou bas.
7. Presser la touche Play/Pause/FM de nouveau, l'indicateur "Niveau du Buzzer" du Timer
apparaîtrasurl’afficheurenclignotant,réglerlevolumeduTimer,hautoubas,enpressant
les touches Tune/Clk+ ou Tune/Clk- , haut ou bas.
8. Chaque état en haut sera annulé si aucune touche n'est pressée pendant 7secondes.
9. L’appareil s'allumera automatiquement à l'horaire de "ALARM ON", et s'éteindra à l'horaire
de"ALARMOFF."
ACTIVATIONALARME
1. Appuyez sur en séquence de touches ALARM pour sélectionner l'alarme désirée (si votre
iPod, radio ou du buzzer).
2. L'écran affiche une petite icône avec le symbole d'alarme choisi.

FrançaisFrançais
l’appareil (15) ou les touches d’Augmentation ou Réduction (21,8) sur la télécommande.
• Pour éteindre la radio, appuyer sur la Touche de STANDBY.
RECHERCHEMANUELLEDELASTATION
Il est très utile de rechercher les stations manuellement, si vous connaissez déjà la
fréquence de la station émettrice.
• Brancher l’antenne FM à l’arrière.
• Pour changer de fréquence, appuyer plusieurs fois sur les touches Tune/Clk+ ou Tune/
Clk-, jusqu’à ce que la fréquence précise ait été atteinte.
• Sinon, vous pouvez appuyer sur le mode JOG (19) et tournez le VOLUME / TUNE pour
obtenir la fréquence désirée.
RECHERCHEAUTOMATIQUEDESSTATIONS
• Appuyer sur la Touche de Recherche Fréquence Tune/Clk+ ou Tune/Clk- en avant ou en
arrière et la maintenir enfoncée pendant une seconde environ. La radio commence
automatiquement l’exploration des signaux radio les plus puissants. L’afficheur de la
RADIO montre la fréquence en MHz pour la bande FM.
• Le syntonisateur arrête l’exploration dès qu’il trouve un signal assez puissant.
• Répéter ce procédé pour intercepter la station émettrice souhaitée.
Remarques: Comme la recherche automatique des stations dépend de la puissance du
signal des stations émettrices, les stations les plus faibles sont quelquefois
ignorées. Dans ces cas, il faut rechercher les stations manuellement, afin
d’intercepter aussi les stations émettrices les plus faibles. D’autre part,
en présence d’un signal très puissant, la recherche des stations peut
s’arrêter avant que le réglage optimal ait été atteint. Rechercher la station
manuellement, pour que la réception soit la meilleure possible.
MEMORISATIONDESSTATIONS(PARTELECOMMANDE)
Cet appareil vous permet de mémoriser les fréquences de 20 stations radio.
• Avanttoutil faut intercepter la station que l’on désire mémoriser, selonl’undesméthodes
indiqués ci-dessus.
• Appuyer ensuite sur la touche Preset Menu.
• Sélectionner le positionnement souhaité en pressant les touches PRESET-UP ou
PRESET-DN (3,4) sur la télécommande et presser la touche de Preset Menu entre 10
secondes pour la mémoriser.
Pour reprogrammer une station présélectionnée, il faut répéter le procédé indiqué ci-dessus.
31 32
REMARQUE: Si vous réglez l 'alarme avec l'iPod / iPhone et iPad et aucun appareil est
relié à le connecteur approprié, l'unité'Automatiquement actionner le buzzer.
Pour désactiver les alarme, appuyez sur le touche ALARM et le icône de l'alarme
disparaît de l'afficheur.
FONCTIONSNOOZE
Lorsque l 'alarme retentira, le bouton SNOOZE appuyez sur le touche alarme que
sera désactivée pendant 5 minutes et l'écran affiche le symbole SNOOZE: Cette
opération est possible de répéter pour la durée d'une heure .
CONTRÔLE EQ(PARTELECOMMANDE)
EQ montre la tonaité du son actuel (Bass et Treble).
Quand on presse la touche EQ, activant cette fonction la tonalité du son changera.
FONCTIONSLEEP(PARTELECOMMANDE)
1. Si vous voulez vous endormir avec la musique, presser la touche SLEEP.
2. Vous pouvez sélectionner entre les modes de TUNER, iPod ou AUX, dans la modalité
Fonction Sleep pour écouter la musique pour 90, 80, 70 jusqu'à 10 minutes avant qu'il
s'éteigne automatiquement.
SELECTIONDELAFONCTION
1. Presser la touche FUNCTION (12) sur l’appareil ou sur la télécommande (9) pour
sélectionner la fonction désirée: iPod / Radio / AUX-IN.
ECOUTEDELARADIO
FONCTIONNEMENT
• Appuyersur la Touche deSTANDBY (On/Off) sur l’appareil (23) ousur la télécommande
(9) pour allumer l’appareil.
• Appuyer sur la Touche de FONCTION (21) pour sélectionner TUNER.
• Il y a plusieurs possibilités pour intercepter les stations émettrices. Suivre les instructions
indiquées dans la section ci-dessous.
• Régler le VOLUME au niveau de son souhaité en utilisant la manople du Volume sur

FrançaisFrançais 33 34
Comme charger le lecteur iPod Player par l’appareil:
1. Le lecteur iPod a sa batterie intérieure. Elle aura besoin d'être chargée quand elle
n'est pas utilisée pour un peu de temps.
2. Vous pouvez charger automatiquement le lecteur iPod par le biais de l’appareil en
modalité STANDBY ou POWER ON.
Note:
1. La batterie du lecteur iPod se charge au 80% pendant une heure, et il se charge
complètement après quelques heures. Si elle est chargée pendant la lecture elle
nécessitera de plus temps.
2. Il est mieux de ne pas charger en modalité TUNER. Il pourrait interférer avec la
réception.
Note:
1. Vous pouvez toujours contrôler le lecteur iPod par l’appareil principal, la
télécommande ou le lecteur iPod lui-même quand l’appareil se trouve en modalité
"iPod" ou "iPod MENU."
2. Le lecteur iPod doit être solidement toujours fixé, et en mode STANDBY pour éviter
des dommages à l’appareil et à l'iPod.
REPRODUCTIONAUXIN
L'entrée AUX IN se trouve sur l’arrière de l’appareil (12). Utiliser un câble avec une fiche
stéréophonique de 3.5mm pour connecter l’appareil sonore extérieur à l'entrée LINE IN.
1. Pour sélectionner la fonction AUX IN, presser plusieurs fois la touche FONCTION sur
l’appareil tant que AUX apparaît sur l’afficheur.
2. Presser la touche VOLUME, haut ou bas, pour régler le niveau de sortie.
Note: Le câble LINE IN n'est pas inclus dans l'emballage.
MUTE(DELA TELECOMMANDE)
1. Pousser la touche MUTE (2) sur la télécommande pour annuler instantannément le
volume, le niveau du volume sera abaissé.
2. Pousser de nouveau MUTE pour reporter le volume au niveau précédent.
CASQUES
Avec cet appareil l’on peut utiliser des casques stéréo (non inclus) avec une fiche de 3,5
mm. de diamètre et une impédance égale ou supérieure à 8 ohms.
Les haut-parleurs sont automatiquement déconnectés quand les casques sont branchés
à la PRISES DE CASQUES (18).
SELECTIOND’UNESTATIONPRESELECTIONNEE
Pour sélectionner une station préréglée, appuyez sur la touche PRESET UP ou PRESET DN
(3,4) sur la télécommande jusqu'à la station désirée apparaît à l'écran.
E 'peut également sélectionner la station préréglée en tournant le bouton de Volume / Tune
(15) sur l'unité.
RECEPTIONFMENSTEREOPHONIEETMONOPHONIE
Quand un signal FM-Stéréo est intercepté, la transmission sera reçue en stéréophonie.
L’indicateur ((( ST. ))) s’allumera. Lorsque les stations FM sont faibles et dérangées, en
sélectionnant FM Mono avec la touche PLAY/PAUSE MONO-STEREO (9), l’écoute peut être
améliorée. La réception sera en Mono.
ANTENNE
Pour la réception en FM il y a une antenne à fil (17) placée au dos de l’appareil. Dérouler le
câble et l’orienter de manière à ce que la qualité de la réception soit la meilleure possible.
FONCTION iPod iPad iPhone
EnmodalitéArrêt(STANDBY):
1. Insérer le lecteur iPod iPad ou iPhone solidement dans le logement d'iPod sur la
partie supérieure de l’appareil.
2. Presser la touche STANDBY sur l’appareil ou sur la télécommande pour allumer
l’appareil.
Presser la touche FONCTION sur l’appareil ou sur la télécommande pour
sélectionner la modalité iPod, l'indicateur iPod apparaîtra sur l’afficheur.
Avecl’appareilenmodalitéiPod:
1. Presser PLAY/PAUSE une fois pour commencer la lecture de l'iPod.
Régler le volume en tournant le bouton de VOLUME haut/bas.
2. Presser PLAY/PAUSE une fois pour arrêter la lecture de la piste actuelle. Pour
reprendre la lecture, presser la touche PLAY/PAUSE de nouveau.
3. Pour sauter les pistes en avant ou en arrière, presser Tune/Clk+ ou Tuner/Clk- pour
sélectionner la piste désirée.
Avecl’appareilenmodalitéiPodMENU:
1. Quand l’appareil est en modalité iPod, presser la touche PRESET/MENU (11) par
telecommande une fois, l’appareil entre en modalité iPod MENU.
2. Presser Skip/Tuner (6,15) pour revenir au menu iPod.
3. Presser la touche Select pour confermer.

FrançaisFrançais 35 36
AFFICHEURLCD
A. INDICATEURSTEREO E. INDICATEURALARME
B. INDICATEUR SLEEP F.INDICATEURNIVEAUVOLUME
C.INDICATEURMUTE G. INDICATEURORAIRE/FREQUENCE
D. INDICATEUR SNOOZE H. INDICATEUR EQUALISEUR
CARACTERISTIQUESTECHNIQUES
ALIMENTATIONÉLECTRIQUE
CA: 230V - 50 Hz
Pile: 1 xCR-2032 pour la télécommande
LIMITESD’AUDIBILITÉFRÉQUENCESRADIO
FM: 87,5 - 108 MHz
GÉNÉRAL
Casques: Fiche stéréo 3,5 mm de diamètre, 8-32 ohms
Sortie 2 x 2 Watt
Caractéristiques sujettes à modifications sans avis préalable.
Comment éliminer ce produit -
(déchets d'équipements électriques et électroniques)
Ce symbole sur le produit ou sa documentation indique qu'il ne doit pas être
éliminé en fin de vie avec les autres déchets ménagers. L'élimination incontrôlée
des déchets pouvant porter préjudice a l'environnement ou a la santé humaine,
veuillez le séparer des autres types de déchets et le recycler de
façon responsable. Vous favoriserez ainsi la réutilisation durable des ressources
matérielles.
Les particuliers sont invites a contacter le distributeur leur ayant vendu le produit
ou a se renseigner auprès de leur mairie pour savoir ou et comment ils peuvent
se débarrasser de ce produit afin qu'il soit recyclé en respectant l'environnement.
Les entreprises sont invitées a contacter leurs fournisseurs et a consulter les
conditions de leur contrat de vente. Ce produit ne doit pas être éliminé avec
les autres déchets commerciaux.
RÉTROÉCLAIRAGEAFFICHEUR
Cette unité dispose de 4 niveaux de réglage de l'intensité de l'affichage.
Appuyezsur le bouton rétroéclairage de l'écrande la télécommande ((Backlight) pour obtenir
l'intensité de l'éclairage désiré.
FONCTIONX-BASS
Appuyez sur le touche X-BASS sur la télécommande pour obtenir un meilleur effet sonore
avec plus de basses présentes.
Table of contents
Languages:
Other Roadstar Docking Station manuals