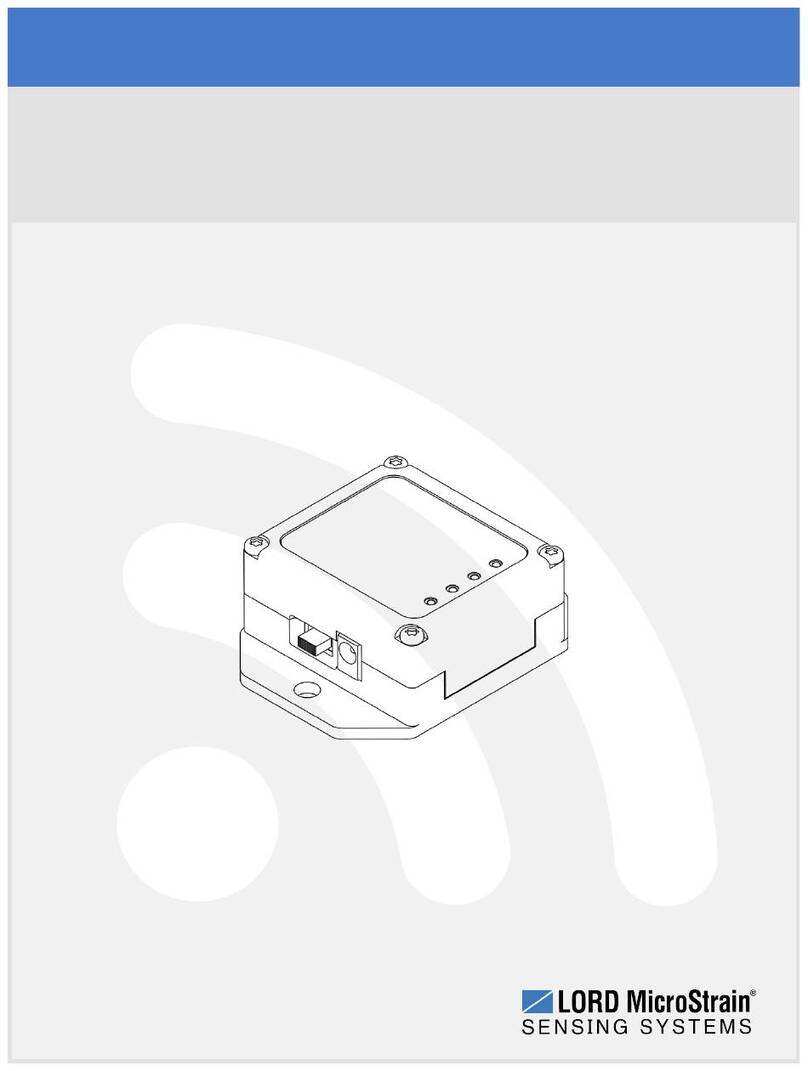
Lord MicroStrain V-Link-200 User manual

LORD USERMANUAL
V-Link-200
Wireless 8 Channel Analog Input Sensor Node

LORD Sensing Systems
459 Hurricane Lane
Suite 102
Williston, VT 05495
United States of America
Phone: 802-862-6629
Fax: 802-863-4093
http://www.microstrain.com
sensing_support@LORD.com
sensing_sales@LORD.com
Copyright © 2016 LORD Corporation
3DM®, 3DM-DH®, 3DM-DH3™, 3DM-GX1®, 3DM-GX2®, 3DM-GX3®, 3DM-GX4-15™, 3DM-GX4-25™, 3DM-GX4-45™,
3DM-GX4™, 3DM-RQ1™, 3DM-GQ4™, AIFP®, Ask Us How™, Bolt-Link®, DEMOD-DC®, DVRT®, DVRT-Link™, DEMOD-
DVRT®, EH-Link®, EmbedSense®, ENV-Link™, FAS-A®, G-Link®, G-Link2™, HS-Link®, IEPE-Link™, Inertia-Link®, Little
Sensors, Big Ideas.®, Live Connect™, LXRS®, MathEngine®, MicroStrain®, MVEH™, MXRS®, Node Commander®, PVEH™,
RHT-Link®, RTD-Link™, SensorCloud™, SG-Link®, Shock-Link™, Strain Wizard®, TC-Link®, Torque-Link™, V-Link®, Watt-
Link™, Wireless Simplicity, Hardwired Reliability™, and WSDA®are trademarks of LORD Corporation.
Document 8500-0063 Revision A
Subject to change without notice.

V-Link-200 Wireless Sensor Node User Manual
Table of Contents
1. Wireless Sensor Network Overview
6
2. Node Overview
7
2.1 Components List
8
2.2 Interface and Indicators
9
2.3 Node Diagnostics
10
2.4 Node Operational Modes
13
3. System Operational Overview
14
3.1 Software Installation
14
3.2 System Connections
15
3.3 Gateway USB Communication
16
3.4 Connect to Nodes
17
3.5 Configure Node
19
3.6 Sampling Configuration
22
3.7 VIEWINGDATA
24
3.7.1 Using Dashboards and Widgets 24
3.7.2 Navigating Graphs 25
3.7.3 Widgets Options 25
3.8 Data Handling
27
3.8.1 Connecting to SensorCloud 28
3.8.2 Sensor Data Files 31
4. Node Installation
32
4.1 Mounting Recommendations
32
4.2 Optimizing the Radio Link
33
4.2.1 Range Test 33
5. Connecting Sensors
35
5.1 Sensor Requirements
35
5.2 Wiring Recommendations
36
5.3 Sensor Power
37
5.4 Node Channels Designations
37

V-Link-200 Wireless Sensor Node User Manual
5.5 Terminal Block Connections
38
5.6 Pin Descriptions
39
5.7 Differential Input Channels
40
5.7.1 Differential Sensors 41
5.7.2 Measuring Small Voltages 43
5.8 Single-Ended Input Channels
44
5.8.1 Measuring Small Currents (4 to 20mA Sensors) 45
5.9 Using the Excitation Output as a Switch
46
5.10 Thermocouples
47
5.11 Connecting Accelerometers
48
5.12 On-board Temperature Sensor
48
6. Sensor Settings
49
6.1 Sensor Calibration
50
6.1.1 EXAMPLE: Internal Shunt Calibration 52
6.1.2 Calibration Lab or Field 55
6.1.3 Manufacturer Calibration 59
6.2 Sensor Conversion Values
60
6.2.1 Calculating a Linear Slope 63
6.2.2 Differential Input Gain and Offset 66
7. Powering the Node
68
7.1 Using the Internal Node Battery
69
7.2 Connecting an External Power Supply
70
8. Troubleshooting
71
8.1 Troubleshooting Guide
71
8.2 Using the Node Tester Board
75
8.3 Updating Node Firmware
80
8.4 Repair and Calibration
81
8.5 Technical Support
82
8. Maintenance
83
8. Parts and Configurations
84

V-Link-200 Wireless Sensor Node User Manual
8.6 Standard Nodes
84
8.7 Node Accessories
85
8.8 Recommended Sensors
86
8.9 Wireless System Equipment
87
8.10 Product Ordering
88
9. Specifications
89
9.1 Physical Specifications
89
9.2 Operating Specifications
90
9.3 Radio Specifications
92
10. Safety Information
94
10.1 Replacing Batteries
94
10.2 Battery Hazards
94
10.3 Power Supply
95
10.4 Disposal and Recycling
95
11. References
96
11.1 Reference Information
96
11.2 Glossary
97

V-Link-200 Wireless Sensor Node User Manual
1. Wireless Sensor Network Overview
The LORD Sensing Wireless Sensor Network is a high- speed, scalable, sensor data acquisition and
sensor networking system. Each system consists of wireless sensor interface nodes, a data collection
gateway, and full- featured user software platforms based on the LORD Sensing Lossless Extended
Range Synchronized (LXRS) data communications protocol. Bi- directional wireless communication
between the node and gateway enables sensor data collection and configuration from up to two
kilometers away. Gateways can be connected locally to a host computer or remotely via local and mobile
networks. Some gateways also feature analog outputs for porting sensor data directly to stand-alone data
acquisition equipment.
The selection of available nodes allows interface with many types of sensors, including accelerometers,
strain gauges, pressure transducers, load cells, torque and vibration sensors, magnetometers, 4 to 20mA
sensors, thermocouples, RTD sensors, soil moisture and humidity sensors, inclinometers, and orientation
and displacement sensors. Some nodes come with integrated sensing devices such as accelerometers.
System sampling capabilities are IEEE 802.15.4-compliant and include lossless synchronized sampling,
continuous and periodic burst sampling, and data logging. A single gateway can coordinate many nodes of
any type, and multiple gateways can be managed from one computer with the SensorConnect and
SensorCloud software platforms. Integration to customer systems can be accomplished using OEM
versions of the sensor nodes and leveraging the LORD Sensing data communications protocol.
Common wireless applications of LORD Sensing Sensing Systems are strain sensor measurement,
accelerometer platforms, vibration monitoring, energy monitoring, environmental monitoring, and
temperature monitoring.
6

V-Link-200 Wireless Sensor Node User Manual
2. Node Overview
The V-Link-200 wireless sensor node features eight analog input channels designed to accommodate a
wide range of Wheatstone bridge and analog sensors, including strain, load cell, torque, pressure,
acceleration, vibration, magnetic field, displacement, and geophones. There are four channels for single-
ended sensor measurement, four channels for differential sensor measurement, and an on-board internal
temperature sensor.
The V-Link-200 wireless accelerometer node features an on-board triaxial accelerometer that allows high-
resolution data acquisition at noise levels as low as 25 µg√Hz, lossless data transmission and node-to-
node synchronized sampling at ±50 microseconds. There are four derived channels including, Vrms,
Arms, App, and Crest Factor which allow long- term monitoring of key performance indicators while
maximizing battery life.
V-Link-200 inputs are 18-bit resolution with ± 0.1% full scale measurement accuracy. The node can log
data to internal memory, transmit real-time synchronized data, and it supports event driven triggers with
both pre- and post- event buffers.
To acquire sensor data, the V-Link-200 is used with a LORD Sensing data gateway such as the WSDA
101 or WSDA-1500 Base.
Figure 1 - V-Link-200 Wireless Sensor Node
7

V-Link-200 Wireless Sensor Node User Manual
2.1 Components List
V-Link-200 sensor nodes come with the following components and options. For a complete list of
available configurations, accessories, additional system products and ordering information
see Parts
and Configurations on page 84
.
Item Description Quantity
AV-Link-200 Wireless Sensor Node 1
BAntenna with right angle adapter 1
CNode Tester Board 1
DAA Lithium Batteries (3.6 V dc, 2.4 Ah) 43
-- Calibration Certificate 1
Table 1 - V-Link-200 Components List
8

V-Link-200 Wireless Sensor Node User Manual
2.2 Interface and Indicators
The indicators on the V-Link-200 include operational modes showing when the node is booting up, idle
and waiting for a command, sampling, resynchronizing, or if there is an error. The following table
describes basic indicator behavior.
Figure 2 - Interface and Indicators
Indicator Behavior Node Status
Device
status
indicator
OFF Node is OFF
Rapid green flashing
on start-up Node is booting up
1 (slow) green pulse per
second Node is idle and waiting for a command
1 green blip every 2 seconds Node is sampling
Blue LED during sampling Node is resynchronizing
Red LED Error
Table 2 - Indicator Behaviors
9

V-Link-200 Wireless Sensor Node User Manual
2.3 Node Diagnostics
In the Wireless Node Configuration menu under the Sampling tab, there are four user-set data points
to provide information about the status of the Node.
Figure 3 - Node Diagnostic Menu
lLost Beacon Timeout: The time a node will search for a beacon before determining there
is no base station connectivity. User-set between 2 minutes and 600 minutes
lDiagnostic Info Interval: Thereport rate of the diagnostic packet. User-set between 30
seconds and 65536 seconds. The following data channels are available.
oCurrent State: The current state of the device when the Diagnostic
Packet is sent.
o0 = Idle
o1 = Deep Sleep
o2 = Active Run
o3 = Inactive Run
oRun Time: The number of seconds the Node has been in each state.
oReset Counter: The number of times the Node has reset.
oLow Battery Indicator: If 1, a low battery event has been detected since
the last Diagnostic Packet.
10

V-Link-200 Wireless Sensor Node User Manual
oSample Info:
oSweep Index: The total number of sweeps (good and
bad).
oBad Sweep Count: The total number of failed sweeps.
oTransmit Info:
oTotal Transmissions: Number of unique packets
transmitted (not including retransmissions.)
oTotal Retransmissions: Number of retransmitted
packets. Packets are retransmitted when a node does not
receive acknowledgment from the base station.
oTotal Dropped Packets: Number of packets the Node
has discarded due to buffer overflow, or exceeding the
maximum number of retransmissions per packet.
oBuilt in Test Result: The result of the Built in Test function.
oEvent Trigger Index: The index of the most recent Event Trigger logged
to the Node. When this number changes, a new event has occurred.
oExternal Power: Flag indicating if external power is connected or not.
o0 = Not Connected
o1 = External Power Connected
oInternal Temperature: The internal temperature of the Node in degrees
Celsius.
lStorage Limit Mode: Determines the behavior of the storage as either first in, first out
(FIFO), or stops when the storage is full. Set at Stop by default with an Overwrite option in
the drop down menu
11

V-Link-200 Wireless Sensor Node User Manual
lSensor Warm Up Delay: The delay time before sampling after excitation is enabled.
Sensor Always On is set by default and indicated by a check mark. To manually set this
feature, uncheck the box and set between 1 µsecond and 66000 µseconds.
Figure 4 - Viewing Node Diagnostic Data
12

V-Link-200 Wireless Sensor Node User Manual
2.4 Node Operational Modes
Sensor nodes have three operational modes:
active
,
sleep
, and
idle
. When the node is sampling, it is in
active mode. When sampling stops, the node is switched into idle mode. Idle mode is used for
configuring node settings (such as frequency and sampling rates) and is the only way to stop sampling
or go between active and sleep modes. Sleep mode is an ultra low-power mode. The node will
automatically go into sleep mode after a user-determined period of inactivity. The node will not go into
sleep mode while sampling.
Figure 5 - Node Operational Modes
13

V-Link-200 Wireless Sensor Node User Manual
3. System Operational Overview
To acquire sensor data, nodes are used with any LORD Sensing data gateway, such as the WSDA-101
or WSDA-1500 Base, and a software interface.
LORD Sensing has two software programs available for data acquisition from the wireless sensor
network: SensorCloud and SensorConnect. SensorCloud is an optional web-based data collection,
visualization, analysis, and remote management platform based on cloud computing technology.
SensorConnect is used for configuring gateways and nodes, selecting sampling modes and parameters,
initializing data acquisition, and viewing and saving data.
The operational overview describes system hardware and software setup, and the basic navigation of
SensorConnect used to configure the node and begin data acquisition. A brief overview of porting data to
SensorCloud is also included. This section is included as a quick start guide and is not a complete
demonstration of all system and software capabilities.
3.1 Software Installation
To install SensorConnect on the host computer, run the installer executable file and follow the on-
screen prompts. The software is provided with all gateways and is also available on the LORD Sensing
website (
see References on page 96
).
SensorCloud is an optional data collection, visualization, analysis, and remote management tool. It
is based on cloud computing technology and is accessed directly from a web connection.
Automatic, real-time data collection is available through Ethernet gateways, such as the WSDA-
1500. Data files can also be uploaded. For more information
see Data Handling on page 27
.
Users can also design custom programs with the open source data communications protocol (
see
References on page 96
).
14

V-Link-200 Wireless Sensor Node User Manual
3.2 System Connections
To acquire sensor data the following components are needed: a LORD Sensing data gateway, and a
host computer with access to the data acquisition software. For a connections overview refer to
3.2
System Connections
.
Nodes will communicate with any LORD Sensing data gateway. The sensor, node, gateway, and
software selection are application-dependent, but the basic interfaces are the same. Communication
protocols between the gateway and host computer vary depending on which model gateway is used,
but they all require interface to a host computer or network.The WSDA-1500 gateway utilizes Ethernet
communications and can be used with SensorConnect and SensorCloud, although system
configuration is completed using SensorConnect.
Users can also write custom programs by utilizing the LORD Sensing Wireless Sensors Network
Software Development Kit.
15

V-Link-200 Wireless Sensor Node User Manual
3.3 Gateway USB Communication
The WSDA-101-Base USB gateway is used in this example. For information on how to use other
gateways, refer to the gateway or SensorConnect user manual (
see References on page 96
).
Drivers for the USB gateways are included the SensorConnect software installation. With the
software installed, the USB gateway will be detected automatically whenever the gateway is plugged
in.
1. Power is applied to the gateway through the USB connection. Verify the gateway status
indicator is illuminated, showing the gateway is connected and powered on.
2. Open the SensorConnectsoftware.
3. The gateway should appear in the Controller window automatically with a communication
port assignment (
Figure 6 - USB Gateway Communication
) . If the gateway is not
automatically discovered, verify the port is active on the host computer, and then remove and
re-insert the USB connector.
Figure 6 - USB Gateway Communication
16

V-Link-200 Wireless Sensor Node User Manual
3.4 Connect to Nodes
The node can be connected with the automatic node discovery feature and by manually entering the
node address and then searching for it on the current gateway communication frequency.
1. In the automatic node discovery feature, if the base and node are on the same operating
frequency, the node will populate below the Base Station listing when powering on the V-
Link-200.
Figure 7 - Automatic Node Discovery
2. If a red circle with a number appears next to Base Station, select Nodes on Other
Frequencies.
Figure 8 - Nodes On Other Frequencies
17

V-Link-200 Wireless Sensor Node User Manual
3. Highlight the new node being added. Select Move Node to Frequency (#).
Figure 9 - Move Node
4. When manually entering the node address, select Manual Add Node, enter Node Address,
last known Frequency (factory default is 15), and select Add Node.
Figure 10 - Adding a Node by Address
NOTE
Automatic node discovery may not work in some boot-up modes. If the node is not in
normal boot up mode, the assigned one can be bypassed to enable node discovery.
For more information
see Troubleshooting Guide on page 71
.
18

V-Link-200 Wireless Sensor Node User Manual
3.5 Configure Node
The sensor settings are stored in the node memory for that channel. The configuration menus only
show the channels and configuration options available for the type of node being used.
For this example the V-Link-200 tester board is on channel 1.
1. Select Hardware > Input Range for channel 1, select +/-2 mV from the drop down menu.
2. Under Hardware Offset, select Balance Target for channel 1, select Mid (50%) from the drop
down menu.
3. Select Auto- Balance. When auto- balance is complete, a blue information window will
indicate the balance result.
Figure 11 - Auto-Balance
4. Select Calibration.
5. Select Microstrainfrom the Unit drop down menu, and select the Shunt Cal button enabled
on the right.
Figure 12 - Node Configuration Menu
19

V-Link-200 Wireless Sensor Node User Manual
6. Use the following settings:
a. Calibration Mode: Internal
b. Number of Active Gauges: 4
c. Gauge Factor: 2
d. Gauge Resistance: 1000
e. Shunt Resistance: 499000
7. Select Start Shunt Cal for Slope and Offset calibrations.
8. Select Accept Calibration.
Figure 13 - Channel Settings
9. When the calibration is complete, the Wireless Node Configuration window will appear.
10. Select Apply Configuration to write to node memory.
For this example, the V-Link-200 is using the default settings found under Configure > Hardware, see
Figure 14 - Node Configuration
Input Range: ± 2 G's (acceleration)
Low Pass Filter: 1,000 Hz
High Pass Filter: Disabled
20
Table of contents
Other Lord MicroStrain Network Hardware manuals
Popular Network Hardware manuals by other brands

Balluff
Balluff BNI PG3-508-0C5-Z015 user guide

ADTRAN
ADTRAN NetVanta T1/FT1 + DSX-1 quick start guide

Western Digital
Western Digital My Cloud EX2 Ultra user manual

TP-Link
TP-Link TL-PA8033P Quick installation guide

Spirent
Spirent DLS 6700 operating manual

Spirent
Spirent VisionWorks 7562 Installation and setup manual

2gig Technologies
2gig Technologies 2GIG-NVR1 installation instructions

ZyXEL Communications
ZyXEL Communications IES-6000 - ANNEXE 749 Brochure & specs

Nortel
Nortel BayStack 100-S release note

Cyberteam
Cyberteam FiberTechnic Ftech G-01 user manual

MSTRONIC
MSTRONIC MIT-904P user manual

ADF Web
ADF Web HD67561 user manual